
In this chapter, you will learn the key concepts of Vue.js and why you should consider Vue.js for your next project. You will learn how to run Vue projects from the command line; describe the Vue.js project architecture; create Vue single file components using various styling and HTML syntax flavors; and also write Vue methods and data objects and control HTML templates competently.
By the end of this first chapter, you will be able to describe the basics of Vue lifecycle hooks and expressions.
Introduction
Developers in the industry are required to resolve frontend development problems quickly with minimal impact on existing workflows or backend architecture. In many cases, the UI is overlooked completely until the end of a project, which can happen because of a lack of resources, ever-evolving product requirements, or the existing attitude that the frontend is the easy bit. However, companies such as Apple and Google have proven that design thinking on the frontend is key to a solid product or platform that will excite and engage users leading to a higher return on investment and a more successful business.
If you have found Vue.js, you may have also come across other frontend frameworks that, at face value, solve the same problems such as Ember, Angular, or React. At the surface level, they all attempt to make reactive frontend development more reliable and introduce patterns that make this easier to do. However, there are some critical differences in how a Vue project might play out compared to an Angular or React project. Let's look into them.
Angular versus Vue
Angular is a Model-View-ViewModel (MVVM) framework built by Google that, generally, enterprise companies in the past tended to favor because of Google's backing and the fact that from the ground up, Angular was created to be used alongside TypeScript. The ecosystem supporting Angular includes Ahead of Time (AoT) rendering, and router and CLI management, but fails to deliver a simplified global state management system; developers would need to learn and use Flux or adopt NgRx. Vue takes Angular's core ideas of robustness and reliability and improves the development experience with its agnostic approach to development by removing the restrictiveness of an enforced code style for developers. Simplifying familiar Angular patterns such as HTML directives and dependency injection for modularity with Vue's single-file component system benefits developers by removing the necessity to learn and remember a variety of structures (injectables, components, pipes, modules, and so on). Vue has excellent support for TypeScript and typing without the drawbacks that Angular can have with its enforced coding language and development style. React and Vue share a focus on component-driven development, which reduces the amount of time and effort needed to uptake a new framework.
React versus Vue
The driving force behind React's popularity and large development community is attributed to Facebook's dedicated engineers and its 2013 open source release at a time when Angular 2+ was nowhere to be seen. React's JSX pattern (a way of writing HTML and CSS in JavaScript) introduces with it a heightened learning curve for new developers who are both required to learn another language and also wrap their heads around component-based architecture. Components allow developers to build applications in a modular way; individual components describe their own piece of functionality and lifecycle, where they can be instantiated when they are required and destroyed when they are not used. Vue takes these core concepts of modular coding and enables developers to build these components using either JSX or writing HTML, CSS, and JavaScript as you would a traditional web application in a single file. Vue's separation of concerns in a single-file component simplifies this modular structure for developers.
Advantages of Using Vue for Your Project
Vue has a gentle learning curve and a vibrant ecosystem. This benefits teams of any size by not requiring a huge amount of overhead to educate teams of developers on how to use the Vue.js framework.
- Vue.js is another example of a pattern in development that is easy to learn but hard to master. A key benefit of Vue is its approachability for both new and veteran developers.
- Out of the box, developers can use a well-optimized and performant framework on which to build dynamic frontend applications of any size.
- The single-file component (SFC) pattern offers a modular and flexible blueprint to simplify the development process and provides an enjoyable experience for developers of all levels, bringing order to component chaos. Single-file components allow Vue to be genuinely versatile, where you can implement basic functionality and incrementally adopt pieces of a static site into Vue rather than overhauling your entire website.
- Official global state management support should come as a relief to any developer who is familiar with the Redux and NgRx patterns. As powerful as these libraries can be when used well, Vuex is a great middle-ground for creating robust global state patterns that are flexible to meet most development needs.
For those developers who are looking to get off the ground quickly, do not reinvent the wheel by building a custom reactive pattern unless individual use cases require it. You can save time and money by using Vue as a framework because it is already performant and officially supports libraries that are necessary to build an end-to-end app, which include vue-router, Vuex state management, dev tools, and more.
In this chapter, we will start by introducing the Vue architecture before familiarizing you with Vue's unique SFC pattern and HTML template syntax sugar. You will learn how to work with the Vue-specific template syntax and coding patterns that include Vue bindings, directives, lifecycle hooks, scopes, and the local state. Out of the Vue ecosystem of official plugins, we will primarily be focusing on the core Vue libraries. First, let's look at Vue's project architecture.
The Vue Instance in a Simple Vue Application
One of the easiest ways to get started with Vue is to import the Vue package through a Content Distribution Network (CDN). By doing this you can create a Vue instance with the Vue function. Each Vue application consists of one root Vue instance that is created using the new Vue function. All corresponding Vue components that are created are also defined using the same syntax, however, are considered as nested Vue instances that can contain their own options and properties:
var vm = new Vue({
// options
})
Note
vm is a term commonly used to refer to a View Model, which is an abstraction of the view that describes the state of the data in the model. Binding a Vue instance to vm helps you to keep track of your Vue instance in a block of code.
In this example, we import Vue using the jsdelivr CDN, which will allow you to utilize the Vue functions:
<!DOCTYPE html>
<html>
<head>
<title>Vue.js CDN</title>
<script src="https://cdn.jsdelivr.net/npm/vue/dist/vue.js">
</script>
</head>
</html>
Declare an element in the <body> tag using a class, ID, or data attribute. Vue is known for its ability to declaratively render data to the DOM using simple template syntax such as double curly braces to specify reactive content, for example, {{ text }}:
<!DOCTYPE html>
<html>
<head>
<title>Vue.js CDN</title>
<script src="https://cdn.jsdelivr.net/npm/vue/dist/vue.js">
</script>
</head>
<body>
<div>
<p class="reactive-text">{{ text }}</p>
</div>
</body>
</html>
In the <head> tag, we see some vanilla JavaScript code that fires off when the DOM loads. This constructs a Vue component bound to the element with class .reactive-text. The data property labeled text will replace the curly brace placeholder with the string defined as Start using Vue.js today!:
<head>
<title>Vue.js CDN</title>
<script src="https://cdn.jsdelivr.net/npm/vue/dist/vue.js">
</script>
<script>
document.addEventListener('DOMContentLoaded', function () {
new Vue({
el: '.reactive-text',
data: {
text: "Start using Vue.js today!"
}
})
})
</script>
</head>
<body>
<div>
<p class="reactive-text">{{ text }}</p>
</div>
</body>
</html>
In the preceding script, you bind the <p> element with the reactive-text class to the new Vue instance. So, now that Vue understands this HTML element you can use the {{ text }} syntax to output the data property text inside of the <p> element.
The output of the preceding code will be as follows:
Start using Vue.js today!
While a CDN is a very portable way to start including Vue.js in your projects, using package managers is the recommended installation method for Vue, which is compiled by webpack, because it allows you to control third-party library versions easily. You can access it here: https://vuejs.org/v2/guide/installation.html. We will explore what a webpack example looks like next.
A Webpack Vue Application
Vue projects are structured similarly to a lot of modern node-based apps that contain a package.json file and a node_modules folder in the root of your project. Various other configuration files are usually contained at the root level, such as babel.config.js and .eslintrc.js, since they will generally have an effect across your whole project. The following screenshot displays a default Vue app folder structure:
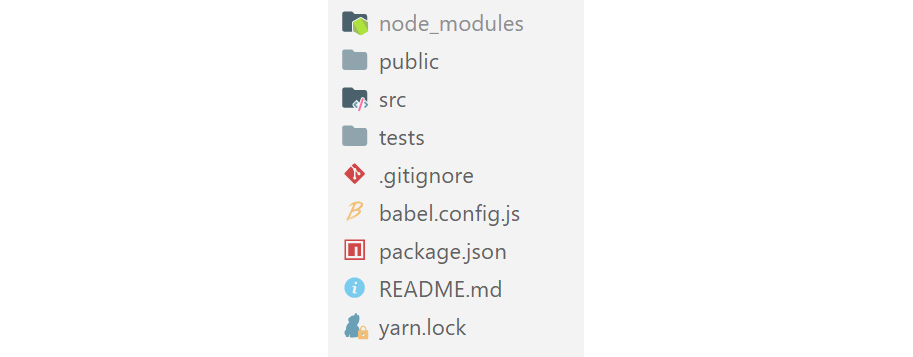
Figure 1.1: Default Vue application folder structure
The Vue project structure follows a pattern where most of your source code is managed within the /src directory. You can subdivide your Vue files into various folders, for example, using a components folder to store reusable Vue components. By default, Vue will create assets and a components folder to code split the default files. For beginners, it is good to follow this pattern until you get more comfortable with splitting up your code in ways that make sense for your application:

Figure 1.2: Default Vue application src folder structure
The public folder is a special directory for containing files that need to be transferred directly to the output location. The following screenshot displays how this folder will look:

Figure 1.3: Default Vue application public folder
By default, the public folder will contain an index.html file that serves as a placeholder for loading the Vue application. The index.html file can be modified to include header and footer scripts as required, such as Google Fonts or third-party JavaScript libraries that are not included as a part of your webpack bundle.
Vue Single-Page Components
Components are the building blocks of most modern frameworks. Generally splitting your work into smaller chunks not only makes your code much easier to interpret but functionally follows the principles of Don't Repeat Yourself (DRY). One of the most unique patterns for Vue users with arguably one of the most benefits is the Single File Component (SFC) pattern. SFCs centralize the responsibility of both appearance and behavior into a single file, often simplifying the architecture of your project and making the development process simpler being able to refer to your HTML, CSS, and JavaScript logic without switching files. Your default .vue file structure will be as follows:
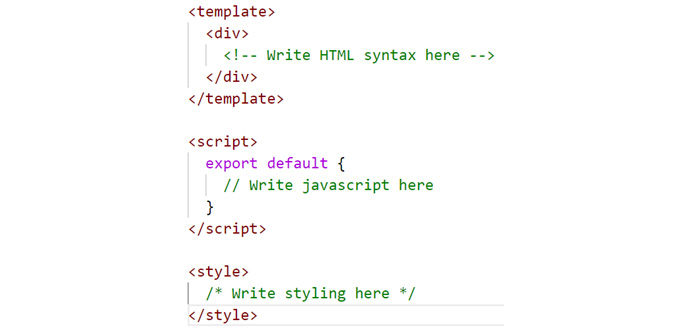
Figure 1.4: Default .vue file structure
A trap that a lot of new Vue developers fall into is writing mega Vue files of over 500 lines of code, just for the HTML itself. Usually, what this means is that you could break this long component down into some smaller ones; however, we will cover file importing and code splitting in future chapters.
For example, in the header of your application, you may have a reusable logo element that needs to remain consistent on other pages. You would create a component such as logo.vue:
// logo.vue
<template>
<img src="myLogo.png" />
</template>
You can import it into your header component named header.vue:
// header.vue
<template>
<header>
<a href="mywebsite.com"><logo /></a>
</header>
</template>
<script>
import logo from 'components/logo.vue'
export default {
components: {
logo
}
}
</script>
Very soon, you will have lots of these semantically structured files, which use these small chunks of reusable syntax that your team can implement across various areas of your application.
In the next section, we will gain an understanding of data properties.
Data Properties (Props)
One of the most used terms and reactive elements used when constructing Vue components is data property. These manifest themselves within the data function of a Vue instance:
<template>
<div>{{color}}</div>
</template>
<script>
export default {
data() {
return {
color: 'red'
}
}
}
</script>
You can use data property to essentially store any information you want to use within your Vue templates. When this data property is updated or is changed, it will reactively update in the corresponding template.
Exercise 1.01: Building Your First Component
In this exercise, we are going to build our first component inside of a Vue project. In this context, components are imported using ES6. We will require Node.js and yarn to be installed. These will be covered in the Preface. By the end of the exercise, you will be able to confidently create new Vue components using Vetur and import them into your project.
To access the code files for this exercise, refer to https://packt.live/35Lhycl.
- Open a command-line terminal and navigate into the Exercise 1.01 folder and run the following commands in order:
> cd Exercise1.01/
> code .
> yarn
> yarn serve
Go to https://localhost:8080.
Note
Your app will hot reload when you save new changes, so you can see them instantly.
- In VSCode (which will have opened when you ran the code . command), go into the src/App.vue directory and delete everything in that file and save.
- In your browser, everything should be blank a clean slate to start working from.
- The three primary components that make up a single-file component are the <template>, <script>, and <style> blocks. If you installed the Vetur extension from the Preface, write vue and press Tab to choose the first selection of the prompt. This is the quickest way to set up your default code blocks as displayed in the following screenshot:

Figure 1.5: VSCode Vetur
The following is the code generated after pressing Tab when using Vetur:
// src/App.vue
<template>
</template>
<script>
export default {
}
</script>
<style>
</style>
- Create another file in the components folder called Exercise1-01.vue and repeat the same step for scaffolding the Vue blocks using Vetur:
// src/components/Exercise1-01.vue
<template>
</template>
<script>
export default {
}
</script>
<style>
</style>
- Within our Exercise1-01.vue component, compose a set of <div> tags, with an <h1> element and a heading inside the <template> tags:
<template>
<div>
<h1>My first component!</h1>
</div>
</template>
- Inside the <style> block, add some styling as follows:
<template>
<div>
<h1>My first component!</h1>
</div>
</template>
<style>
h1 {
font-family: 'Avenir', Helvetica, Arial, sans-serif;
text-align: center;
color: #2c3e50;
margin-top: 60px;
}
</style>
- Import our component into the App.vue by using the ES6 import method and defining the component inside the components object in the <script> block. We can now reference this component inside the HTML by using its name in camelCase or kebab-case (both will work):
<template>
<Exercise />
</template>
<script>
import Exercise from './components/Exercise1-01'
export default {
components: {
Exercise,
}
}
</script>
When you press Save, https://localhost:8080 should reload and display the following output:

Figure 1.6: Localhost output for Exercise 1.01
In this exercise, we saw how to structure Vue components using template tags, scaffold basic Vue components using Vetur, output HTML, and use ES6 syntax to import the Exercise1-01 component into App.vue.
Note
You can only have one root HTML element inside <template> tags. Complex components should be wrapped in a containing HTML tag of your choice. <div>, <article>, and <section> are all semantic HTML component wrappers.
Data Binding Syntax Using Interpolation
Interpolation is the insertion of something of a different nature into something else. In the Vue.js context, this is where you would use mustache syntax (double curly braces) to define an area where you can inject data into a component's HTML template.
Consider the following example:
new Vue({
data() {
title: 'Vue.js'
},
template: '<span>Framework: {{ title }}</span>'
})
The data property title is bound to Vue.js reactive data and will update on the fly depending on state changes to the UI and its data. We will go into more depth about how to use interpolation and how to bind it to data properties in the next exercise.
Exercise 1.02: Interpolation with Conditionals
When you want to output data into your template or make elements on a page be reactive, interpolate data into the template by using curly braces. Vue can understand and replace that placeholder with data.
To access the code files for this exercise, refer to https://packt.live/3feLsJ3.
- Open a command-line terminal and navigate into the Exercise 1.02 folder and run the following commands in order:
> cd Exercise1.02/
> code .
> yarn
> yarn serve
Go to https://localhost:8080.
- Inside of the Exercise1-02.vue component, let's add data within the <script> tags by adding a function called data() and return a key called title with your heading string as the value:
<script>
export default {
data() {
return {
title: 'My first component!',
}
},
}
</script>
- Reference the data title by replacing your <h1> text with the interpolated value {{ title }}:
<template>
<div>
<h1>{{ title }}</h1>
</div>
</template>
When you save this document, the data title will now appear inside your h1 tag.
- In Vue, interpolation will resolve any JavaScript inside curly braces. For example, you can transform your text inside the curly braces using the toUpperCase() method:
<template>
<div>
<h1>{{ title.toUpperCase() }}</h1>
</div>
</template>
You should see an output like the following screenshot:

Figure 1.7: Save the file—you should now have an uppercased title
- In addition to parsing JavaScript methods, interpolation can handle conditional logic. Inside the data object, add a Boolean key-value pair isUppercase: false:
<template>
<div>
<h1>{{ isUppercase ? title.toUpperCase() : title }}</h1>
</div>
</template>
<script>
export default {
data() {
return {
title: 'My first component!',
isUppercase: false,
}
},
}
</script>
The preceding code will generate the following output:

Figure 1.8: Exercise 1.02 output after including the inline conditional statement
- Add this condition to the curly braces, and when you save you should see the non-uppercased title. Play around with this value by changing isUppercase to true:
<script>
export default {
data() {
return {
title: 'My first component!',
isUppercase: true,
}
},
}
</script>
The following screenshot displays the final output generated upon running the preceding code:

Figure 1.9: Final Exercise 1.02 output
In this exercise, we were able to use inline conditionals inside the interpolated tags (curly braces) by using a Boolean variable. This allows us to modify what data is displayed inside of our component without overly complicated conditions, which can be useful in certain use cases.
We will now learn about how to style components using a variety of methods.
Styling Components
When using Vue components, the webpack compiler allows you to use almost any frontend templating language style you prefer. For example, there are several ways to compose CSS, either directly or with pre-processing. The easiest way to enable these expressive languages in your Vue templates is to install them when you set up your project ahead of time using the Vue CLI.
When using the style tag inside of a Vue component, you have the option to specify a language, provided you have installed the appropriate webpack loader. In Exercise 1.01, if you chose to install the SCSS preprocessor, you can add the lang="scss" attribute to the style tag to begin using SCSS.
For example, if you chose to install the Stylus preprocessor, you can add the lang="stylus" attribute to the style tag to begin using Stylus:
<style lang="stylus">
ul
color: #2c3e50;
> h2
color: #22cc33;
</style>
Vue scoping is a handy way to stop individual components from inheriting styles from the virtual DOM head. Add the scoped attribute to your style tag and write some component-specific styles that will override any other CSS rules from the global sheet. The general rule is to not scope global styles. A common method for defining global styling is to separate these styles into another style sheet and import them into your App.vue.
Exercise 1.03: Importing SCSS into a Scoped Component
In this exercise, we will be utilizing the style tag to add SCSS preprocessed styles to a component and importing external stylesheets.
To access the code files for this exercise, refer to https://packt.live/3nBBZyl.
- Open a command-line terminal and navigate into the Exercise1.03 folder and run the following commands in order:
> cd Exercise1.03/
> code .
> yarn
> yarn serve
Go to https://localhost:8080.
- Inside of the exercise file, let's write some HTML that can be styled using SCSS. Let's keep practicing the interpolation method:
// src/components/Exercise1-03.vue
<template>
<div>
<h1>{{ title }}</h1>
<h2>{{ subtitle }}</h2>
<ul>
<li>{{ items[0] }}</li>
<li>{{ items[1] }}</li>
<li>{{ items[2] }}</li>
</ul>
</div>
</template>
<script>
export default {
data() {
return {
title: 'My list component!',
subtitle: 'Vue JS basics',
items: ['Item 1', 'Item 2', 'Item 3']
}
},
}
</script>
- Add the lang property to the style tag and add the value scss to enable SCSS syntax inside the style block:
<style lang="scss"></style>
- Create a folder inside the src/ directory called styles. Inside this new folder create a file called typography.scss:
src/styles/typography.scss
- Inside typography.scss, add some styling for the template you composed in your component:
/* typography.scss */
$color-green: #4fc08d;
$color-grey: #2c3e50;
$color-blue: #003366;
h1 {
margin-top: 60px;
text-align: center;
color: $color-grey;
+ h2 {
text-align: center;
color: $color-green;
}
}
ul {
display: block;
margin: 0 auto;
max-width: 400px;
padding: 30px;
border: 1px solid rgba(0,0,0,0.25);
> li {
color: $color-grey;
margin-bottom: 4px;
}
}
Note
In SCSS, you can use standard CSS selectors to select elements in your component.
ul > li will select every <li> element inside of a <ul> element for styling. Similarly, using the addition symbol + means the elements placed after the first element will be styled if they match the condition. For example, h1 + h2 will dictate that all H2 elements after H1 will be styled in a way, but H3 will not. You can understand this better through the following example.
In CSS, you would present this code as follows:
h1 + h2 {
/* Add styling */
}
ul > li {
/* Add styling */
}
In SCSS, the same code can be represented as follows:
h1 {
+ h2 {
// Add styling
}
}
ul {
> li {
// Add styling
}
}
- In your component, import these styles by using the SCSS @import method:
<style lang="scss">
@import '../styles/typography';
</style>
This will generate an output as follows:
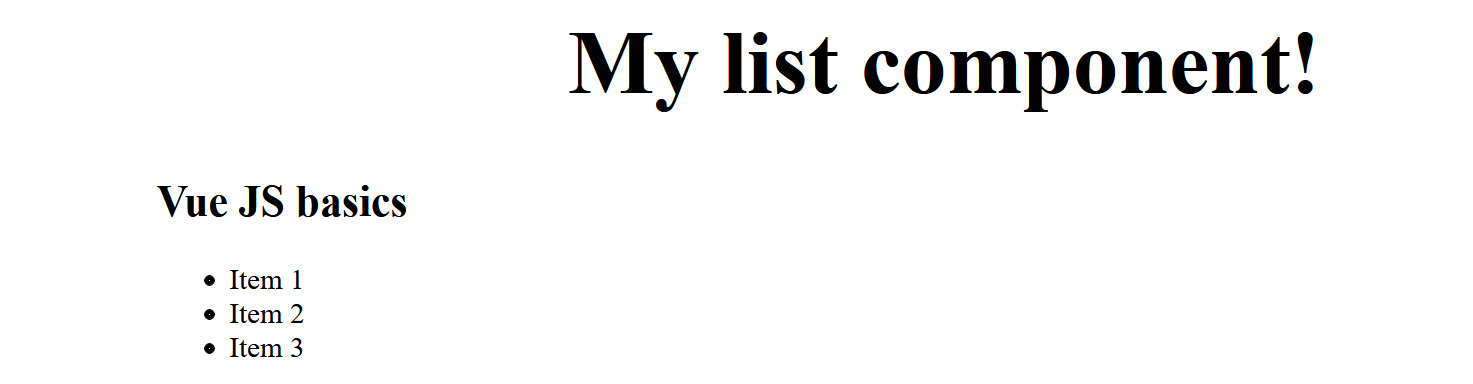
Figure 1.10: When you save and reload, your project should have the style imported
- Add the scoped attribute to your <style> tag to only apply these styles to this component instance. Use the variable from the imported stylesheet $color-blue:
<style lang="scss" scoped>
@import '../styles/typography';
h1 {
font-size: 50px;
color: $color-blue; // Use variables from imported stylesheets
}
</style>
The output of the preceding code is as follows:
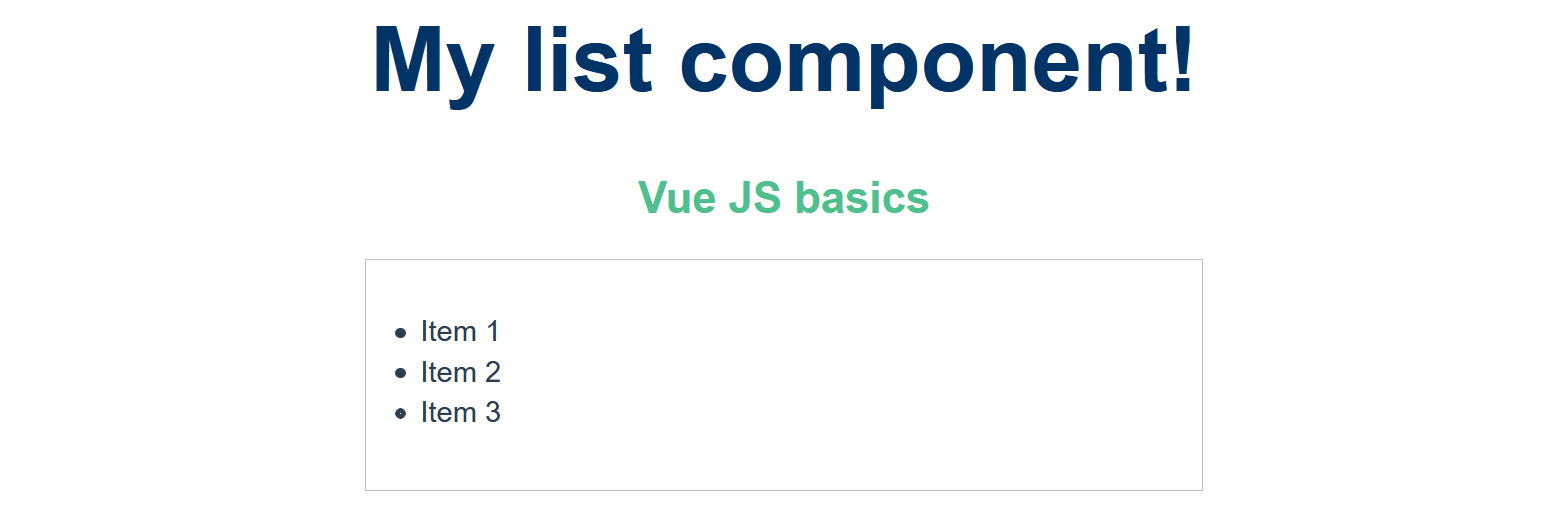
Figure 1.11: The outcome of scoping styles
Inspect the DOM and you will notice that at run-time, that scoping has applied v-data-* attributes to your DOM elements specifying these specific rules. Our typography.scss, which we are scoping to our component, references an HTML tag that does not live within the scope of our component. When Vue adds data attributes to the scoped component, it generates the style if the <body> tag exists within the component. In our case, it does not.
The Elements tab of your browser dev tools will show the following after expanding the <head> and <style> tags:
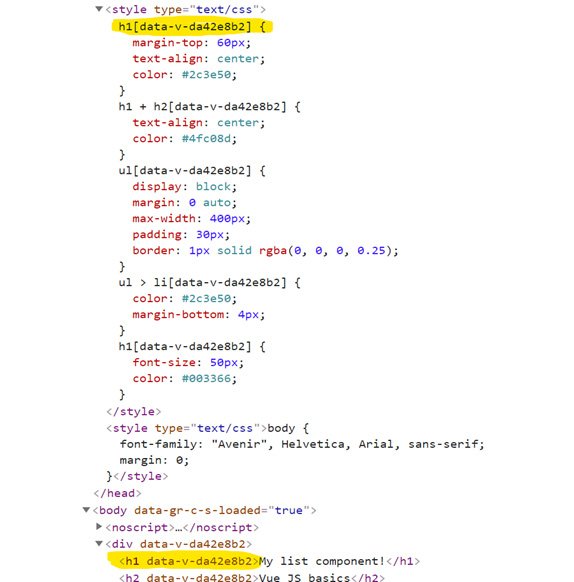
Figure 1.12: Observe how the virtual DOM uses data attributes to assign scoped styles
- Create a new style sheet called global.scss in the styles folder:
/* /src/styles/global.scss */
body {
font-family: 'Avenir', Helvetica, Arial, sans-serif;
margin: 0;
}
- Import this stylesheet into your App.vue:
<style lang="scss">
@import './styles/global';
</style>
Our app should now be back to normal, with a mixture of globally defined styling and properly scoped styles for this component, as follows:

Figure 1.13: Properly scoped styles for Exercise 1.03
In this exercise, we interpolated data that originated from an array, then styled our component using forms of scoped SCSS, which can both exist inside the <style> tag or be imported from another directory in our project.
CSS Modules
A recent pattern that has become popular in the reactive framework world is CSS modules. Frontend development has always had to face the issue of conflicting CSS class names, ill-structured BEM code, and confusing CSS file structures. Vue components help to solve this by being modular and allowing you to compose CSS that, at compile time, will generate unique class names for the specific component that it was composed for. You can even have the exact same class names across components; however, they will be uniquely identified using a randomly generated string attached to the end.
To enable this feature in Vue, you will need to add the module attribute to the style block, and reference classes using JavaScript syntax:
<template>
<div :class="$style.container">CSS modules</div>
</template>
<style lang="scss" module>
.container {
Width: 100px;
Margin: 0 auto;
background: green;
}
</style>
In the preceding example, if you inspected the DOM tree that class will be called something like .container_ABC123. If you were to create multiple components that had a semantic class name like .container but used CSS modules, you would never run into style conflicts again.
Exercise 1.04: Style Vue Components Using CSS Modules
In this exercise, you will utilize CSS modules to style a .vue component. By using the $style syntax inside of a :class bind, you refer to the Vue instance's this.$style scope. Vue will generate random class names based on the components at run or build time ensuring the style will not overlap with any other classes in your project.
To access the code files for this exercise, refer to https://packt.live/36PPYdd.
- Open a command-line terminal, navigate into the Exercise1.04 folder, and run the following commands in order:
> cd Exercise1.04/
> code .
> yarn
> yarn serve
Go to https://localhost:8080.
- Inside of Exercise1-04.vue, compose the following code:
<template>
<div>
<h1>{{ title }}</h1>
<h2>{{ subtitle }}</h2>
</div>
</template>
<script>
export default {
data() {
return {
title: 'CSS module component!',
subtitle: 'The fourth exercise',
}
},
}
</script>
- Add the <style> block with the SCSS language and add module as an attribute instead of scoped:
<style lang="scss" module>
h1,
h2 {
font-family: 'Avenir', Helvetica, Arial, sans-serif;
text-align: center;
}
.title {
font-family: 'Avenir', Helvetica, Arial, sans-serif;
color: #2c3e50;
margin-top: 60px;
}
.subtitle {
color: #4fc08d;
font-style: italic;
}
</style>
- To use CSS modules in your template, you need to bind them to your HTML elements by using :class syntax, which is the same as the v-bind:class directive:
<h1 :class="$style.title">{{ title }}</h1>
<h2 :class="$style.subtitle">{{ subtitle }}</h2>
When you save, your project should look something like this:

Figure 1.14: Exercise 1.04 output using CSS modules
If you inspect the virtual DOM, you will see how it has applied unique class names to the bound elements:
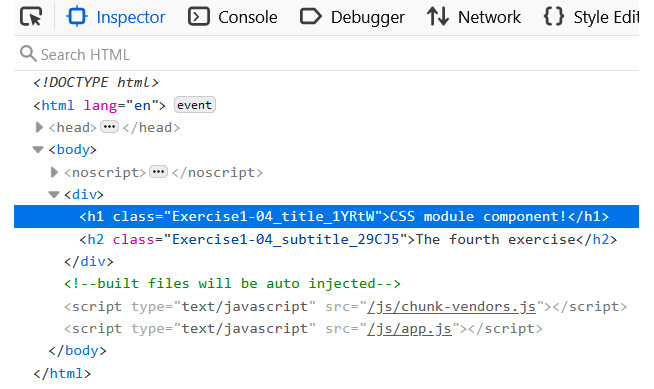
Figure 1.15: The virtual DOM tree's generated CSS module class
In this exercise, we saw how to use CSS modules in your Vue components and how it works differently to CSS scoping. In the next exercise, we will learn how to write a template in PUG (HAML).
Note
In combination with file splitting and importing SCSS, CSS modules are the preferred method of scoping component styling here. This safely ensures that individual component styles and business rules do not risk overriding each other and do not pollute global styling and variables with component-specific styling requirements. Readability is important. The class name also hints to the component name as opposed to the v-data attribute, which can be good when debugging large projects.
Exercise 1.05: Writing a Component Template in PUG (HAML)
With the right loader enabled you can use HTML abstractions such as PUG and HAML to template your Vue components instead of writing HTML.
To access the code files for this exercise, refer to https://packt.live/2IOrHvN.
- Open a command-line terminal and navigate into the Exercise1.05 folder and run the following commands in order:
> cd Exercise1.05/
> code .
> yarn
Go to https://localhost:8080.
- If Vue is running in the command line, press Ctrl + C to stop the instance. Then run the following command:
vue add pug
yarn serve
- Inside of Exercise1-05.vue, compose the following code and specify the lang attribute pug on the <template> tag:
<template lang="pug">
div
h1(class='title') {{ title }}
</template>
<script>
export default {
data() {
return {
title: 'PUG component!',
}
},
}
</script>
<style lang="scss">
.title {
font-family: 'Avenir', Helvetica, Arial, sans-serif;
text-align: center;
color: #2c3e50;
margin-top: 60px;
}
</style>
The preceding code will generate the following output:

Figure 1.16: Output for the PUG exercise
In this exercise, we saw how to use other HTML languages for templating and to interpolate data in PUG format. After installing the Vue.js PUG plugin you can write your component syntax inside of these template tags using PUG by adding the lang attribute with the value pug.
Vue Directives
Vue's templating language allows you to interpolate the HTML code with JavaScript expressions and Vue directives. This templating pattern is often referred to as syntax sugar because it does not change how the code itself works, just how you use it. Syntax sugar allows you to clearly define template-specific logic inside of your HTML without the need to abstract this logic elsewhere in your project or return copious amounts of HTML directly from your JavaScript code. All Vue based directives are prefixed with v-*, which indicates that it is a Vue specific attribute:
- v-text: The v-text directive has the same reactivity interpolation does, except you reference the same piece of data inside of a directive. Interpolation (curly braces) {{ }} is more performant than the v-text directive; however, you may find yourself in situations where you have pre-rendered text from a server and want to override it once your Vue application has loaded. For example, you can predefine static placeholder text while the DOM waits for the data and v-text attributes to eventually replace it.
- v-once: As a directive, this is unique in that you pair it with other directives to augment how they function. Passing data via v-text or interpolated curly braces into the HTML element this attribute is added to will stop the Vue instance from reloading the element with new data, removing the reactivity of the element. This is handy for situations where you want to render decorative elements using data, but do not want them to update when the data changes after the initial render.
- v-html: This directive will render valid HTML in your data string inside of the HTML element it has been bound to. This directive is a heavier operation than the other directives, so limited usage is recommended when other options are not otherwise available.
Note
<script> tags can be run in this directive. Only render content originating from secure or trusted sources.
- v-bind: This directive is one of the most widely used directives in Vue. Throughout Vue, you will be binding reactive data to HTML attributes and passing data into props using this directive's :attr shortcut instead of v-bind:attr.
- v-if: To control the display state of HTML elements inside the template, you will often use v-if to completely remove elements from the DOM tree. So far, you have seen how to interpolate conditionals like this {{ isTrue ? 'Show this': 'Not this' }}. With the v-if directive, you can control entire blocks of HTML syntax. v-else-if can be used like else if statements and finish with v-else, which is the equivalent to the catch { ... } declaration of an else { ... } statement in traditional JavaScript.
- v-show: You can control the visible state of HTML elements by using v-show, which, instead of removing the element from the DOM tree, will apply a display: none style. The difference between a v-if and v-show is that v-show will remain as a block element in the DOM tree but will be hidden with css instead of being removed from the DOM tree. You also cannot chain v-show with v-else or v-else-if.
- v-for: Apply this to an element you want to repeat or iterate on. This directive requires an additional prop called :key to allow it to properly reactively render; it can be as simple as a unique number.
Consider an example where we iterate over the list element five times. Each list item will render its count (1, 2… 5):
<ul><!-- do not apply v-for to this <ul> element -->
<li v-for="n in 5" :key="n">{{ n }}</li>
</ul>
Now let's look at how some of the basic directives work.
Exercise 1.06: Basic Directives (v-text, v-once, v-html, v-bind, v-if, v-show)
More complicated components will use multiple directives to achieve the desired outcome. In this exercise, we will construct a component that uses several directives to bind, manipulate, and output data to a template view.
To access the code files for this exercise, refer to https://packt.live/3fdCNqa.
- Open a command-line terminal, navigate into the Exercise1.06 folder, and run the following commands in order:
> cd Exercise1.06/
> code .
> yarn
> yarn serve
Go to https://localhost:8080.
- Compose the following syntax inside of Exercise1-06.vue. This uses the interpolation method that we have used in previous exercises and that will be very familiar by this point:
<template>
<div>
<h1>{{ text }}</h1>
</div>
</template>
<script>
export default {
data() {
return {
// v-text
text: 'Directive text',
}
},
}
</script>
<style lang="scss" scoped>
h2 {
margin: 40px 0 0;
font-weight: normal;
}
</style>
- Replace the interpolation with the v-text attribute. You will notice the output will not change:
<template>
<div>
<h1 v-text="text">Loading...</h1>
</div>
</template>
<script>
export default {
data() {
return {
// v-text
text: 'Directive text',
}
},
}
</script>
Figure 1.17 displays the output of the preceding code:
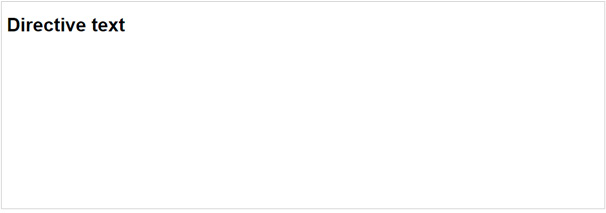
Figure 1.17: The v-text directive output works very similarly to the interpolation method
- Add the v-once directive on the same element. This will force this DOM element to only load the v-text data once for as long as it exists in the page:
<template>
<div>
<h1 v-once v-text="text">Loading...</h1>
</div>
</template>
<script>
export default {
data() {
return {
// v-text
text: 'Directive text',
}
},
}
</script>
...
- Underneath the h1 element, include a new h2 element, which uses the v-html attribute. Add a new data key called html, which contains a string with HTML formatting in it like the following:
<template>
<div>
<h1 v-once v-text="text">Loading...</h1>
<h2 v-html="html" />
</div>
</template>
<script>
export default {
data() {
return {
// v-text
text: 'Directive text',
// v-html
html: 'Stylise</br>HTML in<br/><b>your data</b>',
}
},
}
</script>
...
Running the preceding code will generate an output as follows:

Figure 1.18: Output on rendering the HTML elements
- Add a new link object to the data object that contains a bunch of information such as URL, target, title, and tab index. Inside the template, add a new anchor HTML element and bind the link data object to the HTML element using the colon syntax, for example, :href="link.url":
<template>
<div>
<h1 v-once v-text="text">Loading...</h1>
<h2 v-html="html" />
</div>
</template>
<script>
export default {
data() {
return {
// v-text
text: 'Directive text',
// v-html
html: 'Stylise</br>HTML in<br/><b>your data</b>',
}
},
}
</script>
...
The following screenshot displays the output:

Figure 1.19: Output on binding the reactive data from the Vue instance to any HTML attribute
- Apply v-if="false" to the h1 element, v-else-if="false" to h2, and v-else to the a tag like this:
<template>
<div>
<h1 v-if="false" v-once v-text="text">Loading...</h1>
<h2 v-else-if="false" v-html="html" />
<a
v-else
:href="link.url"
:target="link.target"
:tabindex="link.tabindex"
v-text="link.title"
/>
</div>
</template>
You should only see the <a> tag in the page since we have set the conditional statements to false.
The v-else condition will display as follows:

Figure 1.20: False v-if statements hiding the whole HTML element from the DOM
- Change the template to use v-show instead of the v-if statements:
<template>
<div>
<h1 v-show="true" v-once v-text="text">Loading...</h1>
<h2 v-show="false" v-html="html" />
<a
:href="link.url"
:target="link.target"
:tabindex="link.tabindex"
v-text="link.title"
/>
</div>
</template>
The output of the preceding code will be as follows:

Figure 1.21: Changing v-show to true will display the element
When you open the Elements tab of your browser dev tools, you should be able to observe the h2 display state set to none, as follows:
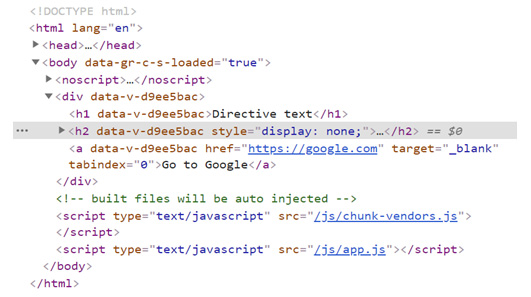
Figure 1.22: h2 displaying "display: none" for false condition
If v-show results in a true Boolean, it will leave the DOM element as is. If it resolves as false, it will apply display: none styling to the element.
In this exercise, we learned about the core Vue directives to control, bind, show, and hide HTML template elements without requiring any JavaScript outside of adding new data objects to your local state.
In the next section, we will learn how to achieve a two-way binding with the help of Vue's v-model.
Two-Way Binding Using v-model
Vue has simplified the way to achieve two-way data binding by creating a directive that specifically watches a data property inside of your Vue component. The Vue directive v-model will reactively change when the bound data property that Vue is watching changes. This directive is usually useful for HTML form elements that need to both display the data and modify it reactively, for example, input, textarea, radio buttons, and so on.
Two-way binding is achieved by adding the v-model directive to the element you want bound and referring to a data prop:
<template>
<input v-model="name" />
</template>
<script>
export default {
data() {
return {
name: ''
}
}
}
</script>
Figure 1.23 represents the output generated by running the preceding code:
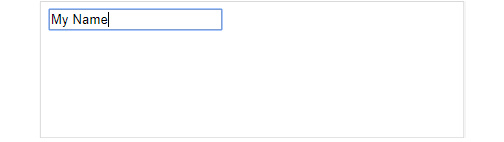
Figure 1.23: Output for the v-model example
Be careful using this directive as binding a huge amount of data in this way can affect the performance of your application. Consider your UI and split these into different Vue components or views. Vue data in the local state is not immutable and can be redefined anywhere in the template.
Exercise 1.07: Two-Way Binding Using v-model
We are going to build a component using Vue's two-way data binding attribute v-model. Consider what it means to bind a piece of data in two ways. The context for this form of data model is usually forms, or where you expect both input and output data. By the end of the exercise, we should be able to utilize the v-model attribute in a form context.
To access the code files for this exercise, refer to https://packt.live/2IILld8.
- Open a command-line terminal, navigate into the Exercise1.07 folder, and run the following commands in order:
> cd Exercise1.07/
> code .
> yarn
> yarn serve
Go to https://localhost:8080.
- Start by composing an HTML label and input element bound to the name data prop using v-model inside the template area:
<div class="form">
<label>
Name
<input type="text" v-model="name" />
</label>
</div>
- Finish binding the text input by returning a reactive data prop called name in the <script> tag:
<script>
export default {
data() {
return {
name: '',
}
},
}
</script>
- Compose a label and selectable HTML list bound to the data prop language using v-model inside of the template area:
<div class="form">
<label>
Name
<input type="text" v-model="name" />
</label>
<label>
Preferred javascript style
<select name="language" v-model="language">
<option value="Javascript">JavaScript</option>
<option value="TypeScript">TypeScript</option>
<option value="CoffeeScript">CoffeeScript</option>
<option value="Dart">Dart</option>
</select>
</label>
</div>
- Finish binding the select input by returning a reactive data prop called language in the <script> tag:
<script>
export default {
data() {
return {
name: '',
language: '',
}
},
}
</script>
- Below the form fields, output the name and language inside of an unordered list structure (<ul> and <li>) by using curly braces, for example, {{ name }}:
Note
Wrap the form and the display area within another tag such as a <section> tag, as only one HTML element can be at the root of a template.
Your code should look as follows:
<template>
<section>
<div class="form">
<label>
Name
<input type="text" v-model="name" />
</label>
<label>
Preferred javascript style
<select name="language" v-model="language">
<option value="Javascript">JavaScript</option>
<option value="TypeScript">TypeScript</option>
<option value="CoffeeScript">CoffeeScript</option>
<option value="Dart">Dart</option>
</select>
</label>
</div>
<ul class="overview">
<li><strong>Overview</strong></li>
<li>Name: {{ name }}</li>
<li>Preference: {{ language }}</li>
</ul>
</section>
</template>
- Add styling inside the <style> tag at the bottom of the component, and set the lang attribute to scss:
Exercise1-07.vue
37 <style lang="scss">
38 .form {
39 display: flex;
40 justify-content: space-evenly;
41 max-width: 800px;
42 padding: 40px 20px;
43 border-radius: 10px;
44 margin: 0 auto;
45 background: #ececec;
46 }
47
48 .overview {
49 display: flex;
50 flex-direction: column;
51 justify-content: space-evenly;
52 max-width: 300px;
53 margin: 40px auto;
54 padding: 40px 20px;
55 border-radius: 10px;
56 border: 1px solid #ececec;
57
58 > li {
59 list-style: none;
60 + li {
61 margin-top: 20px;
62 }
63 }
64 }
65 </style>
The complete code for this step is available at https://packt.live/36NiNXH.
Your output should look as follows:

Figure 1.24: Displaying the final form after the data is updated
Your form should look something like this. When you update the data in the form, it should also update the overview area synchronously.
In this exercise, we used the v-model directive to bind the name and JavaScript-style drop-down selection to our local state's data. When you change the data, it will reactively update the DOM elements we output this bound data to.
Anonymous Loops
To loop over HTML elements in Vue, you utilize the v-for loop directive. When Vue renders the component, it will iterate the HTML element you have added the directive to in order to use the data being parsed into the directive. Anonymous loops can be performed using this directive, where you can define a number X and the loop will iterate that many times, which can be handy in situations where you can more strictly control how many loops you iterate on or for placeholder content. All loops require an iterator :key. When the key or the content bound to the key changes, Vue knows that it needs to reload the content inside the loop. If you have multiple loops in one component, randomize the key with extra characters or context-related strings to avoid :key duplication conflicts.
Anonymous loops are demonstrated below; note that you can use quotation marks or backticks (`) to describe strings:
<div v-for="n in 2" :key="'loop-1-' + n">
{{ n }}
</div>
<!-- Backticks -->
<div v-for="n in 5" :key="`loop-2-${n}`">
{{ n }}
</div>
The output of the preceding code should look as follows.

Figure 1.25: Output of anonymous loops example
Understanding loops is key to not only working with Vue but also with JavaScript in general. Now that we have covered how to handle loops by using the v-for syntax and the importance of binding the :key property to add reactivity to the content being looped, we will utilize this function in the next exercise.
Exercise 1.08: Using v-for to Loop Over an Array of Strings
In this exercise, we are going to perform an anonymous loop using Vue's v-for directive. This will be familiar to those who have used for or foreach loops in JavaScript before.
To access the code files for this exercise, refer to https://packt.live/390SO1J.
Perform the following steps to complete the exercise:
- Open a command-line terminal, navigate into the Exercise1.08 folder, and run the following commands in order:
> cd Exercise1.08/
> code .
> yarn
> yarn serve
Go to https://localhost:8080.
- Compose the following syntax inside of Exercise1-08.vue by adding an <h1> title to your component and a <ul> element with an <li> tag which will have the v-for directive, which has the value of n as 5:
Exercise1-08.vue
1 <template>
2 <div>
3 <h1>Looping through arrays</h1>
4 <ul>
5 <li v-for="n in 5" :key="n">
6 {{ n }}
7 </li>
8 </ul>
The complete code for this step is available at https://packt.live/3pFAtgB.
This will generate an output as follows:
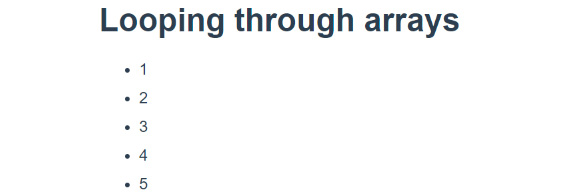
Figure 1.26: Iterating over arbitrary numbers will also allow you to output the index
- Now let's loop through an array of strings and count the iteration of our array with n. Prepare an array of your personal interests in the data() function. By looking for (item, n) inside the interests array, item outputs the string of the array, and n is the loop index:
<template>
<div>
<h1>Looping through arrays</h1>
<ul>
<li v-for="(item, n) in interests" :key="n">
{{ item }}
</li>
</ul>
</div>
</template>
<script>
export default {
data() {
return {
interests: ['TV', 'Games', 'Sports'],
}
},
}
</script>
The following output is generated upon running the preceding code:

Figure 1.27: Iterating over an array of strings
In this exercise, we learned how to iterate over both an arbitrary number and a specific array of strings, outputting the string value or index of an array. We also learned that the key attribute needs to be unique to avoid DOM conflicts and forces the DOM to re-render the component properly.
Iterating over Objects
When requesting data from an API, you will often be iterating over an array of objects that contains both logic and raw content. Vue makes it easy to control the data's various states through its directive syntax. Conditional directives control the display state of DOM elements in Vue. The HTML syntax provides clear visibility when it comes to the display rules set in your component.
Exercise 1.09: Using a v-for Loop over an Array of Objects and Using Their Properties for v-if Conditions
In this exercise, we will be controlling a Vue data array and iterating over the objects inside of it.
To access the code files for this exercise, refer to https://packt.live/32YokKa.
- Open a command-line terminal, navigate into the Exercise1.09 folder, and run the following commands in order:
> cd Exercise1.09/
> code .
> yarn
> yarn serve
Go to https://localhost:8080.
- Compose the following syntax inside Exercise1-09.vue and create a data object that contains a title string, and a favorite array of strings. We will loop over the interests object similarly to the array of strings; however, you will need to refer to the title key inside the interests object:
<template>
<div>
<h1>Looping through array of objects</h1>
<ul>
<li v-for="(item, n) in interests" :key="n">
{{ item.title }}
</li>
</ul>
</div>
</template>
The output of the preceding code will be as follows:

Figure 1.28: You should see a list of titles now in the frontend
- Let's create a second v-for loop to iterate over your favorites list. Note that we use different keys— fav and m—for our nested loop. This is because you can still use the values item and n inside the nested loop context:
<template>
<div>
<h1>Looping through array of objects</h1>
<ul>
<li v-for="(item, n) in interests" :key="n">
{{ item.title }}
<ol>
<li v-for="(fav, m) in item.favorite" :key="m"> {{ fav }}</li>
</ol>
</li>
</ul>
</div>
</template>
Figure 1.29 displays an output where looping is performed through an array of objects:
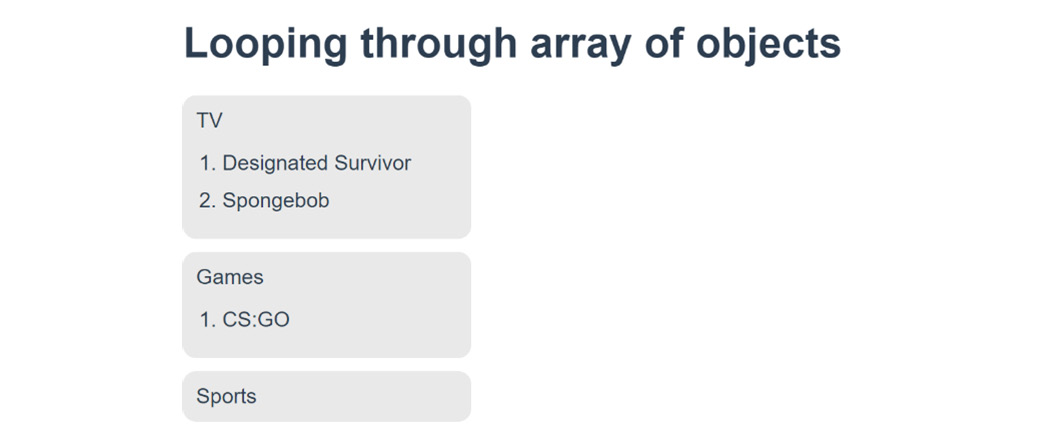
Figure 1.29: Nested ordered list detailing your favorites
- To optimize the DOM tree, we can use the v-if conditional directive from Exercise 1.09 to hide unnecessary DOM elements:
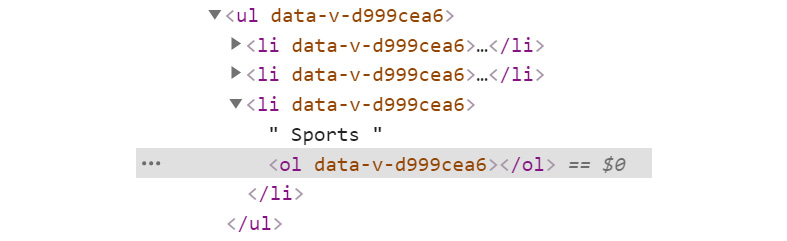
Figure 1.30: Displaying empty DOM elements in your virtual DOM
- We will check whether there are more than 0 items in the array to display the ordered list HTML element. Add a v-if directive to the <ol> with the condition item.favorite.length > 0:
// src/components/Exercise1-09.vue
<template>
<div>
<h1>Looping through array of objects</h1>
<ul>
<li v-for="(item, n) in interests" :key="n">
{{ item.title }}
<ol v-if="item.favorite.length > 0">
<li v-for="(fav, m) in item.favorite" :key="m"> {{ fav }}</li>
</ol>
</li>
</ul>
</div>
</template>
This won't make a difference in the visuals of your page, but when you inspect the virtual DOM tree in your browser, you'll notice an HTML comment in dev mode allowing you to understand where a v-if statement might be false. When you build for production, these HTML comments won't be in your DOM.

Figure 1.31: Output displaying no HTML comment in production builds
By using the v-if directive in dev mode, you will see an HTML comment. These will not exist in production builds.
In this exercise we have been able to iterate over complex arrays of objects, outputting these objects' nested keys and controlling the view state of DOM elements based on length conditions.
Methods in Vue
Vue methods are defined inside the methods object within the Vue instance and can be written like normal JavaScript functions where you define a piece of logic that is executed. When you use JavaScript functions, normally, you would either return a value or simply perform a global action. The primary difference between writing functions and Vue methods is that the Vue method is scoped to your Vue component and can be run from anywhere inside the component it was written inside. Since the methods are scoped to your component's Vue instance, you can reference them inside of event directives easily in the HTML template. When binding events to HTML elements in Vue, you would use the @ symbol; for example, v-on:click is equivalent to @click.
Exercise 1.10: Triggering Methods
In this exercise, we are going to build a component that uses Vue's methods API. Consider how similar these Vue methods can be written like your own named functions in JavaScript, as they behave in a very similar way. By the end of the exercise, we should be able to use methods and trigger them from the HTML template.
To access the code files for this exercise, refer to https://packt.live/3kMTWs5.
- Open a command-line terminal and navigate into the Exercise1.10 folder and run the following commands in order:
> cd Exercise1.10/
> code .
> yarn
> yarn serve
Go to https://localhost:8080.
- Let's loop over a method trigger and pass its number to a method. Set up an anonymous v-for loop on an HTML list and add an anchor element inside of the list element. Set the loop to iterate 5 times:
<template>
<div>
<h1>Triggering Vue Methods</h1>
<ul>
<li v-for="n in 5" :key="n">
<a href="#">Trigger</a>
</li>
</ul>
</div>
</template>
- Add the @click directive referencing a method called triggerAlert and pass the value of n as an argument. Output the value n into the anchor element using curly braces:
<template>
<div>
<h1>Triggering Vue Methods</h1>
<ul>
<li v-for="n in 5" :key="n">
<a href="#" @click="triggerAlert(n)">Trigger {{ n }}</a>
</li>
</ul>
</div>
</template>
- Inside the methods object, add the triggerAlert(n) key with the n argument. Inside this method, add an alert function, which will output the value n plus some static text:
<script>
export default {
methods: {
triggerAlert(n) {
alert(`${n} has been clicked`)
},
},
}
</script>
- Add styling inside the <style> tag at the bottom of the component, and set the lang attribute to scss:
Exercise1-10.vue
22 <style lang="scss" scoped>
23 ul {
24 padding-left: 0;
25 }
26 li {
27 display: block;
28 list-style: none;
29
30 + li {
31 margin-top: 10px;
32 }
33 }
34
35 a {
36 display: inline-block;
37 background: #4fc08d;
38 border-radius: 10px;
39 color: white;
40 padding: 10px 20px;
41 text-decoration: none;
42 }
43 </style>
The complete code for this step is available at https://packt.live/374yKZZ.
- Your page should feature a list of buttons that when clicked, trigger an alert with a message that contains the button number you clicked as follows:
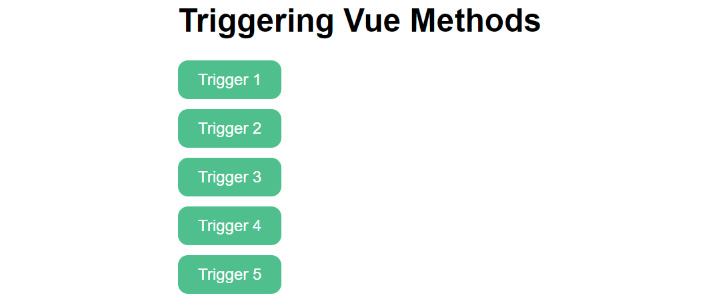
Figure 1.32: Output a list of triggers
The following prompt is displayed when a trigger is clicked:

Figure 1.33: Displaying a browser alert with the index number in it
Note
While you can add an event directive to any HTML element, a suggestion would be applying them to native HTML interactive elements such as anchor tags, form input, or buttons to help with browser accessibility.
In this exercise, we were able to utilize the Vue methods API to define and trigger methods from the HTML template, and parse arguments into each method dynamically.
Exercise 1.11: Returning Data Using Vue Methods
In this exercise, we are going to learn how to use Vue methods as a function to return data in the Vue instance and inside of the template.
Often in a web application, we want elements to appear on the page depending on whether a condition is met or not. For instance, if our product is not in stock, our page should display the fact that it is out of stock.
So, let's figure out how could we conditionally render these elements, depending on whether our product is in stock or not.
To access the code files for this exercise, refer to https://packt.live/3pHWCeh.
- Open a command-line terminal, navigate into the Exercise1.11 folder, and run the following commands in order:
> cd Exercise1.11/
> code .
> yarn
> yarn serve
Go to https://localhost:8080.
- Let's iterate over a random amount and trigger an addToCart method. Set up two data objects, totalItems and totalCost, which will be updated when a user clicks on our shop buttons. Next, refer to data objects inside the script block of Vue by specifying this. For example, in the template block, we refer to totalItems as {{ totalItems }}, but in the script block, we will refer to it as this.totalItems. The same pattern is used for methods where addToCart would be referred to as this.addToCart within another method:
<template>
<div>
<h1>Returning Methods</h1>
<div>Cart({{ totalItems }}) {{ totalCost }} </div>
<ul>
<li v-for="n in 5" :key="n">
<a href="#" @click="addToCart(n)">Add {{ n }}</a>
</li>
</ul>
</div>
</template>
<script>
export default {
data() {
return {
totalItems: 0,
totalCost: 0,
}
},
methods: {
addToCart(n) {
this.totalItems = this.totalItems + 1
this.totalCost = this.totalCost + n
},
},
}
</script>
<style lang="scss" scoped>
ul {
padding-left: 0;
}
li {
display: block;
list-style: none;
+ li {
margin-top: 10px;
}
}
a {
display: inline-block;
background: rgb(235, 50, 50);
border-radius: 10px;
color: white;
padding: 10px 20px;
text-decoration: none;
}
</style>
This will generate an output as follows:
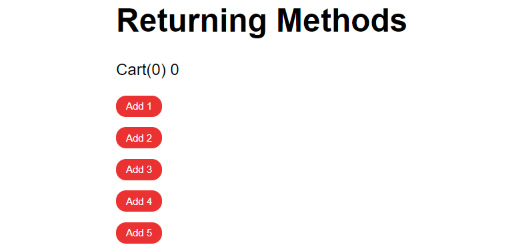
Figure 1.34: Pressing any of the buttons will demonstrate the cart logic
When you click the buttons, the items counter should increment by 1, but the cost will increment by the n value, which should demonstrate normal cart functionality (clicking Add 2, then Add 5):
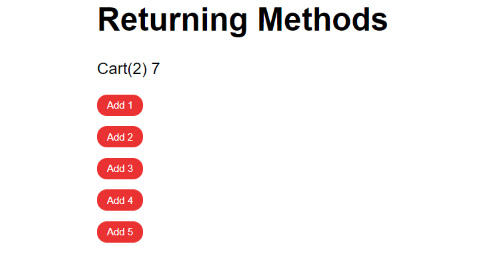
Figure 1.35: Output displaying Returning Methods after increments
- Let's talk money. We can use methods to perform logical operations that augment or format strings based on events. Create a method called formatCurrency, which accepts one argument. We will return the same value after giving it two decimal points and a $ symbol. To use this method in the template, simply add it to the interpolated curly braces and pass the value that was there as an argument inside the method instead:
<template>
<div>
<h1>Returning Methods</h1>
<div>Cart({{ totalItems }}) {{ formatCurrency(totalCost) }} </div>
<ul>
<li v-for="n in 5" :key="n">
<a href="#" @click="addToCart(n)">Add {{ formatCurrency(n) }}</a>
</li>
</ul>
</div>
</template>
<script>
export default {
data() {
return {
totalItems: 0,
totalCost: 0,
}
},
methods: {
addToCart(n) {
this.totalItems = this.totalItems + 1
this.totalCost = this.totalCost + n
},
formatCurrency(val) {
return `$${val.toFixed(2)}`
},
},
}
</script>
The following screenshot displays the output of the preceding code:
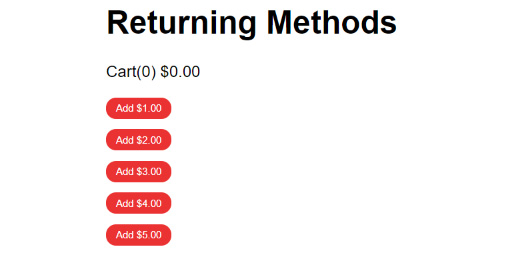
Figure 1.36: Now all the values are expected to look like currency, while retaining the cart counter
In this exercise, we were able to utilize Vue's methods API to parse arguments into methods, return modified values, and use methods to update the local data state in a life-like scenario.
Vue Lifecycle Hooks
The Vue component lifecycle events include the following:
- beforeCreate: Runs when your component has been initialized. data has not been made reactive and events are not set up in your DOM.
- created: You will be able to access reactive data and events, but the templates and DOM are not mounted or rendered. This hook is generally good to use when requesting asynchronous data from a server since you will more than likely want this information as early as you can before the virtual DOM is mounted.
- beforeMount: A very uncommon hook as it runs directly before the first render of your component and is not called in Server-Side Rendering.
- mounted: Mounting hooks are among the most common hooks you will use since they allow you to access your DOM elements so non-Vue libraries can be integrated.
- beforeUpdate: Runs immediately after a change to your component occurs, and before it has been re-rendered. Useful for acquiring the state of reactive data before it has been rendered.
- updated: Runs immediately after the beforeUpdate hook and re-renders your component with new data changes.
- beforeDestroy: Fired directly before destroying your component instance. The component will still be functional until the destroyed hook is called, allowing you to stop event listeners and subscriptions to data to avoid memory leaks.
- destroyed: All the virtual DOM elements and event listeners have been cleaned up from your Vue instance. This hook allows you to communicate that to anyone or any element that needs to know this was completed.
Exercise 1.12: Using Vue Lifecycles for Controlling Data
In this exercise, we will be learning how and when to use Vue's lifecycle hooks, and when they trigger by using JavaScript alerts. By the end of the exercise, we will be able to understand and use multiple Vue lifecycle hooks.
To access the code files for this exercise, refer to https://packt.live/36N42nT.
- Open a command-line terminal, navigate into the Exercise1.12 folder, and run the following commands in order:
> cd Exercise1.12/
> code .
> yarn
> yarn serve
Go to https://localhost:8080.
Note
Feel free to swap the alert for console.log().
- Start by creating an array of data to iterate over in a list element, set the key to n, and output the value {{item}} inside of the <li> element using curly braces:
<template>
<div>
<h1>Vue Lifecycle hooks</h1>
<ul>
<li v-for="(item, n) in list" :key="n">
{{ item }}
</li>
</ul>
</div>
</template>
<script>
export default {
data() {
return {
list: [
'Apex Legends',
'A Plague Tale: Innocence',
'ART SQOOL',
'Baba Is You',
'Devil May Cry 5',
'The Division 2',
'Hypnospace Outlaw',
'Katana ZERO',
],
}
}
}
</script>
- Add beforeCreated() and created() as functions below the data() function. Set an alert or console log inside these hooks so that you can see when they are being triggered:
<script>
export default {
...
beforeCreate() {
alert('beforeCreate: data is static, thats it')
},
created() {
alert('created: data and events ready, but no DOM')
},
}
</script>
When you refresh your browser, you should see both alerts before you can see your list load on the page:
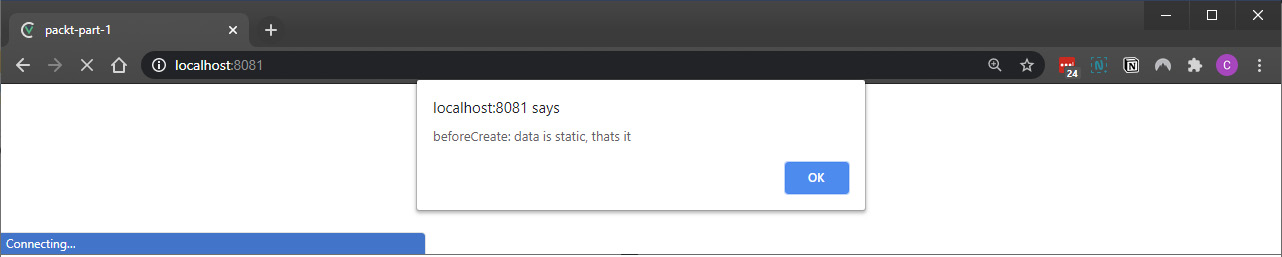
Figure 1.37: Observe the beforeCreate() hook alert first
The following screenshot displays the created() hook alert after the beforeCreate() hook:
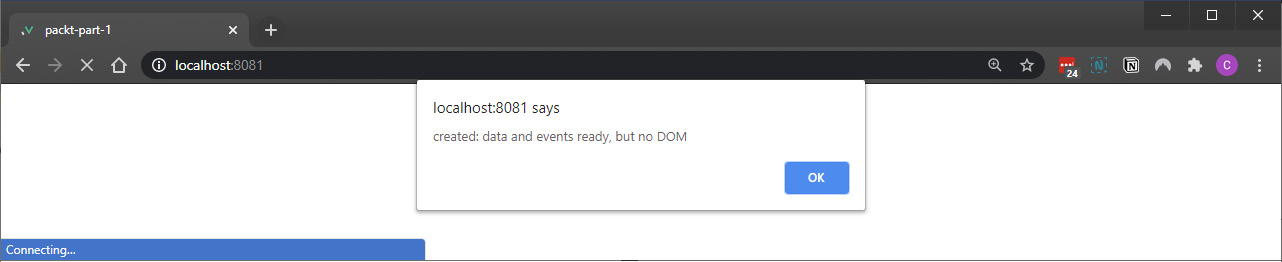
Figure 1.38: Observe the before() hook alert after the beforeCreate() hook
- Add beforeMount() and mounted() as functions below the created() hook. Set an alert or console log inside of these hooks so you can see when they are being triggered:
<script>
export default {
...
beforeMount() {
alert('beforeMount: $el not ready')
},
mounted() {
alert('mounted: DOM ready to use')
},
}
</script>
When you refresh your browser, you should also see these alerts before you can see your list load on the page:
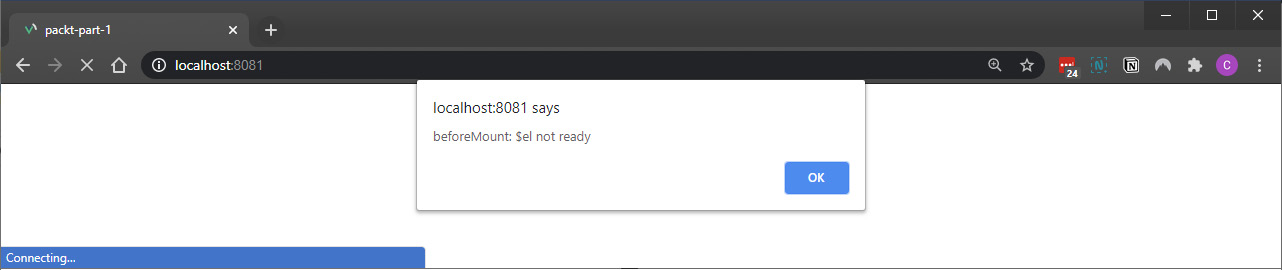
Figure 1.39: Observe the beforeMount() hook alert after the create() hook
The following screenshot displays the mounted() hook alert after the beforeMount() hook:

Figure 1.40: Observe alert mounted() hook alert after the beforeMount() hook
- Add a new anchor element inside your <li> element that sits next to the item output. Use a @click directive to bind this button to a method called deleteItem and pass the item value as an argument:
<template>
<div>
<h1>Vue Lifecycle hooks</h1>
<ul>
<li v-for="(item, n) in list" :key="n">
{{ item }} <a @click="deleteItem(item)">Delete</a>
</li>
</ul>
</div>
</template>
- Add a method called deleteItem into a methods object above your hooks, but below the data() function. Inside this function, pass value as an argument and filter out items from the list array that do not match the value, then replace the existing list with the new list:
Exercise1-12.vue
17 <script>
18 export default {
19 data() {
20 return {
21 list: [
22 'Apex Legends',
23 'A Plague Tale: Innocence',
24 'ART SQOOL',
25 'Baba Is You',
26 'Devil May Cry 5',
27 'The Division 2',
28 'Hypnospace Outlaw',
29 'Katana ZERO',
30 ],
31 }
32 },
33 methods: {
34 deleteItem(value) {
35 this.list = this.list.filter(item => item !== value)
36 },
37 },
The complete code for this step is available at https://packt.live/3pJGLvO.
- Add styling inside the <style> tag at the bottom of the component, and set the lang attribute to scss:
<style lang="scss" scoped>
ul {
padding-left: 0;
}
li {
display: block;
list-style: none;
+ li {
margin-top: 10px;
}
}
a {
display: inline-block;
background: rgb(235, 50, 50);
padding: 5px 10px;
border-radius: 10px;
font-size: 10px;
color: white;
text-transform: uppercase;
text-decoration: none;
}
</style>
- Add beforeUpdate() and updated() as functions below the mounted() hook and set an alert or console log inside these hooks so that you can see when they are being triggered:
<script>
export default {
...
beforeUpdate() {
alert('beforeUpdate: we know an update is about to happen, and have the data')
},
updated() {
alert('updated: virtual DOM will update after you click OK')
},
}
</script>
When you delete a list item by clicking the delete button in your browser, you should see these alerts.
- Add beforeDestroy() and destroyed() as functions below the updated() hook. Set an alert or console log inside these hooks so that you can see when they are being triggered:
<script>
export default {
...
beforeDestroy() {
alert('beforeDestroy: about to blow up this component')
},
destroyed() {
alert('destroyed: this component has been destroyed')
},
}
</script>
- Add a new item to your list array:
<script>
export default {
data() {
return {
list: [
'Apex Legends',
'A Plague Tale: Innocence',
'ART SQOOL',
'Baba Is You',
'Devil May Cry 5',
'The Division 2',
'Hypnospace Outlaw',
'Katana ZERO',
],
}
},
You should also see the destroy alerts after the update alerts are shown in your browser after you have saved this change with localhost running. This will generate the following output:
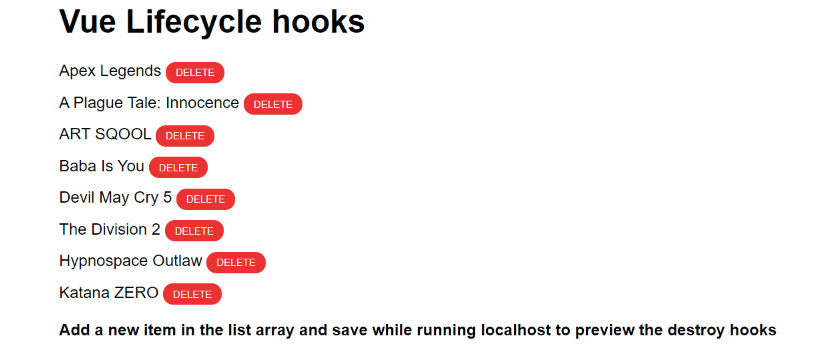
Figure 1.41: Output displaying Vue Lifecycle hooks
- Alerts will run at each lifecycle hook. Try deleting elements, adding new ones in the list array, and refreshing the page to see when each of these hooks occurs. This will generate an output as follows:
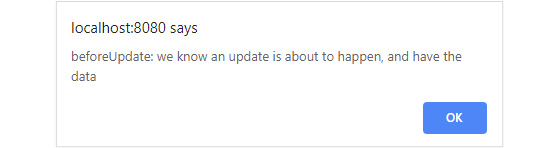
Figure 1.42: Displaying a message on every trigger
An alert will trigger every time you manipulate something on the page, demonstrating each available Vue lifecycle.
Note
Mounted and created lifecycle hooks will run every time a component loads. If this is not the desired effect, consider running the code you want to run once from the parent component or view, such as the App.vue file.
In this exercise, we learned what Vue lifecycle hooks are and when they trigger. This will be useful in combination with triggering methods and controlling data within your Vue components.
Activity 1.01: Building a Dynamic Shopping List App Using Vue.js
In this activity, we will build a dynamic shopping list app that will test your knowledge of Vue by using all the basic functions of an SFC, such as expressions, loops, two-way binding, and event handling.
This application should let users create and delete individual list items and clear the total list in one click.
The following steps will help you complete the activity:
- Build an interactive form in one component using an input bound to v-model.
- Add one input field that you can add shopping list items to. Allow users to add items by using the Enter key by binding a method to the @keyup.enter event.
- Users can expect to clear the list by deleting all the items or removing them one at a time. To do so, you can use a delete method that can pass the array position as an argument, or simply overwrite the whole shopping list data prop to be an empty array [].
The expected outcome is as follows:

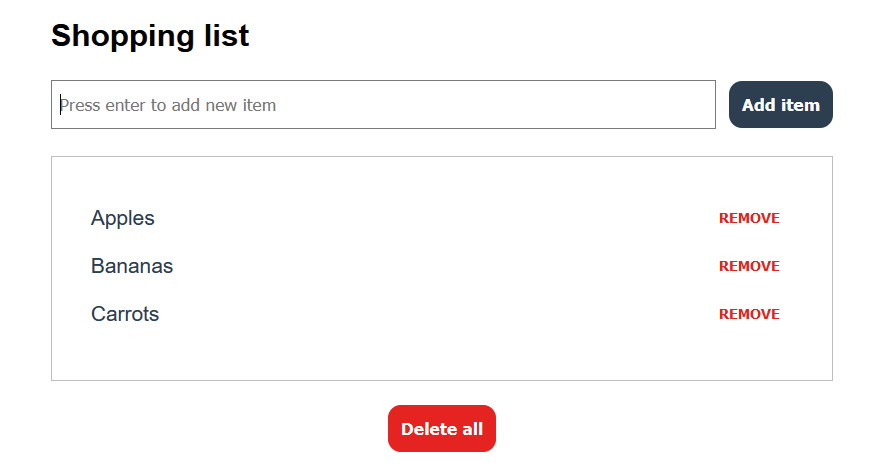
Figure 1.43: Final output
Note
The solution for this activity can be found via this link.
Summary
In this chapter, you have learned how to run a Vue project using the command prompt and to create basic Vue components. Within these Vue components, you can scaffold template that use Vue's unique directives and HTML syntax sugar to loop over data or control DOM states with conditional statements. Key concepts of reactive data through the use of data props and the v-model binding were explored and made useful in real-life examples that utilized Vue.js methods and lifecycles.
In the next chapter, we will learn about more advanced reactive data concepts that will build upon this first chapter: using computed props and watchers and fetching asynchronous data from an external source.