
Overview
In this chapter, you will expand on what you learned in the previous chapter by introducing more ways to control data inside Vue components. You will learn how to set up advanced watchers to observe data changes inside your components, and utilize Vue's powerful reactive data feature, computed data properties, to concisely output just the data you need in your template. You will also be able to utilize asynchronous methods to fetch data for your Vue components.
By the end of this chapter, you will be able to watch, manage, and manipulate data from various sources in your Vue.js components.
Introduction
In the previous chapter, you were introduced to the concepts of single-file components and the Vue API, which provides access to methods, directives, and data properties. Building on these foundations, we will be introducing computed properties, which, like data properties, are reactive in the UI but can perform powerful calculations, and their results are cacheable, increasing the performance of your project. When building e-commerce stores, you will usually want to calculate pricing and cart items reactively as users interact with your UI, which in the past would need to be achieved without a page reload using something like jQuery. Vue.js makes short work of these common frontend tasks by introducing computed properties that react immediately to frontend user input.
Let's begin by introducing reactive data that can be computed on the fly and understanding how to call and manipulate asynchronous data.
Computed Properties
Computed properties are a unique data type that will reactively update when source data used within the property is updated. They may look like a Vue method, but they are not. In Vue, we can track changes to a data property by defining them as a computed property, add custom logic within this property, and use it anywhere within the component to return a value. Computed properties are cached by Vue, making them more performant for returning data than a data prop or using a Vue method.
Instances where you may use a computed property include but are not limited to:
- Form validation:
In this example, an error message will appear when the total data property is less than 1. The computed property for total will update every time a new piece of data is added to the items array:
<template>
<div>{{errorMessage}}</div>
</template>
<script>
export default {
data() {
return {
items: []
}
},
computed: {
total() {
return this.items.length
},
errorMessage() {
if (this.total < 1) {
return 'The total must be more than zero'
} else {
return ''
}
}
}
}
</script>
This will generate the following output:
The total must be more than zero
- Combining data props:
In the following example, you can use computed props to combine two pieces of data into one returnable string, formalName, that can be used within your component:
<template>
<div>{{ formalName }}</div>
</template>
<script>
export default {
data() {
return {
title: 'Mr.',
surname: 'Smith'
}
},
computed: {
formalName() {
return this.title + ' ' + this.surname
}
}
}
</script>
This will generate the following output:
Mr. Smith
- Outputting complex information into the Vue template:
In this more complicated example, we use computed properties to break down the large data object called post. You will use the simplified and semantic computed properties to output the information into your components template. The computed properties in this example make it easier to identify and use the author's full name, see how many posts they have produced, and have the data to display their featured post:
<template>
<div>
<p>{{ fullName }}</p>
<p>{{ totalPosts }}</p>
<p>{{ featuredPosts }}</p>
</div>
</template>
<script>
export default {
data() {
return {
post: {
fields: {
author: {
firstName: 'John',
lastName: 'Doe'
},
entries: [{
title: "Entry 1",
content: "Entry 1's content",
featured: true
},
{
title: "Entry 2",
content: "Entry 2's content",
featured: false
}
]
}
}
}
},
computed: {
fullName() {
// Return string
return this.post.fields.author.firstName + ' ' + this.post.fields.author.lastName
},
totalPosts() {
// Return number
return this.post.fields.entries.length
},
featuredPosts() {
// Return string
return this.post.fields.entries.filter(entry => {
// If featured is true, return the entry title
if (entry.featured) {
return entry
}
})
}
}
}
</script>
This will generate the following output:

Figure 2.1: The computed name output
Computed properties are very valuable to a Vue developer when creating performant components. In the next exercise, we will explore how to use this inside of a Vue component.
Exercise 2.01: Implementing Computed Data into a Vue Component
In this exercise, you will use a computed property to help cut down the amount of code you need to write inside your Vue templates by concisely outputting basic data. To access the code files for this exercise, refer to https://packt.live/3n1fQZY.
- Open a command-line terminal, navigate into the Exercise 2.01 folder, and run the following commands in order:
> cd Exercise2.01/
> code .
> yarn
> yarn serve
Go to https://localhost:8080.
- Create an input field for the first name, use v-model to bind the data prop firstName to this field:
<input v-model="firstName" placeholder="First name" />
- Create a second input field for the last name, and use v-model to bind the data prop lastName to this field:
<input v-model="lastName" placeholder="Last name" />
- Include these new v-model data props in the Vue instance by returning them in the data() function:
data() {
return {
firstName: '',
lastName: '',
}
},
- Create a computed data variable called fullName:
computed: {
fullName() {
return `${this.firstName} ${this.lastName}`
},
},
- Underneath your input fields, using heading tags, output the computed data:
<h3 class="output">{{ fullName }}</h3>
This will generate the following output:

Figure 2.2: Output of the computed data will show the first and last name
In this exercise, we saw how we can write an expression inside a computed data property using data from the v-model and combine the first name and last name into a single output variable that can be reused.
Computed Setters
In the last exercise, you saw how to write maintainable and declarative computed properties that are reusable and reactive and can be called anywhere within your component. In some real-world cases when a computed property is called, you may need to call an external API to correspond with that UI interaction or mutate data elsewhere in the project. The thing that performs this function is called a setter.
Computed setters are demonstrated in the following example:
data() {
return {
count: 0
}
},
computed: {
myComputedDataProp: {
// getter
get() {
return this.count + 1
},
// setter
set(val) {
this.count = val - 1
this.callAnotherApi(this.count)
},
},
},
}
By default, computed data is a getter only, which means it will only output the outcome of your expression. In this example, the computed myComputedDataProp data prop will output 1 in your Vue component:
get() {
return this.count + 1
},
Then, using a setter in a computed property allows you to reactively listen to data and run a callback (setter) that contains the returned value from the getter, which can optionally be used in the setter.
In this example, the setter will update the data prop count to its new value (reflected in the getter) and then call a method within the component called callAnotherApi. Here, we pass in the count data prop to mimic sending this information somewhere useful:
set(val) {
this.count = val - 1
this.callAnotherApi(this.count)
},
You will find out exactly how to use computed data as both getters and setters in the following exercise.
Exercise 2.02: Using Computed Setters
In this exercise, you will use a computed prop as a setter and a getter, which will both output expressions and set data when triggered by a user's input.
To access the code files for this exercise, refer to https://packt.live/2GwYapA.
- Open a command-line terminal, navigate into the Exercise 2.02 folder, and run the following commands in order:
> cd Exercise2.02/
> code .
> yarn
> yarn serve
Go to https://localhost:8080.
- Create an input field with a v-model value bound to a computed data value called incrementOne, return the value of a Vue data variable called count in the getter, and set the count variable in the setter:
<template>
<div class="container">
<input type="number" v-model="incrementOne" />
<h3>Get input: {{ incrementOne }}</h3>
</div>
</template>
<script>
export default {
data() {
return {
count: -1,
}
},
computed: {
incrementOne: {
// getter
get() {
return this.count + 1
},
// setter
set(val) {
this.count = val - 1
},
},
},
}
</script>
The output of the preceding code will be as follows:

Figure 2.3: First steps of a computed setter and getter
- Next, let's utilize the setter again. We will divide whatever the new val argument is by 2, and save that to a new data variable called divideByTwo:
<template>
<div class="container">
<input type="number" v-model="incrementOne" />
<h3>Get input: {{ incrementOne }}</h3>
<h5>Set division: {{ divideByTwo }}</h5>
</div>
</template>
<script>
export default {
data() {
return {
count: -1,
divideByTwo: 0,
}
},
...
</script>
...
- Update the setter to divide val by 2, and bind this new value to the divideByTwo variable:
set(val) {
this.count = val - 1
this.divideByTwo = val / 2
},
The output of the divideByTwo value should generate an outcome from the value entered in the input field, as follows:

Figure 2.4: The outcome of the divideByTwo value
In this exercise, we saw how we can use computed data to both get and set data reactively in our template by binding computed variables to the v-model.
Watchers
Vue watchers programmatically observe component data and run whenever a particular property changes. Watched data can contain two arguments: oldVal and newVal. This can help you when writing expressions to compare data before writing or binding new values. Watchers can observe objects as well as string, number, and array types. When observing objects, it will only trigger the handler if the whole object changes.
In Chapter 1, Starting Your First Vue Project, we introduced life cycle hooks that run at specific times during a component's lifespan. If the immediate key is set to true on a watcher, then when this component initializes it will run this watcher on creation. You can watch all keys inside of any given object by including the key and value deep: true (default is false) To clean up your watcher code, you can assign a handler argument to a defined Vue method, which is best practice for large projects.
Watchers complement the usage of computed data since they can passively observe values and cannot be used like normal Vue data variables, while computed data must always return a value and can be looked up. Remember not to use arrow functions unless you do not require the Vue context of this.
The following watcher example demonstrates the immediate and deep optional keys; if any key inside of the myDataProperty object were to change it would trigger a console log:
watch: {
myDataProperty: {
handler: function(newVal, oldVal) {
console.log('myDataProperty changed:', newVal, oldVal)
},
immediate: true,
deep: true
},
}
Now, let's set some new values with the help of watchers.
Exercise 2.03: Using Watchers to Set New Values
In this exercise, you will use watcher arguments to watch data properties for changes, then use this watcher to set variables via a method.
To access the code files for this exercise, refer to https://packt.live/350ORI4.
- Open a command-line terminal, navigate into the Exercise 2.03 folder, and run the following commands in order:
> cd Exercise2.03/
> code .
> yarn
> yarn serve
Go to https://localhost:8080.
- Set up the document by adding a discount and an oldDiscount data variable with some styling:
<template>
<div class="container">
<h1>Shop Watcher</h1>
<div>
Black Friday sale
<strike>Was {{ oldDiscount }}%</strike>
<strong> Now {{ discount }}% OFF</strong>
</div>
</div>
</template>
<script>
export default {
data() {
return {
oldDiscount: 0,
discount: 5,
}
},
}
</script>
<style lang="scss" scoped>
.container {
margin: 0 auto;
padding: 30px;
max-width: 600px;
font-family: 'Avenir', Helvetica, sans-serif;
margin: 0;
}
a {
display: inline-block;
background: rgb(235, 50, 50);
border-radius: 10px;
font-size: 14px;
color: white;
padding: 10px 20px;
text-decoration: none;
}
</style>
- Observe the discount property by adding it to the watch object. Trigger a method called updateDiscount. Inside the method, set the oldDiscount data prop to be this.discount + 5:
watch: {
discount(newValue, oldValue) {
this.oldDiscount = oldValue
},
},
- Include a method that will augment the discount variable and trigger the watcher:
methods: {
updateDiscount() {
this.discount = this.discount + 5
},
},
Now add a line break, and an anchor element with the @click directive bound to the updateDiscount method:
<br />
<a href="#" @click="updateDiscount">Increase Discount!</a>
The output of the preceding command will be as follows:

Figure 2.5: A shop watcher page should look something like this
In this exercise, we saw how we can use watchers to observe and reactively manipulate data when data is changed by other methods in the Vue component.
In the next section, we will learn about deep watching concepts.
Deep Watching Concepts
When using Vue.js to watch a data property, you can purposefully observe keys inside an object for changes, rather than changes to the object itself. This is done by setting the optional deep property to true:
data() {
return {
organization: {
name: 'ABC',
employees: [
'Jack', 'Jill'
]
}
}
},
watch: {
organization: {
handler: function(v) {
this.sendIntercomData()
},
deep: true,
immediate: true,
},
},
This example will watch all available keys inside the organization data object for changes, so if the name property inside the organization changes, the organization watcher will trigger.
If you do not need to observe every key inside of an object, it can be more performant to just watch a specific key inside an object for changes by specifying it as a myObj.value string. For example, you may allow a user to edit their company name and have that data sent to an API only when that key has been modified.
In the following example, the watcher is specifically observing the name key of the organization object.
data() {
return {
organization: {
name: 'ABC',
employees: [
'Jack', 'Jill'
]
}
}
},
watch: {
'organization.name': {
handler: function(v) {
this.sendIntercomData()
},
immediate: true,
},
},
We saw how deep watching works. Now, let's try the next exercise and watch the nested properties of a data object.
Exercise 2.04: Watching Nested Properties of a Data Object
In this exercise, you will use watchers to observe keys within an object, which will update when a user triggers a method within the UI.
To access the code files for this exercise, refer to https://packt.live/353m59N.
- Open a command-line terminal, navigate to the Exercise 2.04 folder, and run the following commands in order:
> cd Exercise2.04/
> code .
> yarn
> yarn serve
Go to https://localhost:8080.
- Start by defining a product object that contains a price and label and a discount key. Output these values into the template:
<template>
<div class="container">
<h1>Deep Watcher</h1>
<div>
<h4>{{ product.label }}</h4>
<h5>${{ product.price }} (${{ discount }} Off)</h5>
</div>
</div>
</template>
<script>
export default {
data() {
return {
discount: 0,
product: {
price: 25,
label: 'Blue juice',
},
}
},
}
</script>
<style lang="scss" scoped>
.container {
margin: 0 auto;
padding: 30px;
max-width: 600px;
font-family: 'Avenir', Helvetica, sans-serif;
margin: 0;
}
a {
display: inline-block;
background: rgb(235, 50, 50);
border-radius: 10px;
font-size: 14px;
color: white;
padding: 10px 20px;
text-decoration: none;
}
</style>
- Set up a button that will modify the price of the product. Do this by adding a button element with a click event bound to an updatePrice method that decrements the value of price:
<template>
...
<a href="#" @click="updatePrice">Reduce Price!</a>
...
</template>
<script>
...
methods: {
updatePrice() {
if (this.product.price < 1) return
this.product.price--
},
},
...
</script>
When you click the button, it should reduce the price as seen in the following screenshot:

Figure 2.6: Screen displaying the reduced price of Blue juice
- Time for the nested watcher. We will watch the product object's price, and increment the discount data prop:
watch: {
'product.price'() {
this.discount++
},
},
Now, as you reduce the price, the discount value will go up because of the watcher:

Figure 2.7 Output displaying an increased discount value
In this exercise, we used watchers to observe a key inside an object and then set new data with or without using the optional arguments parsed by the watcher.
Methods versus Watchers versus Computed Props
In the Vue.js toolbox, we have access to methods, watchers, and computed properties. When should you use one or the other?
Methods are best used to react to an event occurring in the DOM, and in situations where you would need to call a function or perform a call instead of reference a value, for example, date.now().
In Vue, you would compose an action denoted by @click, and reference a method:
<template>
<button @click="getDate">Click me</button>
</template>
<script>
export default {
methods: {
getDate() {
alert(date.now())
}
}
}
</script>
Computed props are best used when reacting to data updates or for composing complicated expressions for us in your template. In this instance, if the animalList data changes, the animals computed prop will also update by slicing the second item from the array and returning the new value:
<template>
<div>{{ animals }}</div>
</template>
<script>
export default {
data() {
return {
animalList: ['dog', 'cat']
}
},
computed: {
animals() {
return this.animalList.slice(1)
}
}
}
</script>
Their reactive nature makes computed properties perfect for composing new data variables from existing data, such as when you are referencing specific keys of a larger, more complicated object, helping to simplify readability of your template. In this example, we output the authors twice in two different ways. However, notice in the authorName computed prop, you can compose conditional logic cleanly without bloating the HTML template:
<template>
<div>
<p id="not-optimal">{{ authors[0].bio.name }}</p>
<p id="optimal">{{ authorName }}</p>
</div>
</template>
<script>
export default {
data() {
return {
authors: [
{
bio: {
name: 'John',
title: 'Dr.',
}
}
]
}
},
computed: {
authorName () {
return this.authors ? this.authors[0].bio.name : 'No Name'
}
}
}
</script>
Data watchers should be used when you need to listen to a data property change or a specific data property inside an object, and then perform an action. Because of the unique newVal and oldVal arguments of a watcher, you can watch a variable until a certain value is reached, and only then perform an action:
<template>
<div>
<button @click="getNewName()">Click to generate name </button>
<p v-if="author">{{ author }}</p>
</div>
</template>
<script>
export default {
data() {
return {
data: {},
author: '',
}
},
watch: {
data: function(newVal, oldVal) {
this.author = newVal.first
alert(`Name changed from ${oldVal.first} to ${newVal.first}`)
}
},
methods: {
async getNewName() {
await fetch('https://randomuser.me/api/'). then(response => response.json()).then(data => {
this.data = data.results[0].name
})
},
},
}
</script>
With this in mind, we will build a simple search functionality using a method, computed props, and a watcher to achieve a similar outcome and demonstrate the ability of each method.
Exercise 2.05: Handling Search Functionality Using a Vue Method, a Watcher, and Computed Props
In this exercise, you will create a component that allows users to search data arrays using three different methods in Vue. By the end of the exercise, you will be able to see firsthand how each different method works.
To access the code files for this exercise, refer to https://packt.live/32iDJVe.
- Open the command-line terminal, navigate to the Exercise 2.05 folder, and run the following commands in order:
> cd Exercise2.05/
> code .
> yarn
> yarn serve
Go to https://localhost:8080.
- In the data object, add a list of frameworks in an array, assigned to the frameworkList value. Include an empty string with the key to input and an empty array with a key of methodFilterList:
<script>
export default {
data() {
return {
// Shared
frameworkList: [
'Vue',
'React',
'Backbone',
'Ember',
'Knockout',
'jQuery',
'Angular',
],
// Method
input: '',
methodFilterList: [],
}
},
}
</script>
- In the template, include a div container, a title, and a column container. Inside this column container, create an input that is bound to the v-model input, and bind the keyup event on the input to the searchMethod method:
<template>
<div class="container">
<h1>Methods vs watchers vs computed props</h1>
<div class="col">
<input
type="text"
placeholder="Search with method"
v-model="input"
@keyup="searchMethod"
/>
<ul>
<li v-for="(item, i) in methodFilterList" :key="i"> {{ item }}</li>
</ul>
</div>
</div>
</template>
<script>
export default {
data() {
return {
// Shared
frameworkList: [
'Vue',
'React',
'Backbone',
'Ember',
'Knockout',
'jQuery',
'Angular',
],
// Method
input: '',
methodFilterList: [],
}
},
methods: {
searchMethod(e) {
console.log(e)
},
},
}
</script>
<style lang="scss" scoped>
.container {
margin: 0 auto;
padding: 30px;
max-width: 600px; font-family: 'Avenir', Helvetica, Arial, sans-serif;
}
.col {
width: 33%;
height: 100%;
float: left;
}
input {
padding: 10px 6px;
margin: 20px 10px 10px 0;
}
</style>
The output of the preceding code will be as follows:

Figure 2.8: Console should output the key input
- Inside our searchMethod method, write a filter expression that binds the methodFilterList data prop to a filtered frameworkList array based on the input value. Trigger searchMethod on the created() life cycle hook so that when the component loads, a list is present:
<script>
export default {
...
created() {
this.searchMethod()
},
methods: {
searchMethod() {
this.methodFilterList = this.frameworkList.filter(item =>
item.toLowerCase().includes(this.input.toLowerCase())
)
},
},
}
</script>
On running the preceding code, you will be able to filter the list as shown in Figure 2.9:
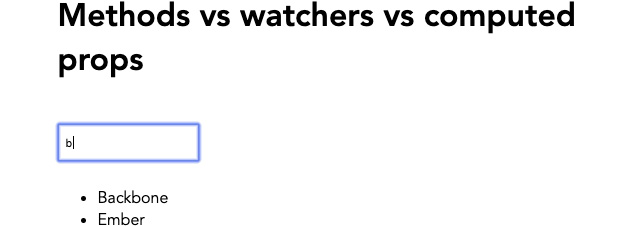
Figure 2.9: You should now be able to filter the list using a Vue method
- Let's make a filter using computed props. Include a new data prop called input2 and create a computed prop called computedList that returns the same filter as the searchMethod but does not need to bind to another data prop:
<template>
<div class="container">
...
<div class="col">
<input type="text" placeholder="Search with computed" v-model="input2" />
<ul>
<li v-for="(item, i) in computedList" :key="i"> {{ item }}</li>
</ul>
</div>
...
</div>
</template>
<script>
export default {
data() {
return {
...
// Computed
input2: '',
...
}
},
...
computed: {
computedList() {
return this.frameworkList.filter(item => {
return item.toLowerCase().includes(this.input2. toLowerCase())
})
},
},
...
}
</script>
You should now be able to filter the second column of frameworks with the help of computed props, as shown in the following screenshot:

Figure 2.10: Filtering the second column of frameworks using computed props
- Finally, let's filter the same list using a watcher. Include an input3 prop with an empty string and watchFilterList prop with an empty array. Also create a third column div, which contains an input bound to the input3 v-model, and a list outputting the watchFilterList array:
<template>
<div class="container">
…
<div class="col">
<input type="text" placeholder="Search with watcher" v-model="input3" />
<ul>
<li v-for="(item, i) in watchFilterList" :key="i"> {{ item }}</li>
</ul>
</div>
</div>
</template>
<script>
export default {
data() {
return {
...
// Watcher
input3: '',
watchFilterList: [],
}
},
...
</script>
- Create a watcher that watches the input3 prop for changes and binds the result of the frameworkList filter to the watchFilterList array. Set the immediate key of input3 to true so it will run when the component is created:
<script>
export default {
...
watch: {
input3: {
handler() {
this.watchFilterList = this.frameworkList.filter(item =>
item.toLowerCase().includes(this.input3.toLowerCase())
)
},
immediate: true,
},
},
...
}
</script>
With the help of a watcher, you should now be able to filter the third column, as shown in the following screenshot:
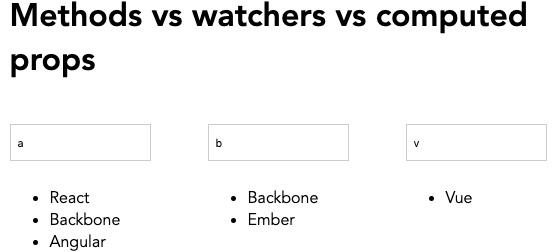
Figure 2.11: Filtering the list using a watcher in the third column
In this exercise, we have seen how we can achieve a filtered list using a method, computed props, and a watcher. Each has their own pros, cons, and use cases depending on what you are trying to achieve in your application.
Async Methods and Data Fetching
Asynchronous functions in JavaScript are defined by the async function syntax and return an AsyncFunction object. These functions operate asynchronously via the event loop, using an implicit promise, which is an object that may return a result in the future. Vue.js uses this JavaScript behavior to allow you to declare asynchronous blocks of code inside methods by including the async keyword in front of a method. You can then chain then() and catch() functions or try the {} syntax inside these Vue methods and return the results.
Axios is a popular JavaScript library that allows you to make external requests for data using Node.js. It has wide browser support making it a versatile library when doing HTTP or API requests. We will be using this library in the next exercise.
Exercise 2.06: Using Asynchronous Methods to Retrieve Data from an API
In this exercise, you will asynchronously fetch data from an external API source and display it in the frontend using computed props.
To access the code files for this exercise, refer to https://packt.live/353md9h.
- Open a command-line terminal, navigate to the Exercise 2.06 folder, and run the following commands to install axios:
> cd Exercise2.06/
> code .
> yarn
> yarn add axios
> yarn serve
Go to https://localhost:8080.
- Let's start by importing axios into our component and creating a method called getApi(). Use axios to call a response from https://api.adviceslip.com/advice and console.log the result. Include a button that has a click event bound to the getApi() call:
<template>
<div class="container">
<h1>Async fetch</h1>
<button @click="getApi()">Learn something profound</button>
</div>
</template>
<script>
import axios from 'axios'
export default {
methods: {
async getApi() {
return axios.get('https://api.adviceslip.com/advice'). then((response) => {
console.log(response)
})
},
},
}
</script>
<style lang="scss" scoped>
.container {
margin: 0 auto;
padding: 30px;
max-width: 600px;
font-family: 'Avenir', Helvetica, Arial, sans-serif;
}
blockquote {
position: relative;
width: 100%;
margin: 50px auto;
padding: 1.2em 30px 1.2em 30px;
background: #ededed;
border-left: 8px solid #78c0a8;
font-size: 24px;
color: #555555;
line-height: 1.6;
}
</style>
The output of the preceding code will be as follows:
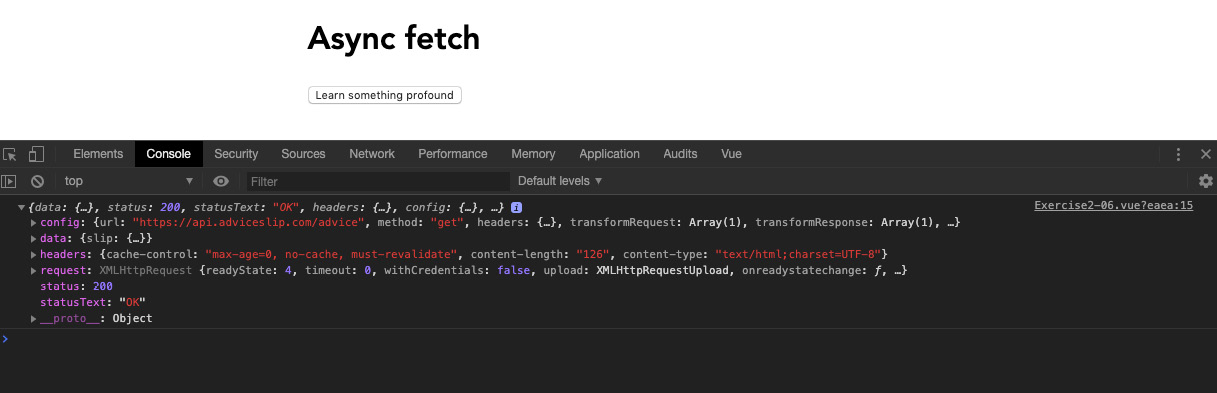
Figure 2.12: Screen displaying a very large object in the console
- We are only interested in the data object inside the response object. Assign this data object to a Vue data prop called response that we can reuse:
export default {
data() {
return {
axiosResponse: {},
}
},
methods: {
async getApi() {
return axios.get('https://api.adviceslip.com/advice'). then(response => {
this.axiosResponse = response.data
})
},
},
}
- Output the quote from inside the response prop object using a computed prop that will update every time the response prop changes. Use a ternary operator to perform a conditional statement to check whether the response prop contains the slip object to avoid errors:
<template>
<div class="container">
<h1>Async fetch</h1>
<button @click="getApi()">Learn something profound</button>
<blockquote v-if="quote">{{ quote }}</blockquote>
</div>
</template>
<script>
import axios from 'axios'
export default {
data() {
return {
axiosResponse: {},
}
},
computed: {
quote() {
return this.axiosResponse && this.axiosResponse.slip
? this.axiosResponse.slip.advice
: null
},
},
methods: {
async getApi() {
return axios.get('https://api.adviceslip.com/advice'). then(response => {
this.axiosResponse = response.data
})
},
},
}
</script>
Figure 2.13 displays the output generated by the preceding code:
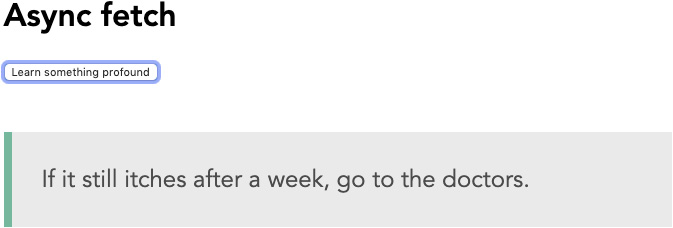
Figure 2.13: Screen displaying the quote output in your template
- As a final touch, include a loading data prop so the user can see when the UI is loading. Set loading to false by default. Inside the getApi method, set loading to true, and in the then() chain, set it back to false after 4 seconds using the setTimeout function. You can use a ternary operator to change the button text between the loading state and its default state:
<template>
<div class="container">
<h1>Async fetch</h1>
<button @click="getApi()">{{
loading ? 'Loading...' : 'Learn something profound'
}}</button>
<blockquote v-if="quote">{{ quote }}</blockquote>
</div>
</template>
<script>
import axios from 'axios'
export default {
data() {
return {
loading: false,
axiosResponse: {},
}
},
computed: {
quote() {
return this.axiosResponse && this.axiosResponse.slip
? this.axiosResponse.slip.advice
: null
},
},
methods: {
async getApi() {
this.loading = true
return axios.get('https://api.adviceslip.com/advice'). then(response => {
this.axiosResponse = response.data
setTimeout(() => {
this.loading = false
}, 4000);
})
},
},
}
</script>
The output of the preceding code will be as follows:
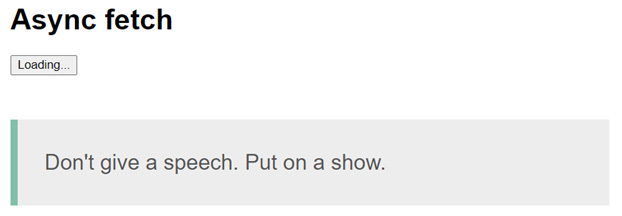
Figure 2.14: Screen displaying the loading button state output in your template
In this exercise, we saw how we can fetch data from an external source, assign it to a computed prop, display it in our template, and apply a loading state to our content.
Activity 2.01: Creating a Blog List Using the Contentful API
In this activity, we will build a blog that lists articles from an API source. This will test your knowledge of Vue by using all the basic functions of a Single-File Component (SFC) and async methods to fetch remote data from an API and use computed properties to organize deep nested object structures.
Contentful is a headless content management system (CMS) that allows you to manage content separately to your code repository. You can consume this content using the API inside as many code repositories as you need. For example, you may have a blog website that acts as a primary source of information, but your clients want a standalone page on a different domain that only pulls in the most recent featured articles. Using a headless CMS inherently allows you to develop these two separate code bases and use the same updated data source.
This activity will be using the headless CMS Contentful. The access keys and endpoints will be listed in the solution.
The following steps will help you complete the activity:
- Use the Vue CLI to create a new project that uses babel presets.
- Install the contentful dependency into your project.
- Use computed properties to output the deeply nested data from the API response.
- Use data props to output the user's name, job title, and description.
- Use SCSS to style the page.
The expected outcome is as follows:

Figure 2.15: Expected outcome with Contentful blog posts
Note
The solution for this activity can be found via this link.
After the activity has been completed, you should be able to use async methods to pull remote data from an API source into your Vue components. You will find that computed props are a sophisticated way of breaking down the information into smaller chunks of reusable data.
Summary
In this chapter, you were introduced to Vue.js computed and watch properties, which allow you to observe and control reactive data. You also saw how to use methods to asynchronously fetch data from an API using the axios library and how to flatten the data to be more usable within the Vue template using computed props. The differences between using methods and computed and watch properties were demonstrated by building search functionality using each method.
The next chapter will cover the Vue CLI and show you how to manage and debug your Vue.js applications that use these computed properties and events.