
Chapter 8. Using the Desktop Environment

Just like a typical computer, the BeagleBone has a graphical desktop environment that you can navigate with your mouse. It will let you click through the filesystem, drag and drop files, and launch windowed graphical programs. If you’re pretty good at getting around Windows or OS X, you’ll have no problem working with LXDE, the desktop environment preloaded onto the BeagleBone’s distribution of Linux. (See Figure 8-1.)
Much of what you have done on the command line can also be done within the desktop environment. Unless you’re a command line power user, it’s probably much easier to switch between files, applications, and copy and paste text when you’re within the desktop.

Accessing the Desktop
One way to access the desktop environment on the BeagleBone is to connect a keyboard, monitor, and mouse directly to it (see Figure 8-2). A USB keyboard and mouse can be connected through a USB hub to the USB host port on the board. If you have a BeagleBone Black, you can connect a monitor through the Micro HDMI port on the bottom of the board next to the MicroSD slot. This Micro HDMI connector, also called a “Type D” connector, isn’t as easy to find in stores as the standard HDMI and the Mini HDMI type of cables. You may need to order this part online. Stores like Monoprice sell inexpensive Micro HDMI cables and adapters.

Note
If you have the original BeagleBone, you can attach the DVI Cape expansion board to display the desktop environment on a monitor.
You can also access the desktop remotely through VNC if you’d rather not connect a keyboard, mouse, and monitor. See Connecting to the Desktop Remotely with VNC.
After connecting the monitor to your BeagleBone and rebooting the board, you should see the desktop environment on screen (Figure 8-1). If not, try clicking the mouse or hitting a key on the keyboard.
Getting to the Terminal
Despite the fact you can do a lot within the desktop environment, from time to time you’ll find yourself needing a command line. Luckily, it’s only a few clicks or keypresses away.
Using the Terminal Application
On the menu bar at the bottom left of the screen, click Accessories→LXTerminal, which will bring up a windowed terminal. (See Figure 8-3.)

You can have multiple windows open at once (File→New Window) or keep multiple terminals open in a single window with a tabbed interface (File→New Tab).
You may have noticed that the command prompt doesn’t look like what you’ve gotten used to when you connect by SSH. That’s because when you use the graphical desktop, you’re running as a user named debian rather than as the root user. To run commands that require root privileges (including most of the commands you’ve seen in the book), type the command sudo -i and you’ll see the familiar prompt appear.
Note
Don’t run as root unless you need to run a script that accesses the BeagleBone’s hardware.
If you’d like to change a setting in the terminal such as the font, click Edit→Preferences and make your changes, as shown in Figure 8-4.

Switching Terminals
You can also use the command line terminal without being within the desktop environment. To do this, try holding down the Control and Alt keys while tapping on the F1 through F6 keys. This gives you access to 6 different text-based terminals on F1 through F6. To get back to the desktop environment, type Control-Alt-F7.
Navigating the Filesystem
In Chapter 3, you explored the Linux filesystem from the command line with the commands cd and ls. To explore the filesystem within the desktop environment, click the menu in the lower left and select Accessories→File Manager. Click the up icon on the tool bar a couple of times. The directories on display should look a bit familiar. You’re viewing the contents of the root of the filesystem. (See Figure 8-5.)
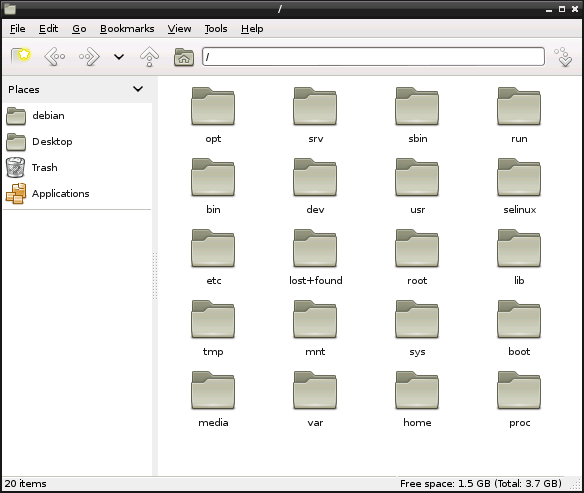
On the pane on the left side of the window are a few shortcuts to different parts of the filesystem. You can add to these shortcuts by dragging a file or folder to the lower part of the pane. To remove a shortcut, right click it and choose Remove from Bookmark.
Most of the file management functionality that you’d expect from a modern operating system is available to you here. Open files and directories by double clicking on them, and take other actions by right-clicking on them. Moving files or directories is as simple as dragging them from window to window. If you want to copy instead of move, hold down the Control key before letting go of the file or directory.
Editing Text
A text editor called Leafpad is pre-installed on the BeagleBone. To launch it, click the menu in the lower left and choose Accessories→Leafpad. A window will open with a blank text document. If you’re within the file management windows and want to open a file within gedit, simply right click on the file and click Leafpad. (See Figure 8-6 for an example of opening a file with Leafpad.
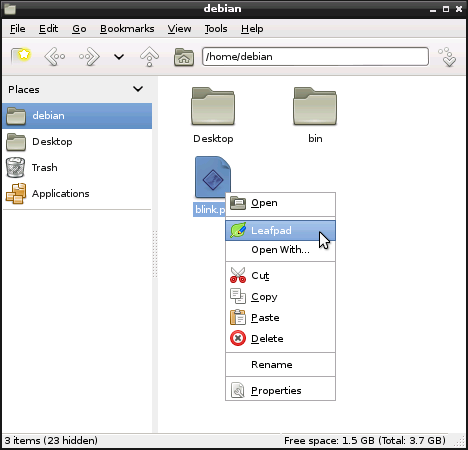
If you don’t see Leafpad in the menu after right clicking on a file, choose Open With… and select Leafpad (or perhaps some other editor you’ve installed with apt-get install) from the list of applications. Make sure to choose the option to set the selected application as the default action so that in the future you can just double click the file to open it.
Executing Scripts
At the beginning of many of the scripts we’ve written, we’ve included a shebang or hashbang on the first line of the file. This instructs the system to use a particular interpreter (such as Python or Node) to run the file. That way, we can set the script file as executable and then run the file (see Figure 8-7). The system will then pass the script file to the interpreter listed on the line after the #!. The shebangs for the languages we’ve used are:
-
Bash scripts:
#!/bin/bash -
Python scripts:
#!/usr/bin/python -
Node scripts:
#!/usr/bin/node
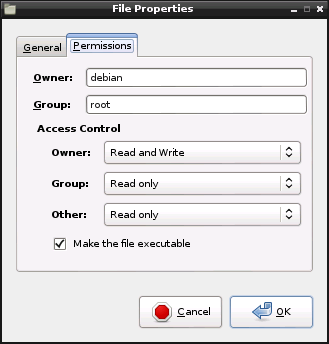
As long as the script has a proper shebang on the first line, you can set it as executable and run it directly. To set a file as executable within the desktop environment, right click on it and click Properties. Under the Permissions tab, check off the box that says “Make the file executable.” This is the equivalent to executing chmod +x filename on the command line.
Now when you double click the file you’ll be presented with the option to execute the script, execute it in the terminal (so you can see the output), or open the file. (See Figure 8-8.)

However, in order to run any script that interacts with the hardware, you’ll need to be logged in as root. You can get around that requirement by running the script with a program called gksu, which lets you invoke root privileges right from the File Manager. First, let’s make sure the File Manager is configured to run your script in the same terminal you’ve been using in the desktop environment.
In the File Manager, choose Edit→Preferences. Go to the Advanced tab, and change the value for Terminal Emulator to lxterminal -e %s. Click Close.
Next, right-click on the script, such as blink.py, and choose Open With… Click the Custom Command Line tab and type sudo and check the box labeled “Execute in terminal emulator”, then click OK.
You can kill the script by pressing Control-C (don’t just close the window that opened when you ran it or you’ll lose control of the script). If your script does something quickly and then exits, the window won’t stay around. Next time you want to run that script this way, you can right-click and select sudo from the list of options without needing to choose Open With… again.
Switching Workspaces
If you find yourself with too many windows open and you’re feeling overwhelmed, you can always switch to another workspace to get a clean desktop (see Figure 8-9). Just click on one of the inactive workspaces in the workspace switcher on the lower right hand side of the screen.
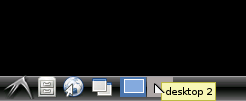
If two workspaces isn’t enough or you’d like to label each workspace, you can change things in the preferences. Simply right click on the workspace switcher and click “Desktop Pager” Settings.
Connecting to the Desktop Remotely with VNC
You may want to access the BeagleBone’s desktop environment but don’t want to bother with connecting a keyboard, mouse, and monitor to the board. To access the desktop without these, you can use VNC, which is a way of displaying and controlling a computer’s desktop environment from a remote computer over the network.
The first step is to start the VNC server on the BeagleBone. When you’re logged in via SSH, open the LXDM window manager configuration file with nano:
root@beaglebone:~# nano /etc/lightdm/lightdm.conf
Next, press Control-W to search for text in the file. When you see the “Search:” prompt, type VNC and press Enter. That will take you to the VNC server configuration. Uncomment the five lines under [VNCServer] by deleting the leading # and change them as follows (you may want to change width and height to fewer or more pixels depending on the screen size of the computer you’re connecting from):
[VNCServer]
enabled=true
port=5900
width=1024
height=768
depth=16
Type Control-X and type “y” to save the file when it prompts you. Then type reboot to restart the BeagleBone.
If you’re using a Mac, on the Finder’s menu bar, click Go→Connect to Server. A window will appear where you can enter the server address. Enter vnc://beaglebone.local:5900 (see Figure 8-10) and click connect. You’ll be prompted to enter the password (“pass” in the example above) and then you’ll be connected.

If you’re using Windows, you’ll need to download a VNC client application such as RealVNC or TightVNC. After installing, connect to your BeagleBone with the server name beaglebone.local:5900 or its IP address (Figure 8-11).

Note
On some networks (such as Verizon FIOS home Wi-Fi networks), you may need to use beaglebone.home instead of beaglebone.local.