Making Photo Quality Ink-Jet Prints
You guys are the Lone Gunmen, aren’t you? You guys are my heroes. I mean look at the crap you print.
Printing using digital technology is simply the latest link in a chain that started when Louis Jacques Mandé Daguerre placed a silver-covered copper plate in iodine vapors and watched an image appear. Printing photographic images in a desktop darkroom means no more working in the dark, fingers soaking in smelly chemicals, while waiting for results to appear on dripping wet paper. This is not to demean traditional darkroom methods; there is nothing more luminescent than a platinum contact print made from a properly exposed large format negative, but the ink-jet print is clearly this millennium’s medium.
Some purists may scoff at digital printing, claiming that the images created using computer technology aren’t permanent, but the truth is that while traditional photographic prints may be processed to assure permanence, others, through either choice of materials or the processes used, may not be. In much the same way, some digital prints may be produced using inks and papers that will create an archival print, while others may not. The image maker’s choices made through experience or inexperience will determine the final result.
The Zuiko Digital ED 7–14mm f/4.0 was used to photographing the rare McLaren M6GT in the Mathews Collection (www.mathewscollection.com) set at 7mm. It was also shot wide open at f/4.0 yet look at the depth of field! Yes I used a tripod. ©2005 Joe Farace.
Ink and Paper Compatibility
We all know how well ink-jet printers and papers work together? All you have to do is to stick some papers in the printer, tell your software that you want to produce photo quality output, and the results are perfect. Right? If that’s hasn’t been your personal experience, you should read what follows.
All ink-jet printers spray ink through nozzles—or jets—onto paper and the technology used falls into two categories:
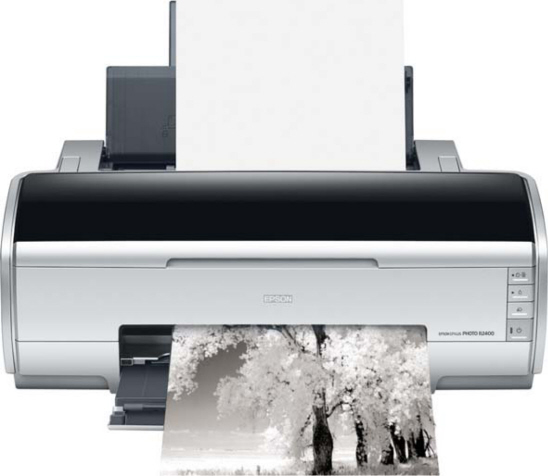
Micro Piezo: Much like a tiny Super Soaker, the micro piezo print head used in Epson printers, squirts ink through nozzles using mechanical pressure. Depending on the amount of current applied, the print head changes shape to regulate the amount of ink released.
Thermal: In the system used by Canon, Hewlett-Packard, Lexmark and other manufacturers, ink in the print head is heated and expands to where it’s forced though the nozzles and onto the paper. There are variations with how each company’s printers accomplishes this task, but you get the idea.
Some printers have nozzles built into the print head, while others place them in the ink cartridges, but I’ve never seen much visible difference in the output because of this difference in design.
How much ink exits the print head is measured by its droplet size. In general, the smaller the size, the better the image quality. Ink droplets are measured in picoliters, which is one million millionth of a liter! Printer resolution is rated in dots per inch or dpi. A 720dpi device prints 518,400 dots of ink in one square inch; the greater the number of dots, the higher the resolution.
Printing in the Real World
One of the first things digital imagers are in a hurry to do after capturing an image is to print it. Here in the digital darkroom where technical advances have freed us from most of the restrictions of the traditional darkroom, for most photographers ink-jet printer use breaks down along the classic line of the three “P’s”—proofs, prints, and portfolios.
Proofing: Most digital color printers started life as proofing devices for making a quick approval print for a client before producing separations, and many photographers still use their desktop printers for proofing. A proof printed on inexpensive but high-quality media provides insurance that the final image will look the same way it looks on your monitor. Making a paper proof is also a good idea when sending a digital file to a client or service bureau so the recipient knows what the finished image will look like. I made proof sheets of all of the images in this book to give the designer an idea of how the images should appear.
Printing: The papers and inks that can be used by the latest ink-jet printers produce prints that have a life as long as a lab-made print. Information on archival stability of inks and papers can be found at Wilhelm Research’s website (www.wilhelm-research.com). For most applications, people receiving the prints I send don’t even ask if they’re “digital” because they look just like “real” photographs.
Portfolios: For professional and aspiring professional photographers, one of the advantages of producing photo quality output in-house is the ability to update and customize a portfolio. Having an ink-jet printer, such as the Epson Stylus Photo R1800, lets photographers print high-quality portfolio images up to 13 19 inches.
The revolution in color ink-jet printing technology forever changed the deskscape. For less than $100, inexpensive printers from companies such as Canon, Epson, HP, and Lexmark let you produce photographic quality output, but there is a price to be paid for this capability. As color printers became better and better (and cheaper too), computer users began to demand more from them; not just higher resolution but better, more accurate color. This quest engendered an endless cycle of continued printer improvements to find color nirvana: WYSIWYG color.
Before starting on the path to accurate color there are many roadblocks that must be overcome, including price. Somewhere along the way, you are going to have to stop and ask yourself this question: “How much am I willing to pay for accurate color?” Your answer determines which of the several available software and hardware solutions are appropriate for your situation. That’s why one of my goals in this chapter is to point you toward inexpensive solutions to the color management dilemma.
Practical Color
There are few obstacles standing in the way of obtaining an exact color match between what you see on the monitor and what your printer will deliver. The most fundamental difference is that when looking at a monitor you are viewing an image by transmitted light. Much as when viewing a slide on a light box, light is coming from behind that image. When looking at output, you are seeing the print by reflected light. Right away there is a difference, but these differences can be exacerbated by environmental factors, including monitor glare and ambient light color. While light may appear white to our eyes, it actually comes in many hues.
Depending on chemical composition (more on ink idiosynchracies later), the output of printers using pigmented inks exhibit a characteristic called metamerism. If you look up “metamerism” in the American Heritage Dictionary of the English Language, Fourth Edition 2000, it is defined as “The condition of having the body divided into metameres, exhibited in most animals only in the early embryonic stages of development.” Aren’t you glad you know that? As the coachman said to Dorothy when taking her to see the Wiz, “that’s a horse of a different color.” Metamerism refers to situations where output from a color printer looks fine under one set of viewing conditions but not under another.
Since metamerism can never be completely eliminated with output from some desktop printers, you should make sure it’s originally viewed under consistent lighting. If you go into any professional photographic lab or a commercial printer, you’ll find a special area set aside for viewing output. This area will have test prints posted and will have lighting fully corrected for daylight. If it looks good there, as the song goes, it’ll look good anywhere. Most computer users can’t afford the kind of viewing boxes professional labs have, but Ott-Lite (www.ott-lite.com) sells affordable accessory lamps that can bring color-correct viewing to your desktop printer. They offer a family of modestly priced VisonSaver lights that you can place near your printer to help you see color properly. Ott-Lite’s 13-W Portable lamp, for example, should fit into anybody’s workspace.

Ott-Lite’s VisionSaver Plus table lamp can be used parallel to the desktop, straight up to illuminate larger areas, or can be attached to a wall. It features a 13-W VisionSaver Plus tube that lasts up to 10,000 hours. Photo courtesy of Ott-Lite Technology.
Once you’re aware of the environmental effect on output, you need to take steps to bring your computer system into color harmony. There are a few ways to minimize problems, but the key is knowing what the color of your image is to begin with. Running Adobe’s Gamma software (www.adobe.com), automatically installed with recent versions of Photoshop as well as the inexpensive Photoshop Elements, is the first step. The Gamma Control Panel lets you calibrate your monitor’s contrast and brightness, gamma (midtones), color balance, and white point. There are two ways to work with Gamma and both are easy, including a step-by-step wizard approach. More detailed information of setting Gamma can be found in Adobe’s on-line Technical guides (www.adobe.com/support). The settings you obtain by working with the Gamma control panel are used to create a profile for your monitor that is used by color management systems such as ColorSync for the Mac OS and Microsoft’s ICM for Windows.
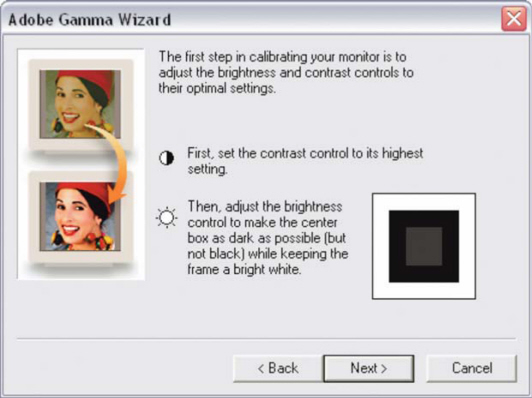
Adobe Gamma can calibrate and characterize your monitor: Calibrating your monitor brings it into compliance with a standard. Characterizing your monitor simply creates a profile that describes how the monitor is currently reproducing color. It also helps you set optimum brightness and contrast range.
While Gamma isn’t perfect, it will get you into the ballpark. Once again the better the color match, the pickier you may become. The secret in pursuing the quest is not to hunt until the color dragon is slain but until you are satisfied, considering how much it has cost so far, with the match between monitor and print. One of the least expensive ways to calibrate your monitor is by using ColorVision’s Monitor Spyder (www.colorcal.com). This combination of hardware and software can calibrate any cathode ray tube (CRT) monitor and will produce International Color Consortium (ICC; www.color.org) profiles for Mac OS and Windows color management systems.
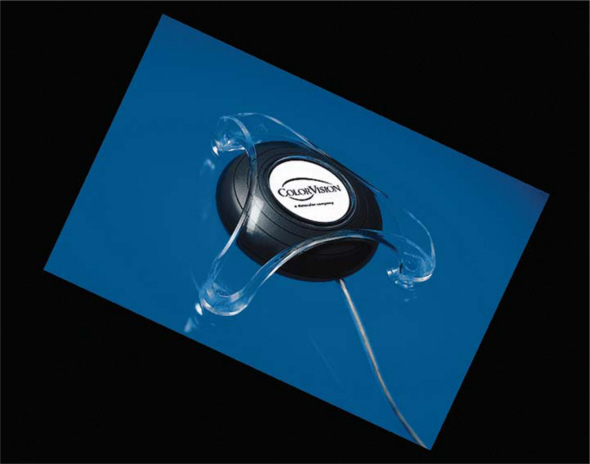
This Spyder is a Plexiglas and metal device that attaches to your liquid crystal display (LCD) or CRT monitor, the way you may already have stuck a stuffed Garfield there. When used with ColorVision’s software, such as PhotoCal or OptiCal, it’s relatively simple to calibrate your monitor.
Monaco Systems (www.monacosys.com) offers a color management package that includes MonacoPROOF software and X-Rite’s Digital Swatchbook spectrophotometer. Digital Swatchbook works with Macintosh or Windows computers using measured spectrophotometer readings for color-managing desktop computers. MonacoPROOF builds custom ICC profiles to let you obtain accurate color from scanners, digital cameras, monitors, printers, and even color copiers. The software has a wizard-like interface that guides users through the profiling process and displays on-screen images accurately to produce “soft” proofs. Some ink-jet printers bundle a copy of Monaco EZcolor Lite that lets you create a single monitor profile for your system.
Output Solutions
You may find after you’ve tried one of these monitor calibration methods, that while your on-screen image and output are a much closer match, they are not quite the same. (Don’t forget differences in reflective and transmitted light and the possibility of metamerism.) In my own case after happily using Adobe Gamma for many years I started using ColorVision’s Monitor Spyder and PhotoCal software. The result was that output from my printers looked better than it did on screen. If you’re still not happy with your prints, it’s time to look at output profiling.
There are two kinds of people in this desktop darkroom world; those who need output profiles and those who don’t. When using ink-jet or even laser output as a proofing media, prepress users know output profiling is critical. Photographers using ink-jet output as the final product have different needs from prepress users. All these people need is for the prints to match their monitor or their original vision of how the image should appear—what Ansel Adams called previsualization.
A great companion to ColorVision’s Spyder Monitor is their Profiler software, which is one of the neatest ways I’ve found for color managing a desktop printer. ColorVision provides target files that you output on your printer. After you digitize that output with your scanner, Profiler RGB compares your image with the original file and creates a unique profile for a specific paper/ink/printer combination. If you’re serious about color management, you might want to check out two other ColorVision products. Doctor Pro software lets you edit RGB and CMYK printer files and uses Photoshop’s capabilities to create adjustment scripts for editing output profiles, including color cast removal, opening shadows, correcting color mismatches, as well as adjusting brightness, saturation, and contrast.
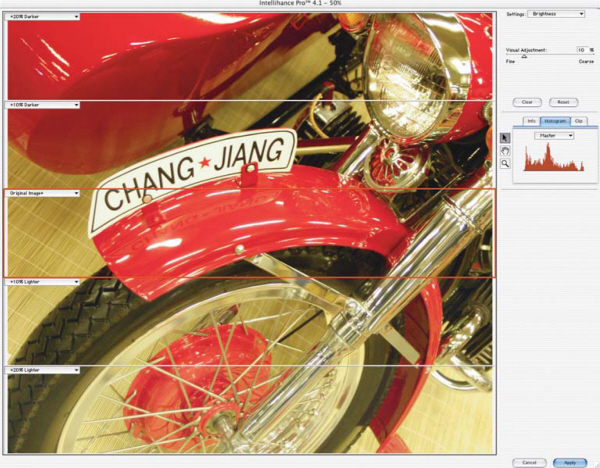
OnOne Software’s Intellihance Pro offers many image enhancement capabilities and functions the same way a traditional darkroom worker might produce a test strip. Printing a digital test proof shows what the image looks like with user-specified increments of additional cyan, yellow, and magenta, or red, blue, and green, so you can see how much of what color to add in the printer driver to get output matching your previsualization. The plug-in is available in Mac OS or Windows versions, and you can download trial versions from the onOne website (www.ononesoftware.com).
OnOne Software’s Intellihance Pro has a feature that functions much like a traditional wet darkroom test strip. © 2006.
Ink and Paper
Four-color ink-jet printers have the same Cyan, Yellow, Magenta, and Black color combination used by commercial printing presses. To reproduce delicate textures such as skin tones and metallic surfaces, six color printers add Light Cyan and Light Magenta. Some Epson (www.epson.com) printers, such as the Stylus Photo 2200, uses seven colors, adding a light black for more depth and better monochrome reproduction. There is a trend to keep adding more colors. Most desktop ink-jet printers use one or two ink cartridges, but professional ink-jet printers typically have a separate cartridge for each color, something Canon (www.canon.com) originally popularized for desktop photo printers.
Ink-jet printers do not have the same ink formulations. Some companies use pigmented-based inks for their black ink cartridge and dye-based inks in their CMY or CMYcm color cartridges, while yet others use all dye-based inks or all pigmented inks. Why do you care? Pigmented inks last longer but are not as vibrant; dye-based inks are colorful but have less longevity. On plain paper, dye and pigmented inks mix easily because of this media’s high ink absorption rate, but when printing on coated stock, such as photo papers, printers with different types of inks turn off the black ink. (Black in the output then becomes a composite of the CMY inks.) Pigmented black ink is slightly better than dye-based ink for printing sharp, dense, black text on plain papers and some manufacturers prioritize black text over photo quality. Epson’s UltraChrome inks, found in the Stylus Photo 2200 as well as their large format printers, is water-resistant and provides bright colors that are similar to dye-based inks, but retains pigmented ink’s lightfastness.
Because of these differences, selecting the paper type in the printer driver is a critical step in achieving the best possible output. Each type of paper shown in the printer software driver uses a different look-up table and assigns different ink saturation. Any ink-jet printer can print black and color inks on plain paper at the same time, but if you select the wrong media—either by accident or on purpose—you’ll get poor results. So waddaya do to get the best results?
Read the paper’s instruction sheets to see which driver settings are compatible with the paper and what settings should produce the best results.
Not every paper and ink combination works together perfectly. Before making a big investment in papers, purchase a sampler pack or small quantity of a paper and make prints with your own test files. (More on how to do this later.) Write notes about the settings and papers on the back of the prints and put them away in a file for future reference.
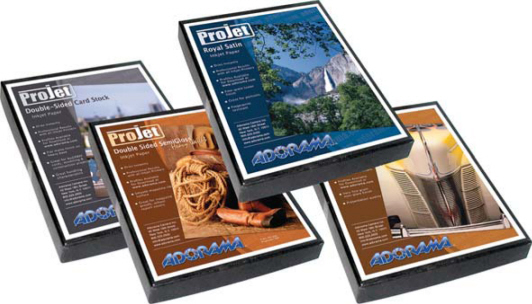
Adorama’s ProJet Photo Gloss papers are a premium, high-resolution microporous resin-coated photographic quality paper. It was designed for the highest-quality color images and features an excellent tonal range, bright whites, and “bleed control” to prevent banding. ProJet Photo Gloss is water-resistant and is compatible with all desktop printers. Photo courtesy of Adorama.
There are all kinds of generic inks out there that are theoretically designed to replicate OEM inks, and if you don’t mind getting messy, you can refill those puppies yourself. Using non-OEM inks will void your printer warranty, but I know many people using replacement inksets, especially continuous flow systems from Media Street (www.mediastreet.com) that have been happy with the results. A user of Media Street’s Niagara II system told me, “I am not only saving a tremendous amount of money . . . but I also get the advantage of using specialty ink which allows me to print long-lasting photos right from my inkjet . . . and I will never run out of ink again in the middle of a print.”
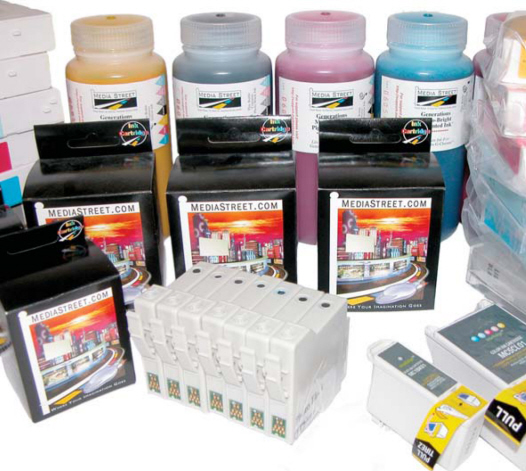
It’s not a sin to use third-party inks, and my own experience, and that of others have shown that Media Street inks in continuous flow or cartridges that are compatible with Epson and other ink-jet printers are really compatible with them. Photo courtesy of Media Street.
While your printer is still coved by a warranty, your best bet for achieving the goal of quality output is with OEM inks. Thrifty shoppers tell me Costco has low prices on ink and media. On line, websites such as InkjetArt.com have some of the best prices available anywhere on OEM ink and paper. I advise digital imagers who want to work with archival and gray inksets to do it with another printer not the bread-and-butter model used for everyday work. Go to eBay or look for deals at the sales shelves of computer superstores to find discontinued models and experiment to your heart’s content with cheap, recycled, or whatever home brew ink you want. The real question to ask yourself is: Do I really care what the output looks like?
Black and White in Color
One of the biggest challenges in managing color output is printing black and white or monochromatic images—including IR image files. This is especially a problem with ink-jet printers because the best you can accomplish by using colored inks is cool or warm toned output, which when used with printers using pigmented inks, finds metamerism rearing its colorful head. You can always print using black ink only, and I have successfully produced output this way especially using 2800 dpi printers, but the results are heavily dependent on the original image. To get truly continuous tone black and white output, you need a grayscale inkset. These replacement inksets and complimentary software are available from companies such as Media Street and Lyson (www.Lyson.com). These companies offer archival quality inks that when used with acid-free paper produce museum quality gicleé images (pronounced zhee-CLAY) that can be sold in art galleries anywhere in the world.
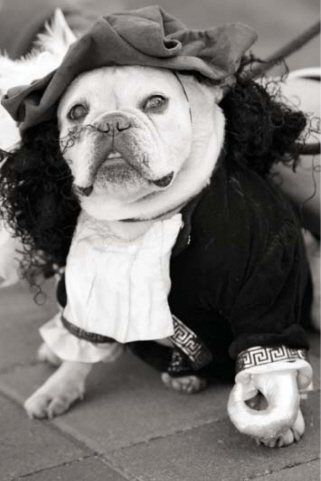
I think “Captain Hook” looks more dramatic in monochrome than color because it removes the distraction of color from his handsome face. He was captured directly in black and white using the Canon EOS-1D Mark II N’s Monochrome mode. Exposure was 1/160 second at f/5.0 at ISO 320. He was digitally toned using Pixel Genius’ PhotoKit Photoshop-compatible plug-in. © 2005 Joe Farace.
Printer manufacturers including Epson and HP have started offering printers that will print IR monochrome images by using additional black ink cartridges. Epson’s R2400 has a maximum output size of 13 × 19, and uses the printer’s eight UltraChrome K3 pigment inks to produce archival color and black and white photographs. Yup, that’s the same inkset Epson offers in their professional wide format printers, but are available here at a more or less desktop price. The printer is delivered with nine inks including user-interchangeable Photo and Matte Black cartridges. With its expanded inkset, including Black, Light Black, and Light–Light Black inks, Epson’s Stylus Photo R2400 produces beautiful black and white prints that should last up to 200 years, and color prints that are fade-resistant for up to 108 years.
On the Epson 2400, monochrome IR image files are printed deliciously warm on Epson media, which I liked. If you go into the Advanced section of the printer’s driver and select “Black and White printing” only the three black inks are used and the images produced are falling down beautiful and as neutral as Switzerland.
The Print Button
Sometimes it seems that different people can get different results from the same photographic file printed working with the same kind of ink-jet printer while using the same kind of paper. How is this possible? The biggest difference is that one of these pixographers is getting the most out of his printer’s driver, while the other is just clicking the “Print” button. I get this question all the time from people who ask why the prints made on my printer look different from those that they’re making with the same brand and model of ink-jet printer.
There are a few steps you should take before even starting to work with your printer’s software:
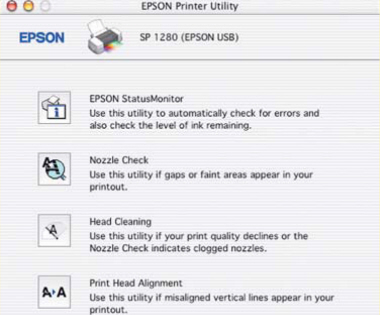
Before you make your first print, do something that some male readers may find difficult: Read the instruction manual. If you do, you’ll discover that there are usually several utilities that will help your printer produce the best possible results. With new Epson ink-jet printers, it’s always a good idea to run both the Head Alignment and Nozzle Check utilities before putting in any “good” paper and making a print. Some new printers run two head alignment tests, one for black ink, the other for color. When you run these tests, it’s a good idea to evaluate the output using a high-quality magnifying loupe so that the feedback you provide the utility is as accurate as possible.
Download the latest printer driver. Don’t assume that just because you unpacked a brand new printer you’ll have the latest driver. It may be that support has been added for new, different kinds of papers or it could be that software bugs have been fixed, but take the time to go to your printer manufacturer’s website, download the most current driver, then install it.
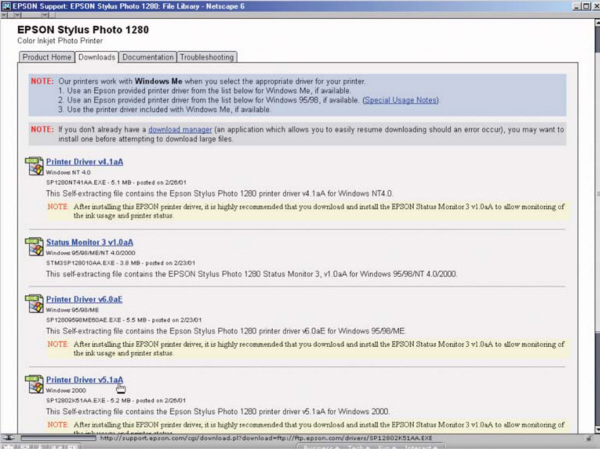
Don’t assume that just because you unpacked a brand new printer you’ll have the latest driver and don’t forget to check back periodically for updates.
Clean the printer heads! If you don’t like the results coming off your ink-jet printer, clean the print heads! They get clogged and your printer’s manual contains information on how to use software to clean clogged heads. If you are having a problem and don’t like the output from your ink-jet printer this will fix it—most times anyway. Many photographers show me ink-jet prints and ask what’s wrong with them when the answer is simply that the heads are clogged. How do heads get dirty? If the printer is left on and not used regularly, air gets into the heads and dries the ink, which clogs the ink ports. Print heads get dirty or clogged from not being used, so try to use them every day.
|
TIP |
|
|
If you don’t use your printer daily, at least turn it on once a day. Most printers include a startup routine that cleans the heads. By simply running this every day you can prevent |
clogged heads. Yes, this uses ink, but far, far less than running repeated head cleanings to clear clogged heads. |
Until somebody invents a self-cleaning head for ink-jet printers (why just have it for ovens?), we’ll have to clean them periodically, wasting precious Dom Perignon-priced ink in the process. Hey, you used to have to scrub your ovens by hand too; now self-cleaning ovens make that chore a cinch. So maybe somebody will figure out something similar for ink-jet printers—or maybe not.
Get to Know Your Printer Driver
Some printers have built-in calibration routines that set up the device after you’ve made your initial connections. With most computer systems, this will most likely happen when the printer driver is installed, but you may also need to recalibrate it from time to time.
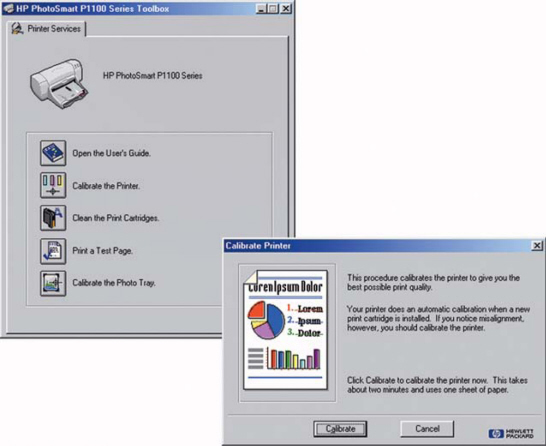
HP’s PhotoSmart Toolbox software that’s bundled with their printers, such as the PhotoSmart P1100, let you perform an automatic series of diagnostics and corrections, and when completed it outputs a test page.
No matter what brand of printer you use, its driver software has many controls that allow you to print on different kinds of papers, which are usually those offered by the printer manufacturer. While you can use software, such as ColorVision’s Profiler RGB to precisely calibrate a specific kind of paper for your printer, the driver itself provides enough controls that let you fine tune the color, density, and contrast of your output. I liken these controls to manually tweaking a color enlarger in a traditional wet darkroom.
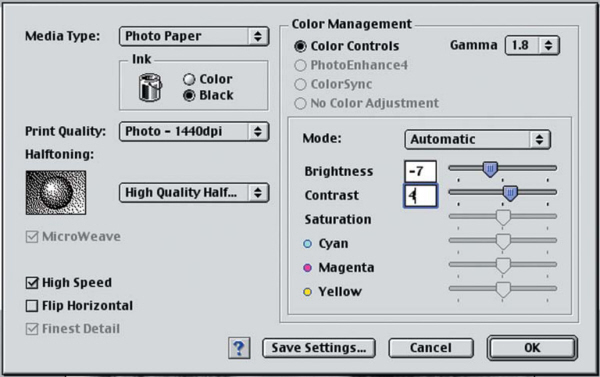
Printer drivers do more than just direct your computer to send data to the printer. In most cases, the drivers let you specify information about the kind of paper you’re using and how you want the finished print to appear. You can simply pick the kind of paper you’re using, click the “Automatic” button, set the slider to “Quality” and you’ll usually get a pretty good output, but maybe not the best possible print. Just as you sometimes need to take your camera off its automatic mode, and apply all of your experience and take manual control over a special photographic situation, there are times you need to do the same thing printing digital images.
With most drivers, you can tweak output by slightly increasing or decreasing brightness or contrast settings as well as the color balance to get the best results. Before making a print, take a look at any Advanced settings that are available in the driver.
Many ink-jet printer’s drivers include full manual control over the output’s brightness, contrast, saturation, and color; but before you work with these controls, it’s a good idea to create a personal test print file.
|
Printer Drivers |
|
|
After connecting your printer to a computer, you need to install software that lets the two devices communicate. This is called “driver” software because it drives the printer and makes it work. With Mac OS computers, I prefer to insert the driver software CD-ROM, and then double-click the icon to make it work. With Microsoft Windows computers I’ve found the most prudent way to install printer drivers is by connecting the printer and restarting the computer. This will cause Windows’ Plug-and-Play feature |
to recognize that a new device is connected and will guide you through the process of installing the driver. While more experienced computer users may feel they can just install the hardware, then install the software, I’ve often found that when working with some printers, not using Windows plug-and-play installation features can create problems with partially installed software. This is more trouble to fix that simply letting Windows guide you through the installation in the first place. |
A Personal Test Print
Some ink-jet printers automatically output a test page shortly after you connect it to the computer and install the driver, and while these pages may tell you that the printer is actually working, you may want more information than that. One of the best ways to discover your printer’s capabilities is to create and print a “personal” test print.
Comparing test prints is one of the best ways to evaluate different kinds of printers as well as different brands of papers. I’m not talking about the kind of test prints seen in computer and electronics stores where you press a button and output rolls off of the printer. While these files are usually optimized to make the printer look good, the output can be compromised if the paper used is either the best or cheapest available. In this kind of setting, there are too many variables present to use these test prints for comparing one printer to another. The key to comparing results from different printers or papers is to create a standardized test file and use it to compare results.
Your personal test file should reflect your typical image, such as an IR landscape photograph. Use your favorite image-editing program to save a photograph in a high-resolution format such as TIFF (tagged image file format). Instead of making the image 8 10 or full letter size, keep it around 5 7. This will make the file size smaller and take less time to print. The file should then be saved on some kind of removable media, such as recordable CD/DVD so it can be used later when testing new printers, inks, or papers.
Start by printing the testing image on your own printer, but also ask friends if you can output it on their printer, so both of you will be able to make a valid comparison. Use the test print with the printer driver’s Advanced settings and experiment with the slider settings for brightness or contrast. Then take a look at color bias. Monochrome prints will clearly show any kind of color shifts for the papers, inks, or printers because color shifts will be more apparent with no color in the image. Working with your customized test file will let you know what driver settings will produce results you like and can also be a big help when evaluating different kinds of paper brands. After a little testing, you’ll find the best paper and settings that will produce the optimum quality output from your printer.
Ink-Jet Paper Choices
The ink-jet paper you use can have a dramatic effect on the quality of your output. Printer manufacturers may insist that the best output will only be produced when using their papers, and I won’t argue that some of them are spectacular, but we wouldn’t be photographers if we weren’t looking for something different. When working in a traditional wet darkroom, I used Agfa, Ilford, and Kodak papers, and would try to match the paper used to the image. Now I keep papers from Epson, Media Street, Moab Paper (www.moabpaper.com), and others on hand and use the same concept of matching paper to the image’s mood.
I like glossy papers such as Epson Premium Glossy Photo Paper and Konica’s (www.konicaminolta.com) Professional Glossy QP for photographs of automobiles and other shiny machines. Portraits look fabulous on Moab’s Kayenta matte paper but don’t be bound by anybody’s dictums. Adorama (www.adorama.com) offers a true heavyweight paper (80lb, 12mil) that’s double-sided matte and perfect for use in presentations or portfolios. Complementing their Double-Sided Matte is a Double-Sided Matte Gloss and a Royal Satin, which has a fine “pearl” surface.
Experimenting with different kinds of papers with interesting textures and ink absorption characteristics can be fun, but judging from the questions I get during workshops, this is often when fun goes out of the process. The stock answer is that you should create a custom profile that is hardware, ink, and paper specific. Many new digital imagers don’t want the hassle involved, but some forward-thinking paper companies are taking steps to put that creativity back into printing and have created generic profiles for each of their papers and different kinds of ink-jet printers. I used to go to the art supply store to find papers with interesting textures, but now papermakers such as Hahnemühle (www.hahnemuhle.com) and Adorama are offering interesting surfaces.
While the safest way to get the best possible results is to use the inks and papers produced by the printer manufacturer, it isn’t always the best way. If you are still not satisfied with the results—but before you go running of to try other inks and papers—make sure that the printer itself is capable of providing the best possible results. It may not be. If your friends and colleagues are getting better results than you, the first place to look for improvements is the printer driver. Only after you’ve first optimized the printer to produce the best possible results you should start looking for ways to improve your printer output.
Print Longevity
One of the best things to ensure a print’s longevity is to take a few simple steps:
Allow prints to dry for 24 hours before framing them. Avoid framing when humidity is high because condensation can form behind the glass. Don’t hang prints in direct sunlight or display prints outdoors.
When storing prints in a stack, allow them to dry for at least 15 minutes, and then place a sheet of plain paper (I use copier paper) between the individual prints. Allow a full day for prints to dry before removing the separator sheets. And don’t force-dry prints with a hair dryer.
Keep prints away from sources of ozone, such as computer monitors, televisions, air cleaners, or high-voltage electricity. Don’t store prints where they are exposed to chemicals, such as in a traditional darkroom.
When storing prints in photo albums, use acid-free, archival sleeves.
Finally, visit Wilhelm Research’s website, which is regularly updated with information on the stability and longevity of new inks and papers.