
Let’s get this film down to the lab at Mrs. Mason’s drugstore.
The Photo Marketing Association’s US Photo Industry 2006: Review and Forecast reports that digital camera sales are on the rise, and will continue to rise through early 2007. Last year, 41.1% of US households owned a digital camera, and that figure is expected to grow to 52.4% this year. Once again, digital cameras are expected to outsell film cameras, and 82% of all cameras sold in 2006 will be digital. As anybody who read my work over the years might guess, I attend a lot of car shows and can’t remember the last time I saw anybody—participants or observers—shooting film.
So, as pundits have reported so many times before, is film dead? I don’t know. I still occasionally shoot film using Leica single lens reflex and Hasselblad rangefinder cameras, but almost all of my negatives (I seldom shoot slides) are scanned using an Epson (www.epson.com) or Microtek (www.microtekusa.com) scanner and printed on Canon (www.usa.canon.com) or Epson ink-jet printers. Sometime during that trip from capture to output, those silver-based images are transformed into pixels, manipulated, and printed on decidedly non-digital paper. Is the final print digital? Who cares? It’s a photograph. How I arrived at what you see on the paper is unimportant, only the image and its impact on the viewer matters (see “Digital Dreams”).
|
Digital Dreams |
|
|
I like panoramic photographs; that’s one reason I still shoot film using a Horizon 202 (www.kievusa.com) or Hasselblad (www.hasselblad.com) Xpan. Sometimes I make photographs using a digital SLR and crop them into a panoramic shape. Which one of these two images was made with film and which one with digital? Which one |
became a 4×12 foot mural that was displayed in a car dealership’s service department? From the reproduction here you can’t tell, can you? More important, it doesn’t matter. For the record: The drag racing image was made with a Canon EOS 1D Mark II (a digital SLR); the car show was captured on film with a Kiev USA Horizon 202. |
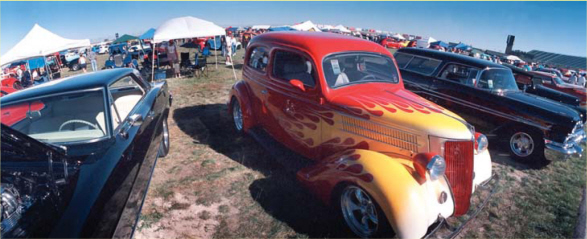
This photograph of cars at The Good Guy’s show in Fountain, Colorado was made using a Horizon 202 panoramic camera and Kodak 400 NC color negative film. Exposure was 1/250 second at f/16, determined by a Gossen Luna Star F2 hand-held meter. Image was scanned using a Microtek (www.microtekusa.com) ArtixScan 120tf film scanner that’s well suited for scanning medium and panoramic format film. © 2005 Joe Farace.
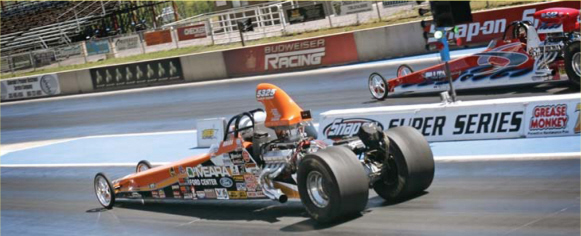
This photo of Bill Lagoni driving his O’Meara Ford-sponsored dragster was shot with a Canon EOS 1D Mark II using a 75-300 IS zoom lens set at 75mm. Yes, I was that close to the action. Exposure at ISO 200 was 1/320 second at f/11 in Aperture priority mode. The camera was panned during exposure. © 2005 Joe Farace.
|
The Net |
|
|
As you might have already noticed, I will be using a webcentric approach to the products and services that are mentioned in these pages. Whenever I mention a company’s |
name for the first time, I will also list in parenthesis the addresses (URL) of web sites where more information about that particular product or company can be found. |
Digital imaging consists of four phases that are not too different in intent from the traditional silver-based imaging process:
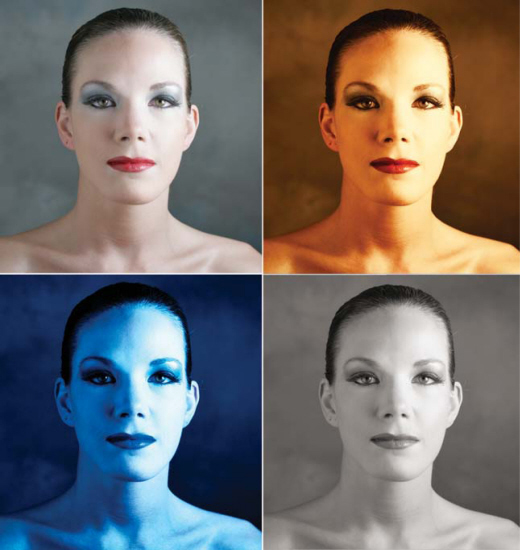
To illustrate the four phases of digital imaging, the original headshot of Leah was made using a Canon EOS 20D and 60mm EF-S macro lens. A Lowel (www.lowelego.com) Ego Light was used along with an F.J. Westcott (www.fjwestcott.com)reflector to light the portrait. Exposure at ISO 400 was 1/200 second at f/3.5 to minimize depth-of-field. The color variations of the original image were created using nik Color Efex (www.niksoftware.com) and the black and white used Pixel Genius PhotoKit (www.pixelgenius.com). All four versions of Leah’s portrait were combined into a single document using Adobe Photoshop CS2’s Layers function. I’ll show you how to make an image like this later in the book. © 2005 Joe Farace.
Capture: This occurs at the moment—decisive or otherwise—when the shutter clicks, but digital photography extends that metaphor by providing other ways of capturing images of people, places, or things. It can also occur/happen when you digitize a slide or negative that was originally shot on film.
Enhance: Some of the enhancements you can make in your desktop darkroom are similar to what you might accomplish in a traditional darkroom, but with digital you can produce something seen only in your mind’s eye. In the digital darkroom, you have the all of the advantages of cropping, adjusting brightness and contrast, or tweaking color while working with the room lights on.

Some people, such as my pal Rick Sammon, make wonderfully realistic photographs of butterflies; but I prefer interpretive image making. This original photograph was made at the Butterfly Pavilion (www.butterflies.org) in Westminster, Colorado using a Canon EOS 20D and a 60mm EF-S macro lens. Exposure in manual mode was 1/60 second at f/13 with lighting provided by Canon’s Macro Ring Lite MR-14EX. Special effects were created with nik Color Efex’ Duplex: Color filter. © 2005 Joe Farace.
Output: This is the step where computer hardware and software collide with traditional print making to produce output that, when done properly, cannot be distinguished from a sliver halide photograph. To make sure this phase of the process matches what you created in the digital darkroom, it helps to have a large, color-corrected monitor.
Presentation: You can make prints using an ink-jet printer or at a kiosk in Wal-Mart then and place them in a conventional album, but there are many other ways to use digital images that are, truly digital. Using photo sharing web sites such as SmugMug (www.smugmug.com) you can share photographs with family and friends around the globe. See what’s possible by taking at look at my own SmugMug page (http://farace.smugmug.com).

Photo sharing sites let digital photographers share their images with family and friends who can also order traditional prints via the site. This page appears in my Friends gallery on SmugMug that displays pictures of me made by my friends, such as this one of Queen Amidala and I, along with pictures of my friends made by me. © 2005 Mary Farace.
Capture the Sun
As far as getting involved in digital imaging, the good news is that you can be as digital as you want to be! The advantages of both purely digital capture and digitizing film are many, and include the following.
Recycling: Once you’ve captured an image onto a memory card, you can re-use that CompactFlash, Secure Digital, or Memory Stick, many hundreds of times. Not only is this media re-usable, it’s editable. Every digital camera includes an LCD preview screen that lets you see the captured image immediately. If someone’s eyes are closed, you can erase the photo where they have their eyes closed and re-shoot it right there on the spot.
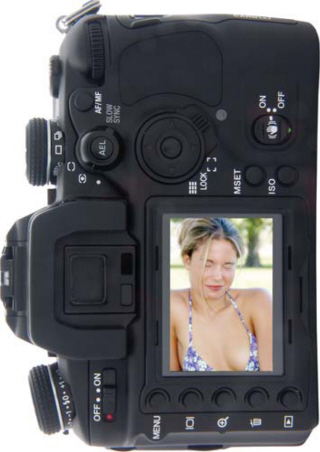
This photograph of Leslie was snapped at the very instant a bug flew in her mouth! It’s a funny picture to be sure, but seeing the result on the preview screen gave me the opportunity to reshoot, plus gave us both a big laugh. ©2004 Joe Farace.
Flexibility: Scanners are now so inexpensive that anyone who owns a computer can also afford to purchase a flatbed scanner, such as the $99 Epson Perfection 2480, and use it to digitize prints whose negatives have long ago been lost and turn them into twenty-first century digital images.
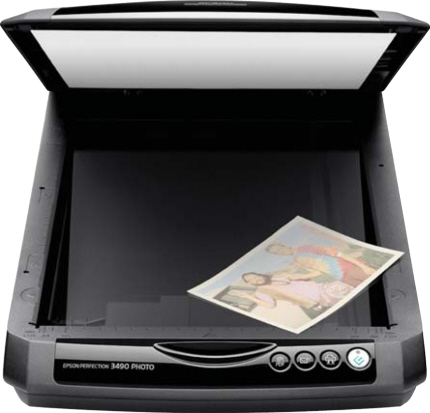
The Epson Perfection 3490 Photo has an affordable $99 price tag. It has an optical resolution of 3200dpi (dots per inch) combined with fast USB 2.0 connectivity, making it the best photo quality scanner at this price point. Photo courtesy of Epson.
Convenience: When your memory card is full of images you can copy them onto writable CD discs that cost just pennies each, and stack them in a compact space. Who knows, by using the right digital asset management software, you might finally be able to keep track of all of your images and find that picture of your dad on his old sailboat.
Artificial Lies aka Le Manipulateur
When initially setting up your digital darkroom you’re going to need image-editing software along with the output devices to print digital images. Digital imaging software is available in three broad categories.
Beginners can use snapshot software that offers basic manipulation techniques such as cropping, changing brightness and contrast, and useful features like redeye reduction. Some free programs that fall into this category include Apple Computer’s (www.apple.com) iPhoto, and Google’s Picasa (www.picassa.com) for Microsoft Windows.
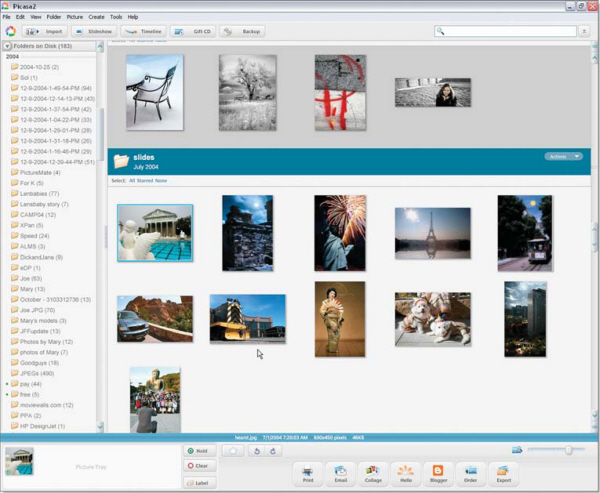
Picasa is a free Windows-based image management, Web sharing, and enhancement program that offers one-click photo repairs and lets you e-mail, print, make gift CDs, instantly share via their “Hello” feature, and post pictures on your own blog. © 2005 Joe Farace.
Intermediate users work with programs that add more capabilities for image editing, often including features that let them produce special effects. Applications in this class often accept plug-ins that allow you to extend the capabilities of the program from within. Windows-based software in this category includes Corel’s (www.corel.com) PaintShop Pro and Ulead’s (www.ulead.com) PhotoImpact. MediaChance’s (www.mediachance.com) $49 PhotoBrush is a Windows-only best buy.
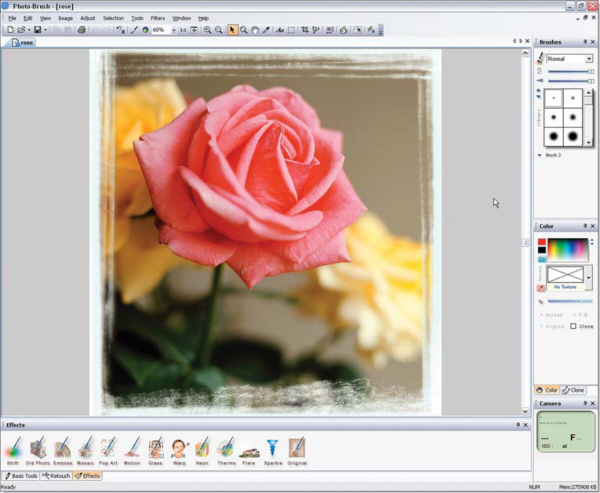
PhotoBrush is a $49 Windows-based program that combines image editing and artistic media painting. The latest version adds RAW file support for over 100 different cameras and PhotoBrush not only accepts Photoshop-compatible plug-ins (more on them in Chapter 9) but also can read and write Photoshop’s PSD files as well. © 2005 Joe Farace.
Serious image makers use professional-level tools that have the most powerful capabilities but also demand a serious digital imaging computer. This category is dominated by Adobe (www.adobe.com) Photoshop CS; and while there have been challengers over the years, there are few competitors left. Corel’s Painter offers professional-level tools and lets you produce images for the Web, fine art, or separations for prepress applications.
Software is one area of the digital imaging process that has decided advantages over traditional photography. When you commit to a camera system and make a corresponding, and sometimes hefty, investment in lenses and accessories, switching brands can be too expensive for most photographers. Digital imagers, on the other hand, can assemble a digital software toolkit that contains products from many different companies, all of which are complementary, and some of which share software components.
When working with digital images, manipulation techniques fall into several categories:
Enhancement: After capturing an image, the next step is to make it look as good as it can. Some of the tools built into image enhancement programs, such as Levels and Curves, may be tricky for beginners to wrap their brains around, but inexpensive add-ons such as PhotoTune’s (www.phototune.com) 20/20 Color MD let you tweak an image by making a series of choices between two alternatives.
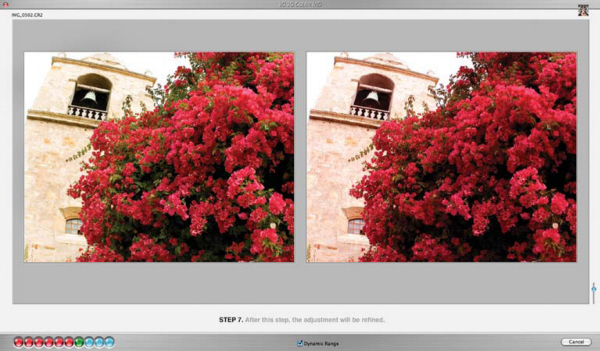
Using PhotoTune’s 20/20 Color MD Photoshop-compatible plug-in is a lot like going to the eye doctor. You just click on whichever image you like best between two that are offered and in a few seconds, the image’s color, density, and dynamic range are tweaked! © 2005 Joe Farace.
Retouch: Since photography began, portrait photographers have retouched negatives with pencils and dyes, applying artwork and airbrushing to improve on nature’s little imperfections. Photoshop-compatible plug-ins, such as Kodak’s (www.asf.com) Digital GEM Airbrush Professional, lets you smooth skin, reduces harsh shadows and highlights, minimizes imperfections, and preserves details such as hair, eyelashes, and eyebrows.
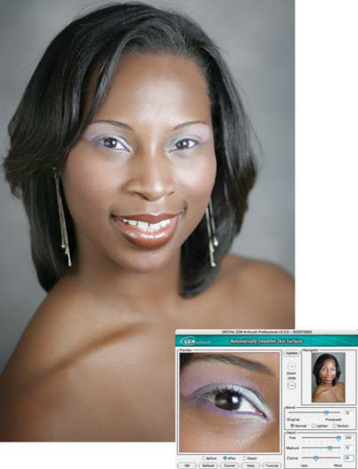
One of my favorite retouching tools for portraits is Kodak’s Digital GEM Airbrush Professional, a Photoshop-compatible plug-in. © 2005 Joe Farace.
Restoration: Repairing old faded and damaged photographs used to be the province of the specialist, but now anyone with a little patience to learn a few new digital tools and tricks can use image-editing programs to fix old scratched photographs and make them look like new again. The good news is that the original and often fragile print is left untouched and undamaged by the process.
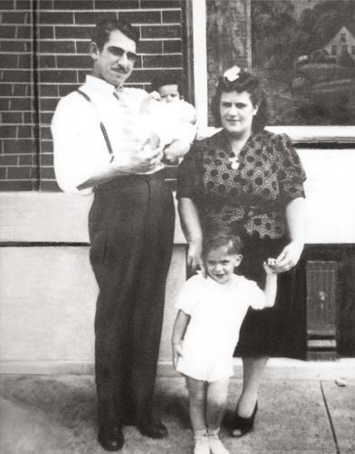
One of the best things you can do with a scanner and some digital imaging software is to restore old photographs such as this 1940s shot of me with my mom, dad, and sister. I’m the cute li’l tyke in the short pants.
Creativity: Digital imaging software empowers user to produce images they could only dream of. Years ago I labored many hours in a wet darkroom to produce a composite image showing what an historic statue would look like when moved to a different location. Digital imaging applications that have Layers function, such as Adobe Photoshop CS, let me do a better job in much less time, and I don’t have to work in the dark with smelly chemicals.

Only part of this photograph, that I call “Colorado Hot Rod,” was made in Colorado. I originally shot the car shot in Fountain, CO in 2004, but Bob Geldmacher photographed the background image in 1971 using color slide film. (Hiding under the hot rod there’s a shot of my then-new 1971 Porsche 914 and me.) They were combined using Photoshop CS’s Layers function and finished with nik Color Efex filters. © 2005 Joe Farace/Bob Geldmacher.
Print the Image
Making your own prints using a desktop darkroom eliminates a trip to a photo lab and is a lot faster than going to a 1-hour lab. I think that’s one reason many pros like digital imaging, and many amateur photographers as well. You can even have your own desktop minilab. All-in-one devices, such as Canon’s Pixma MP760 let you print high-quality proof sheets and snapshots directly from memory cards without using a computer.

Canon’s PIXMA MP760 all-in-one is a versatile tool combining printer, scanner, copier, and card reader that works with your computer, or all by itself. The printer function has 1856-nozzle print heads that eject droplets as small as two picoliters and produce photo quality output up to 4800 1200dpi. Photo courtesy of Canon USA.
Printing your photographs doesn’t have to be complicated. To make your next ink-jet printing session produce the kind of output you want, here are a few tips:
Read the manual: It’s usually short and contains helpful information on the printer’s driver, which is the most important bit of software needed for achieving optimum results. The manual has all kinds of other information about what type of media works best at what settings, and highlights other features, such as how to make borderless or double-sided prints.
If you decide to use paper different from what the printer manufacturer offers, take the time to read this media’s instructions to learn which driver settings are compatible with the paper and will produce the best results. Since this is an imperfect world, go to the paper company’s website to look for the latest recommendations or even printer profiles to achieve more precise results.
Out here in the real world there are lots of variables and not every paper and ink combination works together the way you might like. Before making a big investment in papers, purchase a sampler pack or small quantity of the paper and make a few prints with your own test files. Write notes about the printer driver’s settings and paper used on the back of the prints and file them for future reference. Don’t be flummoxed by this quick start guide to printing, there’s a lot more in Chapter 11.
The last part of the digital imaging process gives the concept of output a worldwide dimension and opens the door to what you can do with your photographs after you’ve captured, manipulated, and output them. Because of the Internet, you can now share digital images with friends and family anywhere on the planet. What’s more, you can create presentations that combine still images with video clips, music, and graphics to tell a story.
Photo sharing: Instead of mailing a photo album across the country to friends or relatives, you can post them on a web site such as WebShots (www.webshots.com).
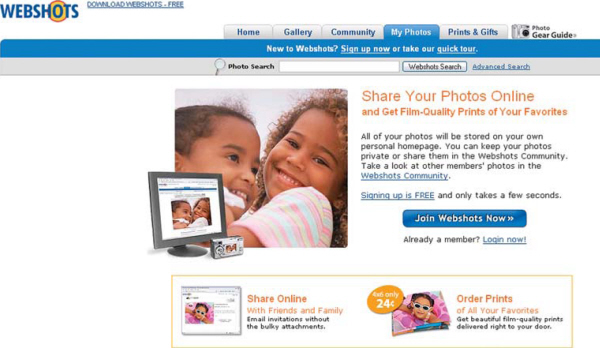
Not only to photo sharing web sites such as WebShots.com make it convenient for people anywhere in the world to view these photographs, they also let family and friends order reprints from the images directly from the on-line service taking you out of the re-order loop. Photo courtesy of WebsShots.com.
Build your own web site. If you have aspirations to sell your photographs to the public, having a website gives you the same storefront on the digital highway as much larger gallery operations. Even if you don’t want to sell your images, having a personal web site gives you a way to communicate with others in ways that could have only been dreamed about 10 years ago.
Assemble a digital album: . . . and record it onto a CD-ROM disc. With inexpensive album software, such as, E-Book Systems’ (www.ebooksys.com) FlipAlbum CD Maker, you can turn your family photographs into a presentation complete with musical accompaniment and special effects transitions between images.
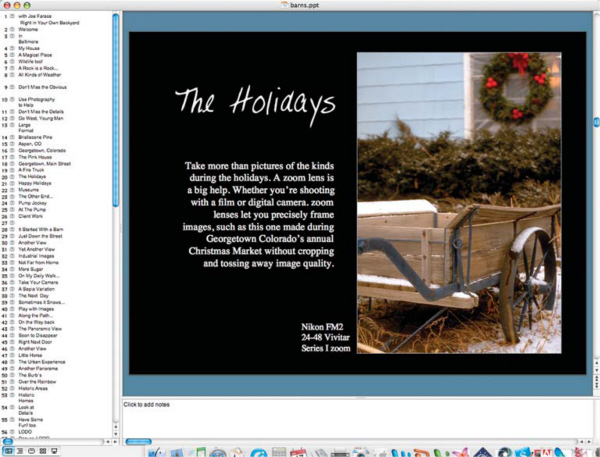
Programs such as Microsoft’s (www.microsoft.com) PowerPoint empower professional and amateur photographers alike to create presentations as well as e-books.
The best advice I can give about going digital is to have fun with your image making. Don’t be so serious or the playful, experimental aspects of digital imaging will get lost.
Torn Curtain
The computers I used for this book are the same ones I use every day: An Apple Power Macintosh G4 with two 40GB internal hard drives, DVD-R drive, built-in Iomega Zip drive, and an external SimpleTech 300GB FireWire drive. My Windows machine is a 2.6GHz Compaq Presario with 160GB of hard disk space, CD-RW, and DVD drives. In the digital imaging universe, these are what I would call middle-of-the-road machines. I know photographers working with less complex computers, and others working with more extensive systems. Digital imagers working with systems with more power, larger memory, and higher capacity storage will be able to produce the effects in this book faster than I was able to, while those with smaller, slower systems may have to be more patient.
All of the images and effects produced in the how-to sections of the book were created using both computers. This was done for a very practical reason: Not every software program is available for both Mac OS and Windows environments. Programs that are platform-specific, like the Windows-based Ulead System’s PhotoImpact, were run on my Presario computer. Cross platform software packages, such as Adobe Photoshop CS2, were run mostly on my Power Macintosh system and occasionally on Windows.
Most of the photographs were created using digital, 35mm, 6×6, or 4×5 film formats. Film images were digitized with a Microtek ArtixScan 120tf or Epson Perfection 4870 Photo scanner. Unless otherwise credited, all of the photographs you see in these pages are copyright Joe Farace.
A word about quote and subheads: I’m a movie buff. All of the quotes that start each chapter are from movies and the occasional TV show. Some of the subheads also reference some of my favorite films. If you get the references, great. If you don’t, don’t worry about it, just ignore it and read the text.
Two-Minute Warning
Before jumping into Chapter 1 I want to share a few important “rules” about how I create my personal digital images:
Keep it simple: it’s a cliché but true nonetheless. Start with image capture and making sure the image you make isn’t cluttered, makes a strong point and tells a story, the simpler that story is, the easier the photograph will be to “read.” It’s also true for image enhancement and manipulation. I prefer to use one or two steps rather than many different steps for the simple reason that we are dealing with binary numbers represented as pictures. Software crunches those numbers and over time there are minuscule rounding errors that occur; keeping these number of steps to a minimum minimizes these errors and maximizes image quality.
The “20-minute” rule: I have discovered that if I can’t make the final image look the way I have previsualized in 20 minutes, I am never going to do it. I have spent hours working on an image wasting paper and ink trying to make an image file to look like what I dreamed it should be. Fuggedaboutit. Sometimes it’s just doesn’t happen. Try to capture it on the file the next time and learn from your mistakes.
Let the tools do the work; use Power Tools: You can build a house with a hammer and manual saw but the work goes faster with power tools. I like to use digital power tools too, so I’ll be introducing you to Photoshop-compatible plug-ins and Actions that make quick work of digital effects and do a great job at the same time.
Fun with Dick and Jane
All photographs—digital or silver-based—combine elements of reality with imagination. How these elements are combined is up to the photographer, but there is no denying that digital imaging has presented the creative image maker with some powerful tools. In this book, I’ll introduce you to some of those tools and show you how you can use them for your own digital explorations.
Not every aspect of every possible imaging technique will be found in these pages. There are many ways to produce any kind of creative photographic effect. That’s why photography is still just as much art as it is craft. Some writers and gurus may insist there is only one way to produce an image, but I don’t agree. This book has been designed to show you one way of creating digital images, not the only way. You should use my meanderings as a jumping-off point for your own explorations, not as a destination.
Kevin Elliott, of Mac MD (www.macmdcare.com) recently gave me some advice I’d like to pass on to anyone wishing to get started in digital imaging. “When a photographer has achieved a certain level of skill, they expect to compress the time it takes them to get into digital imaging,” he told me, “when they really have to start all over again.”
In this book, traditional silver-based photography meets digital imaging. It’s not just a new edition of “Digital Imaging: Tips, Tools, and Techniques” but also a new approach for amateur photographers and aspiring pros who want to work with digital images. I try to take you “behind the screens” to show you how to use the tools—not just the software—that can be used to produce prints or digital image files for via e-mail or posting on the World Wide Web.
Joe Farace
Brighton, Colorado 2006