
Preparing Images for the Web
This is like some kinda prehistoric Internet.
There are two really important aspects to consider when producing graphics for the World Wide Web: technical and esthetics. Given the vagaries of connections, servers, and the short attention spans of most Web surfers, you’ve gotta be concerned not only with getting their attention, but the technical aspects of saving files in compressed formats that load as fast as possible. To accomplish both of these objectives, you not only need talent; you must have the proper tools. Since most of us are stuck with the talent that came at birth, it helps to have the right software to create Web graphics that attract attention and display quickly.

Krystene was photographed with a Canon EOS 10D and 28–105mm zoom lens. Exposure was 1/200 second at f/5.6 at ISO 200. Fill was provided by the camera’s pop-up flash. The photograph was captured as a JPEG file but it might be too big to e-mail, so it needs to be converted to a smaller file, yet maintain the original image quality. © 2003 Joe Farace.
The Pixel Parade
Producing images for the World Wide Web introduces variables into the design process that doesn’t affect other media. One of the most dramatic differences is that you no longer have control over the how a viewer sees your artwork. Some things that affect preparing image files for the Web are the viewer’s display system and speed of their Internet connection. Since you have no control over these variables, all you can do is take a few steps to prepare your image for the Web that will minimize download time and display well on most systems.
Among Web designers there is occasional controversy over which image file type is best: JPEG or GIF. As in everything else in digital imaging there are tradeoffs over which file format works best. A GIF file work bests when there are a few colors in the image. If your image contains less that 64 colors, a GIF will be smaller than a JPEG file. Because JPEG is a “lossy” compression method, text can become blurry when combined with an image. That’s why GIF is the best choice if your graphic contains text or sharp edges.
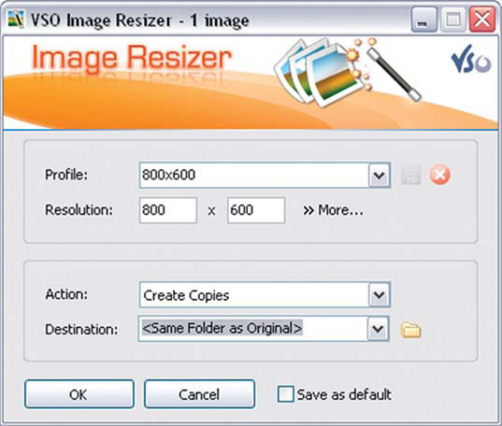
VSO Software’s Image Resizer (www.vso-software.fr) is a handy Windows-based freeware tool that resizes and converts images between different formats. It is aimed at people who store their digital pictures on their computer and want to quickly create e-mail friendly versions of their images, load them fast, move them easily from folder to folder, change format, and edit large numbers of images to save hard drive space.
In general, use JPEG when saving photographic files. JPEG allows the use of more colors, but depending of the viewer’s graphics can be wasted on the viewer and can take longer to display because the files tend to be larger than GIF. On the other hand, GIFs have less on-screen quality but often display faster. JPEGs make good backgrounds. Because of the low contrast and similarity of colors required for a good background, the larger number of possible colors available with the JPEG format makes it a good bet.
Unlike other compression systems, GIF was designed specifically for on-line viewing. If your image was stored in non-interlaced form, when half of the image download time was complete, you would see 50% of the image. At the same time in the download of an interlaced GIF, the entire contents of the image would be visible—even though only one-half of the image data would be displayed.
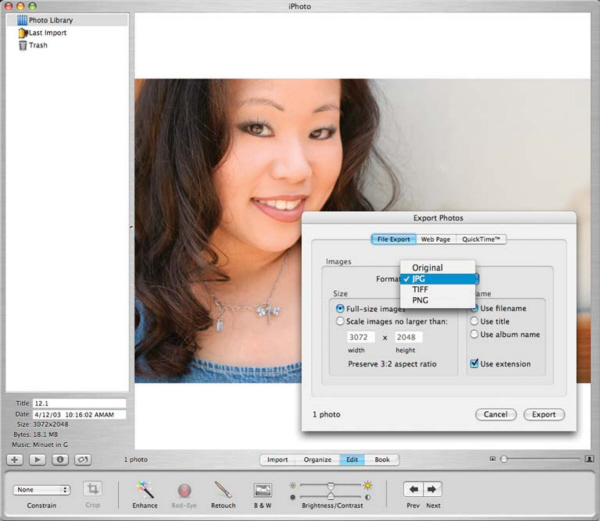
You don’t need an expensive image-editing program to create files for e-mailing or Web use. Apple’s iPhoto, which is free with all new Mac OS computers, includes the ability to simply convert and resize and image into a JPEG or PNG file. © 2003 Joe Farace.
An alternative to using interlaced GIF is progressive JPEG. This file format rearranges stored data into a series of scans of increasing quality. When a progressive JPEG file is transmitted across a slow communications link, a decoder generates a low-quality image very quickly from the first scan, then gradually improves the displayed quality as more scans are received. After all scans are complete, the final image is identical to that of a conventional JPEG file of the same quality setting. Progressive JPEG files are often slightly smaller than equivalent sequential JPEG files, but the ability to produce incremental display is the main reason for using progressive JPEG.
The Machine that goes Ping
Portable Network Graphics or PNG (pronounced “ping”) is the successor to the GIF format widely used on the Internet. In response to the announcement from CompuServe and UNISYS that royalties would be required on the formerly freely used GIF file format, a coalition of independent graphics developers from the Internet and CompuServe formed a working group to design a new format that was called PNG. PNG’s compression method has been researched and judged free from any patent problems. PNG allows support for true color and alpha channel storage and its structure leaves room for future developments. PNG’s feature set allows conversion of GIF files, and PNG files are typically smaller than GIF files. PNG also offers a more visually appealing method for progressive on-line display than the scan line interlacing used by GIF. PNG is designed to support full file integrity checking as well as simple, quick detection of common transmission errors. All implementations of PNG are royalty free, but that doesn’t seem to have helped it achieve greater popularity.
Save for Web
One of the simplest ways to prepare an image for the Web is Adobe Photoshop’s Save for Web command (File > Save For Web.) It also lets you preview an image’s gamma at different values. A monitor’s gamma affects how light or dark an image looks in a Web browser. Because Windows systems use a gamma of 2.2, images look darker on Windows than on Mac OS systems, which are normally set to a gamma of 1.8. Save for Web lets you preview how your images will look on systems with different gamma values and you can even make adjustments to the image to compensate. Save for Web also lets you save the files as a JPEG, GIF, PNG, or BMP file.
To save a file to e-mail: Open the image in Photoshop, and choose File > Save For Web. Next, click the Optimize tab at the top of the Web dialog box. Pick your preferred file type (most always JPEG). For e-mail choose “JPEG Low” from the Preset menu. Click the Image Size tab but make sure “Constrain Proportions” is selected and enter an image width. For most e-mail systems and to avoid the file being bounced by your own ISP, 400 pixels is a good place to start. Click Save and enter a file name and location in which to save the file. You are now you are ready to e-mail the file. In some e-mail programs, you can drag the file into the body of the message. In others, you should use the Attach or Insert command.
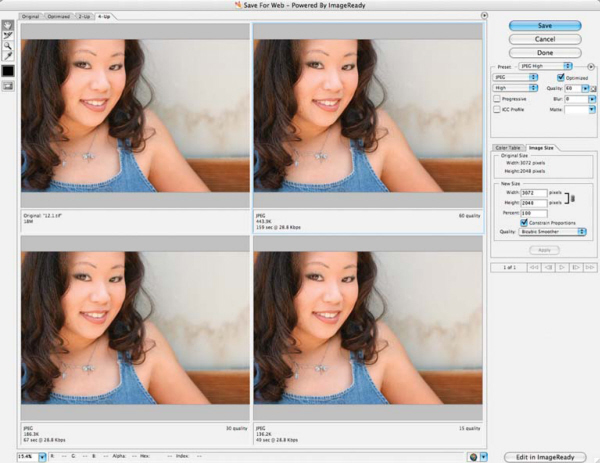
Photoshop’s Save for Web dialog box lets you view the image with the current optimization settings applied. You can see 2-Up to view two versions of the image side by side, or 4-Up to view four versions of the image side by side. If you work in 2-Up or 4-Up view, you must select a version before you apply optimization settings. © 2003 Joe Farace.
Web Tips
Number 1: Because Web surfers have the attention span of a Honduran Water Moth, if something doesn’t display FAST, you have lost them. Make sure it loads fast.
Number 2: Choose the appropriate graphics file format. To make sure a site loads fast, avoid large, complex graphics, and follow the previous suggestions about choosing the right kind of image file format. There is some controversy over which graphic file type—JPEG or GIF—is best.
Number 3: Consider interlaced files. If your image was stored in non-interlaced form, when half of the image download time is complete, you would only see 50% of the image. At the same time in the download of an interlaced GIF, the entire contents of the image would be visible—even though only one-half of the image data would be displayed. An alternative to using interlaced GIF is progressive JPEG.
Number 4: Use an appropriate color palette. The color scheme of a website is key to its overall design and attractiveness. For most sites, avoid dark colors like black and maroon, and harsh colors light bright red. Instead, use soft grays, pastels, and even light textures to make it easy on the viewer’s eyes. One common design flaw is a lack of uniformity of color within a site and far too many sites alternate between vivid and subdued color schemes, resulting in an unbalanced appearance that lacks a visual signature.
Jpeg 2000
With the introduction of 4GB CompactFlash cards (even if they aren’t cheap) and Adobe’s’ awesome Camera RAW plug-in, it might seem that serious photographers will only shoot RAW files. So why should we even care about JPEG 2000? It’s like this, Bunky, out here in the real world sometimes size does matter. Files have to be distributed, e-mailed, and archived, and even with Terrabyte-sized drives for desktop computers around the corner, some kind of compression strategy is gonna be required. And everyone would prefer that approach to be lossless.
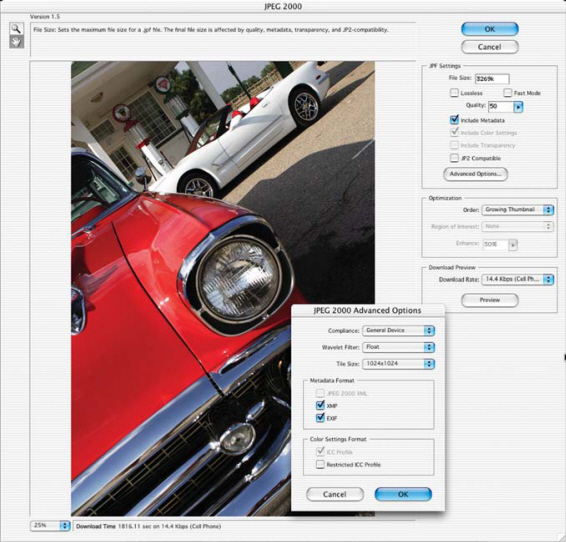
Welcome, my friends to JPEG 2000, the latest incarnation of the ubiquitous image file format and compression method known as JPEG. Like the existing format, this new one is sponsored by the Joint Photographic Experts Group of the International Standards Organization, but provides an integrated system for coding digital images, instead of just a method for compressing still images. Classic JPEG uses DCT (discrete cosine transform) functions to compress an image, while JPEG 2000 uses wavelets that decompose the image signal into different little waves, that when summed up become as equal to the original as possible. The new format uses two different kinds of wavelets: family 5 × 3 (reversible) and 9 × 7 (irreversible). When compressing an image with 9 × 7 you lose some image quality, but produce really itty-bitty files; or you can choose to preserve all the quality and still save lots of space.
According to Andrea de Polo, head of the New Technologies Office at Fratelli Alinari, which owns the oldest photographic archive in the world, “JPEG 2000 might soon replace all previous file formats used up to now.” Why is that? Simple, because de Polo claims that “JPEG 2000 is faster, better, and provides error resilience, file history, metadata (for Electronic Copyright Management Systems), color correction, and files can be saved as lossy or lossless.” Other critical features for professional photographers consist of Intellectual Property Rights (IPR) protection in the form of labeling and watermarking, including a unique identifier that can be delivered and managed by Trusted Third Parties. There is also built-in access control for confidentiality and pay-per-view systems, so JPEG 2000 is more than just another compression system.
Photoshop Creative Suite, including version 2, supports the JPEG 2000 format natively. © 2003 Joe Farace.
How can you use it? Adobe Systems provides support for JPEG 2000 with its original introduction of the Camera RAW plug-in for Photoshop 7.01, and Photoshop Creative Suite further supports JPEG 2000 by having the capabilities built-in. SouthDowns’ Perl software for creating JPEG 2000 files can be downloaded at http://public.migrator2000.org/downloads.xalter Algo Vision LuraTech, Inc. has been working with the format longer than anybody, it seems, and you can download their Photoshop-compatible plug-in at luratech.com/products/lurawave_jp2/photoshop/index.jsp?OnlineShopId=498221062010392790.
As the dust settles around JPEG 2000, you may see several different acronyms, but don’t be confused; simply check to see if your favorite imaging application reads and writes the format. One version, JJ2000, was developed by EPFL (L’Ecole Polytechnique FÈdÈrale de Lausanne), Ericsson, and Canon Research Center France (CRF,) as a Java implementation. In case you’re not familiar with Java (not an acronym, by the way), it makes the format both platform-independent and portable. A Java implementation makes it easy for JPEG 2000 integration in browsers and other Internet applications, which accelerates its adoption as a still image compression standard. http: Read more about it JPEG 2000 at: http://jj2000.epfl.ch/jj_whitepaper/index.html and, www.jpeg.org, and www.migrator.org.
Tools of the Trade
Trevoli’s (www.trevoli.com) Photo Finale automatically transfer photos from digital cameras, memory cards, photo CDs, and scanners, and helps you organize photos into categories and folders. You can search and find photos by up to 10 different ways including name, date, rating, category, and caption. A calendar view lets you view all photos, or drag and drop photos directly to a date. You can access 100 printable templates to create announcements, greeting cards, magazine covers, and certificates, or print one or multiple images on a single page using templates from wallet size to 13 × 19 inches. You can e-mail directly from Photo Finale with automatic photo conversion and no additional software required. Photo Finale offers a free version of the program, that you can upgrade to the Premium version for $40.
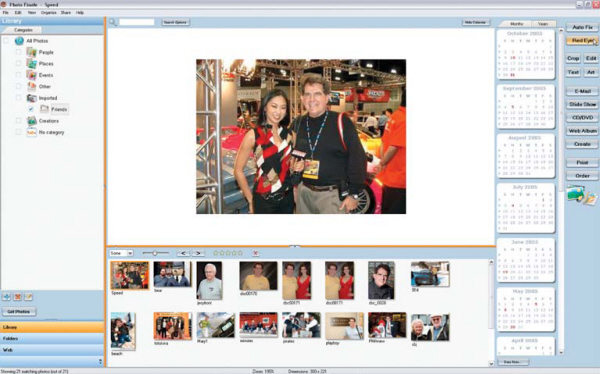
You can e-mail directly from Photo Finale with automatic photo conversion and no additional software required.
Photo-Sharing Websites
Don and Chris MacAskill started SmugMug; it’s a photo-sharing website that doesn’t quite fit any conventional category. SmugMug.com features an interesting blend of tools and a design that will appeal to photographers and surfers alike. The site is scalable, allowing users to add new albums, and upload hundreds of images in a single click. Amazingly, the site is free of advertising and pop-ups. Its kinda like a personal home page and sharing website that lets you tweak its appearance and functionality to work the way you want. You can control almost all layout aspects and esthetics of your SmugMug page, including comments, personal URLs, and custom subcategories. If you have even modest HTML skills (I don’t) you can replace the Smugmug logo and navigation with your own identity, customize the colors and backgrounds, write scripts, and use style sheets. SmugMug has a lot going for it, including the ability for visitors to add comments to your images (or not) or order prints (or not) or download photographs—you guessed it—or not. It’s totally customizable. SmugMug offers three levels of membership: Standard, Power, and Professional. The annual cost is $29.95, $49.95, and $99.95, respectively, and all provide 8MB of storage for what SmugMug calls an “unlimited” number of images. The two more expensive memberships allow for unlimited customization, while the higher priced options permit traffic up to 120,000 views per month.
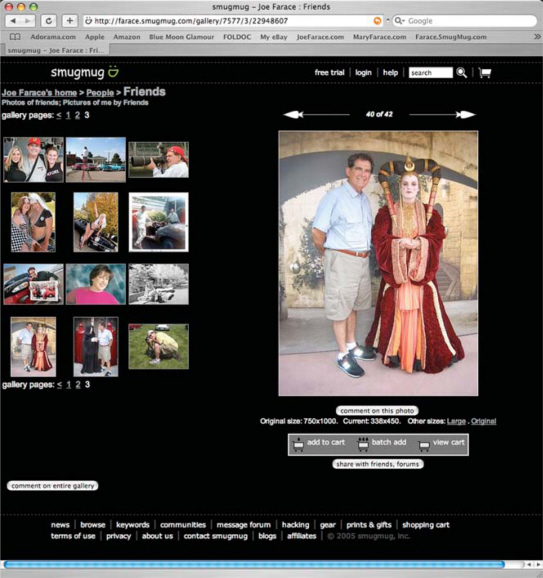
What’s a SmugMug page look like? Visit my power user page at http://farace.Smugmug.com to see what I’ve done.
Ranked by Nielsen/NetRatings as the #1 photo site, Webshots (www.webshots.com) defies easy description; it’s much more than just a photo-sharing site. Sure, Webshots offers a number of ways for friends and family to share imagery with one another, such as Photo Messages, online photo albums, and custom prints and gifts, but there’s more; like their own software. Called Webshots Desktop, made for both Mac OS and Windows, the software is a surprisingly robust (yet free) photo management application that combines the ability to make wallpaper and screensavers with tools for managing and sharing photos. The application lets you produce on-screen slideshows, gives you one-click uploads of photos from digital cameras to online albums, along with a feature that lets you track and view the photo albums of friends and family. Free (there’s that word again) membership allows members to download any of their Gallery images to their computer and upload and share their own photographs. Once your own image files are uploaded, you can send Photo Messages or invitations to view entire albums, and can choose to list albums publicly in the Webshots Community and Photo Search directories.
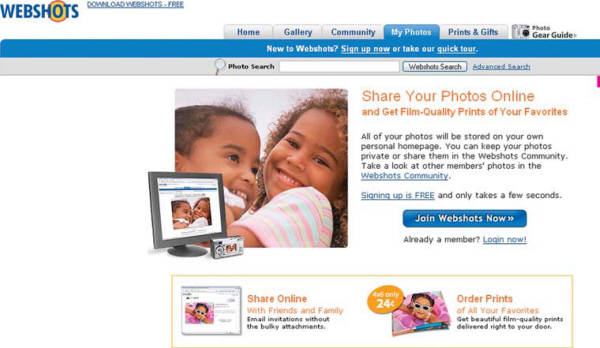
Within WebShots personal My Photos area, you can track downloads and view statistics for your images, as well as order prints, frames, and a variety of customized gifts, such as t-shirts, mugs, and mouse pads. Premium features (that means you gotta pay), such as high-resolution downloads, additional image storage, and ad-free browsing, are available with Webshots’ Unlimited service.
For cell phone slinging digital photographers, Webshots’ My Photos Viewer mobile service lets members use their wireless phone or handheld device to remotely browse their own and favorite members’ albums. My Photos Viewer is carrier-independent, operates on WAP 2.0-enabled, color screen phones and wireless handheld devices with graphic Internet browsers. (Wireless Application Protocol is an open international standard for Internet access using cell phones.)
Other Websites
Flickr (www.flickr.com) is part of the Yahoo! Empire and provides a way to store, sort, search, and share your photos online and provides a way to organize yours, and for you and your friends and family to tell your stories about them. Flickr allows photo submitters to categorize their images by use of keyword “tags” that allow searchers to easily find images concerning a certain topic such as place name or subject matter. Flickr also allows users to categorize their photos into “sets,” or groups of photos that fall under the same heading. However, sets are more flexible than the traditional folder-based method of organizing files, as one photo can belong to many sets, or one set, or none at all.
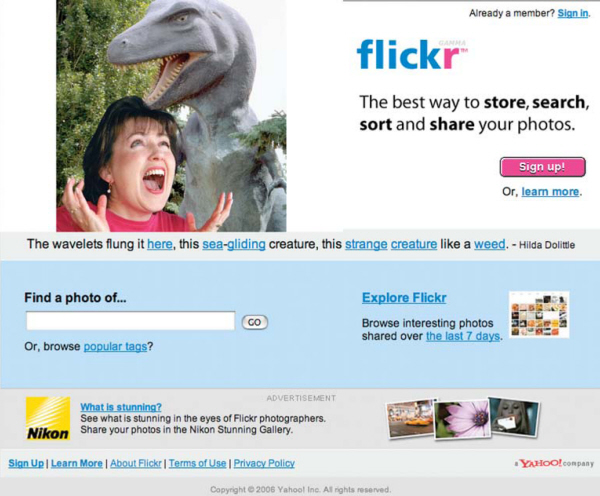
In March 2005, Yahoo! Inc. acquired Ludicorp and Flickr. During the week of June 28 all content was migrated from servers in Canada to servers in the US.
Snapfish (www.snapfish.com) is an online photo service with more than 24 million members and one billion unique photos stored online. It enables members to share, print, and store their most important photo memories at low prices; Snapfish offers professionally developed digital camera prints as low as 10¢, film developing for just $2.99 per roll, free online photo sharing, unlimited online photo storage, free editing tools and software, wireless imaging services, and more than 80 personalized photo products, ranging from calendars, mugs, and mouse pads, to boxer shorts, dog leashes, and teddy bears.

Based in San Francisco, Snapfish is a division of Hewlett-Packard. Snapfish also provides infrastructure services to leading retailers, Internet service providers and wireless carriers, allowing them to offer these same products and services to their own consumers.
Photobucket (www.photobucket.com) is a simple, fast, and reliable service that enables efficient sharing and publishing of visual digital content online. Images and videos can be directly linked from Photobucket to any site, including popular sites like MySpace, eBay, LiveJournal, Xanga, Friendster, and Neopets. Photobucket was named the fastest growing site of 2005 according to Nielsen/Netratings and now ranks as a Top 100 site by traffic. As of March 2006, Photobucket had over 15 million users growing by over 65,000 users per day and, like McDonald’s, serves over 50 billion images per month. Founded in 2003, Photobucket is based in downtown Palo Alto with technology operations and development based in Denver, Colorado.
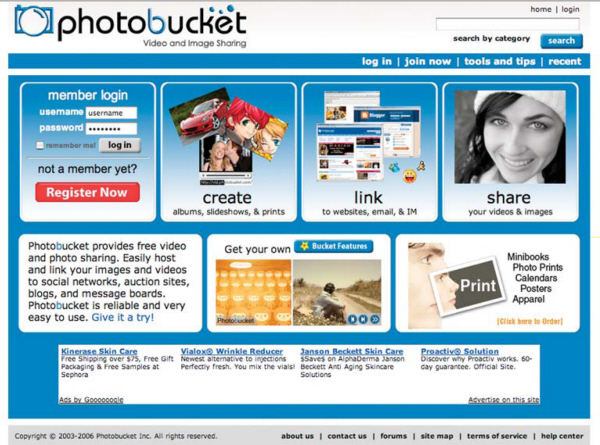
Photobucket essentially serves as a central “hub” for storing, sharing, and publishing visual digital media. In just the last 12 months, Photobucket has welcomed more than 10 million unique visitors per month, driven purely by word of mouth.
Cybertheft
The Internet represents the greatest marketing and sales opportunity for photographers—greater than any previous technological breakthrough—but it’s not without a few problems. First and foremost in many photographers’ minds is the possibility of digital theft of copywritten images.
What sends shivers down many photographers’ spines is the ease in which Internet images can be illegally obtained. Most browsers allow you to click on any object—like any one of your best selling photographs—and print it, save it as a file, or copy it to the Clipboard. Once on the Clipboard, your image can be pasted into a blank document in any kind of image-editing program. Because of the ease in which this copying is done, some photographers feel they will have no real control over their copywritten images one they are posted on the Internet. To many, it is worse than the adverse affects that the color copier or digital copy stations brought to their business; some see it as the color copier from hell. Before you run screaming to your lawyer, lets back up a bit.
All of the hysteria surrounding Internet copyright issue is based on the naive assumption that stealing images isn’t already going on in the non-digital arena. We all know that this is not true. Even ignoring the impact of the color copier and digital copy stations, people have been stealing our images for years. Does this true story sound familiar?
A client called me to talk about a concern that he had with the quality of some prints that I had delivered to her. It seemed that the prints of a portrait I made of the company’s CEO were not acceptable and a publication they sent it to told them it was not of “reproduction quality.” This sounded hard to believe so I made an appointment to meet with the client to look at the “problem” prints. Before I went, I pulled the client’s file along with a file print of the same image that she had questioned. When I went to her office, I asked to see the bad print and she showed me the poorest quality copy print I’d ever seen. It was flat, unspotted, and covered with scratches. At that point, I handed her the file print and said this was the quality of the prints that I had delivered and without naming names suggested that someone in her organization had made illegal copies of my original prints. I left with a big print order and a client better educated in what copyright means on a practical level.
Basic Protection
One of the most obvious ways to protect the rights of your digital images is with a visible copyright symbol. Sometimes called a “watermark” this is a secondary image that is overlaid on the primary image, and provides a means of protecting the image. One of the easiest ways is to use your image-editing programs and simply add a text layer with a copyright statement. If you have a lot of them to watermark, multiple image files use a power tool such as ReaWatermark (www.reasoft.com/products/reawatermark). This Windows-based software simplifies the process of creating and applying watermarks to multiple files in multiple folders. It supports a mixture of text, copyright symbols, graphics, and drawing watermarks of any complexity. A multi-level transparency setting allows you to choose and preview how your watermark image or text will affect the protected image.
One of the most powerful protection tools you have at your disposal is the ability to create small, low-resolution images that look good on screen but aren’t worth stealing for use in print or as a print. Just as you can post “No Trespassing” signs on your property to keep interlopers out. The first thing you need to do when setting up a website is to post a notice saying “No Stealing Allowed.” Rohn Engh (www.photosource.com) suggested posting a legal notice on your website relating to the photographs that appear there. Here is his suggested warning label that appeared in my book, “The Photographer’s Internet Handbook”:
ReaWatermark, the watermark software helps you apply transparent logo on images. It takes just one step to process large number of photos of variable size and orientation in multiple folders. Photo courtesy of ReaSoftware.
“Image Restrictions: Each image on this website is legally protected by US and International Copyright Laws and may NOT be copied and used for reproduction in ANY way unless arranged for in writing. All pictures on this website are Copyrighted © YOUR NAME and are for Web browser viewing only. Usage of any image (including comp usage) must be negotiated. No Image on this website may be used for any purpose without express written consent of the Copyright holder [YOUR NAME]. Unauthorized duplication of these images is prohibited by US and International Copyright Law. In the event of an infringement, the infringer will be charged triple the industry-standard fee for usage, and/or prosecuted for Copyright Infringement in US Federal Court, where they will be subject to a fine of $100,000 statutory damages as well as court costs and attorney’s fees.”
Quoted by permission from PhotoSource International, producers of the stock photographer’s directory, “The PhotoSourceBook.”
Embed Protection within the File
There are lots of ways to protect digital images from theft, but I prefer to use a method that makes that copyright notice a part of the image file. Adobe’s Extensible Metadata Platform (XMP) is a labeling technology that provides a method for capturing, sharing, and most important to us as photographers, implementing rights management. Built into both Photoshop CS and CS2 is a way to embed metadata containing copyright information into the image file. Instead of digitally stamping a big copyright notice across the image, you can use the following steps to make your copyright notice an integral part of a digital file itself:
Step 1: Open a blank document in Adobe Photoshop CS2 (File > New). Click OK. (Don’t worry about any of the settings that appear in this dialog box.)
Step 2: Choose File Info from the File menu (File > File Info). Select “Description” in the menu on the left-hand side. Next chose “Copyrighted” from the Copyright Status pop-up menu. In the Copyright Notice section that appears just below this menu, you should enter all of the information that you want to appear as part of this image file.
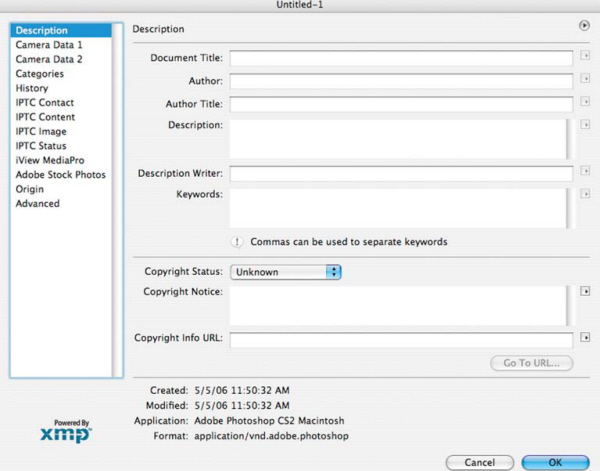
You can include a phone number, © symbol, year created, “All Rights Reserved,” or whatever you think is appropriate. If you have a website, enter its URL (uniform resource locator) in the Copyright info URL space. If you don’t already have a website, maybe it’s time you did.
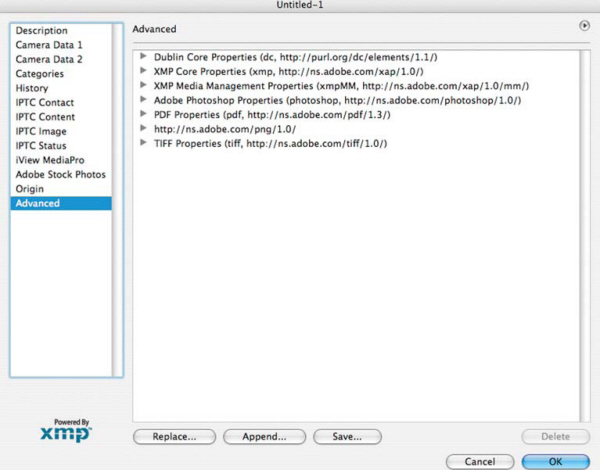
Step 3: Next, choose “Advanced” from the menu on the left-hand side of the File Info dialog box. Next, click the Save button to save all of the data you have entered as an .xmp file containing your copyright notice.
Choose whatever file name you like (but make it easy to remember) and decide where on your hard drive you want to store it, but make sure it’s an easy place to remember. Then click OK.
Step 4: To assign all of this copyright information to an image, open File Info (File > File Info) for that specific file, and then click the Append button.
Take Action
Having to go through this process for each and every image file you create is tedious, so the next phase will be to create a Photoshop Action (see Chapter 9 for more details on Actions) that will automate the entire process:
Step 1A: Make sure you have gone through the above process at least once and have saved an XMP file with the appropriate copyright data. You can have more than one file for different purposes or even different websites. Then, start with a blank document (File > New).
Step 2A: In the dialog box that opens, assign a function key so that the next time you want to associate a file with your copyright notice, it’s simply a button click.
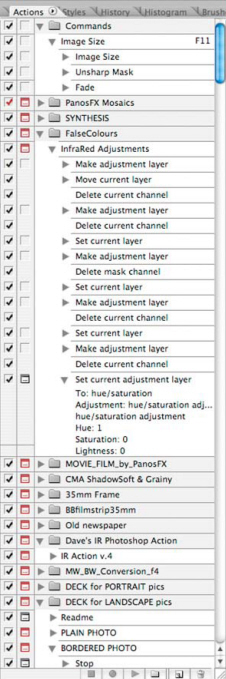
Go to the Actions palette making sure you are not in Button Mode. (If so, go to the Actions fly-out menu and select Button Mode.) Then choose New Action.
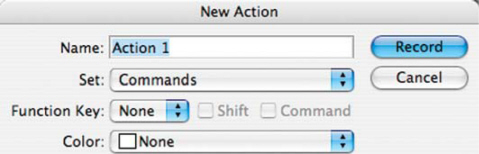
You can choose to group the Action with some of Photoshop’s sets of Actions that you’ve already installed. Then click Record.
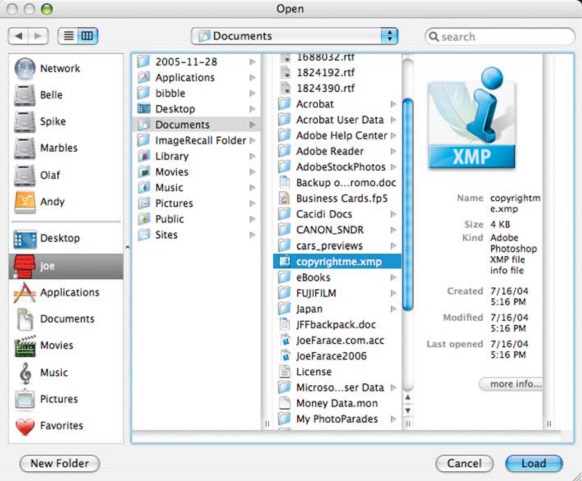
Step 3A: Chose File Info (File > File Info), select Advanced, click Append, navigate to the place on your hard drive where you stored the related .xmp file and click Load. Then click OK to close the File Info box.
After appending, click the Stop Recording button at the bottom of the Actions palette, and you’re done!
You only have to go through this latter process once. The next time you want to embed copyright information into any image file, just click the function key you’ve chosen or on the newly created button (when back in Button mode) in the Actions Palette and you’re finished! You can even do an entire folder of image files at once using Photoshop batch processing features (File > Automate > Batch) and assign your Action to the batch.
