Tools of the Trade
I love it when a plan comes together!
The times they are changing. You don’t need a computer for digital imaging anymore. Digital minilabs make creating inexpensive prints from your memory cards or digital files as easy as shooing film, but just as the person who wants to create expressive images with film needs a darkroom, the digital photographer who wants to produce images that sing needs a digital darkroom. Much as the center of the traditional darkroom is the enlarger, the heart of that digital darkroom is the computer. Connecting digital imaging peripherals to your computer may initially seem confusing but quickly settles down after you’ve identified what kind of devices you plan to connect. Most users will find that they are speaking fluent computerese in no time.

This photograph of the “Patriarchs” at Zion Nation Park was made with a Pentax K100D SLR, and was captured at 1/45 second at f/22 in Aperture Priority mode. The K100D was set at 200 and the Pentax smc P-DA 12–24mm F4.0 ED/AL lens. © 2006 Joe Farace.
If you’ve seen any digicam advertisement you already know that a camera’s resolution is rated in megapixels. A pixel is another way of saying picture element. In mathematical terms a megapixel would simply be one million pixels. A digital photograph’s resolution is measured by the image’s height and width as measured in pixels. The higher the resolution—the more pixels it has—the better the visual quality. To determine how many megapixels a camera can produce, you multiply the maximum image file’s length and width (in pixels) together. In the case of a camera that has a resolution of 2240 × 1680, it would be 3,763,200 pixels or 3.7 megapixels. As in many fields, some manufacturers sometimes liberally interpret how that rating is obtained.
While you can get analytical about it, I prefer to interpret megapixel ratings much as automotive horsepower ratings. The hybrid/electric Honda Insight delivers 68 economical horsepower while a Dodge Viper produces 450 horsepower. I don’t care if either engine is rated a little higher or lower than what they really are, but those ratings tell me the Viper will blow the doors of the Honda, but both cars can easily take you to work or shopping.

The 7.5-megapixel Olympus EVOLT E-330 enables users to take pictures with resolution up to 3136 × 2352 pixels, and produces crisp, detailed image files in color or black and white. Photo courtesy Konica Minolta USA.
Some manufacturers of low end point and shot cameras tend to overstate their camera’s capabilities or advertise interpolated resolutions (see Chapter 1 for the scoop on interpolation) that use a variety of trademarked names. Just as when evaluating film or flatbed scanners, you should look for the “raw” or optical resolution specifications of a camera when making a purchase decision. If you want to get down and techie with megapixels, visit the Megapixel Myths website (www.megamyth.homestead.com).
Most digital cameras use CCD (Charged Coupled Device) chips to capture light and convert it into images. In fact, some inexpensive cameras use camcorder chips that have rectangular pixels. In order to be displayed on a monitor, these pixels have to be converted into square pixels. This conversion can produce a noisy image, which shows up as a grainy image or as posterized areas. Square pixels are typically found on higher end digital cameras, but more and more inexpensive models use them as well.
Cameras, such as Canon’s (www.powershot.com) EOS 5D, use a CMOS (pronounced “sea moss”) chip. In the past, CMOS imaging chips were inferior to CCDs, limiting this technology’s ability to penetrate the imager market. More and more digital SLRs are using CMOS because of the inherent advantages of low-cost and low-battery consumption. CCD chips have high photoelectric efficiency, which permit pixels to be tightly packed and produces high-resolution arrays on silicon dies, but they have higher manufacturing costs, greater power consumption, and lower production yields. CMOS sensors are built using the same kind of semiconductor process as computer microprocessor chips. As a result, many functions, such as digital signal processing, logic, and microcontrollers, can be integrated onto a single chip. The downside of CMOS is that low light performance may not be as good as an equivalent-sized CCD. But that’s changed quickly, and is mitigated by larger pixel sizes, so it isn’t a consideration when looking for a new digital SLR.
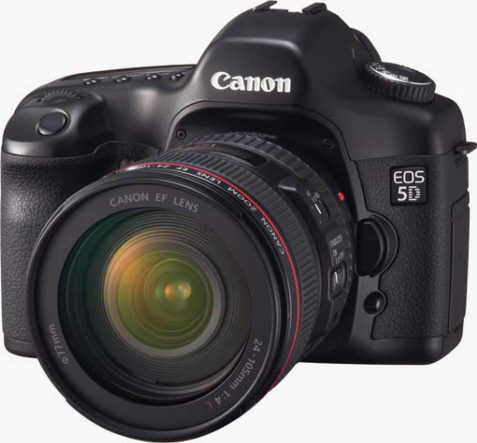
The EOS 5D has a full-frame 12.8-megapixel CMOS sensor, combined with Canon’s DIGIC II Image Processor, a 9-point AF system with six assist points, a 2.5-inch liquid crystal display (LCD), and a magnesium-alloy body. Photo courtesy Canon USA.
How Many Megapixels are Enough?
With the popularity of digicams, there’s still confusion about how much resolution is enough. Unlike Mies van der Roh’s comment about design, more is always better when it comes to resolution. I’ve seen stunning output from Nikon’s (www.nikonusa.com) D1x 5.47 megapixel camera when printed at 24 × 36 inches using an Epson Stylus Pro 10000 large format ink-jet printer, and fine detail was apparent even upon close examination. At some point, cameras might reach a point of diminishing returns; more megapixels may be provided, but nobody will be able to tell the difference when looking at output.
No matter what their maximum resolution may be, most digital cameras offer more than one resolution option allowing you several choices, depending on how the image will ultimately be used. Changes in resolution can be compared to image formats in traditional film cameras. An image printed at a large size that would be unacceptable if made with a 35-mm film camera will look much better if it has been photographed on 4 × 5 or 8 × 10 sheet film. The highest-quality digital image settings are made using the camera’s maximum resolution and is your best choice if you want to make great looking 8 × 10 inches prints. Good-quality images are, more often than not, 640 × 480 pixel-sized photographs that are more than adequate for use on the World Wide Web, but may not make the best looking prints.
Just as important as image resolution is what file format is used to store the images. Most cameras store images in the compressed JPEG (Joint Photographic Experts Group) format, which applies compression to the file. Since JPEG is an inherently “lossy” format, some image data is invariably lost during the process, the best quality will be obtained by using the lowest compression ratios; or even better, no compression. Many digicams let you store images in a RAW format that delivers every pixel that was captured, undiluted by compression. Other cameras let you save images using the TIFF (Tagged Image File Format) that is immediately available for use by an image-editing program without requiring a special, camera-specific RAW interpreter plug-in for importing. (Note: If you got lost in that last paragraph don’t worry, help is on the way. Chapter 3, The X Files, provides an in-depth look at image file formats and why you should even care.)
It’s always important to match the resolution of the camera to how the image will be reproduced. Image resolution can be less critical when printing with an ink-jet desktop printer, and almost any contemporary digital camera will produce acceptable snapshot-sized images. Depending on the compression, a 3.3-megapixel camera will produce adequate quality for an 8 × 10, and maybe even an 11 × 14 inch print depending on other components in its imaging path. They key to making your images look good is matching the image size to how large it will be used in your output.
Digital Film
So this guy walks into a bar and asks the bartender: “Waddya put in a digital camera to take pictures?” And the bartender answers, “Digital film”—old digital imager’s joke.
The term digital film seems to upset students of semantics, digital purists, and even a few computer users, but it’s usage—not academicians—that will determine how language evolves. Most first generation digital cameras offered only built-in memory for image storage. Once that was full, the files would then have to be downloaded from the camera onto your computer’s hard disk, connected to the computer via a special cable. Having a fixed amount of built-in memory meant that once it was full and you wanted to capture more images, you either had to download images to a computer or delete a few that were already stored in the camera. What was missing with most of these early cameras was the ability to remove those captured images like you would a roll of film, and insert another storage device, creating what would be the digital equivalent of film. The industry rose to the occasion by offering what ultimately became a bewildering variety of storage media.
Unlike “real” film, whose photochemical nature imparts a distinct personality to each image by affecting its color, contrast, and grain structure, digital film is simply a passive storage media. The camera’s chip creates all of these imaging characteristics previously attributed to film, so “digital film” simply stores digital photographs. Right now, memory cards are available in many different shapes, sizes, and capacities. Most modern devices are memory cards small enough to hide in the hand, and light as a potato chip. When they’re full of images, you simply take the card out and slip another one into the camera, much like changing a roll of film—only without all that winding. Larger-capacity cards allow storage of more images, but also cost more. Best of all, although memory cards vary in capacity and price, almost any camera that accepts a specific format can use one of any capacity, much as a 35-mm camera accepts film in 24 or 36 exposure lengths (there are some limitations as a camera ages and technology changes, however).
Here’s a look at most of the popular digital film formats:
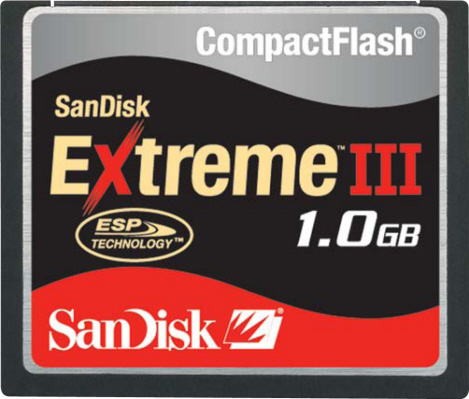
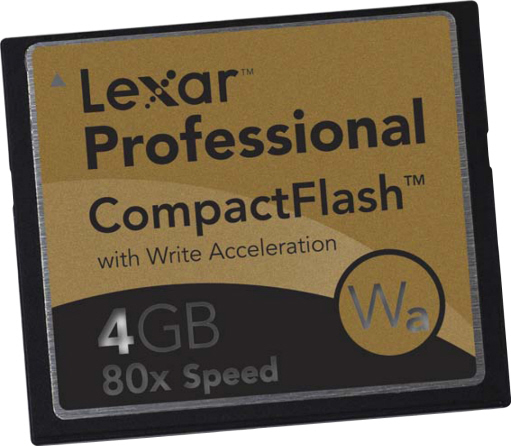
CompactFlash: First introduced by SanDisk (www.sandisk.com) in 1994, these matchbook-sized memory cards are pin-compatible with PCMCIA (Personal Computer Memory Card International Association) card making it possible for companies to offer adapters allowing CompactFlash media to be used in older digital SLRs that were designed only for PC cards, as they are called these days. These adapters are especially useful for notebook computer users and provide a seamless way to transfer and unload images from digital cameras using CompactFlash. Type I CompactFlash cards measure 3.3mm in thickness, while Type II are 5mm.
SanDisk’s Extreme III product line includes CompactFlash, Memory Stick PRO, and SecureDigital formats, and is targeted at high-megapixel resolution digital cameras that can take advantage of a significantly faster memory card. They have minimum write and read speeds of 20MB/s and the cards range in capacity between 1 and 4GB.
Microdrive: The Microdrive has a form factor identical to Type II (5mm) CompactFlash cards, weighs only 16 grams, and provides lots of storage capacity in a compact, portable package.
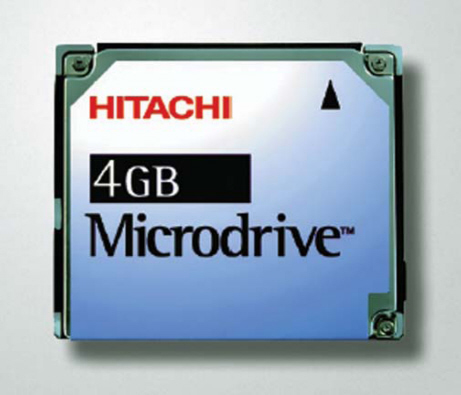
Hitachi’s Microdrive is really a tiny 1.0-inch hard disk drive, featuring a dramatically reduced footprint for integration into PDAs and digital cameras. With a maximum capacity of 8GB, the 3600RPM drives will hold 33% more than its predecessor. Photo courtesy of Hitachi.
SmartMedia: Toshiba’s Solid-State Floppy Disk Card (SSFDC), usually just called SmartMedia, is a tiny flash memory-based storage card designed specifically for digital cameras and reminds me more of a Wheat Thin than their designers probably ever intended. The tiny SmartMedia card combines a flash memory chip with a 22-pin surface connector in a 45 × 37mm package. SmartMedia cards are less costly than other types of memory storage devices and, as I write this, are about as extinct as a plesiosaur.
Memory Stick: Sony originally introduced the Memory Stick for its Cyber-shot series of digital cameras and uses the format in a wide range of consumer products, including MP3 music players. There are currently many Memory Stick formats including Memory Stick Pro, Memory Stick Duo, and Memory Stick Pro Duo. While mostly used in Sony cameras, occasionally dual-format digicams include Memory Stick as an option.
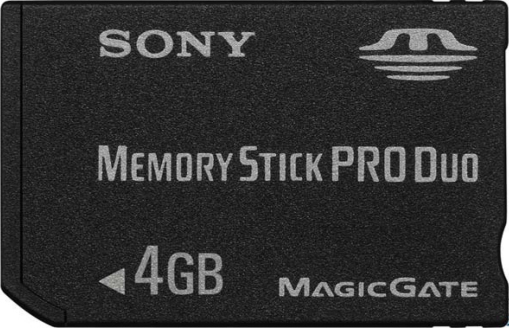
At one-third the size and half the weight of the standard-size Memory Stick card, Sony’s 4GB PRO Duo media is designed to store large amounts of high-resolution digital photos. All Sony Memory Stick PRO Duo media cards are sold with an adapter for devices with a standard-size Memory Stick media slot. Like all Memory Stick media products, the 4GB Memory Stick PRO Duo card incorporates MagicGate copyright protection technology for secure distribution of commercial content. Photo courtesy Sony.
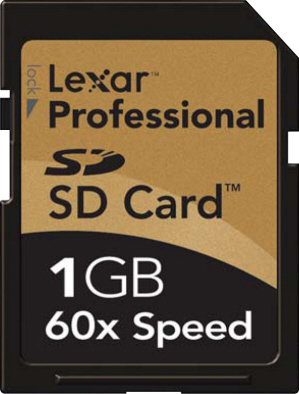
SD/MMC: The SD Memory Card measures 24 × 32 × 2.1mm and allows cameras to be more compact and gives product designers new freedom. Next to the CompactFlash card it is the most popular memory card format for digital imaging. Unlike MMC (MultiMediaCard), SD media have an erasure-prevention switch to keep your data safe. When the switch is in the locked position, it will stop you from accidentally copying over or deleting data stored on your card. A mini SD card, measuring 20 × 21.5 × 1.4 mm is available as smaller form factor of the SD Memory Card and finds most use in cell phones—for now anyway.
Similar in size to MMCs, Lexar Media SD cards are designed for use in many digital devices including digital cameras, MP3 players, PDAs, cellular phones, and camcorders. Photo courtesy Lexar.
xD Picture Card: As if we need a smaller memory card format, the minuscule xD Picture Cards is brought to us by the same pack of geniuses that created SmartMedia. Like SmartMedia, their capacities are limited, but unlike SmartMedia they are a lot easier to lose.
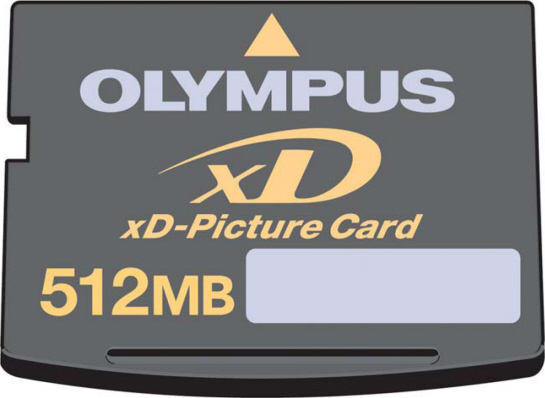
The Olympus xD Picture Card is compact for smaller and more stylish digital devices. And it’s just as easy using this format in non-xD devices as well, thanks to a number of adapters that will be available including a CompactFlash Adapter, SmartMedia USB Reader/Writer, and PCMCIA/PC Card Adapter. Photo courtesy Olympus.
All memory cards are the same, right? All you need to do is buy whatever is cheap to capture your precious images. Wrong! Just as choosing the correct film for the assignment is important in traditional photography, choosing the right memory card is critical for digital capture. Here’s why:
They’re not all the same speed. Lexar was the first company to rate the speed of its flash memory cards and currently provides ratings for its Platinum and Professional lines. Most other memory card manufacturers also rate their products’ speed, but what does it really mean? The rating refers to the speed (who woulda thunk it?) that data can be written to, or read from a flash memory card. Photographers often think their memory card’s speed and performance only make an impact on digital capture when the card is in their camera, but speed-rated cards impact workflow while reading data onto a computer with a card reader as well. A “sustained speed rating” is important because it allows the photographer to capitalize on the camera’s built-in functions, such as burst mode and video capture. When using a card with inconsistent, high-speed performance, either function can be interrupted.
One “X” represents the basic transfer rate of 150Kb/s and increases are in multiples (e.g. 133X) signifying the card’s overall speed, as in “133 times faster than the original transfer rate of 150Kb. (Note: When people started storing data on CD-ROM discs, the same system was used.) An embedded high-speed controller allows a flash memory card to perform at its best, but the bottom line is that the higher the number, the faster the card.
The Big Three
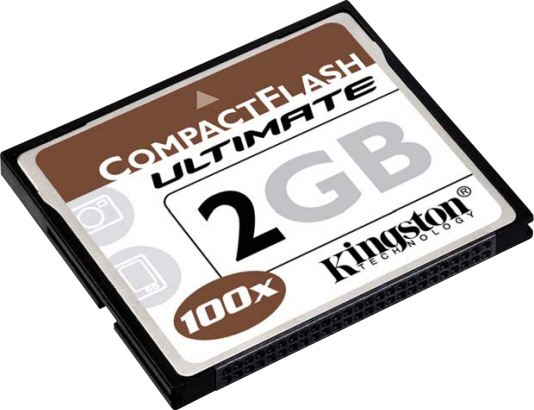
Kingston (www.kingston.com) may be better known for its computer memory than digital media, but offers a full slate of products including Ultimate 100X CompactFlash cards that are available in 1, 2, and 4GB capacities. These cards offer a 20MB/s read rate and a 16MB/s write rate, or 100X. Kingston defines its X-speed by the write speed because read speeds for memory cards are higher than write speeds and they believe photographers “care more about how long it takes to write data to a digital camera” that read it. I think we care about both speeds because either way, time is money.
Lexar’s 133X Professional CompactFlash Memory Cards have a 20MB/s minimum sustained read and write capability and are available in 1, 2, and 4GB capacities. The cards are bundled with Image Rescue 2.0 software and a 30-day trial version of the Photo Mechanic 4.3 image browser. Image Rescue can recover lost or deleted JPEG, TIFF, and RAW files even if you’ve erased them, reformatted the card, or if the memory card has been corrupted.
Kingston’s Ultimate 100X cards carry a lifetime guarantee that a representative told me, “If it’s broke, we will fix it or replace it.” Photo courtesy Kingston.
Lexar’s Pro cards are backed by a lifetime-limited customer-satisfaction warranty (see “When Good Cards Go Bad”).
Although not specifically speed rated, SanDisk’s Extreme III memory cards feature ESP (Enhanced Super-Parallel Processing) for high-performance producing 20MB/s sequential read and write speeds. CF cards are available in 1, 2, 4, and 8GB capacities.

Every SanDisk Extreme III CompactFlash card comes with RescuePRO software that lets you preview recoverable data before you try to retrieve it. SanDisk memory cards have a lifetime-limited warranty.
Real World Testing
To see how fast these three cards performed under real world conditions, the crack Farace Testing Labs staff designed a test to see how fast the cards really are. Like Consumers Reports, the cards used for the test were not requested from the manufacturers specifically for this chapter so there was no chance any ringers were sent. Cards tested included a 2GB Kingston Ultimate, a 2GB Lexar Professional, and a 1GB SanDisk Extreme II. The middle-of-the-road Canon EOS 30D was used to simultaneously capture a RAW file plus a large JPEG, giving the camera the largest possible amount of data to write. The results were a tie for first place between Lexar and SanDisk at 2 seconds each; the Kingston took 3 seconds. (JPEG only capture on all three cards was virtually instantaneous.) I leave it to you to decide if that difference is significant to your camera and type of photography.
Scanners
Like traditional image making, digital imaging begins with capturing the image. That process is composed of different steps starting with capture, but also including manipulation, output, and presentation. Of these the capture phase is important because the higher the quality of the digitized image, the higher the quality of the output.
Although I’ve met a few people who have only made images using digital cameras, most photographers have captured an image or two (thousand) using a film camera during their lives. Scanners offer film photographers, who are moving into the digital darkroom, two advantages. First, you can create computer-ready files with the same cameras and film that you’re already using. Second, scanners can digitize all of the images in your existing library of prints, slides, and negatives.
There was a time when the only way to digitize film was with a film scanner or a process such as Kodak’s Photo CD. As the prices of flatbed scanners dropped through the floor and the “under $50” scanner became a reality, manufacturers began looking for ways to add value to their products. One of the first “new” features added was the ability to scan film in addition to prints and artwork.
If you’ve been around the digital carousel a while, you know that using flatbed scanners to digitize film is nothing new. Transparency adapters for flatbed scanners have been available as an option for some time. In most cases these adapters were nothing more than “light box” lids to backlight negatives or transparencies so they could be digitized by the moving CCD elements. This method produced a digitized image, but the adapter itself was sometimes cumbersome, and always expensive—sometimes costing more than the scanner. All that’s changed. Transparency adapters have gone from expensive to inexpensive options and even standard equipment for some scanners.

One of my favorite imaging formats is the panorama and one of my favorite ways to capture it is with a dedicated panoramic camera like Hasselblad’s 35mm Xpan that was digitized using Epson’s Perfection 4870 PHOTO flatbed scanner. © 2003 Joe Farace.
Pick a Scanner; Any Scanner at All
Scanners convert prints, slides, and negatives into digital form by passing a lightemitting element across them, transforming the image into a collection of pixels that will be stored as a digital file. Depending on the original film or print format, there are two types of scanners:
Flatbed scanners look like small office copiers, and there are similarities in how they work. Shopping for a flatbed scanner is a matter of determining what type of images you want to digitize along with what format your final output will take. Asking yourself the maximum size of your original images will tell you how large the scanning area must be. Next, ask what the resolution of your output needs to be.
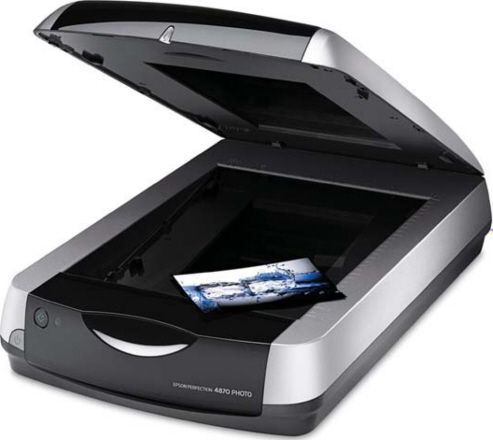
Recently, I’ve been using the Epson Perfection 4870 PHOTO to scan panoramic negatives. Yes, I tend to shoot negative film, color and C-41 black and white, for my panoramas.
Film scanners let you to scan slides, negatives, and transparencies. Film scanners are popular because they eliminate a generation by scanning the original film. Besides removing the print phase from the process you also save the cost and time associated with making a print. They are smaller than flatbeds and their cost reflects how many different film formats they can digitize. For example, 35mm only scanners are less expensive than those can digitize medium or large format film. If you only shoot 35-mm film or slides, you shouldn’t spend money for a larger, more expensive scanner that handles sheet film.
A typical desktop scanner uses an array of several thousand CCD elements arranged in a row, or a single chip. Three-pass CCD scanners—those that make three passes across an image to fully digitize it—use a single linear array and rotate red, green, and blue filters in front of the lens before each pass. Single-pass scanners use three linear arrays, individually coated to filter red, blue, and green light, and the same image data is simultaneously focused onto each array. Instead of CCDs, some flatbed scanners use contact image sensors (CIS) that bounce light off the surface of a print directly onto a closely mounted sensor, allowing the form factor of these scanners to be quite thin. An analog to digital converter (ADC) changes these signals into digital form and is rated by its color depth. An 8-bit ADC, for example, separates the visual information into 256 brightness levels.
Scanner Slang
There are two big myths about making great scans. The first one is that the process is so difficult that it is beyond the capabilities of the average person. The second is that it’s really easy to make a great scan. Of the two, the second is truer than the first. The real secret, if there is any secret at all, is to examine all of the scanner software’s options and make decisions appropriate for your output.
Scanners are usually rated by their color depth, resolution, and dynamic range. Color depth refers to the number of bits assigned to each pixel. These days even inexpensive flatbed scanners offer a 36-bit color depth that assign 12 bits to each red, blue, or green pixel. The more bits you have for each color, the more photorealistic the final scanned image will appear. Because 36- and 48-bit scanners capture more detail than 24-bit models, the resulting images are also easier to edit with image enhancement software.
A scanner’s dynamic range depends on the maximum optical density that can be achieved by the hardware and the total number of bits that can be captured. This measurement can be liberally interpreted as the range of f/stops that can be captured from a digital photograph. The greater the density range and the greater the number of tones that can be captured, the better the final scan’s image quality will be.
A scanner’s resolution is determined by the maximum number of dots or pixels per inch it can read and can be measured as both optical and interpolated resolution. Film scanners often have a resolution of 2700 dpi or higher because resolution requirements are more critical, given the small size of the original. Having higher resolution and bigger files also allows some flexibility if the image is cropped.
Keepin’ It Real
These days, scanners are measured by their optical as well as interpolated resolution. Optical refers to the raw resolution of the scanner that is produced by the hardware, while interpolated resolution refers to the maximum dpi specification the scanner and its driver software can produce for a selected image size. When the resolution specified exceeds the optical resolution, the software interpolates the data by resampling the existing data using algorithms to fill in the area—adding pixels, really—between existing pixels. While the method of interpolation can vary depending on scanner manufacturer, Epson uses a method similar to the bicubic or bilinear interpolation a user can select in Adobe Photoshop. If you start with a poor scan that is not sharp or clear enough, interpolation is only going to make the image look worse—not better.
When a flatbed scanner has an “uneven” optical resolution specification, such as 600 × 1200dpi, it is theoretically capable of capturing more data by a technique called “microstepping.” A scanner head has 600 elements in 1 inch in the horizontal direction. Most flatbed scanners use a 5000 element CCD—600dpi × 8.5 inch width equals 5100 pixels of data. The scanner head can move in 1/1200-inch increments in the vertical direction (back to front). When 1200dpi is selected it can slow down the scanner. The scanner may pick up some additional detail in the vertical direction; however, software interpolation occurs horizontally to create a new square pixel.

Differences in quality at two times the original optical resolution should not be noticeable in color images. Sharpening the image using your favorite digital imaging program’s Unsharp Mask filter will add edge definition and crispness to the image. Unsharp Mask controls are found in many digital imaging programs, including ACD Systems (www.acdsystems.com) ACD See 8 shown here. © 2005 Joe Farace.
The big question on many a scanner-user’s mind is: Is an interpolated scan as good as a scan made on a scanner that has the matching optical resolution? Usually there is no real visible difference between a “raw” or interpolated scan. You would have to be zoomed in at a 1:1 pixel ratio or even 4:1 to see any difference in quality.
The question remains: How does someone shopping for a scanner know the quality of the interpolation? The short answer is: it depends on the manufacturer. To avoid direct comparisons, some scanner companies avoid explaining the methods used to provide interpolated resolution. The safest measure of quality for a scanner is the horizontal optical resolution. The best way to test a scanner is to evaluate the unit at its optical resolution using different kinds of originals, such as color photographs, transparencies, negatives, and even black and white line art.

This photograph of Brenda was made with a Canon EOS 5D, which has a resolution of 2844 × 4341 pixels. This camera has a full-size chip close to the size of a standard 24 × 36mm film frame. Exposure was 1/125 second at f/6.3 at an ISO because the day was a lot more overcast than this sunny picture would otherwise seem to indicate. © 2005 Joe Farace.
|
TIP: Black and White in Color |
|
|
It sounds obvious that you should scan color images in color, but it’s also a good idea to scan black and white photographs using the driver’s Color setting so you can |
pick up subtle tones in parts of the monochrome image. You can always convert it to grayscale later using your image-editing program. |

On a Snowy January in 1945 in the Ardennes Forest on the German/Belgium border, a medic was involved in the “Battle of the Bulge.” In this battle there were more than one million soldiers—500,000 Germans, 600,000 Americans, and 55,000 British—including my dad. It was a medic, much like this young man, who pulled my Dad from a mortar crater where he had been wounded and patched him up so he could return home after the war to my sisters and me. This image is an homage to all the brave young men and women of our armed forces.
|
TIP: Clean Mind, Clean Body: Take Your Choice |
|
|
A clean original means less retouching later, so it’s a good idea to keep a can of environmentally friendly air near the scanner to blow dust particles off slides or negatives. Keeping your negatives and slides clean is more important |
with film scanners than flatbeds. Because of the small original size, even the tiniest dust speck can end up looking like a boulder in the final scan. |
It’s an alphabet soup out there: Enhanced Parallel Port (EPP), Universal Serial Bus (USB), and Small Computer System Interface (SCSI). To add to the confusion, some computers have different names for the same type of connection. Apple Computer calls their high-speed connection FireWire, but purists and Apple haters insist that it’s Institute of Electrical and Electronic Engineers (IEEE) 1394 (which it is too), while Sony calls it iLink.
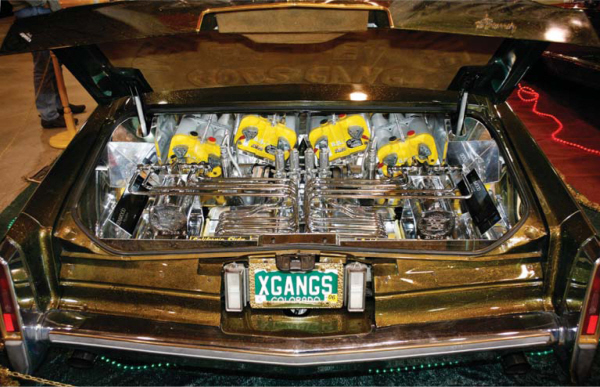
Does this trunk of a Lowrider remind you of what you think the insides of your computer looks like? Have no fear, mon frére. In this chapter I’ll introduce you to the buzzwords and the hardware that makes your computer go “ping.” © 2005 Joe Farace.
While it might seem obvious, the most important first step in setting up any peripheral device, such as a printer, is connecting it to your computer. For some digital imaging beginners this can be confusing because that printer may have one or more different kinds of connections or ports on its back, and it’s more that likely there’s no cable included in the box with the peripheral that you just purchased. Since you have more than one choice available, which one should you choose?
Serial: This is the kind of port that’s used to connect peripheral devices such as modems and printers. The serial port sends and receives data 1 bit at a time. While found on both Windows and older Mac OS computers, serial ports were once the only way to connect devices to a Mac. Like its Windows cousins, Macintosh computers have abandoned serial connections in favor of the USB.
Parallel: Sometimes called EPP for Enhanced Parallel Port. This is a type of port found only on Windows computers and is used for connecting printers, modems, and other devices. The parallel reference means that data—several bits at a time—is simultaneously sent and received over individual but adjacent wires. No longer in fashion, EPP has been replaced by USB in all new computers.
USB: USB connections are found on all new Mac OS and Windows computers and provide a faster connection than either serial or parallel connection (see “Comparing Interfaces” for speed ratings). USB was created in 1995 by a consortium that included Compaq, DEC, IBM, Intel, Microsoft, NEC, and Northern Telecom, and was designed to provide an interface between computers and various peripherals over inexpensive cables. USB supports daisy chaining (cabling devices together directly) allowing you to connect multiple devices through the one or two ports found on the host computer. The USB connection carries 5.0 volts of power allowing it to be distributed to all of your peripherals through a single, thin cable, which is how some low-power devices, such as memory card readers, get all of their power through the USB connection. USB devices are also “hot pluggable,” meaning you can connect and disconnect equipment while your computer is running.
SCSI: This is an acronym for Small Computer System Interface and is pronounced “scuzzy.” SCSI is an 8-bit computer interface that allows the connection of up to seven peripheral devices to a single SCSI port; although, depending on the computer, you can usually add another port. There are variations on the SCSI standard including SCSI-2 and SCSI-3, which are faster versions of the original. Unlike USB devices, SCSI devices are not hot pluggable and trying to treat them that way will result in system crashes, which is one of the 101 reasons it’s been replaced by FireWire.
FireWire: The FireWire standard (a.k.a. lEEE 1394) is a fast serial bus interface originally developed by Apple Computer and Texas Instruments in the early 1990s and adopted as an IEEE standard in 1995. Like USB, IEEE 1394 enables plug-and-play peripheral connectivity and provides power to peripherals eliminating the requirement that every device have its own power supply. FireWire’s major advantages over SCSI are simplicity and speed.
Ethernet: This is a form of Local Area Network (LAN) that connects computers from different manufactures and enables them to communicate. These days most computers must have an interface card or Ethernet capability built in. Ethernet only appears on professional and graphic arts printers, but can be added as an option on some of Epson’s printers. Ethernet is also used to connect cable modems to computers.
The Importance of Being Earnest
When you open the box, you may be surprised to find that a cable is not packaged with your printer or scanner. This was not always the case, but as device prices kept getting lower, manufacturers looked for ways to save a few bucks, and the cable was the first thing to go.
Choosing the right cable is not just a matter of buying a piece of wire that has the right connection on both ends. Let’s start with the construction of the cable: you should use a cable whose design eliminates cross talk, static, electromagnetic interference, and radio frequency interference. Other features to look for in quality cables are double shielded cables with low impedance wires and gold plated copper connectors. These cables provide better conductivity and shielding than bargain basement cables or terminators, and quality cables translate into more reliable, faster performance, with fewer errors during data transfer. Sure, these kinds of high-quality cables cost a little more, but aren’t your images worth it?

Belkin’s Gold cables, such as this FireWire model, have 24K gold plated corrosion-proof connectors for maximum conductivity and clean transmission. Its foil and braid shield comply with fully rated cable specifications reducing electromagnetic and radio frequency interference and use impedance matched twisted pair construction to minimize cross talk, ensuring high-speed, error-free transmission. Oh yeah, and it has a lifetime warranty. Photo courtesy Belkin, Inc.
When connecting peripherals, make sure that you use a cable that delivers the most performance—especially when you’re printing photographs. Many printers have more than one type of connection and some can have as many as three. If your printer has parallel and USB ports, use the USB connection, even if it means tossing away the parallel cable you used with your old printer. Some printers and a growing number of scanners have FireWire options. If speed is important to you, take advantage of these faster connections.
Hub Cap World
Since some older computers have just two USB ports, what happens when you plug in your keyboard (the mouse plugs into some USB keyboards) and a card reader? All of a sudden, there’s no room for your printer. Here come hubs to the rescue! A USB hub is a small device that plugs into one of your USB ports and allows you to plug more devices into it.
Hubs are available from many companies and are necessary when working with more than a few USB peripherals. The best hubs are those that offer AC power for those peripherals that draw power directly from the USB connection. Once you split the single USB path into four different directions, you may not have enough power for that last device—such as that USB drive you just inserted. AC powered USB hubs cost a little more than unpowered but are more practical for the serious digital imager.
Belkin’s TetraHub USB 2.0 4-Port Hub provides 480Mb/s for all Hi-Speed USB 2.0 devices and a dedicated 12Mb/s per port for all connected USB 1.1 devices. Photo courtesy Belkin, Inc.
|
Comparing Interfaces |
|
|
Performance may be one of the most important aspects in selecting which kind of computer connection you want to make. This chart compares various types of peripheral |
connections along with their data transfer rates in megabytes per second (MB/s) or megabits per second (Mb/s). |
Serial port | 115Mb/s |
Standard parallel port | 0.115MB/s |
USB | 1.5–12Mb/s |
USB 2.0 | 480Mb/s |
EPP | 3MB/s |
IDE | 3.2–16.7MB/s |
SCSI-1 | 5MB/s |
SCSI-2 | 10MB/s |
Ultra SCSI | 20MB/s |
FireWire | 12.5–50MB/s |
Ultra2 SCSI | 80MB/s |
Wide Ultra3 SCSI | 160MB/s |
While there are those, especially in the camera industry, who think photographers will connect their camera directly to computers using the cords they thoughtfully provided in the box with the camera, the reality is that the media and camera are often in different places at the same time: as in a situation where a long shoot is ongoing. Hence, the need for a card reader. All of the big three memory vendors offer a card reader with some similarities and some differences.
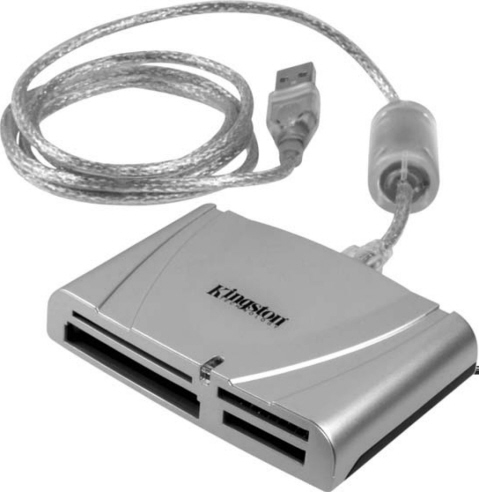
The Kingston USB 2.0 Hi-Speed 15-in-1 Reader comes with a 5-year warranty and free customer support. This sells for less than 25 bucks and supports CompactFlash Type I/II, SD, SD High Speed, miniSD, MMC, MMCplus, MMCmobile, MMCmicro (adapter required), RS-MMC, microSD (adapter required), Memory Stick, Memory Stick Pro, Memory Stick Pro Duo, SmartMedia, and the never popular Microdrive.
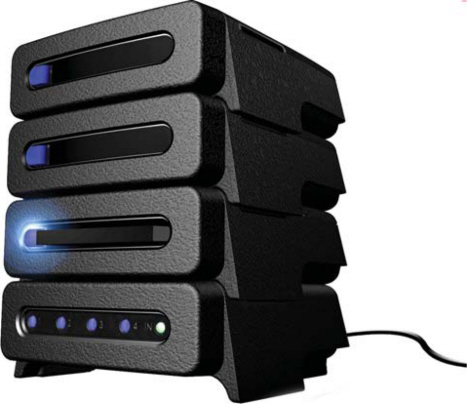
Lexar offers separate Lexar Professional CompactFlash Readers in both USB 2.0 and FireWire connections. The CompactFlash Readers are stackable and designed to connect multiple readers with a single connection. Up to four FireWire readers can be daisy-chained, and up to four USB 2.0 CompactFlash Readers can be connected via Lexar’s Professional 4-Port Hub for simultaneous image file transfers. The readers support Lexar’s ActiveMemory and LockTight technologies. With AMS, camera settings (in supported cameras) can be saved to the card to prevent having to re-enter these settings each time. LockTight prevents unauthorized people from accessing your image files.
Both Lexar models sell for a little over 60 bucks each, but stacking them and making simultaneous data transfers can save time for event photographers who need to get image files into the computer and printed in a hurry.
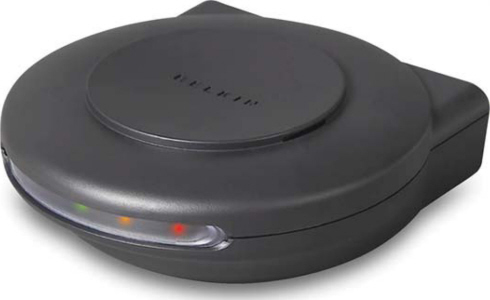
SanDisk’s ImageMate 12-in-1 is a multi-card USB 2.0 reader that like all USB 2.0 devices is backwardly compatible with the slower USB 1.1 ports. The ImageMate 12-in-1 has the ability to write data to and read data from CompactFlash Type I/ II, SD, miniSD, MMC, RS-MMC, Memory Stick including PRO, Duo, and PRO Duo, along with the mostly useless SmartMedia and xD cards.
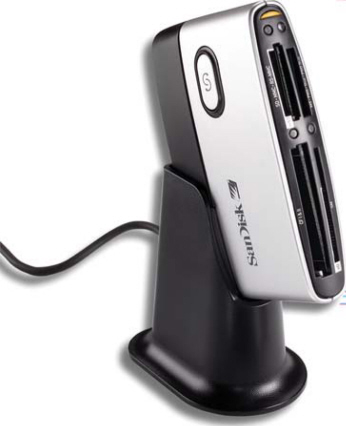
SanDisk’s $35 card reader can be used with or without a bundled and removable cradle. The cradle keeps it from getting lost on the desktop, but might be extra baggage on the road.
USB 2.0 has a raw data transfer rate at 480MB/s and it is rated at 40 times faster than its predecessor, the once ubiquitous USB 1.1. FireWire is rated at 400MB/s but there are differences in the way the systems are designed. Built from the ground up for speed, FireWire uses peer-to-peer architecture, and intelligent peripherals can negotiate bus conflicts to determine which device can best control data transfer. USB 2.0 uses the more traditional “Master-Slave” architecture in which the computer handles arbitration functions (that’s why it costs less) for managing data flow to, from, and between peripherals. Some people claim that this difference makes FireWire faster but my real world tests bore out the raw Mb/s numbers. Using a 2GB Kingston CF card with a mix of 83 RAW and JPEG images, the USB card readers transferred them to my hard drive in 26 seconds; the FireWire reader took 44 seconds. In all the testing done for this story, I attempted to reproduce what you could expect in real world usage, “your mileage,” as the EPA says, “may vary.”
|
When Good Cards Go Bad |
|
|
Memory cards fail for lots of reasons. Sometimes it’s the card’s fault, other times the camera, and often it’s (heaven forbid) the user who creates the problem. No matter whose fault it was, when my 4GB Lexar Professional CompactFlash card failed I reached for Picture Rescue (www.datarescue.com) software that will usually recover images from reformatted cards, but it couldn’t solve this particular problem. Next I tried ProSoft’s (www.prosofteng.com) Picture Rescue, but it wouldn’t work on this card either. The Image Rescue software included on every Lexar Professional CF card can recover lost or deleted JPEG, TIFF, and RAW files from erased, reformatted, or |
corrupted memory cards, but after recovering just a few files it stalled. Since Lexar Professional cards have a lifetime warranty, I contacted customer support, FedEx’ed my card off to Fremont, California, and waited with my fingers crossed. A week later (rescue time varies depending on their work load) I received a stack of CDs with 500 recovered images, and a replacement 4GB CompactFlash card. My wife Mary (www.maryfarace.com) is considering a return to professional photography. When she saw this play out, it helped make up her mind about what brand of memory cards she would use to shoot weddings. |
The Mouse That Roared
Maybe it’s time you gave your mouse a rest and switched to a graphic tablet. Long considered the province of the artist or designer, graphics tablets are also widely used the CAD (Computer Aided Design), digital photography, and presentation fields. If you are not currently using a graphics tablet, there are four reasons you should:
A stylus—or pen—is more natural to hold than a mouse, making the use of a graphics tablet one of the best ways to create original drawings and illustrations.
The human engineering aspects of a graphics tablets can, for some people, reduce the pain caused by carpal tunnel syndrome.
Presenters will find a graphics tablet and pen makes them more comfortable than using a one-, two-, or three-button mouse.
Graphics tablets are a much more accurate pointing and input device than a mouse.
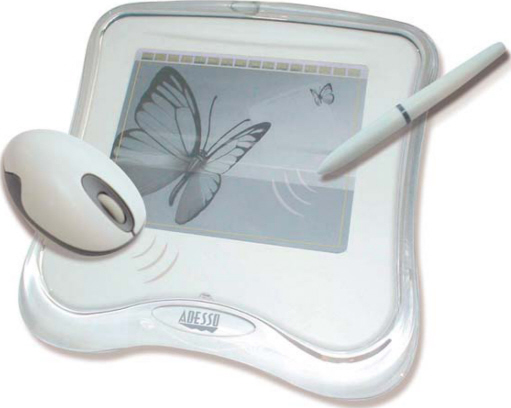
Adesso’s CyberTablet 12000 has a large 12 × 9 inch workspace offers the kind of fine-tuned sensitivity needed for photographic retouching. For $169.99, it includes an ergonomically designed wireless graphics tablet with a wireless two-button scroll-wheel mouse. Photo courtesy Adesso.
Graphics tablets are often called digitizing tablets because they convert images, graphics, and drawings into digital information. This now-digitized visual data can be entered into the computer for storage, analysis, modification, or archiving. While the product is referred to as a tablet, there really are two parts. The tablet itself and a pen—or stylus—is used to “draw” on the tablet’s sensitive surface. The tablet portion, which nowadays can be so thin as to be called a “pad,” contains a mechanism for sensing where on the surface a stylus is positioned. Its bed is divided into a high-resolution matrix that can respond to active or passive actions. (Active response is when the element is drawn and passive is after it is drawn.) Digital information is represented as the X–Y coordinates of where the pen is placed. The accuracy of graphics tablets and their ultimate performance is defined by resolution, accuracy, and linearity.
Resolution measures the number of points per inch a tablet can recognize and how fine a distinction it can make between adjacent points. Typical tablet resolutions vary from 25 to 1000 points per inch, but specifications for some high end CAD markets are higher. Higher-resolution devices naturally cost more, but tablets from the same manufacturer can cost as little as $129, or more than $2400—depending on resolution and size.
Accuracy measures the fidelity that the tablet is reproducing: the actual distance being measured vs. what happens on screen. A tablet that resolves 100 points per inch typically has an accuracy of 0.01 inches and units that resolve 1000 points per inch can exceed 0.005 inches of accuracy. By comparison, a human eye resolves approximately 5000 lines per inch at 10 inches. The average computer user’s accuracy will be plus or minus 0.01 inches, but a skilled CAD operator can usually beat this.
Linearity tells you how much variability there is in the first two parameters across your field of work.
All graphic tablet documentation contains these specifications and can be used to compare one product against another. Just keep in mind that your drawing or illustration needs may be different from an engineer designing parts for a Boeing 777.
Graphics tablets come in many configurations. The first variable is the tablet itself. Tablet size varies from 4 × 5 inches up to 44 × 60 inches depending on the manufacturer and your application. When manufacturers specify a size they are referring to the active area of the tablet; that is, its usable area and not the unit’s physical size. A tablet’s actual size will always be slightly larger. One of the advantages of a flexible tablet is that it can be rolled out on any surface and left in place, acting not just as a tablet but also as a permanent desktop or work area.
Some graphics tablets allow an option to use either a stylus or a mouse-like device called a cursor or puck. Pucks are commonly used in the CAD industry with larger tablets. Yet some companies offer small pads with a puck option. Styluses are available in several flavors, included corded and cordless models. Cordless models are further subdivided by having those that require batteries and those that do not. Batteryless cordless styluses are preferred over pens that use batteries because—if you do not have a battery—it makes it impossible to have the pen run “dry” when on a critical deadline. Instead, radio waves are sent by the pad to the stylus and are returned for position analysis—much like radar. Every 20 microseconds, a grid of wires in the pad alternates between send and receive. Since the grid provides power through resonant coupling, no batteries are required (don’t ask me how it works, it just does). In send mode, the signal from the pad stimulates an oscillation in the coil and capacitor circuit in the pen. In receive mode, the pen’s circuit oscillations are detected and are analyzed by the software to determine not only position but also pressure being applied.
Each of these configurations has advantages and disadvantages. Corded pens may be less convenient than cordless models but because they’re tethered to the tablet with an umbilical, you will never lose a stylus. Another advantage of corded stylus is that they are less expensive. Some pens feature the latest hot button features—erasability and pressure sensitivity. To erase work, users can activate the erasing function by pressing one of the two buttons on the side of the pen, instead of having to flip the pen over. Erasability may or may not be something you need. If you feel you would like this feature, make sure it is implemented in a manner you’ll be comfortable with and won’t accidentally activate. A pressure sensitive stylus lets you control the width of each pen stroke. The harder you rub, the more you erase.
Just What I Need
Anything you can do with a mouse, you can do with a stylus and graphics tablet. And there are some things a stylus does much better. Try writing your name with a mouse, and you will see what I mean. One area of clear stylus superiority is cursor placement. Instead of rolling a mouse to locate a cursor, just tap the pen on the tablet and that’s where the cursor appears. Don’t automatically assume a graphics tablet will make a perfect mouse substitute. Make sure the manufacturer includes software that lets the unit emulate your favorite mouse and has an easy, intuitive way to emulate mouse clicks.
If you’re not already using a graphics tablet, maybe you should. In addition to producing freehand drawings, a graphics tablet and stylus make working with image-editing programs such as Adobe Photoshop easier and more intuitive than using a mouse. There are several good reasons why using a graphics tablet and stylus makes the creation of graphics easier.
First, you will find that the cordless stylus or pen that’s part of every graphics tablet package—regardless of size—is more natural to hold than a mouse. Using a stylus and graphics tablet is one of the most natural ways to produce original drawings or illustrations because it’s just like holding a pencil, pen, or hunk of charcoal.
Second, the human engineering aspects of a graphics tablet can, for some people, eliminate the danger of pain caused by repetitive motion syndrome. Any small step you take to eliminate the possibility of carpal tunnel problems is a good idea. Studies have shown that the biggest advantage a stylus has over a mouse is there is less posture deviation from neutral during pen use than is typically experienced during mouse use. Excessive hand extension, as well as more lateral rotation of the hand at the wrist, was observed of people using mice. By comparison, both deviations and extensions were substantially less with stylus use. The bottom line for your health is that using a stylus results in a more neutral and natural posture than using a mouse.
Third, a graphics tablet is a much more accurate pointing and input device than a mouse. It’s tough to get more precise than a photograph, so your photomanipulation tools should be as precise as possible.