
CHAPTER |
|
3 |
Web Page Scripting: An Introduction to JavaScript |
The Google Maps API is a JavaScript library that exposes all the functionality required to embed a map in a HTML page and manipulate the map from within the page’s script. The API exposes its functionality through a number of objects, including the
Map object that represents the map on the page, the Marker object that represents the markers you place on the map, and many more. To take advantage of the API, you must provide scripts that manipulate the objects exposed by the API and these scripts must be written in JavaScript. This is not a limitation of the API; JavaScript is the only language that runs in the context of the browser and it’s supported by all browsers. The API itself is written in JavaScript so that you can include it in your scripts.For the sake of readers who are not familiar with JavaScript, I explore the JavaScript programming language in this and the following chapter. If you’re familiar with JavaScript, you can skip the two chapters and start your exploration of the objects of the Google Maps API in Chapter 5. If you’re familiar with other high-level languages, you can still skip the chapters covering JavaScript and return to them to look up a specific feature or the syntax of a specific method. The two chapters on JavaScript were written to help readers program the Google Maps API and they do not cover the language end to end.
What Is JavaScript?
JavaScript deserves the title of the most popular programming language, primarily because it’s the only language that can be used in web pages and be executed in the browser. As such, it runs on PCs, tablets, and smartphones. JavaScript, however, is not a “proper” programming language; it belongs to a special category of languages known as scripting languages. A scripting language is a lightweight programming language that does anything any typical programming language does, but has no visible interface and interacts with the user through the interface of the application that hosts it. When used with web pages, JavaScript interacts with the user through the web page displayed in the user’s browser. The most important aspect of JavaScript is that it’s supported by all browsers and the latest trend in application development is HTML5 and JavaScript.
Actually, there are three functions that allow scripts to interact with the user: the
alert() function, which displays a message to the user; the prompt() function, which prompts the user for a value; and the confirm() function, which requests the user’s confirmation to proceed. Figure 3-1 shows the three dialog boxes displayed by these functions and the statements that produced them.
Figure 3-1 On its own, JavaScript can interact with the user with these three dialog boxes.
To interact with the user in a friendlier manner, JavaScript must use the controls on the web page to which it belongs. The web page exposes the
document object, which represents the page being displayed. One of the document object’s methods is the getElementById() property, which retrieves an HTML element on the page by its ID. Let’s say that the web page contains an input box whose id property is user_Name. The input box can be placed on the page with a statement like the following:You can read the value entered by the user on this element with a statement like the following in your script:
Conversely, you can change the contents of this element by assigning a value to the same expression:
These statements appear in a function that’s called when a certain event takes place, usually the click of a mouse or a hyperlink. The
document object is a complex object that exposes a lot of functionality. It even allows you to create new elements on the page and/or hide existing ones by manipulating their visibility property.How to Test JavaScript Code
A script in an HTML page must be embedded in a pair of
<script> and </script> tags, which usually appear in the page’s <head> or <body> section. Here’s the simplest script you can write:
To test this script, create a new text file with the extension.html and place the following code in it. The very first line is optional, but strongly recommended; it indicates an HTML 5 page.

Then, locate the file in your drive and double-click its name. As long as the file’s extension is.html, it will be opened in your browser and you will see the alert box.
If you don’t want to have to create HTML files all the time, you can use an online JavaScript editor, such as JSFIDDLE. Direct your browser to http://jsfiddle.net/ and you will see a page with four empty panes, as shown in Figure 3-2. The panes aren’t empty in the figure, but when you first open the JSFIDDLE page, they will be.
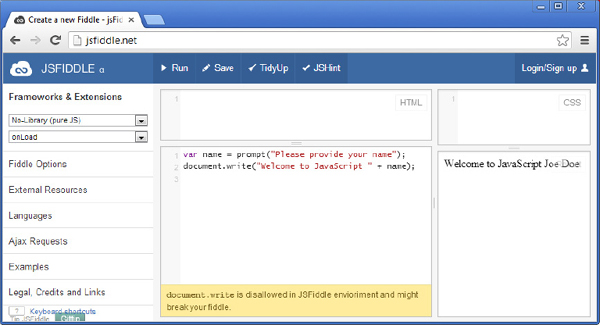
Figure 3-2 The JSFIDDLE online web page editor
Resize the four panes as you wish and for the time being ignore the HTML and CSS panes. Enter some JavaScript code in the JavaScript pane:

JSFIDDLE will display a warning to the effect that you shouldn’t be using the
document.write() method (as shown in the Figure), but go ahead and use it. After all, you’re only testing your code. Then, click the Run button to execute the script. Initially, you will see a welcome dialog box produced by the alert() function, and then you’ll be prompted for your name. As soon as you enter your name and click OK to close the dialog box, a message appears on the output page. Testing simple scripts is easy with JSFIDDLE, and the code segments you write in JSFIDDLE are usually referred to as “fiddles.” It’s not the only online JavaScript editor, but it’s a very popular one along with the Tryit Editor of w3schools (www.w3schools.com/jsref/tryit.asp).JSFIDDLE and Google Maps
To create a web page with a Google map in JSFIDDLE, you must import Google’s script into your custom script. To do so, follow this procedure:
1. Click the External Resources header in the left pane to see an input box. Enter the following string in this box: https://maps.googleapis.com/maps/api/js?&sensor=false&dummy=js.
The additional
dummy parameter will be ignored when the request is transmitted to Google’s servers, but you need to specify it to fool JSFIDDLE into thinking that it’s loading a resource with the extension .js.2. Then, click the button with the plus icon next to the input box. This adds the Google Maps API script to your page, and you can access its objects from within your script.
3. Insert the HTML code that creates the placeholder for your map in the HTML pane and the usual
initialize() function in the JavaScript pane.4. Finally, click the Run link at the top to view your page in the output window.
Figure 3-3 shows a fiddle with a web page that contains a Google map.
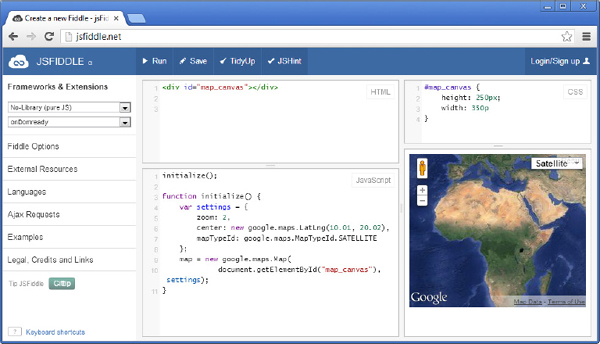
Figure 3-3 A page displaying a Google map designed and tested with the JSFIDDLE online editor
You enter your page’s HTML code in the HTML pane, and you enter the style definitions for your page in the CSS pane. In effect, you can use JSFIDDLE to build complete HTML pages with scripts and test them. For the purposes of this chapter, you simply enter JavaScript code in the JavaScript pane and execute it.
JavaScript’s Basic Syntax
Like any other language, JavaScript has its own basic rules and you must live by them. The first rule is that JavaScript is case-sensitive. Once you have declared the variable
age, you can no longer refer to it as Age or AGE. It’s absolutely valid, however (but certainly not recommended), to create three different variables named age, Age, and AGE.Blocks of statements in JavaScript are enclosed in a pair of curly brackets. Any group of statements that must be treated as a unit should appear in a pair of curly brackets. A function’s body as well as the body of an
if statement is also enclosed in a pair of curly brackets. The initialize() function, for example, was declared as follows:
All the statements that make up the
initialize() function are embedded in a pair of curly brackets following the function name. In effect, the curly brackets delimit a segment of code that should be treated as a unit.The following code segment demonstrates the use of the
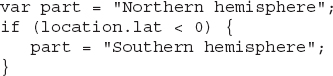
if statement. The block of statements in the curly brackets following the if statement will be executed only if the point variable represents a point in the Southern Hemisphere:
The
point variable represents a location and it exposes the latitude (property lat) and longitude (property lng) of the specific location. The following statement will create a variable that represents a location on the globe:The brackets are not required if the block is made up of a single statement:

The call to the
alert() function is a single statement, even though it’s broken into two lines to fit on the printed page, so the brackets are optional and were omitted.Statements in JavaScript are separated by a new line character, or by a semicolon (or both). If each statement appears in its own line, then you don’t have to use semicolons. You can place multiple statements on the same line, in which case you must separate them with a semicolon. Most developers, however, use semicolons at the end of each and every statement, even when semicolons are not required. The reason for this is that some obscure statements (you won’t find any of them in this book) do require the use of semicolons, so many developers use semicolons with JavaScript routinely. Others don’t. Most published JavaScript code segments use semicolons at the end of each statement, and the sample code in this book follows this practice. If you miss a few semicolons, however, it’s good to know that the JavaScript engine will still figure out where each statement ends.
As with any language, you can make your script more readable by inserting comments explaining the code. Comments are ignored by JavaScript and they’re meant for people reading the code. You can embed comments anywhere in a script as long as you prepend them with two slashes (//). Everything that follows the two slashes on the same line is considered to be a comment and ignored by the JavaScript engine:
Note that you can’t insert another statement after a comment; everything to the right of the two slashes is considered a comment. It’s also possible—and quite common actually—to insert comments in their own line:
You can also create multiline comments. To insert comments that extend over multiple lines, begin the comments with the characters
/* and end them with the same two characters in reverse order: */.
With these basic rules in mind, let’s start our exploration of the JavaScript language.
Variables and Data Types
The most important aspect of any language is the set of data types it supports. JavaScript supports the three basic data types supported by most languages: numbers, text, and dates. In addition, it supports the Boolean data type (
true/false values), and two special values, the null and undefined values. All numbers should be represented as 64-bit double precision values, but different JavaScript implementations store integer values differently.Variables are created with the
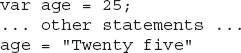
var keyword followed by the name of the variable. The var keyword declares the variable: It tells JavaScript to set aside a variable by that name. Variable names should begin with a letter or one of the two characters: $ (dollar sign) and _ (underscore). The remaining characters can be letters, numbers, and the two symbols mentioned. The letters can be any Unicode character; you can create variable names in any language. Just make sure that the variable name doesn’t begin with a number.In the following statements,
age is the variable name and 25 is its value:You can also combine the declaration and assignment steps into a single statement:
You need not specify a variable’s type when you declare it. In fact, you can’t specify a type for your variables; JavaScript determines the best type for any variable based on its content. You can also use the same variable to store values of different data types in the course of the application. For example, you can assign a numeric value to a variable so that you can use it in numeric calculations, and then assign a string to the same variable and print it:
JavaScript infers the variable’s type from its value at run time and this can simplify the code a lot. When you add two variables, for example, JavaScript will calculate their sum if they’re both numeric types:
The result is 10. Now change the value of the second variable to a string with the same value, as shown here:
JavaScript will concatenate them, because the second one is a string. The result this time will be the string
37. JavaScript figured out that it can’t add the two values numerically; it can only concatenate them as strings. The plus operator has a dual role: It adds numbers and concatenates text.Let’s introduce a third variable. What do you think will be the result of the following statement?
JavaScript processes expressions from left to right. It will add 3 to 7 and reduce the expression to
10 + "5". Now it has to add a number and a string, and it will perform a concatenation. The result will be the string “105”. The evaluation of the preceding expression was mentioned here to help you understand a little better how JavaScript evaluates expressions, but you should never use such statements.By the way, JavaScript doesn’t require that variables be declared before they’re used. If you assign a value to a variable that hasn’t been declared, a new variable will be created on the spot. If you attempt to evaluate an expression that contains a variable that hasn’t been declared, however, a run-time error will occur.
null and undefined are two special values and they usually confuse beginners. When you attempt to access a variable that doesn’t exist, JavaScript will return the value undefined: it means it can’t even locate the variable. The null value, on the other hand, means that the variable has no value. We frequently set a variable to null to indicate that it has not been assigned a value yet. If you misspell property or variable name in your code, JavaScript will generate the “undefined variable” error at run time.Arithmetic Operations
JavaScript supports all arithmetic operators (+ and – for addition/subtraction, * for multiplication, / for division, % for modulus division) and two unary operators: the
++ to increase a numeric value by one, and the -- operator to decrease a numeric value by one. The following are all valid statements for arithmetic operations:
The last statement increases the value of
c by one and is equivalent to the following:The
+ operator can also be applied to variables that hold text, in which case it concatenates them and produces a new longer string. If you attempt to add a string and a numeric value, the result is always a string.The equals (=) symbol is the assignment operator: it assigns the value that appears to its right to the variable to its left. The left part of an assignment operator is always a variable that accepts the value. The right part can be a literal (a number or string), but it can also be an expression. In this case, JavaScript evaluates the expression and then assigns it to the variable. It can also be a function that returns a value. As you recall from the preceding chapter, the
Map object’s getZoom() method returns the current zoom level of the map, which is an integer. The following statement stores the current zoom level to a variable:The assignment operator can be combined with any of the arithmetic operators, as in the following example:
The last statement adds the value shown to the right of the
+= operator to the value of the zoomLevel variable and stores the result to the same variable. The += operator is a shortcut for this statement:The
*= operator works in the exact same manner, only instead of adding the value to the variable, it multiplies the variable by the specified value.The
zoomLevel variable is not associated in any way with the map, of course. To change the map’s magnification level, you must call the setZoom() method, passing the updated zoomLevel variable as an argument:You can also combine the two statements into a single one:
Note that
getZoom() is a method and not a variable, and an expression like map.getZoom()++ is absolutely meaningless.Math Operations
Typical applications do not involve more than basic arithmetic, but JavaScript supports many mathematical and trigonometric functions, which are contained in the Math library. Mapping applications are an exception and they may involve some serious math (you will see some non-trivial math calculations later in this book). The Math library exposes the following functions.
| Function | Description |
abs(v) |
Returns the absolute value of the numeric value v. |
acos(x) |
Returns the arc that corresponds to a cosine of x in radians. |
asin(x) |
Returns the arc that corresponds to a sine of x in radians. |
atan(x) |
Returns the arc that corresponds to a tangent of x in radians. |
atan2(y,x) |
Returns the arc that corresponds to a tangent of the quotient of its arguments. |
ceil(v) |
Returns the value of the argument v rounded to the nearest larger integer. The name of the function comes from “ceiling” and the ceiling of 3.1 is 4, while the ceiling of –3.1 is –3. |
cos(x) |
Returns the cosine of x. The arguments x must be specified in radians. |
exp(x) |
Returns the value of e raised to the power x. |
floor(v) |
Returns of the argument v rounded to the nearest smaller integer. The floor of 4.1 is 3, while the floor of –3.1 is –4. It’s equivalent to the ceil() function, but it rounds in the opposite direction. |
log(x) |
Returns the natural logarithm (base e) of x. |
max(x,y,z,…) |
Returns the largest number from its list of numeric arguments. |
min(x,y,z,…) |
Returns the smallest number from its list of numeric arguments. |
pow(x,y) |
Returns the value of x to the power of y. |
random() |
Returns a random number between 0 and 1. |
round(x) |
Rounds x to the nearest integer. The function round(3.1) returns 3 and the function round(3.9) returns 4. The value that lies halfway between two integers in rounded to the next larger integer. |
sin(x) |
Returns the sine of x. The argument x must be specified in radians. |
sqrt(x) |
Returns the square root of x. |
tan(x) |
Returns the tangent of x. The argument x must be specified in radians. |
In addition to the functions, the Math library provides a few common mathematical constants, which are here.
| Constant | Description |
Math.E |
The base of natural logarithms e (2.718281828 approximately) |
Math.PI |
The famous Greek π (3.14159 approximately) |
Math.SQRT2 |
The square root of 2 |
Math.SQRT1_2 |
The square root of 1/2 |
Math.LN2 |
The natural logarithm of 2 |
Math.LN10 |
The natural logarithm of 10 |
Math.LOG2E |
The 2-base logarithm of e |
Math.LOG10E |
The 10-base logarithm of e |
The following methods, finally, allow you to convert numeric values to different formats.
| Function | Description |
toExponential(n) |
Converts a number into an exponential notation |
toFixed(n) |
Formats a double value with n decimal digits |
toPrecision(n) |
Formats a number with n decimal digits |
toString() |
Converts a number to a string |
valueOf() |
Returns the numeric value of a string that represents a number |
Working with Text
Variables that store text are called strings (from “character strings”) and the text is always embedded in single or double quotes (as long as you use the same quote). The reason for allowing two different delimiters in strings is that you may have to embed the delimiters themselves in your text. Notice the following two assignments:
You can still use single quotes to delimit some text that contains the same character, as long as you escape the single quote with the character in front of it:
If you don’t escape the single quote in the text, JavaScript will think it has reached the end of the string and will attempt to interpret the rest of the string as code, which will result in an error. In most cases, you will get the “unterminated string” error.
The same escape character can be used to produce special characters in JavaScript. These special characters are
for a tab,
for new line, and
for a carriage return.Text Manipulation Methods
Even though what computers do best is calculations, typical applications contain many more statements that manipulate text than statements to perform math calculations, and it’s no surprise that all languages come with a large set of methods for manipulating text.
The
string object exposes a number of methods for manipulating text. It also exposes a property, the length property, which returns the length of a string. To call the length property, append its name to the name of a variable that stores text using the period as a separator:Two of the simpler methods are
toLowerCase() and toUpperCase(), which return the string they’re applied to in lowercase or uppercase, respectively:The following sections describe the most commonly used methods of the
string object.indexOf(string), lastIndexOf(string) The indexOf() method accepts a character or a string as an argument and returns the location of the first instance of its argument in the string to which it’s applied. The index of the first character in the string is 0, not 1. The following expressions both return 4:and
The
lastIndexOf() method is similar, but it searches from the end of the string. If you search for the last index of the character “a” in the string “JavaScript,” it will return the value 3 (the zero-based position of the last “a” in the string).NOTE The
indexOf() and lastIndexOf() methods perform case-sensitive searches. To perform case-insensitive searches, convert both strings to upper- or lowercase:Using the string “SCRIPT” in the place of the expression
“script”.toUpperCase() would make the code a bit simpler. If you decide to replace the literal “script” with a variable, however, you have to use the method toUpperCase(). This odd expression was included in the example to demonstrate the flexibility of objects. The string methods apply not only to text variables, but also to text literals.charAt(position) The charAt() method accepts an integer value as an argument and returns the character at that location. The following expression will return “S”:replace(string_to_replace, replacement_string) The replace() method accepts two arguments: the string to be replaced and the string to be replaced with. The replacement_string replaces all instances of string_to_replace. The following statement changes all instances of “blue” in the instructions variable to “red”:The rest of the string remains the same. Note that the preceding statement will also replace the “blue” in “blueberries.”
The
replace() method’s first argument can be a regular expression, so you can replace patterns instead of plain text, but regular expressions aren’t discussed in this book. For readers familiar with regular expression syntax, here’s a simple example. The following expression replaces all e-mail addresses with a dummy string to mask personal data from the text:
If you execute the preceding statements, they will generate the following output:

The expression
/S+@S+.S+/ is a regular expression, which is a pattern matching mechanism. Instead of a literal, it matches all valid e-mail addresses in the text (segments of the text that start with a word, followed by the @ symbol, then another word, a period, and then yet another word). The first and last characters in the example delimit the regular expression. As you can see in the example, it’s not a perfect regular expression because it treated the comma following the e-mail address as part of the match. A regular expression for catching all valid e-mail addresses in the text is much longer (you can Google it), but this simple regular expression gives you an idea of the enormous flexibility you can embed in your scripts by means of regular expressions.search(string) The search() method searches a long string for a specific string, specified by its argument, and returns its position within the larger string, or –1 if the specified substring doesn’t occur in the longer string. It’s quite similar to the indexOf() method, only the search() method’s argument can be a regular expression to locate patterns of text. Like the indexOf() method, the search() method performs case-sensitive comparisons.split(delimiter) The split() method splits a large string into smaller ones using its argument as delimiter. If you have a list of comma-delimited values, you can generate an array with the numeric values with a single call to the split() method:The
values variable is an array (arrays are variables that store multiple values and are discussed shortly) with the values 32.2, –41.9, and 9.2.substr(start, count) and substring(start, end) Both methods return part of a string. The substr() method returns a number of characters starting at a specific location in the string, and its syntax iswhere
start_index is the index of the first character to be selected and count is the number of characters to be selected. The substring() method does the same, but it accepts different arguments: the indices of the first and last characters to be selected. The syntax of the substring() method isThe expressions:
and
will return the strings “Java” and “Script,” respectively.
toLowerCase(), toUpperCase() These two methods convert the string into lower-and uppercase, respectively.Working with Dates
Another very important set of statements in any language deals with dates. Dates in JavaScript are stored internally as the number of milliseconds since January 1, 1970. Dates prior to this one are presented by negative values. To specify a date value, use a string that represents a date and pass it as an argument to the
parse() method of the Date object. The following statements will generate valid date values:
All three variables represent the same date. If you display the value of any of these variables with the statement:
you’ll get a number like 1,423,778,400,000, which is the number of milliseconds from January 1, 1970 to the specified date. To display an actual date, you must create a new
Date object from this number, and then call its toDateString() method:This statement produces a date like “Fri Feb 13 2015.”
The following methods of the
Date object allow you to manipulate dates in JavaScript:| Function | Descriptions |
getDate() |
Returns the day of the month (an integer value in the range 1–31) |
getDay() |
Returns the day of the week (an integer value in the range 0–6) |
getFullYear() |
Returns the year (a four-digit integer value) |
getHours() |
Returns the hour (an integer in the range 0–23) |
getMilliseconds() |
Returns the milliseconds (0 through 999) |
getMinutes() |
Returns the minutes (0–59) |
getMonth() |
Returns the month (an integer value in the range 0–11) |
getSeconds() |
Returns the seconds (0–59) |
getTime() |
Returns the number of milliseconds since midnight Jan 1, 1970 |
getTimezoneOffset() |
Returns the time difference between UTC time and local time, in minutes |
parse() |
Parses a date string and returns the number of milliseconds since midnight of January 1, 1970 |
setDate() |
Sets the day of the month of a date object |
setFullYear() |
Sets the year (four digits) of a date object |
setHours() |
Sets the hour of a date object |
setMilliseconds() |
Sets the milliseconds of a date object |
setMinutes() |
Set the minutes of a date object |
setMonth() |
Sets the month of a date object |
setSeconds() |
Sets the seconds of a date object |
setTime() |
Sets a date and time by adding or subtracting a specified number of milliseconds to/from midnight January 1, 1970 |
toDateString() |
Converts the date portion of a Date object into a readable string |
toISOString() |
Returns the date as a string, using the ISO standard |
toJSON() |
Returns the date as a string, formatted as a JSON date |
toLocaleDateString() |
Returns the date portion of a Date object as a string, taking into consideration the user’s locale |
toLocaleTimeString() |
Returns the time portion of a Date object as a string, taking into consideration the user’s locale |
toLocaleString() |
Converts a Date object to a string, taking into consideration the user’s locale |
toString() |
Converts a Date object to a string |
toTimeString() |
Converts the time portion of a Date object to a string |
toUTCString() |
Converts a Date object to a string, according to universal time |
UTC() |
Returns the number of milliseconds in a date string since midnight of January 1, 1970, according to universal time |
valueOf() |
Returns the primitive value of a Date object |
In addition to the
get…() and set…() methods, which use the client computer’s date and time, there are the getUTC…() and setUTC…() methods, which use UTC date and time.Control Flow Statements
Control flow statements are a central part of any programming language; they allow applications to take a different course of action, or execute a number of statements repeatedly, depending on a condition. All control flow statements are based on conditions: When the condition is true, the code executes a block of statements. When the condition is false, an alternate block of statements is executed. JavaScript supports two categories of statements that control the flow of the script: the
if statement, which executes or skips a block of statements depending on the outcome of a comparison, and two looping statements, the for and while statements, which execute a block of statements repeatedly.Conditional Statements
JavaScript, like nearly all languages, provides the
if statement, which allows your code to take a different path depending on the outcome of a comparison. Some languages use variations of the if statement with different names (ifTrue, for example), but most modern languages use the if keyword for the conditional statement. There are three variations of the if statement:•
if statement Executes a code block only if the specified condition is true•
if…else statement Executes a code block if the specified condition is true and another block if the condition is false•
if…else if…else statement Selects one of many blocks of code to be executed based on consecutive comparisons•
switch statement Executes one of many code blocks depending on the outcome of a single comparisonThe
if StatementThe
if statement evaluates a logical expression and if the result is true, it executes the associated code block. Otherwise, program execution continues with the statement following the code block associated with the statement. The syntax of the if statement is quite simple:
and here’s a trivial example:
The syntax of the
if…else statement is identical, but it contains the else keyword followed by the code block that will be executed if the condition is false. Here’s an alternate way to code the same operation: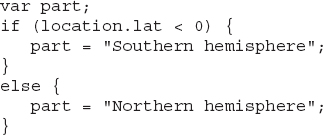
Because each clause of the
if structure contains a single statement, the curly brackets aren’t mandatory:
(The semicolons aren’t mandatory either, but as mentioned earlier, all statements in this book’s code samples are terminated with a semicolon.) The following example uses nested
if statements to handle three cases: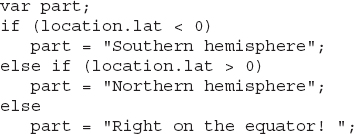
Logical Expressions
The expressions evaluated by the conditional statements must return a true/false value; you can use the following operators to compare values:
== |
Equal to |
!= |
Not equal to |
=== |
Strictly equal to |
< |
less than |
<= |
less than or equal to |
> |
larger than |
=> |
larger than or equal to |
You can also combine multiple comparisons with the following logical operators:
&& |
Logical and |
|| |
Logical or |
The following expression evaluates to
true if the variable a exists and it’s smaller than 8:
The difference between the equals and strictly equals operators is that the equal to operator compares values, but the strictly equal to operator compares values and types. The comparison 3 == “3” evaluates to
true, but the expression 3 === “3” evaluates to false because the first value is a number and the second one is a string. Their values match, but not their types.Why don’t we simply compare the two variables in the preceding
if statement? The following comparison may cause a run-time error:
The problem with this statement is that it will fail if the
a variable hasn’t been declared. The correct statement makes sure the variable exists before attempting to use its value. If the variable hasn’t been declared yet, the expression will evaluate to false.The
switch StatementThe
switch statement is just an alternative to multiple nested if statements. Use the switch statement to select one of many blocks of code to be executed.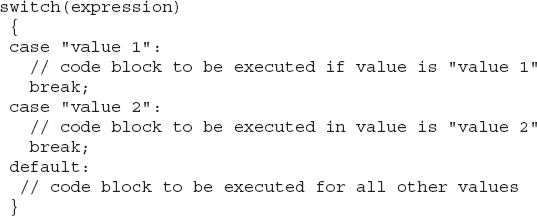
This is how it works: First the expression in the parentheses following the statement name is evaluated. This is not a logical expression; the result of the evaluation can be a number, a string, even a date. Then, the result of the evaluation is compared with the values of each
case in the structure. If there is a match, the block of code associated with that case is executed. The break statement isn’t mandatory. If all cases are not mutually exclusive, then the expression evaluated at the top may match multiple cases.You can also combine multiple values in the same case clause. The following script calculates the days in every month and handles three groups of months: the months with 31 days, the months with 30 days, and February. To calculate the number of days in February, the code examines the year, and if it’s a leap year, February has 29 days, otherwise 28.

Note the use of the
break statement. The switch statement may encounter multiple cases that meet the criteria. If you want to exit the switch statement after the first matching case has been executed, use the break statement. The cases in this example are mutually exclusive and the break statement is not required. It’s a good practice, though, to break out of a switch statement as soon as possible to avoid unnecessary comparisons.Looping Statements
Another common flow control structure in programming is the loop. Quite often, you want to repeat the same process over a large set of data, once for each data point. In these cases, you use a loop to iterate through the data. JavaScript provides two different statements for looping. If the number of iterations is known ahead of time, you use the
for loop. If the number of iterations is not known beforehand, such as when you iterate through data points read from a remote service, you use a logical expression to end the iteration process. In these cases, you use a while loop. And there are, of course, variations on these loops.The
for LoopThe
for loop has the following syntax:
statement 1 is executed before the loop starts and this is where you initialize the variable that will act as a counter for the loop. statement 2 defines the condition for repeating the loop, and it’s usually the maximum value that the counter can reach. statement 3 is executed after each iteration of the loop. It’s actually simpler than this description implies. Here’s the for statement that iterates through the elements of the array months: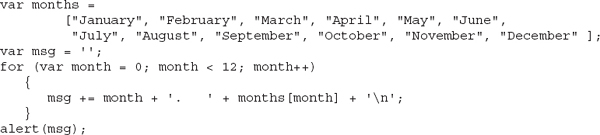
This code segment displays the month names prefixed by their number in a dialog box. To check it out, you can paste it in the JavaScript pane of JSFIDDLE as is and click the Run button. The first statement in the parentheses following the
for keyword sets the counter, which is the month variable, to its initial value. The name of this variable can be any variable name. Following this, the next statement defines when the loop will terminate. It actually defines the condition that must be true for the loop to continue. In the case of the example, the counter must be less than 12. The last statement in the parentheses increases the value of the counter variable by one, so that the loop handles a different month each time.Instead of hardcoding the value 12 in your code, you can implement the loop as follows:

JavaScript allows you to write totally distorted code by moving the statements qualifying the
for statement outside the loop:
There are developers who think this is clean code (they’re probably old hardcore C++ developers). Writing obscure looking code just because you can does not make you a good programmer. Quite the opposite in fact.
You can even omit the statement that tells the loop whether to repeat the loop or not, by embedding this logic into the loop’s body:

The code segment shown here uses the
break statement to break out of the loop after the number of iterations has been exhausted.The last statement in the parentheses usually increments (or decrements) the counter variable, but you can skip even this statement and perform the operation in the loop’s body. However, you can’t skip the semicolons.
The
for in LoopA variation of the
for loop allows you to iterate through the elements of an array or through the properties of an object (objects are discussed in detail in the following chapter). Here’s an alternate form of the for statement to loop through the elements of an array:
If the variable specified in the
for in loop is an object, the loop will iterate through the properties of the object. Even though objects are discussed in the following chapter, here’s a simple example that demonstrates this use of the for in loop:
This loop will store in the
txt variable the values of the properties of the poi object; these values are the name of the point of interest and its coordinates. The preceding code segment generates the following output:
The extra decimal digits were introduced by the internal representation of the longitude value. The specified value can’t be represented exactly as a binary value, so JavaScript introduced some extra decimal digits.
The
while LoopThe
while loop repeats a code block when a condition is true, similar to the for loop, but there’s no counter variable and there’s no need to know the number of iterations ahead of time. The structure of the while loop is as follows:
Here’s how you can iterate through the elements of the months array with a while loop:

Why is the expression
months[i] true, and when does it become false? This expression returns a value that’s not undefined as long as the index value corresponds to an item in the array. When the variable i becomes 12, the element months[12] will return the value undefined, which is treated as a false value.The
do…while LoopThe
while loop tests the condition at the beginning of the loop. If the condition is initially false, the loop’s body won’t be executed at all. There are situations where you want the loop to be executed at least once, and this is when you use the do…while variation. The do…while loop executes the code block and then tests the condition. Then it keeps executing the code block for as long as the condition is true. The following is the structure of this loop:
The following loop keeps prompting the user for numeric values and adds them. To stop the loop, the user must enter the value 0 (or nothing):

Functions
Functions are groups of statements that are executed frequently, so they are put together to form a unit of code that can be called by name. A function has a name and it’s followed by a block of code in curly brackets. The following function displays the map’s center coordinates and the current zoom level, and it may be used in several parts of an application. Instead of repeating the same statements all over the script, you can package them as a function and use the function name just like the built-in functions. Assuming that the page contains two
<div> elements named “coordinates” and “zoom,” the following function displays the relevant data on these two elements:
Every time you need to display the map’s data on the two auxiliary elements, you can call the
showMapData() function as if it were a built-in JavaScript function.The
showMapData() function is a very simple function that extracts the data it requires from the Map object and displays it on the two elements. Most functions accept arguments, which are the values on which the function’s code acts. Let’s consider a function that sets the map’s center and zoom level:
The
centerMap() function accepts three arguments: the coordinates of a location and a zoom level. The function’s code centers the map at the specified location and changes the zoom level. To reposition the map from any place in your script, you can call the centerMap() function as follows, as if it were one of JavaScript’s built-in functions:Instead of passing the two coordinates as numeric values to the function, you can rewrite the function so that it accepts a
LatLng object as an argument. Here’s the revised centerMap() function: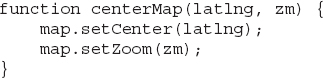
This function should be called slightly differently:
Finally, if you want to pan the map but not change its zoom level, call the
centerMap() function as follows:Figure 3-4 shows a short script in JSFIDDLE that demonstrates the
centerMap() custom function. In the same figure, you will see an odd statement: zm = zm * 1. The prompt() function returns a string, but the zoom factor must be an integer value. By multiplying the zm variable by 1, you force it to become a numeric value without affecting its value. You could use the parseInteger() method, too, but the technique shown here is a quick and dirty method to convert strings to numbers.
Figure 3-4 Exercising the
centerMap() function with JSFIDDLEEarlier in this chapter, you wrote a few statements to calculate the number of days in a given month. If you need this functionality in your code, you should implement a function that accepts the month and year and returns the number of days in the month. By packaging the code you have already tested in a function, you can reuse it in your script by calling the function with the appropriate arguments every time. Here’s the
daysInMonth() function: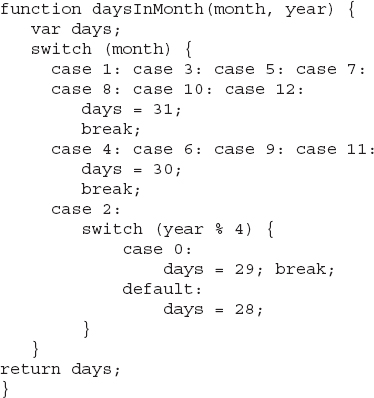
To test the new function call it as:
Place this statement followed by the definition of the function in the JavaScript window of JSFIDDLE and run the code.
Arrays
In practice, data come in sets rather than isolated values. To store multiple data in a single variable, you use arrays. Arrays are variables with multiple values and you access the individual values with an index. The following statements create an array and store three values in it:
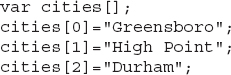
The first element is at position 0 of the array, the second element at position 1, and so on. The numbers following the array name in square brackets are the indices that specify the order of the value you want to set, or read, in the array.
It’s also possible to assign values to the elements of an array in the same statement that declares the array with an array initializer:
The following is another notation to declare an empty array variable, and it’s totally equivalent to the one used in the preceding sample code:
Because the values are embedded in a pair of square brackets, JavaScript knows it’s an array and you can omit the brackets following the array name:
Array values can be objects. The following statement initializes an array with the coordinates of the same three cities:

An object is any data type other than the basic ones (numbers, strings, dates, and the special values). While the basic data types are built into the language, objects are imported into the script. When you include an external script (such as the script for Google Maps) in your own script, the objects defined in the external script become available to your code. You already know one of the objects exposed by the Google Maps API, the
LatLng object, which represents a point on the earth’s surface. If you attempt to create a new google.maps.LatLng object without importing the appropriate script from Google, a run-time error will occur when you attempt to create a variable of the LatLng type. If you insert the <script> statement that references the Google script, which contains the definition of the LatLng object, then this and a host of other objects become available to your script.Not only can arrays store objects, but they can store objects of different types. The following array contains numbers, strings, and custom objects:
The
earthquake array stores the earthquake’s magnitude (a numeric value), its location (a LatLng object), and the region (a string value). Things can get even better with arrays: If you declare multiple arrays, each one containing an earthquake’s data, you can create an array in which each item is an array! Assuming that you have created three array variables to represent earthquakes, you can store all of them in a new array:The three variables that make up the
earthquakes array are themselves arrays and they contain elements of different data types.Array Properties and Methods
Arrays provide a number of properties and methods you can use to manipulate their contents. The number of elements in an array is the array’s length and you can request the count of the elements with the
length property. The expression:returns an integer, which is the number of items or elements in the array to which it’s applied. The index of the first element is 0, and the index of the last element in the array is the length of the array minus 1.
If you add a new element to the
cities array, its index should be 3. If you skip this index or you intentionally specify the value of an element with a higher index, the ones in-between will be left blank. It’s totally valid to add an element at index 4. The fourth element, whose index is 3, will be blank. If you execute the following statement:the
cities array will contain four elements, and you can verify this by requesting the length of the array with the length property:The elements at index values 0, 1, 2, and 4 have valid values. The element
cities[3] has a peculiar value—it’s undefined. The two alert statements that follow will print the contents of the first and third elements in the array:and they will produce the following output:
The value
undefined is a special one that indicates that the variable (the array element) has not been initialized yet. All variables that have not been assigned a value are undefined. After the execution of a statement that assigns a value to them, they have a proper value. To avoid undefined elements in an array, here’s how you should add new elements to an array:The length of an array is equal to the last index in the array plus one, so the position
cities.length corresponds to the next available element in the array. Consider an array with three elements, which have the indices 0, 1, and 2. The length of the array is 3 and the index of the next available position in the array is also 3.Or, you can simply call the
push() method, which accepts as an argument a value and appends it to the array. To remove the last item in the array, use the pop() method, which removes the element at index array.length - 1 and returns it. After the execution of the pop() method, the length of the array is decreased by 1.The
reverse() method reverses the order of the elements in the array. If you have an array sorted in ascending order, you can call the reverse() method to sort the array in descending order. The reverse() method reverses the element in-place: it rearranges the elements in the array.The
indexOf() method allows you to retrieve the index of a specific element in the array. If you need the index of the “Rome” value in the cities array, call the following method:You will use the
indexOf() method when you want to remove a specific element from the array, or when you want to insert elements right after a specific element in the array. You can also use this method to find out if the array contains a specific element. If the indexOf() method returns –1, then the element you specified as an argument to the method does not belong to the array.Sorting Arrays
Finally, the
sort() method sorts the elements of the array. If the array contains simple values, such as strings or numbers, the sort() method sorts these values easily and returns the sorted array. It does so because it knows how to compare the basic data types (strings, numbers, and dates). If the array contains custom objects, however, the sort() method doesn’t know how to sort the objects. To sort an array of custom objects, you must supply the name of a function that knows how to compare two instances of the custom object. All sorting algorithms work by comparing and swapping elements. The swapping part is straightforward, but the comparison operation is not trivial. How do you compare two LatLng objects, for example? In some applications, you might wish to sort locations from west to east, or north to south, in which case you would compare the lat() or lng() properties of the LatLng objects, respectively. If you wish to sort the locations according to their distance from the equator, you’d use the absolute value of their latitude in your comparisons. The first step is to determine how the custom objects should be compared in a way that makes sense to your application. Then, you must implement this comparison as a custom function and pass the name of this function as an argument to the sort() method.The custom function should return zero if the two objects are equal, in which case no further action need be taken (the elements need not be swapped). If the first object should appear before the second one, then the custom function should return a negative value. Finally, if the second value should appear before the first one, the custom function should return a positive value. Here’s a custom function that sorts
LatLng objects based on their distance from the equator:
To use the
sort() method with a custom comparer, pass the name of the function that compares two elements as an argument to the sort() method:You can also use an inline function to perform the comparison:
An inline function is like a regular function, but the entire function definition is passed as the argument to the
sort() method. In the last example, the order of the variables p1 and p2 in the return statement is reversed, and this is how you sort arrays in descending order.To iterate through the elements of an array, set up a
for loop that goes through all elements of the array:
Another type of loop is the
for…in loop, which has the following syntax:
Note that the
city variable doesn’t represent the current element at each iteration; it’s the index of the current element. Even if some of the array’s elements are undefined, the code will skip the indices that correspond to these elements.Slicing and Splicing Arrays
Two very useful methods of the array object are the
slice() and splice() methods. The slice() method returns a segment of the array and accepts as arguments the starting and ending indices of the desired segment. The splice() method removes some elements from the array and inserts another array in their place. If you don’t specify an array to be inserted, the splice() method simply removes the specified elements. This method returns a new array that contains part of the original array. The following statement returns an array that contains the second, third, and fourth elements of the cities array:The selected subset of the array is stored in the
cities1 array.The
splice() method modifies an array by replacing a section of the original array with new elements. If you don’t specify the replacement array, then the splice() method will simply remove the specified elements. The following is the syntax of the splice() method:The method removes
count elements starting at the index specified by the first argument and inserts in their place the elements of the newArray array. One of the forms of the splice() method that you will see in several sample applications in the rest of the book removes a single item from an array. To remove the element at position i in the array, call the splice() methods as follows:Let’s look at a practical application scenario. The array
markers stores all the markers you have placed on a map to identify points of interest. When the user clicks a marker to select it, this instance of the Marker object is stored in the variable selectedMarker. To remove the selected marker from the markers array, you must locate the selectedMarker object’s index in the markers array and then call the splice() method with the appropriate arguments:The first statement is a loop without a body! The second statement is not part of the
for statement because the for statement ends with a semicolon. I mentioned at the beginning of this chapter that the semicolon isn’t required, but this is a case where you must place a semicolon to indicate the end of the loop. Without it, JavaScript would think that the next statement is the body of the loop.The loop keeps increasing the value of the counter variable
i for as long as the markers[i] element is not the same as the selectedMarker object. When the selectedMarker is found, the loop breaks and the i variable maintains the value it had when the desired element was located in the array; its value is the index of the desired element in the array. The second statement in the code segment removes the ith element in the markers array by calling the splice() method.NOTE If you’re familiar with other high level languages (such as the .NET languages), you’re probably wondering why the i variable maintains its value outside the loop in which it was declared. In JavaScript, the scope of variables is limited to a function and not a block of code. A variable declared in a
for loop is visible inside the function that contains the declaration and not just the block that contains the declaration.The following function demonstrates how to set up arrays in JavaScript and how to use the
slice() and splice() methods. You can copy the following code as is in JSFIDDLE and use it as a starting point to experiment with arrays:
The script sets up an array with some ancient cities, the
ancientCities array. It extracts one of them with the slice() method, which requires that you know the position of the desired element in the array. Then it extracts the same city, but this time it locates the element “Rome” in the array and then uses the value returned by the indexOf() method as an index to the array.After that, a new array with the names of a few modern cities is declared, the
modernCities array. The two arrays are then appended into the cities array with the splice() method. The cities array is initially empty and the code uses the expression cities.length-1 as the index of the first available element in the array. This is where each array is inserted with the splice() method.You should keep in mind that the
slice() method returns a segment of the array, but it doesn’t remove this segment from the array. Unlike the slice() method, which does not alter the array, the splice() method does modify the array: It can remove elements, insert new elements, and replace existing ones with new values.Summary
With the basics of HTML and JavaScript out of the way, you’re now ready to explore some more advanced topics in coding with JavaScript. In the following chapter, you will find a few practical examples related to maps. You will learn about JavaScript’s object manipulation features, and you’ll see examples of how to handle some of the simpler objects of the Google Maps API. In Chapter 5, you’ll explore the basic objects of the API in more detail and you will start developing practical map-enabled web applications.
..................Content has been hidden....................
You can't read the all page of ebook, please click here login for view all page.