4. Preparing for the Shoot

There’s a reason that photography is called a visual art—no one takes a photograph blindfolded. We look, frame, consider lighting and shadows, and then select aperture, shutter speed, and ISO. How much of the subject should we capture? Are there distractions? I’ve stood on a ladder picking dead leaves from a plant to make it more photo worthy, but it’s not like we should cut down the entire tree to alter the scene. However, there are other ways to visually alter the subject without actually touching it—and that would come in handy if you’re shooting a grizzly bear!
One common technique to visually alter an image is to shoot photographs of reflections in windows or water, either as abstract forms or distorted visions of reality. For my work, I wanted to extend that technique to intentional—rather than opportunistic—distortions. So in this section, we’ll start looking at an indirect view of the world, filter reality, so you can make it your own.
Hint
Throughout this section we’ll be making filters and screens to alter the scene, but keep your eyes peeled for any transparent material that can become something unique to use as a filter.
In this chapter we’ll look at the techniques and tools that will help prepare us to view our filter reality.
Unexpected Inspiration
These images remind me a bit of ones taken by a camera obscura, but instead of projecting an image to another surface, I rely on reflections or distortions in another material. Images like these, especially using a serendipitous reflection or filter, truly capture a moment in time. And the more I can do that in the camera, the less time I will then have to spend in front of my computer.
A great example of a surprise opportunity to alter my images came on a drive home one day. The fog was so bad that I had to stop driving—everything was socked in completely, and I could barely make out the trees no more than ten feet away. I pulled out my camera and shot a few photographs. When I got home, the images looked purely white in Photoshop, but after some manipulation I was able to pull out ephemeral images from the backgrounds (see some of those images in The Last Layer). This is an opportunity I now seek out. Shooting through a window shade and haze into a courtyard, a white-out snowstorm, or morning mist heavy on a lake all provide opportunities for unique images.
But trying to rely on those moments isn’t really enough—in bright sunny Colorado, there’s not all that much fog and haze. So I began making handheld filters that I could take photographs through—pre-stretched silk or screen (Figure 4.1) simulates fog and mist—and gives the image a grain as if it were a pastel or colored pencil drawing (Figure 4.2). You might be able to use a digital filter to produce something similar, but only with far more work.


Stacking Images
For the processes in this section, we’re going to be shooting multiple images through handmade filters. While you may have some success with smartphone cameras, you’ll get better results using a camera that you can control the aperture and exposure settings manually, and one that can be attached to a tripod so the images align perfectly.
Making a Bracket to Hold Pre-filters
In this section, we’re going to be holding a lot of things (sometimes more than one at a time) in front of the camera lens. When doing so, not only do my arms get tired, but I just don’t have enough hands to do it all. To hold some of the handmade filters we’ll use, I’ve put together a special bracket (Figure 4.3).

FIGURE 4.3 I designed this simple bracket to hold pre-lens filters so that I could get stable, consistent shots.
Hint
If you have a larger budget, you may be able to find and use a theater-style filter or gel holder. Check out www.adorama.com or www.bhphotovideo.com for ideas.
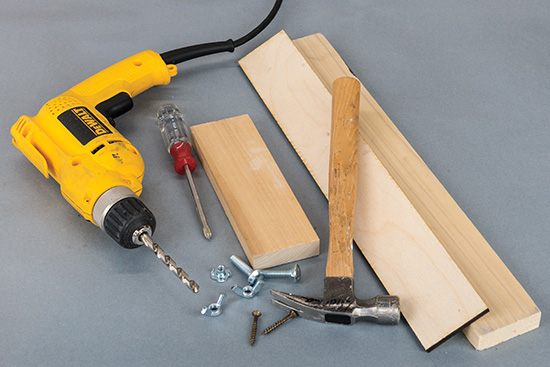
Materials Needed
![]() 1" × 3" × 18" board
1" × 3" × 18" board
![]() 1" × 3" × 8" board
1" × 3" × 8" board
![]() ¼" × 3" × 18" plywood strips
¼" × 3" × 18" plywood strips
![]() ¼" T-nut (will accept camera mount)
¼" T-nut (will accept camera mount)
![]() Three 3/8" bolts and wing nuts
Three 3/8" bolts and wing nuts
![]() Tripod
Tripod
![]() 2" wood screws
2" wood screws
![]() Black paint (optional)
Black paint (optional)
Tools Needed
![]() Safety equipment
Safety equipment
![]() Ruler
Ruler
![]() Saw
Saw
![]() Drill with 3/8" drill bit and counter-sink bit
Drill with 3/8" drill bit and counter-sink bit
![]() Hammer
Hammer
![]() Screwdriver
Screwdriver
To make a bracket to hold pre-filters:
One choice you’ll need to make is what color you want the boards painted—white can cause glares, colors will bleed into the image, and black is fairly neutral. I prefer black for my own work.
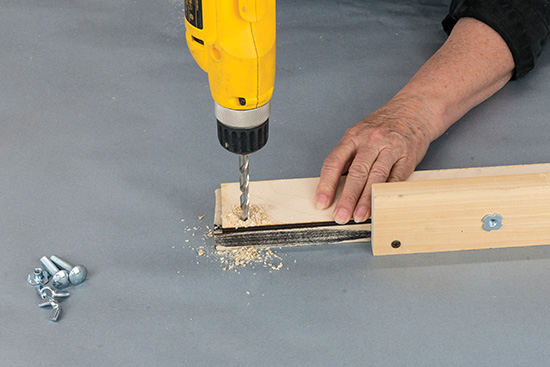
1. Measure and cut the boards for the bracket (Figure 4.4).
2. Drill a hole in the center of the short board.
3. Stack up the 18" boards and drill holes in the ends of the boards (Figure 4.5). These extra boards will be used as spacers when stacking multiple filters in the bracket.
4. Paint all the boards black (optional) or a color of your choice.
5. Tap in the ¼" T-nut into the hole in the center of the short board (Figure 4.6). The tripod bracket will screw into the T-nut used to mount it on the tripod.

6. Screw the short board to the longer board (Figure 4.7).
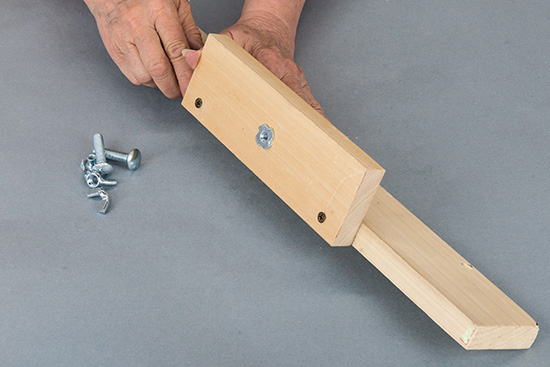
7. Slide the bolts through the holes and screw on the wing nuts (Figure 4.8), and then slide a filter in and tighten the wing nuts. You can use additional boards to stack more filters.

8. Mount the bracket on the tripod (Figure 4.9).

Using Two Tripods
Using two tripods makes it a lot easier to work with these filters—instead of having to hold one in your hand, you can set everything up and capture an image without worrying about shaking the filter (unless you want that blur!). Initially you’ll place your camera on one tripod, place the camera into manual mode (including manual focus) and determine the proper exposure settings, and take your first, master, image.
Then, without moving the camera or changing settings, place your second tripod (holding the handmade filter) in front of the camera lens and take another image. Repeat with as many different filters as you’d like—I prefer to take many images with different filters so I have options when I’m back in my studio.
If you want to experiment further, you can change the focus, aperture, or shutter speed to alter the depth of field or exposure of the image. I do not recommend changing the white balance or ISO settings as these make merging the images together more difficult. To get the best results from this technique, you need to be in full control. Set up your camera to take the first shot as you would normally, and then note the focus, shutter speed, aperture, ISO, and white balance settings. Put the camera into full manual mode (including focus) and duplicate those settings. Take an exposure—this will be your master image.
Now, as I’ll talk about in the chapters of this section, you’re ready to use filters or alter the settings on the camera to take additional photographs of the same scene with distortions or alterations.
Combining Images
While this is not a book on Photoshop or on creating digital images, one key technique that we’ll use throughout this book is digitally combining multiple images. We’ll be taking multiple images of the same scene through different physical (rather than digital) distortion filters, and then combining them in Photoshop for use as custom textures in more complex works.
To digitally combine multiple images:
I use Photoshop CC on a Mac, so your system may be slightly different as you follow these steps.
1. In Photoshop, open your sharpest photograph you wish to combine and place it as your bottom or base layer (Figure 4.10).

2. Open your first filtered image (the one you want to combine with the base image), copy it and paste it into a new layer in Photoshop (Figure 4.11), and then set the new layer’s mode to Normal.
3. Create a mask on top of the layer, and then paste in the next image (Figure 4.12). Use the Brush tool to paint black in the mask. This reveals the sharper image underneath.
4. Repeat Steps 2 and 3 with as many additional images as you’d like. For example, adding a rippled acrylic filter blurs only part of the image (Figure 4.13). You can also change the layer mode or transparency to achieve your desired result (Figure 4.14).
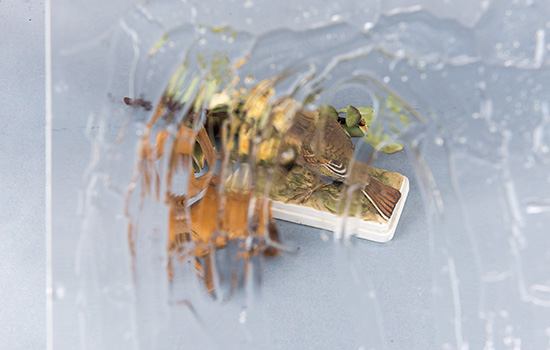
FIGURE 4.13 Stacking filters gives additional effects, like adding this acrylic distortion filter to blur part of the image.

FIGURE 4.14 You may have many different layers, with different layer modes, as part of your final image.
5. When the texture is what you want, flatten the image and save it as a new filename.
Custom Tools
As we create our custom filters and modifiers, we’ll need to make marks and random impressions on paint and substrates. Commercial tools (Figure 4.15) are available to do this, but I prefer to make my own, both to give myself a broader range of alterations and so that my work looks different as tools wear out and I have to replace them. We’ll also need tools for painting surfaces and that we’ll make marks on.
Hint
I’m very right-hand dominant, so sometimes I make my marks with my left hand. Otherwise, doing so with my right can look too much like my handwriting!
To make the marking tools (Figure 4.16), you’ll need some adhesive-backed craft foam, a few paper clips, and a pair of scissors. Cut two layers of foam sheets into a variety of rake-like shapes. Peel off the paper on the adhesive and then press the two sticky sides together. If you want a firmer tool, stick the two sheets together before cutting them. Trim the new tool to be as wide as one of the paper clips.
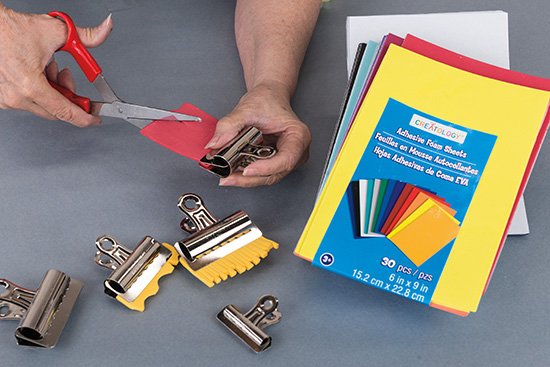
To make a disposable paint applicator (Figure 4.17), purchase a floor paint pad from your local home center and cut it into strips that are ½-inch wide. Open a binder clip and pinch the pad to the edges of the foam side of one of the strips. This will cause the fuzzy side to make a nice round surface. I really like using these to apply shellac because they’re cheap and disposable.
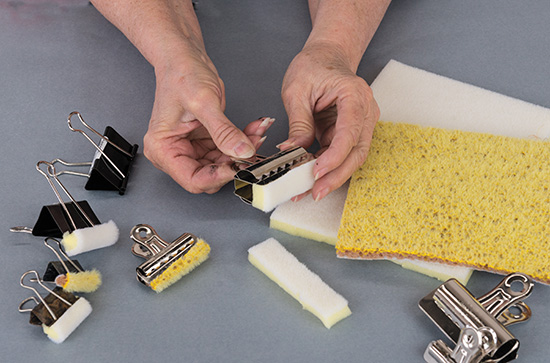
For the distressing chain (Figure 4.18), take a piece of strong wire or cord and then string some nuts, bolts, or other metal objects on it (make sure whatever objects you choose won’t break when you drop the chain on things).

Making a Distressed Mirror
One of the classic ways to distort an image is to shoot into a mirror rather than directly at the subject. We’ll take this one step further and shoot images in a custom-made distressed mirror. This will let you modify the shape and size of the mirror to get some really creative effects.
Hint
For safety reasons, make sure you use tempered glass with a pencil edge. You can also try using a glass block. If you’d rather not work with glass, you can use ACRYLITE® UV filtering (OP3 MR) Colorless 0B000 MR1 acrylic sheet. It’s mar-resistant on one side (use that for the front so you can clean it without scratching).
Materials Needed
![]() An old window or a piece of tempered, pencil-edge glass
An old window or a piece of tempered, pencil-edge glass
![]() Rust-Oleum™ mirror-effect spray paint
Rust-Oleum™ mirror-effect spray paint
![]() Acrylic paints
Acrylic paints
![]() Spray bottle with water
Spray bottle with water
![]() Fine-grit sandpaper (if using an old window)
Fine-grit sandpaper (if using an old window)
![]() Cleaning paste
Cleaning paste
![]() Paper towel
Paper towel
Tools Needed
![]() Brushes
Brushes
![]() Pebbles, stone, or sand
Pebbles, stone, or sand
![]() Distressing chain
Distressing chain
![]() Safety equipment
Safety equipment
Caution
Most windows are made of regular non-tempered glass—be very careful when working with this glass—particularly with a distressing chain. Wear appropriate safety equipment.
Here I show how to make a distressed mirror with a wood window frame (which I then leave in my final work), but you can just use a sheet of tempered glass by itself.
1. If you’re using an old window, scrape and sand the wood frame until it has the finish you want (Figure 4.19).

2. Use the glass cleaning paste from Chapter 2 and clean both sides of the glass (Figure 4.20).
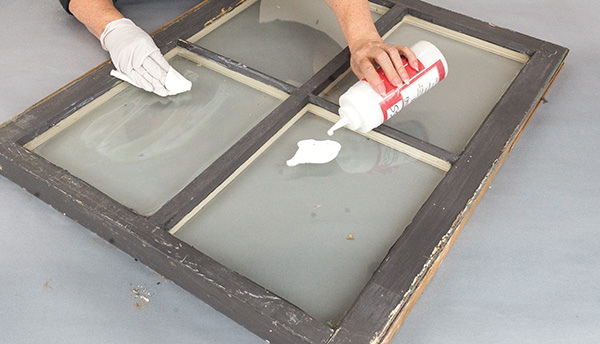
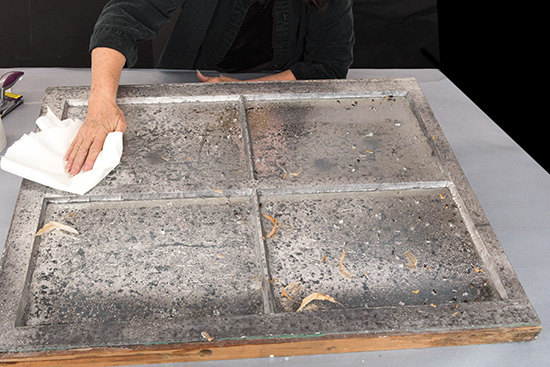
FIGURE 4.20 Cleaning the glass is important—not because of marks but because oil and grease can keep the paint from sticking.
3. Place the glass pane on a level surface, and then place bits of pebble or other objects on the surface to act as resists (Figure 4.21).
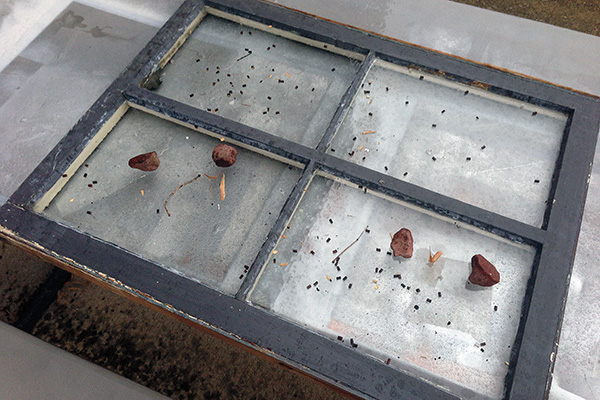
4. Spray the back surface with a layer of mirror paint (Figure 4.22). If you’d like, you can be a bit sloppy and let it puddle or be uneven (a bad paint job can be good in this case!).
5. Now for the creative part. While the paint is wet, you can either spray it with some water and then blot it dry to pick up some of the paint or use the distressing chain to make marks (Figure 4.23) that go through the paint to the glass (make sure you don’t break the glass). I got lucky because it rained as I was applying the spray paint, which gave it a wonderful natural patter.

FIGURE 4.23 I learned the water technique as part of my acrylic paintings—everything old has a new use.
6. After the paint is dry, remove everything from the surface. If you’d like, you can paint the back of the mirror with a solid color or leave it alone—it all depends on the look you’re trying to achieve in your final image (Figure 4.24).
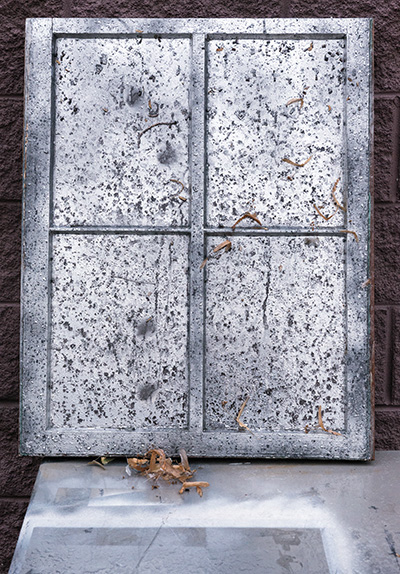
FIGURE 4.24 I like bringing my own window and mirror with me to a shoot rather than hoping I’ll find one there. You can even flip it over—it’s like having two mirrors in one package.
Conclusion
We each see the world through the filter of our lives and the reflection of our experiences (Figure 4.25). Sometimes there’s meaning in not only what we capture but through those hidden assumptions (and even when we use perfect filters, that’s just another form of distortion). So in this section, we’re going to use imperfect filters, lens modifiers, textures, and reflections to make these a part of the image itself and alter our perception of reality.