17. Hydrographic Coloration of 3D Printed Objects

Water transfers, popularly called hydrographics, to 3D objects like car wheels, helmets, and gun stocks are not new, but most of the processes are industrial and use toxic chemicals that I wouldn’t want in my home studio. To do those transfers, industry uses gravure printed images rather than desktop inkjet prints. Since I don’t own a gravure printer nor do I have a hazmat suit handy, I developed a safer process to get a highly detailed and richly colored image onto a 3D object. With this process, I’ve eliminated as many of the hazards as I could. With practice you can reliably apply an image to 3D objects. The process uses materials available to general consumers but they do require proper safety equipment—more than most of my other processes.
This process can be used on a wide variety of materials and objects. In the example in this chapter, I’m working with a 3D printed object and an image skin created by Carrie Neher Lhotka using ZBrush (www.pixologic.com) and Adobe Lightroom and Photoshop (www.adobe.com).
For a current and updated list of products and resources (since products may change over time), you can check the book’s website: www.hackingthedigitalprintbook.com.
About Dipped Inkjet Water Transfers
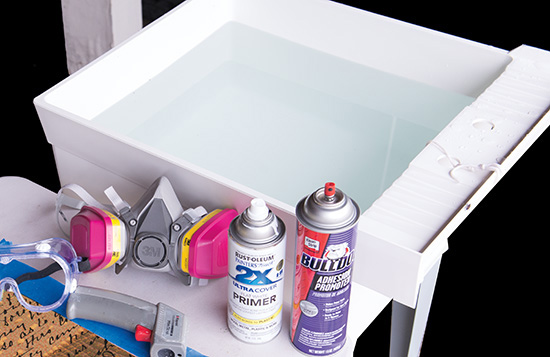
Getting the print to stick to the materials used to print 3D objects requires using primers and adhesion promoters (Figure 17.1). This process includes several steps done over a few days time. First, you’ll print and prepare your object. In parallel with that, you’ll create an image skin and allow it to dry. Then you’ll float the image on water, activate the skin, and dip the object through the floating image until it’s coated. This process is great for applying patterns and textures but if you want a perfectly registered image (matching teeth to a mouth for example), I’d suggest using the skin appliqué process shown in Chapter 16 instead.
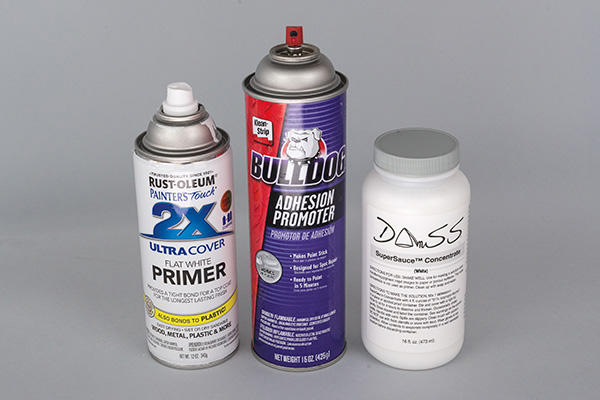
FIGURE 17.1 We’ll use SuperSauce Concentrate White to prime the print and then use the spray activator and another primer to apply the skin.
Tip
To simplify the text, I’m just using “object” in this section to refer to your 3D print or 3D printed object. The final, full-colored work I refer to as a 3D sculpture.
You may need some practice to get the dipping right. Since it takes awhile to print large sculptures, I started out with some rocks (Figure 17.2) from my backyard, moved up to craft store trinkets (skulls, actually), and then once I was comfortable I started dipping the sculptures. If you don’t like the way the dip turned out, immediately rinse off as much as possible under very warm water, dry the piece, apply a primer, and start over (Figure 17.3).

FIGURE 17.2 Rocks are free and make nice items for practice dips. Besides, they look great in the garden.

For this process, you’ll build on the skills from Chapter 11, but there are a few differences, so make sure you read the instructions carefully.
Important
This process uses spray paint and primer, which probably require the strongest safety precautions of any products in any of my books. Read and understand all safety instructions on the containers and the MSDS sheets. I always do this outside wearing full goggles and a respirator suitable for organic vapors (not just a paper mask)—the Bulldog label says to remove contact lenses, so I always do that, too! Consult your local home center and buy and use appropriate safety equipment.
Tip
You can use a clear primer if you’d like—I use a white one in this example.
Materials Needed
![]() Practice objects
Practice objects
![]() 3D printed object
3D printed object
![]() Soft clay and wooden dowel or pencil
Soft clay and wooden dowel or pencil
![]() SuperSauce Concentrate White
SuperSauce Concentrate White
![]() SuperSauce Solution Matte
SuperSauce Solution Matte
![]() Image printed on premium transfer film using Photo Black ink
Image printed on premium transfer film using Photo Black ink
![]() Paper towels
Paper towels
![]() Blue painter’s tape
Blue painter’s tape
![]() Permanent marker
Permanent marker
![]() Bulldog Adhesion Promoter (check online or automobile supply stores)
Bulldog Adhesion Promoter (check online or automobile supply stores)
![]() Rust-Oleum Painter’s Touch Ultra Cover 2X Flat White Primer
Rust-Oleum Painter’s Touch Ultra Cover 2X Flat White Primer
![]() Metallic spray paints (optional)
Metallic spray paints (optional)
![]() Acrylic paints (optional)
Acrylic paints (optional)
![]() Newsprint paper
Newsprint paper
Tools Needed
![]() Flat work surface
Flat work surface
![]() Scissors
Scissors
![]() Accurate timer
Accurate timer
![]() Sponge brush
Sponge brush
![]() Smooth, flat, mar-free polypropylene sheet or panel
Smooth, flat, mar-free polypropylene sheet or panel
![]() Alignment board
Alignment board
![]() Paint roller cover
Paint roller cover
![]() Laundry tub filled with 80-degree water
Laundry tub filled with 80-degree water
![]() Garden hose
Garden hose
![]() Long waterproof gloves
Long waterproof gloves
![]() Thermometer (regular or laser/remote)
Thermometer (regular or laser/remote)
![]() Safety equipment including an organic vapor mask
Safety equipment including an organic vapor mask
To prepare the 3D object for dipping:
Not every object is suitable for this process. It works best with sculptures that have a fairly regular surface (think bust of a person or a coconut, not a pinecone).
It takes just a bit of work to get the object ready for dipping. I’ve tried this with PLA and ABS plastics, but it should work with any of the common printing materials.
1. Remove any raft or support material using the techniques in Chapter 15.
2. Drill (or model in) a hole into the bottom of the object so you can insert a dowel or pencil to hold it during the dipping process. Later, just before dipping, you’ll insert the dowel and make sure it’s secure with duct tape.
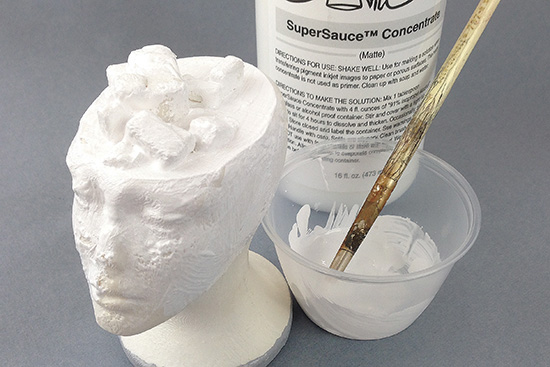
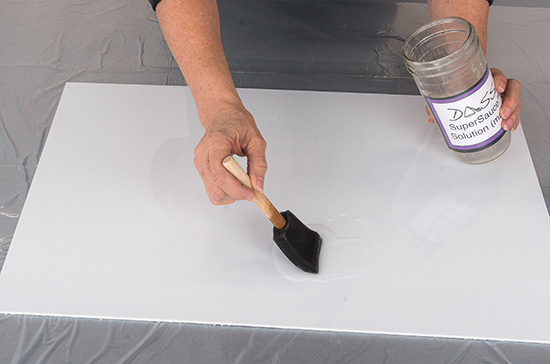
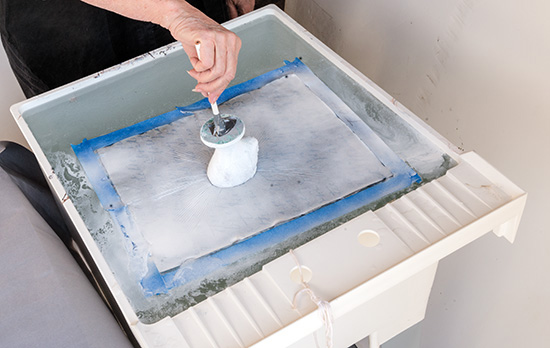
3. The surface of the object must have a flat (matte) finish primer coat for the skin to stick to, so we’ll paint on a light coating of SuperSauce Concentrate White as the base primer since it sticks very well to most 3D printed materials (Figure 17.4). Allow to dry overnight.
If you want, you can apply a metallic paint over the primer as a different colored undercoat—but if you do, you’ll need to do the dip immediately after spraying to attract the flowing ink skin.
To select an image for the 3D print:
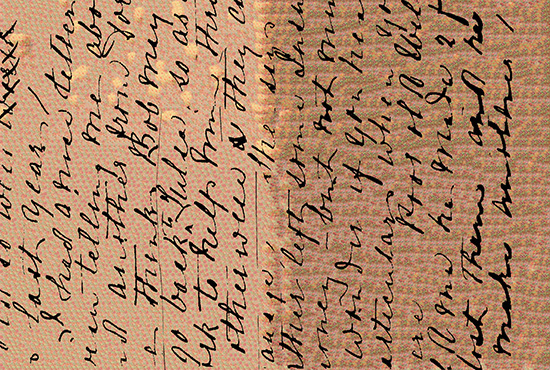
It’s really hard to get good registration of the print to the image with this technique, so I prefer to use an image that has a pattern that works without needing perfect alignment. The image in this example shows the type of patterns that work really well (Figure 17.5). If you want, after applying the dip, you can add detail using acrylic paints—for example, you could transfer a texture of red fur to a 3D print of a cat and then go back in and paint the eyes by hand.
Hint
It’s better to have the skin too large than too small.
You’ll need to measure the object in three dimensions to determine how large to make the skin—you want it larger than the object by about 4 inches in each direction (Figure 17.6).

Print the image on premium film (classic film won’t work—you need the extra coating to support the skin) using pigment inks. You’ll want to use Photo Black ink (Matte Black will run). Just like my other processes, flip the image before printing. After the transfer to the skin, the image should read properly. What you see is how it will be on the object—this can be counter-intuitive, but it works.
To make the image skin:
While I’d like to make several skins in advance, these have a use by date of a few days, so I make only enough to use during one dipping session. If left on the panel for a long time, the skin will get very dry and will not dissolve properly.
1. Much like the skins in Chapter 11, we’ll start with a sheet of smooth polypropylene. Make sure it doesn’t have any cuts or scratches in the surface or the skin may tear when it’s removed.
2. Apply a coat of SuperSauce Solution Matte to the panel using a sponge brush (do this before applying blue painter’s tape). This makes it very easy to peel off the ultra-thin skin from the panel (Figure 17.7).
3. Allow the first layer to dry completely, and then put a layer of blue painter’s tape around all four sides (Figure 17.8).

4. Apply a second coat of solution quickly in single strokes in one direction (Figure 17.9). If you brush back and forth, you may dissolve the first layer and create gummy lumps, which means starting over! Let these two layers dry to the touch. You can use a fan but not a hairdryer.

5. Use the alignment board method shown in Chapter 3 to apply the image. Because none of the alcohol can evaporate between the film and the panel, leave the film on the wet solution for longer than usual before the transfer. If I want a full, perfect transfer, I leave it on for 10 to 15 minutes (Figure 17.10).

6. Leave the skin on the sheet to dry for 24 to 48 hours (overnight is not enough). Dipping a skin before it’s completely dry causes failures. If you have problems getting it to come off the board (in a later step) or it tears, your studio may be too hot or humid. Before removing the skin, with a permanent marker label the tape on the front side “Water” so you know which side goes face down in the water (Figure 17.11). Leave the skin on the panel until just before you dip.

FIGURE 17.11 So you don’t get the wrong side down on the water, write “Water” on the blue painter’s tape.
A utility sink is perfect for dipping because it’s deep, it’s square, and it has a drain. I bought one with legs from my local home center and set it up outside (Figure 17.12). Timing is really important for this process—seconds count, so make sure you read through and understand all the steps before beginning.
1. Air bubbles can spoil the transfer, so I fill up the sink to the top the day before I dip. That allows the air to rise up to the surface. The water needs to be between 70 and 85 degrees during the whole process to work properly so if necessary, I add some hot water just before dipping.
2. Slowly peel the skin off the sheet (Figure 17.13), and then turn it over face down on the panel to keep it clean (Figure 17.14). We’ll be placing the emulsion side down (as it is now) on the water in a later step.
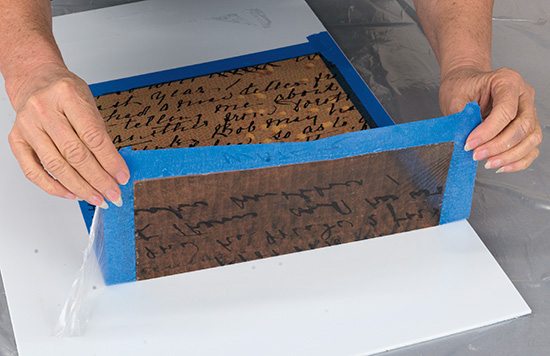
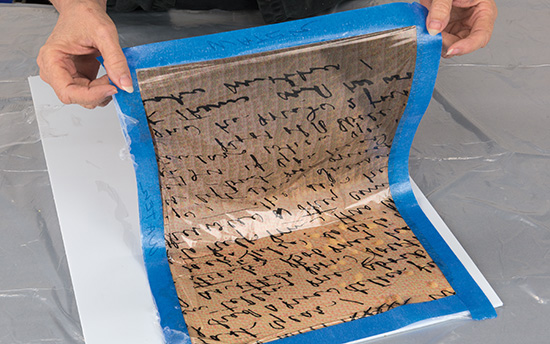
FIGURE 17.14 Make sure you mark the top side before flipping it over—it’s really easy to lose track, and dipping the wrong side doesn’t work.
3. Apply another layer of blue painter’s tape over the sticky side of the tape that is now face up (Figure 17.15)—you don’t want it sticking to your hands as it’s placed in the water. Label this side “This side up.”

4. Snip a few slits in the blue painter’s tape with scissors so edges do not stick up on the water and the image can relax (Figure 17.16). For very large skins, you might want to move it first and then snip once it’s floating in the water (after Step 5), but when I can, I prefer doing it before.

FIGURE 17.16 Cut a few times in each side so the skin relaxes in the water. Remember if you snip while in the water, count the snipping as part of the 60 seconds!
5. Put on your safety equipment now.
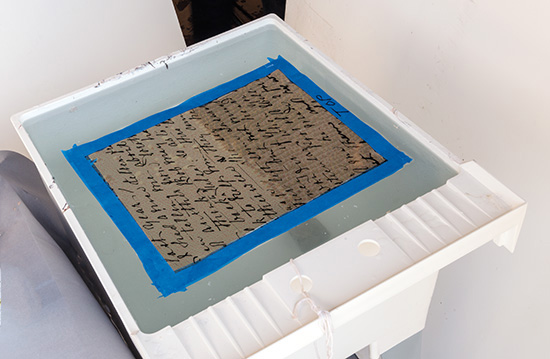
6. Hold the skin by two diagonal corners and lay the center of the skin on the water’s surface. Slowly lower one diagonal corner down on the water (Figure 17.17), and then lower the other corner down carefully. Do not get water on top of the film, and do this step slowly so no air bubbles are trapped under the skin—the skin needs to be in full contact with the water. If necessary, lift the film back up and try again—but do so quickly. If you accidently get a drop of water on top, use a small piece of paper towel to absorb it. Any water spot will repel the Bulldog and spoil the dip.

7. Using a timer, leave the skin undisturbed on the water for 2 minutes (Figure 17.18). While waiting, shake your Bulldog and Rust-Oleum cans vigorously. During this time the inkjet emulsion that moved with the image when it was transferred will soften and become a gooey mass. We’re relying on this to support the skin in the water. This is why premium film is required for this process—classic film doesn’t have as thick a coating. Be careful not to touch the skin at this point or you may end up damaging the skin and having to start over.
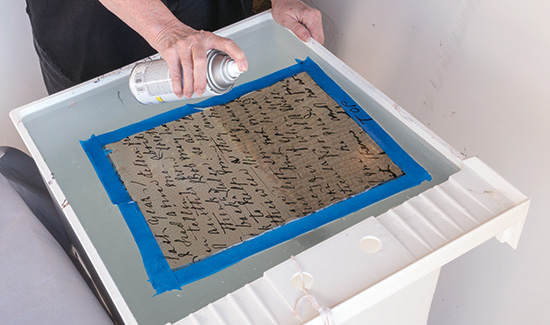
8. Now it’s time to spray Bulldog on the skin, which we’re using as an activator. Spray a coat onto the floating skin, starting at one corner and spraying across (Figure 17.19) and back until the whole film is covered. Getting just the right amount on the skin is really important—for a square foot I spray about 10 seconds. You’ll see the image start to soften: It’ll wrinkle up and then flatten. If you test an edge or corner, the image will lift up in a string (Figure 17.20). I’m showing that here, but you may want to skip testing so you don’t damage the skin.
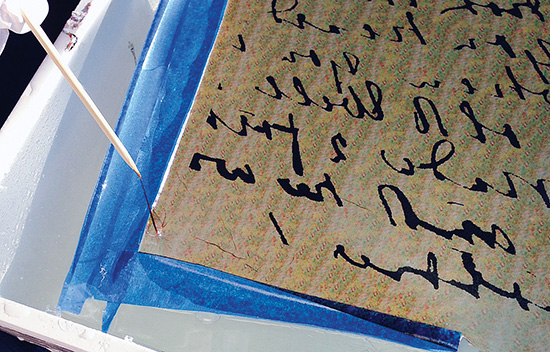
9. After 5 to 10 seconds spray a quick, light coat of the Rust-Oleum primer to the entire skin (I’m using white since the 3D print I’m dipping is white, but you can use clear or another color as long as it’s the same formula). For a square foot I spray for about 5 seconds across the surface. This forms a coating that helps hold the image together (Figure 17.21).
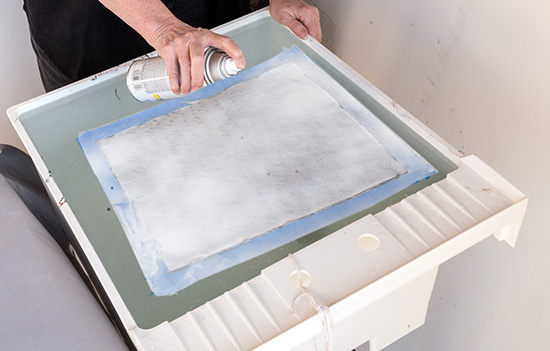
FIGURE 17.21 Rust-Oleum primer acts like an adhesive to hold the image together on the water and also acts as an adhesive between the object and the skin.
10. Slowly push the object into the dissolved image so that the image draws inward as you submerge it in the water (Figure 17.22). It takes about 10 to 15 seconds for me to submerge a 6-inch tall object.
11. When fully submerged, spin and turn the object slowly in a circle to disperse the excess image (Figure 17.23). We’re using the water pressure to push the image down to the object.
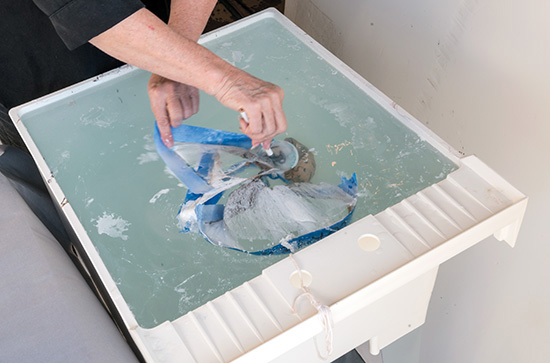
FIGURE 17.23 Spin the object to break away any excess skin. Moving it in the water also uses the water pressure to push the image into small areas.
12. Rotate your hand and slowly lift out the object through a clean part of the water (Figure 17.24). If you see strings of the image separate from the object, pull them off so they don’t touch it and adhere to the surface; if the strings fall back onto the object, it will be too late to remove them.
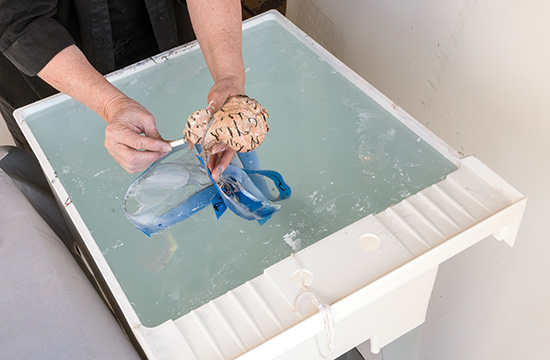
FIGURE 17.24 As you rotate your hand, slowly lift out the coated object. Pull any extra strings of image away from the sculpture as it’s lifted or they’ll stick to its surface.
13. Set the object aside and let it dry overnight.
14. Skim off the tape and remaining image from the tub of water and dispose of properly. I use a flat sheet of newsprint to rake off any bits of the image still floating on the water. If you keep the water clean, you can dip multiple times in the same tub.
One cool thing is that all the inkjet emulsion that moved when the transfer skin was made is washed off in the dipping process so you’re ready to finish the sculpture.
Hint
Applying the sprays can be tricky. Some aerosol sprays are so strong they will blow the skin into a heap. Practice spraying on a thin plastic bag spread on a table to see how far away you need to be to coat the skin thoroughly without moving it.
Tip
There are several different sprays I’ve used as an activator, but Bulldog works the best. It’s essentially a clear spray paint used in automotive painting to bond later coats of paint onto the metal. Unfortunately, it contains toluene, which is something I try to avoid (that’s why I’m so committed to proper safety equipment). The toluene is a solvent that melts the image skin and prepares it for bonding to the print when we dip it. Keep an eye on the book’s website—if I find something better, I’ll be sure to share it there.
Conclusion
I have a long history of dipping things for my art. My son still remembers (with shivers—it was in the winter) dipping a screen into colored paper pulp and hand-cranking a hydraulic press to make custom handmade paper. Eventually I moved up to an automated press inside my studio. But now, it’s all about new technology.
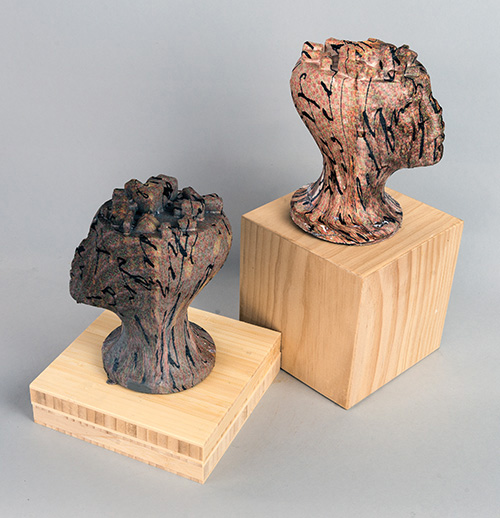
One of the great gaps in the consumer 3D printing revolution has been getting color onto the final prints. Painting is fine, but you lose out on the rich textures available from inkjet prints of digital photographs. Now with this consumer-accessible process, there’s a largely unexplored frontier in 3D printmaking (Figure 17.25).