15. Introduction to 3D Printing

I’ve always been fascinated by technology—new ways of doing things, expanding our capabilities, and seeing the products of the mind brought to life. Probably no modern technology better fits that description than 3D printing. Much like the replicators on your favorite starship, it holds the potential to revolutionize our lives. Yet while consumer 3D printers have made huge improvements in the last couple of years in both price and reliability, the technology remains very much in the experimental phase, so keep your expectations set appropriately. Applying 3D printing to fine art and photography is a great and creative way to explore this exciting, and occasionally frustrating, technology, and in later chapters of this section we’ll see some of these applications.
This chapter includes an overview of the major areas of the 3D modeling and printing workflow so that with this information you can move on to creating your artwork with the new technology. This is an introduction and not a complete in-depth overview of the technology or processes—that would be a book of its own.
The 3D scans, models, skins, objects, prints, lithophanes, and sculptures in this section were done by either myself or Carrie Neher Lhotka.
Note
I’d like to thank Jennifer Adams from MakerBot, maker of the Replicator and Digitizer, and Natasha Spokish and Ben Malouf from Aleph Objects, maker of the LulzBot TAZ 4, for all their help and advice. Thanks also to Jeff Cochran, Ed Tech Coordinator of Ellensburg High School in Ellensburg, Washington, for his insight as a real user during his review of this chapter.
The technology is evolving very fast and I’ll continue to share new discoveries, so please check the book website, www.hackingthedigitalprintbook.com, or my site, www.3dRiffs.com, for other resources as well as for the latest updates, information, and troubleshooting tips.
Overview of 3D Printing
Before you can print an object, you need to have a file to print, called a 3D model. If you’ve seen a movie in the past ten years, you’ve seen models used in special effects. These are digital representations of physical objects, animals, or people. A model consists of a skin, called a mesh (Figure 15.1), which forms the shape of the object. Over the mesh is a paint layer that provides coloring and visual texture. A mesh is formed by a collection of polygons (Figure 15.2), each of which is formed by three or more vertices that combine to create a face (so a triangle is a common polygon used in models). A typical model used in 3D printing may have many thousands of faces. The more faces, the smoother the final surface will be, but for 3D printing there’s a sweet spot between not enough and too many. For our work the mesh is the important part.

FIGURE 15.1 This mesh, shown in ZBrush, is a 3D scan of an actual coconut I mailed to my grandparents while on a trip to Hawaii as a kid. You can even see the ridge of the stamps on the front.

FIGURE 15.2 With the polygons turned on, you can see the vertices and faces that make up the object.
Your 3D printed models have to be watertight, meaning that the mesh has no openings, gaps, or holes. Without an enclosed space, your print is likely to fail. The mesh itself has no thickness—it’s just a mathematical concept—but think of it like a balloon and its closed space: If you tie the end, the balloon holds in the air, but without the end tied, the air leaks out and the balloon collapses. Most 3D printing software will correct minor openings automatically.
You can create models in many different ways, including using a 3D scanner to scan a physical object (Figure 15.3); using CAD (computer-aided design), modeling, or sculpting software to build a model from scratch or to modify a scanned model; and downloading a digital model from one of many different Internet sites. There’s also one specific kind of software that generates lithophanes (more on that later).
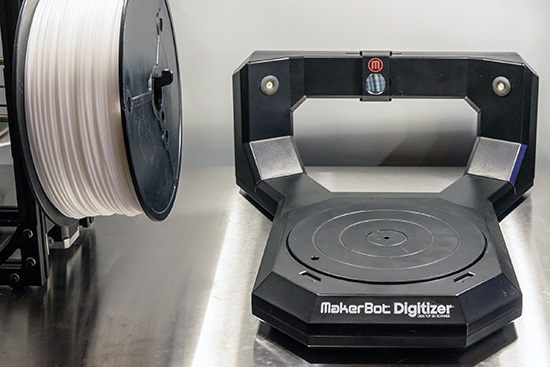
FIGURE 15.3 I’ve been working with the MakerBot Digitizer desktop scanner—one of the best consumer scanners currently on the market.
Most consumer 3D printers operate by melting and extruding a plastic filament into very thin layers and building up a print like the frosting on a cake (Figure 15.4). In order to turn your 3D model into a printable file, it has to be sliced into individual layers and then converted into instructions for your printer. There are many options to create these print files or instructions, but as you start out I’d recommend using the one that comes with your printer. After your model is sliced, you can print it on a 3D printer using one of several different materials—most often plastic but sometimes wood, nylon (which you can dye with fabric dye before printing), or even chocolate!
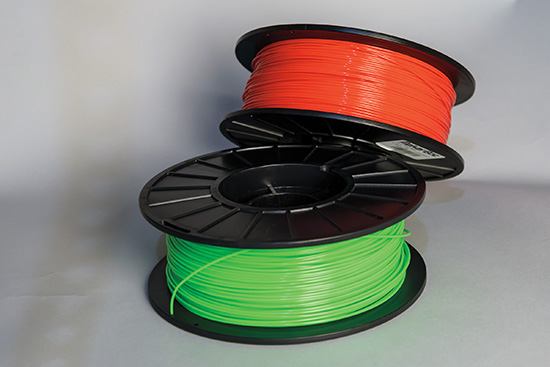
FIGURE 15.4 Filament like this PLA is melted in the extruder to build up the layers in your 3D printed object.
You can print either on your own printer or through one of several Internet-based printing services like Shapeways (www.shapeways.com). Because consumer 3D printing is becoming so popular, printers are now available from several vendors for an affordable price. There are even some makers (a term for people who create things in their spare time—see www.makezine.com) who download instructions to print most of the parts for printers and then print those parts on other printers, all to make their own 3D printer—self-replicating machines are getting closer all the time! I’ve actually printed replacement parts for my TAZ 4 3D printer myself, which is a handy capability—as long as I print them before the parts break. For all of these printers, though, one of the biggest limitations is that they print using only one (or sometimes two) colors at a time—for this reason the other chapters in this section will cover how to get full color images applied to your 3D prints.
As you get started the number of choices for printers, filament types, and all the other options can be a bit daunting. The printers and software I show in this chapter are representative of what’s currently available. Since this technology is evolving rapidly, I’d encourage you to read reviews and search the Internet for the latest information on the various printers on the market.
Even with that, keep in mind that 3D printing is still relatively young, particularly at the consumer level of products and solutions. You’re going to have challenges, frustrations, and puzzling problems, right before (or after) you’ve had an exhilarating success. The first time I printed one of my own models I couldn’t stop chuckling for a half an hour; conversely, my mother would be ashamed of some of the language I use on bad days. In the end, though, it’s worth it. I’m a technologist by trade, an engineer by training, and a hacker by temperament—working with 3D is the most fun I’ve had in years.
3D Models
Of all of these steps, getting the model, or the digital three-dimensional image, to print is the greatest challenge. I recommend starting the learning process by printing a model downloaded from a site like www.thingiverse.com or www.youmagine.com. I realize most artists will quickly want to create their own unique work, but the benefit to a proven downloaded design is if you get a mass of plastic thread in your printer, you’ll know it’s your printing technique and not a problem with the model itself (besides, there’s some cool stuff out there). As your learning process progresses, there are various avenues for creating your own models.
Scanners
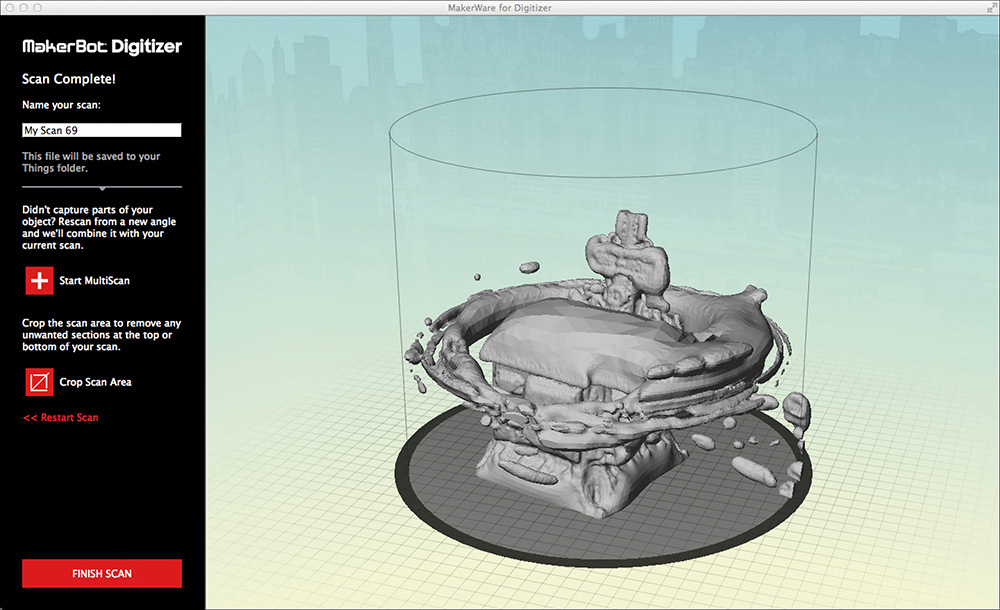
Using a 3D scanner is a great place to start making your own models based on actual physical objects. These come in two styles: desktop (for small objects) and handheld (for large ones). Consumer handheld scanners are a recent innovation, so check online for current information. Desktop scanners, like the MakerBot Digitizer, work really well as long as you have reasonable expectations about size and detail. Many of the models in this section started out with a 3D scan of a physical object. To use the scanners, after unpacking and running the calibration routine in the Digitizer software, you just place your object on the platform (Figure 15.5) and follow the easy-to-use wizard to produce a watertight 3D model that’s almost ready to print (Figure 15.6).
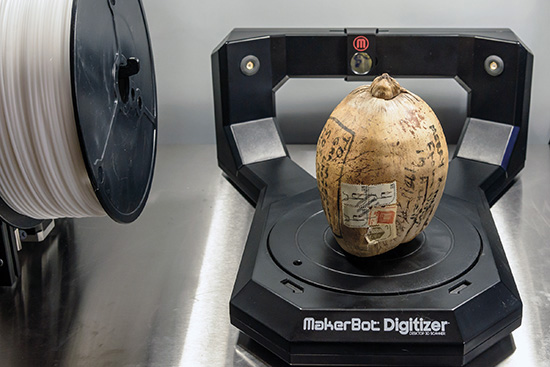

FIGURE 15.6 3D scanning with automated software really speeds up the process of creating an initial 3D model.
The best way to learn the limits of the scanner is to scan a bunch of items, and there are some important ideas to keep in mind as you experiment. Very dark or very light objects don’t scan as well as those with midtones. Shiny, reflective, or clear (like glass or crystal) objects can confuse the scanner and result in floating blobs around the final 3D model (Figure 15.7), though you can dust them with cornstarch to help reduce that. Objects with a lot of surface recesses, like a pinecone, can be scanned, but you’ll find that the final model doesn’t accurately capture those deep pockets. Last, make sure that you don’t have any objects right behind the scanner that can reflect the laser beams—put the object on a table several feet from a blank wall and with nothing in between.
There are also software-based solutions like 123D Catch available free from Autodesk and Strata Foto 3D SE direct from Strata or from the Apple Mac App Store that allow you to take a series of flat photographs around an object and then convert those photographs into a 3D model. This process works fairly well as long as your object is against a clean, uncluttered background and easily isolated from it. With a bit of patience and fiddling, you can get a reasonable 3D model to use as a starting point. I find that this is the most convenient way to “scan” a large object.
Software
There are five basic categories of software you can use in creating a 3D object: slicing and printing, mesh manipulation, CAD, lithophane, and modeling/sculpting packages. One of the cool things about 3D work is that there is a wealth of free software available to get you started, as well as very mature commercial packages available. You can find a good overview of common CAD and modeling software at www.shapeways.com/creator/tools.
Slicing and printing software is used to convert your models into printable files and for actually controlling the printer. Packages in this category include Cura, Slic3r, Simplify3D, and MakerBot Desktop. I’ll talk more about this kind of software in the printing section.
As I’ve been exploring 3D modeling, I’ve run across a number of blog posts, forum suggestions, or other online communities that suggest mesh manipulation software to solve problems with the mesh. Software in this category includes MeshLab, Meshmixer, and netfabb Basic. Using them is beyond the scope of this book, but it doesn’t hurt to be familiar with the options.
CAD software is most often used to create mechanical or “hard surface” parts for manufacturing or detailed blueprints and models for architecture or construction. CAD is an important kind of software, and while you could use it to create 3D models for the processes in this section, it’s less artistic than other options. Software in this category includes Cheetah3D, Rhinoceros, Tinkercad, and AutoCAD.
Software used to specifically create lithophanes includes the Customizer on www.thingiverse.com and PhotoToMesh from www.ransen.com. We’ll talk more about using software to create a lithophane in Chapter 18.
Modeling and sculpting software is probably the category you’ll spend most of your time with as you create artwork. These packages work well for organic forms, and some even allow you to sculpt your models using virtual clay and various tools. Software in this category includes Draw in 3D, 123D Design, Blender, Sculptris, ZBrush, and Maya, and if you have kids (or are a big kid yourself), make sure you check out 123D Creature on the Apple iOS App Store—it’s a lot of fun.
One of the most common questions I’m asked is, “Which package should I start with?” The answer to that could fill a separate book, but here’s some brief advice.
For your very first experiments, Draw in 3D is brand new and looks really cool. You can also try 123D Creature or the MakerBot PrintShop. For lithophanes, the Customizer on Thingiverse is a good starting option, but Photo2Mesh is more powerful, easy to use, and not very expensive. For CAD software, Tinkercad is a great starting point.
For modeling, there are a number of options, but all have limitations that you’ll soon discover. 123D Design is a good starting point, but once you push the limits, I’d suggest using Blender—there are free tutorials on Apple’s iTunes U that will get you started, and the program itself is free. There’s a learning curve, but it’s worth it—just decide up front if you want to focus only on modeling for printing or on the animation capabilities as well.
For sculpting software, it’s a bit more complicated. Sculptris is a good free option to start with but again has some limitations and hasn’t been updated in a while. If you like the idea of using virtual clay (and I really do), you’re likely to end up using ZBrush—it’s the gold standard. Let me talk a bit more about why I find this software worth the expense.
ZBrush from Pixologic (http://pixologic.com) is a powerful and flexible digital sculpting and painting program that uses millions of polygons to create a model. It’s primarily used for digital animation, but the organic and natural sculpting capabilities make it very compelling for 3D art. Though relatively complex, after a few basic tutorials (available free on the Pixologic website) you can start sculpting with it quickly. Becoming an expert does have a learning curve, but you can learn features as you find you need them. It’s worth the effort, though, as the product is incredible—it allows you to free-hand sculpt and edit a 3D model, either from scratch or by using a scanned image as a starting point. Most of the sculptures in this section either were created from scratch or were 3D scans modified using ZBrush—some within days of starting to work with ZBrush.
Tip
With ZBrush, Blender, or the other advanced tools, if you want to get really serious, check your local community college or university for a 3D modeling class (sometimes in digital design, game design, or motion-picture programs).
3D Printers
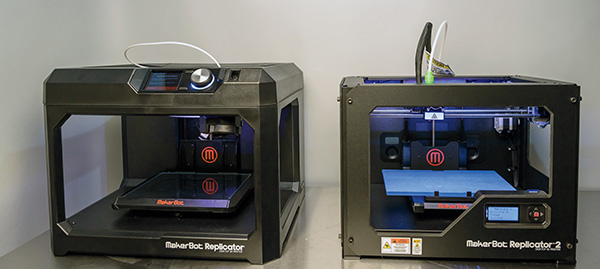
Before we talk about how to print a model you either downloaded, scanned, or created, let’s cover the final preparatory step and talk about 3D printing technology. For this section of the book, I’ve been working with three printers—a MakerBot Replicator 2 that works well for printing sculptures, a MakerBot 5th Generation that I use for lithophanes (Figure 15.8), and a LulzBot TAZ 4 (Figure 15.9) that works for all jobs. Keep in mind that none of these machines are at the “it just works” stage. Think more Apple ][+ circa 1982 than Macintosh circa 2014. Check for current reviews and information to help decide the best printer for your situation (www.makezine.com has a great annual printer roundup, and as always, your favorite search engine is a great resource).

Tip
You’re going to have failures—it’s part of learning. I recommend you always do a small test print of an object before committing to a long, material-intensive build. For me this has saved a lot of filament, particularly as I’ve begun working with my own models (Figure 15.10).
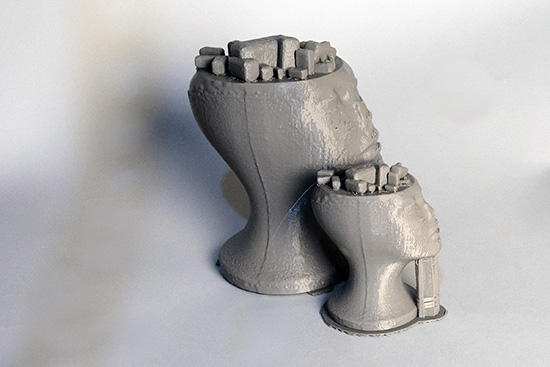
FIGURE 15.10 Prints take exponentially more time and material the larger they get. The small print took three hours and the big one almost eight.
Power, Environment, and Maintenance
There are some equipment and tools that can really help you as you begin to print your own models. I live in Colorado, and between spring snowstorms and summer thunderstorms, our power flickers fairly often. Since printing models can take several hours, I treat my printer just like a computer and have it plugged into an uninterruptable power supply (UPS). Check the wattage on your printer and buy a UPS that’s big enough to handle the load for at least 15 minutes. I like the ones that also condition the power so that I not only have protection against a true power outage but am protected from brownouts (when the lights in your house dim or flicker) and from surges due to lightning.
These machines make some noise (the Replicator 5th Generation sometimes sounds like a droid from a science-fiction movie) and have parts or beds that move with a fair amount of force.
It’s very important to have your printer on a rock-solid stable surface so that movement doesn’t shake the printer out of alignment and cause your print to fail. Keeping the printer away from dust and in a room that’s at least 70 degrees is also very important. Cooler rooms, or ones with fans or drafts, can cause warping and failed prints. I’m sensitive to odors and don’t find either PLA or ABS objectionable when printing, but if you do, you can have ventilation as long as it doesn’t create a draft.
Note
For folks in countries still using the English measurement system, it’s worth getting comfortable with metric units. An inch is 25.4 millimeters; 200 degrees centigrade is 392 degrees Fahrenheit. Metric is your friend.
Make sure you follow whatever maintenance routines your manufacturer recommends. For some printers, that means lubricating the z-axis screw drive with the appropriate lubricant. Wear a nitrile glove, apply a small amount of the lubricant to your fingers, and just rub it in—be careful you don’t over lubricate the machine. I also recommend checking for firmware and other software updates on a regular basis as there are constant improvements being released.
Filament
One of the big choices to make when looking at printers is which materials they can print with. The majority of the consumer 3D printers use a spool of plastic filament as the raw material for printing. Depending on the color and material, the filament costs between $15 and $50/pound. That sounds like a lot until you realize that your prints are usually hollow—a typical print uses between 0.03 and 0.1 pounds of filament or about $0.75 to $2.50 per print. The slicing software will give you the option to either fill your print solid or fill with a pattern that saves filament and provides structural strength. More creative filaments, like glow in the dark or wood, can be much more expensive, so I reserve those for final prints that I know will work.
Tip
I only use brand-name filament from the manufacturer of my printer or from another reputable source. I want to eliminate as many variables as I can, and having a predictable, trustworthy filament is really important. If filament isn’t exactly the proper diameter, it can cause jams or extrusion and feeding problems, and the quality control on the material itself may not be up to snuff. For me, while brand-name is a bit more expensive, it’s worth it. As you first get started, I’d recommend going one step further and use only filament direct from your printer manufacturer (some require that as part of warranty limitations, anyway). Then if there is a problem, it’s much easier to get support!
The two most common types of plastic are ABS and PLA. ABS plastic is the material used in those snap-together blocks we played with as kids. It’s hard, durable, and makes really resilient prints. It also can be finicky and highly sensitive to ambient and build plate temperature (it requires a heated bed). Also, working with ABS can involve acetone for some applications.
PLA is a corn-based bioplastic that’s still strong but a touch more brittle than ABS. There’s no odor when printing (though some people report a slight glue smell or even a sugary fragrance) and it’s a much more forgiving material. If you’re just getting started, I highly recommend starting with PLA as your first material. Other types of filament require different bed preparation, tools, and techniques, so be sure you research and understand what to do for your particular material.
Caution
Even though PLA is a bioplastic, not all of it is food-safe (check with the manufacturer). Also, it’s not waterproof, so making something such as a vase out of it requires some sort of waterproof coating.
Filament comes in many different colors. For the processes in this book, I most often printed models in white, but for a couple of lithophanes I used natural/translucent PLA when I wanted a linen-like texture. If you’re printing an elephant, you’d probably want to use gray, or for a flower use yellow.
Many filament materials can absorb moisture from the air, which turns to steam during printing and causes printing problems. PLA and wood are most susceptible, but others like ABS can be problematic as well. To make it simple, I store all my filament in a cooler with a large can of desiccant (a material that absorbs moisture) to keep it consistently dry. In Colorado, it’s usually dry enough that I’m not too worried about leaving it on the printer for a couple of days between prints, but if you’re in Hawaii during monsoon season, I’d suggest unloading and storing it in the cooler after every print. For single rolls, you can put a smaller desiccant package and the filament in a thick zip-top plastic bag.
Tip
The desiccant cans I use are available online or sold in sporting goods stores for use in firearm safes. Most cans have some form of indicator crystal (the ones I use change from orange to green) that tells you when it’s saturated with moisture. You recharge the desiccant by drying it out in your oven—but make sure you get the kind that’s cobalt chloride free so it’s safer to use in the oven. I like to use a can that’s larger than I really need so there’s less recharging. A 750 gram can will last for a long time. I do not recommend using an electric desiccant system.
Make sure you follow all the manufacturer’s instructions when loading and unloading filament. Before loading I always cut the end of my filament to remove any strings, ridges, or lumps from the previous print. Don’t push or pull until it’s the proper time in the load cycle to do so or you risk damaging or clogging your extruder head. You can unclog some extruders on your own, while others must be sent back to the manufacturer for replacement. Eventually you’re going to have a clogged extruder, so have a spare on hand or read your instructions on how to unclog it yourself.
I’ve found that if I let filament cool in the printer, it will form a bulb on the end that can clog or jam the printer if I later heat it up and try to run the unload cycle. To avoid this problem, after heating the printer, I run the load filament cycle first and then immediately run the unload cycle. It’s much easier than dealing with a clogged extruder.
Tools
I highly recommend getting a Cricut® Tools spatula (Figure 15.11), an artist palette knife, or a clam knife. I use these to gently pry completed printed objects off of my build plate. If you’re careful, you can use your build plate tape covering for many different prints. I also use these tools to clean off a hot nozzle when filament gets stuck to it. A pair of metal tweezers comes in handy as well.

FIGURE 15.11 Be careful—always pry away from your hands, fingers, and any other body parts you’re particularly attached to.
You’ll also need a pair of scissors or snippers to cut filament and a hobby knife or variable-speed hobby tool (I like the Dremel brand) to remove support material and finish your prints (more on that later). Last, at some point you may need a pair of calipers to measure filament, particularly if you’re using filament from a source other than your printer manufacturer.
Hint
Bed Preparation
One of the challenges with extrusion-based 3D printers is getting the model to stick to the printing bed at just the right adhesion. I’ve had some prints stick nearly permanently while others move during printing. Success depends on how you prepare the bed and set the temperature for the material you’re printing with.
Some printers have a heated printing bed, which is more forgiving of ambient temperature and allows the prints to cool and contract more slowly. With some filaments like PLA that don’t shrink much, that’s not as critical, but with others like ABS, if they cool and contract, they pop off the bed surface before the print is finished. There will be particular temperatures recommended by the manufacturer for the bed just as there are specific temperatures for the extruder based on the material being used.
When choosing a printer, if you’re only going to print with PLA, a heated bed isn’t as critical, but if you’re going to use other materials, you’ll definitely want one that has that feature. I’ve found that glass beds seem to be much more predictable and reliable, especially for large flat prints like lithophanes. After-market glass beds are available for most printers that shipped with an acrylic bed.
Let’s talk about bed coverings next. While some advanced users do print directly on the bed, I recommend that you use some sort of removable tape so that you have a more forgiving surface if something goes wrong. This tape has to be sticky enough to hold down on the build plate (either glass or plastic) yet release without leaving a residue behind—even after it’s been heated by the extruding plastic.
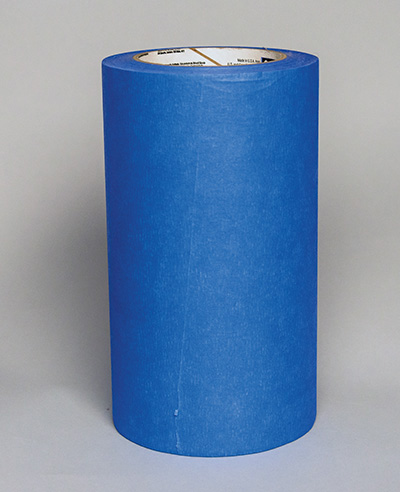
So let’s take a printer like the MakerBot Replicator 5th Generation as an example. It has an unheated glass printing bed and prints only in PLA. For that situation, I like to use wide blue painter’s tape to cover the plate because it’s inexpensive and easy to work with (Figure 15.12). I prefer to purchase this tape in pre-sized sheets or in rolls wide enough to cover the entire plate with one strip rather than use the 2- or 3-inch wide blue painter’s tape from your local home center. With the narrower tape you might have overlapping strips that would cause problems with your print or gaps between the tape that would allow the extruded plastic to adhere near-permanently to your build plate.
Gaffer’s Tape

FIGURE 15.13 Gaffer’s tape can help with some kinds of printing problems but is harder to work with.
Hint
Don’t skimp on tape quality—buy high-quality, brand-name stuff from reputable vendors. I use www.bhphotovideo.com to buy my gaffer’s tape and www.tapecase.com to buy real 3M painter’s tape. Like everything else, I suggest you buy bed tape direct from your printer manufacturer as you get started. Again, it’s all about eliminating variables.
As another example, let’s look at printing with ABS on the TAZ 4. My TAZ 4 came from the factory with the bed covered with PET polyester film. This film can be replaced, but it’s not the easiest thing; it’s best to use some sort of adhesive release coating on top of the film (which can last for dozens of prints if treated well). For ABS the bed also must be heated to prevent warping and detachment. The classic method of coating PET film for ABS printing has been to dissolve small pieces of ABS in acetone to create a slurry that’s painted on the bed. I try to avoid acetone whenever I can, so Ben and Natasha at Aleph Objects suggested using an Elmer’s washable glue stick instead and coating the film with a layer before each print. That’s turned out to be an awesome solution; the print sticks well yet releases cleanly with minimal force (once it’s cool, of course—patience is a virtue). Then I can use a wet paper towel to wash off the residue with no damage to the film.
Caution
Acetone is highly flammable and not something to breathe. If you do try the slurry, make sure the printer is turned off, dead cold, and in a well ventilated room away from any ignition sources.
Covering the Build Plate for PLA Printing
For getting started with PLA printing, your best bet is to use blue painter’s tape on an unheated bed. You’ll need to cover your build plate completely—edge to edge, with no tape overlap or overhang off the edge.
Note
Some printers, like the MakerBot in this example, have quick-remove build plates. This makes it much easier to reapply the tape.
First, make sure your hands are clean and dry and without lotion or oil on them (you can wear gloves for this part if you want). Clean the build plate with isopropyl alcohol and allow to dry. Pull out enough tape to cover the plate, but leave it attached to the roll, and then slowly lower one corner down and lightly press it onto the plate. Make sure there aren’t any bubbles that form—you can lift it back off a bit, but if you do it too many times, the adhesive may not stick as reliably. Use a credit card behind the tape to press it into the surface as you slowly lower it down. Once it’s down, cut the tape off the roll with your sharp hobby knife. Use your fingers to press the tape firmly onto the surface.
Next, trim the excess tape off the build plate. Press the edges down one more time. If you’re making a large, flat print, lightly wipe down the surface of the tape with isopropyl alcohol to remove any oil from your hands.
When reinserting a removable build plate in the printer, make sure it’s seated properly; on some printers, it’s easy to get it misaligned, so I run my fingers along both edges to make sure it’s under the little tabs on all four corners. Take your time and don’t rush.
I change my tape whenever there’s a tear or nick, when models don’t stick to it reliably anymore, or if it has lifted off the build plate during a print.
Leveling the Build Plate
The biggest cause of failed prints is a build plate that’s not level or not set at the right gap from the print head. I recommend leveling every time you change the tape or filament. I also suggest leveling after printing a few small- or mediumsized prints or if you have printing problems. And I always level before every large print.
Note
Level your printer itself as well as the printer table as best you can. If you have to trade perfectly level for perfectly stable, stable is the better option.
With filament loaded in the printer, a small portion can be stuck to the tip of the extruder, which will cause you to level too far from the bed. For that reason, it’s always best to unload the filament from the printer before leveling. As it cools, use tweezers to remove the remaining filament that “leaks” from the extruder. Once it’s cold, proceed to level the bed. Some new printers, like the MakerBot Replicator 5th Generation, force unloading before leveling to avoid this problem.
There are two kinds of leveling processes: manual and automatic. In either case, always make small adjustments rather than large movements of the adjustment knobs. The Replicator 2 and TAZ 4 use manual leveling—you check the gap manually and adjust the plate until it feels right.
Tip
Jen at MakerBot suggested using a folded Post-it note and adjusting the height at each position until it feels like a pencil dragging across the paper (Figure 15.14). That works really well—I tried using a metal shim with a specific known thickness, but it didn’t work as well as the method she suggests. Sometimes you can over-engineer a solution.

FIGURE 15.14 The feel as you level reminds me of those thick pencils and Big Chief tablets in first grade.
More and more of the newer printers have automatic leveling systems, with some that do it all, and some still require some manual turning of knobs (though the printer will tell you which knob to turn and how much). Either of these takes a lot of the guesswork out of the process. With any of these systems, I recommend repeatedly leveling until there’s no further adjustments to be made. It may take several times to get it dialed in just right. If it doesn’t seem to converge, contact your printer’s support department for help.
Now that we’ve got a model and a printer ready, it’s time to start actually printing!
The Printing Phase
The first time you print something, you’ll probably end up watching the entire process. My first job was the chain that comes with the MakerBot printers. It took about 25 minutes, and when I peeled it off the plate, broke away the raft, and saw the chain actually move and flex, I chuckled like a schoolboy and was hooked.
Slicing
As you’re ready to begin the printing phase, I recommend using the slicing and printing software that comes with your printer. Slicing prepares your model for printing by dividing it into layers, generating toolpaths, and then creating instructions for your printer. For nuances of printer-specific slicing, see your printer’s manuals.
There are two important items you have to make decisions about when preparing your model to print: rafts and supports. A raft is a printed layer of filament on the bed of your printer that helps control warping and allows the model to stick better to the surface (Figure 15.15). The raft is designed so that it can be popped off of your model rather than requiring cutting or sanding. Supports are needed because 3D printers can’t print in midair and only up to about a 40-degree angle. Slicing software can automatically create supports where needed (Figure 15.16). That’s great, but cleaning up a model afterwards can take some time. Both rafts and supports take extra filament, so I try to position the model in the slicing/printing software to minimize both of them as much as I can.

FIGURE 15.15 Rafts are much more important on unheated beds—I always use a raft on those printers. With heated beds, I rarely do.

Begin by adding your model to the print—scale it to the size you want during this step. The first thing I do is to look for areas where support is going to be needed. I really try to avoid having supports on the front of a face or in areas where there’s a lot of detail as it makes removal more difficult. Turn and move your model as necessary until you think you’ve gotten a good layout (Figure 15.17). Make sure it’s flat on the surface, and then click the button to start the slicing process.
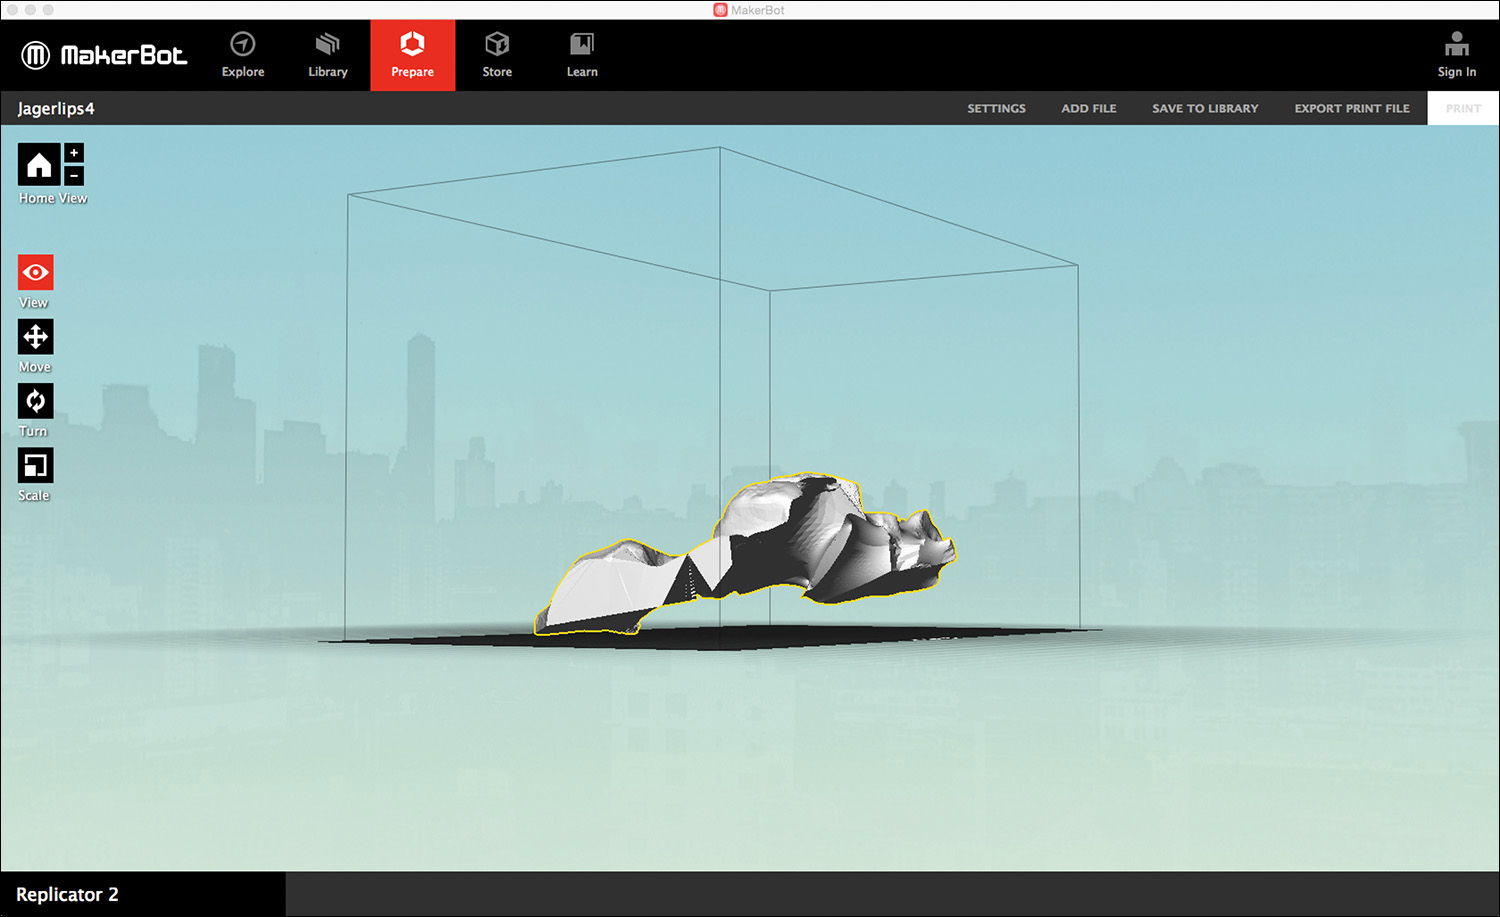
FIGURE 15.17 Sometimes the best orientation can be counterintuitive, so you’ll need to try a few small prints and see if horizontal or vertical works best.
Here we have several options. For a first print using PLA on an unheated bed, I suggest using a medium or standard profile and selecting the Raft and Support checkboxes. As you get more advanced, you may want to change the number of shells (the number of layers of solid material that it prints around the outside of the object) and the fill percentage (it uses a grid fill to increase strength and save material). I generally don’t change either of those settings unless I’m printing a lithophane (see Chapter 18). Once you have your settings, click to continue. Slicing may take some time, especially for a complex model. If it runs for more than 10 or 15 minutes, your model is probably too complex to successfully print (it has too many polygons) or has errors in it that the slicing software can’t fix.
Once it’s done, most slicing software lets you review the printed version on your computer (Figure 15.18). It’s worth taking a moment to see what’s going to happen. In this case, everything looks fine, so it’s ready to print. This really is a bit of a trial-and-error process. Again, I suggest working with small models and watching the printer as it runs until you get a feel for what’s likely to be a problem.

FIGURE 15.18 I always check my slices to make sure the model will print as expected. The yellow area in Cura here is the slice that the slider on the right is showing.
Tip
I’ve found that I get better results at scaling if I do it in the modeling software rather than simply exporting the model and letting the printing software modify the size. The challenge is that scale can be somewhat independent of the real world (something that bites me often), so it’s often trial and error to get it just right. Fortunately, it takes only a minute to export as an OBJ and import that into your printing software.
Printing
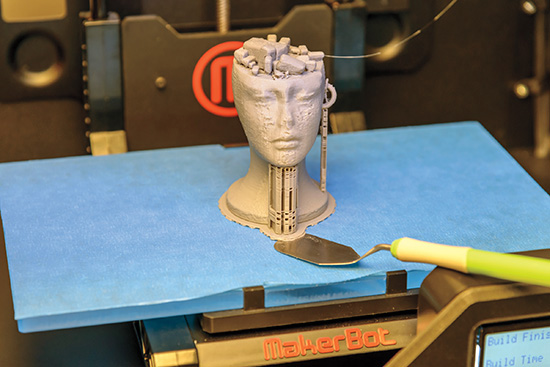
If your printer is networked, you can just send the file to the printer; otherwise, copy the file to the SD card and plug it into the printer so you don’t lock up your computer for hours. Then grab your favorite beverage and watch it print! I still find myself following the progress like one of my cats watching the fish tank—it’s just plain cool. The extruder melts the filament and slowly builds up layers, less than a millimeter at a time. When it’s done, allow the bed to return to the home position and let the printer, bed, and model cool to room temperature (it only takes a few minutes). If you have a removable bed, take it out of the printer before carefully prying the print off the bed (Figure 15.19). If your printer uses a starter line or brim, pop that off and throw it away, too. If you damaged your tape on the bed, I’d suggest immediately replacing it so you don’t accidently print on an uncovered bed. If you won’t be printing for a while or are in a very humid climate, unload your filament (remember the tip on unloading!) and store it in the cooler with the desiccant.
Finishing Your Model
If you used a raft, hold the model in one hand and flex and peel it off with the other hand. If it’s a bit hard to get going or very small, you can use the spatula as well. Once the raft is off, break off as many of the supports as possible while being careful not to break the model itself. Bonny says removing it reminds her of cracking crab legs, but I’m sure it doesn’t taste as good.
You can use a sharp hobby knife to trim them down further, but I find that using a Dremel tool works best (Figure 15.20). Make sure you wear appropriate safety equipment and do this in an area where you can control the dust that forms—not right next to your spool of fresh filament!

Look for a Dremel model that has variable speed and set it on the lowest speed to avoid melting the plastic with friction. I start with one of the cutting blades or disks to remove the bulk of the support material, and then switch to a grinder to bring it down to the surface. A final polish with a sanding wheel gives it a smooth finish. If you want, you can sand the entire surface with a fine-grit sandpaper to eliminate any shine or striations or to prepare the surface for the processes in the other chapters in this section.
One of the big challenges is assembling a final sculpture from multiple printed parts. This is an area of a lot of experimentation across the 3D printing community. Gluing is a chicken-and-egg challenge—many glues won’t stick to a painted or transferred surface, and many paints and transfers won’t stick to the glue.
You can try an adhesive like Loctite 401 or Duco Cement; just read the safety instructions. A hot glue gun works really well if you’re careful not to get extra glue on the surface, but since it has a lower melting point the final model may not be as durable. For filaments like ABS, you can make an ABS/Acetone slurry to use as a glue. You can also “weld” the parts together with a soldering iron, a bit of extra filament (you can reuse those starter lines as “welding” material), and a lot of care, but that’s really challenging and you can end up with burned fingers.
Caution
Printed plastic can be sharp, and when you break supports, it can cause pieces to fly into the air. Sanding can also create dust and particles. Cutting supports can require a lot of force before they give way suddenly. So, as we said at Boy Scout Camp, to avoid getting a “Finger Carving Merit Badge,” always wear appropriate hand, eye, and other safety equipment when breaking, cutting, sanding, or polishing printed models.
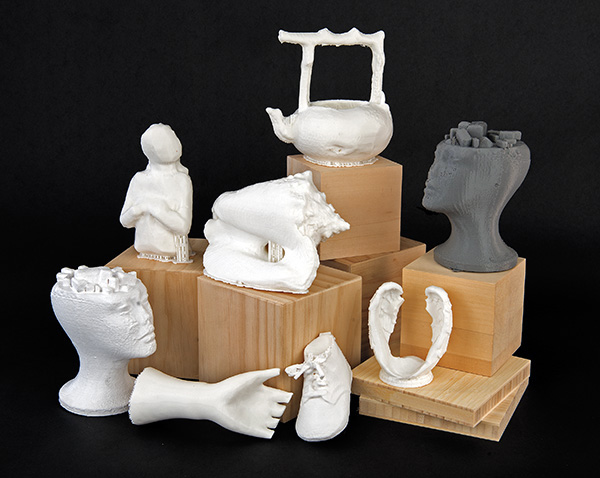
Conclusion
For me, 3D modeling and printing is the most exciting new technology to come along in years, and I’m absolutely convinced it’s going to change the world. The potential to transform our general lives is endless: being able to download instructions to print a replacement part for your window blind (instead of throwing it away and buying a new one), manufacturing your own toys, or, as some really cutting-edge folks are doing, printing prosthetic limbs. In the art world, it has the potential for artists to produce editions of original sculptures and for photographers to truly bring a third dimension to their work. The chapters in Section 4 show experimental concepts using this new technology, so take the ideas, tips, and techniques, apply your own insights to create unique works, and share your eureka moments with the world (Figure 15.21).