5. Mirrors and Mylar Reflections
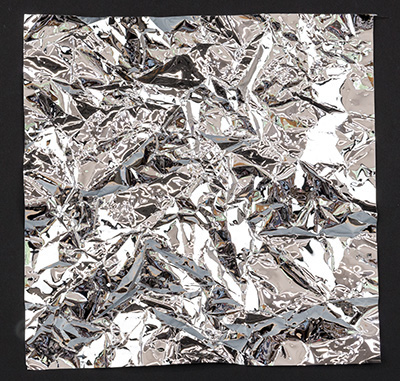
Kaleidoscopes have always fascinated me: The mirrors, beads, and stones in the cylindrical tube produce an unending and never repeated sequence of shapes, forms, and colors—it’s almost alive. I’ve always wondered if there was a way I could take photographs that mimicked that unique look. When I was cleaning my studio one day, I noticed a scrap of Mylar foil on the floor, crumpled up and reflecting pieces of the room in all the different folds. This was yet another serendipitous accident that led me to another way reality can be transformed. While reflected reality in photographs isn’t unusual, I was initially limited to what was already there; in this chapter I’ll share ways you can bring your own reflection tools along to any location.
For a current and updated list of products and resources (since products may change over time), you can check the book’s website: www.hackingthedigitalprintbook.com.
About the Mylar Reflector Process
I do have my limits for my art—there’s only so much I’m going to drag out to a cornfield, and very large, heavy mirrors aren’t on my list (Figure 5.1). Instead I use Mylar, in many different forms, to achieve my goals and save my back at the same time. Reflectors like these can be crumpled, taut, loose, or even assembled from multiple pieces, each of which gives a completely different look (Figures 5.2 through 5.6). Moving the reflector slightly (or waiting for the wind to do it for you) lets you capture multiple images of the same scene, all looking different, yet clearly part of a common body of work.
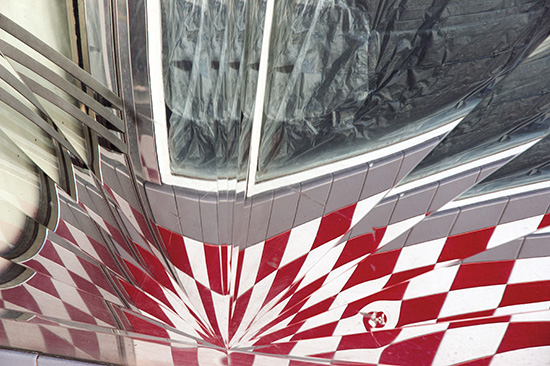
FIGURE 5.1 A classic photographic technique is to capture an image in the reflection of a building...if one is around!


Hint
You can add dimension to the image by misting the Mylar with a spray bottle filled with water.
Tip
Mylar is available in gold, too—that’s one thing still on my to-do list.
Have fun and experiment with this—circles, ovals, even Mylar balloons can all create unique patterns. And it may help you look at common scenes in new ways, like the wildlife preserve I passed a few times before I finally decided to stop and take some shots using my very portable Mylar reflector (Figure 5.7).
To make and use Mylar reflectors:
Place an old or inexpensive wooden picture frame on a flat surface and then roll the Mylar across the surface. Staple at the center of each side, and then alternate sides, pulling it tight and adding more staples (Figure 5.8). You can make it as tight or as loose as you’d like—the looser it is, the more distortion it will create, like with this image of aspen trees (Figure 5.9).
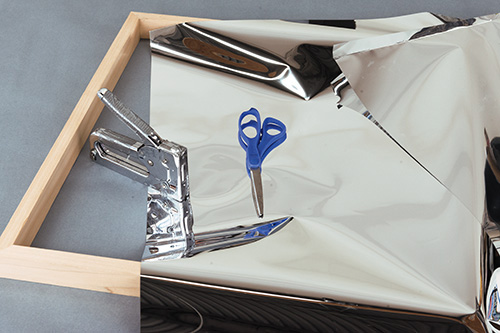

FIGURE 5.9 I placed the reflector flat on the ground to capture this image—changing perspective in more than one way.
Hint
Wind-blown highlights are a common challenge when taking images in distortion reflectors, so usually I take several exposures that I can later blend together. Just make sure you use a tripod if you want the blended stack to register well in Photoshop, and hope the wind doesn’t blow too much!
Materials Needed
![]() Wood frame or stretcher bars
Wood frame or stretcher bars
![]() Reflective Mylar
Reflective Mylar
![]() Water
Water
Tools Needed
![]() Scissors
Scissors
![]() Mat knife
Mat knife
![]() Ruler used for a cutting edge
Ruler used for a cutting edge
![]() Staple gun
Staple gun
![]() Spray water bottle
Spray water bottle
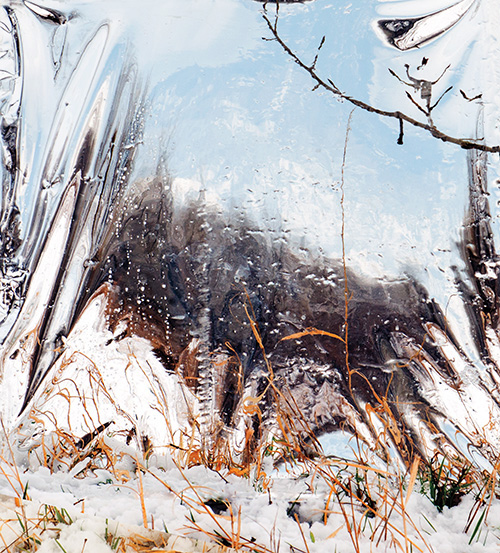
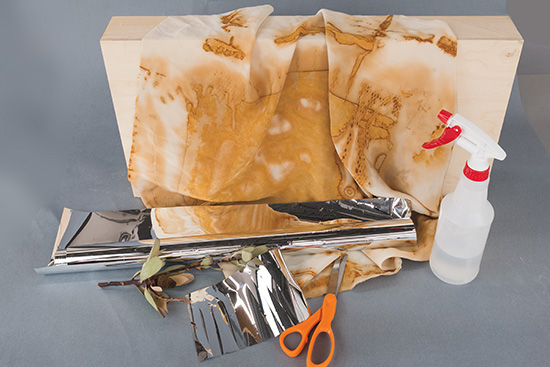
After the last snowfall of the year, I took a trip to the ponds near my home. I picked out a location to work (Figure 5.10) and then moved around until I found a good spot to frame what I wanted to photograph (Figure 5.11). As the snow began to melt off the tree above, it added water droplets to the final image that really set it off nicely (Figure 5.12). I always love it when Mother Nature is a partner in my work.


I love using the reflectors outside to capture parts of the natural world, but sometimes Mother Nature really isn’t happy, and I retreat to my warm, dry studio. Here, I’m able to cut strips, drape large sheets, or make custom backgrounds without the wind blowing items across the fields (Figure 5.13).
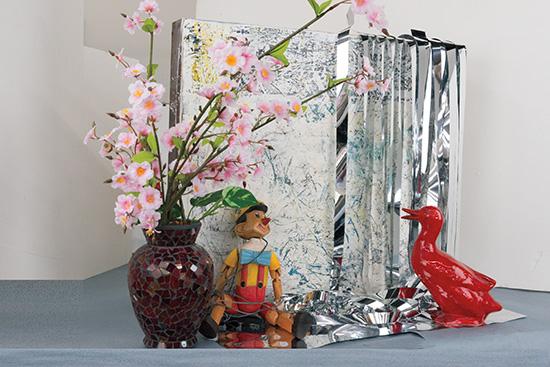
Even then, doing a still life shoot can be a spur-of-the-moment thought—usually when I’ve brought some interesting find into the studio from a salvage yard or antique shop. I know that adding a reflector will create something completely different, transforming the ordinary into an abstract work (Figure 5.14). I approach this the same way I do cooking—look around, see what’s available, throw it together with a few creative herbs and spices, and let it simmer until something wonderful comes out.

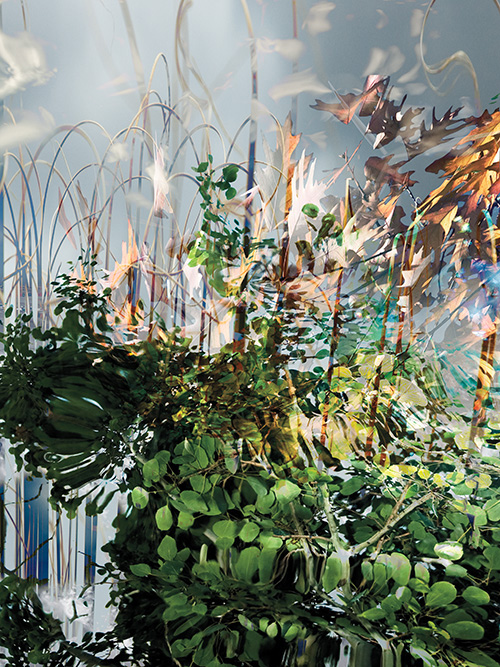
I’ve taken to carrying a few small pieces of Mylar with me so that I can use them with my iPhone for those spur-of-the-moment photographs (Figure 5.15). In this setting of flowers with fringed Mylar underneath, I sprayed the Mylar with water to add texture and increase the reflection and then shot the image. When I got home and opened the image on the computer, I had a nice surprise awaiting me—just a bit of cropping to zero in on the perfect composition and I had something ready to go (Figure 5.16).

I’d encourage you to give this a try—it’s more convenient than waiting for rain to form puddles (or getting a hose and making your own), and it lets you put mirrors where you want them. Then experiment, tweak, change, and do your own thing with your images—your portfolio is a reflection (pun intended) of your own view of reality. So take a look at the world in a different way, and discover what you can see.
When you take a photograph of a subject, the camera captures a 2D image of a 3D subject, but when you take one of a reflected image, it captures a 2D subject. It’s a subtle but important difference. I often find that framing the camera on a reflection helps me define the composition—and for some reason, I notice those strange outliers (like telephone poles growing out of someone’s head) better in a reflected image.
In this example, I set up an antique shaving mirror reflecting an image of an antique creamer (Figure 5.17). After taking the first image, I looked at it on the computer to help decide which part of the still life I wanted to focus on. In this case, I decided that the picture of the mirror itself was only what I wanted, so I refocused the camera and took the final image (cropping it in the camera rather than the computer). I like how the texture of the mirror perfectly complements the creamer (Figure 5.18).


About the Polished Metal Reflector Image Process
Mylar and mirrors allow me to either capture a scene perfectly or distort it almost beyond recognition. But there are times when I want something softer and more ephemeral, yet still visibly recognizable. While I could probably achieve this on the computer using filters, there’s something about doing it in the real world that enhances the image in a unique way. Also it avoid the whispers in the gallery discussing what filter was used and instead focuses attention on the composition.
Materials Needed
![]() Mill finish copper, aluminum, or brass sheet
Mill finish copper, aluminum, or brass sheet
![]() 300-, 600-, 1000-, and 2000-grit waterproof sandpaper
300-, 600-, 1000-, and 2000-grit waterproof sandpaper
![]() Steel wool pads with soap (like S.O.S. brand)
Steel wool pads with soap (like S.O.S. brand)
![]() Dishwashing detergent (with grease removal)
Dishwashing detergent (with grease removal)
![]() #0000 steel wool
#0000 steel wool
Tools Needed
![]() Smooth, solid work surface
Smooth, solid work surface
![]() Waterproof gloves
Waterproof gloves
Tip
Mill finished means that there isn’t any permanent coating or anodizing (used to prevent corrosion) on the metal surface. Since metal like this can degrade over time, it often comes with a light coating of oil to protect it until use—this has to be removed to get the results we want. Coated or anodized surfaces won’t polish to the level we need, so be careful when you buy your materials.
To make a polished metal reflector:
Taking the time to prepare the mill finish metal can be tedious but the end result is well worth the effort. The reflection in a polished surface has a different character from a mirror because the reflective coating is on the front of the surface and not behind glass. There are front-surface mirrors available, but they are very expensive, and besides, this is good practice for scrubbing out your studio sink.
For this section, I’m working with an aged aluminum plate (see The Last Layer for information on how to make them). I’m going to polish only the center oval so I have a non-reflective surface around the edge to act as a frame for my final reflected image. You can use a whole sheet, or other metals if you’d like—it’s all about the look you’re trying to achieve.
Tip
You can try an electric random orbital sander, but only if it’s rated for wet sanding use. I don’t have one, so it’s elbow grease only.
1. Wet the 300-grit sandpaper and scrub the portions that you want to have a mirror finish until it’s as shiny as it will get. Wash the residue off with water, and then repeat with the 600-, 1000-, and 2000-grit wet sandpapers in turn to remove the scratches and further polish the surface. It may take as long as 15 minutes for each grit (Figure 5.19).

FIGURE 5.19 Gradually increasing the grit of the sandpaper removes the scratches from the previous sanding.
2. Wash the sanded plate with warm, soapy water and dry it completely.
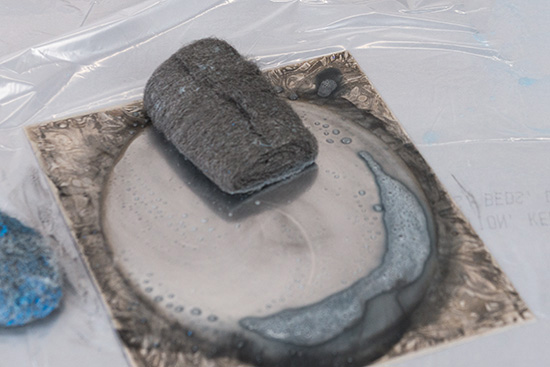
3. Wet your steel wool soap pad and lightly polish the surface (Figure 5.20). Take your time with this, using the soap to help bring up the shine to a mirror-like reflective surface.

4. Leave the soap on the plate, and then switch to the #0000 steel wool and do a final polish with a light touch (Figure 5.21).
5. Wash and dry the plate, and then take a test photograph to see if it has reached your desired mirror finish. In this case, it’s not quite where I want it, so back to the polishing (Figure 5.22).

6. Repeat Steps 3 through 5 until you reach your desired result (Figure 5.23). If you’re not worn out yet, doing one final buffing with a lamb’s wool buffing pad gives a nice final finish.

Conclusion
The world can be reflected in water, mirrors, Mylar, or our own mind and experience. Changing how we reflect it can change how we view it—and using that technique in our art adds substance to the final work not achievable in any other way. When viewed through a high-shine, we get almost a perfect reflection, but not quite. When viewed through a distressed, bent, or faceted mirror, a character of the world is revealed that’s otherwise hidden.
As an artist or photographer, making your own mirror is another way to bring the hand back into your work—but this time before the image is taken instead of afterward. It’s another arrow in your quiver, a tool to create something that makes your body of work different. You may find, as I have, that it pushes your envelope and challenges you to slow down and take more time before the shutter goes click, rather than time afterward making the mouse go click. I like having my art happen on both sides of the camera lens and computer screen, and these are fun ways to do that (Figure 5.24).
