
In this book, we have learned a lot about Neo4j capabilities, including graph data modeling, Cypher, and link prediction using the Graph Data Science Library. Almost everything we have done required writing Cypher queries to extract data and/or store the results in Neo4j. In this chapter, we will discuss how to use Neo4j in a real-world web application, using either Python and the Flask framework or the React JavaScript framework. This chapter will also give you the opportunity to play with GraphQL in order to build a flexible web API.
The following topics will be covered in this chapter:
- Creating a full-stack web application using Python and Graph Object Mappers
- Understanding GraphQL APIs by example – the GitHub API v4
- Developing a React application using GRANDstack
Let's get started!
Technical requirements
In this chapter, you will require the following technical tools:
- Neo4j ≥ 3.5
- Python:
- Flask: A lightweight but powerful framework used to build web applications.
- neomodel: A graph object mapper for Python that's compatible with Neo4j.
- requests: A small Python package used to make HTTP requests. We will use it to test a GraphQL-based API.
- JavaScript and npm
Creating a full-stack web application using Python and Graph Object Mappers
There are different ways to programmatically interact with Neo4j. In the previous chapters, we used the Neo4j Python driver, from which we have been able to execute Cypher queries and retrieve the results, especially for creating DataFrames in a data science context. In the context of a web application, manually writing a Cypher query each time we want our program to perform an action on the graph would be a very time-consuming and laborious task involving repeating code. Fortunately, Graph Object Mappers (GOMs) have been created to interface Python code to Neo4j without us having to write a single Cypher query. In this section, we are going to use the neomodel package and use it alongside Flask to build a web application that displays information from Neo4j.
Our context is similar to GitHub: we have users that can own and/or contribute to repositories.
Toying with neomodel
neomodel is a Graph Object Mapper for Python whose syntax is very close to Django's object-relational mapping (ORM). For instance, in order to retrieve the user whose ID is 1 from a User table (SQL), in Django, you would write the following:
User.objects.get(id=1
The same goal can be achieved with neomodel to retrieve the node with the User label, whose id property is 1, with the following code:
User.nodes.get(id=1)
In both cases, this statement returns a User object whose id is 1. How we define this object in the case of Neo4j is the topic of the upcoming subsection.
The previous statement is equivalent to the following Cypher query:
MATCH (u:User {id: 1}) RETURN u
By using this package, you can also traverse relationships, which is the purpose of graphs!
Defining the properties of structured nodes
Neo4j does not have a schema for node properties. You can basically add whatever you want as a property for nodes with any label. However, in most cases, you know what your data must look like and at least some of the fields are mandatory. In this case, you need to define a StructuredNode. If, on the contrary, you do not have any constant properties for your nodes, then a SemiStructuredNode will meet your requirements.
StructuredNode versus SemiStructuredNode
In neomodel, we will create a model for each node label in our graph. A model is a class that will declare the properties that are being attached to a given node label.
We can choose to create StructuredNode or SemiStructuredNode. A StructuredNode will have to declare all properties that can be attached to it. You will not be able to add properties to a node if these properties have not been declared. On the other hand, SemiStructuredNode offers more flexibility.
In this chapter, we will always use StructuredNode since the graph schema will be clear from the beginning. The minimal code to create a User model is as follows:
from neomodel import StructuredNode

class User(StructuredNode):
    pass
The next step is to declare the properties for this model.
Adding properties
Properties have types. In neomodel, all the basic types are available:
- String
- Integer
- Float
- Boolean
- Date, DateTime
- UniqueID
Apart from that, there are other extra types that exist as well, as follows:
- JSON
- Email (a string with extra checks for its format)
- Point (the Neo4j spatial type)
Each of these properties is created with some optional parameters to define; for instance, whether they are required or not.
For our purposes, let's create a User model with the following properties:
- login (String): Required and a primary key
- password (String): Required
- email (Email): Optional
- birth_date (Date): Optional
The User model should look like this:
class User(StructuredNode):
    login = StringProperty(required=True, primary=True)
    password = StringProperty(required=True)
    email = EmailProperty()
    birth_date = DateProperty()
Now that our model exists, we can use it to create and retrieve nodes, without writing any Cypher queries.
Creating nodes
The simplest way to create a user is by creating an instance of the User class:
u = User(login="me", password="12345")
To save the object, or create it in Neo4j, you just have to call the save method on that instance:
u.save()
If you want to use a MERGE statement instead, you will have to use a slightly different method:
    users = User.get_or_create(
        dict(
            login="me",
            password="<3Graphs",
            email="[email protected]",
            birth_date=date(2000, 1, 1),
        ),
)
Now, go ahead and add a few more users to the graph. Once we have some users in the graph, we can retrieve them.
Querying nodes
If you want to see all the nodes in the graph, you can use the following code:
users = Users.nodes.all()
This is equivalent to the following:
MATCH (u:User) RETURN u
users is a list of User objects. We can iterate through it and print the user properties:
for u in users:
    print(u.login, u.email, u.birth_date)
Next, we'll look at filtering nodes.
Filtering nodes
GOM also allows you to filter nodes based on their properties:
- User.nodes.get: This is when a single node is expected to match the requirements. If no node is found, a neomodel.core.UserDoesNotExist exception is raised.
- User.nodes.filter: This is when you expect several nodes to match the requirements. Similar to the User.nodes.all() method, the filter() method returns a list of User.
Nodes can be filtered when their properties match. For instance, you can filter all users whose birth date is January 1, 2000, with the following:
users = User.nodes.filter(birth_date=date(2000, 1, 1))
The equivalent Cypher for this statement is as follows:
MATCH (u:User)
WHERE u.birth_date = "2000-01-01"
RETURN u
However, you can also use other filters by adding a __<filter_name>=<value> suffix to the property name in the filter clause. The available filters are limited and listed at https://neomodel.readthedocs.io/en/latest/queries.html#node-sets-and-filtering. For instance, we can filter users born after January 1, 2000, by asking for a birth date greater than 2000-01-01:
users = User.nodes.filter(birth_date__gt=date(2000, 1, 1))
You are now able to create (check the previous section) and retrieve nodes from Neo4j. However, GOM doesn't stop here and also allows you to model relationships between nodes.
Integrating relationship knowledge
First, let's create another StructuredNode to represent repositories. In this exercise, repositories are only characterized by their name, so the Repository class only contains one property:
class Repository(StructuredNode):
    name = StringProperty()
Next, we are going to let neomodel know about the relationships between users and repositories. This is done in order to filter users or repositories depending on whether a relationship between them exists.
We want to keep track of both repository ownership and repository contributions. Regarding the contributions, we want to know when the user contributed to that repository. Therefore, we will create two relationship types: OWNS and CONTRIBUTED_TO.
Simple relationship
Let's start with the ownership relationship. In order to materialize it in our user, we need to add the following line:
class User(StructuredNode):
    # ... same as above
    owned_repositories = RelationshipTo("Repository", "OWNS")
This allows us to query the repositories from the users:
User.nodes.get(login="me").owned_repositories.all()
# [<Repository: {'name': 'hogan', 'id': 47}>]
If we also need to perform the operation the other way around – that is, from the repositories to the users – we also need to add the opposite relationship to the Repository model:
class Repository(StructuredNode):
    # ... same as above
    owner = RelationshipFrom(User, "OWNS")
We can also get the owner from the repository:
Repository.nodes.get(name="hogan").owner.get()
# <User: {'login': 'me', 'password': '<3Graphs', 'email': '[email protected]', 'birth_date': datetime.date(2000, 1, 1), 'id': 44}
The OWNS relationship does not have any attached properties. If we want to add properties to the relationship, we will have to create models for the relationships as well.
Relationship with properties
For the contribution relationship, we want to add a property that will save the relationship when these contributions happen; let's call it contribution_date. This can also be achieved in neomodel using StructuredRel:
class ContributedTo(StructuredRel):
    contribution_date = DateTimeField(required=True)
This class can be used to create the required relationship in the model class:
class User(StructuredNode):
    # ... same as above
    contributed_repositories = RelationshipTo("Repository", "CONTRIBUTED_TO", model=ContributedTo)


class Repository(StructuredNode):
    # ... same as above
    contributors = RelationshipFrom(User, "CONTRIBUTED_TO", model=ContributedTo
With a relationship model, we can filter patterns by relationship properties using the math method. For instance, the following query returns users contributing to the hogan repository after May 5, 2020, at 3 p.m.:
Repository.nodes.get().contributors.match(
    contribution_date__gt=datetime(2020, 5, 31, 15, 0)
).all()
The preceding code is equivalent to the following Cypher query:
MATCH (u:User)-[r:CONTRIBUTED_TO]->(:Repository {name: "hogan"})
WITH u, DATETIME({epochSeconds: toInteger(r.contribution_date)}) as dt
WHERE dt >= DATETIME("2020-08-10T15:00:00")
RETURN u
You are now able to use neomodel to model your Neo4j graph.
In the following section, we will use the model we have created in this section to retrieve data from Neo4j and create new nodes and relationships through a simple user interface built with Flask.
Building a web application backed by Neo4j using Flask and neomodel
In this section, we are going to use one of the popular web frameworks for Python, Flask, in order to build a fully functional web application using the neomodel models we created earlier.
Creating toy data
First of all, let's copy the preceding code into a models.py file. The equivalent file in the Packt GitHub at https://github.com/PacktPublishing/Hands-On-Graph-Analytics-with-Neo4j/blob/master/ch11/Flask-app/models.py contains a few extra lines. They contain some instructions we can use to create example data that we will play with in the following section. To execute it, just run the following command from the root directory:
python models.py
The created nodes and relationships are illustrated in the following diagram:

We have one repository called hogan, owned by a user whose name is me. The user me also contributed to this repository. Two more users, you and trinity, also contributed to the same repository.
Let's start writing our first web page.
Login page
To begin with, we will create a login page in our application so that we can authenticate users. For this, we will rely on the Flask-login package, which will take care of saving the user data in the browser session, for instance. However, we still need to create the form and link it to our User model.
Creating the Flask application
Let's go ahead and create the Flask application in a new app.py file:
app = Flask(__name__)
Since our application will use various forms and POST variables, we need to add Cross-Site Request Forgery (CSRF) protection:
csrf = CSRFProtect(app)
To use the Flask-login plugin, we also need to define a SECRET variable and instantiate the login manager:
app.config['SECRET_KEY'] = "THE SECRET"

login_manager = Flask_login.LoginManager()
login_manager.init_app(app)
With that, our Flask app has been created and we can run it with the following code:
Flask run
However, we have not created any routes yet, so for now, all our URLs will result in a 404, Not found error. We will add the /login route in the following paragraphs.
Adapting the model
In order to use our User class with Flask-login, we need to add a few methods to it:
- is_authenticated: Determines whether the user authentication succeeded.
- is_active: Can be used to deactivate users (email address not validated, subscription expired, and so on).
- is_anonymous: This is another way to detect unauthenticated users.
- get_id: Defines the unique identifier for each user.
Since these methods are common to almost all web applications, they have been implemented in a UserMixin, which we can add to our User class to access these methods. The only method we need a custom behavior for is the get_id method since our model does not have an id field; here, the primary key role is taken by the login field:
class User(StructuredNode, Flask_login.UserMixin):
    # ... same as above

    def get_id(self):
        return self.login
The login form
In order to manage form rendering and validation, we will use another Flask plugin called wtforms. This plugin requires that the form is defined in a dedicated class, so let's go and create a login form. This form requires the following:
- A username/login: This is a required text input that can be created with the following line:
login = StringField('Login', validators=[DataRequired()])
- A password: This is also a required text input with a hidden value (we do not want our neighbor to read the password on the screen). On top of StringField with a DataRequired validator, we will also specify a custom widget for this field:
password = StringField('Password', validators=[DataRequired()],
                           widget=PasswordInput(hide_value=False)
    )
- A submit button:
submit = SubmitField('Submit')
The full code for the login form is as follows:
class LoginForm(FlaskForm):
    login = StringField('Login', validators=[DataRequired()])
    password = StringField('Password', validators=[DataRequired()],
                           widget=PasswordInput(hide_value=False)
    )
    submit = SubmitField('Submit')
Let's continue our implementation and create the login template that will render this form.
The login template
On the login page, which will be accessible via the /login URL, we want to display the login form; that is, the login and password input fields and the submit button. Flask, like many web frameworks, uses a template generator, allowing us to dynamically display variables on the page. The template generator used by Flask is called Jinja2. The following Jinja2 template allows us to display a simple login form with two text inputs (login and password) and a submit button:
    <form method="POST" action="/login">
        {{ form.csrf_token }}
        <div class="form-field">{{ form.login.label }} {{ form.login }}</div>
        <div class="form-field">{{ form.password.label }} {{ form.password }}</div>
        {{ form.submit }}
    </form>
This template can be added to the templates/login.html file, after we've added the basic HTML tags (see https://github.com/PacktPublishing/Hands-On-Graph-Analytics-with-Neo4j/blob/master/ch11/Flask-app/templates/login.html). You will notice that I have used another interesting feature of Jinja2: template inheritance. The base.html template contains all the constant parts across pages. In our case, I have only included a header, but you can also place a footer or a navigation sidebar, for instance. It also contains an empty block:
{% block content %}
{% endblock %}
This block can be seen as a placeholder, where the code from derived templates will be written.
In the login.html template, we then tell Jinja2 that it needs to be included inside the base template with the following instruction:
{% extends "base.html" %}
We also tell Jinja2 where to put the form inside the base template by surrounding our form with the following instructions:
{% block content %}
  /// FORM GOES HERE
{% endblock %}
In the form template, we assume that the page context contains a form variable that consists of a LoginForm instance. We are now going to inject this variable into the context to be able to see the login page.
The login view
So, let's create a simple /login route that will add a LoginForm instance to the application context. Then, we'll render the login.html template:
login_manager.login_view = 'login'

@app.route('/login')  # URL
def login():  # name of the view
    form = LoginForm()   # create a LoginForm instance
    return render_template('login.html', form=form)  # render the login.html template with a form parameter
Now, you can navigate to http://localhost:5000/login. You should see the following form:

However, at the moment, clicking on the form will raise an error because POST requests are, by default, not allowed on our view. To make them allowed, we have to modify the app.route decorator on our view so that we can add the allowed methods:
@app.route('/login', methods=["GET", "POST"])
def login():
Now that we are able to make POSTs to this view, we can handle them. Here are the steps we will follow:
- Validate the form data with the form.validate_on_submit() method. This method performs the following checks:
- ecks that the required fields are there: This is configured by the field validators.
- Checks that the provided login/password corresponds to a real user: Here, we need to implement our own logic in order to check that a User node with the given login/password exists in Neo4j.
- After doing this, two possible scenarios can occur:
- f the form is valid and the user exists, call the Flask_login.login_user function to manage the session.
- Otherwise, render the login form again.
These operations are performed in the view by the following piece of code:
    form = LoginForm()
    if form.validate_on_submit():
        if Flask_login.login_user(user):
            return redirect(url_for("index"))  # redirect to the home page
    return render_template('login.html', form=form)
In order to check the existence of a User with the given credentials, we need to add a validate method to our form:
class LoginForm(FlaskForm):

    # ... same as before

    def validate(self):
        user = User.nodes.get_or_none(
            login=self.login.data,
            password=self.password.data,
        )
        if user is None:
            raise ValidationError("User/Password incorrect")
        self.user = user
        return self
For convenience, the authenticated user is saved in the self.user form attribute. This allows us to retrieve the user in the login view, without performing the same request again.
Reading data – listing owned repositories
You can try this on your own. The results are presented in the following paragraphs.
The view will use the current_user object saved by Flask_login. This current user is already of the User type, so we can directly access its members, such as contributed_repositories and owned_repositories. The full code for the view is as follows:
@app.route('/')
@Flask_login.login_required
def index(*args):
    user = Flask_login.current_user
    contributed_repositories = user.contributed_repositories.all()
    owned_repositories = user.owned_repositories.all()
    return render_template(
        "index.html",
        contributed_repositories=contributed_repositories,
        owned_repositories=owned_repositories,
        user=user
    )
You may have noticed the use of a new function decorator, @Flask_login.login_required. This will check that the user is already logged in before rendering the view. If not, the user will be redirected to the login view.
In the HTML template, we will simply loop over the contributed and owned repositories in order to display them in a bullet list:
    <h2>User {{ user.login }}</h2>
    <p><a href="/logout">Logout</a></p>
    <h3>List of repositories I contributed to:</h3>
    <ul>
    {% for r in contributed_repositories %}
    <li>{{ r.id }}: {{ r.name }} (on {{ user.contributed_repositories.relationship(r).contribution_date.strftime('%Y-%m-%d %H:%M') }})</li>
    {% endfor %}
    </ul>
    <h3>List of repositories I own:</h3>
    <ul>
    {% for r in owned_repositories %}
    <li>{{ r.id }}: {{ r.name }}</li>
    {% endfor %}
    </ul>
The following screenshot shows what the list of repositories will look like after running the preceding snippet:

In this subsection, we have read data from the graph. Now, let's learn how to add data to it.
Altering the graph – adding a contribution
In this exercise, we are going to let the authenticated user add a contribution to an existing repository. Again, we will use the WTForm Flask extension to manage HTML forms. Our form is even more simple than the login form since it contains only one text input: the name of the repository the user contributed to:
from models import Repository

class NewContributionForm(FlaskForm):
    name = StringField('Name', validators=[DataRequired()])
    submit = SubmitField('Submit')
The provided repository name is validated to make sure a Repository node with that name already exists, and raise a ValidationError otherwise:
    def validate_name(self, field):
        r = Repository.nodes.get_or_none(name=field.data)
        if r is None:
            raise ValidationError('Can ony add contributions to existing repositories')
Now, let's build the template that will render this form. This template should not be surprising to you since it is very similar to the login page template:
    <form method="POST" action="{{ url_for('add_contribution') }}">
    {{ form.csrf_token }}
    <div class="form-field">
        {{ form.name.label }} {{ form.name }}
    </div>
    {{ form.submit }}
    </form>
Let's add another piece of information to this page: the validation errors reported by the form. We'll do this to let the user know what happened. This can be achieved thanks to the following code. This code needs to be added before the <form> tag shown in the previous code snippet:
    {% for field, errors in form.errors.items() %}
    <div class="alert bg-danger">
    {{ form[field].label }}: {{ ', '.join(errors) }}
    </div>
    {% endfor %}
We also need to add a link to our new page from the index page. At the end of the contribution list, add the following item:
<li><a href="{{ url_for('add_contribution') }}">Add a new contribution</a></li>
Now, let's focus on the view. Once the user is logged in and the form has been validated, we can find the repository that matches the name entered by the user and add this repository to the contributed_repositories section of the authenticated user:
@app.route("/repository/contribution/new", methods=["GET", "POST"])
@Flask_login.login_required
def add_contribution(*args):
user = Flask_login.current_user
form = NewContributionForm()
if form.validate_on_submit():
repo = Repository.nodes.get(
name=form.name.data,
)
rel = user.contributed_repositories.connect(repo, {"contribution_date": datetime.now()})
return redirect(url_for("index"))
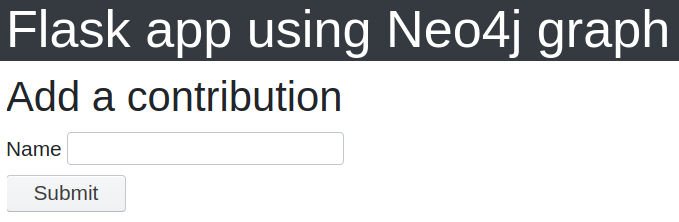
return render_template("contribution_add.html", form=form)
Now, you can navigate to http://www.localhost:5000/repository/contribution/new. You will see something similar to the following:
With that, we have built a web application using Neo4j as the backend. We are able to read data from Neo4j (the login and index pages) and create new relationships in the graph. The full code for this section is available at /Flask-app. This directory contains an extra view that allows the user to create a new repository. I recommend that you try and implement it on your own before looking at the code.
This is one way to interact with Neo4j using Python. The same exercise can be repeated using another popular web framework called Django. You can check the Further reading section to find references for the neomodel and Django integration.
Throughout the rest of this chapter, we will use another way to interface an application with Neo4j – by building a GraphQL API. However, first, we are going to become more familiar with GraphQL by using the GitHub API v4.
Understanding GraphQL APIs by example – GitHub API v4
While in the previous section we used Python to build a full web application whose backend database is Neo4j, in this section, we will remove the dependency on Python and build an API directly accessible from the Neo4j server.
When building APIs, a very popular framework is Representational State Transfer (REST). Even though this approach is still possible with a graph database (check, for instance, the gREST project), a different approach is becoming more and more popular – GraphQL, a query language for API.
In order to understand GraphQL, we will again use the GitHub API. In previous chapters, we used the REST version (v3). However, v4 uses GraphQL, so we should build a few queries. To do so, we can go to https://developer.github.com/v4/explorer/, which is the traditional GraphQL playground. After providing GitHub login credentials, there is a two-part window; the left panel is where we will write the query, while the right panel will display the query result or error messages.
In order to get started with an unknown GraphQL API, the < Doc button (top-right of the screen – see the following screenshot) is key. It will list the available actions, both for querying the database and performing mutations (creating, updating, or deleting objects). Let's start by just reading the data with the query part:

The preceding screenshot is what you will see when you navigate to the GitHub GraphQL API for the first time. It is prefilled with an example query. We will analyze this in the following sections.
Endpoints
Let's start by building a query. We'll do this by choosing an endpoint. One of them is called viewer and, according to the documentation, will give us information about the currently authenticated user. To use this endpoint, we have to write the following in the query builder:
{
    viewer {

    }
}
If we try and run this query, it will return a parse error message. The reason for this is that we are still missing an important piece of information – the parameters about the viewer that we want the API to return.
There is an optional query keyword that can be placed in front of a query request, like this:
query {
    viewer {

    }
}
Returned attributes
One of the advantages of GraphQL is that you can choose which parameters are returned. It is a good way to reduce the size of the data that's received from an API and speed up how it's rendered for the user. The list of available parameters is defined in the GraphQL schema; we will look at this in more detail later in this chapter. A valid query can be written like so:
{
  viewer {
    id
    login
  }
}
This query will return the id and login information of the viewer. The result of this query is the following JSON:
{
  "data": {
    "viewer": {
      "id": "MDQ6VXNlcjEwMzU2NjE4",
      "login": "stellasia"
    }
  }
}
This query is quite simple, especially because it doesn't involve parameters. However, most of the time, the API response depends on some parameters: the user ID, the maximum number of elements to be returned (for pagination), and so on. It is worth focusing on this feature since it is crucial for any API to be able to send parameterized requests.
Query parameters
In order to understand how query parameters work, let's consider another endpoint, organization. Through the GitHub API, let's say you send the following query:
{
  organization(login) {
    id
  }
}
You will receive an error message in return:
"message": "Field 'organization' is missing required arguments: login"
This means the query has to be updated to the following:
{
 organization(login: "neo4j") {
        id
  }
}
By requesting more fields, such as the creation date or the organization's website, the resulting data will be similar to the following:
{
  "data": {
    "organization": {
      "name": "Neo4j",
      "description": "",
      "createdAt": "2010-02-10T15:22:20Z",
      "url": "https://github.com/neo4j",
      "websiteUrl": "http://neo4j.com/"
    }
  }
}
Much more complex queries can be built; simply browse the documentation to see which information can be extracted. For instance, we can build a query that returns the following:
- The current viewer's login.
- Their first two public repositories, ordered by creation date in descending order, along with the following for each of these repositories:
- Its name
- Its creation date
- The name of its main language:
{
  organization(login: "neo4j") {
    repositories(last: 3, privacy: PUBLIC, orderBy: {field: CREATED_AT, direction: ASC}) {
      nodes {
        name
        createdAt
        primaryLanguage {
          name
        }
      }
    }
  }
}
The result is displayed in the following screenshot:

Queries are used to retrieve data from the database. In order to alter the data, we need to perform another type of operation called a mutation.
Mutations
Let's study an example of a mutation allowed by the GitHub API: adding a star to a repository. This mutation is called addStar and accepts a single input parameter: the repository ID to be starred. It can return information of the Starrable type ("Things that can be starred" according to the documentation). The full query is written as follows:
mutation {
  addStar(input: {starrableId: "<REPOSITORY_ID>"}) {
    starrable {
      stargazers(last: 1) {
        nodes {
          login
        }
      }
    }
  }
}
Similarly to the queries, the arguments and returned parameters for each mutation are defined in the GraphQL schema, whose documentation is accessible through the right panel in the GraphQL playground.
We will see more examples of mutations in the next section.
The Neo4j GraphQL JavaScript package is part of GRANDstack, which we will cover in the following section.
Developing a React application using GRANDstack
GRANDstack is the best thing to use if you are creating an application using Neo4j nowadays. In this section, we are going to build a small application similar to the one we created with Python in the first section of this chapter.
The full documentation for GRANDstack can be found at https://grandstack.io/.
GRANDstack – GraphQL, React, Apollo, and Neo4j Database
GRAND is actually an acronym for the following:
- GraphQL
- React
- Apollo
- Neo4j Database
We explored Neo4j throughout this book and GraphQL in the previous section. React is a JavaScript framework used to build web applications. Apollo is the block that will glue together the GraphQL API and the React frontend. Let's see how these things work.
In order to initiate a project using the GRANDstack, we can use the following code:
npx create-grandstack-app <NAME_OF_YOUR_APPLICATION>
The script will ask for our Neo4j connection parameters (bolt URL, username, password, and whether to use encryption or not) and create a directory by using the name of our application. This will contain, among other things, the following elements:
.
├── api
├── LICENSE.txt
├── package.json
├── README.md
└── web-react
As the name suggests, the api folder contains the code for the GraphQL API, while the web-react folder is where the frontend React application lives.
Creating the API
The starter app has already done almost all of the work for us. The api folder's structure is as follows:
.
├── package.json
├── README.md
└── src
    ├── functions
    ├── graphql-schema.js
    ├── index.js
    ├── initialize.js
    ├── schema.graphql
    └── seed
The only file we will need to modify to meet our application goals is the schema.graphql file.
Writing the GraphQL schema
Still in the context of users owning or contributing to repositories, we are going to write the GraphQL schema that will be used to create the same frontend pages that we created in the first part of this chapter.
Defining types
Let's start with the User nodes. We can define the properties with the following code:
type User {
  login: String!
  password: String!
  email: String
  birth_date: Date
}
We can also add more data to the user, such as the following:
- Their owned repositories:
owned_repositories: [Repository] @relation(name: "OWNS", direction: "OUT")
- The repositories they contributed to:
contributed_repositories: [Repository] @relation(name: "CONTRIBUTED_TO", direction: "OUT"
- Their total number of contributions (to all repositories). Here, we have to define this field from a custom Cypher statement to write the COUNT aggregate:
 total_contributions: Int
    @cypher(
      statement: "MATCH (this)-[r:CONTRIBUTED_TO]->(:Repository) RETURN COUNT(r)"
    )
Similarly, the repositories can be described with the following schema:
type Repository {
  name: String!
  owner: User @relation(name: "OWNS", direction: "IN")
  contributors: [User] @relation(name: "CONTRIBUTED_TO", direction: "IN")
  nb_contributors: Int @cypher(
      statement: "MATCH (this)<-[:CONTRIBUTED_TO]->(u:User) RETURN COUNT(DISTINCT u)"
  )
}
You can add as many fields as you think are necessary for your application.
Starting the application
Starting the application is as simple as doing the following:
cd api
npm run
By default, the application runs on port 4001. Now, we will look at two ways we can test whether everything works as expected; namely, the GraphQL playground and sending direct requests to the API.
Testing with the GraphQL playground
When the application is running, we can visit http://www.localhost:4001/graphql/ and find the GraphQL playground for this application.
"editor.theme": "dark",
Change it to the following:
"editor.theme": "light",
Let's write a query that will gather the information we need to create the login page of our application (see the Creating the Flask application section). We want to display, for the authenticated user, their login, the repositories they own, and the repositories they have contributed to. Therefore, we can use the following query:
{
  User(login: "me") {
    login
    owned_repositories{
        name
    }
    contributed_repositories{
        name
    }
  }
}
Similarly, to get the number of contributors and the owner of a given repository, use the following query:
{
  Repository(name: "hogan") {
    nb_contributors
    owner {
      login
    }
  }
}
The API is now totally up and running and you can send requests to it from your favorite tool (curl, Postman, and so on). In the following section, I'll demonstrate how to query this API from Python using the requests module.
Calling the API from Python
In order to make HTTP requests from Python, we are going to use the pip installable requests package:
import requests
Then, we need to define the request parameters:
query = """
{
   User(login: "me") {
        login
    }
}
"""

data = {
 "query": query,
}
Finally, we can post the request using a JSON-encoded payload:
r = requests.post(
    "http://localhost:4001/graphql",
    json=data,
    headers={
    }
)

print(r.json())
The result is as follows:
{'data': {}}
Using variables
The query we are using contains one parameter: the username. In order to make it more customizable, GraphQL allows us to use variables. First, we need to change the way we format the query slightly by adding the parameter definition:
query($login: String!) {
The parameter is called $name, is of the String type, and is mandatory (hence the final exclamation mark !). This declared parameter can then be used in the query, like so:
User(login: $login) {
So, the final query looks as follows:
query = """
query($login: String!) {
    User(login: $login) {
        login
    }
}
"""
However, we now have to feed the parameter into the query in the API call. This is done using the variables parameter. It consists of a dictionary whose keys are the parameter names:
data = {
    "query": query,
    "variables": {"login": "me"},
}
After doing this, we can post this query once more using the same requests.post code we used previously.
Now, let's learn how to build a frontend application that consumes the GraphQL API using React.
Mutations
As we have already seen with the GitHub API, mutations alter the graph, thereby creating, updating, or deleting nodes and relationships. Some mutations are automatically created from the types declared in the GraphQL schema; they can be found in the following documentation:

Let's create a new user and add a contribution to the hogan repository. To create a user, we need to use the CreateUser mutation, with parameters containing at least the two mandatory parameters: login and password. As for any GraphQL query, we also need to list the parameters that we want the API to return in the second part of the request:
mutation {
  CreateUser(login: "Incognito", password: "password123") {
    login
    email
    birth_date {year}
  }
}
We can also create the relationship between the newly created user and the hogan repository:
mutation {
  AddUserContributed_repositories(
    from: { login: "Incognito" }
    to: { name: "hogan" }
  ) {
    from {login}
    to {name}
  }
}
We can check the result in the Neo4j browser, or use the same GraphQL API to check that the User node and the CONTRIBUTED_TO relationships were created properly:
{
  User(login: "Incognito") {
    contributed_repositories {
      name
    }
  }
}
This should result in the following output:
{
  "data": {
    "User": [
      {
        "contributed_repositories": [
          {
            "name": "hogan"
          }
        ]
      }
    ]
  }
}
When creating a new repository, we may want to add its owner to the same query. This can be achieved with GraphQL by chaining mutations:
mutation {
  CreateRepository(name: "graphql-api") {
    name
  }
  AddUserOwned_repositories(
    from: { login: "Incognito" }
    to: { name: "graphql-api" }
  ) {
    from {
      login
      email
      total_contributions
    }
    to {
      name
      nb_contributors
    }
  }
}
In the preceding query, first, we perform a CreateRepository mutation by adding the graphql-api repository. Then, the AddUserOwned_repositories mutation is performed. We do this by adding a relationship between the Incognito user we created earlier and the newly created graphql-api repository.
You should now be able to build your own GraphQL API and query it to fetch and alter data in the graph. The next step is to plug this API into a frontend application.
Building the user interface
The UI is using React. The code shipped with the grand-stack-starter app contains a lot of features but is also quite complex for beginners, which is why we are going to rewrite part of it using a simpler approach. Our goal here is to build an application that will show a list of users on the home page.
In order to make our components use the API, we have to connect them to the GraphQL application we created in the previous section.
Creating a simple component
Let's start by building the home page and creating a component that will list all users.
Getting data from the GraphQL API
In order to retrieve all registered users, we will use a query that requests all users without using any parameters, like so:
query Users {
User {
login
total_contributions
}
}
This can be tested in the GraphQL playground to check that it returns all the users in the Neo4j graph.
https://github.com/grand-stack/grand-stack-starter/blob/master/web-react/src/components/UserList.js.
Writing a simple component
The UserList component will be implemented in the src/components/UserList.js file. We start by importing the necessary tools:
import { useQuery } from '@apollo/react-hooks'
import gql from 'graphql-tag'
Then, we define the query that we need to use to retrieve the data we need for this component:
const GET_USERS = gql`
query Users {
User {
login
total_contributions
}
}
`
After this, we can create the component using function notation. The function has to return the HTML code that will be displayed in the browser.
Before that, however, we need to fetch the data. This is where the useQuery function from Apollo is used. Let's start with a simple implementation where we will just log the results of the useQuery function in the console and return an empty string as HTML:
function UserList(props) {

  const { loading, data, error } = useQuery(GET_USERS);
  console.log("Loading=", loading);
  console.log("Data=", data);
  console.log("Error=", error);

  return "";
};

export default UserList;
We will also need to create the src/App.js file in order to use the UserList component. Ensure it contains the following content:
import React from 'react'

import UserList from './components/UserList';


export default function App() {
  return (
      <div>
        <h1>My app</h1>
        <UserList />
      </div>
  );
}
Once these two files have been saved, we can start the server by running npm start in the web-react folder and visiting http://localhost:3000. The HTML is not showing anything, but the interesting information is in the console, which you can open with Ctrl + I or by pressing the F12 key (Firefox and Chrome). You should see something similar to the following:

As you can see, our logs are displayed twice. The first time this happens, the loading parameter is true and both the data and error variables are undefined. The second time this happens, the result of the POST request that was performed by our GraphQL API is received. This time, we have loading=false, and data actually contains some data.
The data object can be explored even further. You will see something similar to the following:

So, let's modify our UserList function and replace the empty string return statement with some meaningful data.
We have to consider three cases:
- If we do not have data from the API yet, then loading=true. In this case, we would just render the Loading... text:
if (loading) {
  return <p>Loading...</p>
}
- The API returned some errors, error !== undefined. Here, we would display the raw error message:
  if (error !== undefined) {
    console.error(error);
    return <p>Error</p>
  }
- The API didn't return and error and we received some data. In such a case, we would iterate over the data.User array and display its login, its email, and its total number of contributions for each element.
The last step is achieved thanks to the following code:
return (
    <table>
      <thead>
      <tr>
        <th>Login</th>
        <th>Email</th>
        <th>Total contributions</th>
      </tr>
      </thead>
      <tbody>
 {data.User.map((u) => {
        return (
            <tr key={u.login}>
              <td>{u.login}</td>
              <td>{u.email}</td>
              <td>{u.total_contributions}</td>
            </tr>
        )
      })}
      </tbody>
    </table>
)
After saving the new version of UserList.js, visiting http://localhost:3000 again will display a table of existing users in Neo4j.
- Neo4j
- The API from the previous section
- The web-react application
Now, let's add some complexity with navigation. This will enable us to see more information about our user when we click on their login.
Adding navigation
From the home page, which lists all users, it would be nice to be able to navigate to another page showing details about a specific user. To make this possible, let's start by modifying the UserList component and add a link for the user login:
<td><Link to={`/user/${u.login}`}>{u.login}</Link></td>
Now, clicking on such a link will redirect us to http://localhost:3000/user/me. This just shows a blank page since our application has not been configured yet.
Let's go ahead and configure the application. The content of the App component has to be replaced with the following code. We will use a Router object to do so:
export default function App() {
  return (
      <Router>
          <div>
            <h1>My app</h1>
          </div>

          <Switch>
              <Route exact path="/" component={UserList} />
              <Route path="/user/:login" component={User} />
          </Switch>
      </Router>
  );
The router defines two routes:
- "/": This will render the UserList component.
- "/user/<login>": This will render a new User component (we are going to create this now). The login is a parameter of the route, which we will be able to retrieve in the component.
So, let's create the User component in src/components/User.js; this will show the list of owned repositories for the user. The query to get this data is as follows:
const GET_USER_DATA = gql`
    query($login: String!) {
        User(login: $login) {
          owned_repositories {
            name
          }
       }
    }
`;
In this query, we have defined a $login variable that we will have to feed to the GraphQL endpoint, together with the query, to get a result. The beginning of the User component is as follows:
function User(props) {

    let login = props.match.params.login

    const { loading, data, error } = useQuery(GET_USER_DATA, {
        variables: {
            login: login
        }
    });
The login variable is read from the URL because the user page's URL is /user/<login>.
The rest of the User component is quite straightforward; we add loading and error handling and then show a list of repositories:
    if (loading) {
        return <p>Loading...</p>
    }

    if (error !== undefined) {
        return <p>Error: {error}</p>
    }

    let user = data.User[0];
    return (
        <ul>
            {user.owned_repositories.map((r) => {
                return (
                    <li key={r.name}>{r.name}</li>
                )
            })}
        </ul>
    )
};

export default User;
Now, navigating to http://localhost:3000/user/me will display a list of repositories owned by the user with the me login.
The following subsection will show us the missing piece that is needed for writing a fully usable application: mutations.
Mutation
For simplicity's sake, we will implement this mutation in a new component and a new URL.
So, first, let's add a link to this new page in the router (in src/App.js):
<Route path="/user/:login/addrepo" component={AddRepository} />
We also need to add the possibility for the user to reach that page by adding a link to our new page at the end of the repository list of the User component (src/components/User.js):
<li><Link to={`/user/${login}/addrepo`}>Add new repository</Link></li>
Then, we can create the AddRepository component in src/components/AddRepository.js. First, let's define the mutation in terms of GraphQL:
const CREATE_REPO = gql`
mutation($name: String!, $login: String!) {
  CreateRepository(name: $name) {
    name
  }
  AddRepositoryOwner(from: { login: $login }, to: { name: $name }) {
    from {
      login
    }
    to {
      name
    }
  }
}
`;
Similar to what we have done for queries, we will create a mutation with two variables: the user login and the new repository name.
The following task consists of creating a mutation object with the following code:
import { useMutation } from '@apollo/react-hooks';
const [mutation, ] = useMutation(CREATE_REPO);
Once the mutation has been created, we can use it in the callback when the form is submitted with onFormSubmit:
function AddRepository(props) {
    let login = props.match.params.login;

    const [mutation, ] = useMutation(CREATE_REPO);

    const onFormSubmit = function(e) {
        e.preventDefault();
        mutation({variables: {
                login: login,
                name: e.target.name.value,
            }
        });
 props.history.push(`/user/${login}`);
    };

    return (
        <form onSubmit={onFormSubmit}>
            <input type={"test"} name={"name"} placeholder={"New repository name"}/>
            <input type={"submit"}/>
        </form>
    )
}

export default AddRepository;
The onFormSubmit callback contains an extra line in order to redirect the user to the main user page after the operation is complete:
props.history.push(`/user/${login}`);
If we run this code now, we will see that the form is properly submitted, but the list of repositories in /user/<login> has not changed. However, the mutation works! (This can be checked in the database.) The issue is that the UserList component has not been refreshed. We can trigger this refresh in the mutate function, as we will see now.
Refreshing data after the mutation
In order to refresh the queries affected by the mutation, we need to use the refreshQueries parameter of the mutate function, as follows:
import {GET_USER_DATA} from './User';

// .....

        mutation({
            variables: {
                login: login,
                name: e.target.name.value
            },
            refetchQueries: [ { query: GET_USER_DATA, variables: {login: login} }],
        });
Now, if we try and add a new repository, we will see it appear in the list of owned repositories for the user.
You should now be able to read data from Neo4j using GraphQL queries and insert data into the graph using mutations.
Summary
In this chapter, we discussed how to build a web application using Neo4j as the main database. You should now be able to build a web application backed by Neo4j using either Python, its neomodel package, and the Flask framework to build a full-stack web application (back and frontend); GraphQL, to build an API out of Neo4j that can be plugged to any existing frontend; or GRANDstack, which allows you to create a frontend application for retrieving data from Neo4j using a GraphQL API.
Even though we have specifically addressed the concepts of users and repositories, this knowledge can be extended to any other type of object and relationship pretty easily; for example, repositories can become products, movies, or posts written by the user. If you have used a link prediction algorithm to build a followers recommendation engine, as we did in Chapter 9, Predicting Relationships, you can use the knowledge you've gained in this chapter to show a list of recommended users to follow.
In the next and last chapter, we will deal with big data and learn how to use Neo4j at scale.
Questions
- What is GOM?
- Practice: In the Flask application, add the possibility for a user to add a new repository, noting the following:
- A repository is characterized by its name only.
- We can't have several repositories with the same name owned by the same user.
- GraphQL:
- Add the total number of owned repositories in the User type.
- Add a new parameter in the User type that will return the recommended repositories.
- GRANDstack:
- Update the UserList component to also show the number of owned repositories.
Further reading
- More details about neomodel and Flask or Django can be found in the book entitled Building Web Applications with Python and Neo4j, S. Gupta, Packt Publishing.
- All you need to know about GraphQL and Neo4j can be found in the book entitled Full-stack GraphQL, W. Lyon, Manning Publications.
- Learn how to use React with no prior experience with the following series of videos: The Complete React Developer Course (with Hooks and Redux), A. Mead, Packt Publishing.