
Chapter 5. Deploying and Interacting with Contracts
Now that we have completed development of our Greeter contract, it is time to look into how to deploy it.
In this chapter, we are going to learn how to deploy our contract three different ways. First, we will focus on deploying to Ganache, a local blockchain that will allow you to experiment with your application quickly.
Then, we will deploy our contract to the Goerli test network using the Parity Ethereum client. This process is how you would deploy your application directly to the Ethereum network by using a node you are managing yourself.
Lastly, we will deploy our contract to the Rinkeby test network using Infura, a third-party provider of managed Ethereum nodes. Using services like Infura can provide some additional analysis that may be helpful in understanding application performance and utilization.
By the end of this chapter, you will be able to start sharing your application with the decentralized community.
Contract Compilation and Deployment
Up to this point, the only way we have interacted with our contract is through our tests. When we have been running our test suite, Truffle has been compiling and deploying our contracts to a test network and executing our test scripts. When the tests have completed their run, Truffle destroys the test network and all the associated data.
If we want to use our contracts with something other than our tests, we will need to get our contract onto a network that runs outside of the test process. To do this, we use the truffle migrate command. Unlike truffle test, we will need to specify which network we are going to deploy our contracts using the --network flag. Truffle will then look up the configuration details for the corresponding network in our truffle-config.js file and deploy our contracts based on those settings.
Before we jump to configuring and deploying our contracts, let’s first take a moment to discuss what happens when we deploy a smart contract.
Deployment Process
The first step in deployment starts with compiling our contracts. For both the truffle test and truffle migrate commands, this step happens for you automatically. However, we can compile our contracts at anytime using truffle compile.
Let’s go ahead and compile our contracts. Back in our greeter directory, open a terminal and use the following command:
$ truffle compileWe should see output that indicates the contracts that have been compiled and the location, relative to our project directory, where the files have been saved.
The output looks like this:
Compiling your contracts...===========================>Compiling ./contracts/Greeter.sol>Compiling ./contracts/Migrations.sol>Compiling openzeppelin-solidity/contracts/ownership/Ownable.sol>Artifacts written to ./build/contracts>Compiled successfully using:- solc: 0.5.8+commit.23d335f2.Emscripten.clang
Looking at the build/contracts directory, we have three new files that have been generated for us:
build└── contracts├── Greeter.json├── Migrations.json└── Ownable.json
If we take a look at the the build/contracts/Greeter.json file, we will see a JSON formatted data structure. The first field we come across is the contractName field. Not surprisingly, this matches the name of our contract. Though there is a lot of data here, we are going to focus on two fields, the abi and bytecode fields.
The application binary interface (ABI) describes the functions and events (we will cover events later) of our contract. The ABI will be the basis for the client-side abstraction used to interact with our contract, which will be covered in detail in Part III.
The bytecode field contains the result of compiling your contract. This is the code the Ethereum network will execute when our contract has been invoked from a client.
With our compiled contracts in hand, let’s talk about what happens during deployment.
When we deploy a contract, we submit a transaction to the Ethereum network. Unlike a normal transaction that contains both a sender (from) and receiver (to) address, our deployment transaction will need to set the receiving address to the 0x0 address. Our deployment transaction will also need to include the bytecode mentioned earlier, which will be sent as the transaction data. With our contract being sent as a transaction, it has to be mined before we will be able to interact with it. When the contract is mined, it will execute the code in the constructor, setting the initial state for the contract.
Before we deploy, let’s first set up our UI.
Setting Up the UI
Later in this part of the book we dive into building the UIs for our applications, and we’ll borrow some of the code from those chapters. The book’s code is located on GitHub, and we will copy into our Greeter project the code found in the chapter-9 directory code. Let’s start by cloning the directory. The following commands assume you are at the Greeter project’s root directory:
#go to the directory containing our greeter project$cd..#clone the repo$git clone [email protected]:RedSquirrelTech/hoscdev.git
Now let’s copy the client code from Chapter 9 into our Greeter project:
$ cp -r hoscdev/chapter-9/client greeter/clientThis will copy all the UI-related code into our project. The UI code depends on the build files that were generated when we compiled our contract. In order for them to be accessible, we are going to update where Truffle puts the artifacts of compilation. This is a setting that can be adjusted in the truffle-config.js file by adding the following setting:
module.exports={contracts_build_directory:"./client/src/contracts",// ...rest of settings...}
Back in our greeter directory, let’s recompile the contracts to get them in their new home:
$ truffle compileAfter we have double-checked everything worked as expected, our /client/src/contracts/ directory should contain the following files:
client/src/contracts├── Greeter.json├── Migrations.json└── Ownable.json
The client was written using React and uses a few other JS dependencies we haven’t downloaded just yet. Let’s change to the client directory and get everything installed:
$cdgreeter/client$npm install
Once all the dependencies are installed, you can try running the web server to allow your browser to connect to the UI with the following command:
#in the greeter/client directory$npm run start
This command will launch a new tab in your browser and attempt to connect to your Ethereum accounts via MetaMask. At this point, this will crash since the contracts have not been deployed to the network. It may seem odd, but this failure is a win. This means that our UI was built successfully and it tried to communicate with our contract, but it wasn’t there. Let’s fix that problem and do our first deploy by using the local test blockchain, Ganache.
Deploying to Ganache
Now that we have our UI in place, let’s get our contracts set up on Ganache.
In the truffle-config.js file, located in the root directory of our Greeter project, we will see a configuration object that has a network configuration as depicted in Example 5-1.
Example 5-1. Truffle network configuration
networks:{// Useful for testing. The `development` name is special - truffle// uses it by default if it's defined here and no other network// is specified at the command line.// You should run a client (like ganache-cli, Geth, or Parity) in a separate// terminal tab if you use this network and you must also set the `host`,// `port` and `network_id` options below to some value.//// development: {// host: "127.0.0.1", // Localhost (default: none)// port: 8545, // Standard Ethereum port (default: none)// network_id: "*", // Any network (default: none)// },// Another network with more advanced options...// advanced: {// port: 8777, // Custom port// network_id: 1342, // Custom network// gas: 8500000, // Gas sent with each transaction (default: ~6700000)// gasPrice: 20000000000, // 20 gwei (in wei) (default: 100 gwei)// from: <address>, // Account to send txs from (default: accounts[0])// websockets: true // Enable EventEmitter interface for// web3 (default: false)// },// Useful for deploying to a public network.// NB: It's important to wrap the provider as a function.// ropsten: {// provider: () =>newHDWalletProvider(mnemonic,`https://ropsten.infura.io/${infuraKey}`),// network_id: 3, // Ropsten's id// gas: 5500000, // Ropsten has a lower block limit than mainnet// confirmations: 2, // # of confs to wait between deployments. (default: 0)// timeoutBlocks: 200, // # of blocks before a deployment times out// (minimum/default: 50)// skipDryRun: true // Skip dry run before migrations?// (default: false for public nets )// },// Useful for private networks// private: {// provider: () => new HDWalletProvider(mnemonic, `https://network.io`),// network_id: 2111, // This network is yours, in the cloud.// production: true // Treats this network as if it was a public net.// (default: false)// }},
Note
If you haven’t already downloaded Ganache, you can grab the latest release from Truffle Suite’s GitHub repository.
Looking at our configuration file, Truffle created a commented-out section for the development network. Since these commented values are what we want, we can go ahead and uncomment them by removing the // leading each line of the development section. With that out of the way, we can open up the Ganache application, and you should see a screen similar to the one in Figure 5-1.
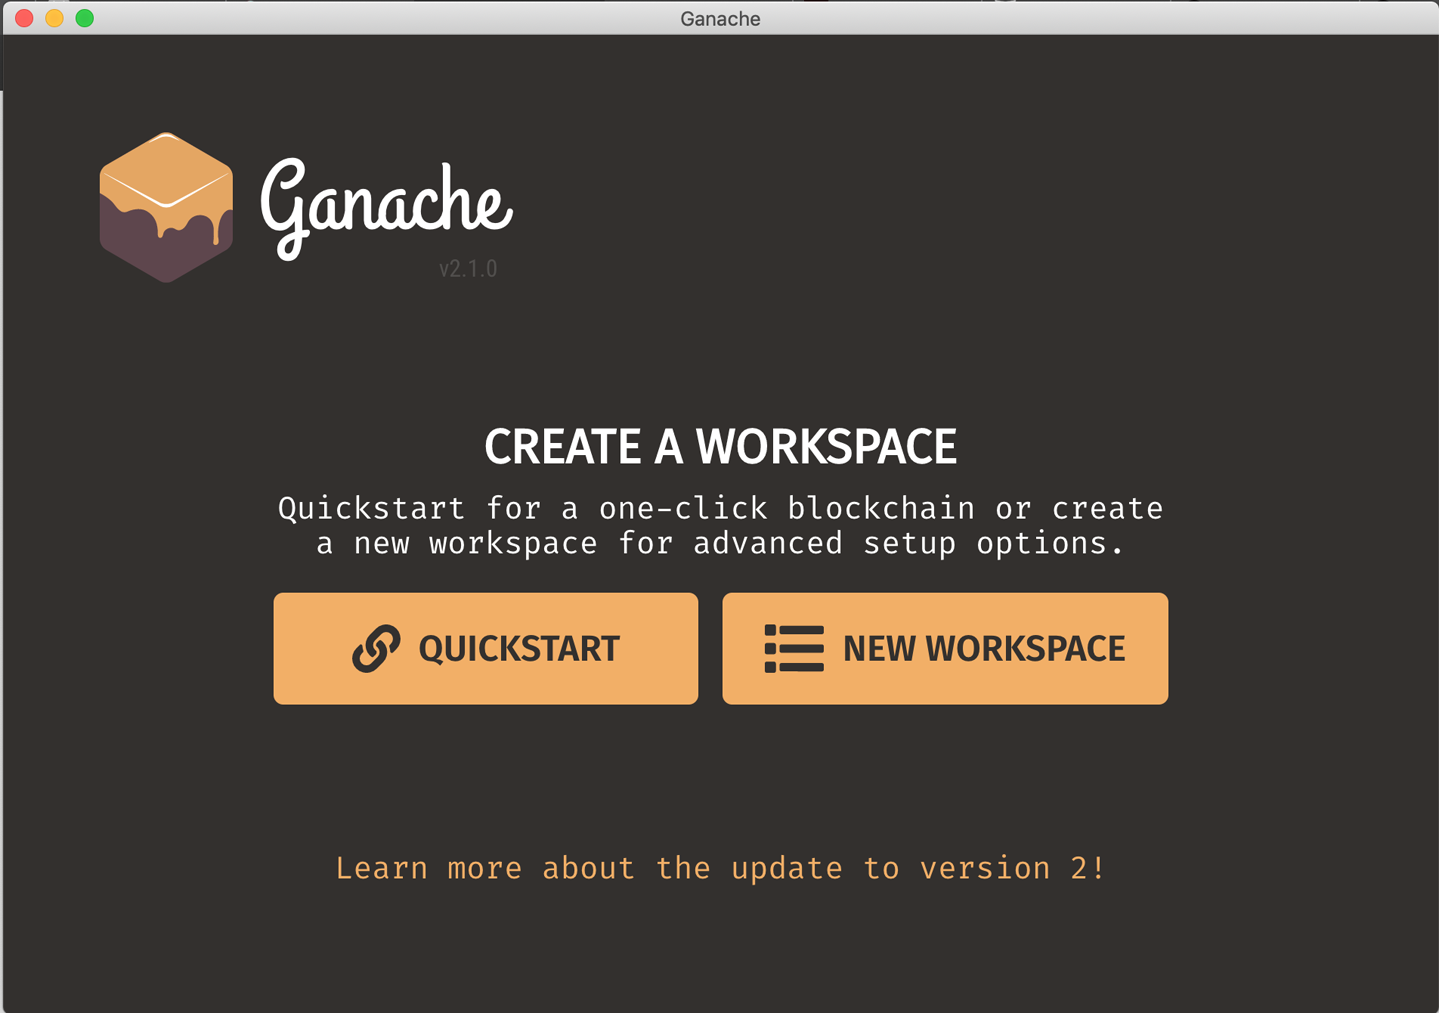
Figure 5-1. Ganache network configuration
Click on the New Workspace button, and you will be taken to a configuration screen asking for the name of the workspace and the Truffle project. Let’s name the workspace greeter-home. Next, click on the Add Project button to navigate to the truffle-config.js file in the project. When you’re all done, your screen should look similar to Figure 5-2.
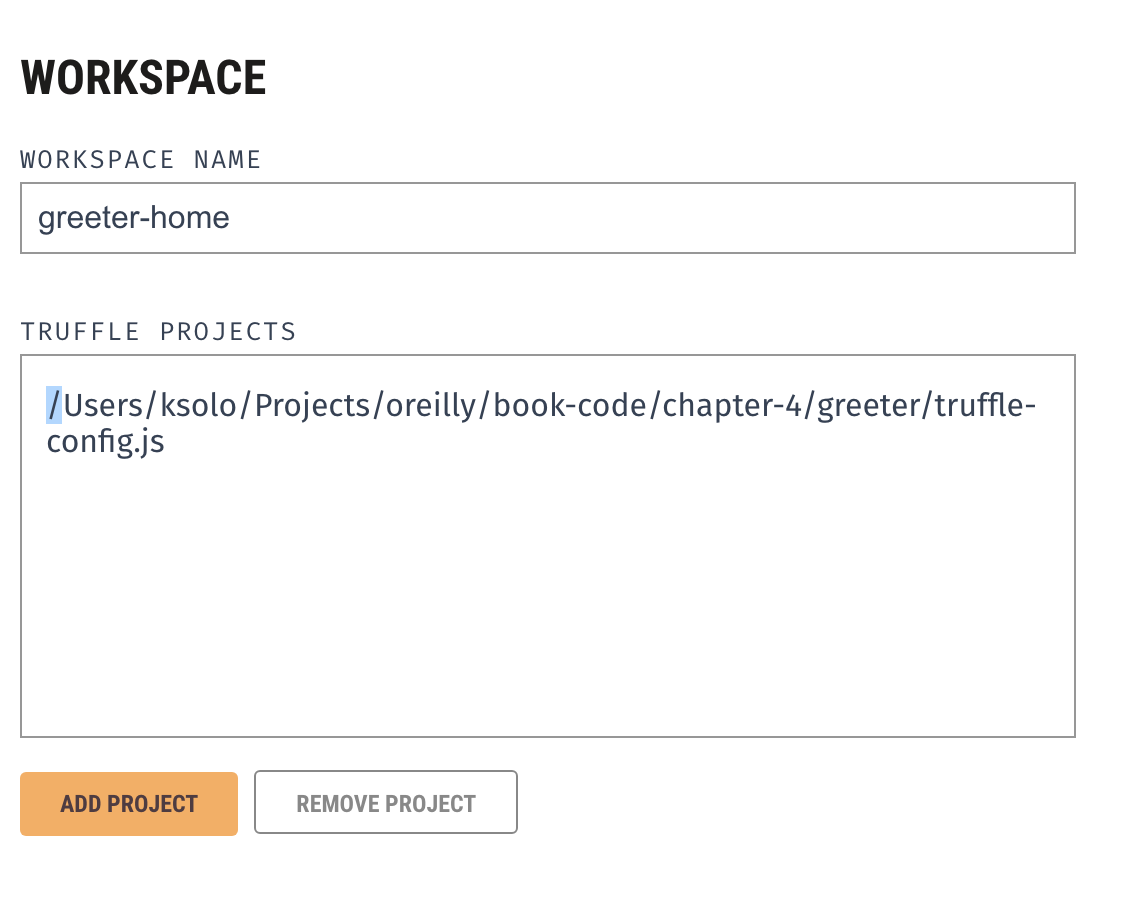
Figure 5-2. Configuring the Ganache workspace
Clicking on Save Workspace will set up the space and then take you to the main screen with all the accounts and server information, as depicted in Figure 5-3.

Figure 5-3. Ganache network configuration
Now that Ganache is running, we will need to import the accounts into MetaMask using the depicted mnemonic. If you are logged in to MetaMask with your secured account, log out and then click on “Import using account seed phrase” to unlock the Ganache-generated accounts.
Before we run the migration command, let’s first take a moment to discuss what is about to happen. When we created our project using truffle init, a Migrations contract was generated for us in the contracts/ directory. This contract stores what migrations in the migrations/ directory have been executed, allowing subsequent calls to truffle migrate to skip running those migrations. With this being our first deployment, we will run both deployment scripts in the migrations/ directory. The first script deploys the Migrations contract, and the second script deploys our Greeter contract.
Without further ado, let’s deploy our contracts to the development network:
$ truffle migrate --network developmentOnce executed, we will see output similar to this example:
Compiling your contracts...===========================>Everything is up to date, there is nothing to compile.Starting migrations...======================>Network name:'development'>Network id: 5777>Block gas limit: 0x6691b71_initial_migration.js======================Deploying 'Migrations'----------------------> transaction hash: 0x297a3e1c371adc4c25376e0df5bdff024afd0ebd01c5db702...> Blocks: 0 Seconds: 8> contract address: 0x310C9d3709158d256DD0cD04958207aD772Df83e> block number: 26> block timestamp: 1565838314> account: 0x0eF75E7c48bd3F0eC90731C6a69B62a00B5C87De> balance: 99.99477214> gas used: 261393> gas price: 20 gwei> value sent: 0 ETH> total cost: 0.00522786 ETH> Saving migration to chain.> Saving artifacts-------------------------------------> Total cost: 0.00522786 ETH2_deploy_greeter.js===================Deploying 'Greeter'-------------------> transaction hash: 0x6bc7882ef6b7b0aa5cc532ba31ea1d665f211ba0024fe1f...> Blocks: 0 Seconds: 12> contract address: 0x81a0970E3c27C8CbEb85a01Fa3FB190197a1a3EC> block number: 28> block timestamp: 1565838344> account: 0x0eF75E7c48bd3F0eC90731C6a69B62a00B5C87De> balance: 99.98097166> gas used: 648001> gas price: 20 gwei> value sent: 0 ETH> total cost: 0.01296002 ETH> Saving migration to chain.> Saving artifacts-------------------------------------> Total cost: 0.01296002 ETHSummary=======>Total deployments: 2>Final cost: 0.01818788 ETH
Looking through this output, we can confirm that we first deployed the default Migrations contract and see how much gas was used. Then we see the deployment of our Greeter contract and again how much gas was used. With our contracts deployed to the local blockchain, they are now ready to use.
Restart the web server that we were running in the client directory by using Control-C to stop the server and the following command to restart it:
$ npm run startNow when we visit localhost:3000, we will see our Greeter UI with the current greeting and an input box ready for us to change the greeting, as depicted in Figure 5-4.

Figure 5-4. Seeing our Greeter UI
As long as you are using the first account, this will allow you to update it, but if you switch to another account, the transaction should be rejected. Try it out: switch accounts in MetaMask and then refresh the page and attempt to change the message.
Ganache is great for testing your application out locally, but when it comes time for others to experiment with your application, we’ll need to deploy to one of the test networks. Our next deployment will walk us through deploying on the Goerli test network, and we’ll do the deployment using the Parity client.
Deploying to Goerli with Parity
Before we begin, let’s talk about the mnemonic we have been using and why mnemonics are so important. When using Ganache, the mnemonic was generated for us, and we then imported it to MetaMask. This was all we needed to do to start signing transactions, but in Chapter 1 we discussed needing to sign transactions with a private key, so what’s going on?
Back in 2012, Pieter Wuille created the hierarchical deterministic (HD) wallet in BIP-32. This created a standard for generating a tree or hierarchy of private/public key pairs using a seed. Then in 2013, Satoshi Labs created a way of using a mnemonic phrase to generate the seed for the HD wallet in BIP-39. Using these phrases makes it much easier to import or export accounts than managing individual private keys. These mnemonic phrases must be kept secret; the ones used in this book are known public phrases and are not secure. They should not be used to deploy on mainnet or test networks.
Log out of the Ganache account and log back in to the MetaMask account you created earlier in Chapter 3. Since we are going to deploy on the Goerli testnet, we’ll need some Goerli ether. Just in case you don’t recall from Chapter 3, Goerli is the testnet that is compatible with both Geth and Parity. To get our test ether, head over to the Goerli Faucet and you will see something similar to Figure 5-5.

Figure 5-5. Goerli Faucet request
Click on the MetaMask plug-in, and then copy your account address to the clipboard and paste it into the address field. Make sure to fill out the Captcha to prove you are not a robot and click the REQUEST button. Once the transaction is complete, the deposit will be reflected in MetaMask (make sure you have selected the Goerli network). In order to have enough gas for the deployment, repeat this process three to four times.
Next we’ll need to update the network configuration to connect to Goerli. This process will require the Truffle HD wallet library to create the provider that can be used during the deployment process. A provider is a component of Web3 that manages how to connect to the Ethereum network. In order to sign the transactions we are going to create in the deployment process, the provider will need access to either your mnemonic or your private key. We will provide this access by using an environment variable.
Let’s go ahead and install the HDWalletProvider by using the following command:
$ npm install truffle-hdwallet-provider --save-devNow we’ll set the mnemonic environment variable:
$exportMNEMONIC="_YOUR MNEMONIC PHRASE GOES HERE_"
With that installed, we’ll now head back to our truffle-config.js file and add the following to the top of the file:
constHDWalletProvider=require("truffle-hdwallet-provider");
Then in the network section of our config object, we will add the Goerli configuration, as shown here:
goerli:{provider:()=>{constmnemonic=process.env["MNEMONIC"]returnnewHDWalletProvider(mnemonic,"http://127.0.0.1:8545");},network_id:"*",}
You can see this network configuration looks different than the development configuration. Instead of relying on the defaults, we set up a provider property, which is a function that will return the provider that should be used. The provider takes a mnemonic and the URL of the JSON RPC node we will be connecting. Parity, by default, will open the JSON RPC on port 8545. Notice that we are accessing the mnemonic through an environment variable; this is to prevent accidental commits of the mnemonic to the repo (if you are using version control).
With all that in place, open a new terminal or terminal tab and launch Parity on the Goerli network.
$parity --chain=goerli
If it has been a while since your last sync, it may take a few moments to catch back up, but once it has resumed tracking the latest blocks, we can deploy to Goerli using the following command:
#from the greeter root directory$truffle migrate --network goerli
Just like when we deployed to Ganache, you’ll see the output letting you know the transaction was sent and mined:
Starting migrations...======================>Network name:'goerli'>Network id: 5>Block gas limit: 0x7a12001_initial_migration.js======================Deploying 'Migrations'----------------------> transaction hash: 0x6e57a078b7d9fdf6a1bc7c777951271220ae3b9f03a62c92...> Blocks: 0 Seconds: 0> contract address: 0x74c7382e11311530757beDb953D7F302cfAef417> block number: 1149113> block timestamp: 1566255037> account: 0xcBe303aF8DF77602227A1a77dEF2983f915f2a12> balance: 0.19477342> gas used: 261329> gas price: 20 gwei> value sent: 0 ETH> total cost: 0.00522658 ETH> Saving migration to chain.> Saving artifacts-------------------------------------> Total cost: 0.00522658 ETH2_deploy_greeter.js===================Deploying 'Greeter'-------------------> transaction hash: 0x94cc8f0ca97b2f4de8f1d33c47796d2f95b211e6b0470c2...> Blocks: 1 Seconds: 28> contract address: 0x321374D4CD736Ce5484BFb3aF59C290639b73eA4> block number: 1149116> block timestamp: 1566255082> account: 0xcBe303aF8DF77602227A1a77dEF2983f915f2a12> balance: 0.18097294> gas used: 648001> gas price: 20 gwei> value sent: 0 ETH> total cost: 0.01296002 ETH> Saving migration to chain.> Saving artifacts-------------------------------------> Total cost: 0.01296002 ETHSummary=======>Total deployments: 2>Final cost: 0.0181866 ETH
Now with that in place, you can launch the web server:
$cdclient$npm run start
This will once again open a new browser tab connecting you to the application. Make sure to select the Goerli network in MetaMask, and you are ready to interact with your contract that has been deployed to the testnet!
We are going to walk through another way of deploying to a testnet—this time we will use the Rinkeby network, managing the deploy through Infura.
Deploying to Rinkeby with Infura
With both Ganache and Goerli deployments, we had to have some local software running, but now we are going to do a deployment where you do not have to download a personal blockchain or an Ethereum client. Instead, the node we will communicate with will be managed by Infura.
Infura is a service provider for managed Ethereum nodes. This saves you the time of syncing a local client, which (depending on your hardware and bandwidth) could take anywhere from hours to days to get fully synced. Infura allows deployments to the mainnet and to the Kovan, Rinkeby, Goerli, and Ropsten testnets. For this example, we will use Rinkeby to walk through another way of getting test ether from a different faucet implementation, but you can use any of the testnets.
To get started, head over to https://infura.io/register to create an account. Once you have verified your email, you will be taken to a page where you can pick your plan. For our purposes, the free plan will suffice.
When you get to your dashboard, you will have an empty project section and a button to create a new project like in Figure 5-6.

Figure 5-6. Creating a new project on Infura
Click on the CREATE NEW PROJECT button and give your project a name, like “greeter.” Once this project appears in your project list, click on the VIEW PROJECT button as shown in Figure 5-7.

Figure 5-7. Infura project list
On the VIEW PROJECT page there is a section labeled Keys that includes an endpoint selection. It is defaulted to mainnet, but we want to use the Rinkeby network. Select that option and then copy the URL, which will look like the following:
rinkeby.infura.io/v3/<PROJECT_ID>Just like we did with our mnemonic, let’s go ahead and add our project ID to an environment variable:
$exportINFURA_PROJECT_ID=<PROJECT_ID>
Now we can update the network configuration in our truffle-config.js file to include a Rinkeby section:
rinkeby:{provider:()=>{constmnemonic=process.env["MNEMONIC"]constproject_id=process.env["INFURA_PROJECT_ID"]returnnewHDWalletProvider(mnemonic,`https://rinkeby.infura.io/v3/${project_id}`);},network_id:"*"}
With the configuration in place, we now need to fund our account on the Rinkeby network by visiting the Rinkeby Faucet. Here it asks you to create a social media post on either Twitter or Facebook and include the URL with the post. Once completed, you will have the funds needed for the deployment.
Now let’s run our migrations:
#from greeter root directory$truffle migrate --network rinkeby
When the scripts finish running, they will have deployed your contracts to the Rinkeby testnet. Launch the web server and then select the Rinkeby network in MetaMask:
$cdclient$npm run start
When the browser launches, we’ll have a clean contract welcoming us with “Hello, World!” You can now update this on the Rinkeby network.
Summary
In this chapter, we deployed contracts to a local blockchain for development using Ganache, and then deployed to two different public test networks using two different methods, one using a local Ethereum client (Parity) and the other using a hosted solution (Infura).
We will now turn our attention to building a larger application, learning the language features of Solidity and utilities of Truffle as we go along.