
Chapter 10. Our Larger DApp
Now that we’ve finished the contracts for our large-scale application, let’s create the client side so we can have users interact with our contracts in the browser. After we create the frontend for our application, our users will be able to create their own fundraisers and see them show up on our home page. Our users will also be able to view more information about an individual fundraiser and donate to it. We’ll be using the Fundraiser contracts we wrote in the previous chapters.
Let’s get started on the development of our application.
Starting with React Truffle Box
We’re going to use React Truffle Box once more to generate frontend code for our Web3 application to get it running quickly and interacting with Web3. Let’s start by making a new directory for our fundraiser application and creating a fresh Truffle React Box application inside it.
The first thing we will need to do is create the new empty repository for our Fundraiser application. Next, we’ll change into that directory and unbox the React Truffle Box:
mdkir fundraiser
cd fundraiser
truffle unbox react
Just like in Chapter 8, this will quickly create scaffolding of a React application that is set up to interact with our fundraiser smart contracts and Web3. After the React Truffle Box has finished unboxing, let’s import all of our contracts and migrations.
We’ll first need to delete the 2_deploy_contracts.js file that has the migration for the SimpleStorage contract because we will no longer need it.
Next, you’ll need to create new files for our contracts and the migration. First, create all the empty files for our contracts and our migration:
touch contracts/Factory.sol
touch contracts/Fundraiser.sol
touch migrations/2_factory_contract_migrations.js
After you’ve created the empty files, import all the Solidity code we wrote for our Fundraiser contracts and migration into the proper files.
Tip
Make sure you create all of these in the outermost contracts and migrations folders and that you are not in the client directory.
We’ll also need to install OpenZeppelin because we are using the Ownable contract:
npm install @openzeppelin/contracts
And in the Fundraiser.sol file, change the import statement to use the node_module we just installed from OpenZeppelin:
import '../client/node_modules/@openzeppelin/contracts/ownership/Ownable.sol';
After we’ve added the contracts, let’s get our Truffle development environment up and running again. In the fundraiser repository, let’s run the commands to compile and migrate our Fundraiser contracts so we can interact with them from our frontend application:
truffle develop
After that command has finished running, we’ll run the compile and migrate in that same terminal window:
compile
migrate
Tip
If you ever run into migration issues and get stuck on the solution, try running migrate --reset.
If your contracts have migrated successfully, they should look like this output:
Starting migrations...
======================
> Network name:    'develop'
> Network id:      5777
> Block gas limit: 0x6691b7


1_initial_migration.js
======================

   Replacing 'Migrations'
   ----------------------
   > transaction hash:    0xf04ee2a0c62330e7a051148d4660de6441abd817caf6...
   > Blocks: 0            Seconds: 0
   > contract address:    0x6Af651D4c6E9f32a627381BFC771a82C882B1E8C
   > block number:        1
   > block timestamp:     1566526994
   > account:             0xb94454C83ff541c82391b4331e75d2E2b16bae9E
   > balance:             99.99477342
   > gas used:            261329
   > gas price:           20 gwei
   > value sent:          0 ETH
   > total cost:          0.00522658 ETH


   > Saving migration to chain.
   > Saving artifacts
   -------------------------------------
   > Total cost:          0.00522658 ETH


2_factory_contract_migrations.js
================================

   Replacing 'Factory'
   -------------------
   > transaction hash:    0xebc5a26bbe12f52b809d9144a839befd0eebd877f7845...
   > Blocks: 0            Seconds: 0
   > contract address:    0xB7780C9AD3ef38bb4C8B48fab37Ef176603E7787
   > block number:        3
   > block timestamp:     1566526995
   > account:             0xb94454C83ff541c82391b4331e75d2E2b16bae9E
   > balance:             99.95063086
   > gas used:            2165105
   > gas price:           20 gwei
   > value sent:          0 ETH
   > total cost:          0.0433021 ETH


   > Saving migration to chain.
   > Saving artifacts
   -------------------------------------
   > Total cost:           0.0433021 ETH


Summary
=======
> Total deployments:   2
> Final cost:          0.04852868 ETH
Great! Now that we have our Fundraiser contracts compiled, migrated, and deployed successfully, let’s get started on running the frontend of our application so users can interact with it and create a fundraiser.
Fundraiser Setup
Let’s work on getting our React Truffle Box up and running so we can interact with our application. We’ll first need to cd into the src file of our React application and install all of the dependencies that the React Truffle Box provided for us. After that, we’ll need to start up the frontend of our application just like we did in the previous chapter:
cd client
npm i
After the modules have finished installing, start up the server:
npm start
If everything has installed properly and started successfully, we can now navigate to localhost:3000 to see our Web3 application. See Figure 10-1.

Figure 10-1. The default oops screen because we haven’t switched our network quite yet
Oops! We forgot to switch our network to match our new application. We’ll need to be on the same network so our app can run properly. Let’s first go into MetaMask and switch the network at the top to be Localhost 8545 (see Figure 10-2). Localhost 8545 should be in the default list. If not, you can refer back to the previous chapter and add it.
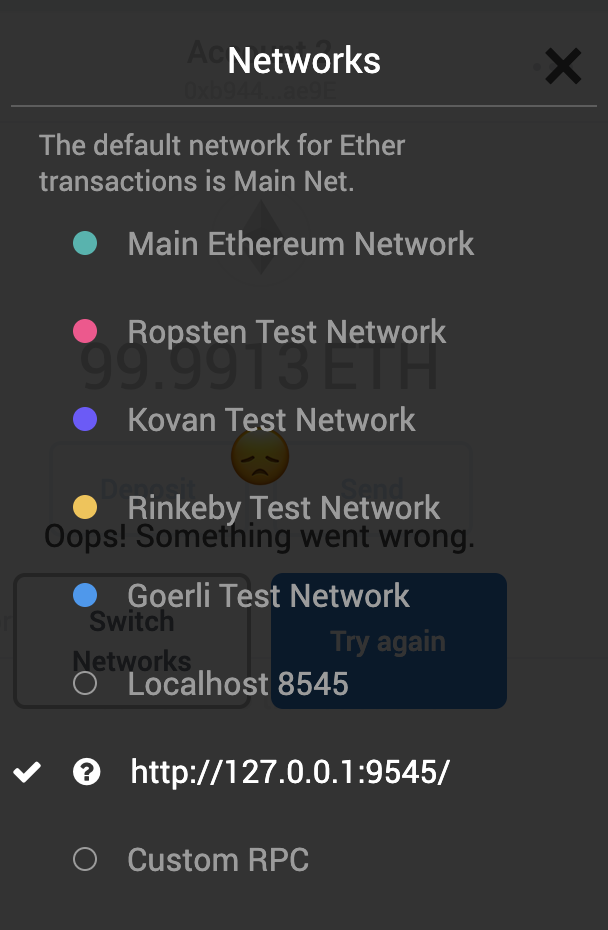
Figure 10-2. Switching our network will fix our error
Now, refresh the screen and you should see the simple storage UI we saw before. Verify that your page looks like Figure 10-3.

Figure 10-3. This is the default frontend for React Truffle Box
With our app running, let’s start in our App.js file and rip out some of the boilerplate code to prepare our frontend to interact with the fundraiser.
First, navigate to the client/src directory and open the App.js file. We’ll need to remove the old React code and replace it with our own React code:
import React, { useState, useEffect } from "react";
import FactoryContract from "./contracts/Factory.json";
import getWeb3 from "./utils/getWeb3";
import "./App.css";

const App = () => {
  const [state, setState] =
      useState({web3: null, accounts: null, contract: null});
  const [storageValue, setStorageValue] = useState(0);

  useEffect(() => {
    const init = async() => {
      try {
        const web3 = await getWeb3();
        const accounts = await web3.eth.getAccounts();
        const networkId = await web3.eth.net.getId();
        const deployedNetwork = FactoryContract.networks[networkId];
        const instance = new web3.eth.Contract(
          FactoryContract.abi,
          deployedNetwork && deployedNetwork.address,
        );

        setState({web3, accounts, contract: instance});
      } catch(error) {
        alert(
          `Failed to load web3, accounts, or contract.
          Check console for details.`,
        )
        console.error(error);
      }
    }
    init();
  }, []);

  const runExample = async () => {
    const { accounts, contract } = state;

  };

  return(
    <div>
      <h1>Fundraiser</h1>
    </div>
  );
}

export default App;
This will let us set up the app to import our contracts. Let’s start with importing our Fundraiser contract, as shown in the preceding code.
Now that we’ve imported our contracts, let’s work on getting a frontend for our application and displaying our list of fundraisers!
React Routing
In order to navigate between different pages of our application with a home page that connects to a new fundraiser page and a donation receipt page, we’ll need to set up routes in our React application. We’ll use react-router-dom to let a user see different pages, depending on what they’ve selected from the navbar.
We’ll start by installing the npm package for react-router-dom:
npm install --save react-router-dom
After you’ve installed the npm package and restarted your frontend server, import the necessary files from react-router-dom in your App.js file, as shown here:
import { BrowserRouter as Router, Route, NavLink } from "react-router-dom"
We’ll also need to import our two new components for the home page and the new fundraiser to use in our routes:
import NewFundraiser from './NewFundraiser'
import Home from './Home'
Next, let’s replace the render function with the following code. This will enable us to use the navbar provided from Material UI to navigate to different pages throughout our app:
<Router>
  <div>
    <nav>
      <ul>
        <li>
          <NavLink to="/">Home</NavLink>
        </li>
        <li>
          <NavLink to="/new/">New</NavLink>
        </li>
      </ul>
    </nav>

    <Route path="/" exact component={Home} />
    <Route path="/new/" component={NewFundraiser} />
  </div>
</Router>
If you try to run the code right now, you’ll get an error stating that our components do not exist. We’ll need to create a few new components first to fix this. In your src directory, you’ll need to create two new components.
Create two new files: Home.js and NewFundraiser.js. We’ll use the home page component as our main landing page for our application and the New Fundraiser page to create a new fundraiser in our application:
touch Home.js
touch NewFundraiser.js
Later on, we’ll also create a receipts route. But for now, let’s work on creating the Home view. We’ll leave it as a simple render function for now until we need to build out the home page view. Inside your Home.js file, use the following placeholder code and save that file:
import React, { useState, useEffect } from "react";

const Home = () => {
  useEffect(() => {

  }, []);

  return (
    <div><h2>Home</h2></div>
  )
}

export default Home;
Similarly, in the NewFundraiser.js file, add this code:
import React, { useState, useEffect } from "react";

const NewFundraiser = () => {
  useEffect(() => {

  }, []);

  return (
    <div><h2>Create a New Fundraiser</h2></div>
  )
}

export default NewFundraiser;
That should fix our error. But one last thing we’ll need to do is modify the code in our index.js file so we can render routes properly. We’ll use BrowserRouter from react-router-dom to wrap our application in a Router:
import React from 'react';
import ReactDOM from 'react-dom';

import { BrowserRouter } from 'react-router-dom'
import App from './App';

ReactDOM.render((
  <BrowserRouter>
    <App />
  </BrowserRouter>
), document.getElementById('root'))
We should be good to go! The preceding code will show you a different page each time you click a nav link. Now if you reload localhost:3000, you should see the page illustrated in Figure 10-4.
And if you click New, it will navigate you to the second view (see Figure 10-5).
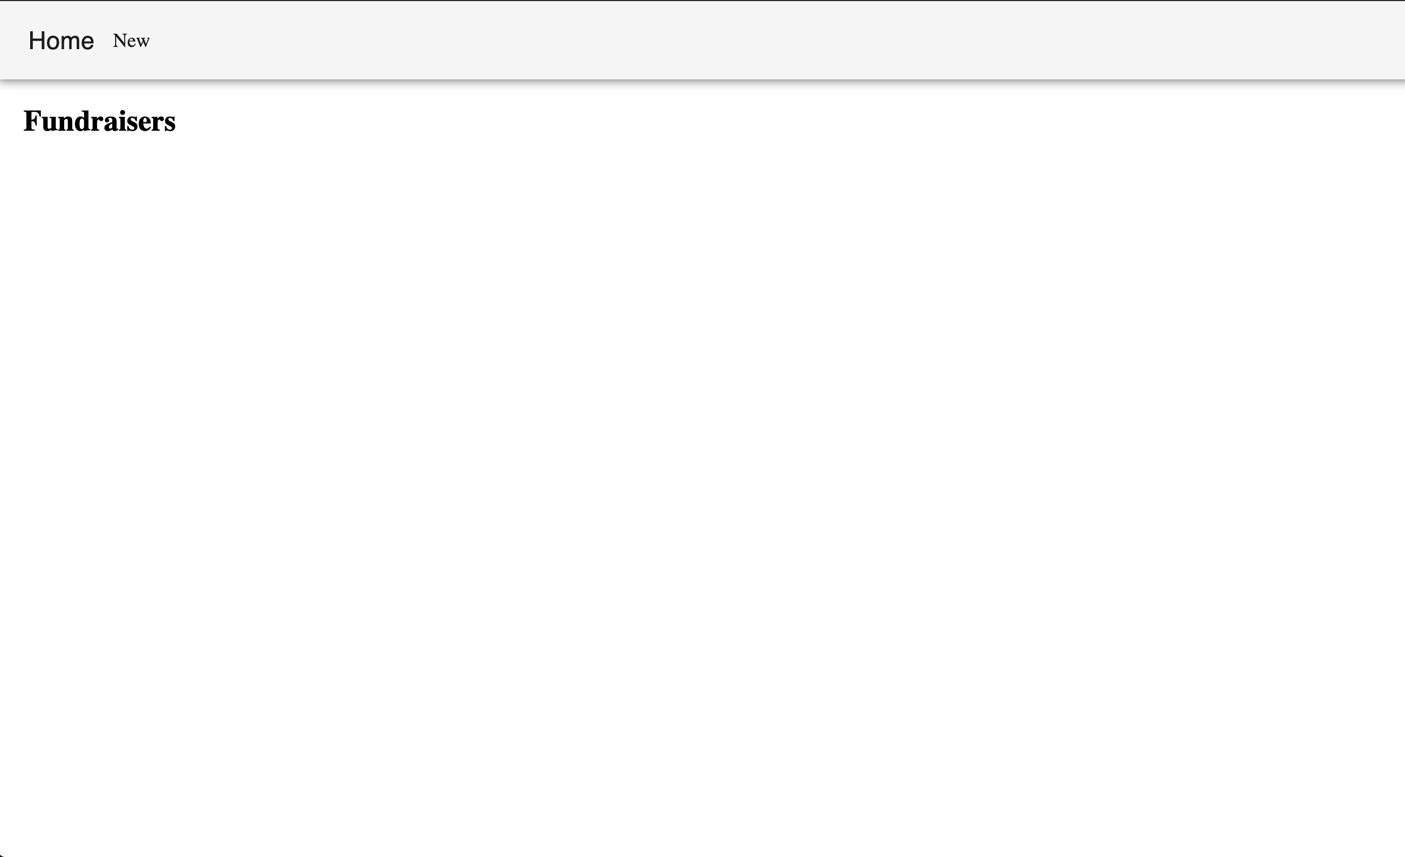
Figure 10-4. Our unstyled navbar view

Figure 10-5. Our fundraiser view (empty for now, but we’ll fix that soon)
Try it out and make sure it’s working. Let’s work on styling this next.
React and Material UI
Our main objective in this book is to learn blockchain development, not frontend development, so we’re going to use a React UI framework to ease the time we spend on frontend development for our Web3 application. We’re going to use Material UI, which is a UI framework that provides React components such as popovers, buttons, tooltips, navigation, and more. We’ll also be using Material UI’s default styling with some minor modifications. You can find out more about Material UI here.
Let’s begin by installing Material UI into our application.
Run the install command in your src directory to install react-bootstrap in our fundraiser application as follows:
npm install @material-ui/core --save
Note that you’ll have to stop the terminal window where your frontend application is running and restart it after installing Material. You won’t see any changes on the frontend quite yet. Let’s add some! First, let’s start with creating better navigation for our application so the user can click through the different sections of our fundraiser application to create a new fundraiser, donate to fundraisers, or get a donation receipt.
From the Material UI site, let’s look at the app bar page here.
Let’s start with the simple app bar. First, we’ll need to add all the imports to the top of our App.js file. This will allow us to use the Material UI components we need:
import { makeStyles } from '@material-ui/core/styles';
import AppBar from '@material-ui/core/AppBar';
import Toolbar from '@material-ui/core/Toolbar';
import Typography from '@material-ui/core/Typography';
Now that we have the imports, we need to add in the styles so our fundraiser app looks good. You’ll need to add in these styles after your useEffect function:
const useStyles = makeStyles({
  root: {
    flexGrow: 1,
  },
});

const classes = useStyles();
After you’ve imported the correct files and added the style preceding code, let’s replace the actual render code so we can see our new navbar:
<Router>
  <div>
    <AppBar position="static" color="default">
      <Toolbar>
       <Typography variant="h6" color="inherit">
         <NavLink className="nav-link" to="/">Home</NavLink>
       </Typography>
       <NavLink className="nav-link" to="/new/">New Fundraiser</NavLink>
      </Toolbar>
   </AppBar>

    <Route path="/" exact component={Index} />
    <Route path="/new/" component={NewFundraiser} />
  </div>
</Router>
Let’s quickly add a little styling to the NavLink component so it looks more professional. In your App.css file, add these to the file:
body {
  margin: 0 !important;
}

.nav-link {
  color: inherit;
  text-decoration: none;
  margin-right: 15px;
}

.nav-link:hover,
.nav-link:active,
.nav-link:visited {
  color: black;
  text-decoration: none;
}
If everything worked, you should now see the new app bar and an empty application. See Figure 10-6 for reference.
Figure 10-6. Our navbar is now simple but set up
Now that we have navigation and routes set up, let’s work on our first page view to allow our users to create a new fundraiser.
Creating Our New Fundraiser Page View
In order to create a new fundraiser, we want to display a simple form to our user that will take the user inputs for the fundraiser name, website, Ethereum address, etc. Following our wireframes, we’ll want to use forms and create a submit button so our user can create a new fundraiser of their own. Since we created the skeleton code and file for our New Fundraiser view earlier, let’s open that file up again. It should exist in src/NewFundraiser.js. The first thing we’ll want to do is create the set of inputs to display to our users.
We’ll start by using Material UI’s text field component. Add an import statement to your NewFundraiser.js file right after your latest import statement:
import { makeStyles } from '@material-ui/core/styles';
import TextField from '@material-ui/core/TextField';

const useStyles = makeStyles(theme => ({
  container: {
    display: 'flex',
    flexWrap: 'wrap',
  },
  textField: {
    marginLeft: theme.spacing(1),
    marginRight: theme.spacing(1),
  },
  dense: {
    marginTop: theme.spacing(2),
  },
  menu: {
    width: 200,
  },
}));
We’ll also need to add a new state item for each piece of data we’ll pull from our contract about our fundraiser. Create each empty useState as shown here:
const [ name, setFundraiserName ] = useState(null)
const [ website, setFundraiserWebsite ] = useState(null)
const [ description, setFundraiserDescription ] = useState(null)
const [ image, setImage ] = useState(null)
const [ address, setAddress ] = useState(null)
const [ custodian, setCustodian ] = useState(null)
const [ contract, setContract] = useState(null)
const [ accounts, setAccounts ] = useState(null)
Now in your render function, add this right after your header. We’ll also add an onChange function to allow the user to type in input, see it actually change in the page, and save to our React state:
<label>Name</label>
<TextField
  id="outlined-bare"
  className={classes.textField}
  placeholder="Fundraiser Name"
  margin="normal"
  onChange={(e) => setFundraiserName(e.target.value)}
  variant="outlined"
  inputProps={{ 'aria-label': 'bare' }}
/>

<label>Website</label>
<TextField
  id="outlined-bare"
  className={classes.textField}
  placeholder="Fundraiser Website"
  margin="normal"
  onChange={(e) => setFundraiserWebsite(e.target.value)}
  variant="outlined"
  inputProps={{ 'aria-label': 'bare' }}
/>

<label>Description</label>
<TextField
  id="outlined-bare"
  className={classes.textField}
  placeholder="Fundraiser Description"
  margin="normal"
  onChange={(e) => setFundraiserDescription(e.target.value)}
  variant="outlined"
  inputProps={{ 'aria-label': 'bare' }}
/>

<label>Image</label>
<TextField
  id="outlined-bare"
  className={classes.textField}
  placeholder="Fundraiser Image"
  margin="normal"
  onChange={(e) => setImage(e.target.value)}
  variant="outlined"
  inputProps={{ 'aria-label': 'bare' }}
/>

<label>Address</label>
<TextField
  id="outlined-bare"
  className={classes.textField}
  placeholder="Fundraiser Ethereum Address"
  margin="normal"
  onChange={(e) => setAddress(e.target.value)}
  variant="outlined"
  inputProps={{ 'aria-label': 'bare' }}
/>

<label>Custodian</label>
<TextField
  id="outlined-bare"
  className={classes.textField}
  placeholder="Fundraiser Custodian"
  margin="normal"
  onChange={(e) => setCustodian(e.target.value)}
  variant="outlined"
  inputProps={{ 'aria-label': 'bare' }}
/>
Let’s also add these styles to our App.css file so we can make our inputs a little nicer:
.MuiTextField-root {
  display: block !important;
}

.MuiInputBase-root {
  width: 300px !important;
  margin-left: 3px;
}
The last thing we’ll need to do is create a button to submit the new data to our Fundraiser contract and create the contract.
First, import the button into our NewFundraiser.js file. Add this Material UI code so we can use the default styles:
import { makeStyles } from '@material-ui/core/styles';
import Button from '@material-ui/core/Button';

const useStyles = makeStyles(theme => ({
  button: {
    margin: theme.spacing(1),
  },
  input: {
    display: 'none',
  },
}));
And then right after our useEffect function, add the following useStyles code:
const classes = useStyles();
After we’ve imported the button and set up the default styles, add the button to render the following:
<Button
  onClick={handleSubmit}
  variant="contained"
  className={classes.button}>
  Submit
</Button>
Now, let’s move on to getting Web3 so we can access our Factory contract. In our NewFundraiser.js file, update the useEffect function to use the Web3 code. The following code will create a new instance of our contract and set the state of Web3, our contract, and our current account:
useEffect(() => {
  const init = async() => {
    try {
      const web3 = await getWeb3();
      const networkId = await web3.eth.net.getId();
      const deployedNetwork = FactoryContract.networks[networkId];
      const accounts = await web3.eth.getAccounts();
      const instance = new web3.eth.Contract(
        FactoryContract.abi,
        deployedNetwork && deployedNetwork.address,
      );

      setWeb3(web3)
      setContract(instance)
      setAccounts(accounts)

    } catch(error) {
      alert(
        `Failed to load web3, accounts, or contract. Check console for details.`,
      );
      console.error(error);
    }
  }
  init();
}, []);
Next, we need to import our contract and point to our contract that has been deployed locally in our NewFundraiser.js file. Add this code right after all your import statements:
import getWeb3 from "./utils/getWeb3";
import FactoryContract from "./contracts/Factory.json";
Finally, let’s call our contracts createFundraiser function and pass in the parameters from our state, including name, website, description, etc. After that has been called and created, we’ll just show a simple alert to the user:
const handleSubmit = async () => {
  await contract.methods.createFundraiser(
    name,
    website,
    imageURL,
    description,
    beneficiary,
    custodian
  ).send({ from: accounts[0] })

  alert('Successfully created fundraiser')
}
Let’s create a few new fundraisers. Next, we’ll need a way to display our new fundraisers to the user so they can donate to them and view more information about each individual fundraiser.
Displaying the Current Fundraisers List
Now that we can create a new fundraiser, let’s add a frontend so we can display the fundraiser we’ve created on the page and all of the other fundraisers created as well. After we’ve created the UI for displaying a fundraiser, we’ll also use a modal so the user can click an individual fundraiser and donate through there. But let’s start with displaying the list of fundraisers.
We’re going to use Material UI’s cards component to display each individual fundraiser. The first thing we’ll need to do is to call our Factory contract using Web3 and return the data about a fundraiser.
To do this, we’ll need to again import Web3 and our FactoryContract JSON at the top of our import file. We’ll also need to add the web3, contracts, and accounts to our state. Last, we’ll need to update our useEffect function to use the same code as in the NewFundraiser.js file.
We’ll make one modification to this useEffect function. In the try/catch statement, we’ll add a function called getFunds() in the try statement. We’ll get our fundraisers in that function and add it in just a moment.
useEffect(() => {
    init()
  }, []);

const init = async () => {
  try {
    const networkId = await web3.eth.net.getId();
    const deployedNetwork = FactoryContract.networks[networkId];
    const accounts = await web3.eth.getAccounts();
    const instance = new web3.eth.Contract(
      FactoryContract.abi,
      deployedNetwork && deployedNetwork.address,
    );
    setContract(instance)
    setAccounts(accounts)

    // We'll add our fundraisers() function call here
  }
  catch(error) {
    alert(
      `Failed to load web3, accounts, or contract. Check console for details.`,
    );
    console.error(error);
  }
}
After we set the state, we’ll call our contract and return the addresses of each contract in the Factory contract we created. We’ll store the funds in our state. Right after the declaration of our Home component, add in one more setState:
const [ funds, setFunds ] = useState(null)
Next, add the following code to our useEffect code where we left the placeholder previously. The following code will call our contract method to get a list of the fundraisers:
const funds = await instance.methods.fundraisers(10, 0).call()
setFunds(funds)
Our fundraiser() method will return the following output. We’ll use this later on to set the instance of a contract and pull data about each fundraiser.
(2) ["0x500116801EAE512672648c80C7a5DB6AdFb2b283",
"0xB705bb647cf75580133540855d015f3Ba5D38C71"]
Now that we’ve received the data from our contract, we’ll work on the frontend to display each Fundraiser card to the user. The first thing we’ll need to do is create a new component that we’ll use to display our Card component:
touch FundraiserCard.js
In the FundraiserCard.js file, we’ll add the card code from Material UI. This will display a simple card to the user with some basic information about the fundraiser:
import React, { useEffect } from 'react';
import { makeStyles } from '@material-ui/core/styles';
import Card from '@material-ui/core/Card';
import CardActionArea from '@material-ui/core/CardActionArea';
import CardActions from '@material-ui/core/CardActions';
import CardContent from '@material-ui/core/CardContent';
import CardMedia from '@material-ui/core/CardMedia';
import Button from '@material-ui/core/Button';
import Typography from '@material-ui/core/Typography';
import FundraiserContract from "./contracts/Fundraiser.json";
import Web3 from 'web3'

const useStyles = makeStyles({
  card: {
    maxWidth: 450,
    height: 400
  },
  media: {
    height: 140,
  },
});

const FundraiserCard = (props) => {
  const classes = useStyles();
  const web3 = new Web3(new Web3.providers.HttpProvider('http://localhost:8545'))

  const [ contract, setContract] = useState(null)
  const [ accounts, setAccounts ] = useState(null)
  const [ fundName, setFundname ] = useState(null)
  const [ description, setDescription ] = useState(null)
  const [ totalDonations, setTotalDonations ] = useState(null)
  const [ donationCount, setDonationCount ] = useState(null)
  const [ imageURL, setImageURL ] = useState(null)
  const [ url, setURL ] = useState(null)

  useEffect(() => {
    // we'll add in the Web3 call here
  }, []);

  return (
    <div className="fundraiser-card-content">
      <Card className={classes.card}>
        <CardActionArea>
          <CardMedia
            className={classes.media}
            image={props.fundraiser.image}
            title="Fundraiser Image"
          />
          <CardContent>
            <Typography gutterBottom variant="h5" component="h2">
              {fundName}
            </Typography>
            <Typography variant="body2" color="textSecondary" component="p">
              <p>{description}</p>
            </Typography>
          </CardContent>
        </CardActionArea>
        <CardActions>
          <Button size="small" color="primary">
            View More
          </Button>
        </CardActions>
      </Card>
    </div>
  )
}

export default FundraiserCard;
If you navigate to localhost:3000, you’ll see that it’s blank for now. Let’s create a render function to go through each fundraiser and display them in a card.
In our render function that follows our main image and header, let’s add a call to a function that will render each fundraiser:
{displayFundraisers()}
Next, let’s create the function. We’ll need to iterate through each fundraiser from our props and display that in a card. But first, we’ll need to import the Fundraiser card we just created.
At the top of the App.js file, add the following import statement so we can use the Fundraiser card:
import FundraiserCard from './FundraiserCard'
Next, we’ll iterate through the list of fundraisers and display the Card component for each one:
const displayFundraisers = () => {
  return funds.map((fundraiser) => {
    return (
      <FundraiserCard fundraiser={fundraiser} />
    )
  })
}
We’ll also want to add some styling to the Home.js component so our cards will render correctly. In the Home.js file, add this container div:
<div className="main-container">
  {displayFundraisers()}
</div>
In the App.css file, add the following styling so our cards are rendered properly with CSS:
.main-container {
  margin: 20px;
}

.fundraiser-card-container {
  display: inline-flex;
  width: 250px;
  height: 250px;
  margin: 20px;
}
Next, we’ll need to call our Fundraiser contract, get information about each fundraiser, and display it to the user. First, let’s only call our init function if the fundraiser exists. Pass in the fundraiser as an argument to the init function so we can use it in the function to fetch the data we need:
useEffect(() => {
  if (fundraiser) {
    init(fundraiser)
  }
}, [fundraiser]);

const init = async (fundraiser) => {
  try {
    const fund = fundraiser
    const networkId = await web3.eth.net.getId();
    const deployedNetwork = FundraiserContract.networks[networkId];
    const accounts = await web3.eth.getAccounts();
    const instance = new web3.eth.Contract(
      FundraiserContract.abi,
      fund
    );
    setContract(instance)
    setAccounts(accounts)

    // Placeholder for getting information about each contract
  }
  catch(error) {
    alert(
      `Failed to load web3, accounts, or contract. Check console for details.`,
    );
    console.error(error);
  }
}
The last thing we’ll need to do is to call our Fundraiser contract and get information about the fundraiser. After we call our Fundraiser contract, we’ll set it in our React state. After the setAccounts set state in the useEffects function, add the code shown here:
const name = await instance.methods.name().call()
const description = await instance.methods.description().call()
const totalDonations = await instance.methods.totalDonations().call()
const imageURL = await instance.methods.imageURL().call()
const url = await instance.methods.url().call()

setFundname(name)
setDescription(descriptions)
setImageURL(imageURL)
setTotalDonations(totalDonations)
setURL(url)
Let’s save that and visit our localhost:3000/ page. If everything is working correctly, you should see the fundraisers displayed on the page, just like in Figure 10-7.
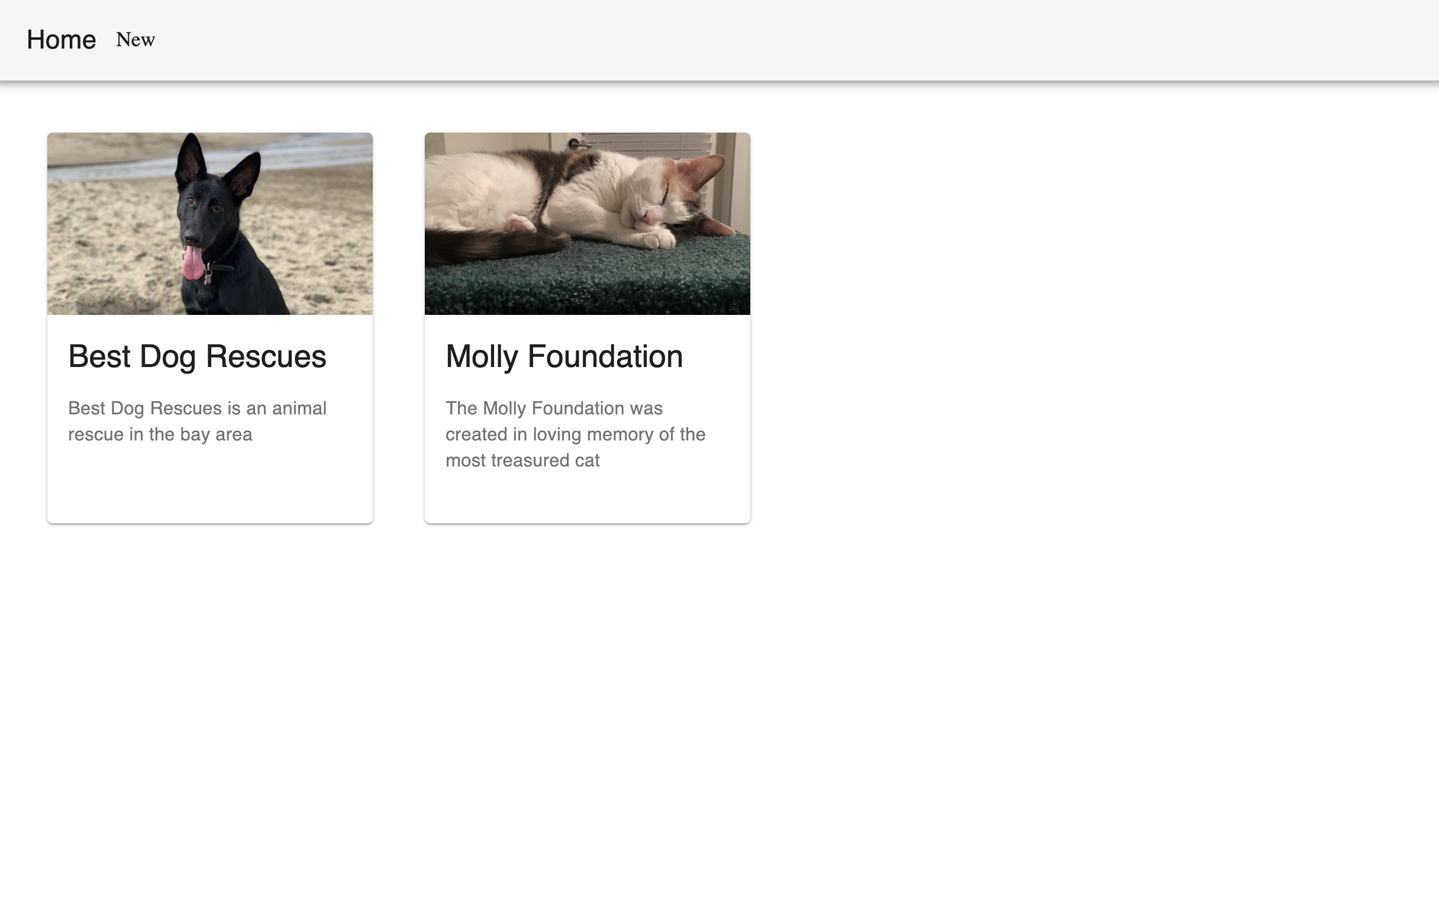
Figure 10-7. Our main fundraiser home page
Now that we have our list of fundraisers displayed on the page, we’ll work on displaying more information to our users in the next chapter and adding our donation functionality.
Summary
In this chapter, we revisited how to set up a Truffle application with a frontend. We also learned how to set up the React Router so we could render different views to our users through a navbar component.
We worked on creating a new form and displaying it to our users so they can now interact with our Web3 application and create their own fundraiser. We learned about submitting that data to the blockchain and returning it as well.
We learned about Material UI, using it to quickly set up a React application, and using the components and styles from Material UI to quickly get our application up and running.
We also displayed the fundraisers from our application and rendered them on the page. In the next chapter, we’ll work on displaying detailed information about the fundraisers and submitting a donation.