
Chapter 11. Finishing Our Fundraiser UI
In this chapter, we’ll continue where we left off in Chapter 10 working on our new Web3 application. We’ll add more detailed information about each fundraiser where our user can click into a fundraiser to see more information, add donation receipts for each individual donation, and more.
We’ll also learn how to accept ether through our application so our user can submit funds to a fundraiser and interact with our contract.
Our first steps will be to display more information about each fundraiser. That will allow our donors to more easily decide what fundraiser they want to donate to and help our fundraiser creators make a more compelling case.
Adding Detailed Information About Each Fundraiser
The next item on our agenda is to display more information about each fundraiser to our user. We’ll use Material UI’s modal to let the user click on an individual fundraiser and see the information display quickly in a pop-up. When the modal is open, they’ll be able to click a donation amount and read more about the fundraiser. They’ll also be able to quickly close the modal. But first, we need to create a button on each card that opens the right fundraiser.
Copy the following code and add it right after your latest import statement. This will first import the button we need from Material UI and also use the default styles provided by Material UI:
import Button from '@material-ui/core/Button';

const useStyles = makeStyles(theme => ({
  button: {
    margin: theme.spacing(1),
  },
  input: {
    display: 'none',
  },
}));
And right before your useEffect function, add the following to use the default styles from Material UI:
const classes = useStyles();
The last thing we’ll need to do is add our button with an action to open our modal. We’ll leave the handleOpen function empty for now. In the FundraiserCard.js file, add this button to the CardActions section in the Card:
<CardActions>
  <Button
    onClick={handleOpen}
    variant="contained"
    className={classes.button}>
    View More
  </Button>
</CardActions>
And in the FundraiserCard.js file, add an onClick method to open the modal to an individual Fundraiser card:
<Card className={classes.card} onClick={handleOpen}>
Now, create the empty handleOpen function for now so we can fix our warning. We’ll use this later to open up our dialog:
const handleOpen = () => {
  // we'll open the dialog here later on
}
Your Fundraiser component should now look like this:
const FundraiserCard = (props) => {
  const classes = useStyles();

  useEffect(() => {

  }, []);

  const handleOpen = () => {
  }

  return (
    <div>
      <Card className={classes.card} onClick={handleOpen}>
        <CardActionArea>
          <CardMedia
            className={classes.media}
            image={imageURL}
            title="Fundraiser Image"
          />
          <CardContent>
            <Typography gutterBottom variant="h5" component="h2">
              {fundName}
            </Typography>
            <Typography variant="body2" color="textSecondary" component="p">
              <p>{description}</p>
              <p>Total Donations: {totalDonations}</p>
            </Typography>
          </CardContent>
        </CardActionArea>
        <CardActions>
          <Button
            onClick={handleOpen}
            variant="contained"
            className={classes.button}>
            View More
          </Button>
        </CardActions>
      </Card>
    </div>
  )
}
Let’s move on to our next step!
Implementing a Material UI Dialog
Now that we’ve finished our button setup, let’s implement the dialog from Material UI next so we can use a popover in our application. The dialog is where we’ll actually display all the additional information about a fundraiser to our user. When the user clicks the button we just created, the modal will open with the fundraiser.
Inside the FundraiserCard.js component, add the dialog code from Material UI.
First, add the import statements to the top of the file after your previous imports:
import Dialog from '@material-ui/core/Dialog';
import DialogActions from '@material-ui/core/DialogActions';
import DialogContent from '@material-ui/core/DialogContent';
import DialogContentText from '@material-ui/core/DialogContentText';
import DialogTitle from '@material-ui/core/DialogTitle';
Next, add in the dialog state and the functions we’ll use to open the dialog:
// Add this code right below the useEffect method.
const [open, setOpen] = React.useState(false);

const handleOpen = () => {
  setOpen(true);
  // this will set our state to true and open the modal
};

const handleClose = () => {
  setOpen(false);
  // this will close the modal on click away and on button close
};
Finally, let’s update the render to open the dialog. Add in the new dialog code right before our <Card> code in our Fundraiser.js file:
<div>
  <Dialog open={open} onClose={handleClose} aria-labelledby="form-dialog-title">
  <DialogTitle id="form-dialog-title">Donate to {fundName}</DialogTitle>
    <DialogContent>
      <DialogContentText>
        <img src={imageURL} width='200px' height='200px' />
        <p>{description}</p>
      </DialogContentText>
    </DialogContent>
    <DialogActions>
      <Button onClick={handleClose} color="primary">
        Cancel
      </Button>
    </DialogActions>
  </Dialog>

<Card className={classes.card} onClick={handleOpen}>
Great! If you navigate to the home page of our application now, you’ll see the fundraiser we created earlier in Figure 11-1.

Figure 11-1. Our Fundraiser card
If you click View More, the dialog will open and we’ll see the empty dialog we added in Figure 11-2.
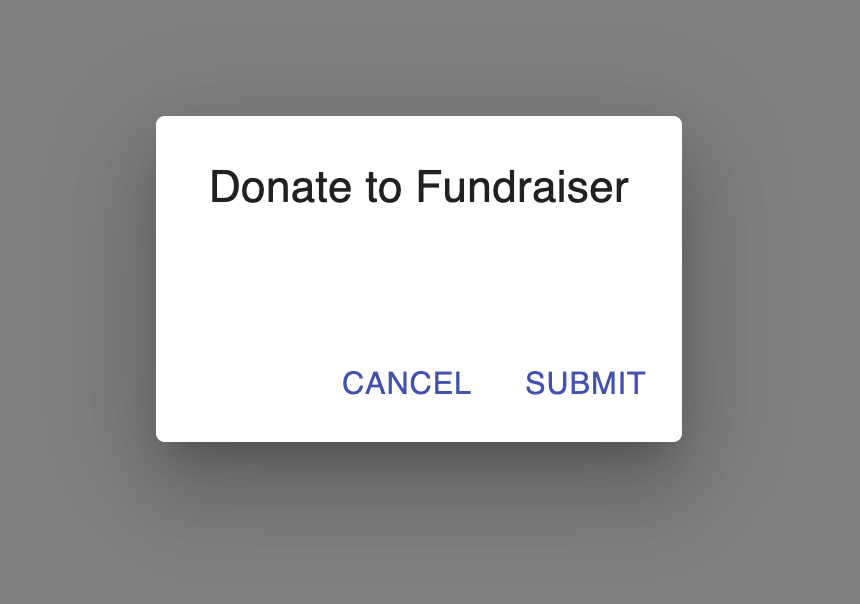
Figure 11-2. Example of our dialog thus far
In the next section, let’s add in the functionality for donating in our new dialog from Material UI.
Accepting a Donation with React
Now that we’ve gotten most of our application UI completed, let’s finish up our next feature: the ability to donate to a fundraiser in our Web3 application and see it update on the page.
We’ll be using Material UI’s forms again to create a simple input so the user can change how much they want to donate to a fund.
Import the form from Material UI into our FundraiserCard.js file:
import { makeStyles } from '@material-ui/core/styles';
import FilledInput from '@material-ui/core/FilledInput';
import FormControl from '@material-ui/core/FormControl';
import FormHelperText from '@material-ui/core/FormHelperText';
import Input from '@material-ui/core/Input';
import InputLabel from '@material-ui/core/InputLabel';
import OutlinedInput from '@material-ui/core/OutlinedInput';

const useStyles = makeStyles(theme => ({
  container: {
    display: 'flex',
    flexWrap: 'wrap',
  },
  formControl: {
    margin: theme.spacing(1),
    display: 'table-cell'
  },
  card: {
    maxWidth: 450,
    height: 400
  },
  media: {
    height: 140,
  },
  paper: {
    position: 'absolute',
    width: 400,
    backgroundColor: theme.palette.background.paper,
    border: 'none',
    boxShadow: 'none',
    padding: 4,
  },
}));
We’ll also need to add useState to our React import in the first line of our Fundraiser.js file:
import React, { useEffect, useState } from 'react';
And we’ll need to add an input for our donation:
const [donationAmount, setDonationAmount] = useState(null)
Now in your dialog, add the form shown here:
<FormControl className={classes.formControl}>
  <Input value={donationAmount} />
</FormControl>
After we’ve created this input, we’ll also need to change the state of the donation amount:
$
<Input
  id="component-simple"
  value={donationAmount}
  onChange={(e) => setDonationAmount(e.target.value)}
  placeholder="0.00"
 />
By using setDonationAmount, we’re immediately setting the new donation amount and storing it in the state in just one line of code. Let’s navigate back to localhost:3000/ and see what it looks like in Figure 11-3!

Figure 11-3. Our donation modal form
But right now when a user wants to donate and types something in the input, nothing happens. We need to add in a submit form button for our donation amount so the user can submit the amount they want to donate to a fundraiser. Let’s start with importing the button into our modal. Next, import the button from Material UI and the useStyles code:
import { makeStyles } from '@material-ui/core/styles';
import Button from '@material-ui/core/Button';

const useStyles = makeStyles(theme => ({
  button: {
    margin: theme.spacing(1),
  },
  input: {
    display: 'none',
  },
}));

const DonateModal = () => {
  const classes = useStyles();

  useEffect(() => {
Now that we’ve imported the button and set up the default styles, add the button to our modal right after our donation input:
<Button onClick={submitFunds} variant="contained" color="primary">
  Donate
</Button>
Now that we have our button rendering, let’s write the function to call Web3 and submit our donation to the blockchain:
const submitFunds = async () => {
  const fundraisercontract = contract
  const donation = web3.utils.toWei(donationAmount)

  await contract.methods.donate().send({
    from: accounts[0],
    value: donation,
    gas: 650000
  })
  setOpen(false);
}
The last thing we’ll have to add is displaying the total funds donated to a fundraiser so we can see the donations change in the frontend. In the Card component in FundraiserCard.js, add the following code to the Card content:
<Typography variant="body2" color="textSecondary" component="p">
  <p>{description}</p>
</Typography>
Now that we’ve finished the code for the donations, let’s take a look at the modal. Navigate to the fundraiser we created earlier and open up the donation modal in Figure 11-4.
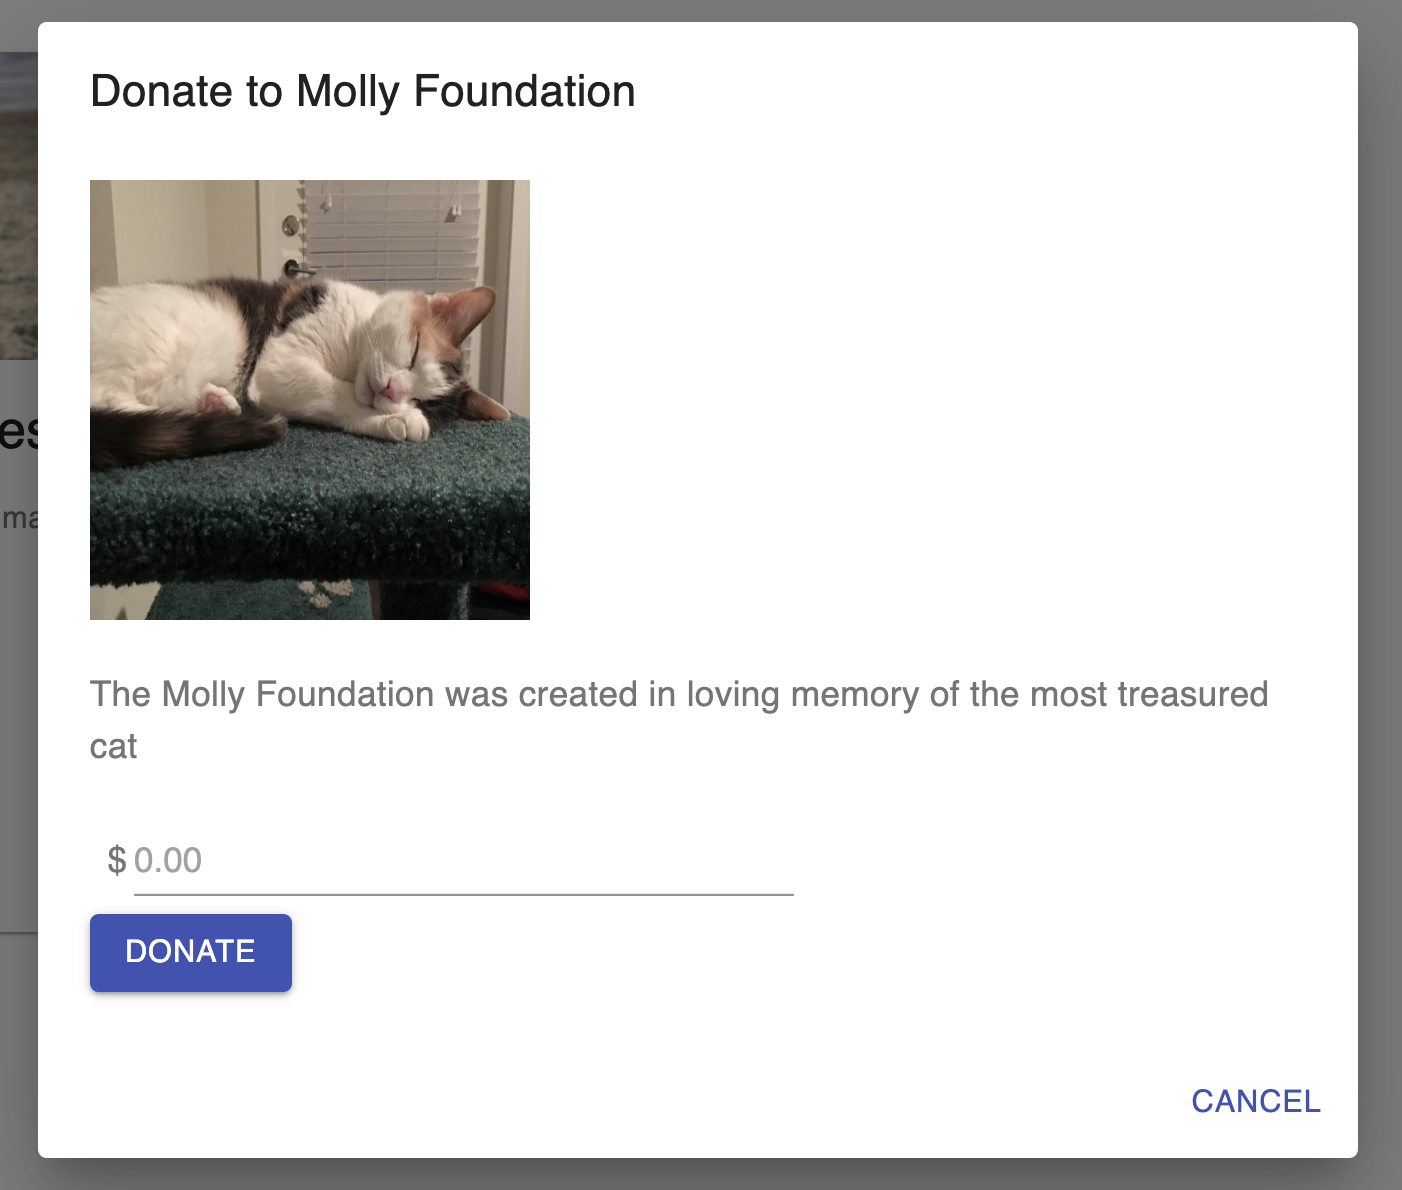
Figure 11-4. Our completed donation modal
Great. Next, let’s work on testing our code and see if we can create a donation.
Testing a Donation
Now that you’ve finished the donation code, let’s test out a donation. First, make sure you’re on the right MetaMask network. We always want to double-check that we’re not sending ether to our local networks. After you’ve verified you’re on the right network, select a donation amount and click submit. MetaMask should open asking you to confirm or reject the transaction.
If everything looks correct, go ahead and confirm the transaction. Once you’ve confirmed the transaction, you should be able to check your balance and see that the eth has been removed from your test account.
Now if you navigate to that fundraiser again, you’ll see the donation amount has increased in that fundraiser, as shown in Figure 11-5.
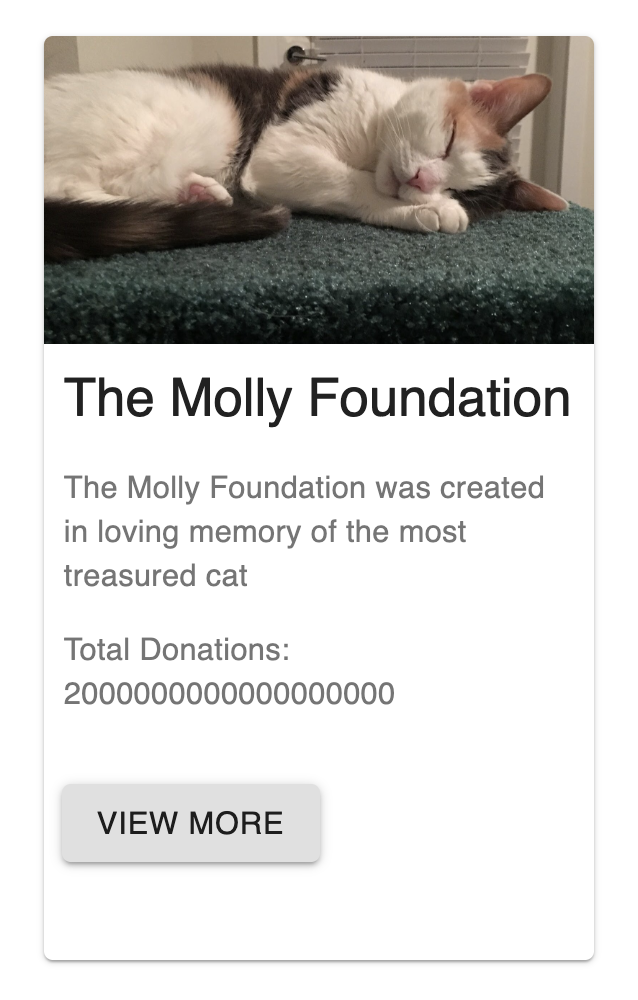
Figure 11-5. The donation increase for our Molly Foundation
The fundraiser should now display a donation amount. But it’s not formatted in dollars. Let’s next call an outside API to find the current exchange rate for ether so we can display how many dollars our fundraiser has raised.
Displaying the Current ETH Exchange Rate
What if we want to display the current exchange rate of ether so the user can see how much ether they’re actually purchasing? Let’s work on displaying the current exchange rate of ether in our application. We’ll use an add-on to make this easier:
npm install --save cryptocompare
Next, import the module so we can get the current ETH price. Add the require statement to our FundraiserCard.js file:
const cc = require('cryptocompare')
The add-on will work without an API key, but you can also generate your own at CryptoCompare and use that:
cc.setApiKey('<your-api-key>')
In the Fundraisercard.js file, add in the init function right after we get the data from our Fundraiser contract, set it in a variable, and add in a call to the npm add-on to get the current exchange rate. For this tutorial, we’ll see USD, but the add-on supports many other currencies as well.
const imageURL = await instance.methods.imageURL().call()
const url = await instance.methods.url().call()

// calculate the exchange rate here
const exchangeRate = await cc.price('ETH', ['USD'])
// pass in the coin you want to check and the currency
const eth = web3.utils.fromWei(totalDonations, 'ether')
const dollarDonationAmount = exchangeRate.USD * eth
Next, change the set state in React to use the new dollarDonationAmount variable we’ve created:
setTotalDonations(dollarDonationAmount)
In the Card content, we’ll also need to add in our USD symbol:
<p>Total Donations: ${totalDonations}</p>
Now if you refresh the page, you’ll see in Figure 11-6 that we get the dollar amount raised for our current fundraiser.
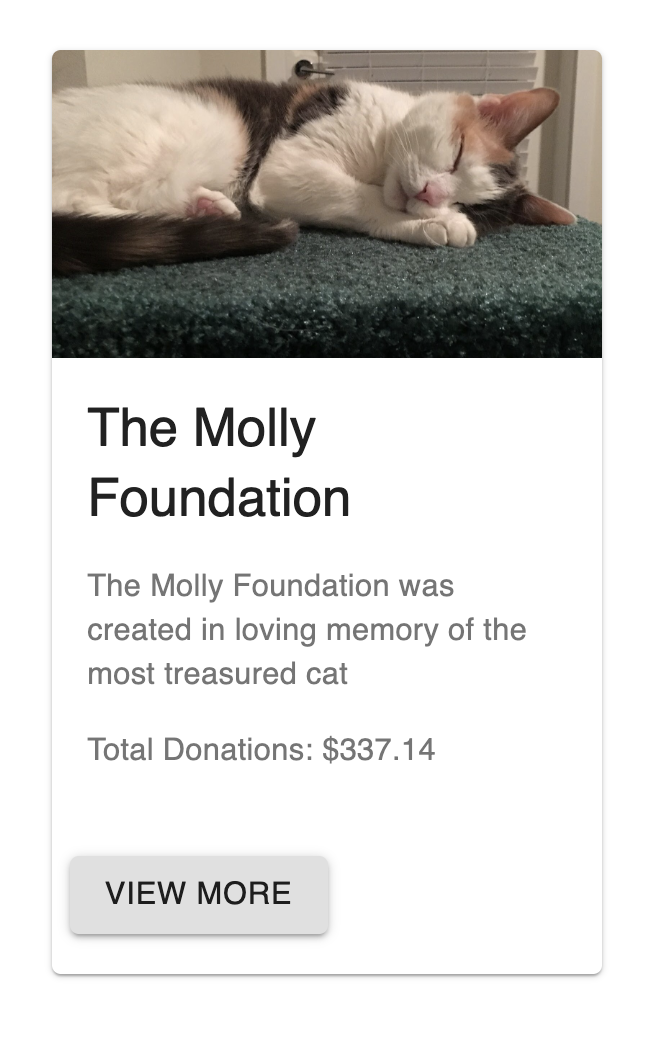
Figure 11-6. Our donation amount now displayed in a dollar amount
Let’s also use this add-on in our donation modal next so our users don’t have to calculate how much ETH they’re sending and instead can just input a dollar amount.
First, let’s update our useEffect function and store the current exchange rate in our React state so we can easily reuse it without calling the API in the add-on again:
const exchangeRate = await cc.price('ETH', ['USD'])
setExchangeRate(exchangeRate.USD)
const eth = web3.utils.fromWei(totalDonations, 'ether')
const dollarDonationAmount = exchangeRate.USD * eth
Remember to create a new state as well in React:
const [ exchangeRate, setExchangeRate ] = useState(null)
Finally, in our submitFunds function, let’s use the new add-on to calculate how much ETH a person wants to buy in a dollar amount:
const submitFunds = async () => {
  const fundraisercontract = contract
  const ethRate = exchangeRate
  const ethTotal = donationAmount / ethRate
  const donation = web3.utils.toWei(ethTotal.toString())

  await contract.methods.donate().send({
    from: accounts[0],
    value: donation,
    gas: 650000
  })
  setOpen(false);
}
Now if you submit a donation in dollar amounts, it will calculate the correct dollar amount in ether in the contract. We can also use this add-on to calculate how much ETH a user is actually buying with the dollar amount they submit. First, create a new variable right after our exchange rate setState in React:
const [ exchangeRate, setExchangeRate ] = useState(null)
const ethAmount = donationAmount / exchangeRate || 0
And right after our donation input, use the variable to display how much the user is purchasing in eth:
  <div className="donation-input-container">
    <Input
      id="component-simple"
      value={donationAmount}
      onChange={(e) => setDonationAmount(e.target.value)}
      placeholder="0.00"
     />
    </FormControl>

    <p>Eth Amount: {ethAmount}</p>
  </div>
</DialogContentText>
And in the App.css file, add in the following CSS:
.donation-input-container {
  display: flex;
}
Refresh the page and open up a fundraiser. Type in an amount and verify that you see the conversion. Your page should look like Figure 11-7.

Figure 11-7. What your conversion rate UI should now look like
Generating a Donation Receipt for Our User
If our user wants to prove they’ve donated to a campaign, we need a way to provide the user with a donation receipt from the fundraiser they’ve donated to. We’ll first need to access our contract again.
In FundraiserCard.js in the useEffect function, add in the following code after our setURL state set:
setURL(url)

const userDonations = await instance.methods.myDonations().call({ from: accounts[0]})
console.log(userDonations)
setUserDonations(userDonations)
If you navigate back to localhost:3000, you’ll see that we have an error:
./src/FundraiserCard.js
  Line 123:  'setUserDonations' is not defined  no-undef
Add in userDonations to the React state, next to all of our other useState statements:
const [ userDonations, setUserDonations ] = useState(null)
If you check out your console now, you should see the following output:
Result {0: Array(1), 1: Array(1), 2: Array(1), values: Array(1),
dates: Array(1), conversionFactors: Array(1)}
0: ["1198178768272226200"]
1: ["1567278668"]
2: ["18460"]
conversionFactors: Array(1)
0: "18460"
dates: Array(1)
0: "1567278668"
length: 1
values: Array(1)
0: "1198178768272226200"
length: 1
We’ll use the preceding information to then create a receipt for our user. In the FundraiserCard.js file, add this to our render function right after our eth amount code:
Eth Amount: {ethAmount}
// add in the below code
<div>
  <h3>My donations</h3>
  {renderDonationsList()}
</div>
Create an empty function where we’ll render all of the users’ donations:
const renderDonationsList = () => {
  var donations = userDonations
  if (donations === null) {return null}
  // we'll return null so we don't get an error when the
  // donations aren't in the state yet

  return (
    <div>
    </div>
  )
}
Now that we have our function, let’s iterate through our donations and display individual receipts to a user. Let’s get the donationList, and create a for loop that iterates through each donation and creates a donationList array we can use for our render function:
const renderDonationsList = () => {
  var donations = userDonations
  if (donations === null) {return null}

  const totalDonations = donations.values.length
  let donationList = []
  var i
  for (i = 0; i < totalDonations; i++) {
    const ethAmount = web3.utils.fromWei(donations.values[i])
    const userDonation = exchangeRate * ethAmount
    const donationDate = donations.dates[i]
    donationList.push({ donationAmount: userDonation.toFixed(2),
        date: donationDate})
  }
}
Next, let’s add the return so we can display the donation amounts and the request receipt buttons for each donation. Add in the following code right after our for loop:
return donationList.map((donation) => {
  return (
    <div className="donation-list">
      <p>${donation.donationAmount}</p>
      <Button variant="contained" color="primary">
        Request Receipt
      </Button>
    </div>
  )
})
Remember to add some styling so the amount and receipt button display properly. In the App.css file, add in the following CSS:
.donation-list {
  margin-top: 10px;
  margin-bottom: 10px;
  display: flex;
  justify-content: space-between;
}

.donation-receipt-link {
  color: inherit;
  text-decoration: none;
}
If you navigate to localhost:3000 and select a fundraiser, you should see the new donation list in the dialog, just like in Figure 11-8.
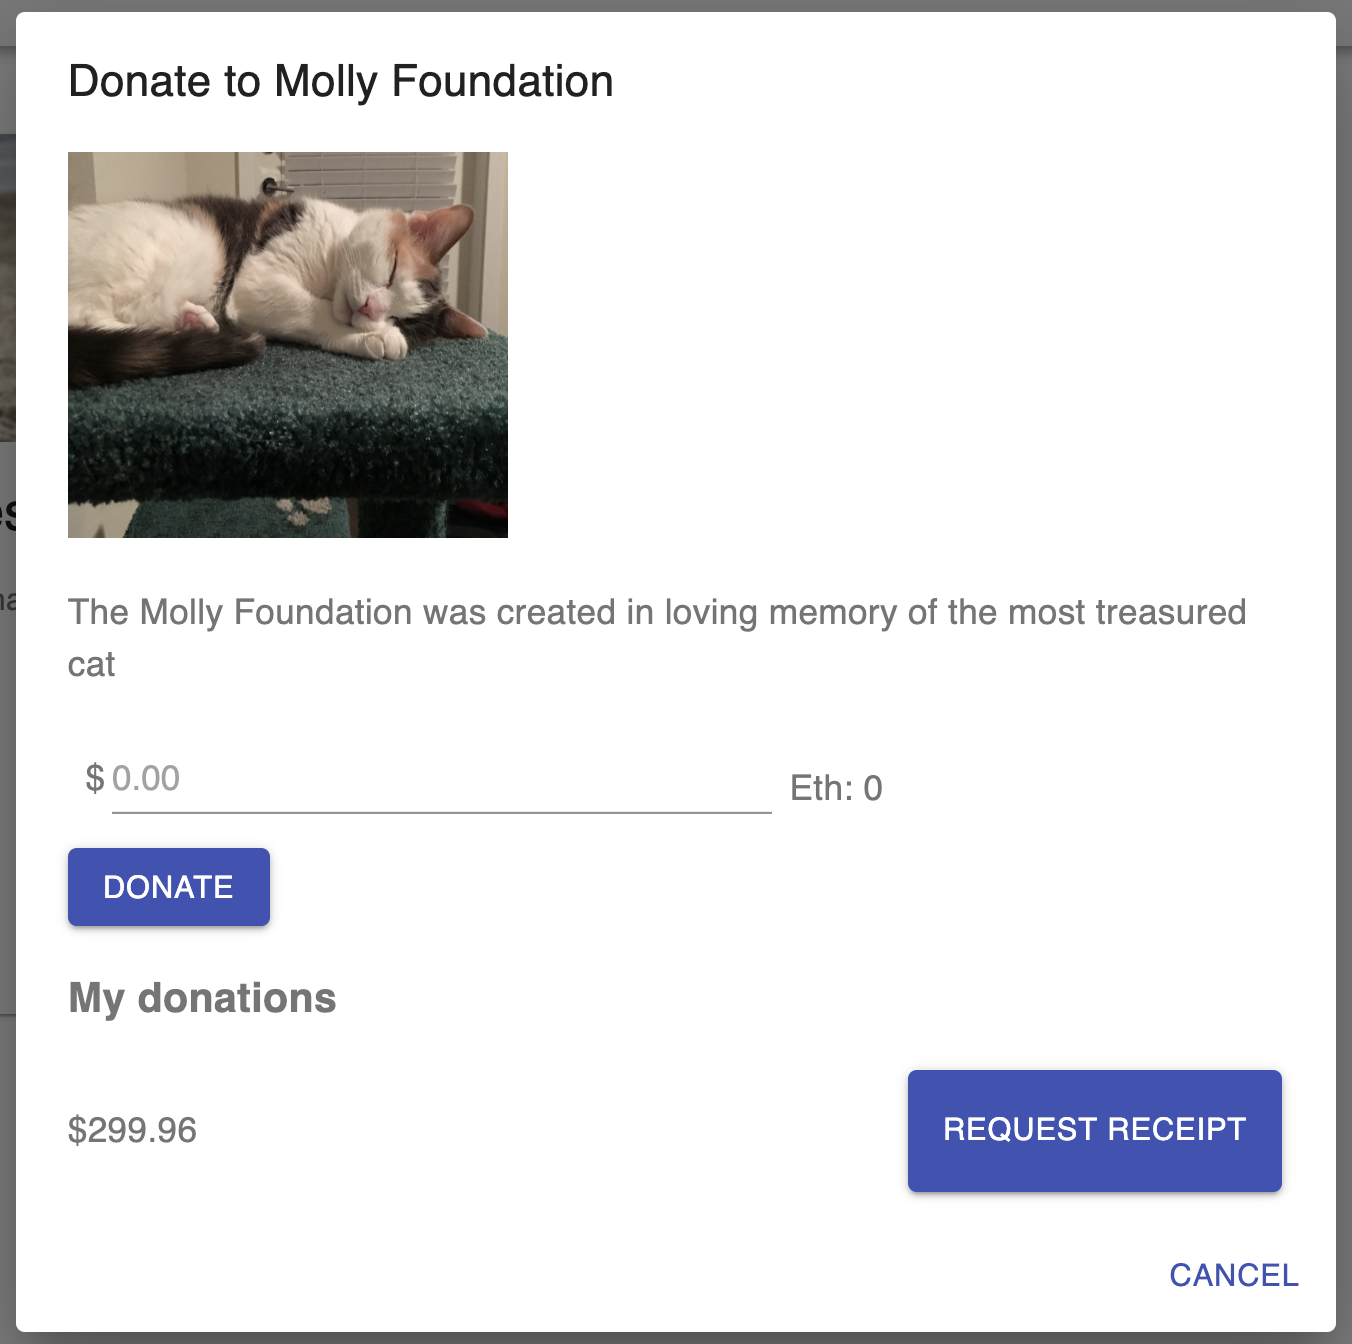
Figure 11-8. Our donation receipt list
Excellent! Now let’s finish the functionality to show a receipt. Let’s work on the showReceipt function.
In our FundraiserCard.js file, let’s add a new import so we can use the link:
import { Link } from 'react-router-dom'
In the same file, adjust the button in our renderDonationsList function so it has a Link component for receipts:
<Button variant="contained" color="primary">
  <Link
    className="donation-receipt-link"
    to={{ pathname: '/receipts',
    state: { donation: donation.donationAmount, date: donation.date}
    }}>
    Request Receipt
  </Link>
</Button>
We’ll get an error, so now let’s create our Receipts component. First, let’s start with creating a new component for receipts that we’ll display in the navigation:
touch Receipts.js
Inside the Receipts.js file, add in the following code as we have done in the previous sections. This will connect to Web3 for us and allow us to access the donation receipts for an account:
import React, { useState, useEffect } from "react";

const Receipts = (props) => {

  useEffect(() => {
    const { donation, date, fund } = props.location.state
    debugger
  }, []);


  return (
    <div>
      <h1>Receipts</h1>
    </div>
  )
}

export default Receipts;
Next, we’ll want to open up our App.js file and add in our new route under the existing routes:
<Route path="/receipts" component={Receipts} />
And in the same file, make sure you import the Receipts component we created so we have access to it in the render:
import Receipts from './Receipts'
In Receipts.js, we’ll need to do a few things to access our data and display it properly to the user. First, we’ll need to set the state for the three props passed in, which are donation, fundName, and date. We’ll also need to format the date and set the state for all of the props so we can use them in our render:
const [ donation, setDonation ] = useState(null)
const [ fundName, setFundName ] = useState(null)
const [ date, setDate ] = useState(null)

useEffect(() => {
  const { donation, date, fund } = props.location.state

  const formattedDate = new Date(parseInt(date))

  setDonation(donation)
  setDate(formattedDate.toString())
  setFundName(fund)
}, []);
In our Receipts.js file, add in the code shown here so we can render our receipt:
return (
  <div className="receipt-container">
    <div className="receipt-header">
      <h3>Thank you for your donation to {fundName}</h3>
    </div>

    <div className="receipt-info">
      <div>Date of Donation: {date}</div>
      <div>Donation Value: ${donation}</div>
    </div>
  </div>
)
Let’s also make it look a little nicer by adding in the following CSS to our App.css file:
.receipt-header {
  border-bottom: 1px solid gray;
}

.receipt-container {
  text-align: center;
}

.receipt-info {
  display: flex;
  padding: 50px;
  justify-content: space-between;
}
Let’s navigate back to the fundraisers home page and open up one of our fundraisers in Figure 11-9.

Figure 11-9. Our donation modal with our request receipt button
Click Request Receipt. It should redirect you to our receipts page. See Figure 11-10.
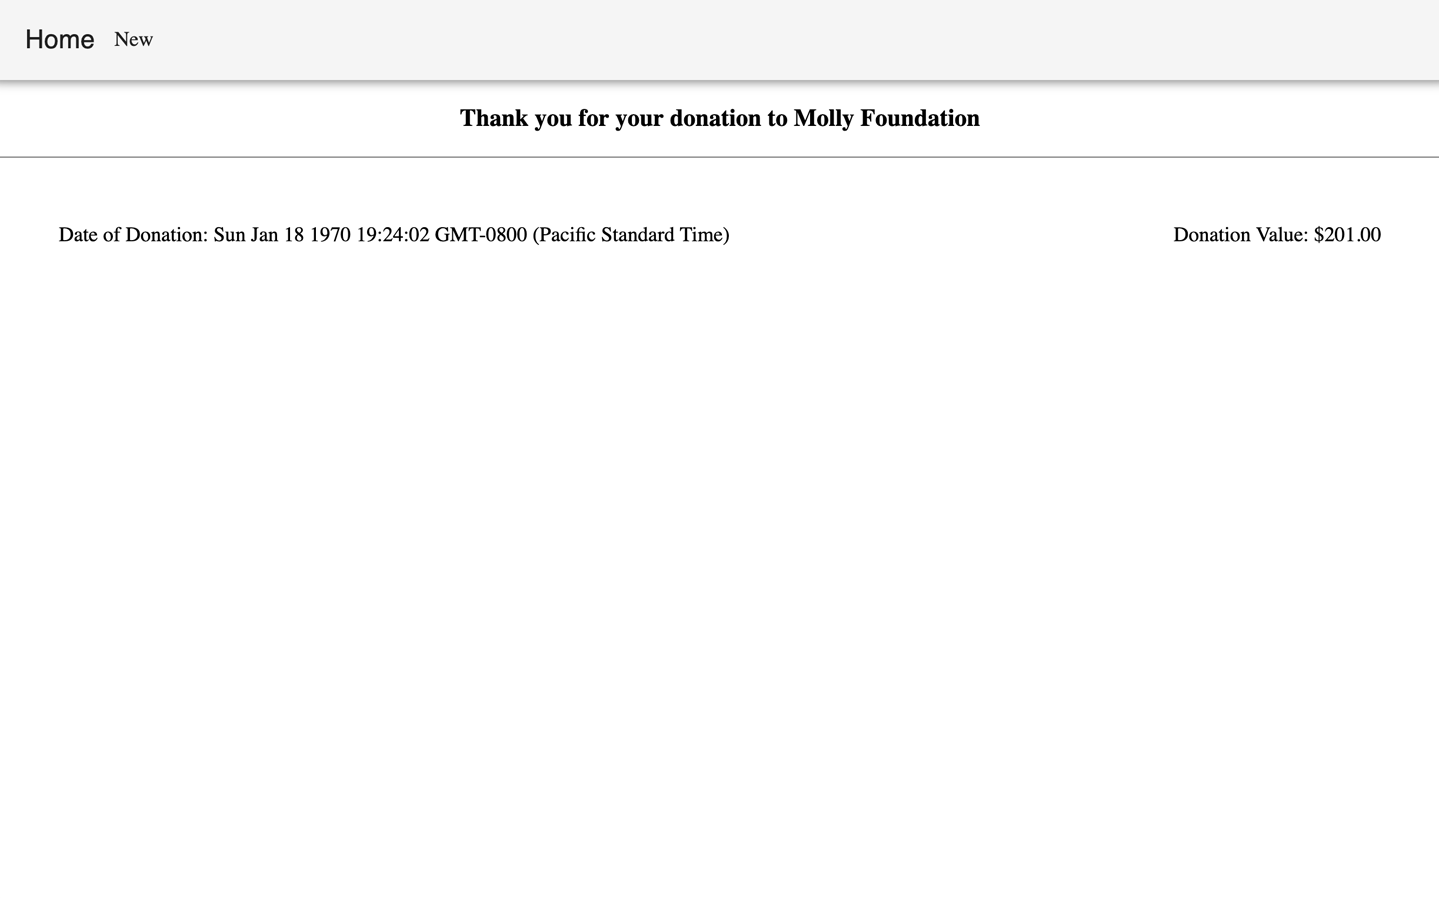
Figure 11-10. Our actual donation receipt
Now your user should be able to make a donation and see a donation receipt. Finally, let’s add the ability to withdraw funds from our contract so a fundraiser owner can benefit from the donations.
Handling a Withdrawal from Our Contract
Our first step to be able to withdraw from a contract will be to add a button that only the owner of our contract can see. We’ll need to verify that they are the contract owner, and display the withdrawal button we’ll add to our frontend if they are. If they are not a contract owner, they’ll only see the option to donate to a fundraiser.
In order to check if the current account owns the contract, we’ll need to add the following code to our useEffect function. We’ll access accounts[0] to see what current account the user is on, and we’ll await an owner() call to see who owns the contract. Finally, we’ll use an if statement to verify that the user is the contract owner:
const isUser = accounts[0]
const isOwner = await instance.methods.owner().call()
if (isOwner === accounts[[0]]) {
  setIsOwner(true)
}
Make sure to add the useState for isOwner so that in a moment we can use the conditional in our render function:
const [ userDonations, setUserDonations ] = useState(null)
// add in the below code
const [ isOwner, setIsOwner ] = useState(false)
Next, let’s add a button in the fundraiser modal. Open the FundraiserCard.js file and in DialogActions, add a button with an onClick action for withdrawing the funds. We’ll use our state conditional to wrap the button as well so only a contract owner can see the button:
<DialogActions>
  <Button onClick={handleClose} color="primary">
    Cancel
  </Button>

  // Add in the code below
  {isOwner &&
    <Button
      variant="contained"
      color="primary"
      onClick={withdrawalFunds}
    >
      Withdrawal
    </Button>
  }

</DialogActions>
It should look like Figure 11-11.
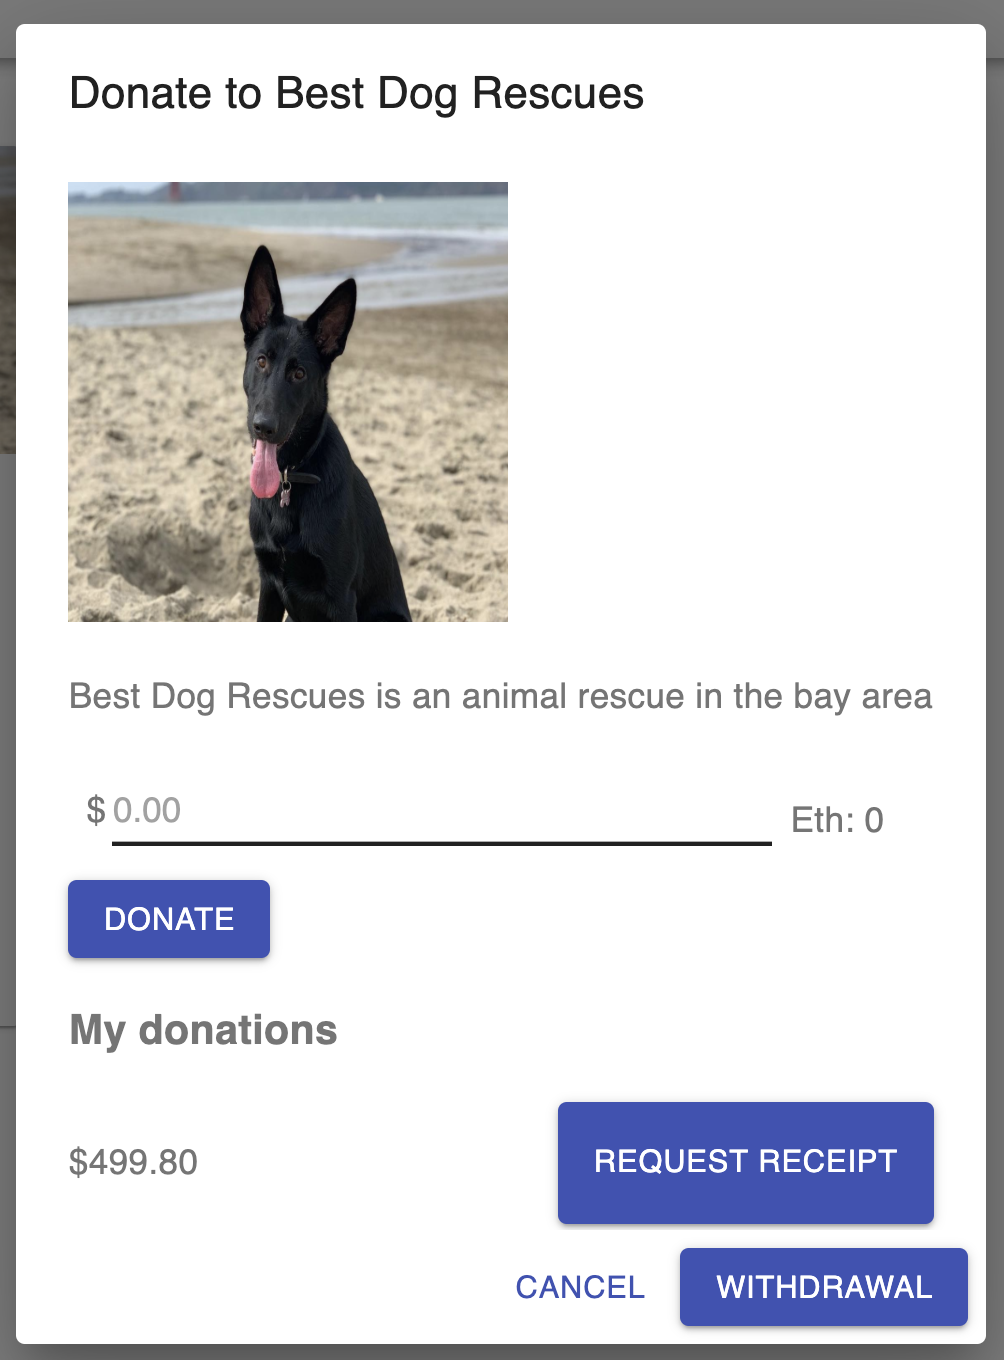
Figure 11-11. Our fundraiser with a withdrawal button
The page will now display an error because we don’t have the withdrawal funds function, so let’s go ahead and create it:
const withdrawalFunds = async () => {
  await contract.methods.withdraw().send({
    from: accounts[0],
  })

  alert('Funds Withdrawn!')
}
For now, let’s refresh the page if the account changes. Add this in your FundraiserCard.js file after the useEffect function:
window.ethereum.on('accountsChanged', function (accounts) {
  window.location.reload()
})
Let’s navigate back to localhost:3000 and test it out. Start by selecting a fundraiser and donating some funds to it (see Figure 11-12).

Figure 11-12. Our fundraiser with a new donation
Now if you open up MetaMask, you’ll see that your balance has decreased. Refer to Figure 11-13.
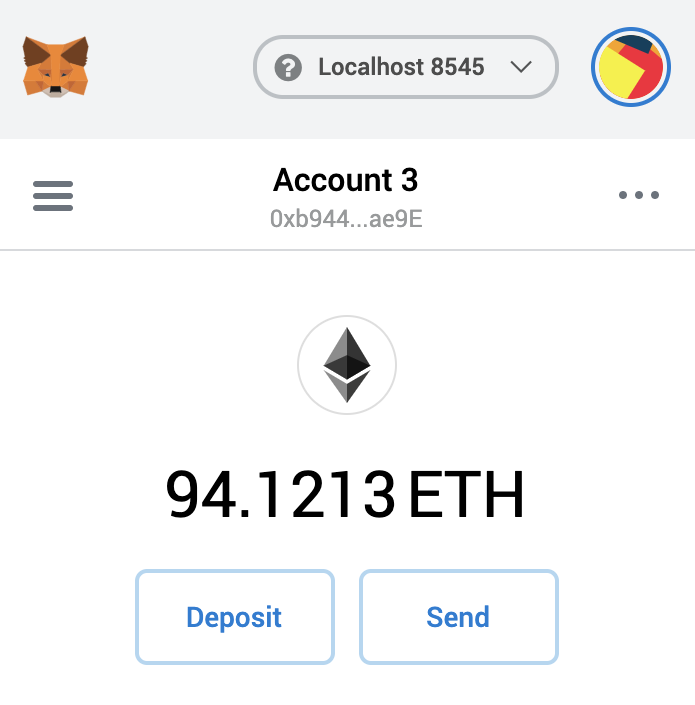
Figure 11-13. MetaMask balance has decreased
You should also see the donation amount increase on the fundraiser (see Figure 11-14).
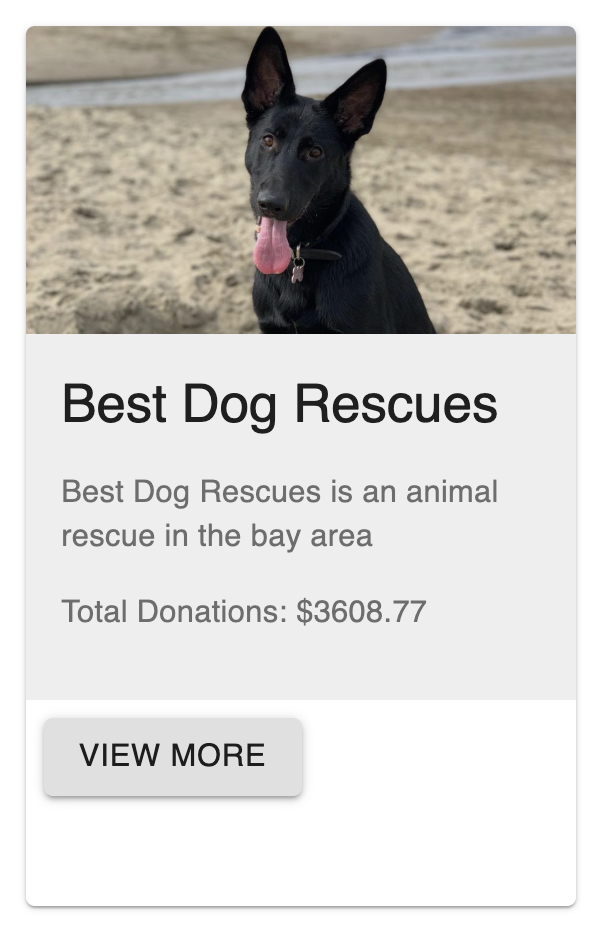
Figure 11-14. Donation amount has increased for our fundraiser
Now, go back to the fundraiser and, using the same address on MetaMask that created the contract, click Withdraw Funds. After, you should see an alert displayed on the page, as shown in Figure 11-15.
And finally, if you open up MetaMask again, you should see your balance has increased, as illustrated in Figure 11-16. You can also see your history of past transactions in MetaMask as well.

Figure 11-15. Our withdraw funds alert
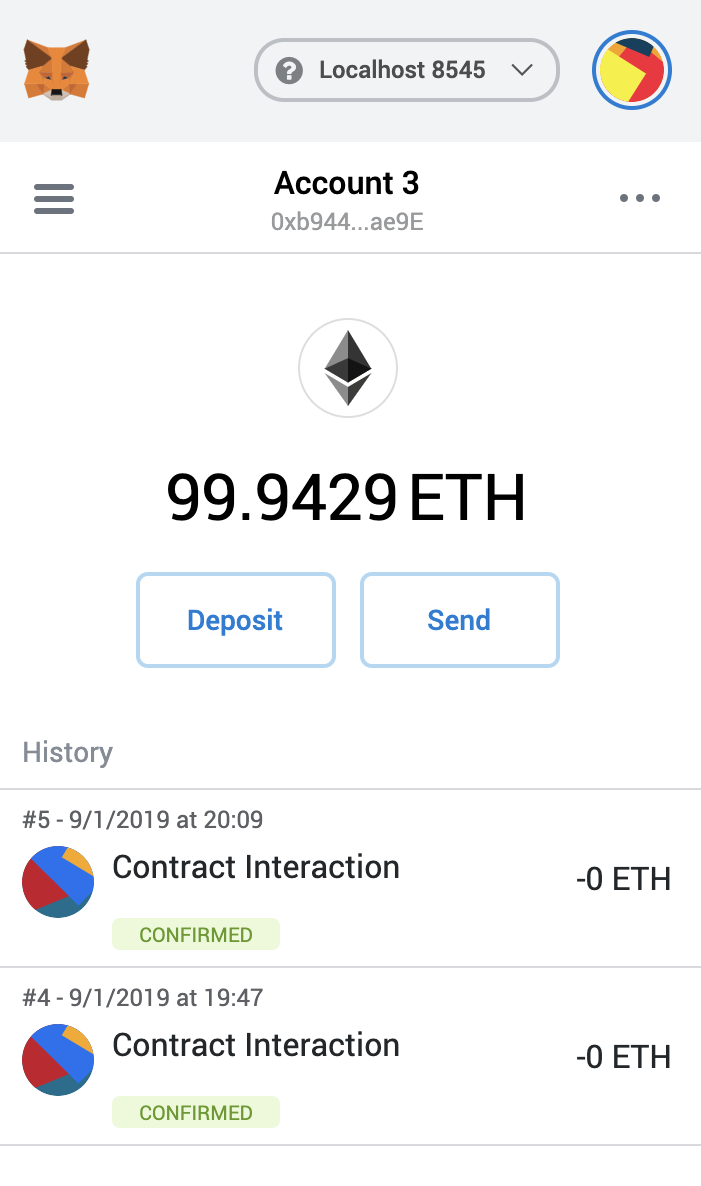
Figure 11-16. MetaMask funds have increased
With the withdrawal functionality complete, your application should look like Figure 11-17.
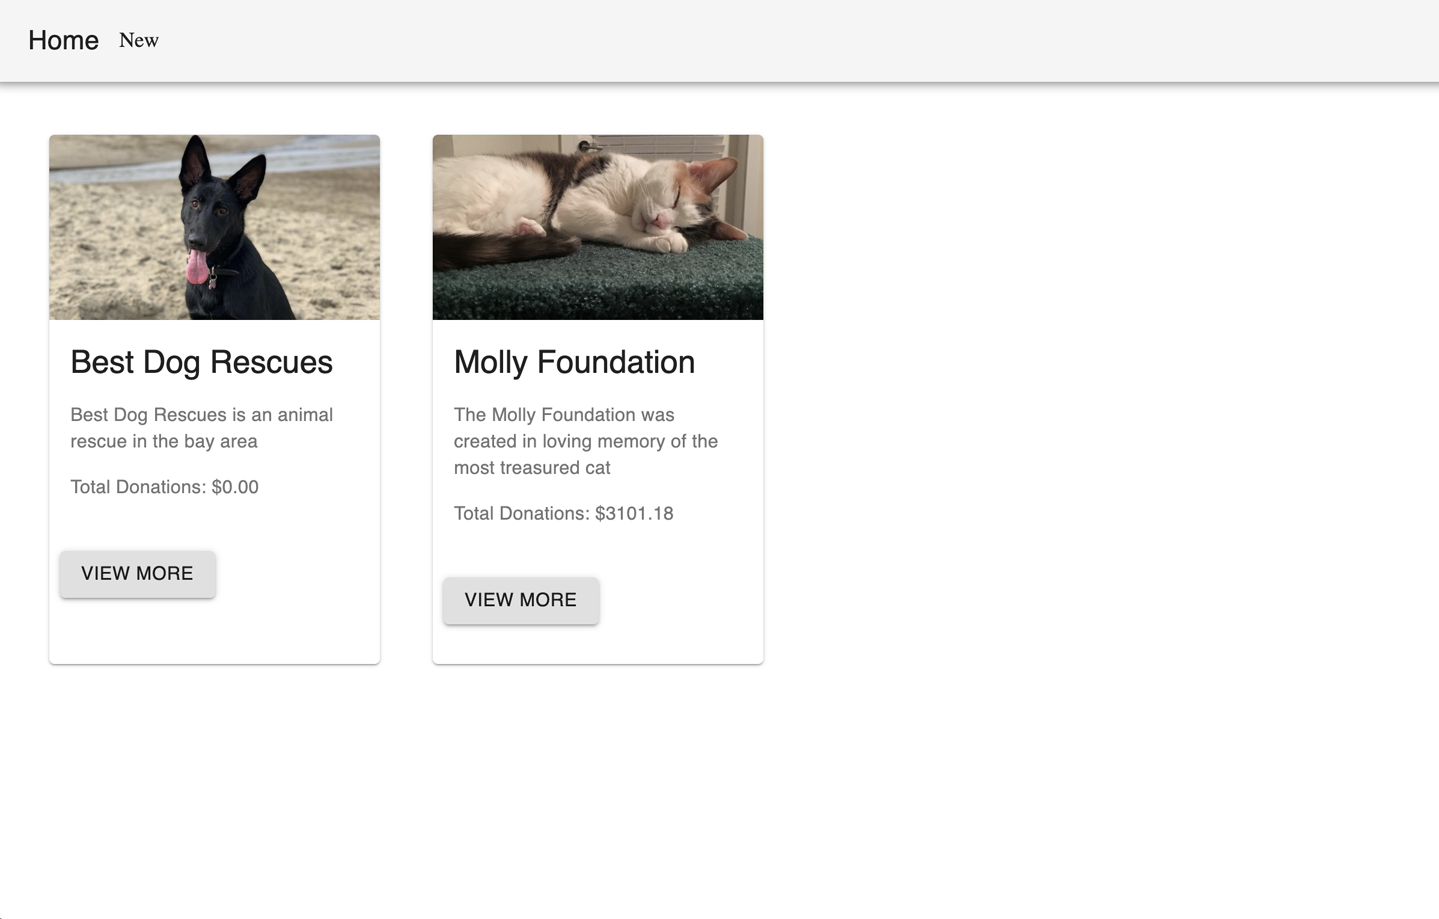
Figure 11-17. Our final application
We do want to add one more use case for our fundraisers: the ability to edit a fundraiser to change the beneficiary.
Adding Edit Beneficiary to the Contract
What if we want to change the beneficiary and make an update to the blockchain? We’ll need to call the setBeneficiary function and update the address of the user who will be the beneficiary of the contract. Let’s start with updating our FundraiserCard.js file. Just like in our previous inputs, we’ll use useState in React in our input:
// Add this to our list of React hooks.
  const [ beneficiary, setNewBeneficiary ] = useState(false)
Next, right after our donations list is rendered in the UI, let’s add a second div with an input and a button to submit the new beneficiary. We’ll also need to wrap it in the isOwner check as we did before to make sure only an owner can call the function:
<div>
  <h3>My donations</h3>
  {renderDonationsList()}
</div>

{isOwner &&
  <div>
    <FormControl className={classes.formControl}>
      Beneficiary:
      <Input
        value={beneficiary}
        onChange={(e) => setNewBeneficiary(e.target.value)}
        placeholder="Set Beneficiary"
       />
    </FormControl>

    <Button variant="contained" style={{ marginTop: 20 }} color="primary"
        onClick={setBeneficiary}>
      Set Beneficiary
    </Button>
  </div>
}
And finally, let’s create the function to call our contract and change the beneficiary:
const setBeneficiary = async () => {
  await contract.methods.setBeneficiary(beneficiary).send({
    from: accounts[0],
  })

  alert(`Fundraiser Beneficiary Changed`)
}
Let’s test it out. Navigate back to the home page and try to change the beneficiary address. Import another test account from truffle develop and switch to that account on MetaMask. Next, copy and paste the address to the input we’ve created. You should see the alert and be able to see the withdraw methods now on that address.
Summary
Great job! Now you have a Web3 application that allows users to create and donate to fundraisers. From here, you can think of an idea for your own Web3 application and use the framework here to get it started.
In this chapter, we learned how to interact with our smart contract by first displaying a dialog to show our application users more information about our fundraiser. We calculated the exchange rate and used our npm add-on in multiple places to make our app easier to use for those who aren’t familiar with Ethereum.
We also worked on interacting with our smart contract by creating a set of inputs that our users could submit data to and donate to through Web3. We created a JavaScript function that connected with the blockchain to submit a user donation.
And finally, we created a receipt for our users that will prove they donated to a particular fundraiser. Opening up the card will display each donation a user has made to a particular fundraiser.
In our final chapter, we’ll discuss security and common ways that developers can find security issues within their contracts. Once a contract is deployed, we can’t edit it like we can a normal web 2.0 application. Security issues are a much bigger concern with a DApp.