
Setting Up the Authentication Server
In our example, we are using a Windows 2000 server for the authentication server. The name of the service we will configure is IAS. This is Microsoft's RADIUS implementation. Note, however, that there are free, open source equivalents available, such as the Free Radius Server project. (See http://www.freeradius.org for more information.)
This chapter assumes that your Windows 2000 server is a clean installation and hasn't been modified. It is possible to run the various services that we will discuss on a single PC or distributed across several machines on your network. This book assumes a simple environment, where all services will be placed on a single PC.
In a Windows 2000 environment, the first step is to configure the necessary services. The first thing you will need to do is install Active Directory on your Windows 2000 server. To launch the Active Directory Installation Wizard (Figure 10.1), click Start | Run, type dcpromo, and click OK. The wizard will walk you through all the steps to promote your server to be a domain controller.
Figure 10.1. Welcome to the active directory installation wizard.

When selecting the Domain Controller Type, consider the overall structure of your enterprise. If this is a new domain, select Domain controller for a new domain (Figure 10.2).
Figure 10.2. Domain controller type.

When choosing between creating a tree or a child domain, you must decide how this domain will integrate into your environment. In our example, this is a new domain, so we will choose Create a new domain tree (Figure 10.3).
Figure 10.3. Create tree or child domain.

Similarly, in our example, we will be creating a new forest, rather than joining an existing one. Therefore, in the Create or Join Forest screen (Figure 10.4), select Create a new forest of domain trees.
Figure 10.4. Create or join forest.

When asked to specify a name for your new domain, simply choose one that is appropriate. Remember to use a complete domain name, such as testnetwork.com or testnetwork.net (Figure 10.5). The NetBIOS name (Figure 10.6) is the domain name that legacy versions of Windows will use to identify the domain. In this case, you can leave off the .com.
Figure 10.5. New domain name.

Figure 10.6. NetBIOS domain name.

When prompted, you can use the default settings for the log locations. When you see the Database and Log Locations screen, click Next. Also, click Next on the following screen Shared System Volume. If you get an error message about a DNS problem, don't worry. The message in Figure 10.7 appears if you don't have DNS services installed on your server. If DNS isn't installed, the installation wizard will give you the option of installing it. We'll walk through the process to configure DNS services in the next step.
Figure 10.7. DNS error.

If you see the error message in Figure 10.7, you will be directed to a screen that gives you the option to configure DNS. Select Yes, install and configure DNS on this computer (recommended) and click Next. The following screen will give you options regarding default permissions for users and groups (Figure 10.8). If your network includes pre-Windows 2000 servers, you must select the Permissions compatible with pre-Windows 2000 servers option. Otherwise, if all of your servers are operating in Windows 2000 native mode (not mixed mode), then you can select Permissions compatible only with Windows 2000 servers.
Figure 10.8. Permissions.

In the next screen, you will be asked to configure a Directory Services Restore Mode Administrator Password. This mode (available at boot time) can be helpful if you are having problems starting your server. Make sure to choose a difficult password. After you've chosen the password, you will see a summary screen where you can review all of your choices. Click Next to begin the installation process. The process to configure Active Directory could take several minutes, so be patient. Note that you may need your original Windows 2000 Server CD, so be sure to have that handy. You'll need to reboot your server when the Active Directory Installation Wizard is complete. Keep in mind that your reboot time may increase significantly. Again, be patient as this is normal.
Once you're done installing Active Directory (and DNS, if it wasn't already there) you'll need to install a few more services. Click Start | Settings | Control Panel. From there, select Add/Remove Programs. In the Add/Remove Programs window, select the Add/Remove Windows Components on the left side. This will give you a list of the Windows 2000 components and services currently installed on your machine (Figure 10.9). From this Windows Component Wizard screen, be sure to:
Highlight Internet Information Services (IIS), click Details, and select World Wide Web Server
Highlight Networking Services, click Details, and select Dynamic Host Configuration Protocol (DHCP) and Internet Authentication Service
Select Certificate Services
Figure 10.9. Windows components wizard.

After you've selected these items, click Next. You will be presented with a screen asking you to choose the Certification Authority Type (Figure 10.10). Select Enterprise root CA and click Next.
Figure 10.10. Certification authority type.

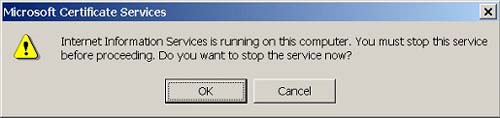
The following screen will ask for your CA Identifying Information. Go ahead and input the information for your enterprise and click Next. Then you will be presented with the Data Storage Location screen that provides you with location options for the certificate database and log files. You can accept these defaults by clicking Next. If IIS is running, you will receive a message telling you that the service must be stopped before proceeding (Figure 10.11). Click OK to stop the service.
Figure 10.11. IIS is running.
At this point, the Windows Components Wizard will set up all of your requested services. When it's done, you'll have a couple of new icons in your start menu that you can use to configure your new services. You'll need to set up a DHCP scope for your wireless clients (Start | Programs | Administrative Tools | DHCP). This is a fairly straightforward task. Remember to assign a range of IP addresses in the nonroutable private IP space (such as 10.x.x.x or 192.168.x.x). Also, be sure to change the DHCP lease life. The default is 8 days. You'll probably need something shorter, such as 24 hours (or less). If you run out of IP addresses it could be because new wireless clients are coming into the environment faster then old IP addresses are being released. If this is the case, simply shorten the lease life as necessary. Remember to authorize the DHCP server.