
Solutions in this chapter:
In Chapter 4, we covered installation and configuration of the Microsoft Office Communicator (MOC) client. In this appendix, we’ll discuss how to customize MOC to extract more features out of this product. Specifically, we’ll discuss adding custom presence status messages, adding more tabs to MOC, and customizing menu commands.
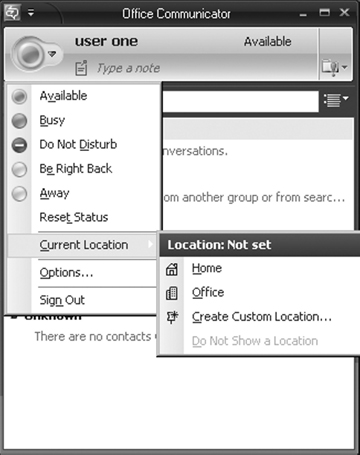
Once you sign in to MOC, you’ll find various status options available to you. You can also set the status during sign-in. The following options are available to you (see Figure A.1):
Available
Busy
Do Not Disturb
Be Right Back
Away
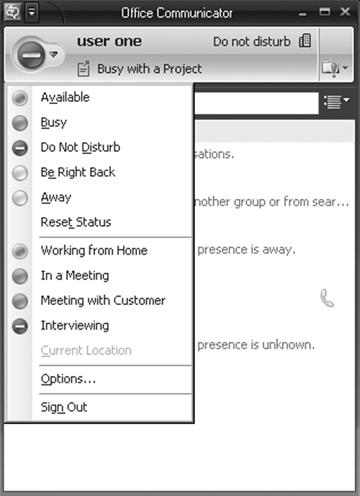
In addition to these, you can also add more specific presence messages by tweaking the client application. Let’s work through this short exercise to configure custom presence states:
Open Notepad (you may also use XML Notepad 2007) and create an XML configuration file with the following code:
<?xml version="1.0"?>
<customStates xmlns="http://demo/newsite/customStates"
xmlns:xsi="http://www.w3.org/2001/XMLSchema-instance"

xsi:schemaLocation="http://demo/newsite/customStates
http://demo/newsite/CustomActivities.xsd">

<customState ID="1" availability="Online">
  <activity LCID="1033">Working from Home</activity>
  <activity LCID="1044">activity 2 for 1044</activity>
  <activity LCID="1055">activity 3 for 1055</activity>
</customState>
<customState ID="2" availability="busy">
  <activity LCID="1033">In a Meeting</activity>
  <activity LCID="1036">In Conference Room-1 </activity>
</customState>
<customState ID="3" availability="busy">
  <activity LCID="1033">Meeting with Customer</activity>
  <activity LCID="1055">Meeting with Client</activity>
  <activity LCID="1036">Meeting with Team</activity>
</customState>
<customState ID="4" availability="do-not-disturb">
  <activity LCID="1033">Interviewing</activity>
</customState>
</customStates>
Note
XML Notepad 2007 is available for download from www.microsoft.com/ downloads. XML Notepad gives you an easy-to-use, intuitive interface to create and view XML files.
Save the file as customp.xml on a shared folder of your server (\demoshare).
Click on Start | Run | and type regedit.
Locate the HKEY_LOCAL_MACHINESOFTWAREPoliciesMicrosoft Communicator key.
Right-click on the right pane, select New | String value, and type the name CustomStateURL.
Type file://\\demo\share\customp.xml (on the local server, or the complete URL where you will upload the customp.xml file created earlier) in the Value column.
Close regedit.
Start MOC (Start | All Programs | Microsoft Office Communicator 2007).
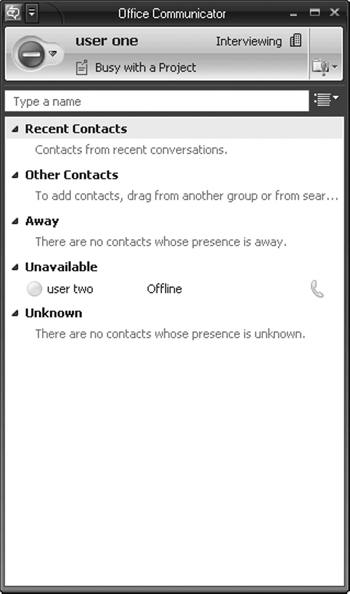
Click on the Down arrow of the status buttons. You’ll notice the newly added presence states (see Figure A.2).
Note
Incorrectly editing the Registry may damage your computer. Make sure you back up the Registry as well as your data before making any changes to the Registry. Perform all your customization tasks on a test machine before you roll out the modified MOC in your network.
You can also save the Registry settings in a text file with a .reg extension (e.g., customp.reg), move it to a shared folder available to clients, and execute the Registry file at the client computer. To do so follow these steps:
Open Notepad.
Enter the following code:
[HKEY_LOCAL_MACHINESOFTWAREPoliciesMicrosoftCommunicator]
@=""
"CustomStateURL"="file://\\demo\share\customp.xml"
Provide a name, such as customp.reg.
Save it in the shared folder (\demoshare).
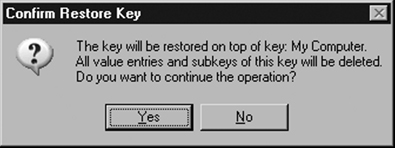
Double-click on the customp.reg file to execute.
Click on Yes to the Registry editor message Are you sure you want to add the information in c:sharecustomp.reg to the registry?.
Click on Yes to the Confirm Restore Key message window (see Figure A.3).
Consider the following points while configuring custom presence states:
The length of the status message should not exceed 64 characters.
Custom presence states are available only with Available, Busy, and Do Not Disturb status messages.
You can add only four custom states.
While mentioning the location of the XML file, only file:///, http://, and https:// addresses are supported.
Note
Knowledge of XML is essential to tweak the code. Administrators with prior HTML experience can learn XML very easily. XML files consist of three essential components: a Document Type Definition (DTD) file or schema, a style sheet, and the main XML program. You can learn more about XML through tutorials available at www.w3.org/XML.
Let’s look at the XML file closely to understand the tags that are used (see Table A.1).
Table A.1. Custom Presence XML File
Code | Description |
|---|---|
<?xml version=“1.0”?> | Defines the XML version |
<customStates xmlns=“http://demo/newsite/customStates” | Points to the XML namespace |
xmlns:xsi=“http://www.w3.org/2001/XMLSchema-instance” | Points to the XML instance |
xsi:schemaLocation=“http://demo/newsite/customStates | Points to the XML schema definition file |
http://demo/newsite/Custom-Activities.xsd”> | |
<customState ID=“1” availability=“online”> | Starts the CustomState tag. ID=1 refers to the first state of availability. Online is the state. Busy and Do Not Disturb are the other two states you can configure to use custom presence. |
<activity LCID=“1033”>Working from Home</activity> | Activity refers to the custom presence state available under Online, Busy, and Do Not Disturb. LCID stands for local ID. |
</customStates> | Closes the CustomState tag |
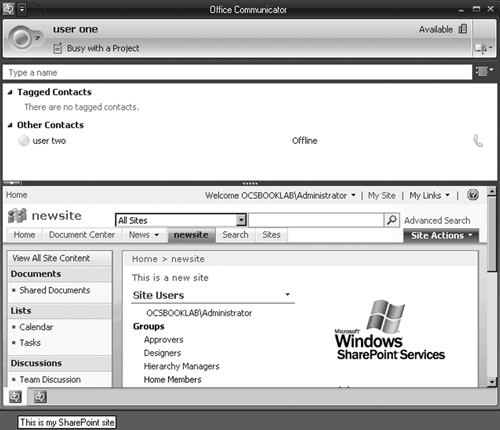
Adding custom tabs is another way to customize MOC. Custom tabs give you the power of displaying Web content on the MOC screen directly (see Figure A.4). Displaying a corporate newsletter Web page when the user logs on to the Office Communications Server (OCS) server can be a great idea. You can add multiple tabs below the MOC client window. Users can navigate through these windows to access various Web pages. In this appendix, we’ll use the SharePoint server that is used in Appendix B to demonstrate SharePoint and Project server integration.
Let’s add a few custom tabs:
Exit the MOC client if it’s already open.
Open Notepad and create a sample HTML page with the following code:
<HTML>
<HEAD>
<TITLE>Sample Page</TITLE>
</HEAD>
<BODY>
This is a sample Page
</BODY>
</HTML>
Save it as index.html to the shared folder (\demoshare).
Once again open Notepad and enter the following code:
<?xml version="1.0"?>
<tabdata>
   <tab>
     <image>http://demo/_layouts/images/titlegraphic.png</image>
     <name>Share1</name>
     <tooltip>This is my SharePoint site</tooltip>
     <contenturl>http://demo/newsite/default.aspx</contenturl>
     <userid>false</userid>
     <contactid>false</contactid>
     <accessibility>inside</accessibility>
   </tab>
    <tab>
     <image>file://demo/share/titlegraphic.png</image>
     <name>Share2</name>
     <tooltip>This is my SharePoint site</tooltip>
     <contenturl>file://demo/share/index.html</contenturl>
     <userid>false</userid>
     <contactid>false</contactid>
     <accessibility>inside</accessibility>
   </tab>
</tabdata>
Save it as tabs.xml to the shared folder (\demoshare) that is accessible to everyone.
Add a string value, TabURL, with the value file://demo/share/tabs.xml to the following locations:
HKEY_LOCAL_MACHINESOFTWAREPoliciesMicrosoftCommunicator
HKEY_CURRENT_USERSoftwarePoliciesMicrosoftCommunicator
Notice the two tabs that appear at the bottom of the MOC client window. You may notice the SharePoint Web site displayed on the first tab. Observe the code you wrote in tabs.xml. The tool tip This is my SharePoint site appears when you move your mouse over the tab (see Figure A.5).
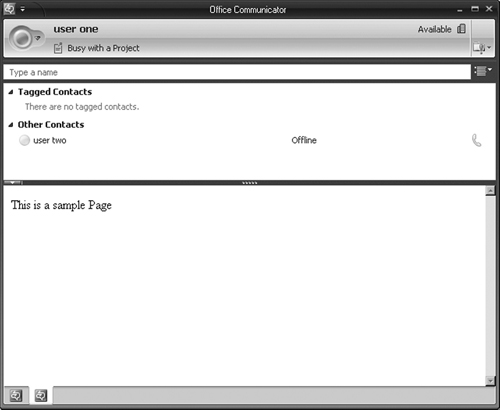
Click on the second tab. You will notice the sample HTML page we created earlier (see Figure A.6).
Consider the following points while configuring custom presence states:
Tabs.xml files consisting of the code for custom tabs should be accessible to clients.
Web sites mentioned in the code should be available to clients.
You can add graphics to differentiate the tabs, provided they are in .png format and are either 16×16 or 32×32 pixels.
You can have a maximum of 32 tabs (however, you may not need that many; the objective is not to overload the messenger client, but to provide some dynamic content).
Let’s look at the XML file closely to understand the tags that are used (see Table A.2).
Table A.2. Custom Tabs XML File
Code | Description |
|---|---|
<?xml version=“1.0”?> | Identifies the XML file |
<tabdata>, </tabdata> | Opening and closing tags for the tab data |
<tab>, </tab> | Opening and closing tags to identify information for individual tabs |
<image>, </image> | Location of the graphics for the Tab button |
<name>,</name> | Name of the tab |
<tooltip>,</tooltip> | Opening and closing tags for the small text balloon that appears when the user moves the mouse over a tab |
<contenturl>,</contenturl> | Opening and closing tags that point to the Web site URL to be displayed inside the tab |
<userid>, </userid> | Optional parameter that passes user information (currently logged in) |
<contactid>, </contactid> | User’s contact ID |
<accessibility>, </accessibility> | Tag to inform whether the information should be available when the user is logged in to MOC from inside or outside the network. Organizations may not prefer that an internal newsletter be available when the user logs in from the outside. |
Note
For more information, download the “Microsoft Office Communicator 2007 Deployment Guide,” available from www.microsoft.com/downloads.
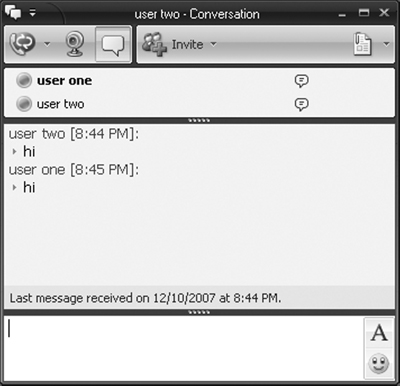
You can also add customized menu commands that will appear in the Tools menu (in the Conversation window), in the Actions menu, and while the user right-clicks anywhere in the Contacts list. Customized menus are utilized to launch an application that is installed in the client computer or any collaboration tool that is used by a group of users. Figure A.7 shows a typical Conversation window.
Follow this exercise to learn how to add a custom menu:
Start MOC and sign in.
Initiate a conversation with another user in your Contacts list.
Click on the Down arrow on the top left of the Conversation window.
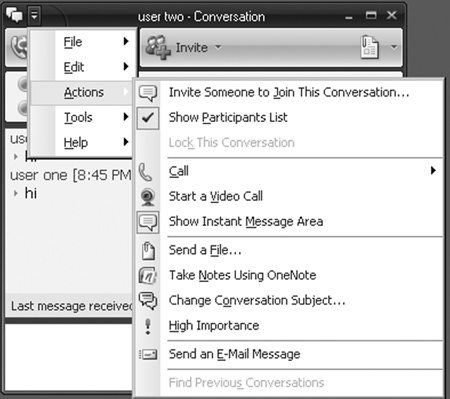
Observe the menu items. These are the standard commands that are available to you (see Figure A.8).
Exit MOC.
Open Notepad and enter the following code:
Windows Registry Editor Version 5.00

[HKEY_LOCAL_MACHINESoftwareMicrosoftCommunicatorSessionManagerApps
{1F9F07C6-7E0B-462B-AAD7-98C6DBEA8F69}]

"Name"="NewApplication"
"HelpMessage"="This is to add a custom menu on Microsoft Office
Communicator 2007"
"ApplicationType"="REG_DWORD:00000000"
"ApplicationInstallPath"="C:\fdm.exe"
"Path"="C:\fdm.exe %user-id% %contact-id%"
"SessionType"="REG_DWORD:00000001"
"ExtensibleMenu"="ConversationWindowActions;MainWindowRightClick"
Save it as custommenu.reg.
Double-click to execute the Registry file.
Start MOC.
Initiate a conversation with another user in your Contacts list.
Click on the Down arrow on the top left of the Conversation window.
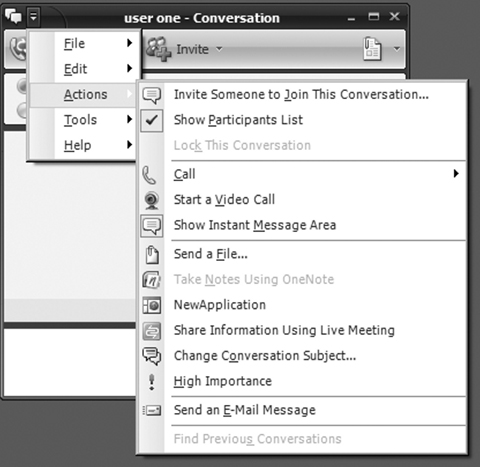
Click on Actions. Now you will see a new menu command, NewApplication, on the menu (see Figure A.9).
Let’s look at the Registry file closely to understand the codes we used (see Table A.3).
Table A.3. Custom Menu Commands Registry File
Description | |
|---|---|
Windows Registry Editor Version 5.00 | Indicates the Registry version |
[HKEY_LOCAL_MACHINESoftwareMicrosoftCommunicatorSessionManagerApps{1F9F07C6-7E0B-462B-AAD7-98C6DBEA8F69}] | Series of hexadecimal characters that denote the application’s globally unique identifier (GUID). Windows uses the GUID to identify applications or its components. |
“Name”=“NewApplication” | Name of the application |
“HelpMessage”=“This is to add a custom menu on Microsoft Office Communicator 2007” | Additional help message |
“ApplicationType”=“REG_DWORD: 00000000” | 0 denotes that it’s an executable application. 1 denotes a protocol. |
“ApplicationInstallPath”=“C:\fdm.exe” | Path where the application is installed |
“Path”=“C:\fdm.exe %user-id% %contact-id%” | Path information along with user information to be passed as parameters while launching the application |
“SessionType”=“REG_DWORD: 00000001” | 0 denotes that it’s a local session. The application will be launched on the local computer. 1 denotes that it’s a two-party and 2 denotes that it’s a multiparty application. |
“ExtensibleMenu”=“Conversation WindowActions;MainWindowRightClick” | Menus on which this application should appear. If you have not specified the ExtensibleMenu option, the default values MainWindow-RightClick and ConversationWindow-Contextual are taken. In this case, we have defined the Conversation window’s Action menu and the main window when the user performs the right-click. |
The MOC client is the corporate version of Windows Messenger (now Windows Live Messenger). MOC works on the OCS 2007 platform to provide instant messaging (IM), audio and video conversations.
MOC allows you to configure contacts from your corporate network, public IM network, and federation network.
Administrators can customize the MOC client to display custom presence states, Web content through custom tabs, and additional menu items that are not available in the default installation.
You can customize MOC client features through XML files and Registry modifications. | |
You can use the standard Notepad or XML Notepad 2007, available from Microsoft, to create XML files. | |
Customized XML files, graphics, and HTML files should be available on a network share or on a Web site accessible to users. | |
You can add custom presence states to give more descriptive messages. These states are available for Online, Busy, and Do Not Disturb options. |
Adding tabs brings more dynamic Web content to the MOC client window. | |
You can add an intranet or Internet Web site or Web pages from the network share. | |
You can add a maximum of 32 tabs. |
You can add menu items for locally available applications or collaborative applications through custom menu commands. These commands are available in the Tools or Actions menu in the Conversation window. | |
Applications frequently launched by the users from their local computers can be added as menu items. Users find it easy to launch such applications from the always-on MOC client. | |
Adding menu commands involves adding a few Registry keys. Registry modifications should be performed with caution. Back up the Registry and your data before you attempt any changes. |
Where can I find more information on XML? | |
You can find tutorials and other resources on XML at www.w3.org/XML. | |
Do I need to be an expert programmer in XML to customize MOC? | |
Basic knowledge of HTML and XML is sufficient to create XML files. Scripts are available at Microsoft’s Web site; you also can refer to third-party sites while customizing MOC for your environment. | |
What other customization options are available for MOC? | |
You can add help menu items, invoke shell commands, and display custom text messages on the MOC window. | |
What if I have not indicated the location of an image file while creating a custom tab? | |
MOC will use a default image file (.png). Tabs can be differentiated to indicate the content using different image files. |