
3. Workspaces
In This Chapter
Features of the Illustrator workspace
Moving an area of a document into view
Fitting an artboard in the document window
Configuring the panel groups and docks
Choosing, saving, managing, and resetting workspaces
In this chapter, you will become acquainted with basic features of the Illustrator interface, such as the Application bar, document tabs, and panels. You will learn how to arrange document windows, change the document zoom level, bring a different part of a document into view, fit an artboard in the document window, change the screen display mode and document views, save and choose custom view settings, reconfigure the panel groups and docks, and save and manage your custom workspaces. By the end of the chapter, you will know how to configure your workspace to suit your usual workflow — and even better, you will have the skills to create custom workspaces for various kinds of tasks.
The Hello screen 
When you launch Illustrator CC for the first time, you’ll notice a new screen that is reminiscent of the old Welcome screen you might be used to: the Hello Screen.
The Hello screen is designed to help you discover, learn, and use Illustrator features. The screen is divided into four tabbed categories: Create, New Features, Getting Started, and Tips & Techniques. The Create tab provides an easy way to create a variety of different types of documents as well as quick access to recently opened documents. The remaining tabs provide access to videos that teach you how to use Illustrator features to their fullest. The content displayed is relevant to your subscription and use of Illustrator and will update accordingly.
Features of the Illustrator workspace
In Windows — and when displayed in the Mac OS — an Application frame houses the Application bar, tabbed document windows, the Control panel, and all the other panels. For Mac OS users, we recommend keeping the frame visible (see the next page). Note: We also refer to the application window in Windows as the “Application frame.” The Application frame cannot be hidden in Windows.
Although you have the option to float individual document windows onscreen or dock them as multiple tabs within a floating window, we recommend docking them as tabs within the Application frame instead. First, the Application frame conveniently blocks out any Desktop clutter, and second, your documents will fit neatly inside the frame without blocking or being obscured by any of the Illustrator features (such as the panels).
To show the Application frame in the Mac OS:
To show the Application frame if it’s hidden, choose Window > Application Frame.A
A In the Mac OS, we strongly recommend that you work with the Application frame showing.
![]() You can resize the Application frame by dragging an edge or a corner.
You can resize the Application frame by dragging an edge or a corner.
![]() To minimize the Application frame in Windows, click the Minimize button; or to do this in the Mac OS, click the yellow Minimize button.
To minimize the Application frame in Windows, click the Minimize button; or to do this in the Mac OS, click the yellow Minimize button.
To use the Application bar:
Use the button and menus on the Application bar to manage your workspace.B In Windows, the main Illustrator menus also display on the Application bar.
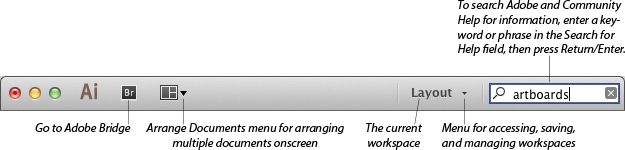
B These controls are available on the Application bar in the Mac OS.
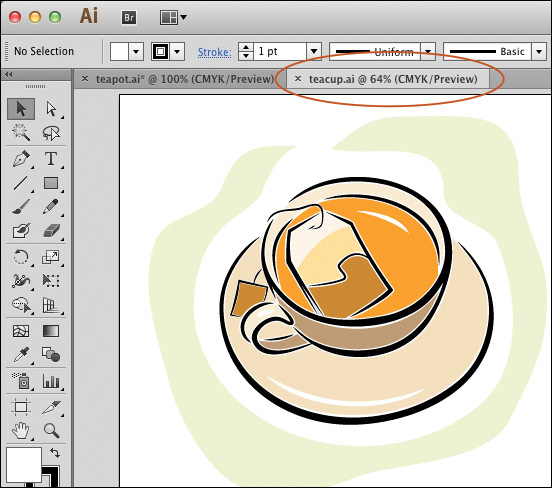
Using tabbed document windows
We recommend that you always dock your open document windows into the Application frame as tabs. You can display any document easily by clicking its tab.
To set a preference so all documents you subsequently open will dock as tabs:
Go to Illustrator/Edit > Preferences > User Interface, check Open Documents as Tabs, then click OK.
If you inadvertently float a document window (by dragging the tab away from the Application bar and Control panel), you can easily redock it as a tab.
To dock floating windows into the Application frame:
To dock one floating document window as a tab, drag its title bar to the tab area (just below the Control panel) of the Application frame, and release the mouse when the blue drop zone bar appears.A–B
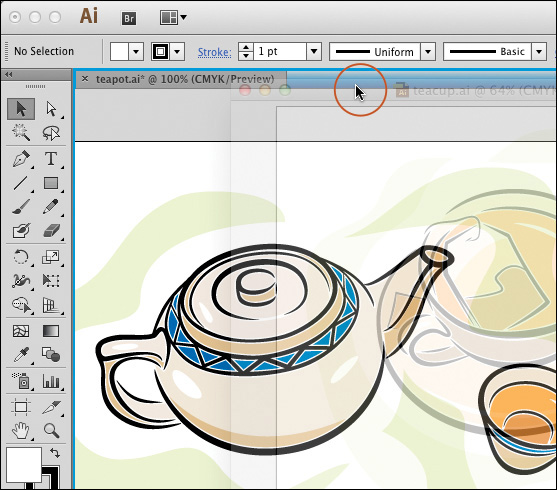
A To dock a floating document window as a tab, drag its title bar to the tab area of the Application frame, and release the mouse when the blue drop zone bar appears.
B The tab appears at the top of the document window.
To dock all currently floating document windows as tabs, on the Arrange Documents menu ![]() on the Application bar, click the Consolidate All (first) icon.
on the Application bar, click the Consolidate All (first) icon.![]() If one or more documents are already docked as tabs and other windows are floating, another option is to right-click a tab and choose Consolidate All to Here from the context menu.C
If one or more documents are already docked as tabs and other windows are floating, another option is to right-click a tab and choose Consolidate All to Here from the context menu.C

C To dock all floating documents into the Application frame, right-click a document tab and choose Consolidate All to Here.
![]() To cycle among the currently open documents, press Cmd- ~ (tilde)/Ctrl- Tab.
To cycle among the currently open documents, press Cmd- ~ (tilde)/Ctrl- Tab.
![]() To fit an artboard in the document window, see page 28.
To fit an artboard in the document window, see page 28.
![]() You can dock one floating document window into another by dragging the title bar of one document below the title bar of the other document. (Frankly, we prefer, and recommend, docking documents as tabs in the Application frame.)
You can dock one floating document window into another by dragging the title bar of one document below the title bar of the other document. (Frankly, we prefer, and recommend, docking documents as tabs in the Application frame.)
Arranging document windows
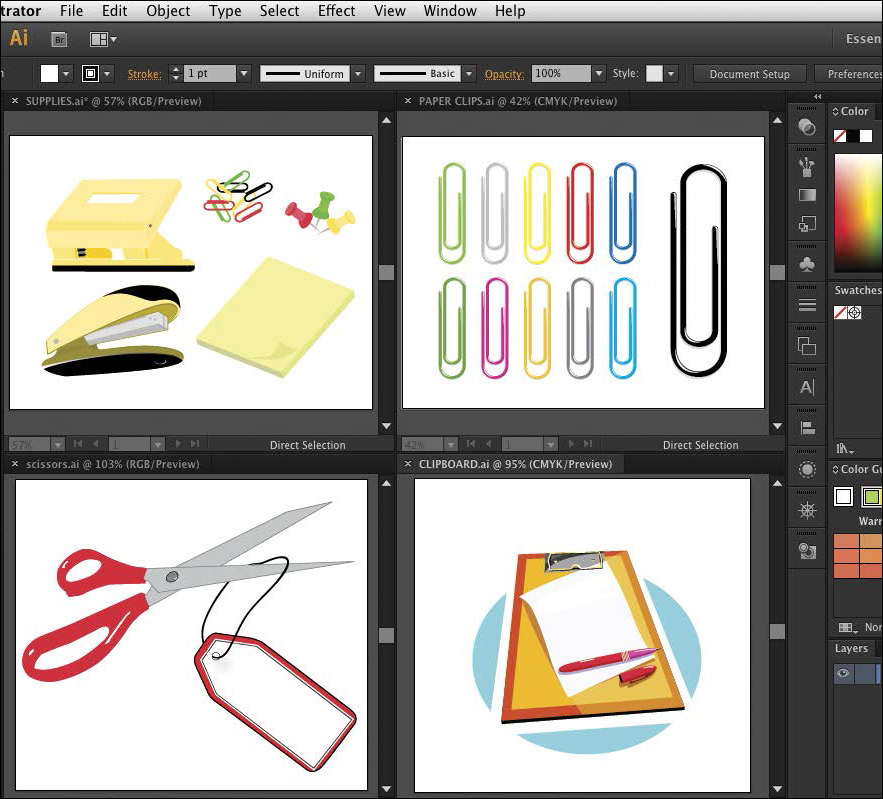
By using icons on the Arrange Documents menu on the Application bar, you can quickly tile multiple documents in various layouts, such as two documents arranged side by side or vertically, or four or six documents in a grid formation.
To display multiple tabbed document windows:
On the Application bar, click the Arrange Documents menu icon ![]() to open the menu, then click one of the available icons (the availability of icons depends on the number of open documents).A
to open the menu, then click one of the available icons (the availability of icons depends on the number of open documents).A
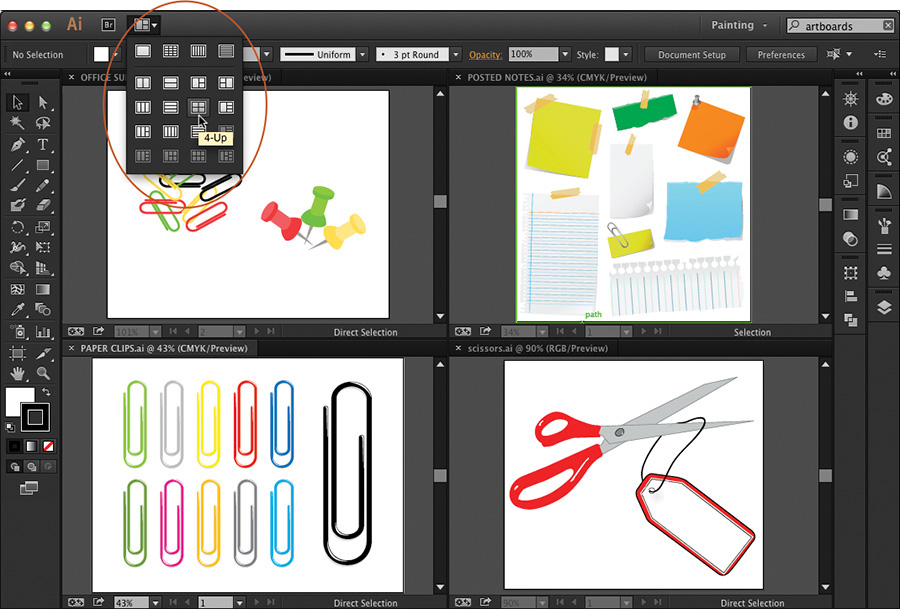
A Choose a tiling option from the Arrange Documents menu.
Note: You can choose a different zoom level for each open document window, even when multiple documents are displayed (see the next page).
![]() If any open documents are floating when you click an option on the Arrange Documents menu, they will be docked as tabbed windows automatically.
If any open documents are floating when you click an option on the Arrange Documents menu, they will be docked as tabbed windows automatically.
Just as easily, you can go back to displaying just one document at a time.
To redisplay one tabbed document window:
Do either of the following:
Right-click a document tab and choose Consolidate All to Here from the context menu.
On the Arrange Documents menu ![]() on the Application bar, click the Consolidate All (first) icon.
on the Application bar, click the Consolidate All (first) icon.![]()
Changing the zoom level
When changing the zoom level for your document, you can zoom out to display multiple artboards, fit one artboard in the document window, or zoom in to magnify a detail of your artwork. The current zoom level is listed as a percentage between 3.13% and 6400% on the document tab and in the lower left corner of the document window. (The zoom level has no bearing on the output size.)
There are many ways to change the zoom level in Illustrator. The most efficient way is via one of the keyboard shortcuts. You can use them while performing other tasks — regardless of which tool is currently selected.
To change the zoom level:
Do any of the following:
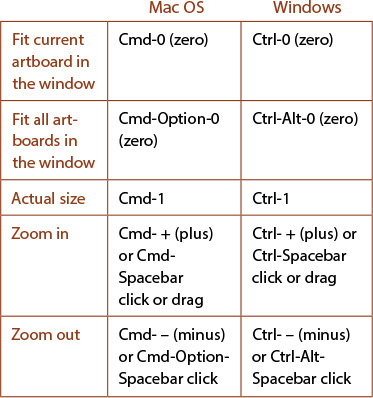
Use any of the shortcuts that are listed in the sidebar at right.
Choose a preset percentage from the zoom menu in the lower left corner of the document window.A Or choose Fit on Screen from that menu to fit the entire active artboard within the current document window size.
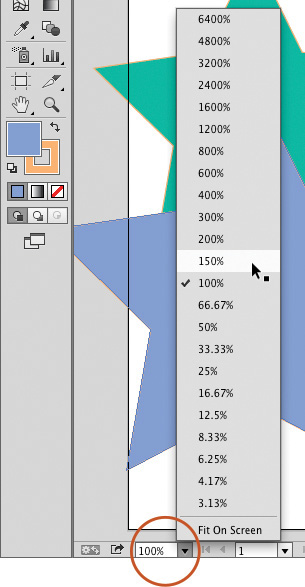
A You can choose a preset percentage from the zoom menu in the lower left corner of the document window.
Make sure no objects are selected, then right-click in the document and choose Zoom In or Zoom Out.
Double-click the zoom field in the lower left corner of the document window, type the desired zoom level, then press Return/Enter.
Display the Navigator panel.![]() Click the Zoom Out or Zoom In button, or move the Zoom slider, or Cmd-drag/Ctrl-drag across a section of the preview to magnify that area of the document.
Click the Zoom Out or Zoom In button, or move the Zoom slider, or Cmd-drag/Ctrl-drag across a section of the preview to magnify that area of the document.
On a touchscreen device or touchpad, pinch inward with two fingers or spread two fingers outward.
![]() To move a different part of your magnified artwork into view, see the next page.
To move a different part of your magnified artwork into view, see the next page.
![]() You can change the zoom level while the screen is redrawing.
You can change the zoom level while the screen is redrawing.
Shortcuts for Zooming in and Out
Using the Zoom Tool
We think the Zoom tool ![]() (Z) is less convenient to use than the other methods described on this page, but if you want to use it, select it, then do any of the following:
(Z) is less convenient to use than the other methods described on this page, but if you want to use it, select it, then do any of the following:
![]() In the document window, click in the center of, or drag a marquee across, the area to be magnified. The smaller the marquee, the higher the zoom level.
In the document window, click in the center of, or drag a marquee across, the area to be magnified. The smaller the marquee, the higher the zoom level.
![]() Option-click/Alt-click in the document window to reduce the zoom level.
Option-click/Alt-click in the document window to reduce the zoom level.
![]() Drag a marquee and then, without releasing the mouse, press and hold down the Spacebar, move the marquee over the area to be magnified, then release the mouse.
Drag a marquee and then, without releasing the mouse, press and hold down the Spacebar, move the marquee over the area to be magnified, then release the mouse.
Do one of the following:
Choose the Hand tool ![]() (H) or hold down the Spacebar to turn the current tool into a temporary Hand tool, and drag the document to the desired position.
(H) or hold down the Spacebar to turn the current tool into a temporary Hand tool, and drag the document to the desired position.
Display the Navigator panel,![]() then drag the Proxy Preview area (red outlined box) on the panel.
then drag the Proxy Preview area (red outlined box) on the panel.
On a touchscreen device or touchpad, drag with two fingers. Or to navigate between artboards, swipe with three fingers.
![]() If your cursor is inserted in a type object, pressing the Spacebar will add spaces to the text. If you’re using a type tool and you want to move the document in the window without switching tools, see the sidebar on page 253.
If your cursor is inserted in a type object, pressing the Spacebar will add spaces to the text. If you’re using a type tool and you want to move the document in the window without switching tools, see the sidebar on page 253.
Fitting an artboard in the document window
There are two ways to fit an artboard to the bounds of the document window. (To learn more about artboards, see pages 7–12.)
To fit an artboard within the document window:
Do either of the following:
On the Artboards panel,![]() double-click an artboard listing (next to the name).A–B Or if the chosen artboard is already displaying, click the listing just once.
double-click an artboard listing (next to the name).A–B Or if the chosen artboard is already displaying, click the listing just once.
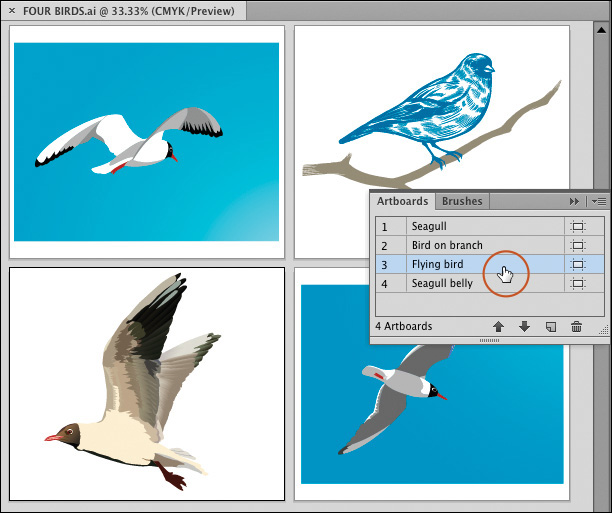
A We’re double-clicking a listing on the Artboards panel ...

B ... to fit that artboard within the document window.
Using the artboard navigation controls at the bottom of the document window, do either of the following: From the Artboard Navigation menu, choose an artboard number,C or click the First, Previous, Next, or Last arrow.
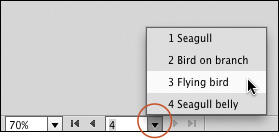
C We’re choosing an artboard number from the Artboard Navigation menu.
Changing the screen mode
The three screen modes control the display of various features of the Illustrator interface.
To choose a screen mode for Illustrator:
Press (and keep pressing) F to cycle through the three screen modes, or from the Screen Mode menu at the bottom of the Tools panel,A choose one of the following:
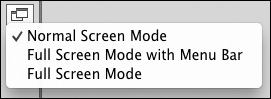
A Choose from the Screen Mode menu at the bottom of the Tools panel.
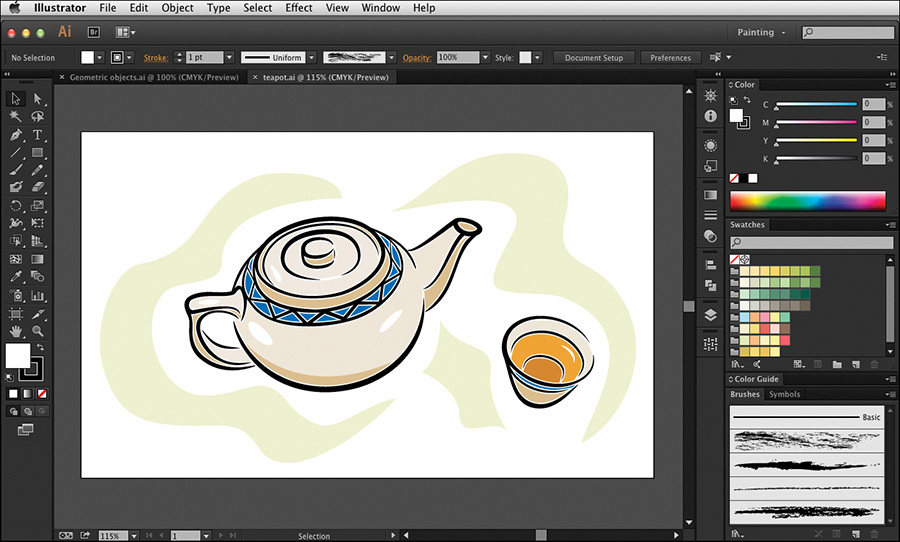
Normal Screen Mode B (the default mode) to display the Application frame (if that option is on), menu bar, Application bar, document tabs, and panels, with the Desktop visible behind everything.
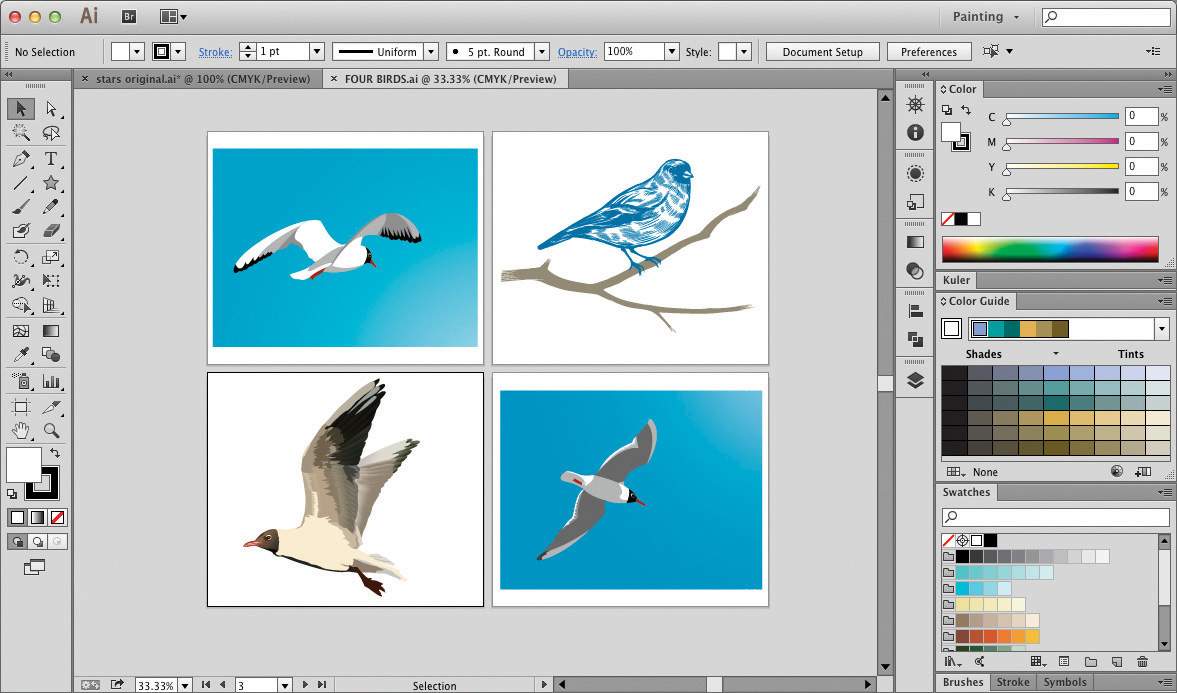
B We chose Normal Screen Mode for this document.
Full Screen Mode with Menu Bar C to display the document in a maximized window with the menu bar, Application bar, scroll bars, and panels visible, but not the document tabs.
C Then we chose Full Screen Mode.
Full Screen Mode to display the document in a maximized window with the zoom and artboard controls showing at the bottom of the screen but all the other Illustrator features (and the Dock/taskbar) hidden.
Switching document views
A document can be displayed and edited in four different views: Preview, Outline, Pixel Preview, and Overprint Preview. In all the views, the other View menu commands — Hide/Show Edges, Artboard, Print Tiling, Slices, Guides, and Grid — are accessible. (For Overprint Preview view, see page 432.)
To switch document views:
Do either of the following:
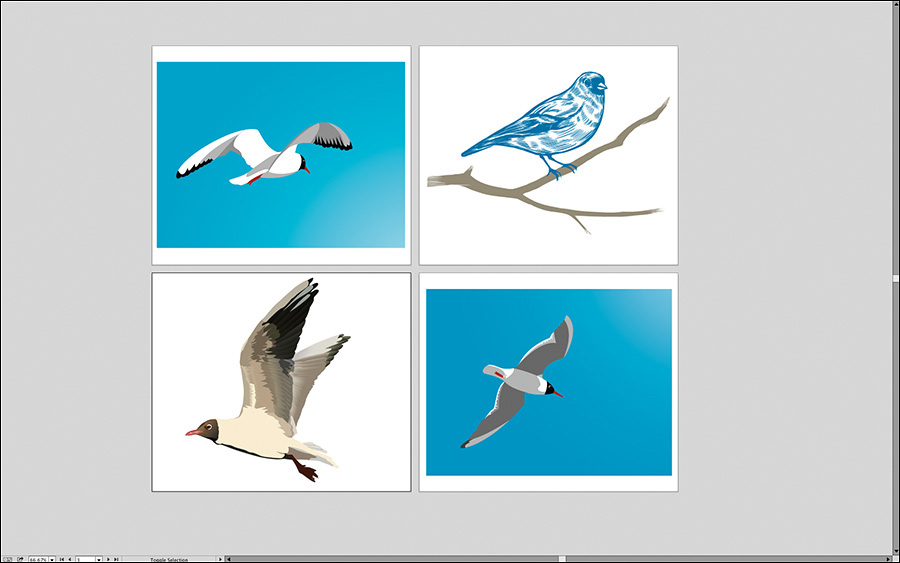
Press Cmd-Y/Ctrl-Y to toggle between Preview view A and Outline view B (View > Preview and View > Outline). In Preview view, all fill and stroke colors and all placed images are visible; in Outline view, objects display as wireframes without fill or stroke colors, and placed images display as an X in a white box. Another option is to deselect (click a blank area of the document), then right-click in the document and choose Outline or Preview from the context menu. The screen redraws more quickly in Outline view.

A This artwork is displayed in Preview view.
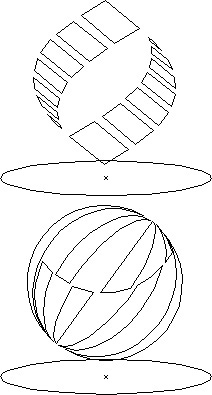
B Here it’s displayed in Outline view.
To activate a 72-ppi view so you can see what your vector graphics would look like if you were to rasterize them for display in a Web browser, choose View > Pixel Preview C (or press Cmd-Option-Y/Ctrl-Alt-Y), and also choose View > Actual Size (Cmd-1/Ctrl-1). See also the sidebar below.

C And here it’s displayed in Pixel Preview view.
![]() Cmd-click/Ctrl-click the visibility icon
Cmd-click/Ctrl-click the visibility icon ![]() for a layer (not an individual object) on the Layers panel
for a layer (not an individual object) on the Layers panel ![]() to toggle Preview and Outline views for just that layer. See also the sidebar on page 193.
to toggle Preview and Outline views for just that layer. See also the sidebar on page 193.
More About the Pixel Grid
![]() To view a representation of the pixel grid in Pixel Preview view, go to Illustrator/Edit > Preferences > Guides & Grid and check Show Pixel Grid (Above 600% Zoom), and choose a document zoom level of 600% or higher.
To view a representation of the pixel grid in Pixel Preview view, go to Illustrator/Edit > Preferences > Guides & Grid and check Show Pixel Grid (Above 600% Zoom), and choose a document zoom level of 600% or higher.
![]() To align objects to the pixel grid, see “Creating pixel-perfect artwork for the Web,” on page 84.
To align objects to the pixel grid, see “Creating pixel-perfect artwork for the Web,” on page 84.
Creating custom views
You can save up to 25 custom views for the current document, and you can switch among them via the View menu. Each custom view can include a zoom level, the display of a specific artboard, and a choice of either Preview or Outline view.
To save a custom view:
1. Do all of the following:
Choose a zoom level for your document.
If the document contains multiple artboards, display the one for which you want to choose a view (see page 28).
Choose Preview, Outline (Cmd-Y/Ctrl-Y), or Pixel Preview (Cmd-Option-Y/Ctrl-Alt-Y) view.
2. Choose View > New View. The New View dialog opens.A
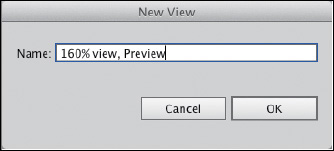
A Type a Name for a custom view in the New View dialog.
3. In the Name field, type a descriptive name for the new view, for easy identification (as in “160% view, Preview, Artboard 4”).
4. Click OK. The view is now listed on, and can be chosen from, the bottom of the View menu.
![]() Unfortunately, custom views can be created only for a specific document — not for the application. However, custom views can be saved as part of a document template (see page 5).
Unfortunately, custom views can be created only for a specific document — not for the application. However, custom views can be saved as part of a document template (see page 5).
To rename or delete a custom view:
1. Choose View > Edit Views.
2. In the Edit Views dialog, click the view to be renamed or deleted.B

B In the Edit Views dialog, click a view name, then change the Name; or to delete a selected view, click Delete.
3. Do either of the following:
Change the name in the Name field.
Click Delete to delete the view.
4. Click OK. The View menu will update to reflect your edits.
![]() If you want to rename more than one view, you have to click OK and then reopen the dialog for each one individually. It’s a simple little system.
If you want to rename more than one view, you have to click OK and then reopen the dialog for each one individually. It’s a simple little system.
Configuring the panel groups and docks
In Illustrator, the panels are as indispensable as the tools. You can easily minimize, collapse, or hide them so they don’t intrude on your document space when you’re not using them, and expand or display them when you need to access them.
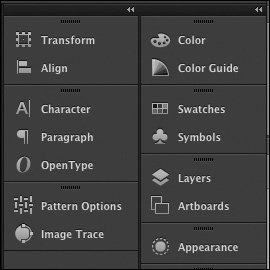
In the predefined workspaces (see page 34), the panels are arranged in docks on the right side of your screen — except for the Tools panel, which is docked on the left side. The panels are stored in groups within the docks (A). In this section, we’ll show you how to open and close the panels, and reconfigure the panel groups and docks to suit your workflow. (For a description and illustration of the individual panels, see the next chapter.)

A The panels in the left dock are collapsed to icons with labels (in three groups), whereas the ones in the right dock are expanded (in four groups). The Layers/Artboards group is minimized vertically.
To show or hide the panels:
To show a panel: Choose the panel name from the Window menu. The panel will display either in its default group and dock or in its last open location (floating or in a dock). To bring a panel to the front of its group, click its tab (the panel name). Some panels can also be opened temporarily via a link on the Control panel or Appearance panel; see the sidebar on page 42.
Close a panel or group: To close (not collapse) a panel, right-click the panel tab or icon and choose Close from the context menu. To close a whole panel group, choose Close Tab Group from the same context menu.
Hide or show all the panels: Press Tab to hide or show all the open panels, including the Tools panel, or press Shift-Tab to hide or show all the panels except the Tools panel.
Make hidden, docked panels reappear: After you have hidden the panels via the Tab or Shift-Tab shortcut, move the pointer just inside the right edge of the Application frame. The panel docks (but not freestanding panels) will redisplay temporarily. Move the pointer away from the panels, and they’ll disappear again. Note: If this isn’t working, redisplay the panels, then right-click any panel icon or tab and choose Auto-Show Hidden Panels from the context menu.
![]() Every panel has a menu
Every panel has a menu ![]() in the upper right corner, from which you can choose options specifically for that panel.
in the upper right corner, from which you can choose options specifically for that panel.
To reconfigure the panels:
Expand a panel that’s collapsed to an icon: Click the icon or panel label. If Auto-Collapse Iconic Panels is checked in Illustrator/Edit > Preferences > User Interface and you open a panel from an icon, it will collapse back to the icon when you click elsewhere. With this preference unchecked, the panel will remain expanded; to collapse it back to an icon, click the Collapse to Icons button,![]() or click the panel icon or label in the dock.
or click the panel icon or label in the dock.
![]() To quickly access the Auto-Collapse Iconic Panels option from a context menu, right-click any panel tab, bar, or icon.
To quickly access the Auto-Collapse Iconic Panels option from a context menu, right-click any panel tab, bar, or icon.
Maximize or minimize an expanded panel or group (vertically): Double-click the panel name or tab bar (next to the names). For some panels, such as Character, Color, Color Guide, and Stroke, you can display more or fewer options by clicking the expand/collapse arrow icon ![]() on the tab.
on the tab.
Collapse a whole dock to icons or to icons with labels: Click the Collapse to Icons button ![]() at the top of the dock (B), or double-click the topmost bar. Repeat to expand it.
at the top of the dock (B), or double-click the topmost bar. Repeat to expand it.
B We clicked the Collapse to Icons button to collapse the whole right dock to icons. The panel groups were preserved.
Change the width of an expanded dock; or expand icons to icons with labels, or vice versa: Position the mouse over the vertical left edge of the dock (![]() cursor), then drag horizontally (C).
cursor), then drag horizontally (C).
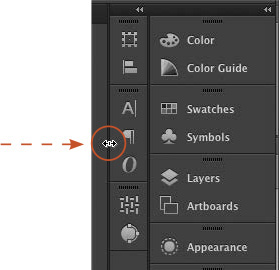
C We dragged the edge of the left dock to the right to shrink it to just icons (no labels).
Move a panel to a different slot in the same group: Drag the panel tab to the left or right.
Move a panel into a different group: Drag the panel tab over the tab bar of the desired group, and release the mouse when the blue drop zone border appears (D).
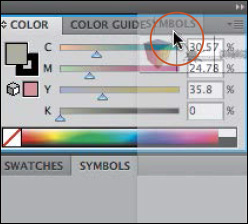
D A blue drop zone border appears as we drag the Symbols panel to the title bar of the Color/Color Guide group.
Change the location of a panel group in a dock: Drag the tab bar upward or downward, and release the mouse when the horizontal blue drop zone bar is in the desired location (E).
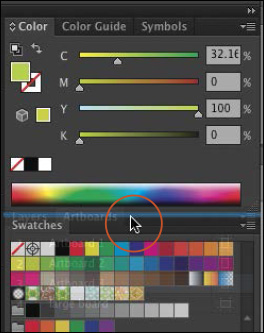
E A blue horizontal drop zone bar appears as we move a panel group upward to a new slot in the same dock.
Create a new dock: Drag a panel tab or tab bar sideways over the vertical left edge of a dock (F), and release the mouse when the blue vertical drop zone bar appears.

F A blue vertical drop zone bar appears as we drag a panel out of a dock to create a new dock for it.
Reconfigure a dock that’s collapsed to icons: The methods are similar to those for an expanded group. Drag the gripper bar ![]() to the edge of a dock to create a new dock; or drag the bar upward or downward between groups to restack the group (look for a horizontal drop zone line); or drag it into another group to add to that group (look for a blue drop zone border).A–B
to the edge of a dock to create a new dock; or drag the bar upward or downward between groups to restack the group (look for a horizontal drop zone line); or drag it into another group to add to that group (look for a blue drop zone border).A–B
A A blue drop zone border appears as we drag a Color Guide/Gradient panel group upward into a Color/Swatches panel group.
B Now the four color-related panels are in the same group.
Float a docked panel or group: Drag the panel tab, icon, or bar out of the dock. To stack floating panels or groups, drag the tab bar of one so it meets the bottom of another, and release the mouse when a blue drop zone bar appears.
![]() To reset the panels to their default visibility states and locations, choose Essentials from the Workspace menu on the Application bar.
To reset the panels to their default visibility states and locations, choose Essentials from the Workspace menu on the Application bar.
![]() To prevent a floating panel from docking as you move it around onscreen, hold down Cmd/Ctrl.
To prevent a floating panel from docking as you move it around onscreen, hold down Cmd/Ctrl.
![]() If you inadvertently take the panel docks out of the Application frame, drag the top bar to the right edge of the Application frame, and release the mouse when a vertical blue drop zone line appears.
If you inadvertently take the panel docks out of the Application frame, drag the top bar to the right edge of the Application frame, and release the mouse when a vertical blue drop zone line appears.
Choosing, saving, managing, and resetting workspaces
When you choose a predefined Illustrator workspace, the panels and panel groups that are most suited to a particular sphere of work appear onscreen. On the following page, you’ll learn how to create and save custom workspaces for different purposes.
To choose a workspace:
From the Workspace menu on the Application bar, choose a workspace.C User-defined workspaces (if any) are listed at the top of the menu, followed by the eight preset workspaces.
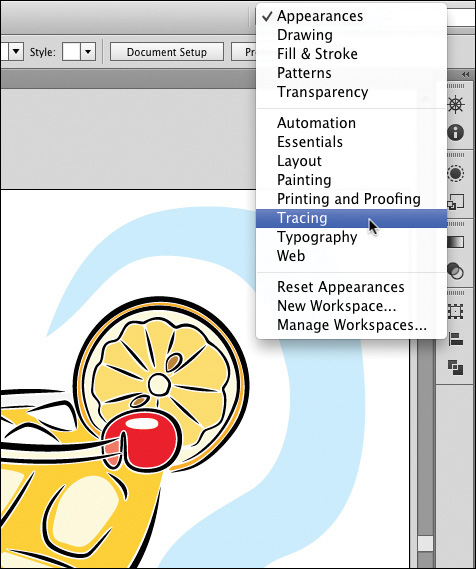
C Choose a workspace from the Workspace menu on the Application bar. (User-saved workspaces are listed at the top of the menu.)
![]() The arrangement of panels on a computer that is hooked up to dual displays is saved as a single workspace. You could put all the panels on one display, or put the ones you use most often on one display and those you use less often in the other.
The arrangement of panels on a computer that is hooked up to dual displays is saved as a single workspace. You could put all the panels on one display, or put the ones you use most often on one display and those you use less often in the other.
If the predefined workspaces don’t suit your needs exactly, you can hide, show, collapse, or expand any of the panels or docks. Even better, instead of tediously repeating those steps at the beginning of each work session, you can save custom workspaces for different kinds of work that you do in Illustrator. Saved workspaces are available on the Workspace menu (on the Application bar) for all documents.
To save a custom workspace:
1. Open a document, so settings will display in panels.
2. If you like, you can use any of the preset workspaces on the Workspace menu as a starting point. Configure the Illustrator workspace by doing any or all of the following:
Position the panels that you normally use where you want them, including the Tools panel tearoff toolbars and any library panels (e.g., any of the PANTONE PLUS color books). Put them in the desired groups in one or more docks.
Expand any of the panel docks, or collapse them to icons or icons with labels. For instance, you could expand the panels that you use frequently in one dock, and collapse the ones you use less frequently to icons in another dock.
Resize any of the temporary panels, including any of those that open from the Control panel, such as the temporary Swatches panel. For the Swatches panel, you can choose a display option from the Show Swatch Kinds menu.![]()
For any panel, choose a View (e.g., a thumbnail or list view) from the panel menu.
Open any tearoff toolbars for tool groups that you use frequently (such as for the type tools or for the Rectangle and its related tools).
3. From the Workspace menu on the Application bar, choose New Workspace.
4. In the New Workspace dialog,A enter a descriptive Name for the workspace.
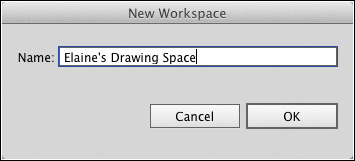
A Type a Name for a new custom workspace in the New Workspace dialog.
5. Click OK. Your workspace (and any other user-saved workspaces) will be listed on, and can be chosen from, the Workspace menu on the Application bar.
![]() To edit an existing workspace, follow the steps above, except in step 4, enter the same name (an alert will appear in the dialog).B
To edit an existing workspace, follow the steps above, except in step 4, enter the same name (an alert will appear in the dialog).B

B To replace an existing workspace, reenter the same name (an alert appears in the dialog).
![]() You can’t save an artboard number, zoom level, or custom view as part of a workspace.
You can’t save an artboard number, zoom level, or custom view as part of a workspace.
To rename, delete, or duplicate a saved workspace:
1. From the Workspace menu on the Application bar, choose Manage Workspaces.
2. In the Manage Workspaces dialog,A do any of the following:
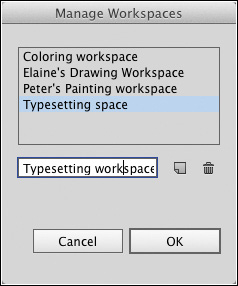
A Use the Manage Workspaces dialog to rename or delete any of the custom workspaces that you have saved.
To rename a workspace, click the workspace name, then type the desired name in the field.
To duplicate a workspace, click an existing workspace, then click the New Workspace button.![]() Rename the duplicate workspace, if desired (a good idea).
Rename the duplicate workspace, if desired (a good idea).
To delete a user-created workspace, click the workspace name, then click the Delete Workspace button.![]() If you try to delete a user-created workspace that is currently displayed in your document, an alert dialog will appear. Click Yes to confirm.
If you try to delete a user-created workspace that is currently displayed in your document, an alert dialog will appear. Click Yes to confirm.
3. Click OK.
![]() If no workspaces are selected in the Manage Workspaces dialog when you click the New Workspace button, the new workspace will include the current state of the panels and other features of the Illustrator interface.
If no workspaces are selected in the Manage Workspaces dialog when you click the New Workspace button, the new workspace will include the current state of the panels and other features of the Illustrator interface.
You can reset any predefined or user-defined workspace to its saved settings.
To reset a workspace:
1. Via the Workspace menu on the Application bar or the Window > Workspace submenu, display the workspace to be reset.
2. From either the menu or the submenu listed in the preceding step, choose Reset [workspace name].