A layer is a transparent canvas where you can add text, images, and other graphics independently. Layers are piled on top of each other in a stack to form the complete image or design.
You can think of a layer as a transparent sheet of glass or acetate stacked on top of another. You can see the sheets underneath through any transparent areas of the top sheet. Each layer contains its own graphics, text, or photographs depending on what the image is.
Photoshop allows you to build up complex designs using multiple layers to contain elements or objects that make up parts of the whole design - like building blocks. This means that each element in the design can be created, edited, and moved around independently without affecting everything else. These elements could be a text, photographs, illustrations, shapes, and so on. This is where Photoshop really shows its power.
and extract them to your pictures folder, if you haven’t already done so from previous chapters.
Let’s begin by taking a look at a simple example.
The Layers Concept

An illustration of three stacked planes. The bottom plane is the background, the one on top of it is layer one, and the topmost one is layer 2.
Layers of an Image
The background layer is a special type that serves primarily as a background. This layer is usually locked, meaning you can’t move it, add any effects, or change the opacity. When you open a PNG or JPEG image, or a new Photoshop project, it opens as a background layer in the layers panel as we can see in the following. Here I’ve opened a Photoshop project that is 600 x 600px in size with a black background.

A window has an untitled document open. On the right pane, an arrow is pointed at the background layer under the layers panel.
You build up your project by adding additional layers on top of the background layer as we can see in Figure 5-1. Let’s add the earth image (earth.png). This image has the planet earth on the bottom left with the rest of the image transparent.
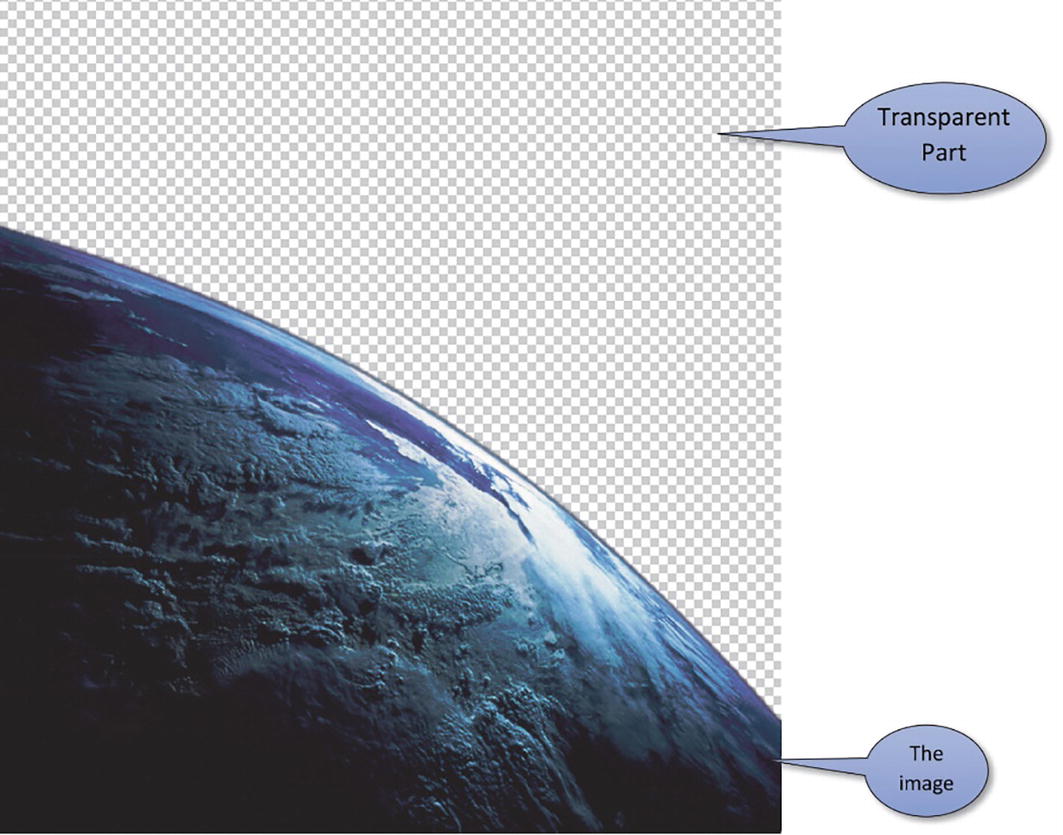
A layer includes an image of a portion of the Earth in the foreground. The background, composed of small square shapes, is the transparent part.
Navigate to the image using File Explorer in Windows (or Finder if you’re using a Mac). Drag and drop the picture onto the Photoshop project we opened earlier.

A window has an arrow pointed at a thumbnail of a file titled, earth, dot, p n g. A curved leftward arrow from the file suggests that it is being dragged to the untitled document on the window behind it.
Once the image appears on your project, you might need to resize it to fill the canvas. Notice on the layers panel that the earth.png image has been added as another layer. You can see the background through the transparent part of the image.

A window has an untitled document with a photo of a portion of the Earth. On the Layers panel on the right, an arrow is pointed at the new layer containing the earth image.
Let’s add a title. Select the text tool then draw a textbox in the black part of the image. Type in “Planet Earth.” We’ll change the text to white and make it larger.
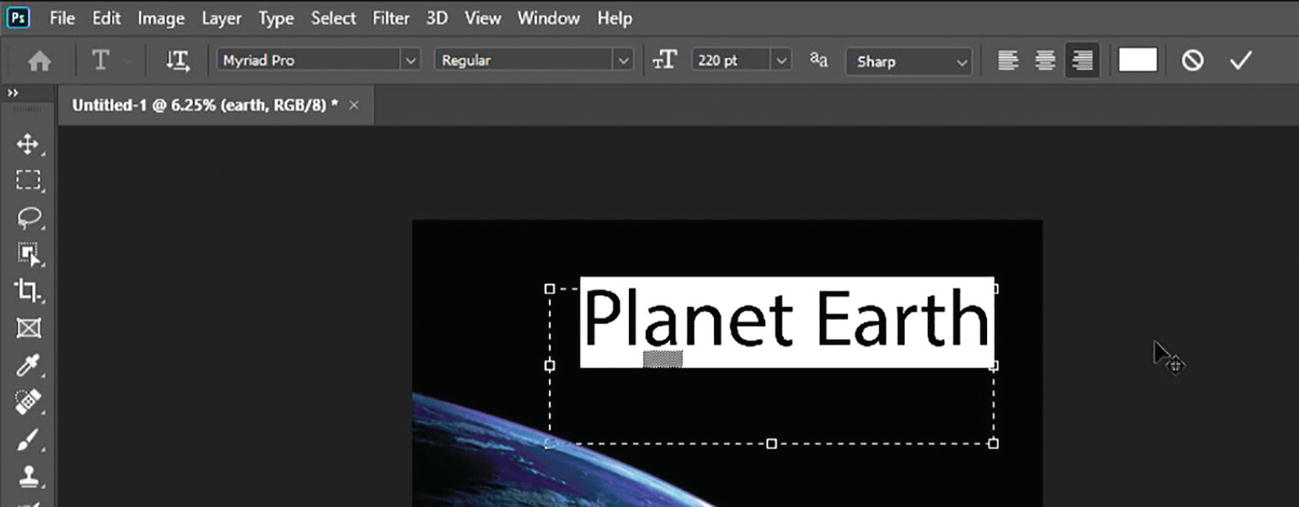
A window has an untitled document with an image of a portion of the earth on it. A text box is produced in the blank area and Planet Earth is typed in.
Move it into position on the top right of the canvas. Click the tick icon on the top right of the options bar.
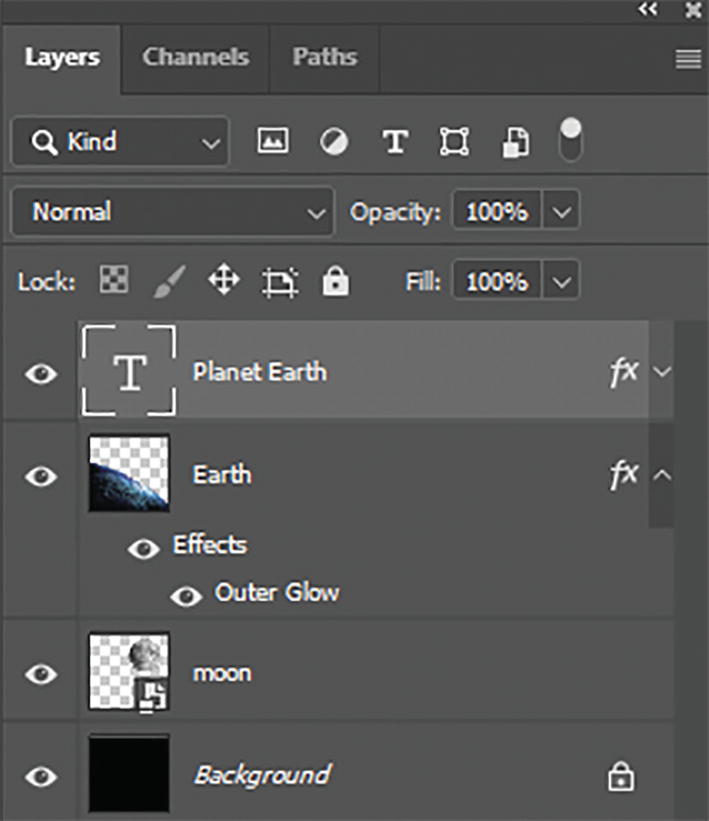
Notice that Photoshop has added a new layer to contain the text.

A window has an image of a portion of the earth on it with the text, Planet Earth typed in. On the Layers panel, an arrow is pointed at the new layer containing the text.

The layers panel includes the background layer, the image layer labeled Earth, and the text layer labeled planet earth.
Photoshop Layers
What’s the point of all these layers, you might ask. Why can’t I just dump all my objects and text on the page?
Well you could, but if you did that, it would be a nightmare to design, edit, and change later on. What if you put the text in the wrong place or wanted to change font? Or change or move an image you inserted? Once you save the image, all the text, graphics and photos are flattened (or merged) so you can’t change them easily.
The idea behind using layers is that you can independently arrange the objects out on the canvas to create your design. You can move them around, try objects or text in different places to see what looks good. You can add effects to individual objects without affecting the others, you can also change an image or text later if you need to. In this way, you can build up multilayered projects and designs piece by piece and save them as multilayered projects (PSD files) instead of flat images (PNG or JPEG files).
For example, carrying on with our little project, we can add some blending effects to the layers. We could add an outer glow to the text.
To do this, double-click the text layer in the layers panel on the bottom right-hand side of your screen to open the layer style dialog box. Make sure you click the actual layer not the text.

A window has an image of the earth on the left. In the Layers panel on the right, an arrow is pointed at the layer labeled, planet earth.
Click on outer glow, on the left-hand side. In the outer glow settings, change the color to yellow, then experiment with the opacity, spread, and size effects and see what happens.
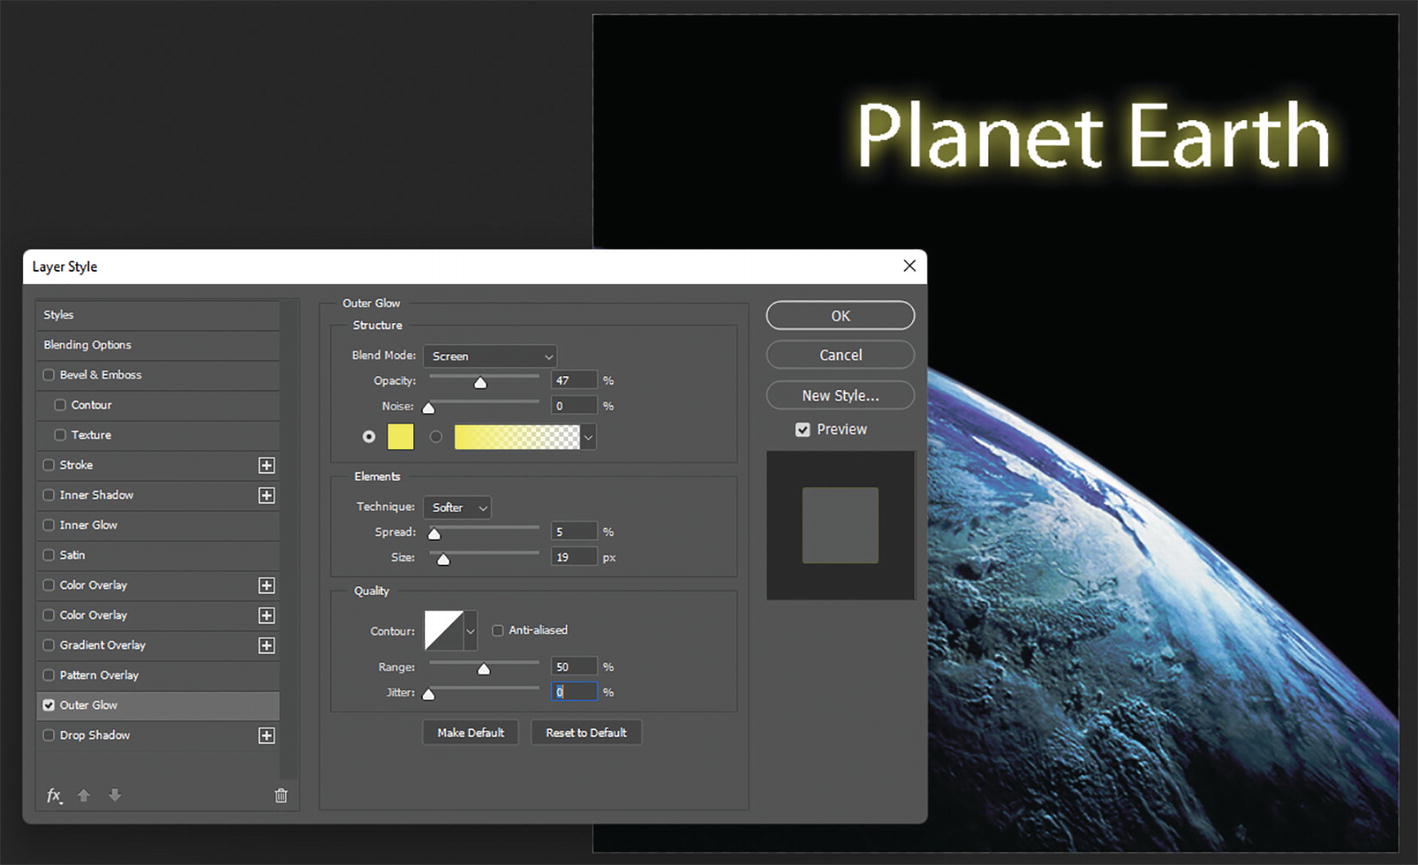
A panel has the text, planet earth, with a glow effect. A dialog box labeled layer style has the outer glow effect selected, with the settings options on the right.
Notice that the effect is applied only to the text layer and not to the earth image layer. The effect appears in an “Effects” section (fx) on the layer in the layers panel on the right.

The layers panel includes the background layer, the image layer labeled, earth, and the text layer labeled Planet Earth. Below the text layer, an arrow is pointed at the outer glow effect.
You can double-click this if you need to change it later. Or you can click the “Eye” icon to hide/show the effect.
Try some of the other effects and see what happens.
Now that we understand layers a little better, let’s take a look at what you can do…
Create an Image Collage
A collage is made up of two or more separate images. We’ll use two images in this example; you can add more if you wish.
Open the house.png image. Using the magnetic lasso tool, make a selection around the cabin. If you are having trouble keeping the line on the edge of the cabin, try increasing the contrast or the frequency in the options bar.
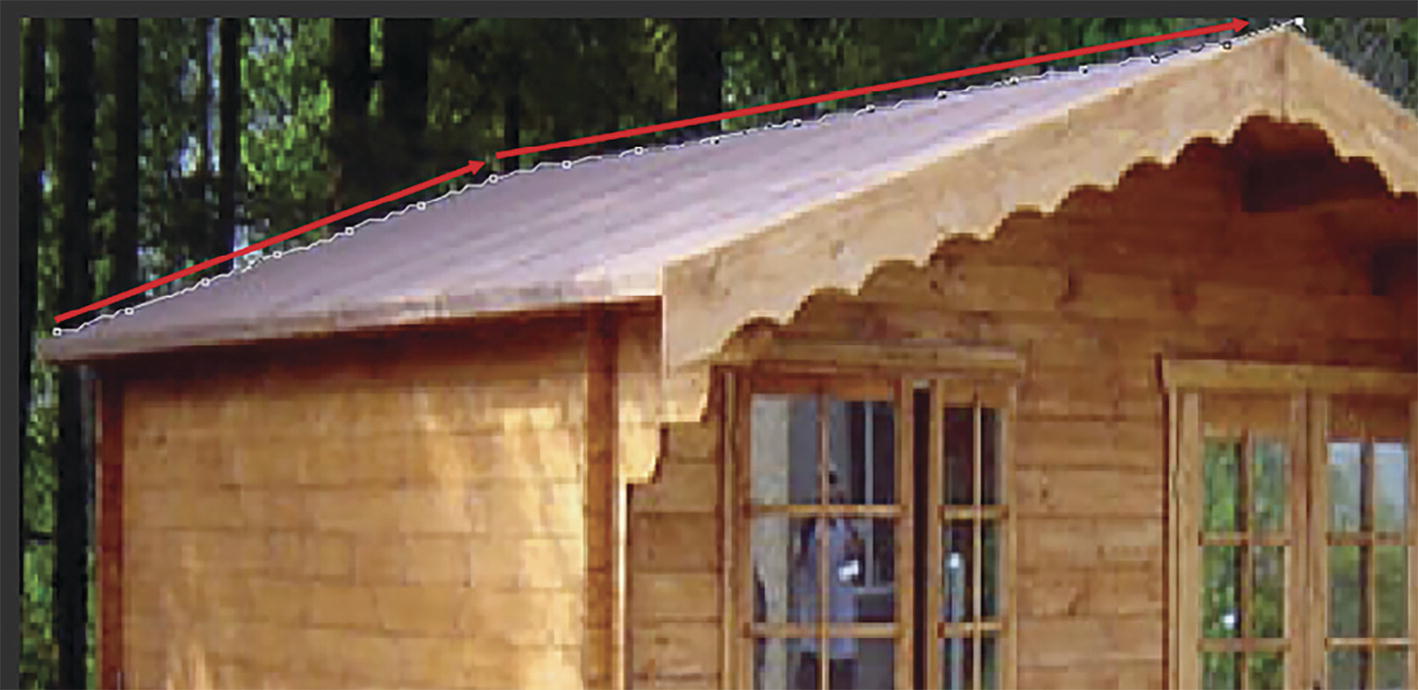
A photo of the upper half of a cabin. The edge of the cabin roof is traced with connected lines and points.
Trace all the way around the edge of the cabin. When you close the loop, you will see the “marching ants” around marking your selection.
Right click your mouse on the “marching ants” selection, and from the popup menu select “feather.” Set it to about 2px. This just softens the edge of the selected image.

A photo of the upper half of a cabin in which the edge of the roof is traced with connected lines and points. A menu pane on it has the highlighted feather option.
Go to edit menu, select copy.
Now load up lake.psd then go to edit menu and select paste. The cabin will appear on a new layer titled “Layer 1,” in the layers panel.

A photo of a cabin is in the foreground. In the background is a lake and a mountain range.
With Layer 1 still highlighted in the layers panel, go to the edit menu, go down to transform then select scale. Drag the resize handles inwards as shown in the following.

A photo of a cabin roof has lines and points on the top and sides used for scaling the size. A point in the corner is encircled, and a downward oblique arrow is next to it.
Reduce the image to about 1/3 of its original size or until it fits nicely. Double-click the selection to execute the transform.
Using the move tool, place this image on the grass bank next to the water, so it looks like it’s next to the river.

A window has a photo of a cabin next to a lake near a mountain range. In the layers panel on the right, the cabin is labeled, layer 1.
A challenge for you. Notice the edges along the bottom of the cabin don’t quite look like they’re sitting on the grass. See if you can remove these and make it look a bit more realistic. Try a few different tools such as the eraser. Perhaps try the clone tool.

A photo of the lower half of a cabin on a field of grass.
Selection and Free Transform
Using the transform and scale tools, it is possible to resize and move objects, shapes, or images on a particular layer.
Open the file moon.png.
Using the marquee tool select the moon.

A photo of the moon with a transparent background. The moon is boxed in dashed lines.
Copy this selection. Go to the edit menu, select copy.
Open up the planetearth.psd file.
Go to edit menu, select paste. You may need to use the free transform tool to resize the moon image.

A cut-out photo of the moon in front of a section of the earth.
Make sure the image you just pasted is behind the earth.

A photo of a section of the earth with the moon behind it.
To put the moon behind the earth, go over to your layers panel and drag “Layer 1” below the “Earth” layer.

The layers panel includes the background layer, an image layer labeled, Earth, and layer 1 with the image of the moon. A curved arrow is pointed at the highlighted layer 1.
Make sure “Layer 1” is selected in the layers panel.

The layers panel includes the background layer, layer 1 with the photo of the moon, and a photo layer labeled, earth. The highlighted layer 1 is encircled.
Go to edit menu, go down to transform, then select scale.
Drag the handles, circled as follows, so that the moon seems smaller than the earth. When you’re satisfied, double-click the moon image to execute the scale.

A photo of a section of the Earth with the moon on the upper right. The Moon is boxed with lines and points for scale adjustment, with one corner point encircled.
Layer Effects
Carrying on from the last section, if not, open the file planetearth.psd
Double-click the earth layer in the layers panel to bring up layer style dialog box.

The layer panel includes the background layer, an image layer labeled Moon, and a photo layer labeled Earth. The Earth layer is highlighted.
Click “Outer Glow.” Change the spread to a value of 26% and the size to a value of 100 px.

A photo of a section of the Earth with its edge glowing, and the Moon on the upper right. A dialog box on it has the outer glow effect selected, with the settings options on the right.
Click “OK” when you’re done.
Add Text
Let’s use some text to title our image. Photoshop uses vector mapping to create text - so you can scale the text to any size without pixelation.
Carrying on from the last section, if not, open planetearth.psd
Select the horizontal text tool from your toolbox. Select a nice font (e.g., myriad pro), size (e.g., 61pt) and color (e.g., #3d81ff) in the options bar shown in the following.

A horizontal text tool panel. It includes icons for several options like font style, size, and color, among others.
Click and drag the text box across the moon on the image where you want to place the text.

A photo of a section of the earth with its edge glowing, and the Moon on the upper right. A text box in front of the moon contains the text, Planet Earth.
Type in a title. My title in this example is “Planet Earth.”
Double-click the text layer you just created in the layers panel to bring up the layer style dialog box.
A Layers panel includes the background layer, an image layer labeled, Moon, an image layer labeled Earth, and the text layer labeled Planet Earth.
Select “Bevel and Emboss” from the list on the left hand side.

A photo of a section of the Earth with its edge glowing, and the Moon on the upper right with the text, Planet Earth, across it. A dialog box has the bevel, and emboss effect selected, with the settings options on the right.
Using the “Structure” and “Shading Settings,” try a different style: “inner bevel,” or “outer bevel.” Try changing the size and depth of the bevel. Also see what happens when you change the shading angles.
Try experimenting with different styles to see what effects you can add. How about a nice outer glow?

A photo of a section of the earth with its edge glowing, and the Moon on the upper right with the glowing text, Planet Earth, across it. A dialog box has the bevel, and emboss effect selected, with the settings options on the right.
Adjust the opacity, try changing the spread or size. Click “OK” when you’re done.
Now we can move this text to wherever we want. From the toolbox, select the Move Tool. To adjust the position of this text, place the Move Tool on your text, click and drag it to the correct location.
Smart Objects
When you drag and drop a photograph or object into a Photoshop image, the object is pasted as a new layer and adopts the characteristics of the Photoshop image.
If you paste it in as a smart object, you can edit and build the object as an independent image with its own characteristics, layers, effects, and so on. A smart object could be another Photoshop (PSD) image or a design from Illustrator.
To embed a Photoshop image or Illustrator design, select the file menu then click “Place Embedded.”

A window has the file tab selected from the menu bar on top. Below is a menu pane with the place-embedded option highlighted.
Navigate to and select the file you want to add.

A dialog box has the highlighted One Drive folder on the left panel. On the right, a thumbnail for a file is encircled, and the place button at the bottom is selected.
Click “Place.”
On your layers panel you’ll see a small logo on the bottom right of the layer thumbnail. This means that the layer contains a smart object.

The layers panel includes an image layer labeled Earth, and another layer with a thumbnail on the lower right encircled.
Now you can directly edit the smart object. To do this, double-click the layer thumbnail on your layers panel.

A window has the Elluminet Press logo of a 3-dimensional orb at the center. In the layers panel on the right, an arrow is pointed at a smart object layer.
The smart object will open up in a new Photoshop window.

A window has a 3-dimensional illustration of an orb below. The smart object file name on top is encircled.
The layers panel will change to show the layers of the smart object you just opened. Here you can make independent changes and edit the object.

A Layers panel is boxed and includes a smart object layer labeled, logo orb, a logo text folder, a white backing layer with gradient overlay effect, and a background layer.
Once you are done, save and close the object file (file ➤ save) and it will automatically update.
Adjustment Layers
Adjustment layers alter all the layers below them, which makes them ideal for adjusting color, contrast, brightness without altering individual layers.
You can find your basic adjustments on the adjustment panel. If the panel isn’t open, go to the window menu and select “Adjustments.”
The adjustments available are shown in the following.

A horizontal adjustments tool panel. It includes icons for several options like brightness and contrast, exposure, hue and saturation, and color vibrance, among others.
A few more advanced adjustments you can perform.

A horizontal adjustments tool panel. It includes icons for several options like photo filter, threshold, gradient map, and posterize, among others.
To apply any of these adjustments, click the icon.
For this example, open windowpasted.psd. Notice that this project has multiple layers. Say I wanted to adjust the whole brightness or contrast of the whole image. If I attempt to use the adjustments on the image menu, the adjustment is only applied to the selected layer.
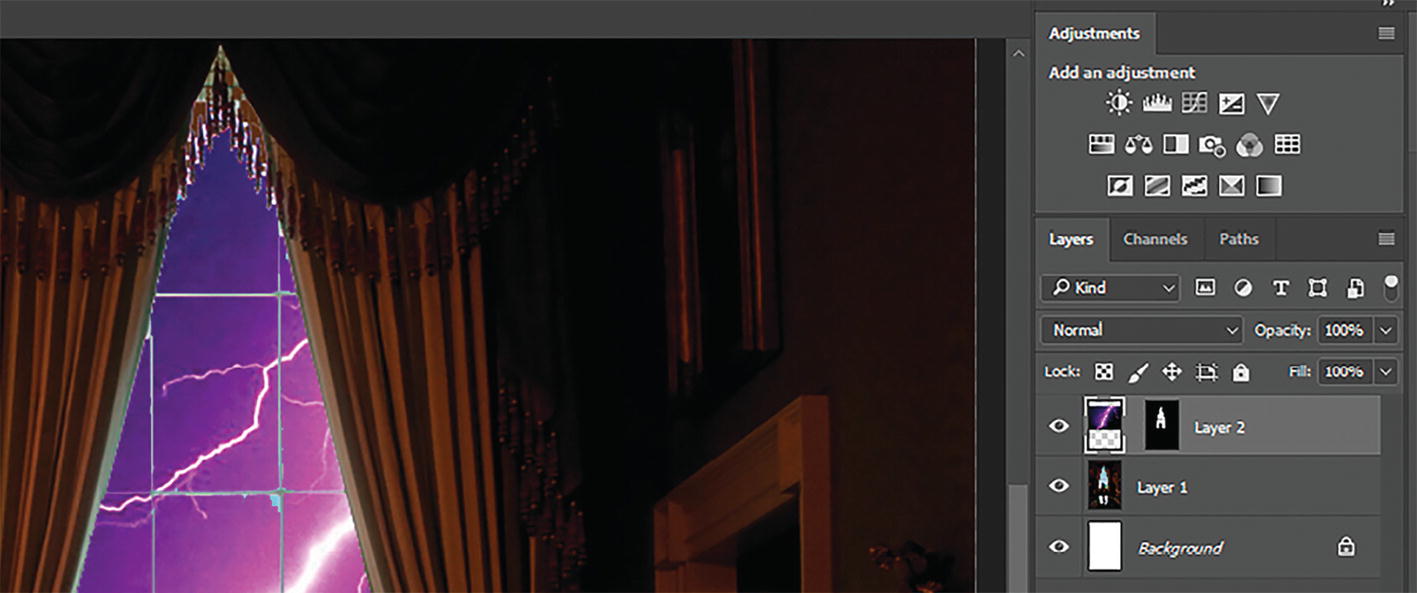
A window has an image of a window with curtains. In the Layers panel on the right are layers labeled layer 2, layer 1, and background.
To apply an adjustment layer, select the top layer of your project (layer 2). Remember the adjustment layer affects all layers underneath it.
From the adjustment panel, select the “Brightness” icon. Notice an adjustment layer has been added in the layers panel

A window has an image of a man facing a window with curtains. On the right, the brightness and contrast settings are boxed and on the Layers panel below, and adjustment layer is encircled.
Some controls will appear in the properties panel. For this particular adjustment layer, we have brightness and contrast sliders. Move these until you have the desired brightness. Try applying some of the other adjustment layers see what they do.
Auto-align Layers
This is a great feature if you have multiple shots of the same scene you want to blend together.
A common example is a group shot at a wedding where not everyone is looking at the camera, some have their eyes closed because they blinked or looked away. If you have a number of different shots taken one after the other, you can combine the best ones to create a new image. This only works with images that have similar contents.
For this to work, your images need to be taken from the same perspective - the same position. Photoshop can’t align the images if they’re very different or taken from different angles. Try it, see what happens.
Let’s take a look at a simple example. Go to your file menu and select open.

A window has the file tab selected from the menu bar on top. The drop-down menu has the open option highlighted.
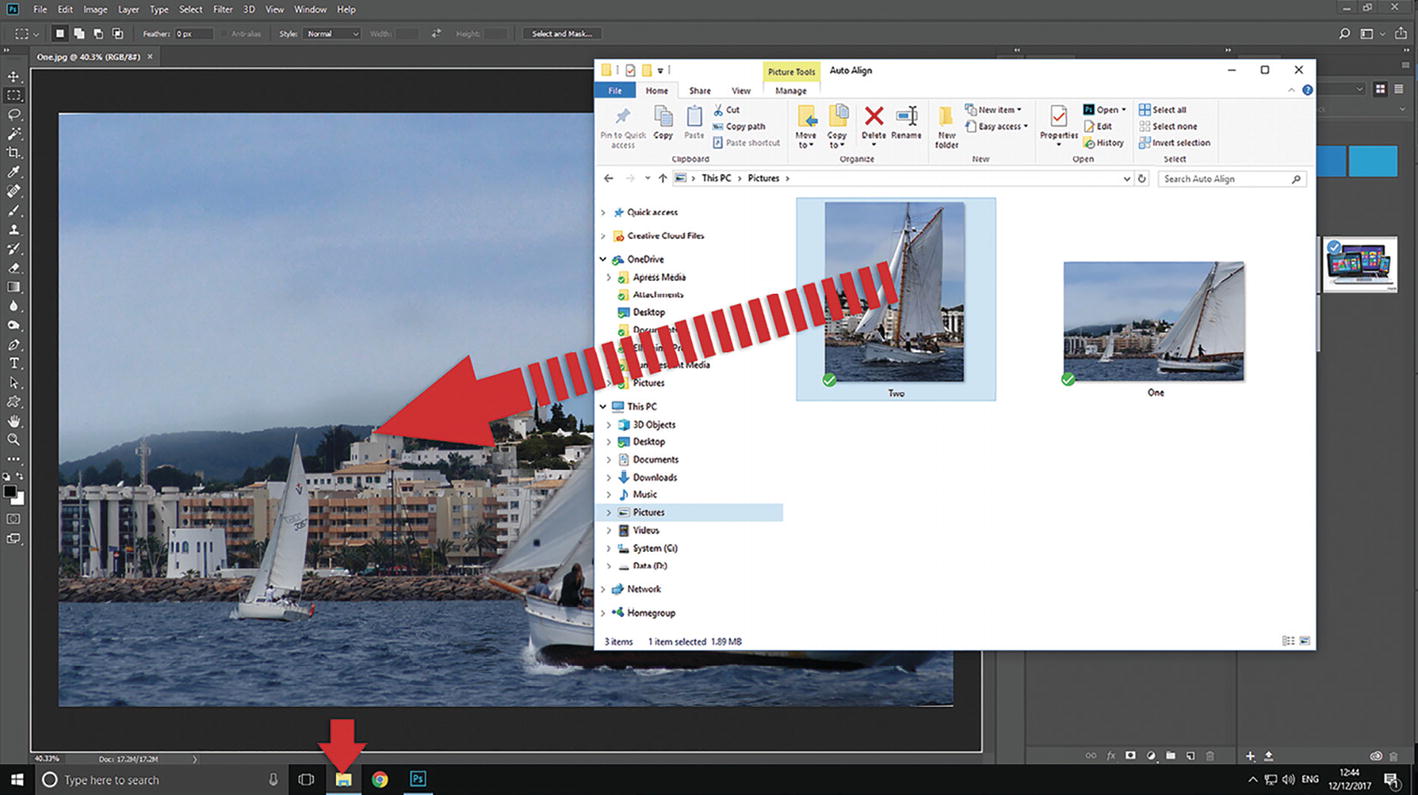
Open the file one.jpg from the auto align folder in the accompanying resources.

A dialog box has the highlighted Elluminet Press folder on the left panel. On the right is a folder and a couple of thumbnails labeled, one and two.
Open your file explorer or finder and navigate to the auto align folder, then drag and drop two.jpg on top of the open image. The image you just imported will be added as another layer.
A window has a dialog box with the pictures folder highlighted, and a thumbnail labeled two, selected. An arrow from the thumbnail is pointed to the photo on the window, and another arrow is pointed at a folder at the bottom.
Notice how the layers don’t match and it would make a nice image if these two shots were combined.
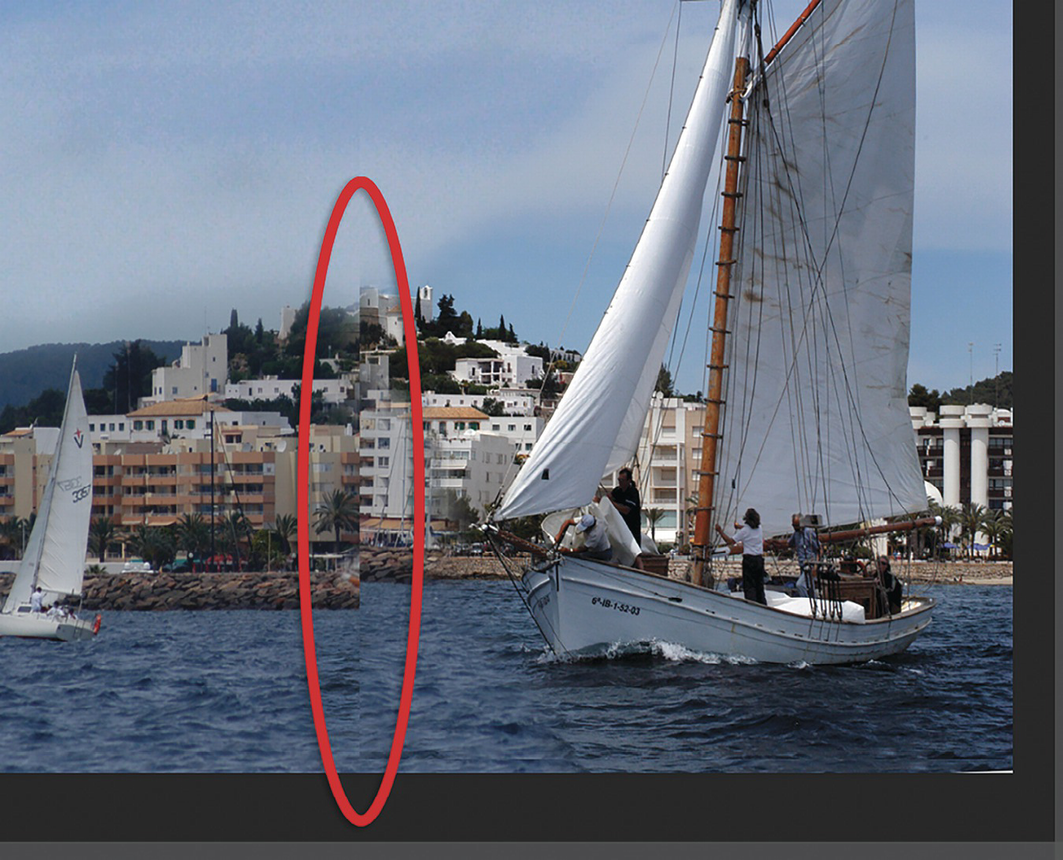
A photo of a sailboat on a body of water with some building structures in the background. An encircled area on it indicates the point where two layers do not match and are not aligned.
To auto align the layers, first make sure all your layers are rasterized. If not, right click the layer name in the layers panel and select “rasterize layer” from the popup menu.

The layers panel has an arrow pointed at the layer labeled, two. On the right is a menu pane with the rasterize layer option highlighted.
Next select both layers. Hold down control or command and click each layer.

A window has an image of a sailboat on a body of water. In the layers panel on the right, layer two and the background layer are selected.
From the edit menu, select “Auto-Align Layers.”

A window has a photo of a sailboat on a body of water. On the menu bar, the edit tab is selected. in the resulting drop-down, the auto-align layers option is selected.
Select “Auto” from the dialog box, then click “OK.”

A dialog box has a projection pane that includes several options. The option Auto is selected, and the O K button on the right is highlighted.
Photoshop will analyze the layers and attempt to align them together.

Two stacked photos of a sailboat on a body of water. The image on top is slightly tilted.
You might need to crop the image to remove any edges.
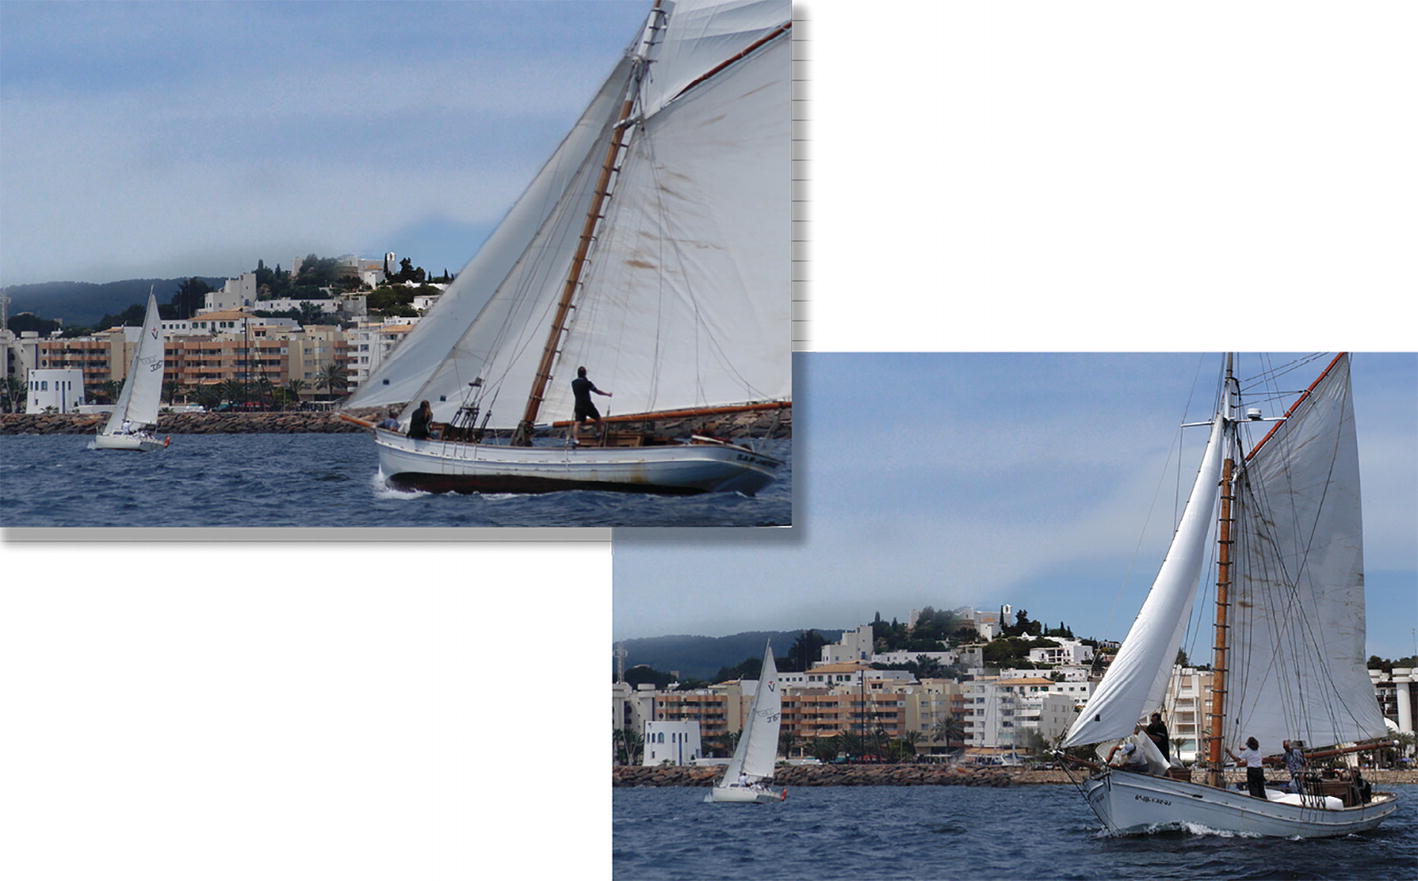
Two photos of a sailboat on a body of water. The photo below is the full one, and the one above is cropped.
You can see it has created a much nicer composition than the original.
Layer Opacity and Fill
The opacity of a layer determines how transparent or opaque the layer is. In other words, it controls how much the layers below show through. Open opacityfill.psd.
Fill will change the transparency of whatever is filling the layer, but will ignore any effects or blend modes that have been applied.
To change the opacity, select the desired layer, then click the opacity drop-down arrow at the top of the Layers panel.

A window contains a photo of fog on the road next to the sea. In the layers panel on the right, a layer labeled fog is selected, while the background layer is locked.
Click and drag the slider to adjust the opacity. You'll see the layer opacity change in the document window as you move the slider.
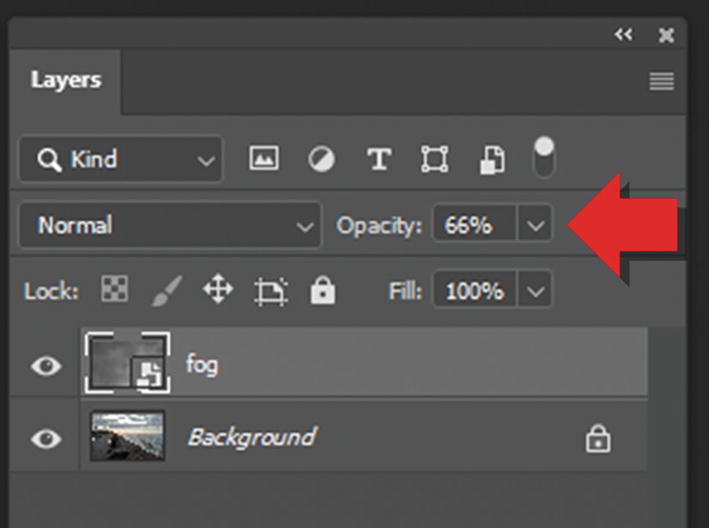
The layers panel includes the background layer, and a selected layer labeled, fog. An arrow points at the opacity effect that is set at 66 percent.
If you set the opacity to 0%, the layer will become completely transparent, or invisible.
If you want to change the fill opacity, click the fill drop-down box instead. Fill Opacity is used when you don’t want the Opacity of the effect to disappear as well.

The layers panel includes the background layer, a selected layer labeled fog, and an arrow pointed at the lock tab. Here, opacity is set at 100 percent, and the fill effect is at 66 percent.
Blending Modes
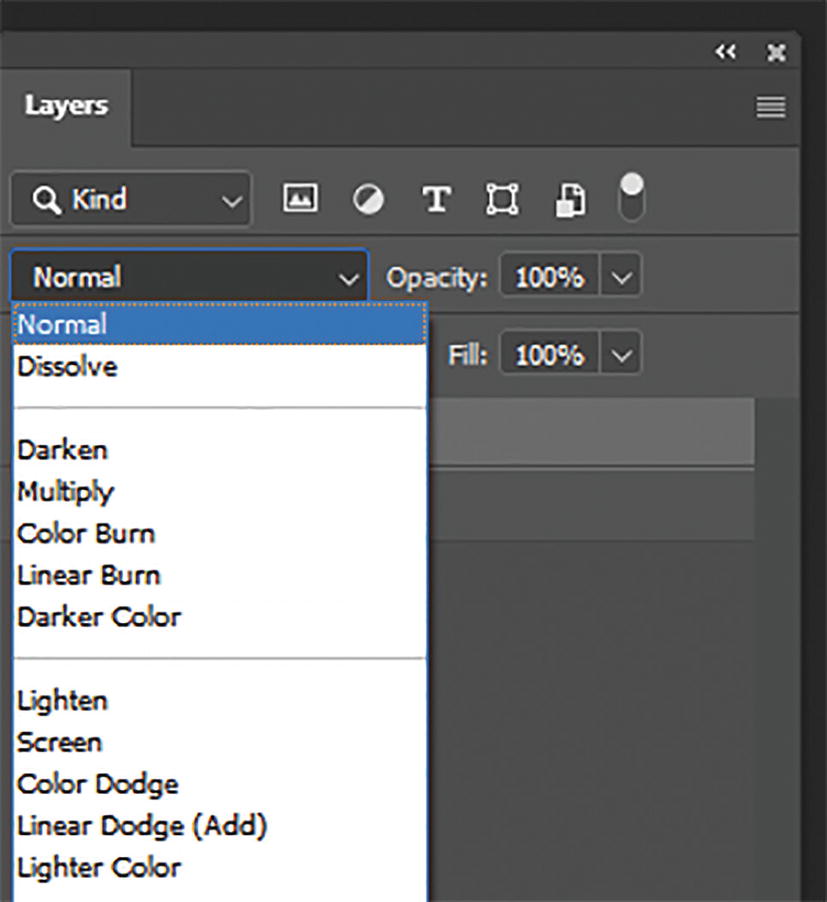
Blend modes are used to determine how layers are blended with each other. There are various different categories of blend modes. Let’s take a look at what they are.

A menu panel has the normal option highlighted. Some options are grouped into five mode types. The mode types are darken, lighten, overlay, difference, and color modes.
Normal Blending shows your layer as it currently is.
Darken Modes darken the dark pixels and makes white pixels transparent.
Lighten Modes lighten dark pixels while making blacks transparent.
Overlay Modes make all pixels that are 50% grey become transparent while lighter pixels get lighter and darker pixels get darker.
Difference Modes make the pixels in the blend layer and layer underneath become opposite of each other.
Color Modes use hue (color), saturation (intensity of color), and luminosity (brightness) to create the blending effects.
Open the file blendmodes.psd.
In the layers panel, you’ll see two layers. Select the shuttle layer. This is the layer we want to blend into the layer underneath (Color Fill 1).

The layers panel has an arrow pointed at the Normal selection on the blend mode menu. An arrow is pointed at the highlighted layer labeled shuttle, and below it is a layer labeled, color fill 1.
You’ll see a whole list of blend modes appear.
The layers panel has the highlighted normal option on a blend modes menu. Other options include, dissolve, darken, multiply, and lighten, among others.
Run through the list and see what each of the blend modes do and note how it affects the shuttle image.

A window has an image of an airplane. In the layers panel on the right, the blend modes menu is open and the color burn option is selected.
You can save your file once you’re done.
Lab Exercise
In this exercise, we’re going to build a slide using various different effects, images, and layers.
Open the file videoslide.psd. This file contains a background image.
Insert person.png into the project. Make sure you resize and move the image so it fits nicely on the screen.

A photo of a woman standing with both hands raised in front of a background made of lines arranged like the rays of the sun.
Now add some text in the blank area on the left-hand side. In the example, I’m creating a slide for a video course.

A photo of a woman standing with both hands raised in front of a background made of lines arranged like the rays of the sun. On the left is a text that reads, Photoshop for beginners.
Select a font, color, and resize the text so it looks good. Add a shadow to the text to make it stand out a bit.
Decorate the rest of the slide with some different types of brushes, maybe a splash of paint.

A photo of a woman standing with both hands raised in front of a background made of lines arranged like the rays of the sun, with splashes of paint on it. On the left is a text that reads, Photoshop for beginners.
Try out a few of the other effects.
Perhaps add a shape to fill the bottom left corner.
Or try and insert another image (e.g., use shuttle.png)
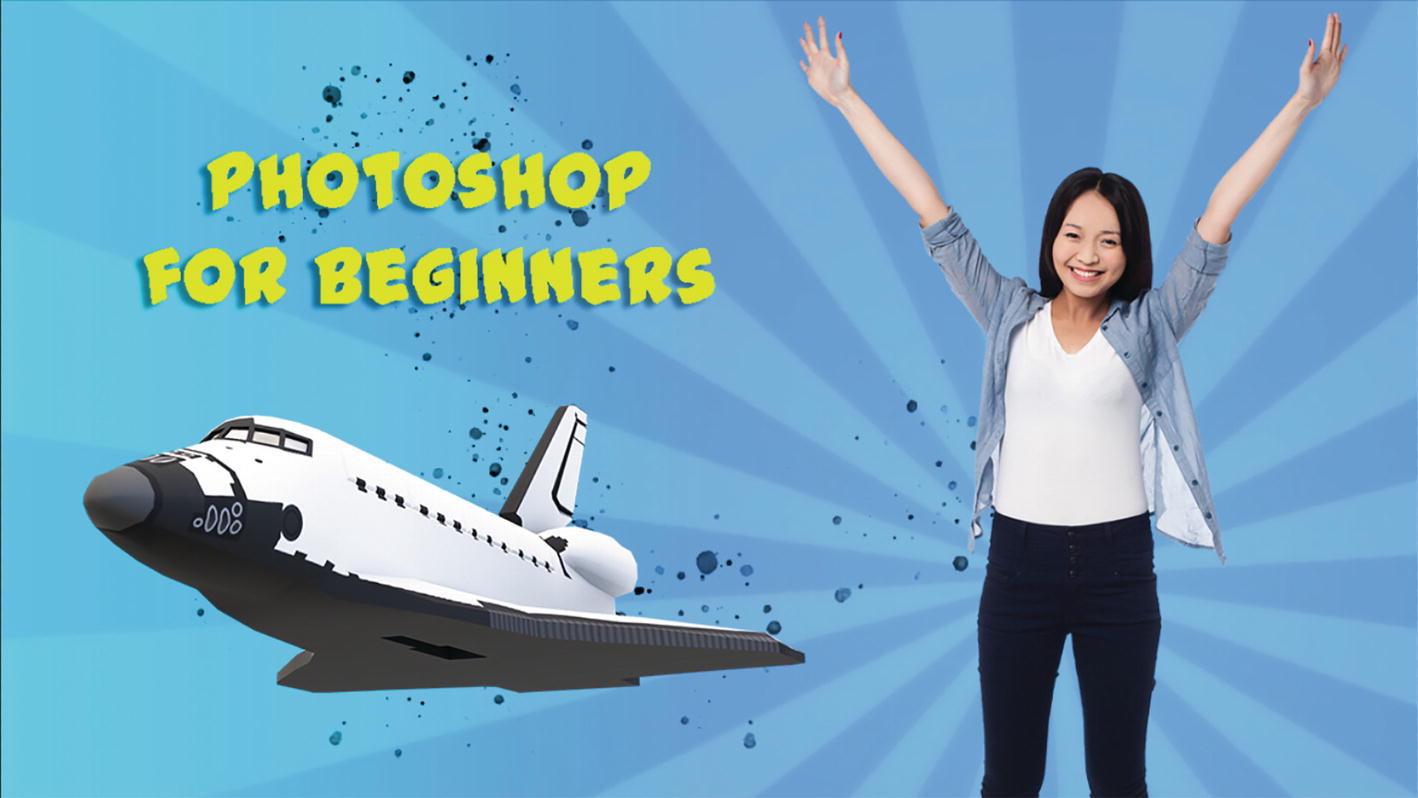
A photo of a woman standing with both hands raised in front of a background made of lines arranged like the rays of the sun, with splashes of paint on it. On the left is an illustration of an airplane and a text that reads, Photoshop for beginners.
Try some blending modes on the text and the shuttle layers.
Summary
A layer is a transparent canvas where you can add text, images, and other graphics independently. Layers are stacked on top of each other in a stack to form the complete image or design.
Use the transform and scale tools to resize and move objects, shapes, or images on a particular layer.
A smart object is an independent image with its own characteristics, layers, effects, etc.
Adjustment layers allow you to add image adjustments to your photos. Adjustments could be brightness, contrast, hue, saturation filters. They are added as layers so you can change or remove the adjustments later. Or you can add the adjustments to multiple layers below the adjustment layer.
Auto-align layer is a great feature if you have multiple shots of the same scene you want to blend together.