
Observe the following instructions:
- Create a new SharedService app using the blank template as shown and go to the SharedService folder:
$ ionic start SharedService blank
$ cd SharedService
- You will need to make several changes in the directory because you have two pages and a common service for both. Let's start by modifying the ./src/app/app.component.ts file so that the rootPage is pointing to Page1:
import { Component } from '@angular/core';
import { Platform } from 'ionic-angular';
import { StatusBar } from '@ionic-native/status-bar';
import { SplashScreen } from '@ionic-native/splash-screen';

import { Page1 } from '../pages/page1/page1';

@Component({
  templateUrl: 'app.html'
})
export class MyApp {
  rootPage:any = Page1;

  constructor(platform: Platform, statusBar: StatusBar, splashScreen: SplashScreen) {
    platform.ready().then(() => {
      // Okay, so the platform is ready and our plugins are available.
      // Here you can do any higher level native things you might need.
      statusBar.styleDefault();
      splashScreen.hide();
    });
  }
}
- Create ./src/pages/page1, as shown in the following code:
$ mkdir ./src/pages/page1
- Create your first template, page1.html, in the page1 folder with the following code:
<ion-header>
    <ion-navbar>
        <ion-title>
            Profile
        </ion-title>
    </ion-navbar>
</ion-header>

<ion-content>
    <ion-card>
        <ion-card-header>
            What you are entering
        </ion-card-header>
        <ion-card-content>
            <ion-badge item-right>Name</ion-badge> {{ user.name }}
            <br><br>
            <ion-badge item-right>Age</ion-badge> {{ user.age }}
        </ion-card-content>
    </ion-card>
    <ion-list>
        <ion-item>
            <ion-label fixed>Name</ion-label>
            <ion-input type="text" [(ngModel)]="user.name">
        </ion-input>
        </ion-item>
        <ion-item>
            <ion-label fixed>Password</ion-label>
            <ion-input type="number" [(ngModel)]="user.age">
        </ion-input>
        </ion-item>
    </ion-list>
    <button ion-button full block (click)="goToPage2()">Go to Page 2</button>
</ion-content>
- Create page1.ts in the page1 folder, as follows:
import { Component } from '@angular/core';
import { NavController } from 'ionic-angular';
import { UserService } from '../../services/user';
import { Page2 } from '../page2/page2';
@Component({
    selector: 'page-one',
    templateUrl: 'page1.html'
})
export class Page1 {
    private user: any;
    private nav: any;
    constructor(public navCtrl: NavController, user:
        UserService, nav: NavController) {
        console.log(user.name);
        this.user = user;
        this.nav = nav;
    }
    goToPage2() {
        this.nav.push(Page2);
    }
}
The file extension is .ts, and not .js, because you are going to use some TypeScript-specific features, such as getters and setters.
- Similarly, create the page2 folder using the following command:
$ mkdir ./src/pages/page1
- Add the page2.html template in the page2 folder as well, as follows:
<ion-header>
  <ion-navbar>
    <ion-title>
      Confirmation
    </ion-title>
  </ion-navbar>
</ion-header>

<ion-content class="home">
  <ion-card>
    <ion-card-header>
      Please confirm your profile
    </ion-card-header>
    <ion-card-content>
      {{ user.name }} is {{ user.age }} years old
    </ion-card-content>
  </ion-card>
  <button ion-button full block (click)="goToPage1()">Back to Page 1</button>
</ion-content>
This is your second page with the same name and age information.
- Create page2.ts in the page2 folder with the following code:
import { Component } from '@angular/core';
import { NavController } from 'ionic-angular';
import { UserService } from '../../services/user';
import { Page1 } from '../page1/page1';
@Component({
  selector: 'page-two',
  templateUrl: 'page2.html'
})
export class Page2 {
  private user: any;
  private nav: any;
  constructor(public navCtrl: NavController, user:
    UserService, nav: NavController) {
    console.log(user.name);
    this.user = user;
    this.nav = nav;
  }
  goToPage1() {
    this.nav.push(Page1);
  }
}
- Create the services folder with the following command:
$ mkdir ./src/services
- Put UserService in the user.ts file, in the services folder, as shown:
import { Injectable } from '@angular/core';
@Injectable()
export class UserService {
    private _name: string;
    private _age: number;
    constructor() {
        this._name = 'John Connor';
        this._age = 31;
    }
    get name() {
        return this._name;
    }
    set name(newVal) {
        console.log('Set name = ' + newVal);
        this._name = newVal;
    }
    get age() {
        return this._age;
    }
    set age(newVal) {
        console.log('Set age = ' + newVal);
        this._age = newVal;
    }
}
- Open and edit ./src/app/app.module.ts so that you can inject UserService as a global provider and declare Page1 and Page2 :
import { BrowserModule } from '@angular/platform-browser';
import { ErrorHandler, NgModule } from '@angular/core';
import { IonicApp, IonicErrorHandler, IonicModule } from 'ionic-angular';
import { SplashScreen } from '@ionic-native/splash-screen';
import { StatusBar } from '@ionic-native/status-bar';

import { MyApp } from './app.component';
;
import { Page1 } from '../pages/page1/page1';
import { Page2 } from '../pages/page2/page2';
import { UserService } from '../services/user';

@NgModule({
  declarations: [
    MyApp,
    Page1,
    Page2
  ],
  imports: [
    BrowserModule,
    IonicModule.forRoot(MyApp)
  ],
  bootstrap: [IonicApp],
  entryComponents: [
    MyApp,
    Page1,
    Page2
  ],
  providers: [
    StatusBar,
    SplashScreen,
    UserService,
    {provide: ErrorHandler, useClass: IonicErrorHandler}
  ]
})
export class AppModule {}
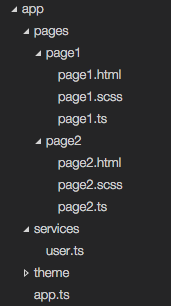
- Verify that your folder structure looks like the following screenshot:
- Go to your Terminal and run the app with the following command:
$ ionic serve
You can move from page 1 to page 2 and then back, and the data will persist across the pages.