
![]()
JavaFX in the Enterprise
JavaFX has recently become one of the most popular technologies for developing graphical user interfaces for Java applications. JavaFX applications run on the client machine using a local Java Runtime Environment, much like Java Swing applications or Java applets. Users can either fire up a JavaFX application that resides locally on their machine or visit a page that includes an applet, which in turn triggers a JavaFX application to be downloaded to their machine.
There is quite a history for JavaFX, although it is a relatively new member to the Java arsenal of technology. Earlier versions of JavaFX (1.3) utilized a language named JavaFX Script for constructing JavaFX applications. This language was developed by Sun Microsystems, and it compiled into Java bytecode. Although JavaFX Script filled a niche, it was not widely adopted throughout the Java community. Therefore, a couple of years later Oracle created the JavaFX 2.0 release to allow developers to use native Java for JavaFX development, rather than JavaFX Script. What about those applications that were written in JavaFX Script? No need to worry; some projects, such as Visage (http://code.google.com/p/visage/), have been started to continue the use of JavaFX Script. JavaFX 2.x developers can utilize native Java (or any other JVM language) to develop JavaFX user interfaces and interact with Java APIs.
Entire books have been written that discuss how to develop JavaFX applications. This book is not intended to be a beginner book for JavaFX development. Rather, it is meant to build upon knowledge that developers already have regarding JavaFX, or even to introduce the technology to new developers, and demonstrate how to apply Java EE 7 technologies to JavaFX applications. For additional information regarding JavaFX, try an excellent book such as JavaFX 2.0: Introduction by Example, published by Apress.
This chapter focuses on recipes that deal with enterprise applications, rather than JavaFX stand-alone applications. Enterprise applications typically incorporate data from one or more locations, via the use of a back-end database or a web service. Therefore, the recipes will not cover user interface programming in detail. The recipes will cover how to integrate enterprise-related concepts into JavaFX applications.
![]() Note You can run the examples in this chapter in a couple of ways. The easiest way to run the examples is to open the JavaEERecipesFX project within the NetBeans IDE, right-click the project, and select the Run option. In this case, to run each of the examples, you will need to change the target example within the project properties. To do so, right-click the project and choose Properties. After doing so, select the Run option within the properties window, and then change the Application Class value according to the example you want to run (Figure 18-1).
Note You can run the examples in this chapter in a couple of ways. The easiest way to run the examples is to open the JavaEERecipesFX project within the NetBeans IDE, right-click the project, and select the Run option. In this case, to run each of the examples, you will need to change the target example within the project properties. To do so, right-click the project and choose Properties. After doing so, select the Run option within the properties window, and then change the Application Class value according to the example you want to run (Figure 18-1).
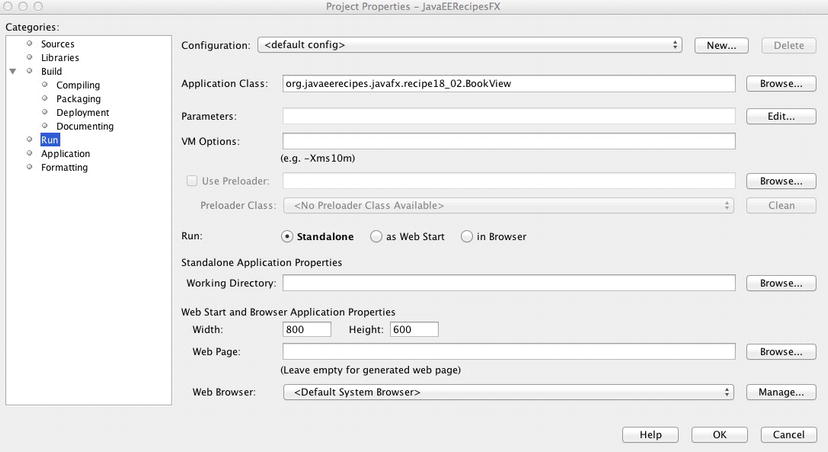
Figure 18-1. Running the JavaFX examples using the JavaEERecipesFX project
![]() Note To run the examples via the command line, be sure that all of the necessary JAR files for executing your application, including database drivers and JavaFX libraries, have been added to your CLASSPATH.
Note To run the examples via the command line, be sure that all of the necessary JAR files for executing your application, including database drivers and JavaFX libraries, have been added to your CLASSPATH.
18-1. Developing a Basic JavaFX Application
Problem
You want to learn how to develop a standard JavaFX application.
Solution
Create a basic application using an IDE such as NetBeans or your favorite text editor. In this recipe, you will develop a basic “Hello World” application, which contains one frame, a button, and a label, using the NetBeans IDE. Since it is demonstrating the development of a “Hello World” application via NetBeans, this recipe will be very simple; in fact, NetBeans provides you with such an application using only a wizard. The NetBeans wizard creates an application that prints “Hello World” to the command line whenever a button in the GUI is clicked. You will modify the application to add a label, which displays a message, rather than using the command line for printing messages when the GUI button is clicked.
To get started, open the NetBeans IDE (release 7.3 at the time of this writing), start a new JavaFX project by clicking the File ![]() New Project menu item, and then select JavaFX Application from the New Project dialog (Figure 18-2).
New Project menu item, and then select JavaFX Application from the New Project dialog (Figure 18-2).

Figure 18-2. NetBeans New Project dialog
Next, designate a project name, location, and folder within the New JavaFX Application dialog (Figure 18-3). This dialog also allows you to specify a JavaFX platform to utilize for the application, as well as a custom preloader, a dedicated folder for storing libraries, and an application main class name. For this example, leave everything at the defaults, but change the application main class name to org.javaeerecipes.javafx.recipe18_01.HelloWorld.
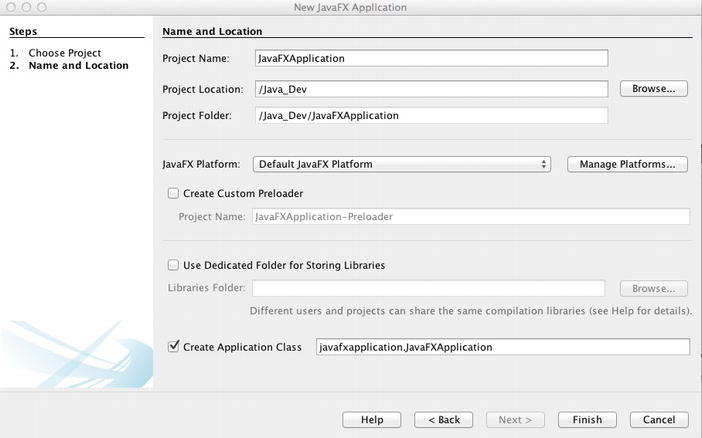
Figure 18-3. The NetBeans New JavaFX Application dialog
Once you click Finish within the wizard, the editor will open with the HelloWorld JavaFX main class. By default, NetBeans will provide you with a simple “Hello World” implementation. Change the implementation to match the following code:
/*
 * Recipe 18-1:  Simple JavaFX Application
 */
package org.javaeerecipes.javafx.recipe18_01;

import javafx.application.Application;
import javafx.event.ActionEvent;
import javafx.event.EventHandler;
import javafx.scene.Scene;
import javafx.scene.control.Button;
import javafx.scene.control.Label;
import javafx.scene.layout.VBox;
import javafx.stage.Stage;

public class HelloWorld extends Application {

    @Override
    public void start(Stage primaryStage) {
        Button btn = new Button();
        final Label lbl = new Label("This will change");

        btn.setText("Say 'Hello World'");
        btn.setOnAction(new EventHandler<ActionEvent>() {
            @Override
            public void handle(ActionEvent event) {
                lbl.setText("Hello World");
            }
        });


        VBox root = new VBox();
        root.getChildren().addAll(lbl, btn);

        Scene scene = new Scene(root, 300, 250);

        primaryStage.setTitle("Hello World!");
        primaryStage.setScene(scene);
        primaryStage.show();
    }

    /**
     * The main() method is ignored in correctly deployed JavaFX application.
     * main() serves only as fallback in case the application can not be
     * launched through deployment artifacts, e.g., in IDEs with limited FX
     * support. NetBeans ignores main().
     *
     * @param args the command line arguments
     */
    public static void main(String[] args) {
        launch(args);
    }
}
After you’ve added the code in the listing, save the file, and then run the application. To run the application, right-click the project within the NetBeans project navigator, and choose Run. The final application is not pretty, but it demonstrates how to quickly construct a JavaFX application. The final product should resemble Figure 18-4.
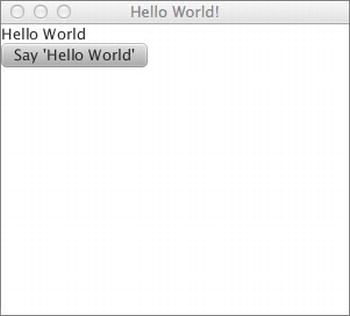
Figure 18-4. “Hello World” application
How It Works
JavaFX is a technology that you can use to develop robust user interfaces that have the ability to interact with other Java APIs. This recipe demonstrates how to build a simple JavaFX application, focusing on the overall task of JavaFX application development, rather than on any particular features of JavaFX. With that said, the demo application is fairly simplistic in that it contains only two nodes: a label and a button. When the user clicks the button, the message “Hello World” is displayed on the label. That is fairly simplistic, right?
Rather than simply demonstrate how to write this application, the recipe demonstrates how to create a JavaFX project within the NetBeans IDE. NetBeans 7.x includes support for the JavaFX platform, allowing developers to utilize the IDE for streamlined JavaFX application development and testing. The solution to this recipe steps through the NetBeans JavaFX project wizard, showing how to create the initial project and then open the main application sources in the IDE. This section of the recipe will focus on the actual code for constructing the application, rather than how to work with the application in NetBeans.
Every JavaFX application contains a main class. The main class can be named anything, but it must include a start method that contains the functionality to construct the UI, perform any necessary initialization, and finally launch the application. A JavaFX application can contain any number of classes, and those classes can be placed in different package locations, just like a standard Java application. From a packaging standpoint, a JavaFX application looks very similar to a stand-alone Java application, except for a few minor differences. The biggest of those differences is that a JavaFX application may contain one or more XML files (including a .fxml suffix) used for GUI construction, but FXML development will be covered in Recipe 18-3.
The main application class must extend javafx.application.Application and override the start method with its own implementation. The start method accepts a javafx.stage.Stage object, which is the top-level JavaFX container. This javafx.stage.Stage object is the primary application base, and it is constructed by the platform. A stage can house other stage objects or javafx.scene.Scene objects. The JavaFX Scene class contains all content within a scene graph. A scene graph is a treelike data structure, where each item in the tree can have zero or one parent object and zero or more child objects. All children in a scene graph must be made up of Node objects. The javafx.scene.Node class is an abstract base class that must be extended by all nodes in a scene graph. You can think of a scene graph as a GUI layout, and each element or widget contained within the layout is a node.
In the solution to this recipe, the start method first creates a Button node, followed by a Label node using the following two lines of code:
Button btn = new Button();
final Label lbl = new Label("This will change");
Next, properties of the button are set, including the text that appears on the button and an action that will occur when the button is clicked. There are many properties that can be set on a button (or any other user interface control node that can be added to a scene graph). For a full listing of control nodes and their properties, please refer to the documentation at http://docs.oracle.com/javafx/2/api/javafx/scene/control/package-summary.html. In this particular example, the setText and setOnAction properties are set:
btn.setText("Say 'Hello World'");
btn.setOnAction(new EventHandler<ActionEvent>() {
    @Override
    public void handle(ActionEvent event) {
        lbl.setText("Hello World");
    }
});
As shown in the code, the setText() method merely allows a String to be specified for display on the button itself. The setOnAction() method accepts an EventHandler anonymous class. The EventHandler must override the handle method, implementing an action that will be invoked when the button is clicked. If you are familiar with Java Swing, working with JavaFX UI nodes is very similar.
After the button and label have been constructed, they need to be added to the Scene. To do that in this example, a container is created to lay out the nodes in a uniform manner. Specifically, a VBox node is created for the layout. JavaFX contains a number of different classes to support the layout of a user interface. The VBox displays its contents in a single vertical line, one on top of the other. If a border or padding is specified, the contents of the container will be laid out within those insets. For a complete listing of all the details regarding the VBox or other JavaFX layout classes, please refer to the online documentation at http://docs.oracle.com/javafx/2/api/javafx/scene/layout/package-summary.html. In the solution, the VBox is created without any spacing or padding, and the nodes are added to it.
VBox root = new VBox();
root.getChildren().addAll(lbl, btn);
Next, a Scene object is created, and the VBox is added to it. The Scene constructor accepts a layout class, followed by two numbers indicating the width and height of the Scene.
Scene scene = new Scene(root, 300, 250);
Finally, the Stage itself is configured, and the Scene is added to it. The final line of the start method makes the Stage visible to the application user via the show method.
primaryStage.setTitle("Hello World!");
primaryStage.setScene(scene);
primaryStage.show();
Most JavaFX user interfaces that are developed using the Java language look similar to this example. Although this demonstration is simplified and contains only a small set of nodes, it provides a foundation to use for building more sophisticated user interfaces. The overall construction of the scene graph is similar, no matter if the resulting user interface contains 2 or 50 different nodes. It should be noted that the class also contains a main method, which is ignored and used only as a fallback for those situations with limited JavaFX support.
18-2. Incorporating Databases into a JavaFX Application
Problem
You want to add the ability to create, read, update, and delete database records from within a JavaFX application.
Solution
Engineer a solution that enables you to incorporate Enterprise JavaBeans in your JavaFX application. In this particular example, you will develop a JavaFX TableView that will display data from the Acme Bookstore database. Particularly, you will query the BOOK database table using a JPA entity and display content within the TableView.
To begin, develop entity classes for each of the underlying database tables that you want to incorporate into the application. In this case, create a single entity class for the BOOK database table. For each entity class, develop an EJB that will use an EntityManager object to query the associated entity. Lastly, develop the JavaFX front end, and build an ObservableList object from a method call to an EJB, populating the list with data from the database. The ObservableList object will be used to populate the TableView with the data from the BOOK database table.
The following class, org.javaeerecipes.javafx.entity.Book within the JavaEERecipesFX project, is an entity class that will be used to work with the data from the underlying BOOK table:
package org.javaeerecipes.javafx.entity;

import java.io.Serializable;
import java.math.BigDecimal;
import java.util.List;
import java.util.Set;
import javax.persistence.*;
import javax.validation.constraints.NotNull;
import javax.validation.constraints.Size;

@Entity
@Table(name = "BOOK")
@NamedNativeQuery(
    name="allBooks",
    query = "select id, title, description " +
                "FROM BOOK " +
                "ORDER BY id",
    resultClass=Book.class)
@NamedQueries({
    @NamedQuery(name = "Book.findAll", query = "SELECT b FROM Book b")})

public class Book implements Serializable {
    private static final long serialVersionUID = 1L;
    @Id
    @Basic(optional = false)
    @NotNull
    @Column(name = "ID")
    private BigDecimal id;
    @Size(max = 150)
    @Column(name = "TITLE")
    protected String title;
    @Size(max = 500)
    @Column(name = "IMAGE")
    private String image;
    @Lob
    @Column(name = "DESCRIPTION")
    private String description;
    @ManyToMany(mappedBy="books")
    private Set<BookAuthor> authors;
    @OneToMany(mappedBy="book", cascade=CascadeType.ALL)
    private List<Chapter> chapters = null;

    public Book() {
    }

    public Book(BigDecimal id) {
        this.id = id;
    }

    public BigDecimal getId() {
        return id;
    }

    public void setId(BigDecimal id) {
        this.id = id;
    }

    public String getTitle() {
        return title;
    }

    public void setTitle(String title) {
        this.title = title;
    }

    public String getImage() {
        return image;
    }

    public void setImage(String image) {
        this.image = image;
    }

    public String getDescription() {
        return description;
    }

    public void setDescription(String description) {
        this.description = description;
    }

    @Override
    public int hashCode() {
        int hash = 0;
        hash += (id != null ? id.hashCode() : 0);
        return hash;
    }

    @Override
    public boolean equals(Object object) {
        // TODO: Warning - this method won't work in the case the id fields are not set
        if (!(object instanceof Book)) {
            return false;
        }
        Book other = (Book) object;
        if ((this.id == null && other.id != null) || (this.id != null && !this.id.equals(other.id))) {
            return false;
        }
        return true;
    }

    @Override
    public String toString() {
        return "org.javaeerecipes.chapter09.entity.Book[ id=" + id + " ]";
    }

    /**
     * @return the authors
     */
    public Set<BookAuthor> getAuthors() {
        return authors;
    }

    /**
     * @param authors the authors to set
     */
    public void setAuthors(Set<BookAuthor> authors) {
        this.authors = authors;
    }

    /**
     * @return the chapters
     */
    public List<Chapter> getChapters() {
        return chapters;
    }

    /**
     * @param chapters the chapters to set
     */
    public void setChapters(List<Chapter> chapters) {
        this.chapters = chapters;
    }

}
Next, let’s take a look at the EJB that is used to manipulate the Book entity. The class is named org.javaeerecipes.javafx.session.BookFacade, and it implements a class named org.javaeerecipes.javafx.session.AbstractFacade, which is used to encapsulate common methods.
package org.javaeerecipes.javafx.session;

import java.util.List;
import javax.ejb.Stateless;
import javax.persistence.CacheRetrieveMode;
import javax.persistence.Query;
import javax.persistence.EntityManager;
import javax.persistence.EntityManagerFactory;
import javax.persistence.Persistence;
import org.javaeerecipes.javafx.entity.Book;

/**
 * Stateless Session Bean for the Book entity
 * @author juneau
 */

@Stateless
public class BookFacade extends AbstractFacade<Book> {

    EntityManagerFactory emf = Persistence.createEntityManagerFactory("JavaEERecipesFXPU");
    EntityManager em = emf.createEntityManager();

    @Override
    protected EntityManager getEntityManager() {
        return em;
    }

    public BookFacade() {
        super(Book.class);
    }

    /**
     * Create a book object
     * @param book
     */
    public void create(Book book){
        em.persist(book);
    }

    /**
     * Update a book object
     * @param book
     */
    public void edit(Book book){
        em.merge(book);
    }

    /**
     * Remove a book object
     * @param book
     */
    public void remove(Book book){
        em.remove(book);
    }

    /**
     * Return a Book object based upon a given title.  This assumes that there
     * are no duplicate titles in the database.
     * @param title
     * @return
     */
    public Book findByTitle(String title){
        return (Book) em.createQuery("select object(o) from Book o " +
                              "where o.title = :title")
                              .setParameter("title", title.toUpperCase())
                              .getSingleResult();
    }

    /**
     * Recipe 10-9:  Forcing a query to be executed
     * @return
     */

    public List<Book> findAllBooks(){
        Query qry = em.createQuery("select o from Book o");
        qry.setHint("javax.persistence.cache.retrieveMode", CacheRetrieveMode.BYPASS);
        return qry.getResultList();
    }
}
Finally, a class named org.javaeerecipes.javafx.recipe18_02.BookView is used to construct the JavaFX GUI. This class contains the TableView implementation and accesses the BookFacade EJB directly to obtain and display the data. The following listing is that of the BookView class:
package org.javaeerecipes.javafx.recipe18_02;

import org.javaeerecipes.javafx.entity.Book;
import org.javaeerecipes.javafx.session.BookFacade;
import javafx.scene.control.cell.PropertyValueFactory;
import javafx.application.Application;
import javafx.collections.FXCollections;
import javafx.collections.ObservableList;
import javafx.geometry.Insets;
import javafx.scene.Group;
import javafx.scene.Scene;
import javafx.scene.control.Label;
import javafx.scene.control.TableColumn;
import javafx.scene.control.TableView;
import javafx.scene.layout.VBox;
import javafx.scene.text.Font;
import javafx.stage.Stage;

public class BookView extends Application {
    private BookFacade ejbFacade = new BookFacade();
    // JavaFX classes accept Java generics to specify the type of objects that
    // will be contained in the class instance
    private TableView<Book> table = new TableView<Book>();

    private final ObservableList<Book> data =
        FXCollections.observableArrayList(ejbFacade.findAllBooks());

    public static void main(String[] args) {
        launch(args);
    }

    @Override
    public void start(Stage stage) {
        Scene scene = new Scene(new Group());
        stage.setTitle("Acme Bookstore Book Selection");
        stage.setWidth(1400);
        stage.setHeight(500);

        final Label label = new Label("Acme Bookstore Book Selection");
        label.setFont(new Font("Arial", 20));

        TableColumn titleCol = new TableColumn("Title");
        titleCol.setCellValueFactory(
            new PropertyValueFactory<Book,String>("title")
        );

        TableColumn descCol = new TableColumn("Description");
        descCol.setCellValueFactory(
            new PropertyValueFactory<Book,String>("description")
        );


        table.setItems(data);

        table.getColumns().addAll(titleCol, descCol);

        final VBox vbox = new VBox();
        vbox.setSpacing(5);
        vbox.getChildren().addAll(label, table);
        vbox.setPadding(new Insets(10, 0, 0, 10));

        ((Group) scene.getRoot()).getChildren().addAll(vbox);

        stage.setScene(scene);
        stage.show();
    }
}
In the end, the final application will look something like Figure 18-5.
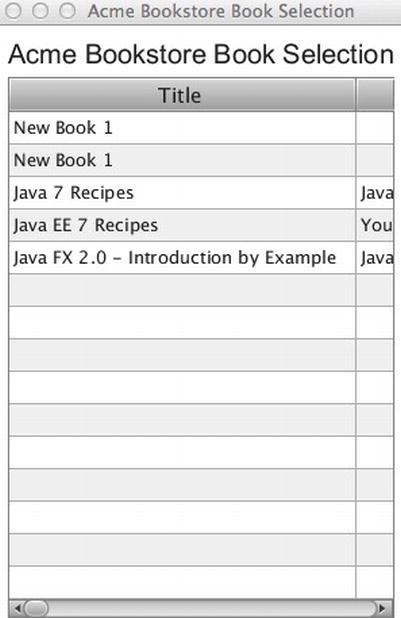
Figure 18-5. Completed JavaFX application with TableView
How It Works
It is easy to incorporate the logic of a Java EE application into a JavaFX application. This recipe demonstrates using EJB technology to retrieve data into a JavaFX TableView. The EJB API can be used to perform database transactions in the same manner within a JavaFX application as is used within a JavaEE web application. In the solution to this recipe, an entity class named Book is used for relational mapping to the underlying BOOK database table. The EJB class, named BookFacade, is then used to work with the Book entity class in the same manner that it would be used in a web application. The main difference occurs in the way that the EntityManager object is created. I will cover these differences, as well as how to integrate the data into a JavaFX node, within this section.
To obtain a connection to the database via an EntityManager, the JavaFX application must include a persistence.xml module. As such, the JavaEERecipesFX project that is included with the book sources has a persistence.xml file located within the src/META-INF directory. The persistence module must be configured to make a local JDBC connection, rather than a connection from an application server JDBC resource. Therefore, the transaction_type attribute of the persistence module should be set to RESOURCE_LOCAL. If you look at the sources within the solution to this recipe, you will see that each entity class that will use the resource is also listed within the persistence module. Provide the properties for making a database connection along with a valid driver for your database to complete the configuration of the module.
The EJB must create an EntityManagerFactory from the persistence module before it can begin to accommodate database requests. To do so, pass the name of the persistence module to the Persistence.createEntityManagerFactory method. After an EntityManagerFactory has been created, an EntityManager object can be obtained by calling the factory’s createEntityManger() method, as demonstrated in the following lines of code:
EntityManagerFactory emf = Persistence.createEntityManagerFactory("JavaEERecipesFXPU");
EntityManager em = emf.createEntityManager();
After the EntityManager object has been created, it can be used to perform operations against the relational database via the entity classes. Since a JavaFX class is written in Java or an alternative JVM language, it can interact directly with an EJB, rather than using a controller class like a managed bean. The idea of a managed bean does not make complete sense when working with a JavaFX application because managed beans are meant for working with the web browser and client sessions. A JavaFX application runs locally on a user’s machine, so there are no browser sessions to be handled. Hence, in the solution to this example, the BookFacade EJB contains methods that allow you to create, update, select, and remove Book entities. That is, these methods will be used to work with database records that reside within the BOOK table via the Book entity class. The findAllBooks() method specifically will be invoked by the JavaFX application in order to retrieve all the records that exist within the BOOK table and display them in a JavaFX TableView node.
How do you populate the TableView? Well, let’s take a look at the code that constructs the GUI, namely, the BookView class. Looking at the class within the solution to this recipe, you can see that it extends the javafx.application.Application abstract class, just as any JavaFX main application class should. Next, an instance of the BookFacade EJB is created, followed by a TableView of Book entities. When the TableView is initially created, it is empty, but it is ready to accept Book entities for each of its rows. To obtain the data from the EJB, an ObservableList<Book> is generated by invoking the FXCollections class observableArrayList method and passing the data that is returned by the BookFacade’s findAllBooks method. The resulting ObservableList<Book> can be used to populate the TableView.
The start method is where the GUI is constructed, and the standard Scene is created first, followed by the configuration of the stage. A Label is constructed, which will be added to the top of the completed JavaFX form. Next, a couple of TableColumn objects are created, one for each column that will be added to the table. When the TableColumn objects are created, a String-based column name is passed into the constructor. After each TableColumn object is created, its cellValueFactory property is set. The cellValueFactory specifies how to populate all cells within a single TableColumn. A cell value factory is a Callback that expects an Observable instance to be returned. Once returned, the instance is observed internally, which will allow the GUI to perform immediate updates on the data. In most cases, a single property from a JavaBean object will be used to populate the cells of a TableColumn. Such is the case when working with entity classes and EJBs, where a single property from an entity will be used. The PropertyValueFactory class can be used to map the JavaBean property with its type and String-based name, as the example demonstrates.
TableColumn titleCol = new TableColumn("Title");
        titleCol.setCellValueFactory(
            new PropertyValueFactory<Book,String>("title")
        );
The previous code creates a TableColumn instance that will use the word Title as the column header. The cellValueFactory is then set to a new PropertyValueFactory, mapping to the title property within the Book entity. Where is the ObservableList<Book> used? After the TableColumn objects have been defined, the TableView setItems method can be invoked, passing the ObservableList<> object to populate the table with data. The TableColumns can then be added to the TableView instance by calling the getColumns().addAll() method and passing each of the TableColumn instances, separated by a comma. The data is now in place.
The final lines of the start method in the solution to this recipe complete the setup of the GUI. A VBox is used to lay out the GUI nicely, and the Label and TableView are added to it. Finally, the VBox layout is added to the scene, which is then added to the stage.
In summary, a JavaFX application can manipulate data using entities and EJBs. The JavaFX classes can make direct calls against the EJB, and in the case of a TableView, the data can be returned into an ObservableList for display purposes.
18-3. Constructing a Sophisticated UI Containing EJB Data
Problem
You have integrated data into your application using JPA; now you want to utilize that data within a sophisticated, multiple-view user interface in your enterprise application.
Solution
A number of different user interface nodes can be used to construct sophisticated user interfaces. One such node is the TabBuilder, which generates a tabbed user interface. In this scenario, a different tab can be generated to contain content to provide various application user interfaces in a single window. In this example, I’ll demonstrate how to incorporate a TableView that contains data in a tabbed user interface.
package org.javaeerecipes.javafx.recipe18_03;

import javafx.application.Application;
import javafx.scene.Scene;
import javafx.scene.SceneBuilder;
import javafx.scene.control.Label;
import javafx.scene.control.LabelBuilder;
import javafx.scene.control.TabBuilder;
import javafx.scene.control.TabPaneBuilder;
import javafx.scene.layout.BorderPaneBuilder;
import javafx.scene.layout.HBoxBuilder;
import javafx.stage.Stage;

public class Main extends Application {

    BookViewNode bookView = null;

    @Override
    public void start(Stage stage) {

       Scene scene = SceneBuilder.create()

      .width(800)
      .height(500)
      .root(
        BorderPaneBuilder.create()
          .top(
            HBoxBuilder.create()
              .children(
                LabelBuilder.create()
                  .id("title")
                  .text("Acme Bookstore")
                  .minHeight(2)
                  .build()
              )
              .build()
          )
          .center(
            TabPaneBuilder.create()
              .tabs(
                TabBuilder.create()
                  .content(new BookViewNode())
                  .text("Book Listing")
                  .closable(false)
                  .build(),
                TabBuilder.create()
                  .text("Other Things")
                  .closable(false)
                  .build()
              )
              .build()
          )
          .bottom(
            HBoxBuilder.create()
              .id("footer")
              .children(
                new Label("Acme Bookstore - Java EE 7 Recipes")")
              )
              .build()
          )
          .build()
      )
      .build();


        stage.setTitle("Acme Bookstore");
        stage.setWidth(1400);
        stage.setHeight(500);
        stage.setScene(scene);
        stage.show();

    }

    public static void main(String[] args) {
        launch(args);
    }
}
![]() Note JavaFX classes use the Builder pattern so that method calls can be chained together. Utilizing this technique, the build method is called at the end in order to construct the class instance.
Note JavaFX classes use the Builder pattern so that method calls can be chained together. Utilizing this technique, the build method is called at the end in order to construct the class instance.
To construct the table, a JavaFX Node object is developed, which contains the TableView implementation. In this implementation, the Node will extend the VBox class, and it will contain references to the EJB named BookFacade, which was introduced in Recipe 18-2. The EJB will be used to obtain the data that will populate the TableView with Book entity titles and descriptions. The following code is that of the Node implementation, a class named BookViewNode:
package org.javaeerecipes.javafx.recipe18_03;

import org.javaeerecipes.javafx.entity.Book;
import org.javaeerecipes.javafx.session.BookFacade;
import javafx.scene.control.cell.PropertyValueFactory;
import javafx.collections.FXCollections;
import javafx.collections.ObservableList;
import javafx.geometry.Insets;
import javafx.scene.control.Label;
import javafx.scene.control.TableColumn;
import javafx.scene.control.TableView;
import javafx.scene.layout.VBox;
import javafx.scene.text.Font;

public final class BookViewNode extends VBox {
    private BookFacade ejbFacade = new BookFacade();

    private TableView<Book> table = new TableView<>();

    private final ObservableList<Book> data =
        FXCollections.observableArrayList(ejbFacade.findAllBooks());

    public BookViewNode(){
        build();
    }


    public void build() {

        final Label label = new Label("Acme Bookstore Book Selection");
        label.setFont(new Font("Arial", 20));

        TableColumn titleCol = new TableColumn("Title");
        titleCol.setCellValueFactory(
            new PropertyValueFactory<Book,String>("title")
        );

        TableColumn descCol = new TableColumn("Description");
        descCol.setCellValueFactory(
            new PropertyValueFactory<Book,String>("description")
        );

        table.setItems(data);

        table.getColumns().addAll(titleCol, descCol);

        }}
        this.setSpacing(5);
        this.getChildren().addAll(label, table);
        this.setPadding(new Insets(10, 0, 0, 10));

    }}

}
When the application is launched, it will render a window containing tabs. The first tab will contain the TableView, whereas the second tab will be empty. The resulting application will look like the one shown in Figure 18-6.
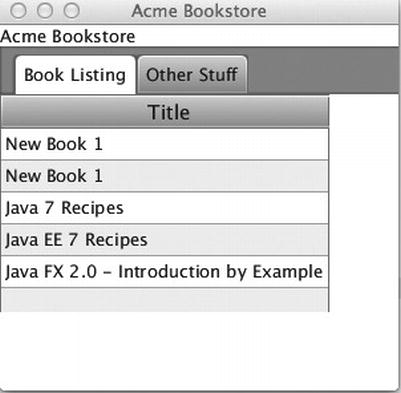
Figure 18-6. TabPane populated with data from EJB
How It Works
One of the most important concepts when developing an application is the user interface. If an application contains a cumbersome interface, its users will not be productive. It has been said that an application’s UI can make or break it. That is why it is imperative that you develop intuitive, easy-to-use applications in which navigating around features is a snap. This recipe demonstrates the use of the TabPane for application layout. The TabPane in the application contains an embedded TableView, which retrieves its data from an enterprise JavaBean.
To get started, let’s take a look at the Main class, which is responsible for the initiation of the application and the overall construction of the GUI. As with any JavaFX main class, this class extends Application. As such, the class also overrides the start() method. The overall GUI, including the TabPane, is assembled inside the start() method, which is automatically invoked when the class is executed. The start() method in this class utilizes the SceneBuilder to create the Scene that will include a tabbed interface with table content. The SceneBuilder, a builder class for Scene objects, assists developers in coding elegant user interfaces. The class in the solution to this example demonstrates the use of the SceneBuilder by creating an entire Scene object using one statement. A series of builders are actually strung together to construct the entire layout. In fact, this example uses the following builders: BorderPaneBuilder, HBoxBuilder, VBoxBuilder, LabelBuilder, TabPaneBuilder, and TabBuilder. Each of the builders is constructed in the same way, by calling the builder class create() method, followed by setting a series of properties for each. To construct each builder, the build() method is called for each. To help you understand the steps that are used to create the GUI, let’s break down the SceneBuilder statement.
- Create a new instance of the SceneBuilder, and set the width and height of the scene.
Scene scene = SceneBuilder.create()

      .width(800)
      .height(500)
.root( - Set the root of the Scene so that it will contain a BorderPane that itself has a top, center, and bottom section. The BorderPane is built using a BorderPaneBuilder.
- Set the BorderPane top property as an HBox using the HBoxBuilder.create() method and then nest a Label inside the HBox that reads Acme Bookstore. In summary, the following code is used to create the top portion of the BorderPane:
BorderPaneBuilder.create()
         .top(
            HBoxBuilder.create()
              .children(
                LabelBuilder.create()
                  .id("title")
                  .text("Acme Bookstore")
                  .minHeight(2)
                  .build()
              )
              .build()
) - Set the BorderPane center property as a TabPane using a TabPaneBuilder. Create two tabs within the TabPaneBuilder tab property, and use the TabBuilder to create the tabs.
- Set the first tab to contain a BookViewNode, which is a custom node that contains the TableView and data for the application. Set the second tab to contain nothing at this point. In summary, the following code is used to create the center portion of the BorderPane:
.center(
            TabPaneBuilder.create()
              .tabs(
                TabBuilder.create()
                  .content(new BookViewNode())
                  .text("Book Listing")
                  .closable(false)
                  .build(),
                TabBuilder.create()
                  .text("Other Things")
                  .closable(false)
                  .build()
              )
              .build()
) - Set the BorderPane bottom property to include an HBox using an HBoxBuilder. The HBox will include a label for the footer of the application window. The following code is used to create the bottom portion of the BorderPane:
      .bottom(
            HBoxBuilder.create()
              .id("footer")
              .children(
                new Label("Acme Bookstore - Java EE 7 Recipes")
              )
              .build()
          )
          .build()
      )
      .build();();
That line of code constructs the UI for the application. The final lines of code within the Main class complete the stage construction by setting the title, proportions, and scene. Finally, the stage is made visible.
Now that I’ve covered the construction of the user interface, I’ll talk about the meat of the application, the BookViewNode class, which is used to construct the TableView that contains the data for one of the tabs. The BookViewNode class extends another Node class, the VBox class. When developing a Node class, the class constructor must call a method that is used to construct the Node. In the solution to this recipe, a method named build() contains the code that builds the VBox content. When a new instance of the BookViewNode class is created, as demonstrated in the TabBuilder, the build() method is called to construct the contents. The contents of this particular VBox are a Label and a TableView. The TableView contains data from an ObservableList<Book> object. The ObservableList<Book> object is generated from a call to the FXCollections.observableArrayList() method, passing the EJB findAllBooks() method. To learn more details regarding the use of the ObservableList and TableView construction, please refer to Recipe 18-2.
JavaFX enterprise applications do not have to contain boring or cumbersome user interfaces. It is quite the contrary really; they should contain intuitive user interfaces that can benefit the user’s productivity. This recipe demonstrated how to take the concept of utilizing EJB data within an enterprise JavaFX application and include it in a sophisticated JavaFX layout. You can apply these concepts to any of the JavaFX layouts to develop customized data-centric applications of your own.
18-4. Developing an Enterprise Application Using MVC
Problem
You want to work with an XML-based UI, rather than coding a user interface with a compiled language (e.g., Java) because you want to separate the business logic of an application user interface from the view code.
Solution
Utilize FXML to develop the user interfaces for your JavaFX application, rather than coding them with a compiled language. The solution to this recipe demonstrates how to construct the user interface using FXML, rather than plain Java code, while using Java to control the actions of the user interface and obtain any data that is used by the application.
The following code demonstrates how to construct the main class of a JavaFX application that utilizes FXML, rather than Java, for constructing a user interface. The org.javaeerecipes.javafx.recipe18_04.Main class loads an FXML file into a Stage object to construct the UI.
package org.javaeerecipes.javafx.recipe18_04;
import javafx.application.Application;
import javafx.fxml.FXMLLoader;
import javafx.scene.Parent;
import javafx.scene.Scene;
import javafx.stage.Stage;

public class Main extends Application {

    @Override
    public void start(Stage stage) throws Exception {
        Parent root = FXMLLoader.load(getClass().getResource("acme_bookstore_main.fxml"));

        stage.setTitle("Acme Bookstore");
        stage.setScene(new Scene(root, 300, 275));
        stage.show();
    }

    /**
     * The main() method is ignored in correctly deployed JavaFX application.
     * main() serves only as fallback in case the application can not be
     * launched through deployment artifacts, e.g., in IDEs with limited FX
     * support. NetBeans ignores main().
     *
     * @param args the command line arguments
     */
    public static void main(String[] args) {
        launch(args);
    }
}
The user interface code is constructed from XML and resides within a file containing the .fxml suffix. In this example, the acme_bookstore_main.fxml file contains the XML that is required for building the user interface. The following XML is contained within the acme_bookstore_main.fxml file and, therefore, is used for the construction of the example. Note that this file utilizes a controller class to separate Java code from the XML. The controller class is set as a controller for the XML <AnchorPane> element, and I will show the code for that class next:
<?xml version="1.0" encoding="UTF-8"?>

<?import java.lang.*?>
<?import java.util.*?>
<?import javafx.scene.control.*?>
<?import javafx.scene.layout.*?>
<?import javafx.scene.paint.*?>

<AnchorPane id="AnchorPane" maxHeight="-Infinity" maxWidth="-Infinity" minHeight="-Infinity"
            minWidth="-Infinity" prefHeight="400.0" prefWidth="800.0"
            fx:controller="org.javaeerecipes.javafx.recipe18_04.AcmeBookstoreMainController"
            xmlns:fx="http://javafx.com/fxml">
  <children>
    <BorderPane prefHeight="399.9999000000025" prefWidth="800.0">
      <center>
        <VBox prefHeight="300.0" prefWidth="600.0">
          <children>
            <Label text="Acme Bookstore" />
            <TabPane prefHeight="200.0" prefWidth="700.0" tabClosingPolicy="UNAVAILABLE">
              <tabs>
                <Tab text="Book Listing">
                  <content>
                    <AnchorPane id="Content" minHeight="0.0" minWidth="0.0" prefHeight="200.0"
                                                            prefWidth="700.0">
                      <children>
                        <TableView fx:id="tableView"/>
                      </children>
                    </AnchorPane>
                  </content>
                </Tab>
                <Tab text="Other Stuff">
                  <content>
                    <AnchorPane id="Content" minHeight="0.0" minWidth="0.0" prefHeight="180.0"
                                                       prefWidth="200.0" />
                  </content>
                </Tab>
              </tabs>
            </TabPane>
          </children>
        </VBox>
      </center>
    </BorderPane>
  </children>
</AnchorPane>
Certain characteristics of the user interface require Java code for pulling in data, and so on. To separate Java from XML, a controller class named org.javaeerecipes.javafx.recipe18_04.AcmeBookstoreMainController is used to contain backing logic for the acme_bookstore_main.fxml user interface. The following code is that of the AcmeBookstoreMainController class:
package org.javaeerecipes.javafx.recipe18_04;

import java.net.URL;
import java.util.ResourceBundle;
import javafx.collections.FXCollections;
import javafx.collections.ObservableList;
import javafx.fxml.FXML;
import javafx.fxml.Initializable;
import javafx.scene.control.TableColumn;
import javafx.scene.control.TableView;
import javafx.scene.control.cell.PropertyValueFactory;
import org.javaeerecipes.javafx.entity.Book;
import org.javaeerecipes.javafx.session.BookFacade;

/**
 * FXML Controller class
 *
 * @author juneau
 */
public class AcmeBookstoreMainController implements Initializable {

    private BookFacade ejbFacade = new BookFacade();

    private ObservableList<Book> data;
    @FXML private TableView<Book> tableView;


    /**
     * Initializes the controller class.
     */
    @Override
    public void initialize(URL url, ResourceBundle rb) {
        setData(FXCollections.observableArrayList(ejbFacade.findAllBooks()));

        TableColumn titleCol = new TableColumn("Title");
        titleCol.setCellValueFactory(
            new PropertyValueFactory<Book,String>("title")
        );

        TableColumn descCol = new TableColumn("Description");
        descCol.setCellValueFactory(
            new PropertyValueFactory<Book,String>("description")
        );


        tableView.setItems(data);

        tableView.getColumns().addAll(titleCol, descCol);
    }

    /**
     * @return the data
     */
    public ObservableList<Book> getData() {
        return data;
    }
    /**
     * @param data the data to set
     */
    public void setData(ObservableList<Book> data) {
        this.data = data;
    }

}
In the end, the demo application contains a TableView, which displays data that is obtained via an EJB. The end result should look like Figure 18-7.

Figure 18-7. JavaFX application utilizing FXML for UI
How It Works
It is a good practice to separate business logic code from the code that is used to make up a user interface. Oftentimes, when business logic is intermixed with view code, it can create a burden for those who have to maintain code at a later time. Clean separation in code makes for easier maintenance and more organized code. The Model-View-Controller (MVC) pattern focuses on the separation of business logic, data models, and view code. JavaFX applications can follow the MVC pattern in a couple of ways. View code can be coded in a compiled language, and it can reside within separate classes than any other classes that contain business logic. Yet an even more organized and cleanly separated solution is to code the user interface or view code in an XML language and then place the business logic into classes that are coded in a compiled language.
JavaFX applications can utilize an XML-based markup language that is referred to as FXML for constructing Java object graphs or user interfaces. FXML looks very similar to JSF code, and it resides within a file that utilizes an .fxml suffix. The FXML file identifies the underlying controller class using the fx:controller attribute, and it contains XML elements that are used to construct the Java object graphs. Objects in the FXML can be controlled by code that is contained within classes that are coded in a JVM language via the controller. The relationship between an FXML file and its controller class is very much the same as the relationship of a JSF view to its managed bean controller. The FXML markup language is extensive, so this recipe will only briefly introduce it, and then it will describe the FXML that is utilized in the solution to this recipe. For more details regarding FXML, please refer to the online documentation, at http://docs.oracle.com/javafx/2/api/javafx/fxml/doc-files/introduction_to_fxml.html, or one of the many great JavaFX 2 books such as JavaFX 2.0: Introduction by Example and Pro JavaFX 2 Platform, both published by Apress.
All FXML documents have the same structure in that they contain two main sections: an import section and the UI section. FXML elements are actually based upon Java classes, and the name of the element corresponds to an underlying Java class name. Therefore, an FXML file can have one or more import declarations, importing those Java classes that are used within the UI. In the solution to this recipe, the FXML contains a handful of import elements that each imports all classes within a specified package. For instance, the import element shown next will import all classes that reside within the java.lang package for use within the context of the FXML document:
<?import java.lang.*?>
That said, to utilize a class within an element, if it’s already imported, then simply specify the class name within the XML element; otherwise, specify the fully qualified class name. The following is an example for utilizing the javafx.scene.control.Label node within the FXML using both of the different syntaxes. Each of them works in the same manner.
<Label text="Acme Bookstore" />
<javafx.scene.control.Label text="Acme Bookstore" />
A single FXML document makes up a single JavaFX view, and each document can be made up of one or more elements. Each of the elements in a document represents one of the following: a class instance, a property of a class instance, a static property, a define block, or a block of script code. The <Label> element demonstrated earlier is an example of a class instance. However, it is possible to define static properties, as well as entire blocks of code, within the FXML language. Doing so is out of the scope of this book, but for more information, please see the documentation; it is highly recommended because FXML can be complex in detail but easy to use.
Going through the FXML document that is utilized in the solution to this recipe, you will see that the code ultimately generates a user interface containing a tab pane, in which one of the tabs contains a TableView control. At the root of the document, an <AnchorPane> is defined; therefore, the <AnchorPane> will embody each of the other nested elements. Each of the attributes of the <AnchorPane> maps to a property of the javafx.scene.layout.AnchorPane class. It is also possible to nest each of the properties within the <AnchorPane> element using separate <property> elements for each. Therefore, rather than utilizing the <AnchorPane> element and then listing each attribute and its associated value within that tag, you could do something like the following:
<AnchorPane>
    <id>Content</id>
    <maxHeight>-Infinity</maxHeight>
...
 </AnchorPane>
One very important attribute of <AnchorPane> is fx:controller. This attribute allows you to specify a controller class that is to be utilized within the context of the given element. Therefore, any element contained inside the element specifying fx:controller may use the given controller class. In the solution to this recipe, the <AnchorPane> specifies org.javaeerecipes.javafx.recipe18_04.AcmeBookstoreMainController; therefore, any elements that are embodied within <AnchorPane> can call upon the AcmeBookstoreMainController. I will get to an example of one such use in a moment when discussing the TableView.
A list of <AnchorPane> children is contained between opening and closing <children> elements. A <BorderPane> instance is instantiated, and inside of that a <VBox> container is created, which embodies the <Label> and <TabPane> nodes. Again, each of the XML element attributes corresponds to a property within the represented Java class. To learn more about each of these nodes and their properties, please see the documentation for each online: http://docs.oracle.com/javafx/2/api/overview-summary.html.
The TableView element within the FXML is different from the others, in that it specifies only one attribute, fx:id. The specification of an attribute that includes a prefix of fx: indicates that this attribute will be obtained from the Java controller class. The controller class source for AcmeBookstoreMainController is listed in the example to this solution. The TableView element specifies fx:id="tableView", which indicates that the tableView property within the controller class will be assigned to the TableView element in the FXML. Looking within the AcmeBookstoreMainController source, a new BookFacade instance is instantiated in the first line; this is the EJB that is responsible for database access. After that, the ObservableList is declared, followed by the TableView. Within the initialize() method, the data is obtained and placed into the ObservableList, as described previously. Following the data retrieval, the TableView and its columns are set up, just like in the previous recipes in this chapter.
![]() Note For this solution, it is also possible to utilize a visual tool to construct the FXML UI. The Scene Builder from Oracle is a great way to utilize a “what you see is what you get” (WYSIWYG) environment for creating your JavaFX FXML user interfaces. The Scene Builder application is beyond the scope of this recipe, but if you are interested in hassle-free visual FXML generation, visit www.oracle.com/technetwork/java/javafx/tools/index.html to learn more.
Note For this solution, it is also possible to utilize a visual tool to construct the FXML UI. The Scene Builder from Oracle is a great way to utilize a “what you see is what you get” (WYSIWYG) environment for creating your JavaFX FXML user interfaces. The Scene Builder application is beyond the scope of this recipe, but if you are interested in hassle-free visual FXML generation, visit www.oracle.com/technetwork/java/javafx/tools/index.html to learn more.
18-5. Incorporating REST Services into JavaFX Applications
Problem
You want to use some Representational State Transfer (REST) web services from a JavaFX application.
Solution
Develop a JAX-RS client solution within a JavaFX application, and utilize a JavaFX control to display the results. In this example, a simple REST web service that was created in Chapter 15 will be called upon from the JavaFX client, and its message will be displayed via a JavaFX <Label> node.
The following class source is that of the main class for the JavaFX application. It sets the stage and loads the necessary FXML for creating the user interface.
package org.javaeerecipes.javafx.recipe18_05;

import javafx.application.Application;
import javafx.fxml.FXMLLoader;
import javafx.scene.Parent;
import javafx.scene.Scene;
import javafx.stage.Stage;

public class Main extends Application {

    @Override
    public void start(Stage stage) throws Exception {
        Parent root = FXMLLoader.load(getClass().getResource("acme_bookstore_rest.fxml"));

        stage.setTitle("Acme Bookstore");
        stage.setScene(new Scene(root, 300, 275));
        stage.show();
    }

    /**
     * The main() method is ignored in correctly deployed JavaFX application.
     * main() serves only as fallback in case the application can not be
     * launched through deployment artifacts, e.g., in IDEs with limited FX
     * support. NetBeans ignores main().
     *
     * @param args the command line arguments
     */
    public static void main(String[] args) {
        launch(args);
    }
}
Next, let’s take a look at the source for the class that generates the web service client, which is responsible for retrieving the REST service content.
package org.javaeerecipes.javafx.recipe18_05;

import com.sun.jersey.api.client.Client;
import com.sun.jersey.api.client.ClientResponse;
import com.sun.jersey.api.client.WebResource;
import java.io.IOException;
import java.net.MalformedURLException;
import javafx.beans.property.SimpleStringProperty;
import javafx.beans.property.StringProperty;
import javafx.concurrent.Service;
import javafx.concurrent.Task;
import javax.ws.rs.core.MediaType;

/**
 * Service class that is used to retrieve web service data and return
 * @author juneau
 */
public class RestClientService extends Service<String> {

    private StringProperty url = new SimpleStringProperty();

    public final void setUrl(String value) {
        url.set(value);
    }

    public final String getUrl() {
        return url.get();
    }

    public final StringProperty urlProp() {
        return url;
    }

    protected Task<String> createTask() {

        return new Task<String>() {
            protected String call()
                    throws IOException, MalformedURLException {
                String result = obtainData();
                return result;
            }

        };
    }

    private String obtainData() {
        String restString = null;
        try {

            Client client = Client.create();

            WebResource webResource = client
                    .resource("http://localhost:8080/JavaEERecipes/rest/simplerest/");

            ClientResponse response = webResource.accept(MediaType.TEXT_PLAIN)
                    .get(ClientResponse.class);

            if (response.getStatus() != 200) {
                throw new RuntimeException("Failed : HTTP error code : "
                        + response.getStatus());
            }
            restString = response.getEntity(String.class);

        } catch (Exception e) {

            e.printStackTrace();

        }
        return restString;
    }
}
The FXML that constructs the user interface is the next source you will look at. The following code is taken from the acme_bookstore_rest.fxml document, and it is responsible for adding various JavaFX nodes to construct the UI for the application.
<?xml version="1.0" encoding="UTF-8"?>

<?import java.lang.*?>
<?import java.util.*?>
<?import javafx.scene.control.*?>
<?import javafx.scene.layout.*?>
<?import javafx.scene.paint.*?>

<AnchorPane id="AnchorPane" maxHeight="-Infinity" maxWidth="-Infinity" minHeight="-Infinity" minWidth="-Infinity" prefHeight="69.0" prefWidth="800.0" xmlns:fx="http://javafx.com/fxml" fx:controller="org.javaeerecipes.javafx.recipe18_05.RESTfulClientController">
  <children>
    <BorderPane prefHeight="69.0" prefWidth="661.0">
      <bottom>
        <Label text="JavaFX Rest Sample" />
      </bottom>
      <center>
        <VBox prefHeight="190.0" prefWidth="800.0">
          <children>
            <Label fx:id="clientLabel" text="Acme Bookstore" />
            <Button mnemonicParsing="false" onAction="#obtainRestText" text="Get REST Text" />
          </children>
        </VBox>
      </center>
    </BorderPane>
  </children>
</AnchorPane>
Finally, you have the controller class that is responsible for all the business logic that is contained within the FXML document. The following sources for the RESTFulCientController are those that back the nodes contained within the FXML sources for this application:
package org.javaeerecipes.javafx.recipe18_05;

import java.net.URL;
import java.util.ResourceBundle;
import javafx.concurrent.WorkerStateEvent;
import javafx.event.EventHandler;
import javafx.fxml.FXML;
import javafx.fxml.Initializable;
import javafx.scene.control.Label;

/**
 * Controller class for acme_bookstore_rest.fxml
 * @author juneau
 */
public class RESTfulClientController implements Initializable {

    @FXML private Label clientLabel;

    private String restString;


    /**
     * Initializes the controller class.
     */
    @Override
    public void initialize(URL url, ResourceBundle rb) {
        // Instantiate the service class
        RestClientService serv = new RestClientService();

        serv.setOnSucceeded(new EventHandler<WorkerStateEvent>() {
            @Override
            public void handle(WorkerStateEvent workerEv) {
                restString =  workerEv.getSource().getValue().toString();

            }
        });
        serv.start();
    }

    @FXML
    private void obtainRestText(){
        clientLabel.setText(restString);
    }

}
In the end, the application displays a simple message from the web service. However, this solution can be exploited to take advantage of powerful solutions offered via JAX-RS and REST services.
How It Works
Building a JavaFX web service client is quite easy, given that you can utilize Java code (or any compiled language for that matter) right alongside the code that is used to develop the user interface. Mixing together the ability to construct complex REST clients with the ease of constructing a user interface provides a powerful combination. The solution to this recipe demonstrates how to utilize a basic REST web service within a very simple JavaFX application. However, these concepts could be built upon to develop advanced interfaces for displaying real-time information that is obtained from web services.
The first source that is contained within the solution demonstrates how to code the main application class. The Main class is not unlike any other JavaFX application’s main, because it extends the javafx.application.Application class and then builds the Stage. The Main class overrides the start() method, which is the invocation point for any JavaFX application. Within the start method, the class loads the FXML file that is used for constructing the user interface via the FXMLLoader utility to obtain the user interface. The stage is then prepared and displayed. The real meat of this example takes place when the FXML file, named acme_bookstore_rest.fxml, is invoked. Invoking the user interface causes the FXML controller class to be instantiated, which in turn starts the web service client. Investigating the FXML, you find that it is bound to a controller class named org.javaeerecipes.javafx.recipe18_05.RESTfulClientController. The UI is very simplistic in that it contains only a couple of labels and a button. Looking closely at the Label and Button nodes that are embodied within the VBox layout, you can see that the Label is bound to a controller property named clientLabel and that the button action is bound to a controller method named obtainRestText. Note that in order to invoke a controller method from FXML, the pound character (#) must be placed before the name of the method that needs to be invoked. Now that you’ve investigated the FXML, let’s dig into the controller class.
When the controller class initialize method is invoked, a RestClientService instance is created. The purpose of the RestClientService class is to initiate the web service client, obtaining data from a remote REST service. The RestClientService class is not a typical class; rather, it is specifically designed to run a service because it implements the Service<String> class. The purpose of the Service class is to help developers implement background thread interaction with the JavaFX application thread. Much like in Swing, where all tasks are completed on the event dispatch thread, the JavaFX application thread must handle all tasks for a JavaFX application. However, performing time-consuming tasks such as querying a database and working with a web service can sometimes cause a JavaFX application to stall, making for a bad user experience. You want to get these time-consuming tasks off the main JavaFX application thread so that they can run asynchronously, without slowing down the UI. Therefore, to add multithreaded concurrency to the application, you can complete such time-consuming work using a background Task object. A Service class can handle the interaction of one or more background Task objects with the JavaFX application thread. To utilize this technique, abstract the time-consuming process into its own class, such as how the RestClientService tasks have been. The class should extend the Service<String> class, and it should contain a method named createTask, which returns a Task<String> object. The time-consuming task should be placed within the body of the createTask method. Since this is where the real work occurs, let’s break the createTask method down a bit. Line by line, the method does the following:
- The method instantiates a new Task<String> object, which it will return to the caller.
- Within the new Task<String> object, a call() method is created, which returns a String and throws an IOException and a MalformedURLException.
- Inside the call() method, a method named obtainData is invoked, which performs the real web-service interaction.
The obtainData method is responsible for calling upon the REST service and obtaining data. The Jersey open source JAX-RS implementation is used to retrieve the data from the REST service. The client work is performed by creating a com.sun.jersey.api.client.Client object, calling its resource method, and then passing the URL to the REST service that is being utilized by the client. The resource method returns a com.sun.jersey.api.client.WebResource object. This object can then be used to obtain a com.sun.jersey.api.client.ClientResource object by calling its accept method, followed by a chained call to the get method. When invoking the accept method, the type of response you want to receive needs to be passed. In the case of this solution, you are expecting to receive a MediaType.TEXT_PLAIN response. In this example, the call to the accept method is followed by a call to the WebResource.Builder get method, passing the ClientResponse.class. Next, the response is checked to see whether it was successful, and if not, then a RuntimeException is thrown. Lastly, if a response was received, then the resource.getEntity() method is called, passing the class for the type of response that is expected. Since a String response is expected in the example, the call to resource.getEntity(String.class) is made.
Since this implementation resides within the RestClientService class, it can be run as a background task. The calling class has great control over the background task because it can start, cancel, and pause a background task by simply invoking the requisite methods. The RestClientService call takes place within the controller class for the FXML document, that is, within the RESTfulClientController class. Since this is a controller class, it implements Initializable and contains a method named initialize, which is where the work takes place. Inside the initialize method, the RestClientService instance is created, and its setOnSucceeded property is set to a new EventHandler<WorkerStateEvent> object. This basically allows you to call the long-running task, perform it in the background, and, finally, return the response into a local variable. The EventHandler<WorkerStateEvent> is an inner class that contains a method named handle. The handle method is automatically called once the service has successfully completed, and its implementation assigns the local restString field to the results returned from the REST service client. The last line of the initialize method starts the service by calling the service class start method.
Looking at the FXML for the UI, the Button element is bound to a method in the controller named obtainRestText. When the button is clicked, this method is invoked because it is accessible to the FXML since it is annotated with @FXML. All the method does is set the clientLabel field equal to the result from calling the web service, which is the restString. The clientLabel field is a javafx.scene.control.Label, and it is bound to the Label element in the FXML document. When the button is clicked, the value of the label is set to the String returned by the web service, which in turn updates the user interface to display that result.