
Chapter 5
Using Colors and Gradients
• Creating mixed colors
• Applying colors to shapes
• Using gradients
In this chapter you explore more deeply the powerful coloring and gradient tools available to you in JavaFX. In Chapter 4 you learned how to apply some basic, pre-created colors to shapes. In this chapter you learn how to mix your own colors, and you apply these colors to shapes and use them in gradients.
Using Color
The Color class is a very powerful class. In the last chapter you used a very small part of the Color class to fill a Line node with a solid color. You used just one or two of the 148 predefined colors of the Color class. This is a small sample of what the Color class is capable of.
The Color class can be used four different ways, each providing a capable method for creating the colors you need for any situation. You can invoke the Color class to use predefined colors, RGB values, HSB values, or web hex values.
In the next section you learn more about the predefined colors available to you. In the sections that follow you learn about the other color methods.
Predefined Colors
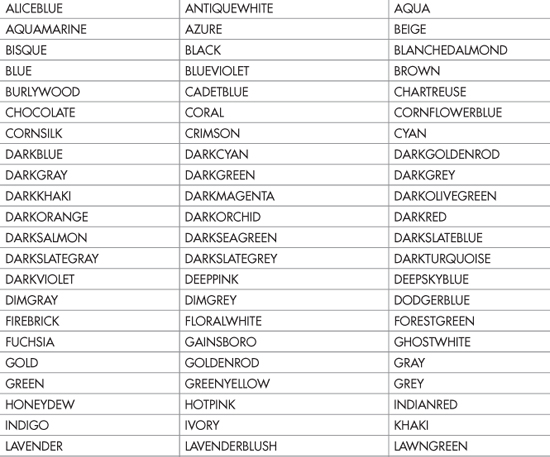
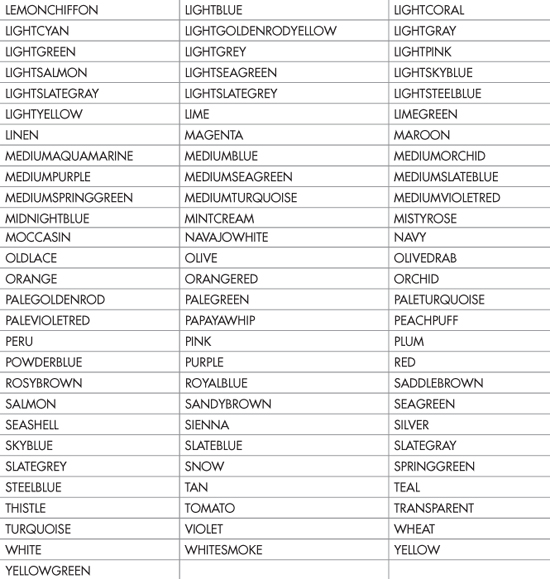
The Color class, as contained in the javafx.scene.paint.Color package, has a number of predefined colors you can use instantly in the attributes of your nodes. In the previous chapter you used a predefined color (Color.TOMATO) to fill a line. In fact, all shapes use the Color.BLACK predefined color as the fill. The Color class provides the following predefined colors:
A predefined color is accessed as a constant of the Color class. For example, in the Color class, the constant BLUE is associated with the values needed to create the blue color. Let’s take a look at the following line of code (which is associated with a shape):
fill: Color.BLUE;
When you assign the fill attribute a value of Color.BLUE, the Color class passes along the values needed to create a blue color.
The Color class does offer a vast array of predefined colors to use in your scripts. But what if one of the predefined colors does not quite fit what you need? Fear not—the Color class has an even more powerful set of methods for rendering almost any color you could possibly need.
In the next section you learn about the methods available in the Color class for creating colors that are not predefined.
Mixing Colors
If you have looked at the predefined colors but cannot find the exact one you need, you can always mix or specify your own color. The Color class would be a very limited tool if you could only use predefined colors without the ability to customize them.
For this reason, the Color class has three very useful methods for mixing your own colors:
Color.rgb();
Color.hsb();
Color.web();
You will learn about each of these methods and how to use them in the following sections.
Color.rgb
The Color class allows you to use the RGB (Red, Green, Blue) value of the color you want to create. Most colors are mixed as a composite of differing amounts of red, green, and blue. The amounts of red, green, and blue used to create a color are defined using a value from 0 to 255 (0 being none of that color, 255 being a full amount of the specified color). The following code will fill the interior of a rectangle with purple:
Rectangle {
            x : 10;
            y : 10;
            width : 150;
            height : 150;
            fill: Color.rgb(255,0,255);
        }
In this method call to the Color class, you specify an RGB value of 255 red, 0 green, and 255 blue. This produces a purple color. However, try the following code and see what you get:
Rectangle {
             x : 10;
             y : 10;
             width : 150;
             height : 150;
             fill: Color{
                   red:1;
                   green:0;
                   blue:1}
       }
This code also produces a rectangle that is filled with purple. The default constructor for the Color class also accepts RGB values to create a color. So what is the difference? The end result is the same either way: You are left with purple as the color. The difference is that the default constructor for the Color class accepts values for red, green, and blue as a float from 0 to 1. Keep in mind that the rgb method of the Color class accepts values from 0 to 255.
Color.hsb
The Color class also has a method for HSB (Hue, Saturation, Brightness) colors. In the HSB color model, the color or hue is represented by a number from 0 to 360. This number corresponds to one of the 360 degrees of a color wheel.
The saturation and brightness attributes are represented by a number from 0 to 1. A value of 0 is no saturation and no brightness, whereas a value of 1 is full saturation and full brightness. To create the same purple color you just created with the rgb method, use the following code:
Rectangle {
            x : 10;
            y : 10;
            width : 150;
            height : 150;
            fill: Color.hsb(300,1,1);
        }
Color.web
Finally, the Color class can also use a web color hex value to create a color for you. The web method of the Color class accepts a standard hex value. Here’s an example:
Rectangle {
            x : 10;
            y : 10;
            width : 150;
            height : 150;
            fill: Color.web("#FF00FF");
        }
The alpha Attribute
One last attribute of the Color class that you should take note of is the alpha attribute. Every method of the Color class has an optional alpha attribute. The alpha value controls the opacity of the color being created. The alpha is a value between 0 and 1, where 0 is transparent and 1 is opaque. The alpha value can be added to any of the methods of the Color class.
By setting the bit to a 0, you will achieve a full transparency.
Rectangle {
            x : 10;
            y : 10;
            width : 150;
            height : 150;
            fill: Color.web("#FF00FF",0);
        }
In contrast to the full transparency of 0, you can set the bit to 1 for a fully opaque color.
Rectangle {
            x : 10;
            y : 10;
            width : 150;
            height : 150;
            fill: Color.web("#FF00FF",1);
        }
Finally, setting the bit to .5 will give you a half transparency.
Rectangle {
            x : 10;
            y : 10;
            width : 150;
            height : 150;
            fill: Color.web("#FF00FF",.5);
        }
In the next section you learn how to create and use gradients. Gradients provide a creative and eye-catching way to fill your shapes.
Using Gradients
You can use two kinds of gradients to fill your shapes: LinearGradients and RadialGradients. LinearGradients are gradients that fill in a straight line from one side of a shape to the opposite side. RadialGradients start the gradient at one point, and the gradient radiates out from that point to fill the shape.
In the section that follows you learn how to apply a LinearGradient to a rectangle.
LinearGradients
The LinearGradient class is contained in the javafx.scene.paint.LinearGradient package. Before you can work with LinearGradients, you must import this package:
import javafx.scene.paint.LinearGradient;
You need to learn about six parameters for the LinearGradient class before you can properly fill a shape with a gradient. The first is the proportional parameter, which accepts a Boolean value and determines how the remaining parameters are treated by the class. If the proportional value is set to true, the gradient fills the shape along a width that you specify. If the proportional value is set to false, you will need to explicitly set the beginning and end points for the gradient within your shape. This concept will make more sense as you move on.
NOTE
If you do not specify a value for proportional, it will be set to true by default.
The next four parameters are startX, startY, endX, and endY. If proportional is set to true, these parameters should have a value between 0 and 1. On the x axis, 0 is the left side of your shape and 1 is the right side of your shape. On the y axis, 0 is the top of your shape and 1 is the bottom of your shape.
If proportional is set to true, the start and end parameters represent absolute points where the gradient should begin and end.
The final parameter is the stops parameter, which holds an array of colors that will be used in the gradient. This is a very versatile aspect of JavaFX: Gradients can be made with more than two colors. Each color you add to the gradient is composed of a Color class and an offset attribute. The offset is a number between 0 and 1 that determines where in the gradient the color is placed.
If your head is just about spinning right now, don’t feel bad. LinearGradients will make much more sense when you see the code in action. Take a look at the following code.
NOTE
Add the following import statement to your script javafx.scene.paint.Stop.
Rectangle {
            x : 10;
            y : 10;
            width : 150;
            height : 150;
            fill: LinearGradient {
                 startX: 0.0;
                 startY: 0.0;
                 endX: 1.0;
                 endY: 0.0;
                 proportional: true;
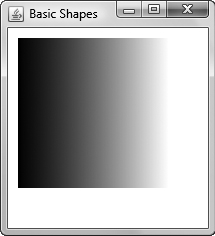
Figure 5-1 A proportionally true, two-color LinearGradient
                stops: [
                     Stop {
                        color: Color.BLACK,
                        offset: 0.0
                    },
                     Stop {
                         color: Color.WHITE,
                         offset: 1
                    }
                ]
            }
        }
The preceding code creates a LinearGradient as shown in Figure 5-1. This is a fairly standard two-color gradient.
The stops attribute accepts an array of colors. This means you can add as many colors as you want to the gradient. The following code creates the three-color LinearGradient shown in Figure 5-2:
Rectangle {
             x : 10;
             y : 10;
             width : 150;
             height : 150;
             fill: LinearGradient {
                 startX: 0,
                 startY: 0,
                 endX: 1,
                 endY: 0.0,
                 proportional: true,
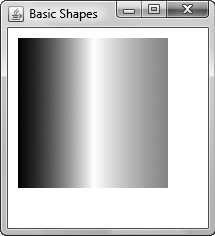
Figure 5-2 A three-color LinearGradient
                stops: [
                     Stop {
                         color: Color.BLACK,
                         offset: 0.0
                    },
                     Stop {
                         color: Color.WHITE,
                         offset: .5
                     }
                     Stop {
                        color: Color.TOMATO,
                        offset: 1
                     }
                ]
            }
        }
Notice how the value of the offset attribute changed to accommodate the three-color LinearGradient. When the gradient was composed of two colors, the offsets were 0 and 1. To place a third color exactly between the other two, an offset of .5 needed to be assigned. An offset higher than .5 would have placed the white closer to the right, whereas a value lower than .5 would have put it closer to the left.
By changing the start and end points along the y axis, you can tilt the gradient as shown in Figure 5-3.
In the next section you learn how to create and use a RadialGradient.
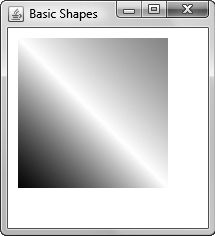
Figure 5-3 A three-color skewed LinearGradient
RadialGradients
RadialGradients are gradient that, instead of emanating from one side, radiate out from a central point. Whereas LinearGradients work well with rectilinear shapes, RadialGradients work best on circles and ellipses. RadialGradients are in the javafx.scene.paint.RadialGradient package. You can import this package into your script using the following statement:
import javafx.scene.paint.RadialGradient;
import javafx.scene.shape.Circle;
Because a RadialGradient emanates out from a center point in a circular pattern, you must define a center point and radius. The center point and radius create a circle for the first color of the RadialGradient. The color will then fill the host shape while diffusing into the second color.
The RadialGradient class, like the LinearGradient class, also accepts an array of stops to produce gradients of more than two colors. The following code produces the gradient shown in Figure 5-4:
Circle {
            centerX: 100;
            centerY: 100;
            radius: 70;
            fill: RadialGradient {
                centerX: 5,
                centerY: 5,
                focusX: 0.1,
                focusY: 0.1,
                radius: 8,
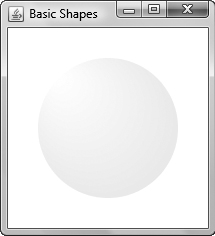
Figure 5-4 A RadialGradient in a circle
                stops: [
                     Stop {
                         color: Color.WHITE,
                         offset: 0.0
                     },
                     Stop {
                         color: Color.BLACK,
                         offset: 1.0
                     },
                ]
            }
        }
Try This Create a Custom Gradient
Using the skills you learned in Chapter 4, create a new Scene with multiple shapes on it. Once your shapes are in place, use the stills you learned in this chapter to add a different gradient to each one. Change the gradient by mixing different colors on each shape. This is a great way to practice multiple techniques and get instant results.
In this chapter you learned how to create colors, make gradients, and apply them to shapes. LinearGradients and RadialGradients provide an easy way to add visual interest to your shapes.
In the next chapter you will learn how to use images in your applications.
 Chapter 5 Self Test
1. How many predefined colors are available in the Color class?
2. What are the three methods available in the Color class for mixing colors?
3. True or false? RGB stands for refraction, gradient, and blur.
4. What is the acceptable value range for Hue?
5. In what package is the code for LinearGradients?
6. What is the default value for the proportional parameter?
7. What is the acceptable value for startX when proportional is set to true?
8. True or false? The stops parameter tells the gradient what point to stop on.
9. True or false? Gradients can be composed of more than two colors.
10. Which gradient is best for curvilinear shapes?