26. Modifying DOM Elements
In This Chapter
• Understand how JavaScript can be used to modify the DOM
• Meet the HTML Element
• Learn how to modify attributes
At this point, you kinda sorta know what the DOM is. You also saw how to find elements using querySelector and querySelectorAll. What’s next is for us to learn how to modify the DOM elements you found:
After all, what’s the fun in having a giant lump of clay (or cookie dough) if we can’t put our hands on it and make a giant mess? Anyway, besides it being fun and all, we will find ourselves modifying the DOM all the time. Whether we are using JavaScript to change some element’s text, swap out an image with a different one, move an element from one part of your document to another, set an inline style, or perform any of the bazillion other changes we will want to do, we will be modifying the DOM. This tutorial will teach you the basics of how to go about doing that.
Onward!
DOM Elements Are Objects—Sort of!
Our ability to use JavaScript to modify what gets shown by the browser is made possible because of one major detail. That detail is that every HTML tag, style rule, and other things that go into your page has some sort of a representation in the DOM.
To visualize what I just said, let’s say we have an image element defined in markup:
<img src="images/lol_panda.png" alt="Sneezing Panda!" width="250"
height="100"/>
When our browser parses the document and hits this image element, it creates a node in the DOM that represents it as shown in Figure 26.1.

FIGURE 26.1
All of our HTML elements will eventually end up having a DOM representation.
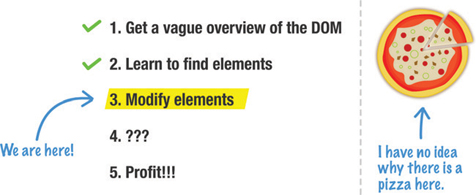
This DOM representation provides us with the ability to do everything we could have done in markup. As it turns out, this DOM representation actually ends up allowing us to do more with our HTML elements than we could have done using just plain old markup itself. This is something we’ll see a little bit of here and a whole lot of in the future. The reason why our HTML elements are so versatile when viewed via the DOM is because they share a lot of similarities with plain JavaScript objects. Our DOM elements contain properties that allow us to get/set values and call methods. They have a form of inheritance that we saw a little bit about earlier where the functionality each DOM element provides is spread out across the Node, Element, and HTMLElement base types, as seen again in Figure 26.2.
FIGURE 26.2
The hierarchy of the visual elements we'll typically encounter in the HTML.
DOM elements probably even smell like an Object when they run inside the house after rolling around in the rain for a bit.
Despite all of the similarities, for legal and...possibly health reasons, I need to provide the following disclaimer: the DOM was never designed to mimic the way Objects work. Many of the things we can do with objects we can certainly do with the DOM, but that is because the browser vendors help ensure that. The W3C specifications don’t state that our DOM should behave identically to how we may expect things to behave with plain old Objects. While I wouldn’t lose any sleep worrying about this, if you ever decide to extend DOM elements or perform more advanced object-related gymnastics, be sure to test across all browsers just to make sure everything works the way you intended.
Now that we got this awkward conversation out of the way, let’s start to actually modify the DOM.
Let’s Actually Modify DOM Elements
While we can certainly lean back and passively learn all there is about how to modify elements in the DOM, this is one of those cases where you may have more fun following along with a simple example. If you are interested in following along, we’ll be using the following HTML as a sandbox for the techniques we will be covering:
<!DOCTYPE html>
<html>

<head>
  <title>Hello...</title>

  <style>
    .highlight {
      font-family: "Arial";
      padding: 30px;
    }

    .summer {
      font-size: 64px;
      color: #0099FF;
    }
  </style>

</head>

<body>

  <h1 id="bigMessage" class="highlight summer">What's happening?</h1>

  <script>

  </script>
</body>

</html>
Just put all of that into an HTML document and follow along. If you preview this HTML in the browser, you will see something that looks like Figure 26.3.
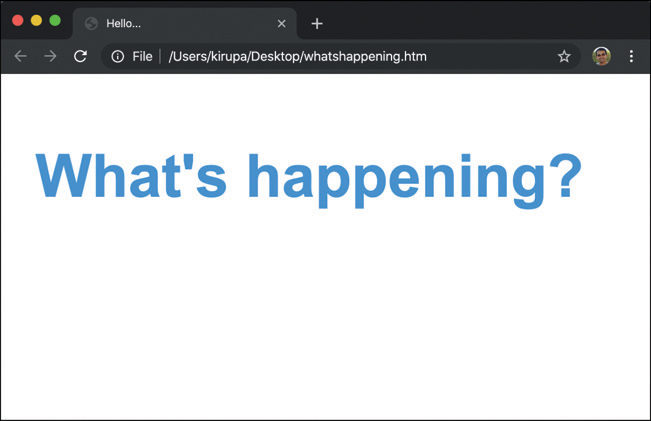
FIGURE 26.3
What’s happening?
There isn’t really a whole lot going on here. The main piece of content is the h1 tag that displays the What’s happening? text:
<h1 id="bigMessage" class="highlight summer">What's happening?</h1>
Now, switching over to the DOM side of things, Figure 26.4 illustrates what this example looks like with all of the HTML elements and nodes like document and window mapped.

FIGURE 26.4
What our DOM structure for our example looks like.
In the following sections, we’ll look at some of the common things you can do in terms of modifying a DOM element.
Changing an Element’s Text Value
Let’s start off with an easy one. Many HTML elements have the ability to display some text. Examples of such elements are our headings, paragraphs, sections, inputs, buttons, and many more. There is one thing they all have in common. The way you modify the text value is by setting the textContent property.
Let’s say we want to change the text that appears in the h1 element from our example. The following snippet shows what that would look like:
<body>

  <h1 id="bigMessage" class="highlight summer">What's happening?</h1>
  <script>
    let headingElement = document.querySelector("#bigMessage");
    headingElement.textContent = "Oppa Gangnam Style!";
  </script>
</body>
If you make this change and preview in the browser, you will see what is shown in Figure 26.5.

FIGURE 26.5
Changing a heading’s text value.
Let’s look at what exactly we did to cause this change. The first step to modifying any HTML element in JavaScript is to first get a reference to it:
let headingElement = document.querySelector("#bigMessage");
Here is where our old friends querySelector and querySelectorAll come in. As we will see later, we also have indirect ways of referencing an element. The direct approach shown here, though, is what we will use when you have a very specific idea of what element or elements you wish to target.
Once we have the reference to the element, we can just set the textContent property on it:
headingElement.textContent = "Oppa Gangnam Style!";
The textContent property can be read like any variable to show the current value. We can also set the property like we are here to change the value that is stored currently. After this line has run, our markup’s original value of What’s happening? will be replaced in the DOM by what we specified in JavaScript.
Attribute Values
One of the primary ways our HTML elements distinguish themselves is through their attributes and the values these attributes store. For example, the src and alt attributes are what distinguish the following three image elements:
<img src="images/lol_panda.png" alt="Sneezing Panda!"/>
<img src="images/cat_cardboard.png" alt="Cat sliding into box!"/>
<img src="images/dog_tail.png" alt="Dog chasing its tail!"/>
Every HTML attribute (including custom data-* ones) can be accessed via the properties the DOM provides. To help us deal with attributes, our elements expose the somewhat self-explanatory getAttribute and setAttribute methods.
The getAttribute method allows us to specify the name of an attribute on the element it is living on. If the attribute is found, this method will then return the value associated with that attribute. Below is an example:
<body>
  <h1 id="bigMessage" class="highlight summer">What's happening?</h1>

  <script>
    let headingElement = document.querySelector("h1");
    console.log(headingElement.getAttribute("id")); // bigMessage
  </script>
</body>
In this snippet, notice that we are getting the value of the id attribute on our h1 element. If we specify an attribute name that doesn’t exist, we will get a nice value of null. The opposite of getting the value of an attribute is to actually set the value. To set the value, we would use the appropriately named setAttribute method. We use this method by calling setAttribute on the element that we want to affect and specifying both the attribute name as well as the value that attribute will store.
Here is an example of setAttribute at work:
<body>
  <h1 id="bigMessage" class="highlight summer">What's happening?</h1>

  <script>
    let headingElement = document.querySelector("h1");
    headingElement.setAttribute("class", "bar foo");
  </script>
</body>
We are setting (well...overwriting actually!) the class attribute on our h1 element to bar foo. The setAttribute function doesn’t do any validation to ensure that the attribute we are setting is valid for the element we are setting it on. Nothing prevents us from doing something silly as follows:
<body>
  <h1 id="bigMessage" class="highlight summer">What's happening?</h1>

  <script>
    let headingElement = document.querySelector("h1");
    headingElement.setAttribute("src", "http://www.kirupa.com");
  </script>
</body>
Our h1 element doesn’t contain a src attribute, but we can get away with specifying it. When our code runs, our h1 element will even sport the src attribute...probably very uncomfortably.
There is something I need to clarify before we move on. In the examples for how to use setAttribute and getAttribute, I picked on id and class. For these two attributes, we do have another way of setting them. Because of how common setting id and class attributes are, our HTML elements expose the id and className properties directly:
<body>
  <h1 id="bigMessage" class="highlight summer">What's happening?</h1>

  <script>
    let headingElement = document.querySelector("h1");
    console.log(headingElement.id); // bigMessage

    headingElement.className = "bar foo";
  </script>
</body>
Getting back to our example, notice that I switched from using getAttribute and setAttribute to using the id and className properties instead. The end result is identical. The only difference is that you had a direct way of setting these attribute values without having to use getAttribute or setAttribute. Now, before we go further, I have to call this strange thing out: yes...we can’t use class in JavaScript for referring to the class attribute because class has a whole different meaning that has to do with dealing with objects. That’s why we are using className instead.
 Tip
Tip
There is a much better way of setting class values besides using className. That way is via the much more awesome classList property that you will learn all about in the next chapter.
The Absolute Minimum
It may seem a bit odd to end our discussion around modifying DOM elements at this point. While changing an element’s text and attribute values is very popular, they are by no means the only major kinds of modifications you will perform. The reason for ending at this cliffhanger is because manipulating the DOM and using an element’s properties and methods to accomplish our task is central to everything we are going to be seeing. In subsequent chapters, you are going to see a whole lot more of what you’ve seen here.
Your main takeaway from this chapter is that the DOM changes you perform will almost always take one of the following two forms:
Setting a property
Calling a method
The textContent, setAttribute, and getAttribute methods you saw here cover both of those approaches, and you’ll see a lot more of them and their friends shortly.
This is a pretty heavy topic! If you have any questions, don’t delay getting an answer. Post on the forums at https://forum.kirupa.com ASAP.