5. Illustrating Your Presentation
The text on your slides will usually carry the weight of your presentation, but the content can be greatly enhanced by the look of your slideshow. Much of that look is provided by the theme you select for your presentation. But graphics on the slide can also add zing to a professional-looking presentation, and often they contribute a significant part of the content of the presentation, as well.
In this chapter, you’ll learn how to use Keynote—with the help of other graphics apps—to add and enhance graphics for your slides.
Placing Images and Videos
The graphics on your slides will be one of two types: imported graphics, which include photographs and drawings from other graphic programs; and shapes, which are simple vector graphics that you can create within Keynote (more about shapes later in this chapter.)
Most presentations use photographs and clip art as illustrations, and three of Keynote’s slide layouts (Title, Subtitle, & Photo, Title, Bullets, & Photo, and Photo) have photo placeholders that are ready to accept graphics from the iPad’s Photo Library ![]() . The nice thing about using placeholders is that the photo drops into the placeholder, which acts as a window onto the photo, masking off parts of the photo you may not want to see. You can edit the mask, moving and scaling the photo under the mask (see Masking Images, later in this chapter).
. The nice thing about using placeholders is that the photo drops into the placeholder, which acts as a window onto the photo, masking off parts of the photo you may not want to see. You can edit the mask, moving and scaling the photo under the mask (see Masking Images, later in this chapter).
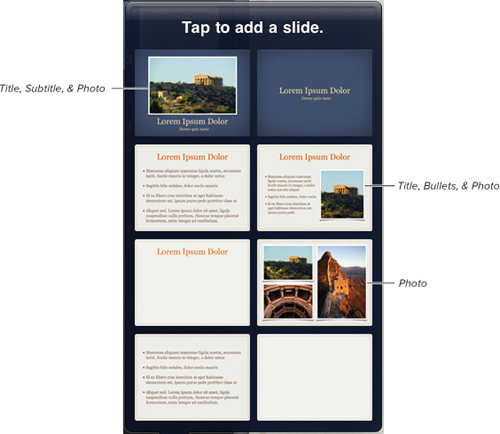
![]() Only three of Keynote’s slide layouts come with photo placeholders.
Only three of Keynote’s slide layouts come with photo placeholders.
You can also place images and videos from the Photo Library on slides without using a photo placeholder. In fact, you can’t put a video into a photo placeholder.
To insert images into photo placeholders:
1. At the bottom of the Slide Navigator, tap the Plus button to display the slide layout popover, and then tap one of the layouts with a photo placeholder.
or
In the Slide Navigator, tap to display the existing slide you want to put the graphic on.
A photo placeholder has a media button in its lower-right corner ![]() .
.
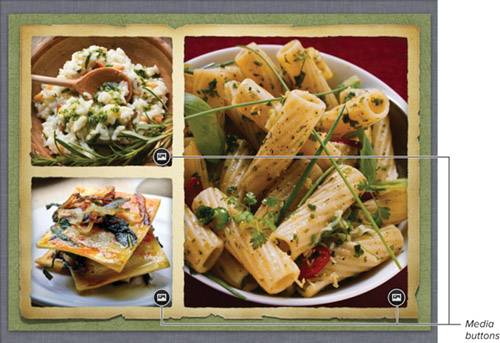
![]() Photo placeholders have a Media button in their lower-right corners.
Photo placeholders have a Media button in their lower-right corners.
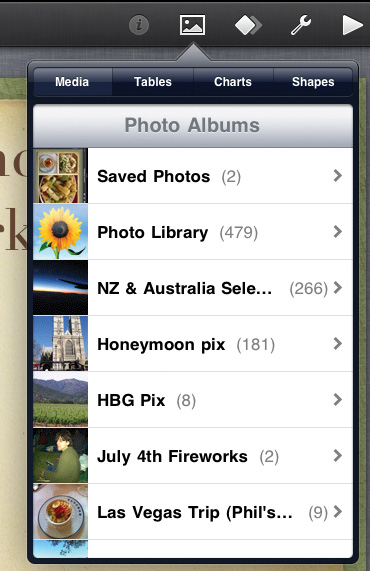
2. Tap the Media button in the placeholder to open the Photo Albums popover ![]() .
.
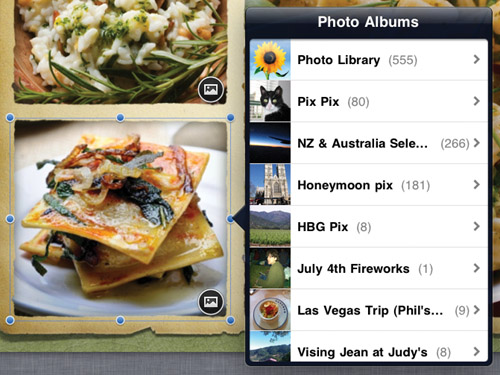
![]() Tapping a Media button in a photo placeholder brings up the Photo Albums popover.
Tapping a Media button in a photo placeholder brings up the Photo Albums popover.
The contents of your iPad’s Photo Library appear in the popover
3. Tap one of the albums in the popover to narrow your choices.
4. Tap the image you want.
The image appears inside the photo placeholder on the slide ![]() .
.
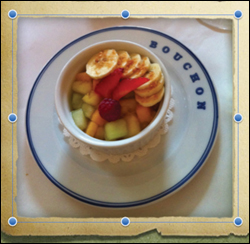
![]() The new picture replaces the contents of the photo placeholder.
The new picture replaces the contents of the photo placeholder.
Tip
You can almost always copy a graphic in another app, switch to Keynote, and paste the graphic into the slide.
To place images:
1. Select the slide you want in the Slide Navigator.
2. Tap the Media button in the toolbar to open the Photo Albums popover ![]() .
.
![]() To place photos on slides without using a photo placeholder, tap the Media button in the toolbar.
To place photos on slides without using a photo placeholder, tap the Media button in the toolbar.
3. Tap one of the albums in the popover to narrow your choices.
4. Tap the image you want.
The image appears on the slide.
1. Select the slide you want in the Slide Navigator.
2. Tap the Media button in the toolbar to open the Photo Albums popover, and then tap the album that contains the video you want.
3. Tap the thumbnail of the video.
The Choose Video pane appears ![]() . You can preview the video by tapping the Play button below the video, or you can scrub through the video by dragging the playhead in the preview area above the video.
. You can preview the video by tapping the Play button below the video, or you can scrub through the video by dragging the playhead in the preview area above the video.
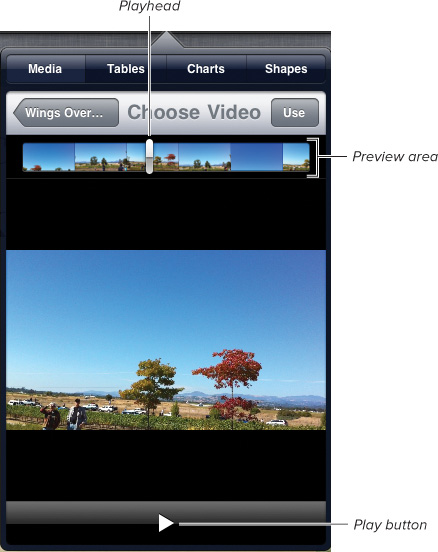
![]() When you select a video in the Media popover, you can preview it before putting it on your slide.
When you select a video in the Media popover, you can preview it before putting it on your slide.
4. Tap Use.
Keynote compresses the video for better playback, and then the video appears on the slide ![]() .
.

![]() You can tap the Play button in the middle of the video to preview it in context on your slide.
You can tap the Play button in the middle of the video to preview it in context on your slide.
Tip
An image or video that isn’t in a placeholder will hardly ever be the right size or in the position you want. See “Positioning and Resizing Graphics” later in this chapter.
To delete graphics:
To delete a graphic or video, slow double-tap it and tap Delete in the resulting Edit popover.
Positioning and Resizing Graphics
Keynote treats graphics much like other slide objects. Once you have placed your image into Keynote, you will usually have to move it to just where you want it on the slide (if you didn’t place it into a photo placeholder), and resize it in some way. That can mean scaling it (making it bigger or smaller) or cropping it (trimming the image to only the part you want). You can scale images in Keynote, but Keynote doesn’t have the ability to crop an image. It does, however, have something even better, called masking (described in the next section).
To move graphics:
To move a graphic, you deal with it as you would any other slide object. Tap once on the graphic to select it, and then touch and drag to move it.
To resize graphics:
1. Select the image on your slide.
Selection handles appear around the image ![]() .
.
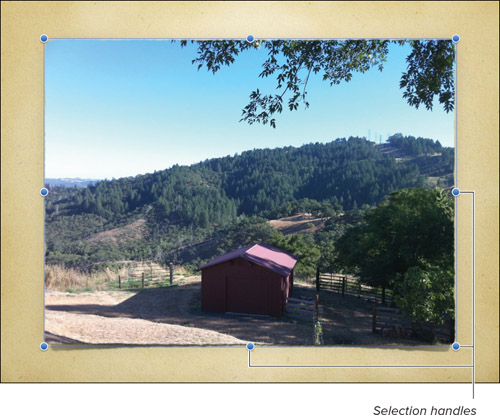
![]() Drag selection handles to resize the image.
Drag selection handles to resize the image.
2. Touch and drag one of the handles to resize the object.
3. After you resize the object to your liking, it will probably not be in the correct position on the slide. Drag it to a position more to your liking.
Using the Alignment Guides
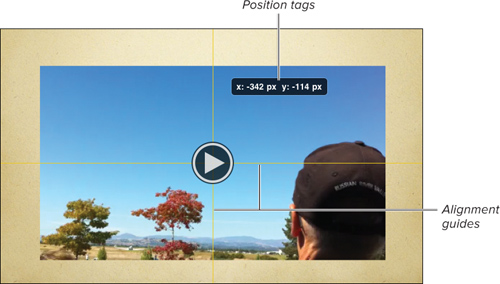
Keynote’s yellow alignment guides appear when you need them; you’ll notice them appearing and disappearing as you move objects around the Slide Canvas ![]() . The guides help you center and align objects on the canvas. The guides appear whenever the center or edge of an object aligns with the center or edge of another object, or with the center of the Slide Canvas. When the alignment guides appear, the object snaps to them.
. The guides help you center and align objects on the canvas. The guides appear whenever the center or edge of an object aligns with the center or edge of another object, or with the center of the Slide Canvas. When the alignment guides appear, the object snaps to them.
![]() As you move an object on your slide, the yellow alignment guides appear.
As you move an object on your slide, the yellow alignment guides appear.
You’ll also see position tags that appear along with the guides. These tags display the X and Y coordinates of the top-left corner of each object as you move it around the Slide Canvas.
The position tag changes into an angle tag when you rotate a graphic object. You can do that by placing two fingers on the object, and then turning your hand ![]() . When rotating, an alignment guide appears from the angle tag to the center of the object, and the object snaps to the guide at 45 degree increments.
. When rotating, an alignment guide appears from the angle tag to the center of the object, and the object snaps to the guide at 45 degree increments.

![]() The angle tag appears when you rotate a graphic.
The angle tag appears when you rotate a graphic.
Similarly, the position tag changes into a size tag when you resize a graphic ![]() .
.
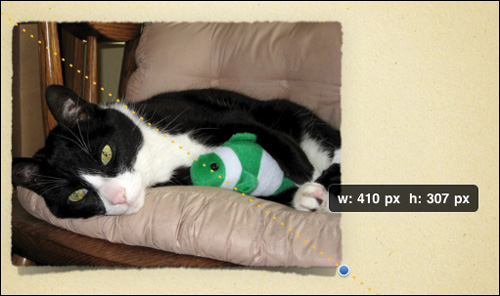
![]() When you resize a graphic, the size tag appears.
When you resize a graphic, the size tag appears.
Nudging Objects
Moving objects around on the canvas with your fingers can sometimes be imprecise; a stray twitch of a finger can move an object much further than you intended. Instead, you can move items in single-pixel increments by nudging them.
To nudge an object:
Touch and hold the object with one finger, and then use another finger, anywhere on the slide, to swipe in the direction you want the object to move.
A position tag appears, showing you the X and Y position on the canvas. As you swipe, you can see the position change in single-pixel increments.
Matching Object Sizes
Sometimes you want two images on a slide to be the same size. You can quickly match their sizes in Keynote.
To match two objects’ sizes:
1. Select the object you want to resize, and then drag one of its selection handles.
2. With your other hand, touch and hold another object that has the size you want ![]() .
.
![]() The picture in front needs to be the same size as the picture in back.
The picture in front needs to be the same size as the picture in back.
3. When Keynote displays a tag that says Match Size, lift both fingers ![]() .
.
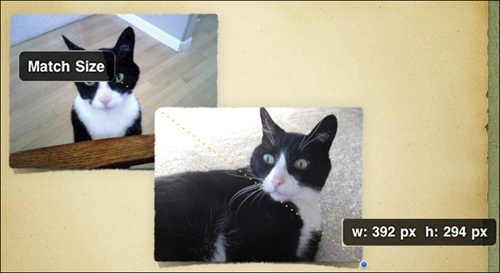
![]() Lift your fingers when the Match Size tag appears.
Lift your fingers when the Match Size tag appears.
The first object resizes.
Masking Images
As noted earlier, photo placeholders in Keynote act as masks, meaning that only part of the photo may be visible. You can think of a mask as a window through which part of the photo appears. You can resize the mask, or move or resize the image inside the mask.
When you place an image on a slide without a photo placeholder, you can still resize or reshape the image, and then use the new shape as the mask for the image.
1. Select an image on the slide.
2. Double-tap the image.
The mask slider appears below the image ![]() .
.
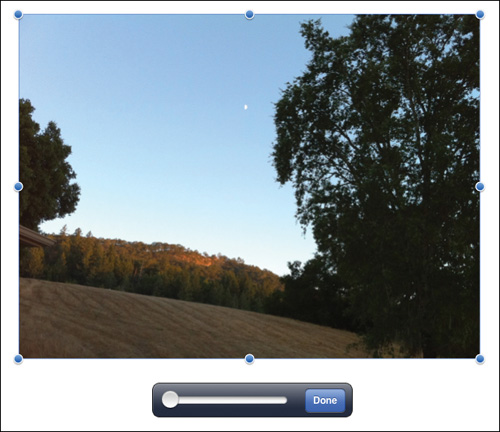
![]() Double-tapping a photo makes the Mask slider appear.
Double-tapping a photo makes the Mask slider appear.
3. Drag the slider to make the image larger or smaller within the mask.
The area of the image outside the mask is dimmed ![]() .
.
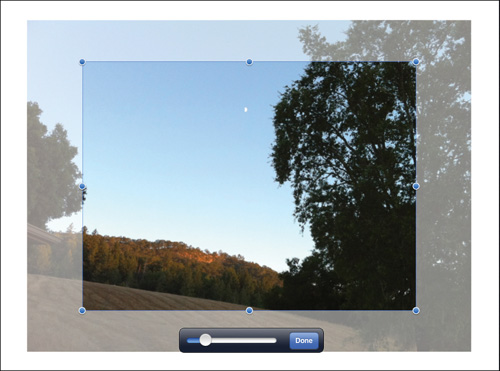
![]() When you place the mask, areas of the image outside the mask area are dimmed.
When you place the mask, areas of the image outside the mask area are dimmed.
4. Drag the mask’s selection handles to resize the mask area. You can also touch and drag inside the mask area to reposition the image under the mask.
You can even rotate the image within the mask by touching the image with two fingers and turning your hand.
5. To exit mask mode tap Done.
Tip
If the image is inside a photo placeholder, and you want to restore the original mask, tap the Info button in the toolbar, tap Arrange, and then tap the Reset Mask button.
Inserting Shapes
Keynote’s shapes are vector graphics that can be scaled and manipulated with no loss of resolution. Because Keynote’s repertoire of shapes is limited (there are only 14: two kinds of lines, rectangle, rounded rectangle, oval, triangle, right triangle, arrow, double-headed arrow, diamond, two kinds of quote bubble, pentagon, and star), you’ll probably be relying more on other graphics programs to provide complex slide graphics, and then importing them into Keynote via the iPad’s Photo Library.
To place Keynote shapes:
1. In the Slide Navigator, tap to select the slide you want to put the shape on.
2. Tap the Media button on the toolbar, and then (if necessary), tap the Shapes button.
The Shapes popover appears ![]() . You can swipe right or left to display the shapes in different colors.
. You can swipe right or left to display the shapes in different colors.
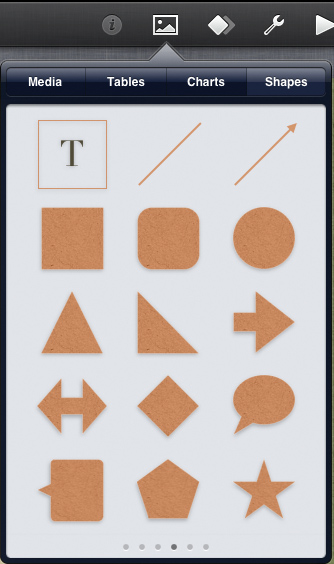
![]() You can swipe left or right in the Shapes popover to get different color options.
You can swipe left or right in the Shapes popover to get different color options.
3. Tap the shape you want.
The shape appears on the slide ![]() . It is selected, so you can modify it. Some shapes have green control points that you can drag to reshape the object. For example, the quote bubble shapes have two control points. Dragging the top control point changes the bubble between an oval and a rectangle. Dragging the bottom control point changes the length and position of the quote bubble’s “tail”
. It is selected, so you can modify it. Some shapes have green control points that you can drag to reshape the object. For example, the quote bubble shapes have two control points. Dragging the top control point changes the bubble between an oval and a rectangle. Dragging the bottom control point changes the length and position of the quote bubble’s “tail”![]() .
.

![]() Different shapes will have different numbers of selection handles.
Different shapes will have different numbers of selection handles.
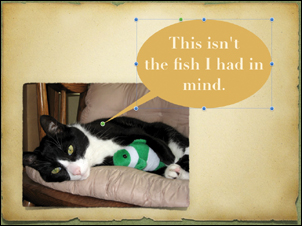
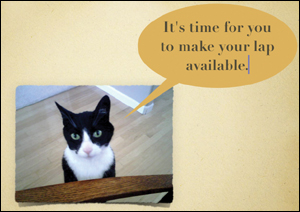
![]() I’ve dragged the control point for this quote bubble to better indicate what my cat is thinking.
I’ve dragged the control point for this quote bubble to better indicate what my cat is thinking.
Tip
Once you place a shape, you can’t change it to a different kind of shape. For example, you can’t convert a rectangle into a circle.
Inserting Text into Shapes
You can place text directly within shapes you’ve created in Keynote. The text that you add will be overlaid on the shape’s fill. Text inside the shape rewraps as you resize the shape, and also as you resize the font size.
To add text to a shape:
1. Using the Media button on the toolbar, place a shape on the slide you’re working with.
2. Resize the shape to your liking.
3. Double-tap in the middle of the shape. An insertion point will appear, centered in the shape.
4. Type the text you want in the shape ![]() .
.
![]() This text is embedded in the shape, moves with the shape, and rewraps as the shape is resized.
This text is embedded in the shape, moves with the shape, and rewraps as the shape is resized.
Tip
You can make the text adjustments available to any Keynote text by selecting the text within the shape, tapping the Info button in the toolbar, and then using the options in the resulting popover. See Chapter 4 for more information.
Styling Photos
Photos and shapes have different styling options. You can change the border around a photo, add a drop shadow, add a reflection effect, and change the photo’s opacity.
To style photos:
1. Select the photo you wish to style.
2. Tap the Info button in the toolbar.
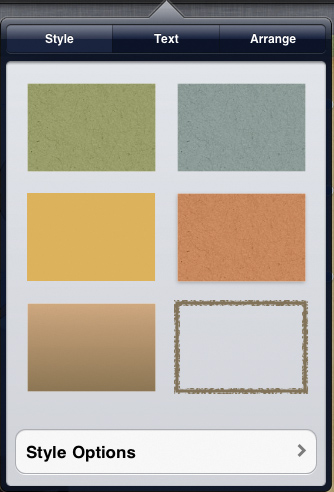
3. If necessary, tap the Style button in the resulting popover ![]() .
.

![]() The style options for photos.
The style options for photos.
4. Do one or more of the following:
• Tap to apply one of the six basic photo frame styles.
• To access more border controls, first tap Style Options, and then in the resulting pane, turn Border to On. Many new controls appear, allowing you to set the border color, width, line style, and 14 additional photo frame styles ![]() .
.
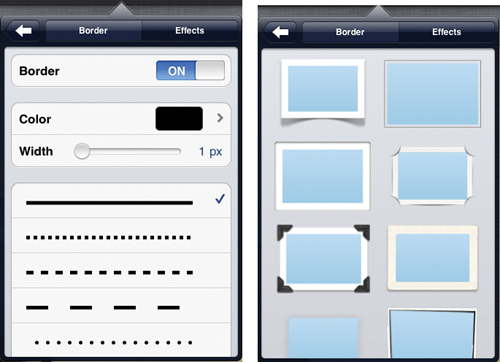
![]() Turning on the Border control gives you many more options (left). Swipe up to display the additional photo frames (right).
Turning on the Border control gives you many more options (left). Swipe up to display the additional photo frames (right).
• To set a drop shadow, reflection effect, or the photo’s opacity, first tap Style Options, and then in the resulting pane, tap the Effects button. Turning the Shadow or Reflection options to On displays additional controls for each effect ![]() .
.
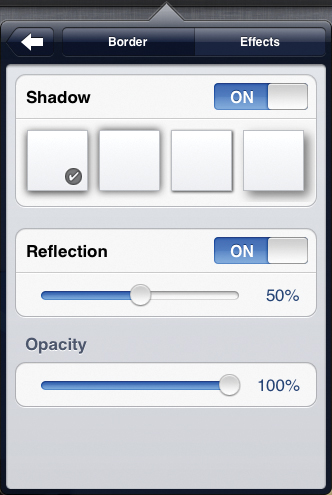
![]() Use the Effects button to apply drop shadows, reflections, and change the photo’s opacity.
Use the Effects button to apply drop shadows, reflections, and change the photo’s opacity.
Styling Shapes
You have different options when styling shapes than you do when styling photos. You can change the shape’s color fill, change its border, apply a drop shadow, and change the shape’s opacity.
To style shapes:
1. Select the shape you wish to style.
2. Tap the Info button in the toolbar.
3. If necessary, tap the Style button in the resulting popover ![]() .
.
![]() There are six basic color fills.
There are six basic color fills.
4. Do one or more of the following:
• Tap to apply one of the six basic color fills.
• To access more color fills, tap Style Options, and then, in the resulting pane ![]() , tap the Fill button. You can swipe right or left in this pane for more color options. Tap a color swatch to apply it to the shape.
, tap the Fill button. You can swipe right or left in this pane for more color options. Tap a color swatch to apply it to the shape.
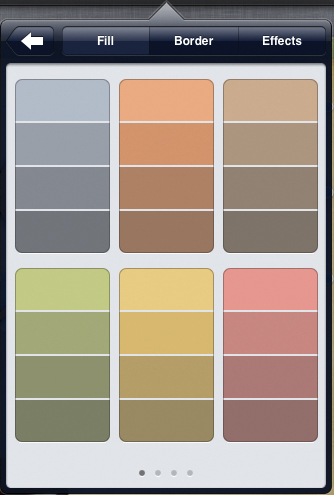
![]() Swipe right or left to scroll through the additional color swatches.
Swipe right or left to scroll through the additional color swatches.
• To access border options, tap Style Options, and then, in the resulting pane ![]() , tap the Border button. You can change the border color, width, and line style.
, tap the Border button. You can change the border color, width, and line style.
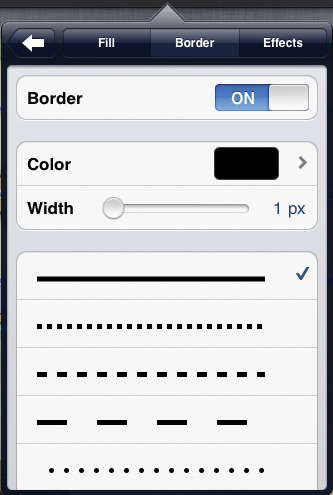
![]() Tap the Border button to change the border color, width, and line style.
Tap the Border button to change the border color, width, and line style.
• To apply effects, tap Style Options, and then, in the resulting pane ![]() , tap the Effects button. You can turn on a drop shadow and change the shape’s opacity by dragging the slider.
, tap the Effects button. You can turn on a drop shadow and change the shape’s opacity by dragging the slider.
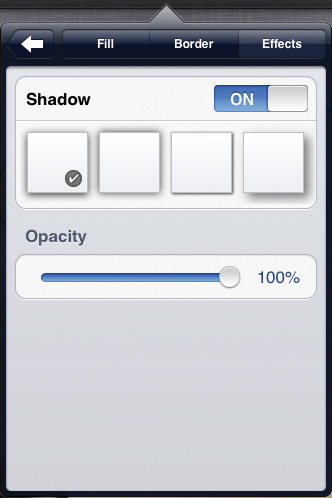
![]() You can add drop shadows to shapes, and change their opacity.
You can add drop shadows to shapes, and change their opacity.
Flipping Graphics
Keynote allows you to flip objects around their horizontal or vertical axes. You use a different technique to flip photos and shapes.
To flip photos:
1. Select the photo you want to flip.
2. Tap the Info button on the toolbar.
3. In the resulting popover, tap the Arrange button ![]() .
.

![]() You can flip photos around their horizontal or vertical axes.
You can flip photos around their horizontal or vertical axes.
4. Tap the Flip Vertically or the Flip Horizontally buttons.
The object flips at your command.
To flip shapes:
1. Select the shape.
2. To flip the shape around its vertical axis, tap either of the two middle selection handles at the sides of the shape, and then drag to the right or left until the object flips over ![]() .
.
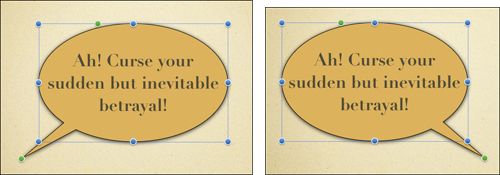
![]() Flip this shape using its selection handles. After the flip, the quote bubble points in a different direction, but the text is still readable.
Flip this shape using its selection handles. After the flip, the quote bubble points in a different direction, but the text is still readable.
or
To flip the shape around its horizontal axis, tap either of the two middle selection handles at the top or bottom of the shape, and then drag up or down until the object flips over.
Tip
If the shape has text inside, the shape flips its direction, but the text stays in its usual orientation, remaining readable.
Layering Graphics
When you place objects on slides, you can think of each object as being in its own layer on the slide. For example, if you have five objects on a slide, you have six layers: one layer for each object, plus the slide background, which is defined in the slide layout. You can move each of these layers forward and back. The exception is the slide background, the layer furthest back, which can’t be brought forward.
Any text boxes that are part of the slide layout, such as the title box and the body box (with or without bulleted text), are part of the background layer, but you can still layer other objects behind these text boxes. Free text boxes that you create on slides can be layered like any other object.
To layer slide objects:
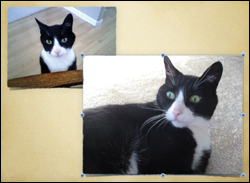
1. Select a slide object that you want to move forward or backward in the slide layers ![]() .
.
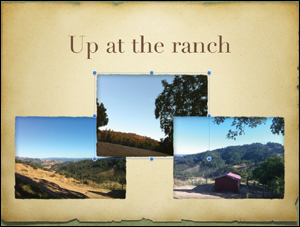
![]() We want the selected photo in front of the other two photos.
We want the selected photo in front of the other two photos.
2. Tap the Info button in the toolbar, and then tap the Arrange button ![]() .
.
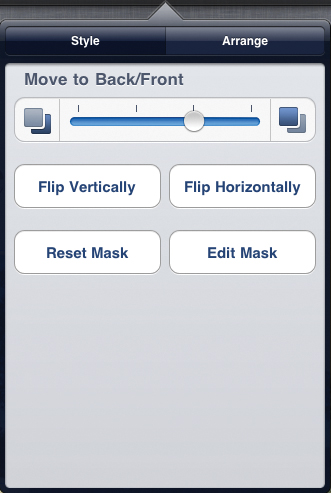
![]() Use the Move to Back/Front slider to change the position of the object in the layers.
Use the Move to Back/Front slider to change the position of the object in the layers.
3. Drag the Move to Back/Front slider.
Dragging the slider to the left moves the object to the bottom of the stack. Dragging it to the right moves the object to the top of the stack.