Chapter 13. ConfigMaps and Secrets
It is a good practice to make container images as reusable as possible. The same image should be able to be used for development, staging, and production. It is even better if the same image is general-purpose enough to be used across applications and services. Testing and versioning get riskier and more complicated if images need to be recreated for each new environment. But then how do we specialize the use of that image at runtime?
This is where ConfigMaps and secrets come into play. ConfigMaps are used to provide configuration information for workloads. This can either be fine-grained information (a short string) or a composite value in the form of a file. Secrets are similar to ConfigMaps but focused on making sensitive information available to the workload. They can be used for things like credentials or TLS certificates.
ConfigMaps
One way to think of a ConfigMap is as a Kubernetes object that defines a small filesystem. Another way is as a set of variables that can be used when defining the environment or command line for your containers. The key thing is that the ConfigMap is combined with the Pod right before it is run. This means that the container image and the Pod definition itself can be reused across many apps by just changing the ConfigMap that is used.
Creating ConfigMaps
Let’s jump right in and create a ConfigMap. Like many objects in Kubernetes, you can create these in an immediate, imperative way, or you can create them from a manifest on disk. We’ll start with the imperative method.
First, suppose we have a file on disk (called my-config.txt) that we want to make available to the Pod in question, as shown in Example 13-1.
Example 13-1. my-config.txt
# This is a sample config file that I might use to configure an application
parameter1 = value1
parameter2 = value2
Next, let’s create a ConfigMap with that file. We’ll also add a couple of simple key/value pairs here. These are referred to as literal values on the command line:
$ kubectl create configmap my-config
  --from-file=my-config.txt
  --from-literal=extra-param=extra-value
  --from-literal=another-param=another-value
The equivalent YAML for the ConfigMap object we just created is:
$ kubectl get configmaps my-config -o yaml

apiVersion: v1
data:
  another-param: another-value
  extra-param: extra-value
  my-config.txt: |
    # This is a sample config file that I might use to configure an application
    parameter1 = value1
    parameter2 = value2
kind: ConfigMap
metadata:
  creationTimestamp: ...
  name: my-config
  namespace: default
  resourceVersion: "13556"
  selfLink: /api/v1/namespaces/default/configmaps/my-config
  uid: 3641c553-f7de-11e6-98c9-06135271a273
As you can see, the ConfigMap is really just some key/value pairs stored in an object. The interesting stuff happens when you try to use a ConfigMap.
Using a ConfigMap
There are three main ways to use a ConfigMap:
- Filesystem
-
You can mount a ConfigMap into a Pod. A file is created for each entry based on the key name. The contents of that file are set to the value.
- Environment variable
-
A ConfigMap can be used to dynamically set the value of an environment variable.
- Command-line argument
-
Kubernetes supports dynamically creating the command line for a container based on ConfigMap values.
Let’s create a manifest for kuard that pulls all of these together, as shown in Example 13-2.
Example 13-2. kuard-config.yaml
apiVersion:v1kind:Podmetadata:name:kuard-configspec:containers:-name:test-containerimage:gcr.io/kuar-demo/kuard-amd64:blueimagePullPolicy:Alwayscommand:-"/kuard"-"$(EXTRA_PARAM)"env:-name:ANOTHER_PARAMvalueFrom:configMapKeyRef:name:my-configkey:another-param-name:EXTRA_PARAMvalueFrom:configMapKeyRef:name:my-configkey:extra-paramvolumeMounts:-name:config-volumemountPath:/configvolumes:-name:config-volumeconfigMap:name:my-configrestartPolicy:Never
For the filesystem method, we create a new volume inside the Pod and give it the name config-volume. We then define this volume to be a ConfigMap volume and point at the ConfigMap to mount. We have to specify where this gets mounted into the kuard container with a volumeMount. In this case we are mounting it at /config.
Environment variables are specified with a special valueFrom member. This references the ConfigMap and the data key to use within that ConfigMap.
Command-line arguments build on environment variables. Kubernetes will
perform the correct substitution with a special $(<env-var-name>) syntax.
Run this Pod, and let’s port forward to examine how the app sees the world:
$ kubectl apply -f kuard-config.yaml
$ kubectl port-forward kuard-config 8080
Now point your browser at http://localhost:8080. We can look at how we’ve injected configuration values into the program in all three ways.
Click the “Server Env” tab on the left. This will show the command line that the app was launched with along with its environment, as shown in Figure 13-1.
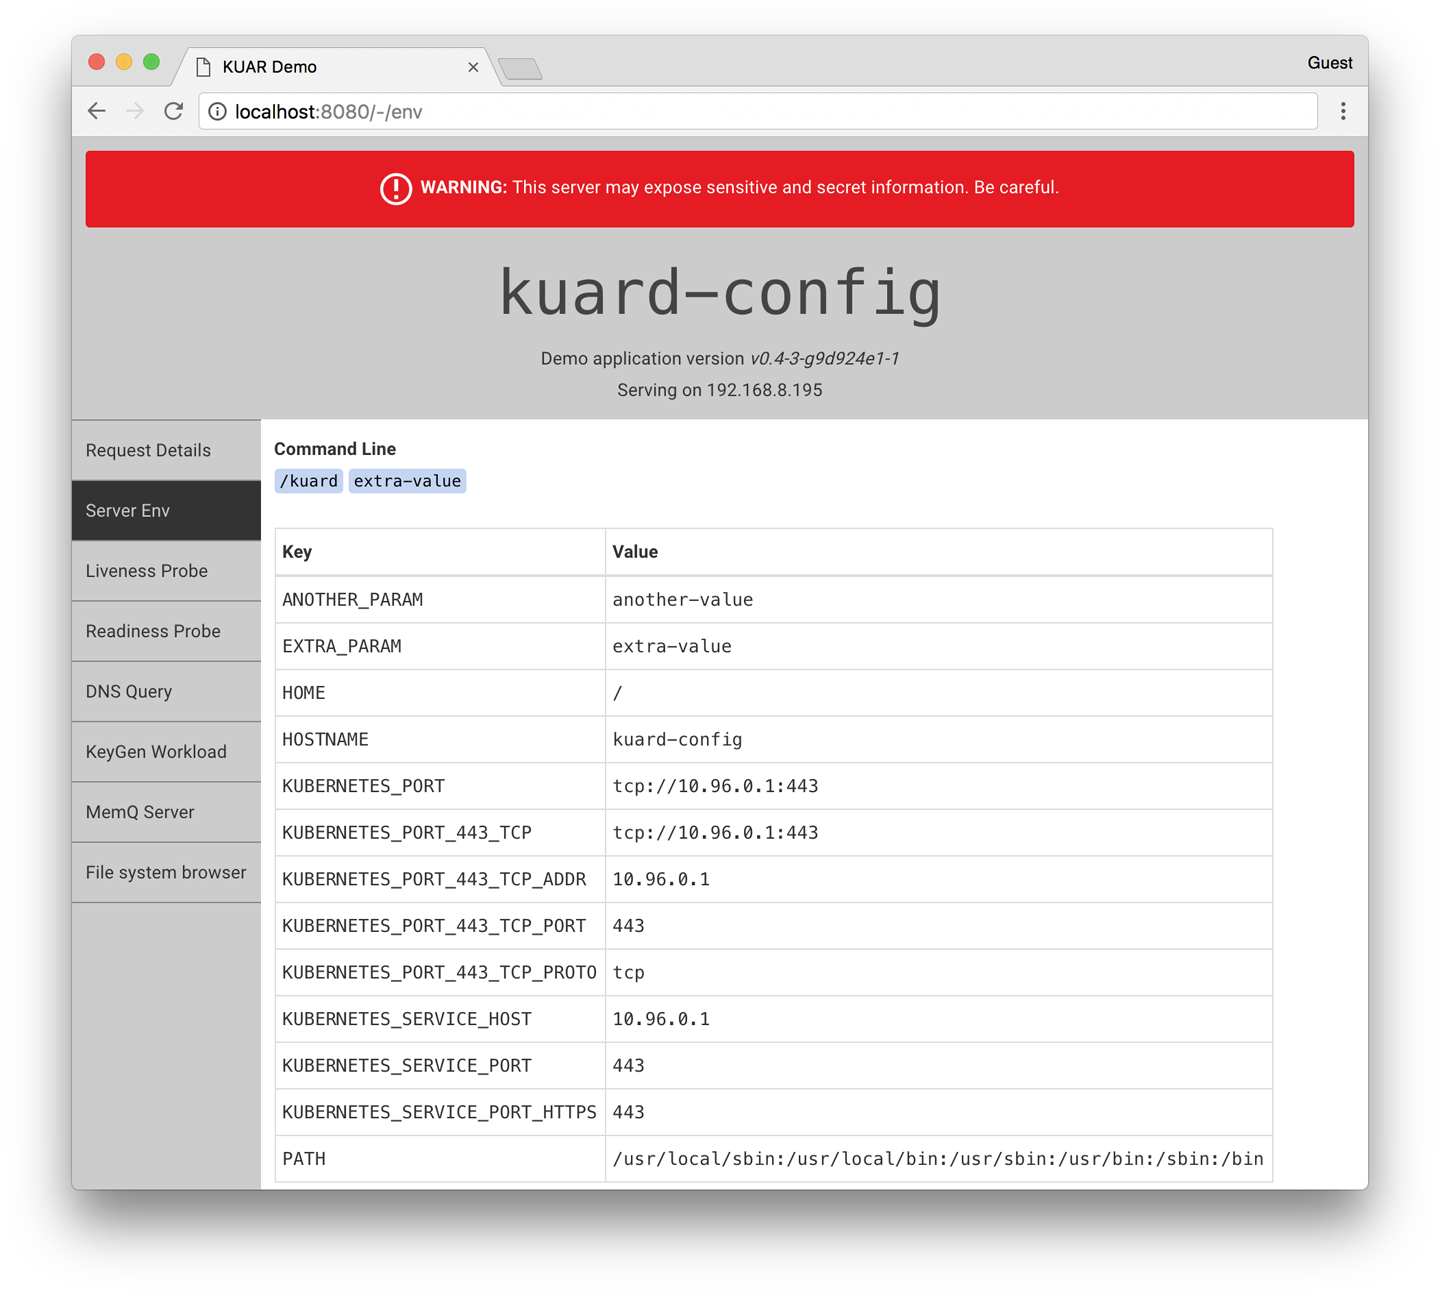
Figure 13-1. kuard showing its environment
Here we can see that we’ve added two environment variables (ANOTHER_PARAM and EXTRA_PARAM) whose values are set via the ConfigMap. Furthermore, we’ve added an argument to the command line of kuard based on the EXTRA_PARAM value.
Next, click the “File system browser” tab (Figure 13-2). This lets you explore the filesystem as the application sees it. You should see an entry called /config. This is a volume created based on our ConfigMap. If you navigate into that, you’ll see that a file has been created for each entry of the ConfigMap. You’ll also see some hidden files (prepended with ..) that are used to do a clean swap of new values when the ConfigMap is updated.
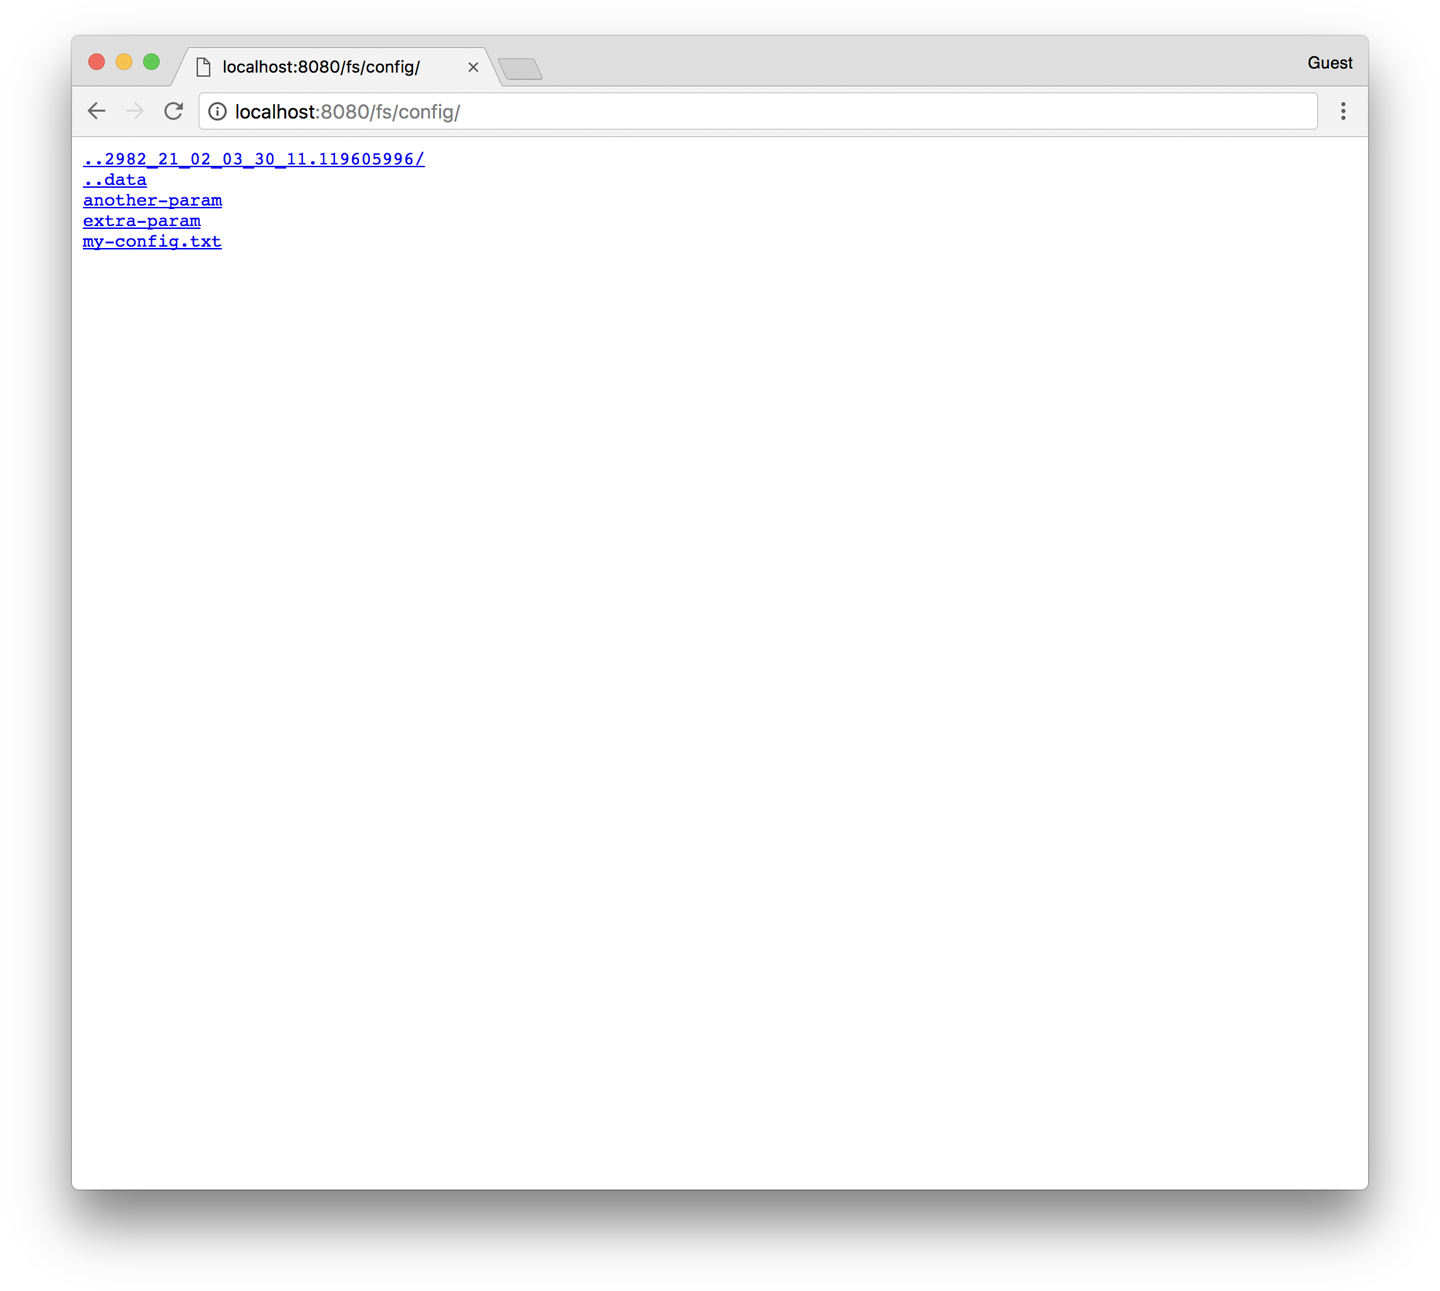
Figure 13-2. The /config directory as seen through kuard
Secrets
While ConfigMaps are great for most configuration data, there is certain data that is extra-sensitive. This can include passwords, security tokens, or other types of private keys. Collectively, we call this type of data “secrets.” Kubernetes has native support for storing and handling this data with care.
Secrets enable container images to be created without bundling sensitive data. This allows containers to remain portable across environments. Secrets are exposed to Pods via explicit declaration in Pod manifests and the Kubernetes API. In this way, the Kubernetes secrets API provides an application-centric mechanism for exposing sensitive configuration information to applications in a way that’s easy to audit and leverages native OS isolation primitives.
Warning
By default, Kubernetes secrets are stored in plain text in the etcd storage for the cluster.
Depending on your requirements, this may not be sufficient security for you. In particular,
anyone who has cluster administration rights in your cluster will be able to read all of
the secrets in the cluster. In recent versions of Kubernetes, support has been added for
encrypting the secrets with a user-supplied key, generally integrated into a cloud key
store. Additionally, most cloud key stores have integration with Kubernetes flexible
volumes, enabling you to skip Kubernetes secrets entirely and rely exclusively on the
cloud provider’s key store. All of these options should provide you with sufficient tools
to craft a security profile that suits your needs.
The remainder of this section will explore how to create and manage Kubernetes secrets, and also lay out best practices for exposing secrets to Pods that require them.
Creating Secrets
Secrets are created using the Kubernetes API or the kubectl command-line tool. Secrets hold one or more data elements as a collection of key/value pairs.
In this section we will create a secret to store a TLS key and certificate for the kuard application that meets the storage requirements listed previously.
Note
The kuard container image does not bundle a TLS certificate or key. This allows the kuard container to remain portable across environments and distributable through public Docker repositories.
The first step in creating a secret is to obtain the raw data we want to store. The TLS key and certificate for the kuard application can be downloaded by running the following commands:
$ curl -o kuard.crt  https://storage.googleapis.com/kuar-demo/kuard.crt
$ curl -o kuard.key https://storage.googleapis.com/kuar-demo/kuard.key
Warning
These certificates are shared with the world and they provide no actual security. Please do not use them except as a learning tool in these examples.
With the kuard.crt and kuard.key files stored locally, we are ready to create a secret. Create a secret named kuard-tls using the create secret command:
$ kubectl create secret generic kuard-tls
  --from-file=kuard.crt
  --from-file=kuard.key
The kuard-tls secret has been created with two data elements. Run the following command to get details:
$ kubectl describe secrets kuard-tls

Name:         kuard-tls
Namespace:    default
Labels:       <none>
Annotations:  <none>

Type:         Opaque

Data
====
kuard.crt:    1050 bytes
kuard.key:    1679 bytes
With the kuard-tls secret in place, we can consume it from a Pod by using a secrets volume.
Consuming Secrets
Secrets can be consumed using the Kubernetes REST API by applications that know how to call that API directly. However, our goal is to keep applications portable. Not only should they run well in Kubernetes, but they should run, unmodified, on other platforms.
Instead of accessing secrets through the API server, we can use a secrets volume.
Secrets volumes
Secret data can be exposed to Pods using the secrets volume type. Secrets volumes are managed by the kubelet and are created at Pod creation time. Secrets are stored on tmpfs volumes (aka RAM disks), and as such are not written to disk on nodes.
Each data element of a secret is stored in a separate file under the target mount point specified in the volume mount. The kuard-tls secret contains two data elements: kuard.crt and kuard.key. Mounting the kuard-tls secrets volume to /tls results in the following files:
/tls/kuard.crt
/tls/kuard.key
The Pod manifest in Example 13-3 demonstrates how to declare a secrets volume, which exposes the kuard-tls secret to the kuard container under /tls.
Example 13-3. kuard-secret.yaml
apiVersion:v1kind:Podmetadata:name:kuard-tlsspec:containers:-name:kuard-tlsimage:gcr.io/kuar-demo/kuard-amd64:blueimagePullPolicy:AlwaysvolumeMounts:-name:tls-certsmountPath:"/tls"readOnly:truevolumes:-name:tls-certssecret:secretName:kuard-tls
Create the kuard-tls Pod using kubectl and observe the log output from the running Pod:
$ kubectl apply -f kuard-secret.yaml
Connect to the Pod by running:
$ kubectl port-forward kuard-tls 8443:8443
Now navigate your browser to https://localhost:8443. You should see some invalid certificate warnings as this is a self-signed certificate for kuard.example.com. If you navigate past this warning, you should see the kuard server hosted via HTTPS. Use the “File system browser” tab to find the certificates on disk.
Private Docker Registries
A special use case for secrets is to store access credentials for private Docker registries. Kubernetes supports using images stored on private registries, but access to those images requires credentials. Private images can be stored across one or more private registries. This presents a challenge for managing credentials for each private registry on every possible node in the cluster.
Image pull secrets leverage the secrets API to automate the distribution of private registry credentials. Image pull secrets are stored just like normal secrets but are consumed through the spec.imagePullSecrets Pod specification field.
Use the create secret docker-registry to create this special kind of secret:
$ kubectl create secret docker-registry my-image-pull-secret
  --docker-username=<username>
  --docker-password=<password>
  --docker-email=<email-address>
Enable access to the private repository by referencing the image pull secret in the Pod manifest file, as shown in Example 13-4.
Example 13-4. kuard-secret-ips.yaml
apiVersion:v1kind:Podmetadata:name:kuard-tlsspec:containers:-name:kuard-tlsimage:gcr.io/kuar-demo/kuard-amd64:blueimagePullPolicy:AlwaysvolumeMounts:-name:tls-certsmountPath:"/tls"readOnly:trueimagePullSecrets:-name:my-image-pull-secretvolumes:-name:tls-certssecret:secretName:kuard-tls
If you are repeatedly pulling from the same registry, you can add the secrets to the default service account associated with each Pod to avoid having to specify the secrets in every Pod you create.
Naming Constraints
The key names for data items inside of a secret or ConfigMap are defined to map to valid environment variable names. They may begin with a dot followed by a letter or number. Following characters include dots, dashes, and underscores.
Dots cannot be repeated and dots and underscores or dashes cannot be adjacent to each other. More formally, this means that they must conform to the regular expression ^[.[?[a-zAZ0-9[([.[?[a-zA-Z0-9[+[-_a-zA-Z0-9[?)*$. Some examples of valid and invalid names for ConfigMaps and secrets are given in Table 13-1.
| Valid key name | Invalid key name |
|---|---|
|
|
|
|
|
|
Note
When selecting a key name, consider that these keys can be exposed to Pods via a volume mount. Pick a name that is going to make sense when specified on a command line or in a config file. Storing a TLS key as key.pem is more clear than tls-key when configuring applications to access secrets.
ConfigMap data values are simple UTF-8 text specified directly in the manifest. As of Kubernetes 1.6, ConfigMaps are unable to store binary data.
Secret data values hold arbitrary data encoded using base64. The use of base64 encoding makes it possible to store binary data. This does, however, make it more difficult to manage secrets that are stored in YAML files as the base64-encoded value must be put in the YAML. Note that the maximum size for a ConfigMap or secret is 1 MB.
Managing ConfigMaps and Secrets
Secrets and ConfigMaps are managed through the Kubernetes API. The usual create, delete, get, and describe commands work for manipulating these objects.
Listing
You can use the kubectl get secrets command to list all secrets in the current
namespace:
$ kubectl get secrets

NAME                  TYPE                                  DATA      AGE
default-token-f5jq2   kubernetes.io/service-account-token   3         1h
kuard-tls             Opaque                                2         20m
Similarly, you can list all of the ConfigMaps in a namespace:
$ kubectl get configmaps

NAME        DATA      AGE
my-config   3         1m
kubectl describe can be used to get more details on a single object:
$ kubectl describe configmap my-config

Name:           my-config
Namespace:      default
Labels:         <none>
Annotations:    <none>

Data
====
another-param:  13 bytes
extra-param:    11 bytes
my-config.txt:  116 bytes
Finally, you can see the raw data (including values in secrets!) with something like kubectl get configmap my-config -o yaml or kubectl get secret kuard-tls
-o yaml.
Creating
The easiest way to create a secret or a ConfigMap is via kubectl create secret
generic or kubectl create configmap. There are a variety of ways to specify the data items that go into the secret or ConfigMap. These can be combined in a single command:
--from-file=<filename>Load from the file with the secret data key the same as the filename.
--from-file=<key>=<filename>Load from the file with the secret data key explicitly specified.
--from-file=<directory>Load all the files in the specified directory where the filename is an acceptable key name.
--from-literal=<key>=<value>Use the specified key/value pair directly.
Updating
You can update a ConfigMap or secret and have it reflected in running programs. There is no need to restart if the application is configured to reread configuration values. This is a rare feature but might be something you put in your own applications.
The following are three ways to update ConfigMaps or secrets.
Update from file
If you have a manifest for your ConfigMap or secret, you can just edit it
directly and push a new version with kubectl replace -f <filename>. You can also use kubectl apply -f <filename> if you previously created the resource with kubectl apply.
Due to the way that datafiles are encoded into these objects, updating a configuration can be a bit cumbersome as there is no provision in kubectl to load data from an external file. The data must be stored directly in the YAML manifest.
The most common use case is when the ConfigMap is defined as part of a directory or list of resources and everything is created and updated together. Oftentimes these manifests will be checked into source control.
Warning
It is generally a bad idea to check secret YAML files into source control. It is too easy to push these files someplace public and leak your secrets.
Recreate and update
If you store the inputs into your ConfigMaps or secrets as separate files on disk (as opposed to embedded into YAML directly), you can use kubectl to recreate the manifest and then use it to update the
object.
This will look something like this:
$ kubectl create secret generic kuard-tls
  --from-file=kuard.crt --from-file=kuard.key
  --dry-run -o yaml | kubectl replace -f -
This command line first creates a new secret with the same name as our
existing secret. If we just stopped there, the Kubernetes API server would return an error complaining that we are trying to create a secret that already exists. Instead, we tell kubectl not to actually send the data to the server but instead to dump the YAML that it would have sent to the API server to stdout. We then pipe that to kubectl replace and use -f - to tell it to read from stdin. In this way, we can update a secret from files on disk without having to manually base64-encode data.
Edit current version
The final way to update a ConfigMap is to use kubectl edit to bring up a version of the ConfigMap in your editor so you can tweak it (you could also do this with a secret, but you’d be stuck managing the base64 encoding of values on your own):
$ kubectl edit configmap my-config
You should see the ConfigMap definition in your editor. Make your desired changes and then save and close your editor. The new version of the object will be pushed to the Kubernetes API server.
Live updates
Once a ConfigMap or secret is updated using the API, it’ll be automatically pushed to all volumes that use that ConfigMap or secret. It may take a few seconds, but the file listing and contents of the files, as seen by kuard, will be updated with these new values. Using this live update feature you can update the configuration of applications without restarting them.
Currently there is no built-in way to signal an application when a new version of a ConfigMap is deployed. It is up to the application (or some helper script) to look for the config files to change and reload them.
Using the file browser in kuard (accessed through kubectl port-forward) is a
great way to interactively play with dynamically updating secrets and
ConfigMaps.
Summary
ConfigMaps and secrets are a great way to provide dynamic configuration in your application. They allow you to create a container image (and Pod definition) once and reuse it in different contexts. This can include using the exact same image as you move from dev to staging to production. It can also include using a single image across multiple teams and services. Separating configuration from application code will make your applications more reliable and reusable.