
Chapter 3. Azure Web Apps
In the previous chapter, you created a VM and manually installed packages to run a basic web server. You could build an online pizza store with this VM if you were hungry to get started. One of the biggest use cases for Azure VMs is to run web applications, typically at scale. Web applications are a comfortable workload for VMs. Comfortable is nice, if you also like the maintenance that goes with managing all those VMs. You know, fun things like software updates, security patches, centralized logging, and compliance reports. What if you could get all the power of a secure web server to run your web applications, including the ability to automatically scale to meet demands, but without the need to create and manage all those VMs? Let me introduce you to the Azure Web Apps service.
In this chapter, we compare the Infrastructure as a Service (IaaS) approach of VMs and web servers to the Platform as a Service (PaaS) approach. You learn the benefits of Azure Web Apps as you create a web application and see how to work with its development and production releases. You then learn how to deploy your web app automatically from a source control, such as GitHub. This workflow is show in figure 3.1. Azure Web Apps allows you to deploy and run your online pizza store in a matter of minutes, without the need to install and configure a VM and web server packages.
Figure 3.1. In this chapter, you create an app service plan and a basic web app and then deploy a website from GitHub.

3.1. Azure Web Apps overview and concepts
With Azure Web Apps, you start to dip your toes into the wonderful world of PaaS solutions. If you think cloud computing is all about VMs, you should probably reset that idea a little. At the start of this book, I talked about buying computer power and focusing on your applications and customers. As you move from IaaS solutions, such as VMs, and drift toward PaaS solutions, such as web apps, your applications and customers become the focus.
To run web applications on IaaS VMs requires management of the OS, application updates, and security and traffic rules, and configuration of the whole system. With Web Apps, you upload your web application, and all those management tasks are taken care of for you. Now you can focus your time on improving the application experience for your customers, or improving availability with scaling options and traffic management.
Does that mean you should never run VMs to host a web application? Probably not. There are valid reasons to run the entire application stack and configure it yourself. But Web Apps can provide for many of the use cases for running web applications.
3.1.1. Supported languages and environments
What kind of flexibility does Web Apps offer in terms of programming languages you can use to build your web application? Quite a lot! There are two primary platforms for running Web Apps: Windows and Linux. The Windows version of Web Apps has been around for a while and offers many languages beyond the expected ASP.NET and .NET Core. You can run Node.js, Python, Java, and PHP web apps natively. If you run Web Apps on Linux, you can also choose to use .NET Core or Ruby. If you want to be really cool and run your web application in containers, there’s also Web Apps for Containers that lets you run native Docker containers for Linux. We dive more into containers and Docker in chapter 19; for now, understand that your options are covered with Web Apps!
When may Web Apps not make sense? Say you really want to torture yourself with a web application written in Perl. In that scenario, you’d likely fall back to running on IaaS VMs that you manage yourself, because there’s no support for Perl in Web Apps. But Web Apps arguably supports the most common web programming languages that you’d want to use. You should probably look at a newer version of your app than one written in Perl, too.
Not only does Web Apps provide support for various languages, but it also provides support for various versions of those languages. Take PHP, for example—there are typically three or four versions of PHP that you can select to best support your application. And best of all, you don’t have to worry about the dependencies on the underlying web server to support it all, as you would if you managed an IaaS VM yourself. Python is another example of differences between the stable 2.7 and 3.4 (and later) versions, as shown in figure 3.2.
Figure 3.2. Select a specific version of a language in the Web Apps application settings.

Web Apps stays up to date on security fixes, too. But don’t expect an older version of PHP or Python to continue to be supported indefinitely. There will be a cutoff on supported older versions at a certain point. Again, that may be a time when you fall back to running IaaS VMs yourself if your app needs an older language version. But if you need to run an older version of a given language to support a legacy application, don’t get sucked in to a constant maintenance approach. Always look to move those legacy apps to more modern supported platforms.
3.1.2. Staging different versions with deployment slots
Deployment slots provide a staged environment for your web application. You can push new versions of your app to a deployment slot and get them running using environmental variables or database connections, without impacting the live site. When you’re happy with how things look and feel in a deployment slot, you can switch this version to the live site in an instant. The previously live site then switches in to a deployment slot of its own, providing an archived version; or, if needed, you can flip the app back to production.
The number of available deployment slots varies based on the tier of web app you select. A larger number of deployment slots enables multiple staged versions to be in use by different developers as they stage and test their own updates.
3.2. Creating a web app
With a little theory under your belt, let’s look at a Web App in action. There are a couple of parts to this. First, you create the basic web app and see the default site in your browser. Then you use a sample web page from GitHub and push that to Azure. Maybe your web developers have started to build a frontend for your online pizza store, so you have a basic site ready to upload.
Note
If you’ve never used Git before, don’t worry. You don’t need to understand what Git is doing at this point, and there’s room at the end of the chapter to play around and explore a little.
3.2.1. Creating a basic web app
The first step is to create the web app in Azure and make sure the default page loads.
This web app is a new resource and is separate from VMs like that you created in the previous chapter. The VM you created in chapter 2 is an IaaS approach to building and running web applications. The PaaS approach is Web Apps. There’s no real relation between the two. In fact, if you followed the advice in the previous chapter and deleted your VM, this web app runs without a VM in your Azure subscription at all!
To create your web app, complete the following steps.
1. Open a web browser to https://portal.azure.com, and log in to your Azure account.
2. In the portal, select Create a Resource in the upper-left corner of the dashboard.
3. Choose Web + Mobile from the list of resources you can create, and then select Web App.
4. Enter a Name for your web app. This name must be globally unique, because it creates the URL to your web app in the form of http://<name>.azurewebsite.net. If you’re wondering, yes—you can apply a custom domain name here. For now, use the default azurewebsites.net address.
5. By default, a new resource group is created. To help keep things clean and organized as you did in chapter 2, I suggest you name this resource group azuremolchapter3.
6. You can natively use a Linux host for your web apps, but for this exercise, choose Windows as the OS if it isn’t already selected.
7. Select App Service Plan/Location, and then choose Create New.
Let’s take a minute to go over the available options.
App Service plans
Web Apps is part of the wider App Service family in Azure. App Service also includes Mobile Apps, API Apps, and Logic Apps. All but Logic Apps are available in every region that Azure runs in. A great resource to check out Azure service availability by region is at https://azure.microsoft.com/regions/services. Many services are available globally.
When you need to create an App Service resource, such as a web app, you create or use an existing service plan. The service plan defines the amount of resources available to you, how much automation is available to scale and back up your web app, and how highly available to make your site with staging slots and Traffic Manager. As with anything, you get what you pay for. Each service tier builds on the features of the lower tiers, generally adding more storage and available resources.
The four main service plan tiers are as follows:
- Free/Shared—Uses a shared infrastructure, offers minimal storage, and has no options for deploying different staged versions, routing of traffic, or backups. The Shared tier allows you to use a custom domain and incurs a charge for this over the Free tier.
- Basic—Provides dedicated compute resources for your web app. Allows you to use SSL and manually scale the number of web app instances you run.
- Standard—Adds daily backups, automatic scale of web app instances, and deployment slots, and allows you to route users with Traffic Manager.
- Premium—Provides more frequent backups, increased storage, and a greater number of deployment slots and instance scaling options.
With PaaS solutions like Web Apps, the infrastructure is intentionally abstracted. As the name of some of the service plan tiers implies, web apps run across a shared platform of available resources. That’s not at all to say that web apps are insecure and others can view your private data! But compliance or regulatory reasons may require you to run your applications in a controlled, isolated environment. Enter App Service environments: isolated environments that let you run App Service instances like web apps in a segmented part of an Azure data center. You control the inbound and outbound network traffic and can implement firewalls and create virtual private network (VPN) connections back on your on-premises resources.
All of these infrastructure components are still largely abstracted with App Service environments, but this approach provides a great balance when you want the flexibility of PaaS solutions but also want to retain some of the more fine-grained controls over the network connections traffic flow.
You can do quite a lot with the Free and Basic tiers, although for production workloads you should probably use the Standard or Premium tier. This chapter’s example uses the Standard tier so that you can see all the available features. When you use Web Apps with your own applications, you can decide how many of these features you need and select the most appropriate service plan tier accordingly.
To finish your web app, complete the following steps.
1. Enter an App Service plan name, such as appservice. The name doesn’t need to be globally unique like your web app name. Choose the most appropriate Azure region for you.
2. Select Pricing Tier, and then choose the S1 Standard Tier if it’s not already selected. This tier provides all the core features without providing too many resources for your basic demo website.
3. Choose Select and then OK.
4. Back in the initial Create Web App window, leave Application Insights turned off for now. Application Insights allows you to dive deeper into the performance of your web application and do things like perform live debugging or stream telemetry. If you’re a developer, this is cool stuff that you may want to explore when you begin to develop your own web applications in Azure.
5. To create your web app, select Create.
6. It takes a few seconds to create your app service. Browse to and select App Services from the navigation bar on the left side of the screen. It then takes a minute or two for the web app to be created, so click the Refresh button until yours appears, and then select it from the list.
7. From the Overview window of your web app, view and select the web app’s URL. Figure 3.3 shows the example of azuremol as the web app name, so the URL is https://azuremol.azurewebsites.net.
Figure 3.3. Select your web app in the Azure portal. On the right side of the windows is information such as the current state of the web app, the location, and its URL.
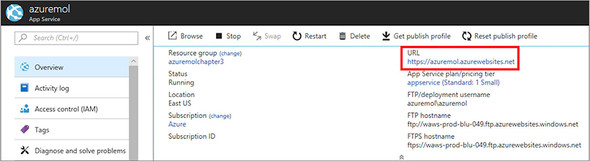
8. When you select the URL to your web app, a new browser window or tab opens. The default web app page loads, as shown in figure 3.4! Still doesn’t look like pizza ...
Figure 3.4. To see the default web app page in action, open a web browser to the URL of your site.

3.2.2. Deploying a sample HTML site
You have a web app in Azure, but it’s the dull, default website. How do you get your own website in Azure? One of the most common cross-platform ways is to use Git.
Most application developers and teams use a source control system. Rather than storing files on your computer and saving changes as you go, source control systems keep track of changes and allow you to work with others. You can create test releases that won’t impact your production code, and revert to earlier versions if problems arise. Git is one of the most common source control systems; GitHub is a cloud-based service that lets you share and contribute code with the rest of the world. Microsoft acquired GitHub in June 2018, but there’s nothing that forces you to use GitHub with Azure, or vice versa. All the samples in this book are available in GitHub.
For this example, you create a local copy of the static HTML sample site and then push the files to your Azure web app. This workflow is shown in figure 3.5.
Figure 3.5. You create a local copy of the sample files from GitHub with the git clone command. To push these local files to your Azure web app, you use git push

To get a copy of the sample HTML page from GitHub and push it to your web app, complete the following steps.
1. Select your Azure web app in the portal, and then choose Deployment Credentials. These credentials are separate from your Azure login details and let you push your application code from Git to a web app. The same deployment credentials can be used across your Azure subscription, so if you create them now, you can use them throughout the rest of the book.
To create your own deployment credentials, enter a username and password, and then choose Save.
2. To configure your web app for use with Git, choose Deployment Options > Choose Source > Local Git Repository. Note that there are several other options you can use to store your source code for web apps, including GitHub itself, Dropbox or OneDrive, and Visual Studio Team Services.
3. To confirm and create a local Git repository, select OK.
4. Before you can push to this local Git repository, you need to get the HTML sample site from GitHub.
Open the Cloud Shell in the Azure portal, and wait a few seconds for your session to connect. To clone, or copy, the HTML sample site from GitHub, enter the following command:
git clone https://github.com/fouldsy/azure-mol-samples.git
If this is your first time with Git in the Cloud Shell, you need to define a couple of settings for Git to understand who you are. For most of the exercises in this book, it doesn’t really matter; but for use with your own projects and applications, it’s a great way to track who performs certain actions in a source control system. You only need to define these settings once. Enter your own email address and full name in git config as follows:
git config --global user.email "[email protected]"
git config --global user.name "Iain Foulds"
5. Change into the azure-mol-samples directory that was created when you cloned the Git repo:
6. To get ready to upload this, you must initialize Git and then add and commit your files. Don’t worry too much about the Git commands right now! You need to tell Git what files to track and add, and give yourself a way to track those changes later if needed:
git init && git add . && git commit -m "Pizza"
Now you can push this HTML sample site to your web app. In the Azure portal, the Overview window for your web app listed the Git Clone URL. It looks like the following example:
https://[email protected]:443/azuremol.git
Your web app is configured to work with Git repos, so you need to tell the Cloud Shell what that repo is. In Git, you define these locations as remotes.
7. Copy your Git clone URL, and then set this URL as a destination for the HTML sample site in the Cloud Shell with the following command:
git remote add azure your-git-clone-url
To upload or copy files with Git, you push them. Where does Git push them to? A remote like you configured in the previous step, such as azure. The final part of the command is a branch, typically master. A branch in Git is how you keep track of different work-in-progress models. A best practice in production environments is to push to release branches that you can name as you wish, such as dev or staging. These additional branches allow your production code to run as normal; you can then work on new features or updates safely and without impact to real workloads that your customers use.
8. Push the HTML sample site to your web app:
9. When prompted, enter the password that you created for the deployment credentials.
You can see from the output that the existing default web app site page is removed and the HTML sample site is uploaded and configured to run. Here’s some sample output:
Counting objects: 6, done. Compressing objects: 100% (5/5), done. Writing objects: 100% (6/6), 1.24 KiB | 0 bytes/s, done. Total 6 (delta 0), reused 0 (delta 0) remote: Updating branch 'master'. remote: Updating submodules. remote: Preparing deployment for commit id 'a3822aa914'. remote: Generating deployment script. remote: Generating deployment script for Web Site remote: Generated deployment script files remote: Running deployment command... remote: Handling Basic Web Site deployment. remote: KuduSync.NET from: 'D:homesite epository' to:'D:homesitewwwroot' remote: Deleting file: 'hostingstart.html' remote: Copying file: 'index.html' remote: Copying file: 'LICENSE' remote: Finished successfully. remote: Running post deployment command(s)... remote: Deployment successful. To https://[email protected]:443/azuremol.git * [new branch] master -> master
To see your updated web app, refresh your site in a web browser or open it again from the Overview window in the Azure portal. It should look like the wonderful example in figure 3.6. Yes, the site is basic, but the workflow for deploying the most basic static HTML site to a complex .NET or Node.js web app is the same!
Figure 3.6. Refresh your web browser to see the default web app page replaced with the basic static HTML site from GitHub.

3.3. Managing web apps
Now that you’ve seen how to create a basic web app and deploy a simple HTML site to it, what about general management? If you run into problems, it would be helpful to see the web server or application logs. To help troubleshoot your apps, you can write output from your app to these log files. Log files can be viewed in real time or written to log files and reviewed later.
3.3.1. Viewing diagnostic logs
Your web app largely runs by itself. There’s not a lot you can do from a maintenance perspective on the underlying web host. If your application runs into problems, you may want to look at the logs to see what’s going on and troubleshoot the issue. With Azure Web Apps, you configure things like the level of log messages to review, where to store the logs, and how long to keep the logs. Figure 3.7 outlines how you generate and view log files with Web Apps.
Figure 3.7. Your application can generate application logs and server logs. To help you review or troubleshoot problems, these logs can be downloaded with FTP or viewed in real time.

To configure your web app for diagnostic logs, complete the following steps.
1. In the Azure portal, select the web app you created in the previous exercise. In the Overview window, scroll down to the Monitoring section and select Diagnostic Logs.
2. Review the available log options, such as the verbosity and whether you want to enable failed request tracing. If you deal with the infrastructure side of Azure, you may need to work with your application developers to determine what logs they need to help troubleshoot problems. You can then turn on the relevant logging here.
3. Note the FTP username and address to obtain your logs. The password is the same as you created in the previous exercise for the deployment credentials.
Enter the FTP address shown in the portal blade in a browser or your local File Manager window. At the login prompt, enter the FTP username shown along with the password you previously created.
In the Log Files directory are the various log files, depending on what you enabled for your application. These logs can be cryptic, and usually there’s no need to review them unless your web application has problems.
At the root of your FTP session is a directory called site. Inside that directory is wwwroot. This is where your web files are stored. When you pushed your site with Git in the previous example, Git wrote the file to this directory. Instead, you could FTP files straight to here; but Git offers additional features once you get used to it, such as versioning, history, and branches.
You may be thinking, “FTP is a complicated way to get diagnostic logs. Isn’t there an easier way?” Why yes, there is! In the Azure portal, right where you configured your diagnostic logs, is a Log Stream option. Can you guess what it does? Let me give you a hint—it has something to do with streaming your log files.
If you select this button in the Azure portal, you can choose between Application Logs and Web Server Logs. These logs read from the same diagnostic logs that are written to file. There’s a bit of a delay in the stream, and what’s displayed depends on the log levels you specify and whether your web application generates any application events. For the basic HTML site, the stream is rather boring, but it’s a great feature to have in the web browser. Figure 3.8 shows example streaming web server logs in the Azure portal.
Figure 3.8. You can view the Web Apps web server log streams of live logs from your application to help verify and debug application performance. The console box at the right side on the screen shows the real-time streaming logs from your web app.

View the streaming log files in the Azure portal. You may need to refresh the page in your web browser a couple of times to generate activity in the logs.
As you get more comfortable with Azure and use the Azure CLI or Azure PowerShell module, you can also stream logs with these tools. For developers, you can also enable remote debugging with Visual Studio under the Application Settings area or configure Application Insights to allow your web application to provide telemetry to additional services for monitoring and diagnostics. The key takeaway here is that as you move toward PaaS solutions like web apps, you can still obtain crucial diagnostics logs and application data to troubleshoot and monitor the performance of your web application.
3.4. Lab: Creating and using a deployment slot
We walked through how to create a simple HTML site and push the page to Azure Web Apps with Git. What if you now want to add some new pizza styles and view those before you make the site live for customers to order? Let’s use a deployment slot to provide somewhere to upload your changes, review them, and then swap them to production:
1. In your web app, choose Add a Deployment Slot. Leave the default options so you don’t clone from an existing deployment slot.
2. Select your deployment slot, and then follow the same procedure to Create a Deployment Source (local Git repository).
3. A sample development site is included in the samples you cloned earlier. In the Azure Cloud Shell, change to the development directory as follows:
4. As before, initialize, add, and commit your changes in Git with the following commands:
git init && git add . && git commit -m "Pizza"
5. Create a link again to the new Git repository in your staging slot with git remote add dev followed by your staging slot Git deployment URL.
6. Use git push dev master to push your changes to the deployment slot.
7. Select the URL to your staging slot from the Azure portal Overview window.
8. What do you think happens if you select the Swap button? Figure 3.9 shows how you can pick Source and Destination deployment slots to swap. Try it, and see how easy it is to make your development site live as a replacement for the production site!
Figure 3.9. Swap between available deployment slots to make your dev site live in production.

When you swap slots, what was live in the production slot is now in the dev slot, and what was in dev is now live in production. Not all settings can swap, such as SSL settings and custom domains; but for the most part, deployment slots are a great way to stage and validate content before it goes live to your customers. You can also perform a swap with preview, which gives you the opportunity to be sure the swapped content works correctly before it’s publicly live in production.
For production use in DevOps workflows, you can also configure Auto Swap. Here, when a code commit is noted in source control such as GitHub, it can trigger a build to an Azure Web Apps deployment slot. Once that build is complete and the app is ready to serve content, the deployment slots automatically swap to make the code live in production. This workflow is typically used with a test environment to review the code changes first, not to publish live straight to production!