
Chapter 5. Organizing devices and users
Now that your ConfigMgr environment has been populated with users and devices, it’s time to start organizing them so that you can start making them work for you.
In a ConfigMgr environment, you don’t directly target users and machines on an individual basis mainly because this method of administration becomes difficult to maintain in production when you’re dealing with more than a few hundred objects. Therefore, in ConfigMgr you use collections to group users and devices into logical, business-relevant groups, and you target all your administrative actions on those same collections. If devices and users are the bricks of the ConfigMgr environment, collections are the mortar that binds everything together and lets it stand up.
As shown in figure 5.1, in this chapter you’ll learn about the built-in collections in ConfigMgr; how to create custom collections; how to populate collections with both static and dynamic members; and how to make the most use of Windows Management Instrumentation Query Language (WQL), which underpins all dynamic collections.
Figure 5.1. By the end of this chapter, you’ll be able to make collections to cater to every situation!

Moving forward, almost all the ConfigMgr administrative work you’ll perform will revolve around working with collections, so it’s important to be comfortable with the content in this chapter before moving on.
5.1. Understanding collection concepts
Apart from being critical components of your ConfigMgr environment, collections also enable you to represent your organization’s business structure, network, and geography within the ConfigMgr console, giving you a more visual and meaningful way of administering the environment.
Let’s delve into this a little deeper. In the ConfigMgr console, navigate to the Assets and Compliance window and select “Device Collections.” As shown in figure 5.2, ConfigMgr already has some built-in device collections. These offer a basic way of segregating out the core device types in any ConfigMgr environment, but also act as good building blocks for you to create collection structures that are meaningful to you and your organization.
Figure 5.2. ConfigMgr comes prepopulated with built-in device collections.

The built-in collections are read-only and can’t be modified. Take a look at user collections as well, and you can see that there are some preexisting collections here too. Table 5.1 outlines how each built-in device collection and user collection is defined.
Table 5.1. Built-in device and user collections. Notice that a collection can contain devices or users—but not both.
|
Collection name |
Collection type |
Purpose |
|---|---|---|
| All desktops and server clients | Device | All systems that have the full ConfigMgr client installed (laptops, desktops, servers, virtual machines, and so forth) |
| All Mobile devices | Device | All systems that ConfigMgr recognizes as a mobile device, such as Windows Phone handsets or iPads |
| All systems | Device | Every single discovered device that ConfigMgr knows about, whether physical or virtual, mobile or traditional |
| All unknown computers | Device | A specialized collection used for operating system deployment, when ConfigMgr needs to be able to respond to systems that it doesn’t already know about |
| All users | User | All users that ConfigMgr knows about |
| All user groups | User | All user groups that ConfigMgr knows about |
| All users and user groups | User | All users and user groups that ConfigMgr knows about combined into a single collection |
The built-in collections are useful, but they aren’t particularly granular—more of a catchall to get you started. The following are examples of collections that would be of more relevance in your organization and that you’ll create in section 5.2:
- All Windows 10 Clients —All systems running Windows 10 that have the ConfigMgr client installed. Useful for targeting client settings that are specific to those operating systems.
- All Windows Servers —All discovered systems running a Windows Server operating system, regardless of whether they have the ConfigMgr client installed or not. Useful as an exclusion; for example, for targeting software updates while excluding All Windows Servers from the software update deployment.
- All HR Users —All discovered users in AD that are also members of an HR security group. Useful for distributing software to a specific group of users, while using existing AD group memberships.
- All Lab Systems —All discovered systems that reside in an AD Site defined as Lab. Useful for targeting software or a policy to a geographical region, and for running reports that contain geographically specific information.
Collections are where the richness of ConfigMgr’s ability to discover information about its environment comes into play. All of the information that ConfigMgr discovers about a device or a user, whether it’s from an AD Discovery Method or from the locally installed ConfigMgr client, gets stored in the ConfigMgr database and is used to build complex, meaningful collections.
Let’s take a look at how collections are constructed.
5.1.1. Collection membership
At its most basic, a collection is a group with members. Those members are either users or devices—but not both.
Important Note
With ConfigMgr 2007, it was possible to have a collection with a membership that was a mixture of users and devices. In order to enable strict, reliable targeting, this was removed in ConfigMgr 2012.
The membership of a collection can be defined and populated in four ways: direct, query, include collection, and exclude collection. Let’s take a look at all of them.
Direct membership
This is the simplest form of collection membership. As shown in figure 5.3, one or more users or devices are made direct members of a particular collection manually, in exactly the same manner that the membership of a security group in AD is defined.
Figure 5.3. Direct membership rules give you what you ask for—useful but inflexible.

Direct membership is useful for testing purposes and lab environments, since statically defined memberships are easy to administer when you’re dealing with only a small number of them. But it’s recommended that direct memberships not be used in production collections: their static definition makes them inflexible. Collections work best when their memberships change dynamically to reflect the changing nature of a real enterprise environment. A reliance upon static membership means that you’ll end up having to update collections manually as the wider environment changes, which introduces too much margin for error.
Query
Query-based membership is probably the most common form of collection membership, and is certainly the most flexible, powerful, and useful.
ConfigMgr collection queries use WQL to directly query the ConfigMgr database for specific information. For example, if you had an All Windows 10 Clients collection, it would be built using a query that looked for the following data:
- All systems running Windows 10
or
- All systems running Windows 10, and
- All systems with the ConfigMgr agent installed
All of these are independent queries in their own right, but ConfigMgr can find the common points between them in order to produce a meaningful, dynamic collection, as shown in figure 5.4.
Figure 5.4. Using data queries to build a dynamic collection

Include collection
In the include collection membership option, one or more collections are defined as a member of another collection, which is similar to using nested groups in AD. This is useful when you need to be able to target multiple collections at once, but still retain the ability for granular targeting. For example, you might need to be able to update the software across two floors of a building, but need to have the option to target either floor separately or both floors together. In that case, you would create two device collections, each one representing a floor: All Systems—Building A—Level 1, and All Systems—Building A—Level 2. This gives you the ability to target systems on either floor.
To update both floors simultaneously, rather than target both floor-based collections separately, you’d create another collection called All Systems—Building A that will act as a catchall for all systems in that building. Rather than define this collection independently, you can include the previous two collections into All Systems—Building A, as shown in figure 5.5.
Figure 5.5. Using an include collection membership can give you terrific management granularity.

The advantages of this approach are as follows:
- Whenever the membership of All Systems—Building A—Level 1 changes, the membership of All Systems—Building A will also change.
- Whenever the membership of All Systems—Building A—Level 2 changes, the membership of All Systems—Building A will also change.
- You can continue to target any of the three collections in a granular fashion, while the structure of the collections gives you maximum flexibility and control.
Exclude collection
An exclude collection membership is the direct opposite of an include collection—a collection is defined as an exclusion, rather than an inclusion.
This membership type is useful when you need to be able to treat a subset of Users or devices as a special case, without impacting the power and flexibility of using catchall collections as already described. Using the include collection example, let’s say that in Building A, on Level 2, is a financial trader’s office containing a pair of important systems that you want to exclude from any application, policy, or software update tasks that you might otherwise target against the All Systems—Building A Collection. In this case, you could create a collection called Financial Trading—Building A and then exclude this collection from the All Systems—Building A Collection. This way, you can still target all systems in the building while excluding the critical financial trading systems, as shown in figure 5.6.
Figure 5.6. An exclude collection membership allows you to protect critical systems.

A collection can incorporate both include and exclude collection membership rules.
Important Note
In the event that there’s a conflict between an include and an exclude rule, the principle of least privilege applies, and the exclude rule takes precedence.
5.1.2. Collection limiting
Let’s look at a potential management scenario. Say you’re going to deploy a newly created 64-bit operating system based on Windows 10 to your environment. Your environment consists of a mix of older machines with less than 4 GB of RAM and without 64-bit processors, so you decide not to deploy the 64-bit operating system to these machines. To do this, you create a device collection with a membership of all systems with at least 4 GB of RAM, called All Systems—4GB RAM Plus. What would happen if you rolled out the new operating system to this collection?
Depending on how your environment is configured, and what devices are present, you potentially just told ConfigMgr to deploy Windows 10 across your managed servers. Why? Because servers are almost guaranteed to have more than 4 GB of RAM, so based on the collection membership query that you constructed, servers are returned as collection members as well as workstations. If you had reimaged your physical servers with Windows 10—well, let’s just say that you’d have some serious explaining to do as well as a lot of late nights recovering everything. To prevent this sort of thing from happening, ConfigMgr uses Collection Limiting.
Collection Limiting requires every collection in ConfigMgr to take its membership from another collection. In effect, every collection is a subset of another collection. Why is this important? Looking at the preceding example, if you created the All Systems—4GB RAM Plus Collection and limited it to another collection that contained only desktop-class systems with the ConfigMgr agent installed, then when the All Systems—4GB RAM Plus Collection passed its query across the ConfigMgr database looking for matching data, it would return only desktop-class systems with the ConfigMgr agent installed with at least 4 GB of RAM, as shown in figure 5.7.
Figure 5.7. Depending on how you configure your limiting collection, the same query can produce different results.

Collection Limiting is an effective way of protecting yourself by restricting the scope of your ConfigMgr queries. It also allows you to use work that you’ve already undertaken, because when you create a new query, you don’t have to reinvent the wheel every single time.
Now that you’ve had a good look at how collections are constructed, let’s get stuck into building some.
5.2. Creating a new collection
This section focuses on the manual, wizard-driven process of creating two new collections: one for devices and the other for users. After creating the collections, you’ll take a deeper look under the hood at what ConfigMgr does to make those collections happen, and what you need to know for your ongoing administrative tasks.
5.2.1. Creating a new device collection
In this section you’ll create a device collection with a query-based membership (remember, this is the most common kind of collection you’ll build).
To create a new device collection:
1. Navigate to “Assets and Compliance.”
2. Select “Device Collections.”
3. Right-click in the right-hand window pane and select “Create Device Collection.”
You’re presented with the Create Device Collection Wizard. As you can see, the first window has two mandatory fields: “Name” and “Limiting Collection.” The collection name should be something unique and descriptive; for this collection, use All Windows 10 Clients.
Click the “Browse” button next to the “Limiting Collection” field. This presents you with a browser window showing the current structure of device collections. Select the built-in collection “All Desktop and Server Clients” and click “OK,” as shown in figure 5.8.
Figure 5.8. Create your new collection and set the limiting collection.

Tip
The Select Collection window contains a device collections drop-down option. If you look at this drop-down menu, you’ll see that only device collections can be selected at this time. This is because a device collection can’t be limited to a user collection, and vice versa. But for other tasks, such as application deployment, you can deploy to either user or device collections, so both options will be available in the drop-down list.
Click “Next” in the wizard, and you’ll be taken to the Membership Rules page. This is where you specify how the collection is to be populated. From the “Add Rule” drop-down, select “Query Rule.” Construct the query as follows:
1. In the “Name” text box, type qry-Windows10OperatingSystem.
2. Click the “Edit Query Statement” button.
3. Click the Criteria tab.
4. Click the sunburst icon to create a new criterion.
5. From the “Criterion Type” drop-down list, select “Simple Value.”
6. Click “Select.”
7. From the “Attribute Class” drop-down list, select “System Resource” (skip the “Alias” field).
8. From the “Attribute” drop-down list, select “Operating System Name and Version.” Then click “OK.”
9. From the “Operator” drop-down list, select “Is like.”
10. Click the “Value” button.
11. Select the “Microsoft Windows NT Workstation 10” option.
12. Change the “Values” field to %Workstation 10% (the % characters are used as wildcards, so that the search returns a wider range of results).
13. Click “OK” multiple times until you get back to the Query Rule Properties window. The text in the query statement field should read select * from SMS_R_System where SMS_R_System.OperatingSystemNameandVersion = "%Workstation 10%", as shown in figure 5.9.
Figure 5.9. Make sure your query rule looks like this.

14. Click “OK.”
15. Back in the Membership Rules window, tick the “Use incremental updates for this collection” check box.
16. Click the “Summary” button.
17. Click “Next” and then “Close.”
Congratulations, you’ve just created a query-based device collection!
Creating a device collection populated by a dynamic query is a multistep process in PowerShell (as it is in the console!), so rather than document all the code here, you can find it all in .powershellNew-CMDeviceCollection.ps1. This script uses a slightly different query to build the collection membership rule, in that it returns a subset of discovered data rather than everything, but the core functionality is exactly the same.
Navigate back to the Device Collections window, and you’ll see the newly created collection. Notice that the icon next to the collection is overlaid with a small egg-timer icon. This indicates that the collection is performing a full update. This also explains why the membership count is zero: there’s nothing wrong with the collection query, it’s just in the process of querying the ConfigMgr database for the first time.
Refresh the console a couple of times until the egg timer disappears and the membership count is incremented. Right-click the collection and select “Show Membership.” This opens a new node under Device Collections, where you can see which systems have been populated into the new collection. The same process works for all collections.
Which Log?
The colleval.log file shows all collections that are in the active process of evaluating their memberships. If you’re seeing collections that should be updating but that don’t seem to be reflecting the correct information in the ConfigMgr console, this is an important place to look so that you can ascertain that collection evaluation is taking place properly.
Go through the steps detailed in section 5.2.1 to create a new query-based device collection that will return all Windows 10 clients.
5.2.2. Creating a new user collection
The process of creating a new user collection is virtually identical to that for creating a new device collection, but because users and devices have different object properties, the options for creating a user collection aren’t the same. In this section you’ll create a user collection by copying in the WQL query directly.
To create a new user collection:
1. Navigate to “Assets and Compliance.”
2. Select “User Collections.”
3. Right-click in the right-hand window pane and select “Create User Collection.”
4. For “Name,” use All ConfigMgr Lab Users.
5. For the “Limiting Collection” field, choose “All Users and User Groups.” Note that you can choose only from user collections.
6. In the Membership Rules page, select Add Rule > Query Rule.
In the same way that you created the device collection query, you’ll create one for the user collection too. But this time you’ll do things a little differently:
1. In the “Name” field, type ConfigMgr Lab Users.
2. Click the “Edit Query Statement” button.
3. Click the “Show Query Language” option.
4. Paste in the following WQL code, shown in figure 5.10:
select * from SMS_R_User where SMS_R_User.UserGroupName =
"MOL\ConfigMgr Lab Users"Figure 5.10. Editing the query directly in WQL is a quick and efficient way to create a query.
(The double backslash is needed due to its use in WQL as an escape character.)

5. Click the “Show Query Design” button and select the Criteria tab.
6. Verify that a criterion has been created. Click “OK.”
7. Click “OK” again to get back to the Membership Rules page. Tick the “Use incremental updates for this collection” check box.
8. Click the “Summary” button.
9. Click “Next” and then “Close.”
You’ve now created a user collection, built on a query that you created by copying in the WQL query directly, rather than needing to select all the query options yourself.
Work through the steps in section 5.2.2 to create a new user collection that will return members of the Active Directory group ConfigMgr Lab Users.
Try creating a new user in AD and adding it to this group. How quickly does the new user appear in the user collection?
5.3. Understanding the WMI Query Language
As you’ve already seen, the query builder is a useful, graphical way of constructing your ConfigMgr queries, but under the hood, ConfigMgr is translating everything in the GUI into WQL. Therefore, if you know enough about WQL, you can quickly construct complex queries without having to manually click through the query builder every time.
Why is this important? Many queries that you’re likely to build during day-to-day administration will be subtle variations of each other. When you’re doing a lot of work with collections and queries, it’s important to be able to rapidly create accurate queries, and the best way to do that is to take advantage of work that you’ve already performed in the past. Additionally, after you start working more regularly with queries, you’ll be exposed to the wealth of data that ConfigMgr is capable of discovering about systems and users, which in turn will help you in your everyday admin tasks.
Regardless of how you construct a query in ConfigMgr (via the query builder or using WQL directly), after you’ve finished the query and it’s working the way you want it to, it’s good practice to always go back into the query, click “Show Query Language,” and copy and paste the WQL code out.
Copy the WQL code from each query into a collaboration tool such as OneNote along with a description of what it does. That way, you’ll start to build up a repository of WQL knowledge that you can refer back to when building new queries. It’s also incredibly useful for knowledge-sharing among colleagues, for maintaining a sense of change control in your ConfigMgr environment, and for not having to start from scratch each time you build a clean ConfigMgr environment.
Let’s take a deeper look at how WQL queries are constructed.
5.3.1. Creating a basic query
Like many query languages, WQL uses a structural syntax that’s similar to basic English phrases, so coming to grips with the flow of a WQL statement isn’t too onerous. Also, it’s not a programming language, so if you don’t have a background in programming or coding (like me), that’s no barrier to entry.
Let’s take a look at this simple query:
SELECT * FROM SMS_R_System WHERE OperatingSystemNameAndVersion LIKE '%Server
     6.3'
The purpose of this statement is to return all systems that are running Windows Server 2012 R2. The query can be broken down as follows:
1. SELECT * means that the query will return all properties for all instances. In other words, “Select/Return Everything.”
2. FROM directs the query to look at a particular Windows Management Instrumentation (WMI) class as the data source for the query.
3. SMS_R_System is the WMI class being used. In your lab environment, this class exists under the rootsmssite_PS1 WMI namespace. SMS_R_System is a dynamic repository of data that’s populated with discovery data. So those discovery methods that you enabled earlier in the lab are working behind the scenes to populate this class.
4. WHERE indicates that you’re looking for a particular attribute (a subset of data) in the SMS_R_System class; it acts as a filter to restrict the data returned.
5. OperatingSystemNameAndVersion is the particular attribute that the query is filtering on—in this case, the name and version of all discovered operating systems.
6. LIKE is an operator indicating that the query is looking for a particular value in the OperatingSystemNameAndVersion attribute, but that the value provided in the query won’t be an exact match. LIKE tells the query to perform a fuzzy search. You have several options for operators, including “greater than,” “not equal to,” and “uppercase is like.”
7. Finally, '%Server 6.3' is the value that the query is searching for. The percentage symbol acts as a wildcard, which in this case means that all operating systems with a name ending with Server 6.3 will be returned in the results.
Tip
When searching for a particular version of a Windows operating system, the version is the Windows kernel version, not the descriptive version. For example, Windows 8.1 is kernel version 6.3, whereas Windows 10 is kernel version 10. To find out which kernel your version of Windows is running, open a command prompt and type ver. Alternatively, open a PowerShell window and type Get-CimInstance ClassName Win32_OperatingSystem | Select-Object version.
Create a new device collection called All Windows Server 2012 R2 Clients. Populate the collection by using the preceding WQL query, without using the query-builder GUI. Make sure that you set the limiting collection properly, so that only servers with the ConfigMgr client are returned by the query.
5.3.2. Using multiple attributes
You can now take that basic query and turn it into something a little more complex. Let’s say you need to build a query based on two criteria: the first is the operating system name and version, and the second is the system name.
In this example, you want the query to return only those matching operating systems whose system names start with CLIENT. In this case, the query looks something like this:
SELECT * FROM SMS_R_System WHERE SMS_R_System.OperatingSystemNameandVersion
     LIKE "%Workstation 10%" AND SMS_R_System.NetbiosName LIKE "CLIENT%"
Note that the class is still SMS_R_System, indicating that both attributes in the query exist within this same WMI class. Also, each attribute (OperatingSystemNameandVersion and NetbiosName) has been appended to SMS_R_System. This acts as an explicit path to the WMI attribute. You’re telling the query that multiple attributes are going to be referenced, and you’re allowing no room for ambiguity as to the location of those attributes. It makes the query more robust.
Finally, the AND operator lets you add another attribute and value into the query. Using AND means that the values for both attributes must be met in order for the query to return a result. For example, if the SMS_R_System class contained discovery data about a system called CLIENT04 but that system was running Windows 8.1 (Windows kernel version 6.3), then the query wouldn’t return that system in the results. But if you used the OR operator instead of AND, CLIENT04 would be returned.
5.3.3. Querying multiple sources
Sometimes you need the main query to run against a set of data not contained within the main WMI class. For example, let’s say that you want to build a query that will return all systems that don’t have Microsoft Outlook installed. Perhaps you’re planning to deploy Outlook in your environment and wish to target only those machines that definitely don’t have it installed (which is a rational thing to do!).
The trick is that the list of installed applications on each machine isn’t discovery data, but rather inventory data. The ConfigMgr agent has run inventory tasks across the system and reported the inventory data back to the ConfigMgr server, which in turn stores it in a different WMI class to the discovery data—in this case, in SMS_G_System_Add_Remove_Programs.
In order to cater to these multiple data sources, you’ll use what is known as a subselect query—a query within a query. For this example, the entire query looks something like this:
SELECT *
  FROM SMS_R_System
    WHERE
        ResourceID NOT IN
        (
            SELECT ResourceID
            FROM SMS_G_System_Add_Remove_Programs
            WHERE DisplayName LIKE '%Outlook%'
        )
I’ve broken the query into multiple lines to make it easier to read. As you can see, the core query is still a basic query, looking for system names (ResourceID) in SMS_R_System. The complexity here is that there’s a subselect query that first looks at the inventory data contained within SMS_G_System_Add_Remove_Programs for all systems with Outlook installed. The resulting names are returned to the original query, which then invokes the NOT IN operator to finally return all the system names (ResourceID) that aren’t found in the subselect query.
In other words, all systems that don’t have Outlook installed. Neat, right?
5.3.4. Combining data from multiple sources
The last type of query you’re going to look at is one that takes data from two sources, and then presents them both together as a single result. This is called joining.
The difference between a join and a subselect is that in a subselect, you use a subquery from a different source to narrow the scope of the main query. A join uses at least two queries, one from each data source, and both are of equal importance. One isn’t a subselect of the other.
The example you’ll look at is a query that returns all systems with internal batteries. This is a query method used to determine whether a system is a laptop/notebook/tablet or a desktop. At its most basic level, the result you’re looking for is something like this:
SELECT *
    FROM SMS_R_System
    WHERE
        SMS_G_System_Battery.DeviceID LIKE '%'
But this isn’t going to work because SMS_R_System and SMS_G_System_Battery are two completely separate WMI classes. The query offers no instruction as to how to bring these two disparate data sources together.
The way to achieve this is to inform the query that there are two data sources and—in order to present the results in a coherent manner—which attributes should be used as a common factor between them. The end result looks something like this:
SELECT DISTINCT *
    FROM SMS_R_System
    INNER JOIN SMS_G_System_Battery ON
        SMS_G_System_Battery.ResourceId = SMS_R_System.ResourceId
    WHERE
        SMS_G_System_Battery.DeviceID LIKE '%'
This query is informed that the first query against SMS_R_System will also have data brought in from SMS_G_System_Battery, via the INNER JOIN operator. The ON operator informs the query which attributes will be used to match results from one WMI class with the other. In this case, both WMI classes use the ResourceID attribute, so this will be used to line up the results.
The result is a list of systems known to have an internal battery. The use of SELECT DISTINCT * rather than the usual SELECT * means that only unique results will be returned, and duplicate ResourceID entries from SMS_R_System will be ignored.
5.4. Managing collections
As a ConfigMgr environment becomes larger and more complex, the number of collections that are created and need to be maintained inevitably increases. This is as it should be, but you need to be aware of a few things so that your collection structure doesn’t end up unmanageable and, ultimately, becoming a problem in its own right.
This section explores how your collections can negatively impact the ConfigMgr server as well as your administrative experience, and what you can do to keep a tight rein on your collections.
5.4.1. Use folders
Do you keep all of your files in a completely flat structure? Of course not; it’s not logical, and it would make it impossible to find anything. The same holds true for collections. Organizational folders are a convenient way to keep your collections logically structured.
Creating a new folder
To create a new folder:
1. Right-click either “User Collections” or “Device Collections,” and select “Folder.”
2. Click the “Create Folder” button.
3. Enter a name for the new folder, such as Application Deployment, and click “OK.”
You now have a new folder underneath the collections root, as shown in figure 5.11.
Figure 5.11. Organizational folders are a great way to keep collection sprawl in check.

Editing or deleting an existing folder
To change or delete an existing folder:
1. Right-click the folder and select “Folder.”
2. Click the “Create,” “Move,” “Delete,” or “Rename” option, as appropriate.
Folders themselves don’t have any editable properties; they aren’t used for security, and they don’t apply any properties or settings to the collections contained within them. They’re there solely for your benefit. In general, it’s a good idea to avoid creating folder levels that are too deep; two or three levels down is generally fine.
If you select a folder and create a new collection, the collection will automatically appear within the folder.
If you select a folder and create a new folder, this will appear as a subfolder.
You can move a folder around after you create it, and any collections contained within that folder will also be moved.
If a folder has any collections within it, you can’t delete the folder.
From a PowerShell perspective, folders are a little tricky, as there aren’t any cmdlets that let you directly interact with them. You can still use PowerShell, however, and you can find the relevant code in .powershellNew-CMOrganizationalFolder.ps1.
Follow the steps in this section to create three new folders at the root of Device Collections: Application Deployment, Operating System Deployment, and Software Update Deployment.
As you create the folders, consider the collection structure in your own production environment. Are organizational folders in use? If so, how have they been created and structured? If not, could the use of folders improve everyday administration?
5.4.2. Be aware of collection updating
As you’ve been working through this lab, you might have noticed that when you create a new collection, there’s an option to set a schedule for a full collection update and also one to enable incremental updates, as shown in figure 5.12.
Figure 5.12. Each collection can be updated on a schedule or updated incrementally—or both, or neither.

Working with full-update schedules
A full update does what it says on the label; the rules governing membership of the collection are completely reevaluated according to the schedule. The default is every seven days, and you can increase or decrease the aggressiveness of that timing.
When considering full-update schedules, the two most important factors are as follows:
- What is the data source used to determine collection membership?
- What is the update schedule of the limiting collection set to?
In the case of the data source, consider a collection that uses a query looking at data stored in an SMS_G_System WMI class. This data is populated via the hardware and software inventory agents in the ConfigMgr client, which run by default every seven days. There’s little point in scheduling a full update on the collection to run more frequently than every seven days, because the source data is unlikely to have been updated.
In the case of the limiting collection, if you create a new collection with a full-update schedule that’s more aggressive than that of its limiting collection (and assuming that the limiting collection doesn’t have incremental updates enabled), then your collection will show only new memberships after the Limiting collection has also been updated. This is a trap that many administrators fall into: creating a new collection and then updating it aggressively when it doesn’t show the membership they were expecting, but then failing to look at any discrepancies of timing between the collection and its Limiting collection as the source of the problem.
Working with incremental updates
When a collection has incremental updates enabled, it will check for any changes since the last full update approximately every 10 minutes. The benefit is that collections built on data sources that are constantly updated (for example, AD group membership) or that need to be refreshed quickly don’t have to wait for a full update to be run, and the full-update schedule doesn’t need to be set aggressively high.
For example, a collection that looks at the membership of an AD group can be left to perform a full update every seven days, and enabling incremental updates will keep its membership constantly refreshed.
Incremental updates strike the balance between functionality and performance. A full update uses both processing and storage resources, and having too many over-aggressive full-update schedules can result in degraded server performance overall, even leading to the server being in a constant state of updating collections, resulting in potentially significant administrative problems.
5.4.3. Move collections between hierarchies
If you have a complex structure of collections, creating a backup repository may be worthwhile in case you ever want to quickly re-create them in another hierarchy—potentially in the event of rebuilding your ConfigMgr environment, or to test a production collection in a lab environment.
Collections can be individually exported and imported. To export a collection:
1. Right-click the collection (you can also select multiple collections, and then right-click) and click the “Export” option.
2. Click “Next.”
3. Select the check box next to each collection you want to export and click “Next.”
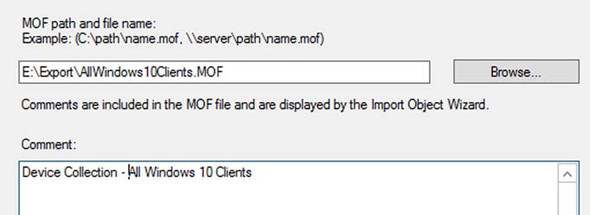
4. Select “The collection data will be saved into a Managed Object Format (MOF) file.” Enter a path and filename for the MOF file, as shown in figure 5.13.
Figure 5.13. Export a built collection and then a different ConfigMgr Site or environment.
5. Click the “Summary” button.
6. Click “Next” and then click “Close.”
Tip
You can open the MOF file in a text editor such as Notepad++ to get a sense of its internal structure.
To export the collection by using PowerShell, use the following command:
Export-CMDevicecollection `
-Name 'All Windows 10 Clients' `
-ExportFilePath 'E:ExportAllWindows10Clients.MOF'
To import a collection from a MOF file, do the following:
1. Right-click the root of either user collections or device collections—you can’t import a collection directly into a folder—and then select “Import collections.”
2. Click “Next.”
3. Click the “Browse for the exported MOF file” button. Then click “Next.”
4. Review the collection details to be imported.
5. Click the “Summary” button.
6. Click “Next” and then click “Close.”
To perform the import with PowerShell, use the following command:
Import-CMDevicecollection -ImportFilePath 'E:ExportAllWindows10Clients.MOF'
At this point, right-click the newly imported collection and select “Properties.” In the General window, you’ll notice that the collection ID has the site code prefix of the site you just imported the collection into. Even though the collection originally had an ID with a different site code prefix, this property isn’t exported because this could cause conflict with existing collections.
Additionally, the limiting collection may or may not be populated. If it isn’t, a warning icon is shown. The reason it’s empty is that the original limiting collection doesn’t exist in the destination hierarchy. For example, a collection that’s limited to All Desktop and Sever Clients will automatically have its limiting collection populated on import, because its limiting collection is a built-in collection that’s present in every ConfigMgr hierarchy. But if the limiting collection is a custom collection that doesn’t exist in the destination hierarchy, the property won’t be populated.
Without a limiting collection, the newly imported collection won’t function. There’s no risk to the ConfigMgr hierarchy: the collection will function only after an administrator manually specifies a new limiting collection.
Follow the steps in this section to import two new device collections into your lab environment.
Import the file from .mofConfigMgrLabcollections.MOF.
Then take a look at the properties of each collection, in particular the WQL statement controlling the membership. Copy the queries out for your own reference.
5.5. Lab
Create a new device collection populated with a query that looks for all systems running Windows Server 2012 R2. Use PowerShell to export the collection after you’ve created it.
5.6. Ideas for on your own
Using collections and WQL to organize and maintain ConfigMgr data has been around for many years. As a result, plenty of examples of WQL queries are scattered across the internet, which administrators just like yourself have blogged about, documented, and tweaked. So if you’re just starting down the path of understanding WQL, remember that a wealth of information is out there.
As a start, look at the example queries contained within this TechNet article, specifically the one that queries for ConfigMgr clients of a specific type (for example, Windows clients or Mac OS X clients): http://technet.microsoft.com/en-us/library/gg712323.aspx#BKMK_Example.
Which of these queries would be useful for your own production environment?