
Chapter 12
Physics Engines
Physics engines are what drive popular iOS games like Angry Birds, Stick Golf, Jelly Car, and Stair Dismount. They allow you to create a world that feels dynamic and lifelike.
Cocos2d is distributed with two physics engines: Box2D and Chipmunk. Both are designed to work only in two dimensions, so they’re a perfect fit for cocos2d.
In this chapter, you’ll learn the basics of both of these physics engines, and along the way you’ll probably come to appreciate one more than the other. I’ll briefly explain the differences between them, but for the most part it’s a choice based on personal preference.
If you’ve never worked with a physics engine before, don’t worry—I’ll also give you a quick introduction to their basic concepts and key elements.
Basic Concepts of Physics Engines
You can think of a physics engine as an animation system for game objects. Of course, it’s up to the game developer to connect and synchronize game objects like sprites with the physics objects, called rigid bodies. They’re called that because physics engines animate them as if they were stiff, nondeformable objects. This simplification allows physics engines to calculate a large number of bodies.
There are generally two types of bodies: dynamic (moving) and static (immovable) objects. The differentiation is important because static bodies never move—and should never be moved—and the physics engine can rely on certain optimizations based on the fact that static bodies never collide with each other.
Dynamic bodies, on the other hand, collide with each other and with static bodies. They also have at least three defining parameters in addition to their position and rotation. One is density, or mass—in other words, a measure of how heavy an object is. Then there is friction—how resistant or slippery the dynamic body is with respect to moving over surfaces. Finally, there is restitution, which determines the bounciness of the object. Although impossible in the real world, physics engines can create dynamic bodies that never lose momentum as they bounce, or even gain speed every time they bounce off of some other body.
Both dynamic and static bodies have one or more shapes that determine the area the body encompasses. Most often the shape is a circle or a rectangle, but it can also be a polygon, a number of vertices forming any complex shape, or merely a straight line. The shapes of a body determine where other bodies and their shapes collide. And in turn, each collision generates contact points—the points where the two bodies’ shapes intersect. You can use these contact points to play particle effects or add scratch marks at exactly the places where the bodies have collided.
Dynamic bodies are animated by the physics engine through applying forces, impulses, and torque instead of setting their position and rotation directly. Modifying position and rotation directly is not advised, because physics engines make certain predictions that no longer hold true if you manually reposition bodies.
Finally, you can connect bodies together using a selection of joints, which limit the movement of connected bodies in various ways. Some joints may have motors, which can act as the drive wheel of a car, for example, or as friction for the joint so that the joint tries to snap back to its original position.
Limitations of Physics Engines
Physics engines have their limits. They have to take shortcuts because the real world is prohibitively complex to simulate. The use of rigid bodies is an example. In some extreme cases, physics engines may not be able to catch every collision—for example, when bodies are moving very fast they may tunnel through each other. Although this has been proven to happen in quantum physics, real-world objects that we can actually see with our own eyes have yet to show that effect.
Rigid bodies can sometimes penetrate each other and get stuck, especially if they’re constrained by joints that hold two or more bodies together and limit their range of motion. This can lead to undesirable trembling motions of the bodies as they struggle to move apart while keeping their joint constraints satisfied. You may have seen this even in modern games; for example, the ragdolls of dead actors in a first-person shooter game can sometimes be seen in very unnatural body positions, their limbs not coming to rest at all, causing the entire ragdoll to tremble or worse. Such events continue to amaze and amuse players. Do a search for “physics glitch” on your favorite video site and you’ll see what I mean.
And of course there can be game-play issues. With rigid bodies, you never know what will happen given enough players interacting with them. Eventually some players may manage to block themselves and trap themselves in a dead-end situation, or they may figure out how to exploit the physics simulation to be able to move to areas they shouldn’t be able to reach.
The Showdown: Box2D vs. Chipmunk
As I mentioned, cocos2d is distributed with two physics engines: Box2D and Chipmunk. How should you choose between them?
In a lot of cases, it boils down to a matter of taste. Most developers argue along the lines of the programming language in which the physics engines are implemented: Box2D is written entirely in C++, whereas Chipmunk is written in C.
You may favor Box2D over Chipmunk simply because of its C++ interface. Being written in C++ has the added advantage that it integrates better with the likewise object-oriented Objective-C language. You may also appreciate that Box2D uses a verbose language throughout, as opposed to the many one-letter variable names common in Chipmunk. In addition, Box2D makes use of operator overloading so that you can, for example, add two vectors simply by writing the following:
b2Vec2 newVec = vec1 + vec2;
But if you’re not very familiar with C++, you may find its steep learning curve daunting. To that end, the Chipmunk physics engine may be more welcoming to you if you’re more familiar with C language syntax or prefer a lightweight implementation of a physics engine that may be easier to pick up and learn. It’s been part of the cocos2d distribution for many months longer than Box2D has, which has also spawned more tutorials and forum posts about Chipmunk, although Box2D tutorials are catching on. Chipmunk also offers several commercial versions from Indie to Enterprise Editions; the higher-end editions include additional performance optimizations and an Objective-C API. Learn more about the commercial version features here: http://chipmunk-physics.net/chipmunkPro.php.
One warning ahead of time: Chipmunk uses C structures, which expose internal fields. If you’re experimenting and don’t know what certain fields are used for, and they’re not documented, that means you shouldn’t change them—because they’re used only internally.
There is also the popular Chipmunk SpaceManager, which adds an easy-to-use Objective-C interface to Chipmunk. SpaceManager also makes it easy to attach cocos2d sprites to bodies and adds debug drawing, among other things. You can download Chipmunk SpaceManager here: http://code.google.com/p/chipmunk-spacemanager. Unfortunately, at the time of writing the latest version 0.1.3 of SpaceManager isn’t compatible with cocos2d 2.0. I’m sure a compatibility update will be made eventually.
In terms of functionality, you can safely choose either engine. Unless your game relies on one particular feature that one physics engine has and the other doesn’t, you can use either to great effect. Especially if you have no familiarity with either one, feel free to choose the one that appeals to you more, based on the language and coding style.
The rest of this chapter introduces you to the basics of both physics engines so you can decide for yourself which one appeals to you more. In Chapter 13, you’ll learn how to build a playable pinball game with bumpers, flippers, and lanes built with Box2D and the VertexHelper tool.
Box2D
The Box2D physics engine, written in C++, was developed by Erin Catto, who has given presentations about physics simulations at every Game Developers Conference (GDC) since 2005. It was his GDC 2006 presentation that eventually led to the public release of Box2D in September 2007. It’s been in active development ever since.
Because of its popularity, the Box2D physics engine is distributed with cocos2d. You can create a new project using Box2D by choosing the cocos2d Box2D application template from Xcode’s File ![]() New Project dialog. This project template adds the necessary Box2D source files to the project and provides a test project in which you can add boxes that bounce off each other, as shown in Figure 12-1. The boxes also fall according to gravity, depending on how you’re holding your device.
New Project dialog. This project template adds the necessary Box2D source files to the project and provides a test project in which you can add boxes that bounce off each other, as shown in Figure 12-1. The boxes also fall according to gravity, depending on how you’re holding your device.
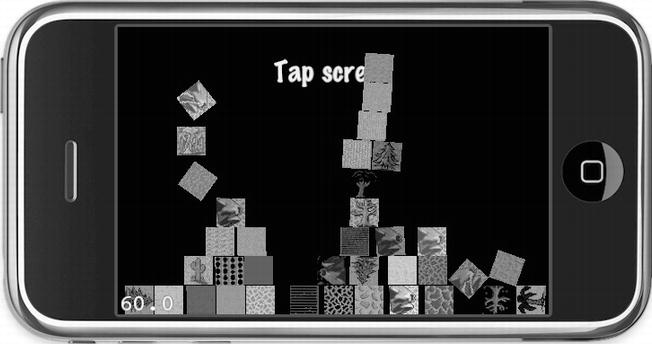
Figure 12-1 . The PhysicsBox2D example project
Caution Because the Box2D physics engine is written in C++, you have to use the file extension .mm instead of .m for all your project’s implementation files. This tells Xcode to treat the implementation file’s source code as either Objective-C++ or C++ code. With the .m file extension, Xcode will compile the code as Objective-C and C code and won’t understand Box2D’s C++ code, which will result in numerous compile errors for every line of code that uses or makes a reference to Box2D. So if you’re getting a lot of errors related to Box2D, check that your implementation files all end in .mm, and if not, rename them.
Documentation for Box2D is available in several places. First, you can read the Box2D manual online at www.box2d.org/manual.html, which introduces you to common concepts and shows example code. The Box2D API reference is distributed with Box2D itself, which you can download at http://code.google.com/p/box2d. You can also find the Box2D API reference in the Box2D version distributed with the book’s source code. The API reference is in the folder /Physics Engine Libraries/Box2D_v2.1.2/Box2D/Documentation/API—to view it, locate and open the file index.html in that folder. You can also browse the Box2D API reference (and other libraries) for the version included in Kobold2D by visiting this URL: www.learn-cocos2d.com/api-ref.
If you like Box2D, you should also consider donating to the project; you can do so via the Donate button on its home page: www.box2d.org.
The World According to Box2D
Because the Box2D example project provided by cocos2d is quite complex, I decided to break it down into smaller pieces and re-create the example project step by step, but not without adding some extras and variations.
Listing 12-1 shows the HelloWorldLayer header file from the PhysicsBox2D01 project.
Listing 12-1. The Box2D HelloWorldLayer Interface
#import "cocos2d.h"
#import "Box2D.h"
#import "GLES-Render.h"

#define PTM_RATIO 32
#define TILESIZE 32
#define TILESET_COLUMNS 9
#define TILESET_ROWS 19

enum
{
  kTagBatchNode,
};

@interface HelloWorldLayer : CCLayer
{
  CCTexture2D* spriteTexture;
  b2World* world;
  GLESDebugDraw* debugDraw;
}

+(CCScene*) scene;
@end
It’s fairly standard, except that it includes the Box2D.h header file and adds a member variable of type b2World. This is the physics world—think of it as the container class that will store and update all physics bodies.
The init method in Listing 12-2 calls initPhysics to set up the physics world. I’ll get to that next. The rest of the init code creates a CCSpriteBatchNode, keeps a reference to the sprite batch texture, and adds a label to the screen. Notice that the dealloc method calls delete on the world and debugDraw instance variables. Because these are C++ class instances, you have to release (delete) them manually. ARC does not manage memory of C or C++ objects.
Listing 12-2. The HelloWorldLayer initialization
#import "HelloWorldLayer.h"
#import "PhysicsSprite.h"

@implementation HelloWorldLayer

+(CCScene*) scene
{
     CCScene* scene = [CCScene node];
     HelloWorldLayer* layer = [HelloWorldLayer node];
     [scene addChild: layer];
     return scene;
}

-(id) init
{
     self = [super init];
     if (self)
     {
         self.isTouchEnabled = YES;

         CCSpriteBatchNode* batchNode = [CCSpriteBatchNode ←
                                       batchNodeWithFile:@"dg_grounds32.png"];
         spriteTexture = batchNode.texture;
         [self addChild:batchNode z:0 tag:kTagBatchNode];

         [self initPhysics];

         CGSize screenSize = [CCDirector sharedDirector].winSize;
         [self addNewSpriteAtPosition:ccp(screenSize.width / 2, screenSize.height / 2)];

         CCLabelTTF* label = [CCLabelTTF labelWithString:@"Tap screen"
                           fontName:@"Marker Felt"
         fontSize:32];
         [self addChild:label z:0];
         label.color = ccc3(0, 0, 255);
         label.position = ccp(screenSize.width / 2, screenSize.height - 50);

         [self scheduleUpdate];
     }
         return self;
}

-(void) dealloc
{
    delete world;
    world = NULL;
    delete debugDraw;
    debugDraw = NULL;
}
The Box2D world is initialized in the initPhysics method by creating a new b2World object with a gravity vector, as shown in Listing 12-3. This also adds collisions at the screen borders and enables debug drawing.
Listing 12-3. Initializing the Box2D World
-(void) initPhysics
{
  b2Vec2 gravity;
  gravity.Set(0.0f, -10.0f);
  world = new b2World(gravity);

  world-> SetAllowSleeping(true);
  world-> SetContinuousPhysics(false);

  debugDraw = new GLESDebugDraw(PTM_RATIO);
  world-> SetDebugDraw(debugDraw);

  uint32 flags = 0;
  flags + = b2Draw::e_shapeBit;
  //         flags + = b2Draw::e_jointBit;
  //         flags + = b2Draw::e_aabbBit;
  //         flags + = b2Draw::e_pairBit;
  //         flags + = b2Draw::e_centerOfMassBit;
  debugDraw-> SetFlags(flags);

  // Define the ground body.
  b2BodyDef groundBodyDef;
  b2Body* groundBody = world-> CreateBody(&groundBodyDef);

  // Define the ground box shape.
  CGSize screenSize = [CCDirector sharedDirector].winSize;
  float boxWidth = screenSize.width / PTM_RATIO;
  float boxHeight = screenSize.height / PTM_RATIO;
  b2EdgeShape groundBox;
  int density = 0;

  // bottom
  groundBox.Set(b2Vec2(0, 0), b2Vec2(boxWidth, 0));
  groundBody-> CreateFixture(&groundBox, density);
  // top
  groundBox.Set(b2Vec2(0, boxHeight), b2Vec2(boxWidth, boxHeight));
  groundBody-> CreateFixture(&groundBox, density);
  // left
  groundBox.Set(b2Vec2(0, boxHeight), b2Vec2(0, 0));
  groundBody-> CreateFixture(&groundBox, density);
  // right
  groundBox.Set(b2Vec2(boxWidth, boxHeight), b2Vec2(boxWidth, 0));
  groundBody-> CreateFixture(&groundBox, density);
}
Remember that Box2D is written in C++. To instantiate one of Box2D’s classes, you have to add the new keyword in front of the class’s name. If Box2D were written in Objective-C, the equivalent line might look like this:
world = [[b2World alloc] initWithGravity:gravity allowSleep:allowBodiesToSleep];
In other words, the new keyword in C++ is equivalent to sending the alloc message to an Objective-C class followed by an init message. That of course means you also have to deallocate the Box2D world, as seen in Listing 12-2. In C++ you do this using the delete keyword:
-(void) dealloc
{
  delete world;
  world = NULL;
  delete debugDraw;
  debugDraw = NULL;
}
The Box2D world in Listing 12-3 is initialized with an initial gravity vector and allows bodies to fall asleep.
Sleeping bodies? It’s a trick that allows the physics simulation to quickly skip over objects that don’t need processing. A dynamic body goes to sleep when the forces applied to it have been below a threshold for a certain amount of time. In other words, if the dynamic body is moving and rotating very slowly or not at all, the physics engine will flag it as sleeping and won’t apply forces to it anymore—that is, unless an impulse or force applied to the body is strong enough to make the body move or rotate again. This trick allows the physics engine to save time by not processing the bodies that are at rest. Unless all your game’s dynamic bodies are in constant motion, you should enable this feature as in Listing 12-3.
The continuous physics setting causes Box2D to track collisions of fast-moving objects more accurately. It effectively prevents fast-moving objects to penetrate or pass through other objects at the expense of speed. In fact, you should probably leave this setting disabled until you actually experience bugs due to fast-moving objects not colliding with each other.
The gravity passed to Box2D is a b2Vec2 struct type. It’s essentially the same as a CGPoint, because it stores x and y float values. In this case, and fortunately for us in the real world too, gravity is a constant force. The 0, –10 vector is constantly applied to all dynamic bodies, making them fall down, which in this case means toward the bottom of the screen.
Debug drawing may be helpful during development but also has a negative impact on performance. Unless you need it, it may be better to leave it disabled. The HelloWorldLayer class performs the debug drawing in the draw method but encloses it in #if DEBUG statement to make sure debug drawing is disabled in release builds:
#if DEBUG
-(void) draw
{
  [super draw];

  ccGLEnableVertexAttribs(kCCVertexAttribFlag_Position);
  kmGLPushMatrix();
  world-> DrawDebugData();
  kmGLPopMatrix();
}
#endif
Restricting Movement to the Screen
World setup, check. What next? Well, you should limit the movement of the Box2D bodies to within the visible screen area. For that, you’ll need a static body. The simplest way to create a static body is by using the world’s CreateBody method and then adding fixtures (collision information) to it. I’ll repeat the relevant code from Listing 12-3 here:
  // Define the ground body.
  b2BodyDef groundBodyDef;
  b2Body* groundBody = world-> CreateBody(&groundBodyDef);
Bodies are always created through the world’s CreateBody method. This ensures that the body’s memory is correctly allocated and freed. The b2BodyDef is a struct that holds all the data needed to create a body, such as position and the body type. By default, an empty body definition creates a static body at position 0, 0.
Note The &groundBodyDef variable is passed with a leading & (ampersand) character to the CreateBody method. That’s C++ for “Give me the memory address of groundBodyDef.” If you look at the definition of the CreateBody method, it requires a pointer passed to it: b2World::CreateBody(const b2BodyDef *def);. Because pointers store a memory address, you can get that address of a nonpointer variable by prefixing it with the ampersand character.
The body itself doesn’t do anything. To make it enclose the screen area, you have to create a shape with four sides:
  // Define the ground box shape.
  CGSize screenSize = [CCDirector sharedDirector].winSize;
  float boxWidth = screenSize.width / PTM_RATIO;
  float boxHeight = screenSize.height / PTM_RATIO;
  b2EdgeShape groundBox;
  int density = 0;

  // bottom
  groundBox.Set(b2Vec2(0, 0), b2Vec2(boxWidth, 0));
  groundBody-> CreateFixture(&groundBox, density);
  // top
  groundBox.Set(b2Vec2(0, boxHeight), b2Vec2(boxWidth, boxHeight));
  groundBody-> CreateFixture(&groundBox, density);
  // left
  groundBox.Set(b2Vec2(0, boxHeight), b2Vec2(0, 0));
  groundBody-> CreateFixture(&groundBox, density);
  // right
  groundBox.Set(b2Vec2(boxWidth, boxHeight), b2Vec2(boxWidth, 0));
  groundBody-> CreateFixture(&groundBox, density);
Look at how the b2EdgeShape groundBox variable is reused. Each Set method call is followed by a call to groundBody-> CreateFixture(), which uses the -> operator to denote that groundBody is a C-style pointer and passes &groundBox. Because Box2D makes a copy of groundBox, you can safely reuse the same shape to create all four sides enclosing the screen area without modifying or overriding the previous lines. Because the body is a static body (the default setting for Box2D bodies), density has no effect and is set to 0.
Notice that the screen width and height is divided by a PTM_RATIO constant to convert them from pixels to meters. Why meters, and what’s PTM_RATIO? Box2D is optimized to work best with dimensions in the range of 0.1 to 10 meters (1 meter is approximately 3.28 feet). It’s tuned for the metric system, so all distances are considered to be meters, all masses are in kilograms, and time is measured in—quite oddly—seconds. If you’re not familiar with the meters, kilograms, and seconds (MKS) system, don’t worry—you don’t have to meticulously convert feet into meters and pounds into kilograms. The conversion to meters is just a way to keep the distance values for Box2D in the desirable range of 0.1 to 10, and the masses used by bodies don’t resemble real-world masses anyway. The masses of bodies often need to be tweaked by feel rather than by using realistic weights.
You should try to keep the dimensions of objects in your world as close to 1 meter as much as possible. That’s not to say that you can’t have objects that are smaller than 0.1 meters or larger than 10 meters, but you may run into glitches and strange behavior if you create relatively small or large bodies.
The PTM_RATIO is defined like this:
#define PTM_RATIO 32
It’s used to define that 32 pixels on the screen equal 1 meter in Box2D. A box-shaped body that’s 32 pixels wide and high will be 1 meter wide and high. A body that’s 4×4 pixels in size will be 0.125×0.125 meters in Box2D, whereas a relatively huge object of 256×256 pixels will be 8×8 meters in Box2D and still well within acceptable Box2D dimensions. The PTM_RATIO lets you scale the size of Box2D objects down to the dimensions within which Box2D works best, and a PTM_RATIO of 32 is a good compromise for a screen area that may be as large as 1024×768 points on the iPad.
Note that the b2Vec2 struct is different from CGPoint, which means you can’t use a CGPoint where a b2Vec2 is required, and vice versa. In addition, Box2D points need to be converted to meters and back to pixels. To avoid making any mistakes, such as forgetting to convert from or to meters or simply making a typo and using the x coordinate twice, wrapping this repetitive code into convenience methods like these is highly recommended:
-(b2Vec2) toMeters:(CGPoint)point
{
  return b2Vec2(point.x / PTM_RATIO, point.y / PTM_RATIO);
}

-(CGPoint) toPixels:(b2Vec2)vec
{
  return ccpMult(CGPointMake(vec.x, vec.y), PTM_RATIO);
}
This allows you to write the following code to easily convert between CGPoint and pixels to b2Vec2 and meters:
// Box2D coordinates to Cocos2D point coordinates
b2Vec2 vec = b2Vec2(200, 200);
CGPoint pointFromVec = [self toPixels:vec];

// Cocos2D point coordinates to Box2D coordinates
CGPoint point = CGPointMake(100, 100);
b2Vec2 vecFromPoint = [self toMeters:point];
Adding Boxes to the Box2D World
With a static body containing the objects within screen boundaries, all that’s missing is something to be kept within the screen boundaries. How about little boxes, then?
I’ve added David Gervais’ orthogonal tileset image dg_grounds32.png to the Resources folder of the PhysicsBox2D01 project. The tiles are 32×32 pixels, so they make perfect 1×1-meter boxes.
The addNewSpriteAt method shown in Listing 12-4 is part of the cocos2d Box2D application template project but slightly modified to make use of all the tiles in the tileset.
Listing 12-4. Adding a New Dynamic Body with a Sprite
-(void) addNewSpriteAtPosition:(CGPoint)pos
{
  int idx = CCRANDOM_0_1() * TILESET_COLUMNS;
  int idy = CCRANDOM_0_1() * TILESET_ROWS;
  CGRect tileRect = CGRectMake(TILESIZE * idx, TILESIZE * idy, TILESIZE, TILESIZE);

  PhysicsSprite* sprite = [PhysicsSprite spriteWithTexture:spriteTexture
  rect:tileRect];
  CCNode* batchNode = [self getChildByTag:kTagBatchNode];
  [batchNode addChild:sprite];
  sprite.position = pos;

  // Define the dynamic body.
  b2BodyDef bodyDef;
  bodyDef.type = b2_dynamicBody;
  bodyDef.position = [self toMeters:pos];
  b2Body* body = world-> CreateBody(&bodyDef);
  body-> SetUserData((__bridge void*)sprite);

  // Define a box shape for our dynamic body.
  b2PolygonShape dynamicBox;
  dynamicBox.SetAsBox(0.5f, 0.5f);

  // Define the dynamic body fixture.
  b2FixtureDef fixtureDef;
  fixtureDef.shape = &dynamicBox;
  fixtureDef.density = 1.0f;
  fixtureDef.friction = 0.3f;
  body-> CreateFixture(&fixtureDef);

  [sprite setPhysicsBody:body];
}
First, a sprite is created from the CCSpriteBatchNode by using PhysicSprite’s spriteWithTexture initializer and supplying a CGRect that’s 32×32 pixels in size, to randomly pick one of the tileset’s tiles as the sprite’s image.
Cocos2d provides the PhysicsSprite class. It’s essentially a regular CCSprite that has an additional physics body instance variable. It uses the physics body to set the sprite’s position and rotation every time the sprite is rendered. This has the added advantage that you don’t need to manually update the sprite’s position and rotation properties, and it works well with ARC because you don’t need to store the sprite with the body’s SetUserData(void* data) function.
But I do store the sprite in the body’s userdata anyway, because I need the sprite later on during collision detection in order to tint its color to visualize the collision. Because the userdata is a void* pointer, assigning an Objective-C object to void* with ARC enabled requires a special bridge cast, like this:
body-> SetUserData((__bridge void*)sprite);
You also need a bridge cast to obtain the physics sprite from the body’s userdata:
PhysicsSprite* sprite = (__bridge PhysicsSprite*)body-> GetUserData();
After the sprite, a body is created, but this time the b2BodyDef type property is set to b2_dynamicBody, which makes it a dynamic body that can move around and collide with other dynamic bodies. Later, when you’re iterating over the bodies in the world, this allows you to quickly access the body’s sprite.
The body’s shape is a b2PolygonShape set to a box shape that’s half a meter in size. The SetAsBox method creates a box shape that’s twice the given width and height, so the coordinates need to be divided by 2—or, as in this case, set to 0.5f to create a box shape whose sides are 1 meter wide and high.
The dynamic body also needs a fixture that contains the body’s essential parameters—first and foremost, the shape, but also the density, friction, and restitution—which influence how the body moves and bounces around in the world. Consider the fixture to be a set of physics parameters used by bodies.
The physics bodies won’t do anything unless you regularly call the Step method of the Box2D world. You do this in the update method, shown in Listing 12-5.
Listing 12-5. Updating Each Body’s Sprite Position and Rotation
-(void) update:(ccTime)delta
{
  int32 velocityIterations = 8;
  int32 positionIterations = 1;
  world-> Step(delta, velocityIterations, positionIterations);
}
You animate the Box2D world by regularly calling the Step method. It takes three parameters. The first is timeStep, which tells Box2D how much time has passed since the last step. It directly affects the distance that objects will move in this step. Although you’re using the time delta here, passing the delta time as timeStep isn’t recommended, because the delta time fluctuates, and so the speed of the physics bodies won’t be constant. This effect rears its ugly head when the device may be taking a tenth of a second to do background processing, such as sending or receiving an e-mail in the background. This can make all physics objects move large distances in the next frame. In a game, you’d rather have the game slow down or even stop for a tenth of a second and then carry on where you left off. Without a fixed time step, the physics engine would try to cope with a short interruption by moving all objects based on the time difference. If the time difference is large, the objects will move a lot more in a single frame, and that can lead to them suddenly moving a large distance.
The second and third parameters to the Step method are the number of iterations. They determine the accuracy of the physics simulation and also the time it takes to calculate the movement of the bodies. It’s a trade-off between speed and accuracy. In the case of position iterations, you can safely err on the side of speed and require only a single iteration—you don’t normally need more position accuracy in games unless you experience objects not coming to rest, colliding in unnatural ways, or missing collision entirely. Velocity is more important, however; a good starting point for velocity iterations is eight. More than ten velocity iterations have no discernible effect in games, but just one to four iterations won’t be enough to get a stable simulation. The fewer the velocity iterations, the more bumpily and restlessly the objects will behave. I encourage you to experiment with these values.
Box2D has a b2ContactListener class, which you’re supposed to subclass if you want to receive collision callbacks. The following collision detection code is in the PhysicsBox2D01 project but not the regular cocos2d Box2D project template.
Create a new class in Xcode and name it ContactListener. Then rename the implementation file to ContactListener.mm so it has the file extension .mm. Then you can use both C++ and Objective-C code in the same file. Listing 12-6 shows the ContactListener header file.
Listing 12-6. The ContactListener Class’s Interface
#import "Box2D.h"

class ContactListener : public b2ContactListener
{
private:
     void BeginContact(b2Contact* contact);
     void EndContact(b2Contact* contact);
};
It’s a C++ class, so the class definition is a little different. Note the trailing semicolon after the last bracket. Forgetting that semicolon is a common error. The BeginContact and EndContact methods are defined by Box2D and get called whenever there’s a collision between two bodies.
In the implementation, I merely change the sprite’s colors to magenta while the two bodies are in contact and set it back to white when they’re no longer in contact, as shown in Listing 12-7.
Listing 12-7. Checking for the Beginning and Ending of Collisions
#import "ContactListener.h"
#import "cocos2d.h"
#import "PhysicsSprite.h"

void ContactListener::BeginContact(b2Contact* contact)
{
  b2Body* bodyA = contact-> GetFixtureA()-> GetBody();
  b2Body* bodyB = contact-> GetFixtureB()-> GetBody();
  PhysicsSprite* spriteA = (__bridge PhysicsSprite*)bodyA-> GetUserData();
  PhysicsSprite* spriteB = (__bridge PhysicsSprite*)bodyB-> GetUserData();

  if (spriteA != NULL && spriteB != NULL)
  {
     spriteA.color = ccMAGENTA;
     spriteB.color = ccMAGENTA;
  }
}

void ContactListener::EndContact(b2Contact* contact)
{
  b2Body* bodyA = contact-> GetFixtureA()-> GetBody();
  b2Body* bodyB = contact-> GetFixtureB()-> GetBody();
  PhysicsSprite* spriteA = (__bridge PhysicsSprite*)bodyA-> GetUserData();
  PhysicsSprite* spriteB = (__bridge PhysicsSprite*)bodyB-> GetUserData();

  if (spriteA ! = NULL && spriteB ! = NULL)
  {
     spriteA.color = ccWHITE;
     spriteB.color = ccWHITE;
  }
}
b2Contact contains all the contact information, including two sets of everything suffixed with A and B. These are the two contacting bodies; no differentiation is made as to which is colliding with the other—they’re both simply colliding with each other. If, for example, you have an enemy colliding with a player’s bullet, you’d want to damage the enemy, not the bullet. It’s up to you to determine which is which. Also keep in mind that the contact methods may be called multiple times per frame, once for each contact pair.
It’s a bit convoluted to get to the sprite from the contact through the fixture to the body and then get the user data from that. The Box2D API reference certainly helps you find your way through the hierarchy, and with a little experience it’ll become second nature.
To actually get the ContactListener connected with Box2D, you have to add it to the world. In HelloWorldLayer, import the ContactListener.h header file and add a ContactListener* contactListener to the class as a member variable:
#import "cocos2d.h"
#import "Box2D.h"
#import "GLES-Render.h"
#import "ContactListener.h"

...

@interface HelloWorldLayer : CCLayer
{
     CCTexture2D* spriteTexture;
     b2World* world;
     ContactListener* contactListener;
     GLESDebugDraw* debugDraw;
}
...
@end
In the initPhysics method of HelloWorldLayer, you can then create a new ContactListener instance and set it as the contact listener for the world:
-(void) initPhysics
{
  b2Vec2 gravity;
  gravity.Set(0.0f, -10.0f);
  world = new b2World(gravity);
  world-> SetAllowSleeping(true);
  world-> SetContinuousPhysics(false);

  contactListener = new ContactListener();
  world-> SetContactListener(contactListener);
  ...
What remains is to delete the contactListener in the dealloc method to free its memory, because it’s a C++ class object:
-(void) dealloc
{
  delete world;
  world = NULL;
  delete debugDraw;
  debugDraw = NULL;
  delete contactListener;
  contactListener = NULL;
}
Now the boxes in the PhysicsBox2D01 project will be tinted purple whenever they touch other boxes. The implementation isn’t perfect, as you’ll notice. Some boxes clearly collide but may not be colored. The problem is that EndContact may be called for a body which still has other contacts. But for demonstration purposes it suffices.
With joints, you can connect bodies together. The type of joint determines which way the connected bodies are connected. In this example method, you create four bodies total. Three are dynamic bodies connected to each other using a revolute joint, which keeps the bodies at the same distance but allows them to rotate 360 degrees around each other. If you find it hard to imagine how these objects might behave, you should try them in the PhysicsBox2D01 project. In this case, working code can explain it better than words or a static image could. The fourth body is a static body to which one of the dynamic bodies is also attached using a revolute joint.
For clarity and brevity I’ve extracted the code that creates the PhysicsSprite into the createPhysicsSpriteAt method, and the createBodyFixture method takes care of creating the body’s shape and fixture.
-(void) addSomeJointedBodies:(CGPoint)pos
{
  // Create a body definition and set it to be a dynamic body
  b2BodyDef bodyDef;
  bodyDef.type = b2_dynamicBody;

  bodyDef.position = [self toMeters:pos];
  bodyDef.position = bodyDef.position + b2Vec2(−1, -1);
  b2Body* bodyA = world-> CreateBody(&bodyDef);
  [self createBodyFixture:bodyA];

  PhysicsSprite* spriteA = [self createPhysicsSpriteAt:pos];
  [spriteA setPhysicsBody:bodyA];
  bodyA-> SetUserData((__bridge void*)spriteA);

  bodyDef.position = [self toMeters:pos];
  b2Body* bodyB = world-> CreateBody(&bodyDef);
  [self createBodyFixture:bodyB];
  PhysicsSprite* spriteB = [self createPhysicsSpriteAt:pos];
  [spriteB setPhysicsBody:bodyB];
  bodyB-> SetUserData((__bridge void*)spriteB);

  bodyDef.position = [self toMeters:pos];
  bodyDef.position = bodyDef.position + b2Vec2(1, 1);

  b2Body* bodyC = world-> CreateBody(&bodyDef);
  [self createBodyFixture:bodyC];
  PhysicsSprite* spriteC = [self createPhysicsSpriteAt:pos];
  [spriteC setPhysicsBody:bodyC];
  bodyC-> SetUserData((__bridge void*)spriteC);
  b2RevoluteJointDef jointDef;

  jointDef.Initialize(bodyA, bodyB, bodyB-> GetWorldCenter());
  bodyA-> GetWorld()-> CreateJoint(&jointDef);
  jointDef.Initialize(bodyB, bodyC, bodyC-> GetWorldCenter());
  bodyA-> GetWorld()-> CreateJoint(&jointDef);

  // create an invisible static body to attach to
  bodyDef.type = b2_staticBody;
  bodyDef.position = [self toMeters:pos];
  b2Body* staticBody = world-> CreateBody(&bodyDef);
  jointDef.Initialize(staticBody, bodyA, bodyA-> GetWorldCenter());
  bodyA-> GetWorld()-> CreateJoint(&jointDef);
}
b2BodyDef is reused for all bodies; only the position is modified for each body, and a PhysicsSprite is created and assigned as user data to the body.
b2RevoluteJointDef is filled with data by using the Initialize method, providing two bodies to connect to each other and a coordinate where the joint is located. By using one body’s GetWorldCenter coordinate, that body will be centered on the joint and allowed only to rotate around itself.
The joint is created by the CreateJoint method of the b2World class. Even though the HelloWorldLayer class in the PhysicsBox2D01 project has a b2World member variable, I wanted to illustrate that you can also get the world through any body—it doesn’t matter which one—with the body’s GetWorld method. This is good to know, because in the ContactListener discussed earlier, you don’t have a b2World member variable, so you’ll have to get the b2World pointer through one of the contact bodies.
Chipmunk
The Chipmunk physics engine was developed by Scott Lembcke of Howling Moon Software. Chipmunk was actually inspired by an early version of Box2D, before it became a full-fledged physics engine. More information about Chipmunk and its documentation are found on Scott’s home page at http://chipmunk-physics.net. And if you need help, you can find that in the Chipmunk forums: http://chipmunk-physics.net/forum.
Chipmunks in Space
For the Chipmunk tutorial, you’ll build the same project as before. You can find the resulting code in the PhysicsChipmunk01 project. Listing 12-8 shows the Chipmunk version of the HelloWorldLayer header file.
Listing 12-8. The Chipmunk HelloWorld Interface
#import "cocos2d.h"
#import "chipmunk.h"

#define TILESIZE 32
#define TILESET_COLUMNS 9
#define TILESET_ROWS 19

enum
{
  kTagBatchNode,
};

@interface HelloWorldLayer : CCLayer
{
  CCTexture2D* spriteTexture;
  cpSpace* space;
  cpShape* walls[4];
}

+(CCScene*) scene;
@end
There’s nothing unusual here, except for the cpSpace and cpShape instance variables. Instead of world, Chipmunk calls its world a space. It’s just a different term for the same thing. The Chipmunk space contains all the rigid bodies. And the wall shapes define the screen boundary collisions. The walls array is only needed so the walls can be removed from the Chipmunk space when the scene is deallocated. Chipmunk doesn’t automatically manage the memory of its physics objects the way Box2D does. Because Chipmunk is a C library, ARC can’t manage Chipmunk’s memory either.
The initialization and dealloc part of HelloWorldLayer isn’t much different from the Box2D version, as you can see here:
#import "HelloWorldLayer.h"
#import "PhysicsSprite.h"

@implementation HelloWorldLayer

+(CCScene*) scene
{
  CCScene* scene = [CCScene node];
  HelloWorldLayer* layer = [HelloWorldLayer node];
  [scene addChild:layer];
  return scene;
}

-(id) init
{
  self = [super init];
  if (self)
  {
     self.isTouchEnabled = YES;

     CGSize screenSize = [CCDirector sharedDirector].winSize;

     CCLabelTTF* label = [CCLabelTTF labelWithString:@"Tap screen"
     fontName:@"Marker Felt"
     fontSize:36];
     label.position = ccp(screenSize.width / 2, screenSize.height - 30);
     [self addChild:label z:-1];

     CCSpriteBatchNode* batchNode = [CCSpriteBatchNode ←
     batchNodeWithFile:@"dg_grounds32.png"];
     spriteTexture = batchNode.texture;
     [self addChild:batchNode z:0 tag:kTagBatchNode];

     [self initPhysics];
     [self addNewSpriteAtPosition:ccp(200,200)];

     [self scheduleUpdate];
     }

     return self;
}

-(void) dealloc
{
     for (int i = 0; i < 4; i++)
     {
     cpShapeFree(walls[i]);
     }
     cpSpaceFree(space);
}

...
You can see in the dealloc method how the four wall segments are freed using cpShapeFree, and following that the space is freed with cpSpaceFree. So let’s see how things are created in the first place. Same as before, you do the Chipmunk initialization in the initPhysics method:
-(void) initPhysics
{
  cpInitChipmunk();
  space = cpSpaceNew();
  space-> gravity = CGPointMake(0, -100);

  ...
}
The very first thing you must do before using any Chipmunk methods is call cpInitChipmunk. After that, you can create the space with cpSpaceNew.
Notice how Chipmunk can use the same CGPoint structure used in the iPhone SDK. Chipmunk internally uses a structure called cpVect, but in cocos2d you can use both interchangeably. I use a CGPoint to set the gravity to −100, which means downward acceleration that’s roughly the same as that used in the Box2D project. You’ll also commonly see the method ccp, which is identical to CGPointMake.
Boxing-In the Boxes
To keep all the boxes within the boundaries of the screen, you need to create a static body whose shape defines the screen area. You do this in the second part of the initPhysics method, shown in Listing 12-9.
Listing 12-9. Creating the Screen Border Collisions
-(void) initPhysics
{
  ...

  CGSize screenSize = [CCDirector sharedDirector].winSize;
  float boxWidth = screenSize.width;
  float boxHeight = screenSize.height;
  // bottom
  walls[0] = cpSegmentShapeNew(space-> staticBody, ccp(0, 0), ←
                               ccp(boxWidth, 0), 0.0f);
  // top
  walls[1] = cpSegmentShapeNew(space-> staticBody, ccp(0, boxHeight), ←
                               ccp(boxWidth, boxHeight), 0.0f);
  // left
     walls[2] = cpSegmentShapeNew(space-> staticBody, ccp(0, 0), ←
                               ccp(0, boxHeight), 0.0f);
  // right
     walls[3] = cpSegmentShapeNew(space-> staticBody, ccp(boxWidth, 0), ←
                               ccp(boxWidth, boxHeight), 0.0f);

  for (int i = 0; i < 4; i++)
  {
     walls[i]-> e = 1.0f;
     walls[i]-> u = 1.0f;
     cpSpaceAddStaticShape(space, walls[i]);
  }
}
Unlike Box2D, with Chipmunk you don’t have to take any pixel-to-meter ratio into account. You can use the screen size in pixels as it is to define the corner points and to work with Chipmunk bodies in general.
Four wall segments are added to the walls array. Each is a segment shape, which in essence is just a line from A to B that blocks physics objects. You create the walls as static shapes with the cpSpaceAddStaticShape method, but not before setting some parameters on the wall. This is where Chipmunk gets a little too lazy for my taste. It takes some getting used to to remember that e stands for elasticity (bounciness) and u of all things means friction. Both values are coefficients, meaning if you set them to 1 they will not be elastic and will cause no friction.
Adding Ticky-Tacky Little Boxes
To add boxes to the world, you use the same code in the init method of HelloWorldLayer as in the Box2D example. Refer to Listing 12-4 to refresh your memory.
I’ll go straight to creating the dynamic body for new boxes, which is what the addNewSpriteAtPosition method does (Listing 12-10).
Listing 12-10. Adding a Body with a Sprite, Chipmunk Style
-(void) addNewSpriteAtPosition:(CGPoint)pos
{
  int idx = CCRANDOM_0_1() * TILESET_COLUMNS;
  int idy = CCRANDOM_0_1() * TILESET_ROWS;
  CGRect tileRect = CGRectMake(TILESIZE * idx, TILESIZE * idy, TILESIZE, TILESIZE);
  PhysicsSprite* sprite = [PhysicsSprite spriteWithTexture:spriteTexture
                                                      rect:tileRect];
  sprite.position = pos;

  CCNode* batchNode = [self getChildByTag:kTagBatchNode];
  [batchNode addChild:sprite];

  const int numVertices = 4;
  float halfTileSize = TILESIZE * 0.5f;
  CGPoint verts[] =
  {
       ccp(−halfTileSize, -halfTileSize),
       ccp(−halfTileSize, halfTileSize),
       ccp(halfTileSize, halfTileSize),
       ccp(halfTileSize, -halfTileSize),
  };

  float mass = 1.0f;
  cpBody* body = cpBodyNew(mass, ←
  cpMomentForPoly(mass, numVertices, verts, CGPointZero));

  body-> p = pos;
  cpSpaceAddBody(space, body);

  cpShape* shape = cpPolyShapeNew(body, numVertices, verts, CGPointZero);
  shape-> e = 0.4f;
  shape-> u = 0.4f;
  cpSpaceAddShape(space, shape);

  [sprite setPhysicsBody:body];
  body-> data = (__bridge void*)sprite;
}
You create the dynamic body for the box with the cpBodyNew method with the given mass and a moment of inertia. The moment of inertia determines the resistance of a body to move, and it’s calculated by the helper method cpMomentForPoly, which takes the body’s mass and the vertices of its 32×32-pixel box shape.
The body’s position, p, is then updated, and the body is added to the space via the cpSpaceAddBody method. Note that contrary to Box2D, you don’t have to convert pixels to meters; you can work with pixel coordinates directly.
The array of vertices are the corners of the box shape. Because the corner positions are positioned relative to the center of the box you’re creating, they’re all half a tile’s size away from the center. Otherwise, the box shape would be twice as big as the tile.
The cpPolyShapeNew method then takes the body as input, the verts array, and the number of vertices in the array, as well as an optional offset, which is set to CGPointZero in this case. Out comes a new cpShape pointer for the box shape. The shape’s elasticity and friction are set to values that give a similar behavior to the Box2D boxes, and after the sprite is set as user data to the data field, the shape is added to the space via cpSpaceAddShape. And finally, there’s also a Chipmunk version of the PhysicsSprite class which gets the body assigned so it can update its position and rotation based on the Chipmunk body.
The Chipmunk body also gets the sprite assigned to its data field. Again this requires a bridge cast so ARC won’t complain.
You have to update the Chipmunk space every frame to advance the physics simulation. You do this in the update method in Listing 12-11.
Listing 12-11. Updating the Chipmunk Space
-(void) update:(ccTime)delta
{
  const int iterations = 10;
  for (int i = 0; i < iterations; i++)
  {
     cpSpaceStep(space, 0.005f);
  }
}
Just as with Box2D, you have to advance the physics simulation using a step method. In this case, it’s cpSpaceStep, which takes the space and a time step as input. A fixed time step works best, and just like in Box2D, using a fixed time step as opposed to passing the delta time is highly recommended. This is probably even truer for Chipmunk, as I noticed very odd effects when using the delta time. As long as the framerate doesn’t fluctuate heavily (it really shouldn’t anyway), using a fixed-time-step approach works very well.
The PhysicsSprite class does all the position and rotation updates for you.
C callback methods handle collisions in Chipmunk. In the PhysicsChipmunk01 project, I’ve added the contactBegin and contactEnd static methods (in Listing 12-12), which do exactly the same as their Box2D counterparts—change the color of boxes that are in contact to magenta.
Listing 12-12. Collision Callbacks a la Chipmunk
static int contactBegin(cpArbiter* arbiter, struct cpSpace* space, void* data)
{
  BOOL processCollision = YES;

  cpBody* bodyA;
  cpBody* bodyB;
  cpArbiterGetBodies(arbiter, &bodyA, &bodyB);

  PhysicsSprite* spriteA = (__bridge PhysicsSprite*)bodyA-> data;
  PhysicsSprite* spriteB = (__bridge PhysicsSprite*)bodyB-> data;
  if (spriteA ! = nil && spriteB ! = nil)
  {
     spriteA.color = ccMAGENTA;
     spriteB.color = ccMAGENTA;
  }

  return processCollision;
}

static void contactEnd(cpArbiter* arbiter, cpSpace* space, void* data)
{
  cpBody* bodyA;
  cpBody* bodyB;
  cpArbiterGetBodies(arbiter, &bodyA, &bodyB);

  PhysicsSprite* spriteA = (__bridge PhysicsSprite*)bodyA-> data;
  PhysicsSprite* spriteB = (__bridge PhysicsSprite*)bodyB-> data;
  if (spriteA ! = nil && spriteB ! = nil)
  {
     spriteA.color = ccWHITE;
     spriteB.color = ccWHITE;
  }
}
The contactBegin method should return YES if the collision should be processed normally. By returning NO or 0 from this method, you can also ignore collisions. To get to the sprites, you first have to get the shapes from the cpArbiter, which just like b2Contact holds the contact information. Via the cpArbiterGetShapes method and passing two shapes as out parameters, you get the colliding shapes from which you can then retrieve the individual PhysicsSprite pointers. If they’re both valid, you can change their color.
As with Box2D, these callbacks don’t get called by themselves. In the HelloWorldLayer initPhysics method, right after the space is created, you must add the collision handlers using the cpSpaceAddCollisionHandler method:
-(void) initPhysics
{
  cpInitChipmunk();
  space = cpSpaceNew();
  space-> gravity = CGPointMake(0, -100);

  unsigned int defaultCollisionType = 0;
  cpSpaceAddCollisionHandler(space, defaultCollisionType, defaultCollisionType,
                            &contactBegin, NULL, NULL, &contactEnd, NULL);
The default collision type for shapes is 0, and because I don’t care about filtering collisions, both collision type parameters are set to 0. You can assign each body’s shape an integer value to its collision_type property and then add collision handlers that are called only if bodies of matching collision types collide. This is called filtering collisions and is described in the Chipmunk manual, at http://files.slembcke.net/chipmunk/release/ChipmunkLatest-Docs/#cpShape.
The next four parameters are pointers to C callback methods for the four collision stages: begin, pre-solve, post-solve, and separation (the same as the EndContact event in Box2D). These serve the same purpose as the corresponding callbacks in Box2D. Most of the time you’ll be interested only in the begin and separation events.
I pass NULL for pre-solve and post-solve, because I’m not interested in handling these. You can use these methods to influence the collision or to retrieve the collision force in the post-solve step. The final parameter is an arbitrary data pointer you can pass on to the callback methods if you need it. I don’t, so I set it to NULL as well.
With that, you have a working collision callback mechanism.
The Chipmunk example project also needs its own implementation of addSomeJointedBodies. The setup is more verbose than for Box2D, as shown in Listing 12-13. You’ll recognize most of the code as setting up static and dynamic bodies—if you find that code familiar, feel free to skip to the end where the joints are created.
Listing 12-13. Creating Three Bodies Connected with Joints
-(void) addSomeJointedBodies:(CGPoint)pos
{
  float mass = 1.0f;
  float moment = cpMomentForBox(mass, TILESIZE, TILESIZE);

  float halfTileSize = TILESIZE * 0.5f;
  int numVertices = 4;
  CGPoint vertices[] =
  {
       ccp(−halfTileSize, -halfTileSize),
       ccp(−halfTileSize, halfTileSize),
       ccp(halfTileSize, halfTileSize),
       ccp(halfTileSize, -halfTileSize),
  };

  // Create a static body
  cpBody* staticBody = cpBodyNew(INFINITY, INFINITY);
  staticBody-> p = pos;

  CGPoint offset = CGPointZero;
  cpShape* shape = cpPolyShapeNew(staticBody, numVertices, vertices, offset);
  cpSpaceAddStaticShape(space, shape);

  // Create three new dynamic bodies
  float posOffset = 1.4f;
  pos.x + = TILESIZE * posOffset;
  cpBody* bodyA = cpBodyNew(mass, moment);
  bodyA-> p = pos;
  cpSpaceAddBody(space, bodyA);

  shape = cpPolyShapeNew(bodyA, numVertices, vertices, offset);
  cpSpaceAddShape(space, shape);

  PhysicsSprite* spriteA = [self createPhysicsSpriteAt:pos];
  [spriteA setPhysicsBody:bodyA];
  bodyA-> data = (__bridge void*)spriteA;

  pos.x + = TILESIZE * posOffset;
  cpBody* bodyB = cpBodyNew(mass, moment);
  bodyB-> p = pos;
  cpSpaceAddBody(space, bodyB);

  shape = cpPolyShapeNew(bodyB, numVertices, vertices, offset);
  cpSpaceAddShape(space, shape);

  PhysicsSprite* spriteB = [self createPhysicsSpriteAt:pos];
  [spriteB setPhysicsBody:bodyB];
  bodyB-> data = (__bridge void*)spriteB;

  pos.x + = TILESIZE * posOffset;
  cpBody* bodyC = cpBodyNew(mass, moment);
  bodyC-> p = pos;
  cpSpaceAddBody(space, bodyC);

  shape = cpPolyShapeNew(bodyC, numVertices, vertices, offset);
  cpSpaceAddShape(space, shape);

  PhysicsSprite* spriteC = [self createPhysicsSpriteAt:pos];
  [spriteC setPhysicsBody:bodyC];
  bodyC-> data = (__bridge void*)spriteC;

  // Create the joints and add the constraints to the space
  cpConstraint* constraint1 = cpPivotJointNew(staticBody, bodyA, staticBody-> p);
  cpConstraint* constraint2 = cpPivotJointNew(bodyA, bodyB, bodyA-> p);
  cpConstraint* constraint3 = cpPivotJointNew(bodyB, bodyC, bodyB-> p);

  cpSpaceAddConstraint(space, constraint1);
  cpSpaceAddConstraint(space, constraint2);
  cpSpaceAddConstraint(space, constraint3);
}
In this example, you’re creating a pivot joint with cpPivotJointNew, which is the same as the b2RevoluteJoint used in the Box2D example. Each joint is created with the two bodies that should be connected to each other and one of the bodies’ center position as the anchor point. The cpPivotJointNew method returns a cpConstraint pointer, which you’ll have to add to the space using the cpSpaceAddConstraint method.
Summary
In this chapter, you learned the basics of the two physics engines distributed with cocos2d: Box2D and Chipmunk. You now have two working examples of these physics engines at your disposal, which should help you decide which one you’d like to use.
You learned how to set up a screen area that contains all the little boxes created from a tilemap as dynamic bodies. You now also know the basics of detecting collisions and how to create joints to connect bodies together in both physics engines.
In the next chapter, you’ll be making a game that uses the Box2D physics engine.