
The player does not yet have a means to defend himself. We will equip the player with a very useful and interesting way, of doing so called magic spells. Magic spells will be used by the player to affect monsters nearby.
Practically, spells will be a combination of a particle system with an area of effect represented by a bounding volume. The bounding volume is checked for contained actors in each frame. When an actor is within the bounding volume of a spell, then that actor is affected by that spell.
The following is a screenshot of the blizzard and force field spells, with their bounding volumes highlighted in orange:
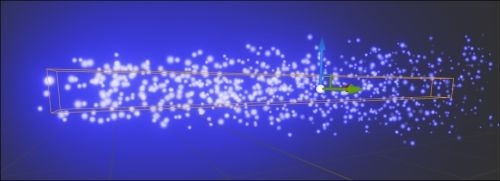
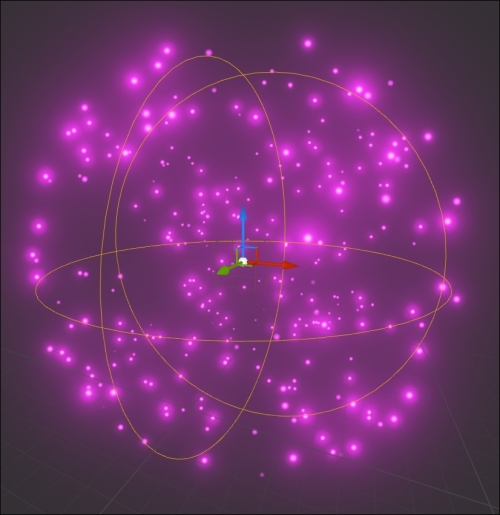
Visualization of the blizzard spell can be seen at the right, with a long, box-shaped bounding volume. Visualization of the force field spell, with a spherical bounding volume, for pushing monsters away, is shown in the following screenshot:
In each frame, the bounding volume is checked for contained actors. Any actor contained in the spell's bounding volume is going to be affected by that spell for that frame only. If the actor moves outside the spell's bounding volume, the actor will no longer be affected by that spell. Remember, the spell's particle system is a visualization only; the particles themselves are not what will affect game actors. The PickupItem class we created in Chapter 8, Actors and Pawns can be used to allow the player to pick up items representing the spells. We will extend the PickupItem class and attach the blueprint of a spell to cast each PickupItem. Clicking on a spell's widget from the HUD will cast it. The interface will look something like this:
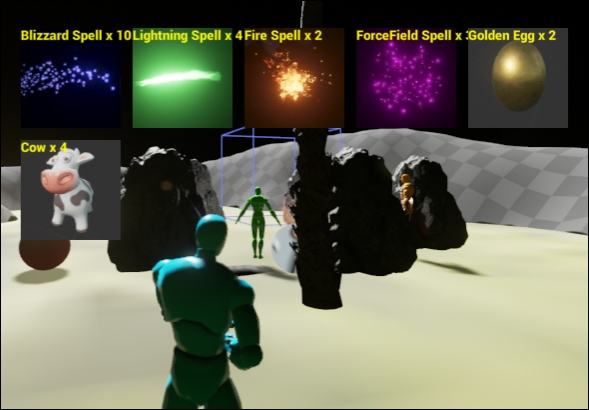
Items the player has picked up, including four different spells
We'll begin the chapter by describing how to create our own particle systems. We'll then move on to wrap up the particle emitter into a Spell class, and write a CastSpell() function for the avatar to be able to actually cast spells.
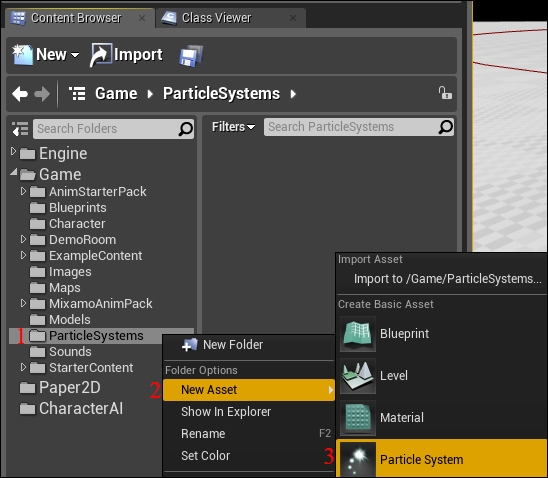
First, we need a place to put all our snazzy effects. In your Content Browser tab, right-click on the Game root and create a new folder called ParticleSystems. Right-click on that new folder, and select New Asset | Particle System, as shown in the following screenshot:
Tip
See this Unreal Engine 4 Particle Systems guide for information on how unreal particle emitters work: https://www.youtube.com/watch?v=OXK2Xbd7D9w&index=1&list=PLZlv_N0_O1gYDLyB3LVfjYIcbBe8NqR8t.
Double-click on the NewParticleSystem icon that appears, as shown in the following screenshot:
You will be in Cascade, the particle editor. A description of the environment is shown in the following screenshot:

There are several different panes here, each of which shows different information. They are as follows:
- At the top left is the Viewport pane. This shows you an animation of the current emitter as its currently working.
- At the right is the Emitters pane. Inside it, you can see a single object called Particle Emitter (you can have more than one emitter in your particle system, but we don't want that now). The listing of modules of Particle Emitter appears listed under it. From the preceding screenshot, we have the Required, Spawn, Lifetime, Initial Size, Initial Velocity, and Color Over Life modules.
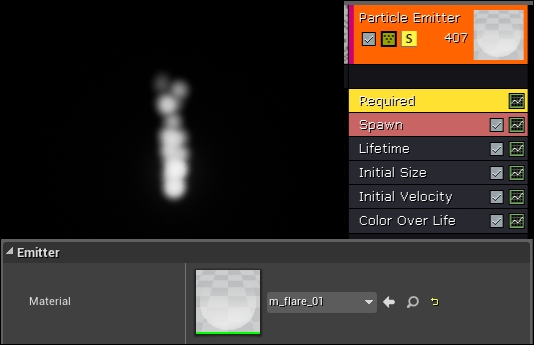
The default particle emitter emits crosshair-like shapes. We want to change that to something more interesting. Click on the yellow Required box under Emitters panel, then under Material in the Details panel, type particles. A list of all the available particle materials will pop up. Choose m_flare_01 option to create our first particle system, as shown in the following screenshot:

Now, let's change the behavior of the particle system. Click on the Color Over Life entry under the Emitters pane. The Details pane at the bottom shows the information about the different parameters, as shown in the following screenshot:
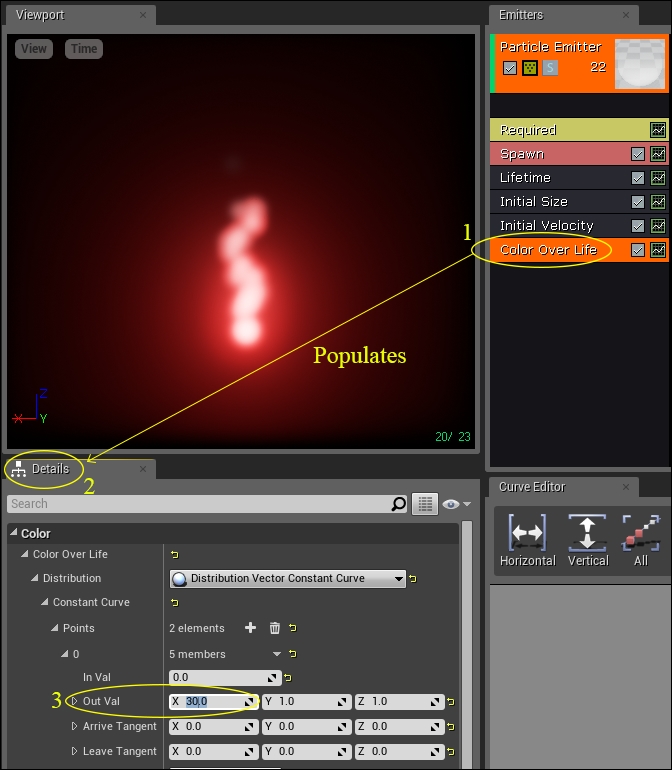
In the Details pane of Color Over Life entry, I increased X, but not Y and not Z. This gives the particle system a reddish glow. (X is red, Y is green, and Z is blue).
Instead of editing the raw numbers, however, you can actually change the particle color more visually. If you click on the greenish zigzag button beside the Color Over Life entry, you will see the graph for Color Over Life displayed in the Curve Editor tab, as shown in the following screenshot:
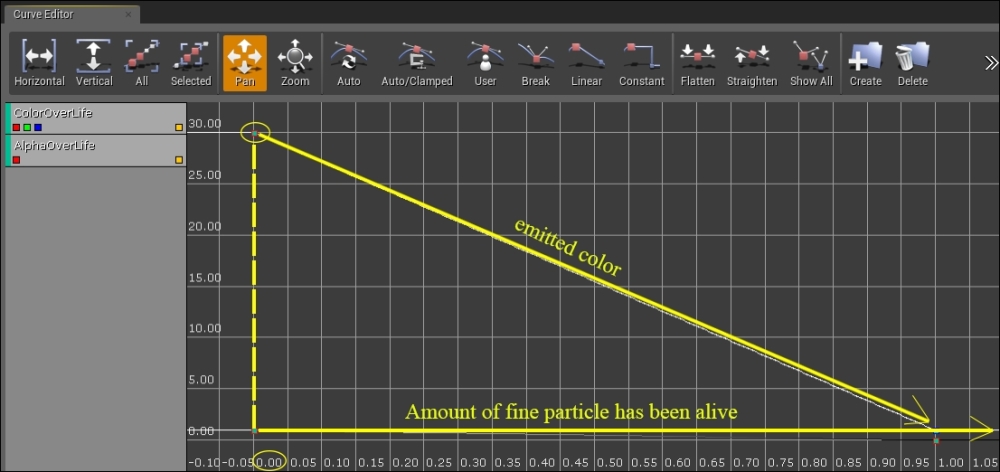
We can now change the Color Over Life parameters. The graph in the Curve Editor tab displays the emitted color versus the amount of time the particle has been alive. You can adjust the values by dragging the points around. Pressing Ctrl + left mouse button adds a new point to a line:
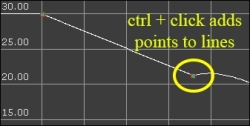
Ctrl + click adds points to lines.
You can play around with the particle emitter settings to create your own spell visualizations.
At this point, we should rename our particle system, from NewParticle System to something more descriptive. Let's rename it P_Blizzard. You can rename your particle system by simply clicking on it and pressing F2.
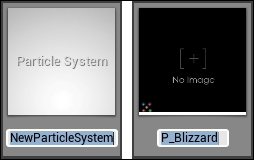
Press F2 on an object in the Content Browser to rename it
We will tweak some of the settings to get a blizzard particle effect spell. Perform the following steps:
- Under the Emitters tab, click on the Required box. In the Details pane, change the Emitter material to m_flare_01 as shown:
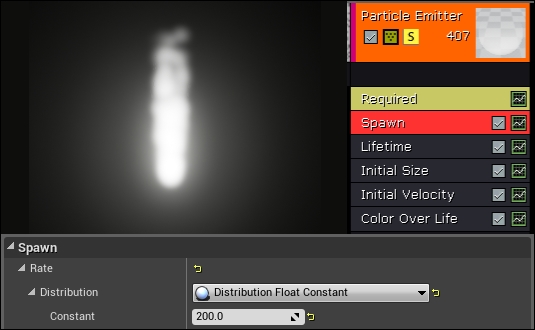
- Under the Spawn module, change the spawn rate to 200. This increases the density of the visualization, as shown:
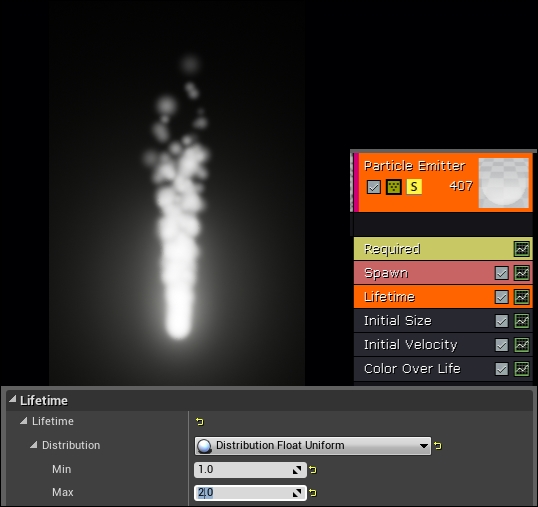
- Under the Lifetime module, increase the Max property from 1.0 to 2.0. This introduces some variation to the length of time a particle will live, with some of the emitted particles living longer than others.
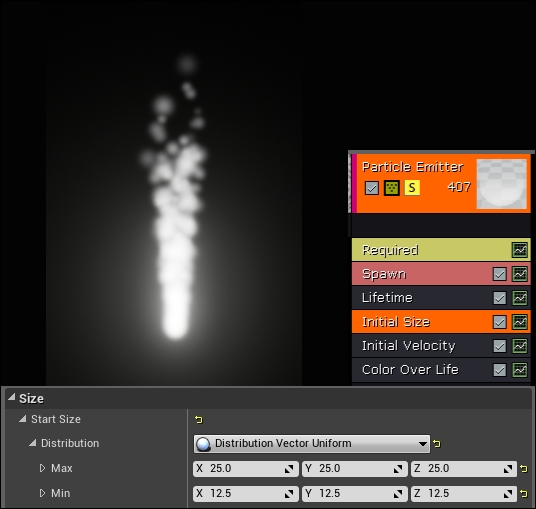
- Under the Initial Size module, change the Min property size to 12.5 in X, Y, and Z:
- Under the Initial Velocity module, change the Min/Max values to the values shown:
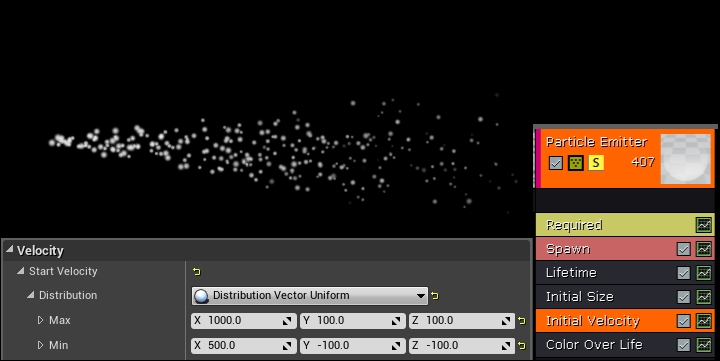
- The reason we're having the blizzard blow in +X is because the player's forward direction starts out in +X. Since the spell will come from the player's hands, we want the spell to point in the same direction as the player.
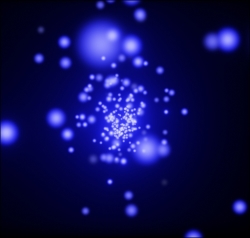
- Under the Color Over Life menu, change the blue (Z) value to 100.0. You will see an instant change to a blue glow:
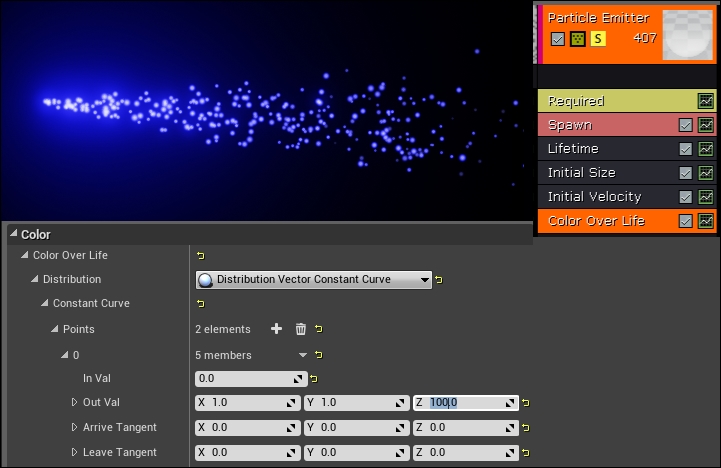
Now it's starting to look magical!
- Right-click on the blackish area below the Color Over Life module. Choose Location | Initial Location:

- Enter values under Start Location | Distribution as shown below:
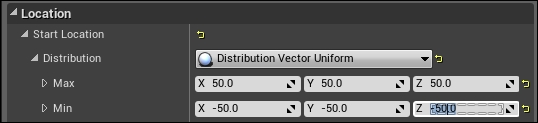
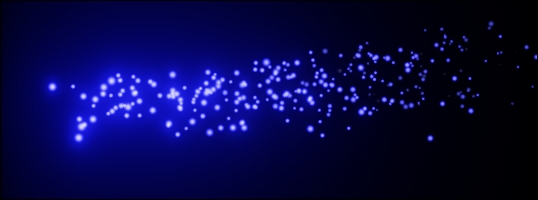
- You should have a blizzard that looks like this:
- Move the camera to a position you like, then click on the Thumbnail option in the top menu bar. This will generate a thumbnail icon for your particle system in the Content Browser tab.
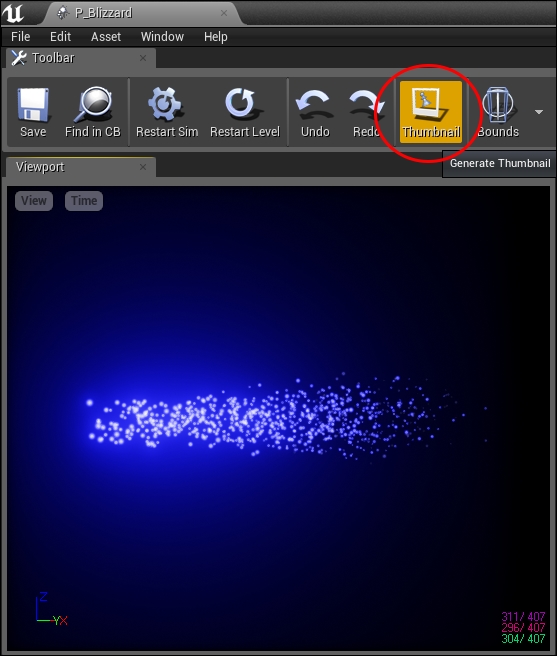
Clicking Thumbnail at the top menu bar will generate a mini icon for your particle system