
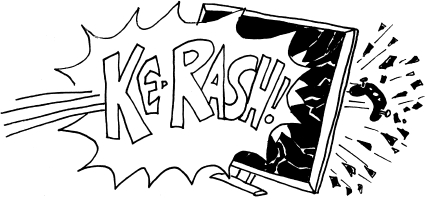
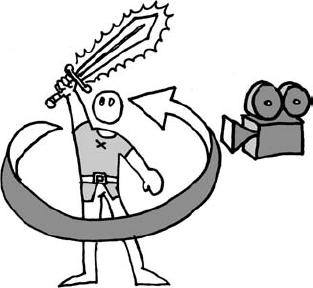
Do you hear that crashing sound? That is the sound of a video game controller being thrown through a 50" 1080p HDTV plasma panel with a 600Hz subfield drive. And why was this fine piece of technology utterly pulverized? Because your game has a really bad camera.
Did you know that over 1 billion TVs are destroyed a year because of really bad game cameras[69]? Nothing will cause a player to stop playing your game faster than a poor camera. This is why it is so important to get it right.
Choosing the right camera for your game is not only very important for determining how to program the camera, but it also impacts how you design your game, map your controls, and create your artwork. It's pretty common for a game to have more than one style of camera, but you should stick with one "main" camera style for the majority of your gameplay and only use other camera views for specific gameplay situations.
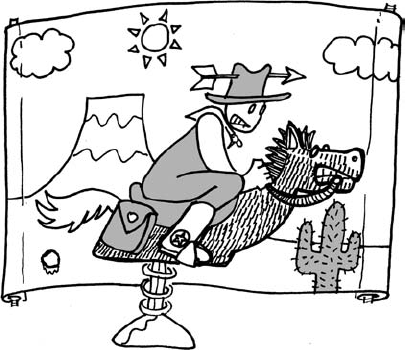
Static camera. A static camera does not move position and stays fixed onto a single screen, location, and image. The earliest video games used static cameras because (a) they hadn't invented the scrolling camera yet (duh!), (b) it allowed the player to keep their eyes on several game elements at once and, in the case of early 3-D games, (c) it allowed teams to maximize the game's artwork by creating art that would only be seen "from certain angles." An item in a game world that is only viewed from one angle doesn't need a backside, which saves on production and processing time.
Even though they're old school, static cameras can still be found in use today in many Flash-based arcade/puzzle games like Peggle and those "find the object" games that your mom likes to play. Another advantage to using a static camera is that you can use it to set the mood. A clever use of the static camera to help mood can be found in early survival horror titles like Alone in the Dark and Resident Evil. These developers not only used the static camera shot to represent a single room, but also used it to set up the camera for maximum effectiveness. Another advantage is that you can easily use it to set up events in your game world, because you don't run the risk of a player looking the other way when it happens. However, you have to be careful with a static screen because they aren't very dynamic. Make sure to compensate for this problem with lots of animation and effects to keep your screen lively.
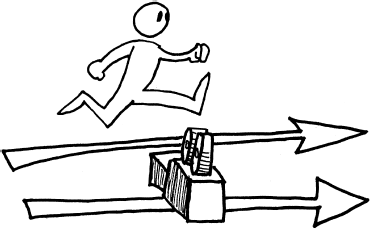
If you aren't satisfied with a camera that stays put, you can always ask your programmer nicely to make it into a scrolling camera instead.
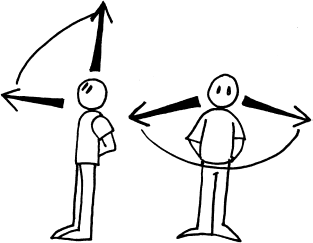
Scrollable camera. Pretend you are looking down at a desktop. Or use the above picture if you are bad at pretending. On this hypothetical desktop you can interact with all of the elements on the desk, but hey—you just can't find your pen. In the picture, what you can see is represented by the gray box. By moving or "scrolling" the camera (in this case your eyes) to another part of the desk—voilà ! You find your missing pen beside a book. Amazing!
A scrollable camera offers all of the advantages of static screen but with the added advantages of (a) movement, which keeps the player engaged in the act of moving the camera, and (b) allowing you to hide stuff off screen or reveal it in a big dramatic way. This is why you will find it being used in many old-school adventure games like Day of the Tentacle. If you use a scrollable camera with a God-mode camera or in isometric view (which I'll be talking about later), then you can simulate a table top to simulate miniature games. This is why a scrollable camera is used in RTS and dungeon crawl games like Dawn of War and Diablo III. Make sure your controls for moving your camera are simple and relative to the player's controller. You don't need anything fancy to move a camera around.
Work with your programmer to tune the hydraulics of your camera: the speed at which the camera accelerates/decelerates. A scrollable camera that moves too fast will overshoot the player's target, which gets very frustrating as the player goes through a process of overshooting back and forth, a condition that eventually leads to insanity and/or a destroyed monitor. Conversely, don't make your camera scroll too slowly. This can be particularly catastrophic in a game where your little army's platoons are in danger of being wiped out by enemy tanks and your damn scrolling camera is too slow to get to them in time. Oh the humanity!
You can always let the player decide what speed they want the screen to scroll at. Just make sure they know where to find this option in your game and give them several speeds to choose from. Just "fast" and "slow" won't cut it.
In the beginning, there was the static screen. The static screen was fine for Invaders from Space and the Kongs of Donkey. But that was in 1981 when no one knew any better. And then game players cried out for more. So in 1982, the great Irem descended from the heavens in a purple moon buggy and introduced parallax scrolling to the video games world.
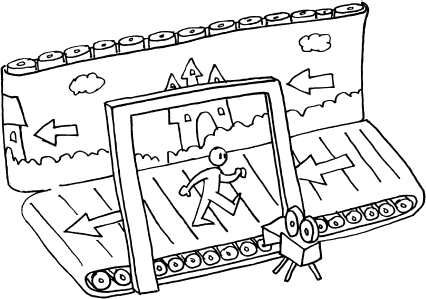
Parallax scrolling. As a parallax scrolling camera moves, the world moves with it. This camera view revolutionized video games, allowing game developers to create longer and deeper game worlds in which to play. There are two different ways you can treat parallax scrolling. First is plain ol' scrolling. The camera is controlled by the player's movement—the player essentially stays in the center of the screen as the world moves past them just like in those old-fashioned western films. Giddyup!
When using this type of scrolling, be careful to play out how your game level loads as your player may be able to "outrun the load." Always play your game level backwards to make sure that your player can't break your game.
The second type of parallax scrolling is the forced scroll. The player is forced to "keep up" with a scrolling camera, which is why it was first used on driving and flying games like Moon Patrol or Scramble. It became popular with first person shooters like Operation Wolf and third person rail shooters like Panzer Dragoon and was later used for "chase" sequences like those found in Crash Bandicoot. More often than not, if a player fails to keep up with the camera, something horrible (such as death) happens to them. This makes a forced scroll camera great for gameplay where you really want to put pressure on a player, but keep in mind that you don't want to use it consistently in a game; that is, unless your whole game is based on this idea.
Parallax scrolling games dominated home video games throughout the 1990s (really—I was there). There were tons of them! When you have a bunch of people making a genre of game over and over again, innovation eventually sneaks in. And it happened. Twice, in fact.
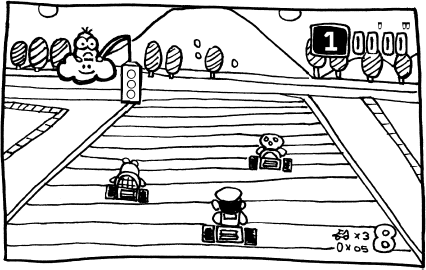
The first was Mode 7, named after the 7th (out of 8) background layer on the Super Nintendo entertainment system[70]. Artists drew the background layer in perspective stretching to the horizon. Scrolling the artwork (which was drawn to look like the ground), created the illusion of a background infinitely moving towards or away from the horizon. Add a forward-facing or rear-facing sprite and you would create the illusion of a car or character travelling towards or away from the screen. Excellent examples of Mode 7 can be seen in Mario Kart, F-Zero, and Super Star Wars. However, designing a level for Mode 7 gameplay can be tricky, as your level has no true back wall; the effect only works with an infinite background. While technology has advanced to allow programmers to easily create 3-D worlds without any special graphic mode, the term still remains in use by some (albeit ancient) game developers.
In addition to scrolling the camera along the parallax, programmers found inspiration from the multi-plane camera used in traditional animation. This camera gives the illusion of depth by zooming the camera towards and away from the screen. By having a camera that tracked in and out of the Z-axis, developers were able to create level designs with parallel paths. Games like Disney's Hercules Action Game (Virgin Interactive, 1997) used the multi-plane camera to create bi-dimensional gameplay; the forerunner to what is known as two and a half D. A side effect of the zooming effect in bi-dimensional games was severe pixilation that occurred when the camera zoomed in on a non-scaling sprite. You can still find this effect being intentionally imitated in "retro"-style games.
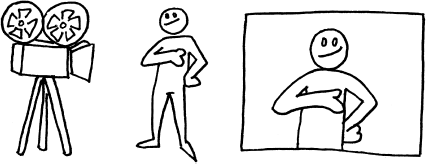
As gameplay moved into the Z-axis, game creators explored more cinematic camera views. While a few games in the 1970s featured a first person camera, it wasn't until Wolfenstein 3D (Apogee Software, 1992) and its successor, Doom (id Software, 1993) that the camera view became popularized. The camera is used in a variety of game genres, from racing to platform; it became most associated with the first person shooter. Despite its popularity, it's hard to discern if the first person camera is really the best camera for gameplay. Here's a quick comparison of the pros and cons of the first person camera:
Advantages | Disadvantages |
|---|---|
Easier to aim weapons at targets | Hard to gauge jump and movement distance |
Player views character as "self", allowing for greater immersion in game world | Players can't see their character and can lose emotional connection |
Easier to create atmospheric situations (like horror) | Player is not always looking where the designer wants them to look |
Player gets close look at weapons, world objects, and puzzle items | Game objects (like pickups) have to be exaggerated in scale to compensate for distance |
As you can see, the arguments for and against the first person camera are pretty darn even. But regardless, there are some pretty fun visual effects you can pull off when using a first person camera.
Blood splatter: many current FPSs use a blood splatter effect on the screen to show that a player has taken damage. You can also have the screen start to "grow dark" or dim to represent the player dying. Some games use this effect heavily and some games do it light, but I feel it's pretty unfair to punish a dying player with the additional disadvantage of not being able to see the gameplay (or where the damage is coming from!).
Raindrops/mist/lens flare: based on, for example, images seen on TV news camera lenses, the effects of weather can be shown. Some driving games even include windshield wiper controls to clear away these effects.
"Predator vision": based on the thermal camera effect seen in the movie Predator, you can simulate these effects in a first person view to make the player actually feel like they are using high-tech or alien gear, such as night vision goggles. Just make sure the effect actually gives the player a gameplay advantage in addition to looking cool.
Blurry/drunken cam: first person view gives the designer a chance to put the player in the character's shoes. As long as the altered state doesn't interfere too much with the player's control of the game for too long, there's no problem with giving the player a good whack in the head now and then—or at least an awful simulated hangover.
Those make the first person camera view sound pretty fun, right? Remember, many of these effects can be used with a third person camera too, but using them with the first person camera really makes you feel like you are "in-the-action." But wait, before you pass judgment, let's "toss" one more "chunk" of information into the "pot":
DIMS stands for Doom-induced motion sickness and it is a very real thing. It's what happens when your eyes register movement and your inner ear (responsible for balance) doesn't. Motion sickness is heavily influenced by the field of view of the game's camera. So, the larger the field of view, the more people will feel motion sick[71]. Victims of this form of motion sickness can suffer from clammy skin, sweating, dizziness, headache, and nausea.

To avoid having your players vomit all over your game, try the following remedies: get the game's frame rate as close to 60 frames per second as possible. Avoid bobbing foreground elements, like your player's weapon. Keep your level's floor as flat as possible[72]. Add large stationary objects to your environments which give the player something to focus on. Don't whip the camera around too much. Try not to have your player change their elevation view (looking up and down) too quickly or often.
And while I am not a doctor, and don't even play one on television, I recommend getting some fresh air, drinking a glass of water, and taking non-drowsy motion sickness medicine if you have to play an FPS for long periods of time.
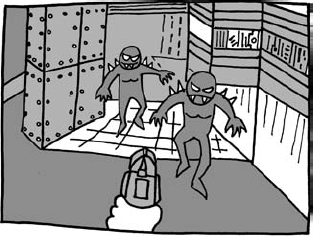
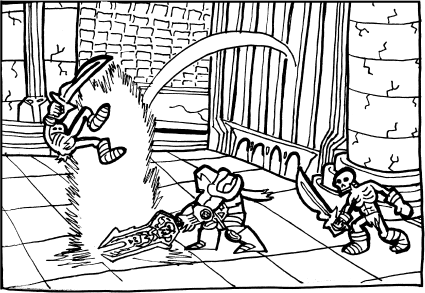
Another good way to avoid turning your game into a puke-a-rama is to pull the view back into the third person view. Now remember, this isn't a solve-all solution, but I have found that when the player has something to focus on, the effects of DIMS seems to reduce. A third person camera also lets the player get a better view of the world, the action, and what's coming up behind you. Watch out War! That skeleton's got a sword!
Pulling the camera back behind the player offers many advantages over the first person view. First off, you get a clear view of your character ...'s butt[73]. Well, that can be fixed by allowing the character to turn around and run towards the camera. But then you have to make sure the camera can track backwards with the player. Does that mean the controls become camera relative or player relative? And how does the player restore the camera back to its original position? Hmmm. This may be more complicated than I first thought.
Getting a third person camera to work correctly may be the biggest challenge a team has to face. While there are many things that can go wrong with your camera, let's try to work through them to get them right.
Camera movement. When I was in high school, I had an after-school job of videotaping sporting events. As I concentrated on filming the game, I lost track of everything else that was going on around me. As a result, I tended to back into the coaches and trip over the gear lying on the sidelines, which (a) didn't result in great footage, and (b) generally pissed off the coaching staff. To solve this, I recruited a friend to act as a spotter as I filmed to make sure the collisions were kept to a minimum.
Having that experience made me realize that every camera needs a spotter—even ones that live within video games, which is why I say "treat the camera like it's a person." As you program your camera and build your world, give the camera room to maneuver and the player a way to manipulate it. This style of camera is commonly called a follow cam because it follows after the player. After years of working on 3-D follow cams, here's what I've learned to watch out for:
Sorting. Sorting is what happens when a camera moves through a character or geometry. Nothing breaks the illusion of a real world faster than this. What's worse, in many cases, the sorting camera will show the background layer of the world, which in most cases is a sky or flat color layer. It looks crappy and great pains should be taken to make sure this doesn't happen in your game.
You can avoid sorting by paying attention to the camera and the geometry. One way is to give your camera a detection radius so that it can avoid passing through world objects by moving over, under, or around objects. If you don't want your game to process that much collision detection (which causes the game to slow down), have world objects turn transparent. It works pretty well with objects within the confines of the walls, but shouldn't be used for perimeter walls. Avoid having objects in the world disappear completely as players get disoriented when elements in the level flicker in and out of existence! (And it looks bad.)
Controls. Think about how your camera is going to operate in regards to controls. Many games won't work properly if the player is pointing the camera straight up or straight down. Another annoyance for me is the great "airplane controls vs. player-relative controls" debate. Personally, unless I'm flying a plane, don't make me push up on the analog stick to make my character go down. Many FPSs do this and frankly, it's just stupid since in most FPSs you are playing a character, not an airplane. If you have to have this camera-relative control option, at least give me the option of changing it. Even better, make the character-relative controls the default and make the airplane controls the option.
Corners. The number one cause of camera flipping (when the camera tries to find a good place to come to rest but ends up bouncing between two or more objects) are corners. Rather than trying to come up with an overly complicated camera system to combat flipping (and believe me, it usually ends up being overly complicated), just keep players out of corners in the first place. But rather than creating invisible geometry (oh how I hate invisible geometry; more ranting on this later), build blocking geometry like small retaining walls, shrubberies, boulders, or fencing which tell the player to "stay out!" of corners. Don't invite trouble: keep your collectables out of corners. Keep your enemy's AI path/detection zones out of corners. Move your gameplay elements to the middle of the room. Stay out of corners! I mean it!
OK, so you didn't listen to me. You HAVE to have that one power-up nestled in the corner of that room. Then, as your character walks into the corner make sure your camera goes up. Imagine that the Amazing Spider-Man is your camera man. What does Spidey do when he reaches a wall? He climbs up. Have the camera scoot up along the surface of the wall to look at the player from a bird's-eye view (or would that be spider's-eye view?). But avoid having the camera show the player from a direct top-down view. Not only does it look bad, but it just invites flipping once the camera tries to decide where to look at the player.
Position. A topic of disagreement among the world's greatest designers is whether the camera should strictly follow the player as if it were attached to a stick stuck to the character OR whether the camera should be more laid back and follow the character around freely. Don't stress it dude, the camera will catch up with the player when it feels like it. (Or when the player chooses to reset it.)
Maybe it's because I grew up in Southern California, but I am definitely in favor of the second method for the following reasons: there are fewer chances for obstruction, you see the character's face from time to time, you can set up gameplay where the player has to deal with enemies that sneak up behind them, and it's easier to orchestrate "chase"-style gameplay. Why this is such a contentious topic is not because the world's greatest designers are against such concepts but because they have to give up control of the camera.
Bad things happen when players are given control of the game camera. They start sticking it in places they shouldn't be sticking it. They find ways to get the camera stuck into geometry. They generally screw things up. And I can tell you that nothing pisses off a game designer faster than watching some idiot screw around with the camera. So you, the game designer, have three choices to solve this issue. Loosen up your sphincter and let the player take control of the camera or screw 'em, take the control away, and make that camera all yours! Or you could decide when they need control and when they don't. You are the designer, you call the shots!
Make your choice, adventurer!
TURN TO PAGE (133) to let players have control of the game camera.
TURN TO PAGE (135) to take control of the game camera away.
TURN TO PAGE (137) to let the player sometimes have control and sometimes not.
In the past I've used three methods to give the player control over the game camera.
The first method is to allow the player complete control over the follow cam. By using the analog stick (or a mouse for PC games), the player can move the game camera to look around 360 degrees at any time; while running, standing still, while in combat, whatever. The disadvantage of this is that players can get quickly disoriented, miss interesting and important level events and clues, or suffer DIMS.
The second method is a free-look camera. This camera allows the player to stop and look around the world (effectively a first person view). The free-look camera is usually initiated by a button press, which activates a mode in which the player can use the analog stick (the one that is usually used to move the player) to rotate the camera around 360 degrees. I have seen versions of this camera where the free-look cam is restricted to a little less than 180 degrees in an attempt to mimic the natural rotation of the human neck. When the player presses the button to return back to the third person view, they are usually reoriented in the direction that the free-look cam was facing.
Reorientation. Speaking of reorientation, giving the player the option to reorient the camera to its default position (behind the character in the case of a third person camera) is usually appreciated by the player. It comes in particularly useful during combat and platform jumping scenarios. Reorientation is usually achieved with a quick, single button press by the player.
Speed. Be mindful of the speed of your third person camera as it is rotated around by the player. A good camera feels like it has hydraulics; it never stops dead, but rather slows down slightly as it decelerates. This will keep the player from suffering from DIMS. As a player character is usually in motion, another trick I learned is to have the camera slightly overshoot its target when the player stops and creep back to center on the player if they stay still long enough. Just remember, you NEVER want the player to get out of the camera's view.
The third method is to give the player selective control over the camera. Like with the first person free-look cam, this mode is activated by a button press which brings the camera in for a closer look at an object's detail or into a special mode like a sniper's scope. The difference between selective control and a free-look camera is context.
With the free-look camera, you are simulating the turning of the character's head. With selective control, you are simulating a piece of equipment, like binoculars or a telescope. Any limitations this camera may have should mirror the limitations of the object the character is using. This realism sells this view, so let reality be your guide.
Some game designers find the transition from third person to first person to be jarring, and feel it risks taking the player out of the carefully constructed atmosphere they've created. Resident Evil 4 created a unique solution for their shooting gameplay. As the player aims their firearm, the camera viewpoint shifts down to hover behind the character's shoulder.

Another infrequently used alternative is to use second person view, where the camera mode is given to an entirely different character. In the Mark of Kri (SCEA, 2002), the player "sees" through the eyes of Kuzo, a bird that can be flown on spy missions. In The Darkness (2K Games, 2007), the player can control a "tentacle cam" to see around corners and further than the player's POV. When the player has seen what they want, a button press returns the view back to the third player view.
Good call. The last thing you need is someone screwing around with the camera making your game look bad. You will realize that there are many benefits to taking away the player's control over the camera.
Removing camera control gives the player one less thing to worry about. If they aren't wrestling with the camera, the player is free to concentrate on what's important: playing your game.
More visual bang for your buck. A camera where YOU determine what it's looking at means that game art can be built to maximize polygon and texturing limitations. In God of War, the environments were built like theater sets, not in full 3-D. Why build the back of a building if you are never going to see it?
You can treat your game like a dark ride. Disneyland's Haunted Mansion is the perfect real-world example of a designer-controlled camera, as its omni-mover carts[74] always have the guest looking at the most interesting scenes in the ride. You commonly find this kind of rail camera in first person shooters like Time Crisis (Namco, 1995) and House of the Dead. (Sega, 1996).
Your game world simply looks better. Taking away camera control means you can set up shots. Want a worm's-eye view to make the boss look more menacing? No problem. Want to skew the camera to make the world look demented or creepy. Go right ahead. No one is going to be able to screw it up.
What did I miss? Have an important clue or event happening in your game world? Want the player to be able to see the Tower of Doom looming in the background or that giant spider that is creeping up on them? No problem. Without camera control, you don't risk the player missing anything important in your game.
Want to have the camera do a barrel roll? Zip in and out between columns? Move around pillars or over or under objects? Match the player's movement as they crawl under obstacles and through narrow passages? Go right ahead and go nuts with those complex camera moves. Using a rail camera you can set up elaborate and cinematic camera angles. You don't have to worry about the player wrestling to regain control of the camera. Just make sure your gameplay controls remain consistent during any of these fancy camera moves.
If you decide to obstruct or let the character get out of the player's view, make sure that your character-relative controls let the player guide the character back into view. For example, if the player moves the character behind a fence, the player should be able to keep pushing the control stick in the same direction with the assumption that the character will eventually emerge on the other side. Don't place hazards behind the obstruction or widen the path in these areas, which would allow for movement in the Z-axis: the player could get unjustly hurt or lost when not in view. These situations, however, are great places to hide goodies.
But the most important thing to remember when removing the player's control of the camera is to make it clear they don't have control over it. Once this is established to the player, they can focus on the gameplay and not worry about the camera.
2-D vs 3-D? In the end, all that matters is that you use the camera that is best for your gameplay.
Crash Bandicoot (SCEA, 1996) was one of the first games to take two-dimensional platform gameplay and move it into the third dimension. Unlike bi-dimensional gameplay which uses sprites for the game world and characters, two and a half D uses three-dimensional character and world models but limits the camera movement in the same manner as a bi-dimensional game: up, down, and in/out on the Z-axis.
When making your two and a half D games just follow the same rules as with a parallax scrolling camera, with the guidelines of taking control away from the player as listed above.
Introduced with Zaxxon (Sega, 1982), the isometric camera gave the player a new way to look at the playing field. Not quite side view and not quite top down, the end result creates a rather toy-like view of the world. This, and the smooth scrolling 3-D world on a 2-D display, contribute to why the isometric view is popular with building and simulation games.
There are some advantages to an isometric (or iso) camera. Players get a quick snapshot of an environment's layout and the relationship of items within it, which makes it good for environmental puzzle solving. Hordes of enemies seem more impressive when seen from this camera view, as exhibited in games like Diablo and Starcraft. That said, elevation can cause some problems in iso view. Determining whether something is higher up and closer than something farther away and lower can be difficult, as they both appear to be in the same spot on screen. Regardless of how small their subjects look compared to their first and third person cousins, iso games can still be quite detailed and beautiful. However, if your gameplay is less concerned about getting a detailed look at the inhabitants of your world, then go ahead and steps into the sandals of the divine with God view.
Because details aren't as important in God view you will find it in games that are concerned with controlling cities or dominating land masses like Spore or Supreme Commander. God view is essentially an isometric camera but where the player is given a wider field of vision over the world, sometimes as high as low orbit.
Considered to be an "old-fashioned" camera view, you can still occasionally find action arcade games presented in a top-down view. Classic games like Smash TV and Gauntlet are examples of games that used this camera view. There are some disadvantages to this view, such as not being able to get a good look at the game character or the game world, and concepts like depth should be avoided from this perspective.
An interesting variation on the top-down camera view is the top-down/side view camera. While some elements in the game level are presented from a top-down view (usually world elements and power-ups), other elements (like characters) are presented from a side view. This view has a certain charm to it, similar to how characters in Egyptian tomb art are always shown from the side view. Games like Snake and Tower Defense are some of the more recent types of games that use this quirky camera view.
OK, so you've decided on what camera to use for your game. You're ready to go, right? Wrong! What about the camera for special instances? Designing a camera to work underwater or while flying adds another layer of complexity.
Here are a few red flags and tricks to keep in mind when adding these extra layers to your own game:
Make sure your camera is always moving along with the player while flying or swimming. Don't let the player rise or fall off screen.
If your player flies or swims straight up or down, make sure your camera doesn't sort through floor geometry.
While swimming, keep your camera underwater with the player. Don't have it pop out of the water unless the player is swimming on the surface. Try to keep a clear distinction between "in water" and "on land."
Try to resist the urge to have your camera realistically bob while underwater. It's effects like this that make players suffer from DIMS.
Another tricky camera angle is when the player is moving through environments like caves, sewers, or dungeons. Low ceilings, narrow passageways, and tight doorways can cause all sorts of trouble to the camera.
I find that if you restrict the movement of the camera using a rail camera in these troublesome locations, not only do you alleviate any camera problems, but it also helps maintain the feeling of claustrophobia. Avoid low angles, rather keep the camera at the character's shoulder height or slightly above the player—but watch out for low-hanging stalagtites that will cause camera sorting issues.
Now that we've seen all the ways a camera can present the game, let's go to the 5-second film school and find out how to set up your camera to get the best shot—just like those Hollywood professionals!
Extreme wide shot (EWS). This shows a character or location from a very far distance. This shot is perfect for showing castles looming in the distance or a planet-killing space station in orbit.
Very wide shot (VWS). Closer than an extreme wide shot so that you can make out some details. Usually used for establishing shots of buildings or other large things like space ships or to set the tone that the player is stranded out at sea or in a desert.
Wide shot (WS). The entire subject (be it a car or person) can be seen in frame on a wide shot. Usually used when first establishing a main character or vehicle so the player can get a good look at it in its entirety.
Medium shot (MS). About half of the figure of the subject can be seen in frame: usually your character from the waist up. Which means your character doesn't need to wear pants that day.
Medium close up (MCU). Also called a "head and shoulders shot." This view is most commonly used when a character is talking. Make sure to animate hands to keep the character on the screen lively.
Close up (CU). Also called a "head shot": the camera is tight into a character's face to show expression. When you get this close to a CG character model, you start to see flaws (such as in the interiors of mouths or close views on textures). I recommend using this shot sparingly.
Extreme close up (ECU). Wham! Right up the nose with this one. It's great for focusing on the expression in eyes like in spaghetti westerns and old horror movies. Or you can use it to show details on objects such as puzzle clues, or even the puzzles themselves.
Cutaway. You know when the hero says "I need to get that magic sword" and the next shot is a magic sword? That's a cutaway. A cutaway can be used for a character reaction shot too.
Cut in. Here, our hero says "I need to examine this clue" and then the camera shows a close-up detail of the clue. That's a cut in.

Two shot. This is called a two shot because it features two elements (usually talking characters) shown on screen at the same time.
Over the shoulder shot (OSS). A shot taken from over the shoulder of a character. It's a good opportunity to show hidden things too, like characters revealing that they have a gun strapped to their back or are crossing their fingers as they promise not to kill the bad guy.
Noddy. A shot in which a character is reacting to what someone else is saying (they are "nodding" in response to the speaker). You see this shot a lot with news interviews.
Point of view shot (POV). A shot from the perspective of someone or something. Usually shown from the eyes of the player, but can be from the point of view of a watching enemy, a floating power-up, whatever you want!
Now that you know what kind of camera you are using and what your shot is going to look like, let's place the camera to make things look as cool as possible.
Eye level: the camera is aiming level at the eyes of your subject.
High angle: the camera is above the subject, looking down on it. This can make things look less impressive. A good shot for showing elements in relationship to each other.
Low angle: the camera is below the subject, looking up at it. This makes things look more menacing or impressive. Great for boss fights.
Worm's-eye view: the camera is literally on the floor looking up, as if a worm were watching the action.
Bird's-eye view: a shot taken from high up in the sky, as if a bird were watching the action.
Dutch tilt: we did this trick in Maximo: Ghosts to Glory. We wanted our in-game camera to feel slightly creepy or wacky, like shots you see in a Sam Raimi horror movie or the 1960s Batman TV show. Tilt the camera so everything seems to be cockeyed. If you do a Dutch tilt subtly, it has a great effect on the player who realizes something is wrong, but isn't sure what. If you do it severely, it really makes things feel screwed up.
Moving the camera is an art all unto itself. Here are the most common ways to move a camera. See if you can incorporate these moves into your game camera to make it feel more cinematic.
Arc: where the camera follows or dollies around a subject in an arc. A common technique is to have the camera arc around the player for 360 degrees if something amazing or wondrous is happening to the character (for example, they've just gained a new power).

Dolly zoom: the camera adjusts the focal length but is moved forward or back to keep the subject the same size on camera. You see this shot a lot in Steven Spielberg movies where a character is amazed by something or comes to a realization that something bad is going to happen.
Follow: the camera moves with the subject. Depending on the style of your cutscene, you can try to make your follow a little shaky as if it was taken by a hand-held camera.

Pedestal: moving the camera up to match the subject. Like a tracking shot but vertical. Having the camera pedestal past objects in the foreground helps add to the illusion of speed, especially if you are trying to show something rise up suddenly or powerfully.

Pan: when the camera moves to the left or the right. Play around with your pans: move them around and past objects. Place items in the foreground to make more interesting shots.

Tilt: where the camera's focus is moved up or down but the camera's position stays the same. Effects like lens flare can make a tilt more interesting.

Dolly: where the camera is moved smoothly towards or away from the subject. This is also called a tracking or crab shot. Speed can really make a dolly more interesting; a slow crawl if something is mysterious or suspenseful, or really rocket forward if something is dangerous or dramatic. Play around with starting and ending your tracking before your subject starts moving to make things feel more dynamic.

Zoom: the focal length of the lens changes, giving the illusion of the camera moving. Be careful not to zoom in through items (sorting) or zoom too close to characters or world objects that aren't very detailed. Seeing textures go from fine to pixilated breaks reality for the viewer.
Now that you are an expert cinematographer, let's work on your directing skills.
Nothing kills a good shot faster than having unappealing composition. The most basic guideline for composition is called the rule of thirds.
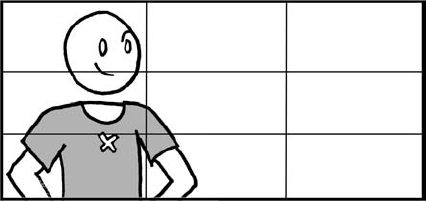
See in the above image how the screen has three imaginary lines running through it? The rule is that you want to put the item of focus either a third of the way up or a third of the way to one side or another. Of course, once you have mastered the rule of thirds, you will want to break it. That's OK too. After all, you are an ar-teest.
Another tried and true rule is called crossing the line. Just like in the rule of thirds, there is an imaginary line that cuts through the middle of your scene or environment. Let's say you have your hero running away from a deadly trap.
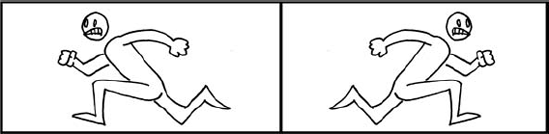
The hero has just crossed the line, which makes it look like he is running first to the right and then to the left, which just looks weird and doesn't convey that our hero is running in the same direction. Instead, add a shot of our hero from the front to show that this is the same guy in the same place.
You also want to apply crossing the line when you have two characters talking to each other, otherwise they'll look like they are talking to someone else off screen.
An excellent rule of directing your shot, whether it is in-game or in a cutscene, is that the camera should tell the player what they should be looking at. For example, you enter a mysterious, underground chamber. The player can be told any number of things by the camera's movement: where puzzle elements can be found, the appearance or location of enemies, a dramatic reveal of a beautiful piece of architecture, or where the exit is. Or even better, all of the above. Playwright Anton Chekhov said "If in the first act you have hung a pistol on the wall, then in the following one it should be fired. Otherwise don't put it there[75]." In other words, show everything that the player needs for the entire room or scene. You can spool clues out to them, but don't make them blindly guess.
Even if the objective can't be seen by the player, give them tools to find another way to see it. Batman: Arkham Asylum uses a "detective mode" (literally a pair of X-ray specs) that allows Batman (the player) to see hostiles as well as points the way to secret paths. Heavenly Sword (SCEE, 2007) displays a picture-in-picture view to show puzzle clues and "beauty shots" of the enemies during boss fights.
Oy. I can hear all of the kvetching now. "How can I keep my camera on the character ALL of the time? But what if my character goes behind a wall or hides behind a very dense shrub?" Feh. Not a problem. There are several tricks you can do to help the player keep track of where they are in the game. Observe:
Show an arrow, name tag, or "ghost image" outline of the player through geometry.
Have the screen react as if it were an X-ray or thermal imaging device and show the player's skeleton or heat signature while they are behind the object.
Make the wall or object turn transparent to show the character behind it.
If your character gets off screen (this can happen in multiplayer mode[76]), have an arrow or icon point to where they are.
Zoom into first person mode to show the character's POV.
Build your geometry to make sure you can always see a little bit of the character; tinted windows, arrow slits, grating with gaps all goes a long way to show the movement of the player behind it.
While the player is in this obscured view, the camera should NOT act any differently: the last thing the player needs is to have to wrestle with the camera when they can't see their character.
Keeping a camera on a player is tricky enough but what if you have more than one player? I have seen many a game designer go mad trying to determine a workable camera scheme for multiple players. Fortunately, I have done all the hard work for you and will save you a trip to a padded cell.
Split screen: GoldenEye 007 (Nintendo, 1997) had a great four-player split screen mode that worked pretty well as long as you didn't expect to make out any detail on the screen. War of the Monsters (SCEA, 2003) used a split screen that only engaged when the two combatants were far enough away from each other to trigger it. Now, in the age of giant plasma screens, split screen works better because each player can actually see what is going on.
Zooming screen: LittleBigPlanet zooms out whenever there is more than one character on screen. If any of the characters get off-screen, they use an arrow to keep track of the player's location. If they stay off screen for too long, the player is "killed" until the next checkpoint is reached. Power Stone does something similar, but dynamically scales in and out as there can be up to four players on screen at once. The characters get pretty tiny at times, but coupled with an indicator arrow system you can keep track of your character pretty well.
Camera in picture: You can also go with the camera-in-picture route. A main character is represented on the "big screen" with additional characters shown on smaller insert camera views. It's not the best solution for some types of multiplayer games like FPSs, but it works pretty well for sports titles.
Whew. I think we've exhausted the topic of cameras. Time to move on to the last of the Three Cs ... Controls.
Level 6's Universal Truths and Clever Ideas:
Prevent DIMS by minding frame rate, speed of camera movement, and level topography.
First person camera allows for greater player immersion.
Third person camera allows the player to get a good view of their character and the world.
Treat the camera like it is the player's "spotter."
Remove camera control whenever it becomes a problem.
When removing camera control, make sure the player knows it.
Use Hollywood-style camera angles and shots to heighten game visuals and drama.
Never let the character out of the camera's sight.
Accommodate multiple players using the game camera.
[69] This is a completely made-up statistic.
[70] The camera effect called "Mode 7" actually existed before the SNES. Racing games like Night Racer (Micronetics, 1977) and Pole Position (Namco, 1982) were some of the first games to feature a scrolling ground plane that gave the illusion of 3-D space.
[71] This is the reason why I never sit closer than the seventh row from the front when I go to the movies
[72] This is what killed me when I played Goldeneye on the N64. Don't get me wrong, this is a brilliant game, but there was one level with an undulating floor that, after I played it for a half hour, I threw up like it was Christmas
[73] The story goes that Toby Gard, one of the designers of Tomb Raider (Eidos Interactive, 1996), made his lead character a woman because he didn't want to spend the entire game's production staring at a guy's ass
[74] Which they call "doom buggies." Heh.
[75] Anton Chekhov: A Life, Donald Rayfield (Henry Holt and Company, 1997).
[76] But it won't because you aren't going to let your main character get out of the camera's sight, right?