
Chapter 9
Keeping Track of Your LinkedIn Activities
In This Chapter
![]() Using LinkedIn as your command console
Using LinkedIn as your command console
![]() Reading your network updates
Reading your network updates
![]() Understanding your Inbox
Understanding your Inbox
![]() Tracking InMail and introductions
Tracking InMail and introductions
![]() Tracking sent and received invitations
Tracking sent and received invitations
I talk a lot about the different functions available on LinkedIn for you to use, and hopefully you've started to set aside some time on a regular basis to keep track of various tasks as you build up your profile and network. Because of the growing number of functions available on LinkedIn, you should take a look around the site to see how you can manage this new set of tasks most effectively.
In this chapter, I detail the different ways you can access the LinkedIn functions as well as how you can keep track of incoming mail, invitations, and other messages that require your input or approval. I discuss the functions that you can access from the top navigation bar on the LinkedIn home page. I also discuss the LinkedIn Inbox, where all your messages, invitations, answers, and communication are received. Then, I go over some ways you can set up LinkedIn to communicate with you through e-mail and keep you informed of communication from other LinkedIn users, whether those are Invitations, Introductions, Recommendations, Answers, or other LinkedIn functions.
Using the LinkedIn Home Page as Your Command Console
The LinkedIn home page is, by default, full of information about how you use the site. Think of the home page as your command console for working with LinkedIn. You can get to the home page at any time by clicking the LinkedIn logo or the Home link in the top-left corner of every LinkedIn Web page. The home page holds a variety of information. Of course, your home page is unique to your LinkedIn identity, so it will look different from mine (shown in Figure 9-1) or any other user on LinkedIn. And remember that your home page is based on the first-degree connections in your network, the pending messages in your Inbox, and the level of participation with functions, such as LinkedIn Groups or Recommendations, or applications like SlideShare or the Amazon Reading List.
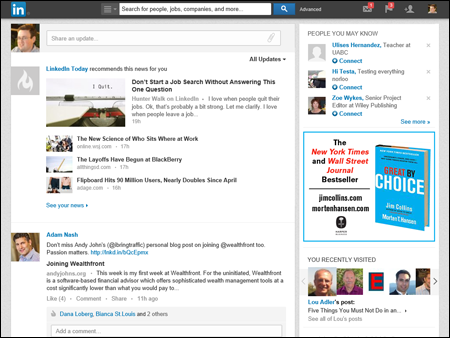
Figure 9-1: Coordinate all your LinkedIn activities through the home page.
First off, check out the menu along the top of the site. As I mention in Chapter 1, I refer to this menu as the top navigation bar. This bar has all the major categories for checking your activities on LinkedIn. Just hover your mouse over each function to expand the menu item to see more options. Figure 9-2 shows an expanded Interests menu.
The number of unanswered messages or invitations in your Inbox is shown in an orange box next to the Inbox menu option, along the top right of the page. Just hover your mouse over the Inbox link and click a category to go straight to the Inbox. To the right of the Inbox link is a notifications flag, and the number of new notification items is shown in an orange box next to that flag, similar to other social media sites such as Facebook.
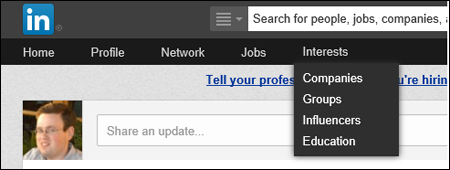
Figure 9-2: Expand your menu options.
Scroll down your LinkedIn home page to see modules of other aspects of LinkedIn, such as LinkedIn Pulse, Jobs, and Network Activity. Based on your profile, positions, and whether you participate in functions like LinkedIn Groups, the site provides a default configuration for your home page and includes the modules it thinks are most useful to you. When you want to change any of the settings of your account, simply hover your mouse over your photo (in the top-right corner of the screen) and click the Review Privacy & Settings link to bring up your settings page, as shown in Figure 9-3. Later on this chapter, I discuss the different categories on this page.
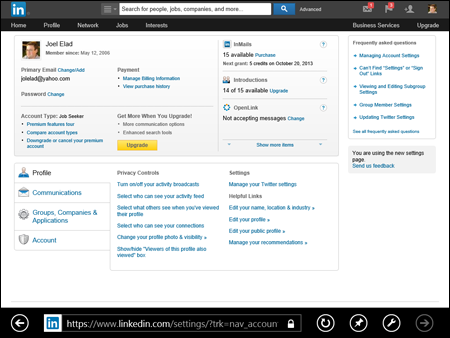
Figure 9-3: See LinkedIn modules on your home page.
Reading your network activity
One way to stay involved with your LinkedIn network is to keep up to date on how your first-degree connections are using LinkedIn. (For more on connection degrees, see Chapter 1.) To that end, the Network Activity section (now called LinkedIn Pulse) summarizes all the activity within your immediate LinkedIn network.
Figure 9-3 gives you an idea of what this Network Activity section can contain. (Typically, it contains the most recent 25 items. I discuss how to change the number of items in a few paragraphs.) If you're looking at the Network Activity section of your LinkedIn home page, you can click the All Updates link (these words are a link) to filter your items, as shown in Figure 9-4. You can pick a subcategory, such as Connections (to see who in your network has new connections), Shares (to see what information your connections are sharing with you), Profiles (to see what profile updates your connections are making), Groups (to see any group updates), Companies (to see any updates from companies you're following), Jobs (to see any updates or activities regarding your job search), or Your Updates (to see a list of the network updates you've made on LinkedIn).
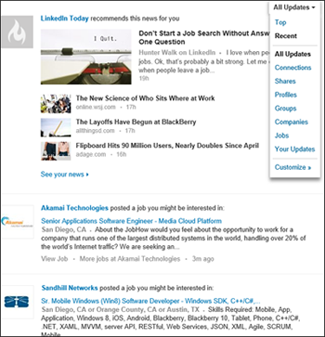
Figure 9-4: Get the full story on your LinkedIn network updates.
Because you can customize the network updates you see in your section, you need to decide which of the following events are worth keeping track of:
- Posts (status updates) shared from your first-degree connections
- Job opportunities
- Trending news
- Profile updates your connections make to their profiles
- New connections in your extended network (meaning any new connections your first-degree connections made)
- Updates from your extended network
- Updates from companies you are following
- Updates from any LinkedIn applications
- Groups that a first-degree connection of yours has joined
- Discussions from any of your LinkedIn groups
As a default, each of these categories is set up to show in your Network Activity section, and 25 updates appear on your home page. To customize the criteria of your Network Activity section, just follow these steps:
- Hover your mouse over the All Updates link in the top-right corner of the LinkedIn Pulse section of your page, then click the Customize link.
The Updates You See on Your Home Page pop-up window appears, as shown in Figure 9-5. By default, all the criteria shown on this page should be selected.
- To remove any criteria from the list, deselect the check box for that feature.
 Additionally, you can change the number of network updates displayed on your home page by picking a number from the drop-down list near the bottom. (The default is 25; you can choose between 10 and 25.)
 - Click the Save Changes button.
You're taken back to the Account & Settings page.
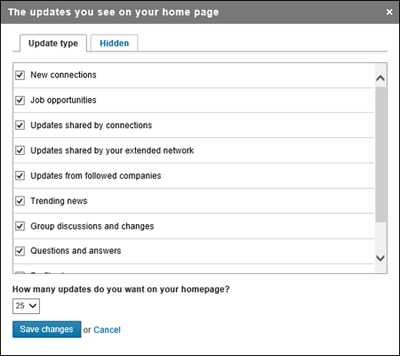
Figure 9-5: Decide what network updates you want to see.
Having LinkedIn automatically contact you
Sure, you can do all the footwork by going to the LinkedIn home page and looking around to see what messages or changes have occurred. The true power of staying connected, however, is having LinkedIn automatically contact you with the information you need to stay informed.
As I mention in the preceding section, clicking the Review link next to Privacy & Settings (after hovering your mouse over your photo button from the home page) takes you to the settings page, which contains information about your account and your LinkedIn settings. Click the Communications header on the left side of the screen to bring up the Communications settings, as shown in Figure 9-6. This is your hub for controlling how you interact with LinkedIn and how the site communicates with you.
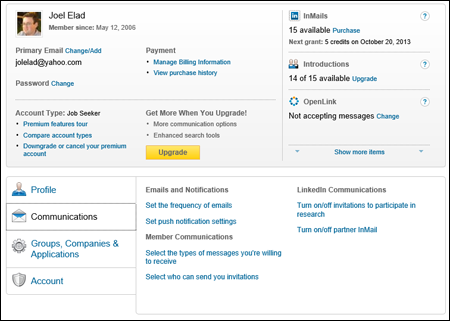
Figure 9-6: Control your LinkedIn settings from the Account & Settings page.
Start by setting preferences in the Emails and Notifications section by deciding when LinkedIn should send you an e-mail to your e-mail account on file with LinkedIn:
- On the Account & Settings page, click the Set the Frequency of Emails link in the Emails and Notifications section.
You're taken to the Email Frequency page. For each section, like Messages from Other Members, click the pencil icon on the right side to expand the list of options, as shown in Figure 9-7.
- Review the list of options and decide how you want to receive your e-mails. Click the drop-down arrow for each row to select:
- Individual Email: As soon as something occurs in a given category, like introductions, invitations, or job notifications, LinkedIn sends you an e-mail with that one item in the e-mail.
- Weekly Digest Email or Daily Digest Email: Instead of individual e-mails, LinkedIn groups activities in a given category and sends you one e-mail in a digest format, with a summary at the top of the e-mail and the detailed activities below the summary. Note that Daily Digests are for Group updates, while Weekly Digests are available for General and Group updates.
- No Email: Turn off e-mail notification. You can read the message, though, when logged in to the LinkedIn site.
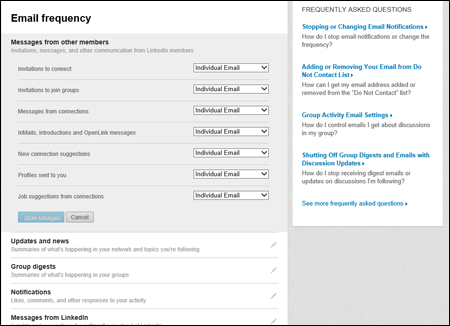
Figure 9-7: Decide what e-mails you want to get from LinkedIn and how often.
- (Optional) Click the pencil icon next to the Messages from LinkedIn header, and select Individual Email for the Announcements, Tips, and Insights into New Products and Features option to receive information from LinkedIn.
- Scroll down to the bottom of the page and click the Save Changes button.
You return to the Account & Settings page.
Understanding Your Inbox
The best hub for your communications is the LinkedIn Inbox, which you can access by clicking the Inbox link in the top navigation bar. In most cases, you go to the action items (or new messages that require your attention) in your Inbox, as shown in Figure 9-8.
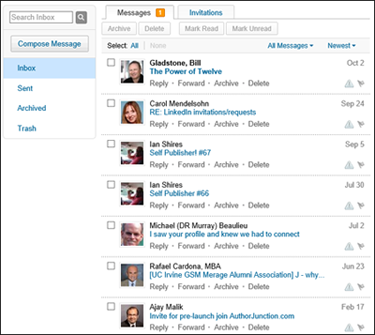
Figure 9-8: Review the action items in your Inbox.
Here are some things to keep in mind when navigating your Inbox:
- Using the links on the left: You can click any of the links along the left side to see your Inbox, sent items, archived items, or your trash.
- Using the filters: By default, when you're looking at your Inbox, you see all messages. If you click the drop-down arrow next to the All Messages heading (above your first item), you can pick a specific category (such as InMail, Introductions, Jobs, Unread Messages, Forwarded Profiles, or Recommendations).
- Archiving: After you read your message, you can archive the message for later viewing. However, unlike other e-mail systems, you can't (as of this writing) create your own folders within your LinkedIn Inbox. Instead, you simply archive a message into a general archive. From within the message, or in the list of messages in your Inbox, just click the Archive link to move the item from your Inbox to your Archived folder.
To view your archived messages, click the Archived link on the left side of your screen when looking at your Inbox. Your archived messages appear in the same place where your Inbox messages appeared. You can also filter your archived messages the same way you filter your Inbox messages.
- Deleting: If you don't want to keep a message, click the Delete link.
Tracking Your InMail and Introductions
Although many of your communications with immediate first-degree LinkedIn connections take place through your own e-mail system, communications with people outside your network of first-degree connections need to be tracked and responded to via LinkedIn. So take a look at how you can track InMail and introductions through your LinkedIn Inbox.
To go directly to your list of InMail messages or introductions, click the InMail link or the Introductions link from the All Messages filter in your Inbox. For example, when I click the InMail link, I go to the InMails page shown in Figure 9-9. In addition, if you want to switch between received and sent InMails, click the Sent link and then filter all the Sent messages by using the All Messages filter to select only InMail.
Your Introductions message list uses a similar setup, like the one shown in Figure 9-10. The third introduction in this example, Michael Bellomo, has been accepted. The fourth introduction, from Jeremy Goldstone, has also been acted upon. You can tell because both items have a green arrow next to the subject line.
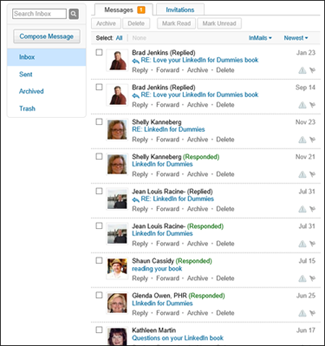
Figure 9-9: Take a look at the InMail you've received.
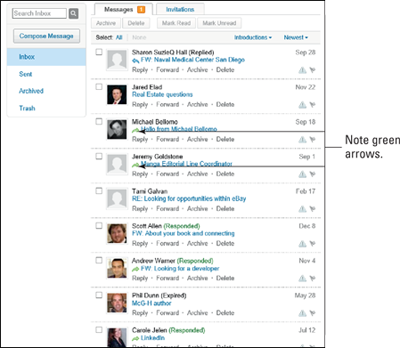
Figure 9-10: Check the introduction messages you've received.
The process is similar for tracking any recommendations you've received. Turn to Chapter 8 for more info on recommendations.
Tracking Invitations
As you grow your network, you need to keep track of the invitations you sent to your connections as well as any incoming invitations. I cover invitations in Chapter 2, and I talk about setting up your notifications for receiving e-mail about invitations in the section “Having LinkedIn automatically contact you,” earlier this chapter. The following sections tell you about monitoring your invitations on the LinkedIn Web site.
Tracking sent invitations
The last thing you want to do is send repeat invitations to the same person because you didn't monitor your sent invitations. Also, you might want to review your sent invitations to see whether someone has responded; if not, you can send that person a follow-up e-mail either through LinkedIn or via your own e-mail account. As of this writing, there is no running list, so you have to go through your Inbox to see which sent invitations have been accepted or not.
Here's how to track your sent invitations:
- Click the Inbox link from the top navigation bar of any LinkedIn page.
This opens the screen for viewing all your incoming messages and invitations, as shown in Figure 9-11.
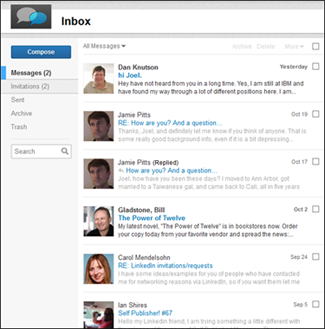
Figure 9-11: Use your Inbox to review potential new connections.
- Click the Sent link to pull up your sent invitations and messages.
You see the Sent page, as shown in Figure 9-12. The status of each invitation depends on whether (Accepted) appears next to each name. If so, that invitation was accepted. If not, the invitation has merely been sent. Be sure to ignore any messages that aren't related to an invitation.
- To view an invitation, click its Subject line.
You see a copy of your invitation, like the one shown in Figure 9-13. In this particular case, the Resend and Withdraw buttons appear because the recipient hasn't yet acted on the invitation.
- Resend: Send a reminder to this person.
- Withdraw: Delete your invitation request.
When you withdraw the request, no message is sent to the other person.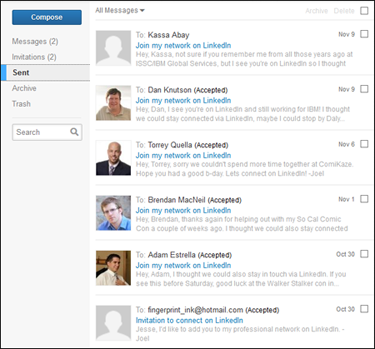
Figure 9-12: See your sent invitations and their statuses.
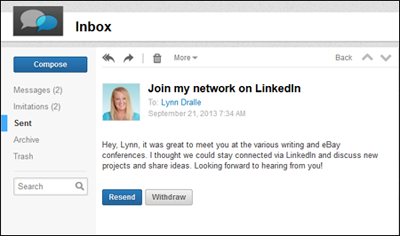
Figure 9-13: Review an invitation you've sent.
Tracking received invitations
When growing your LinkedIn network, you should be responsive to others who want to add you to their LinkedIn connections lists. To review your received invitations, follow these steps:
- Click the Inbox link from the top navigation bar and then click the Invitations link on the left side of the screen.
You're taken to a list of your received invitations, as shown in Figure 9-14. You can hover your mouse over the person's name to see shared connections, and, with a click of the mouse, see his profile.
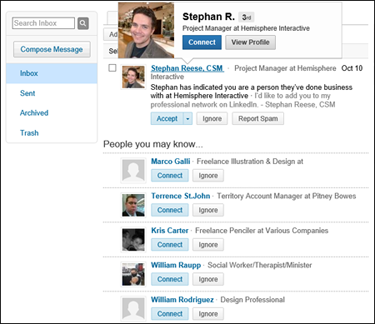
Figure 9-14: Review your received invitations here.
- To accept a pending invitation, click the Accept button.
If you want to reply to the person without immediately accepting that invitation (say, to get clarification in case you don't recognize the person), click the drop-down arrow next to the Accept button and then select Reply (Don't Accept Yet) to open a new message to that person. You can also click the Ignore button to remove this invitation from your Inbox. (See Chapter 6 for tips on growing your network.)
After you click Accept, Reply, or Ignore, that invitation disappears from your view.
- Continue to act on each invitation in your list until there are no more new invitations.