
Lesson 3. Using Effect and Instrument Plug-ins
Lesson Files: Logic Book Sessions > 03 Fast Jam
Time: This lesson takes approximately 45 minutes to complete.
Goals: Insert effect and instrument plug-ins on channel strips
Select plug-in presets and patches from the Library
Edit a patch with Smart Controls
Use bus sends to route to an auxiliary channel strip
Pack tracks in a summing stack to create a layered synth patch
Enable patch merging to load only part of a patch
Reorder and copy plug-ins
Save user plug-in settings and patches
Logic comes with an extensive array of plug-ins that you can insert on your channel strips. Software instrument plug-ins act as virtual synthesizers and samplers, allowing you to record or program MIDI performances on tracks and trigger all kinds of instruments, from realistic emulations of acoustic instruments (drums, guitars, strings, horns, and so on) to the most complex synthesizer and sampler sounds you can imagine.
In this lesson, you will work with a fast-tempo rock song that was built by adding a few Apple Loops to the virtual drum track you created in Lesson 2. You will browse and choose patches from the library, insert individual effect and instrument plug-ins directly into channel strips, move and copy plug-ins in the Mixer, and save your own user settings and patches in the Library.
Inserting Plug-ins
During playback, the data on a track is routed to the top of the track’s channel strip, displayed on the left in the inspector. On audio tracks, the audio signal from the audio regions goes straight into the Audio FX area, where you can process it using audio effect plug-ins. On software instrument tracks, the notes inside MIDI regions are routed through a MIDI FX area to an instrument plug-in that produces an audio signal, which is then routed to the Audio FX area. You will first insert audio effect plug-ins on audio tracks, and then later you’ll insert instrument plug-ins on software instrument tracks and add a MIDI effect plug-in.
Playing Individual Instruments in Solo Mode
Sometimes you may have to complete work on a Logic project that you weren’t involved in putting together from the beginning. For example, an artist wants you to add new instruments to a song they started, or a producer has completed a song and they want you to mix it. In those situations, you can use Solo mode to hear only the selected regions so that you can identify the instruments and get familiar with their sound.
Note ▶
Be sure to read “Installing the Logic Lesson Files” in “Getting Started” before you continue.
Open Logic Book Sessions > 03 Fast Jam.

Listen to the song.
The song structure works, but some of the instruments sound pretty bland. To bring them to life, you will later add effect plug-ins and patches to their channel strips. For now, let’s get to know the different tracks.
In the control bar, click the Solo button (or press Control-S).

Solo mode is turned on, and the LCD display is yellow. In the workspace, all the regions are dimmed to indicate they’re not playing. In Solo mode, only selected regions play back.
Click the Drums track (Track 1) header.

All the Drummer regions on the track are selected and soloed.
Listen to the Drums track.
You should recognize the virtual drums you programmed in the previous lesson. Let’s hear the bass guitar along with the drums.
Shift-click the Bass track (Track 2) header to add all the Bass regions to the selection.

You can now hear only the bass and drums. The Bass track sounds pretty good the way it is, and you won’t add any plug-ins to change its sound.
Click the Verse Guitar track (Track 3) header.
The regions on Track 3 are selected and soloed. On that track, there are regions only during the verses. If your playhead is currently in another section, you are out of luck and won’t hear anything! That’s when the Play From Selection key command (Shift-Space bar) comes in handy.
Press Shift-Space bar.
The playhead jumps to the beginning of the selection (bar 5) and playback continues. This guitar is a dobro, and you can hear the metallic twang of the resonator guitar, reminiscent of classic country music songs. You will later add distortion to this track to give that guitar more of a modern rock sound.
Click the Gtr Harmonics track (Track 4) header.
Press Shift-Space bar.
You hear a clean guitar arpeggiated harmonics. You will later distort that guitar too using a guitar amp patch from the Library.
Click the Lead Synth track (Track 5) header.

The Lead Synth MIDI regions on the track are selected. Remember to press Shift-Space bar as needed to play the selected regions.
You hear nothing. Note that in the inspector, the left channel strip doesn’t have an instrument plug-in. You will later add a synth plug-in to be triggered by the notes inside the MIDI regions on that track.
In the Outro, drag to select all the regions on Tracks 6 and 7.

Both guitar tracks play at the same time. They sound great together, and you’ll process them through modulation and distortion plug-ins to give them movement and character.
In the Intro, drag to select the two tiny regions on Tracks 8 and 9.

The two regions both play short samples and stop abruptly. Later, you will use delay plug-ins on both tracks to make the two samples echo throughout the intro.
In the control bar, press the Solo button (or press Control-S).
Solo mode is off, and all regions are colored again to indicate they’re no longer muted.
Using Solo mode in conjunction with the Play From Selection key command is a great technique for identifying the sound of individual regions in a project you’re hearing for the first time. Remember to use these tools throughout this lesson (and beyond) when you need to focus on an instrument while dialing the plug-ins on its channel strip.
Using Audio Effect Plug-ins Presets
Now that you are familiar with all the tracks in the song, you will insert plug-ins on their channel strips and choose presets or adjust plug-in parameters to give the desired sounds to your instruments.
First, you will add character to the two guitars in the Outro section, using a phaser plug-in to add movement to the first one and a fuzz pedal to distort the other. You’ll then adjust their volume and pan to balance them out nicely in the stereo field, widening the mix to give it dimension in that section.
Select the Outro Rhythm Gtr track (Track 6).
The Outro Rhythm Gtr regions are selected, and the Outro Rhythm Gtr channel strip is displayed on the left in the inspector.
To be able to experiment with plug-in settings while focusing on the sound of the guitar and not have to be concerned with navigation, you’ll solo the track and create a cycle area for the Outro section.
In the track header, click the Solo button (or press S).

The track is soloed and all other regions in the workspace are dimmed. The advantage of using the Solo button on track headers over using Solo mode is that the track remains soloed independently of region selection.
In the ruler at bar 37, drag the first Outro arrangement marker into the ruler.

Cycle mode is on and the cycle area corresponds to the marker you dragged. From now on, use the Space bar to toggle playback on and off, and you will always hear only the Outro Rhythm Gtr region below the cycle area.
Start playback to hear your guitar.
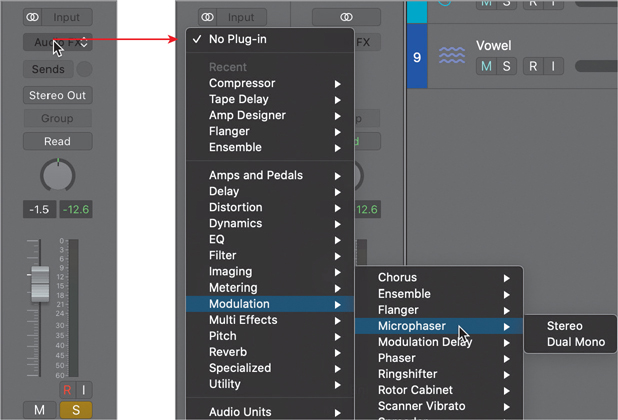
In the inspector, on the Outro Rhythm Gtr channel strip, click the Audio FX slot, and in the plug-in pop-up menu, choose Modulation > Microphaser.
Note ▶
When inserting a plug-in, there is no need to go all the way down the hierarchy in the plug-in pop-up menu to choose a format—such as Stereo or Dual Mono. Simply choose the plug-in name, and Logic picks the most appropriate format for the channel strip—Stereo in this case.
Tip
The five most recent plug-ins you’ve inserted are listed at the top of the Plug-in menu.
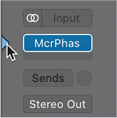
The Microphaser is inserted in the Audio FX area of the channel strip (McrPhas) and the Microphaser plug-in window opens.
You hear the effect on the guitar creating a swooshing filter modulation. Let’s open the Library to choose presets for the Microphaser.
In the control bar, click the Library button (or press Y).

The Library opens, and on the left channel strip, a blue triangle points from the Library to the Setting button at the top. That means the Library displays patches for the channel strip. You will later load patches on other tracks, but right now you will use the Library to select a preset for the Microphaser plug-in.
Click to the left of the Microphaser plug-in.
The blue triangle now points to the Microphaser plug-in and the Library displays Microphaser plug-in settings.
Tip
To position the blue triangle in front of a plug-in slot on a channel strip, Shift-click the plug-in.
In the Library, click the Underwater preset.
In the plug-in window, the Settings menu updates to display the name of the preset and the knobs turn to reflect this preset’s values. This preset creates a very fast twirling effect. It’s way too much for this guitar!
In the Library, click the Slow Heavy preset.
This preset creates a slower yet deep phasing effect. Let’s compare the guitar with and without the phaser.
At the upper left of the plug-in window, click the on/off button.

On the channel strip, the plug-in is dimmed to indicate it’s off, and you can hear the original guitar sound without the phaser effect. You can turn the plug-in on or off directly on the channel strip, which is useful when the plug-in window is not open.
Close the Microphaser plug-in window.
On the channel strip, move the pointer over the Microphaser plug-in and click the on/off button that appears on the left.

Tip
To quickly turn a plug-in on/off on a channel strip, Option-click anywhere on the plug-in slot.
The phasing effect is back on. Keep Track 6 soloed for now; you’ll unsolo it in the next exercise. Don’t forget to regularly save your work!
Choose File > Save As.
In the Save As field, enter 03 Fast Jam – progress and choose a location where you want to save this project.
In the Save dialog, the option to organize your project as a folder is selected. In the Finder, opening the folder gives you easy access to the project file and all assets used by the project file (such as the audio files used in the project) contained in subfolders.
For the rest of this lesson, you will be working on this new copy of the project, leaving the original 03 Fast Jam untouched, should you want to start this lesson over from the beginning in the future.
You have inserted a phaser plug-in in the Audio FX area of a channel strip to process the sound of a guitar track. You also know how to make the blue triangle point to the desired insert on a channel strip to choose among the presets for that plug-in in the Library.
Dialing Audio Effect Plug-ins Settings
Loading a preset from the Library is a quick way to find a premade sound effect. However, if you have something more precise on your mind, you’ll want to dial your own sound. On the lead guitar track in the outro, you’ll customize your own pedalboard plug-in to dial in just the right fuzz distortion sound.
Select the Outro Lead Gtr track (Track 7).
The Outro Lead Gtr channel strip is displayed on the left in the inspector. Track 6 is still soloed from the previous exercise, but now you need to turn your attention to Track 7. To solo a track while unsoloing all other tracks, you can Option-click the track’s Solo button.
On the Outro Lead Gtr track, Option-click the Solo button.
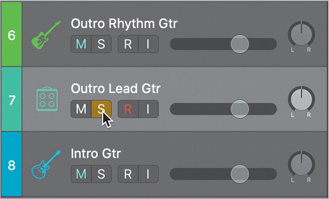
Track 6 is unsoloed, and Track 7 is soloed.
In the inspector, click the Audio FX slot and choose Amps & Pedals > Pedalboard.
The Pedalboard plug-in window opens with an empty pedalboard. Until you add pedals to the pedalboard, the plug-in doesn’t affect the sound of the guitar.
Drag the Octafuzz pedal from the Pedal Browser to the Pedal area.
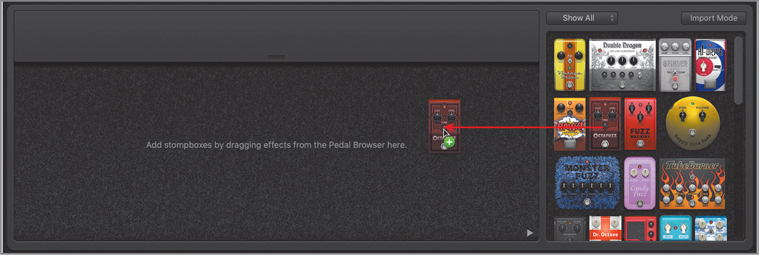
The over-the-top buzzing distortion is just what the doctor ordered for this lead guitar riff, but it’s a bit shrill.
On the Octafuzz pedal, drag the Tone knob all the way down.

The distortion is still intense, but the high frequency is rounded off and the tone is warmer.
Close the Pedalboard plug-in window.
On Track 7, click the Solo button to unsolo the guitar.
The plug-ins you’ve added on the two guitar tracks in the outro affect their loudness, and you need to readjust their volume. You will also pan them on either side of the stereo field to widen the mix in that section.
On the Outro Rhythm Gtr track, drag the Volume fader up to –1.0 dB and the Pan knob down to –28.
On the Outro Lead Gtr track, drag the Volume fader down to –5.7 dB and the Pan knob up to +40.

This outro sounds powerful. The phasing modulation on the rhythm guitar on Track 6 gives it movement and grabs the attention while the heavy distortion on Track 7 gives the lead guitar a commanding tone.
In the ruler, click the cycle area (or press C).
Cycle mode is off.
Choose File > Save (or press Command-S) to save your project.
You have inserted individual effect plug-ins on different channel strips to give different tracks a unique sound and help them stand out in the mix. You used the Library to choose a preset for one plug-in, dialed the other plug-in manually, and balanced the volume and pan of both tracks to give the guitars a nice wide stereo mix at the end of the song.
Using Software Instrument Plug-ins
In the previous exercises, you’ve worked with guitar loops on audio tracks and added audio effect plug-ins to process the audio signal coming from the audio regions on the track. You will now move your attention to the Lead Synth track (Track 5) that has MIDI regions on a software instrument track and insert an instrument plug-in in the Instrument slot.
Click the Lead Synth track header (Track 5).

The track and its regions are selected. In the inspector, the Lead Synth software instrument channel strip is on the left, and the Library displays software instrument patches.
In the control bar, click the Solo button (or press Control-S).
The selected Lead Synth regions are soloed. For the MIDI regions to produce any sound, they need to trigger a software instrument. Let’s try a couple of different instruments.
On the Lead Synth channel strip, click the Instrument slot and choose Studio Horns.
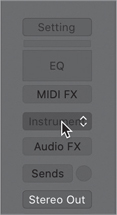
Use Shift-Space bar to listen to the instrument. The notes in the MIDI region trigger the Studio Horns instrument plug-in, which plays the sound of a trumpet. That’s a nice realistic-sounding trumpet, but it’s not quite what you’re after for this modern rock song!
Move your pointer over the Instrument plug-in slot and click the double-arrow symbol that appears on the right.

The instrument plug-in pop-up menu opens, and you can choose a different plug-in.
Tip
To remove a plug-in from a channel strip, in the plug-in pop-up menu, choose No Plug-in.
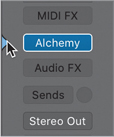
Choose Alchemy.
The Alchemy instrument plug-in is inserted, and its window opens. You will work with presets and don’t need to keep the plug-in window open.
Note ▶
The first time you open Alchemy, you may have to wait for Logic to refresh the Browser Library in the plug-in window.
Close the Alchemy plug-in window.
Alchemy plays a rather generic-sounding synth sound with a modulated filter. Let’s browse Alchemy presets in the Library.
Click to the left of the Alchemy plug-in.
The blue triangle points to the Alchemy plug-in, and the Library displays Alchemy presets.
In the Library, choose Basic > Leads > 80s Sync Lead.

When the Library has key focus, you can use the Up Arrow and Down Arrow key commands to select the previous and next setting in the Library.
Press Down Arrow a few times to listen to a few different Alchemy presets from the Library.
In the Library, choose Basic > Lead > Wobble Lead.
Alchemy now produces a rich and complex, expressive lead synthesizer sound. The synth is quite loud, so you need to turn it down.
On the Lead Synth channel strip, turn the Volume fader down to –15.0 dB.
When working with software instrument tracks, the Library makes it easy to browse different patches. Don’t forget to use the arrow keys to browse through consecutives patches during playback.
Using MIDI Effect Plug-ins
On software instrument channel strips, the MIDI data from the track goes through the MIDI FX area before it’s routed to the Instrument slot. MIDI data is performance data, and the MIDI effect plug-ins affect the incoming notes, their timing, pitch, and velocity— for example, creating transposing or echoing effects. In this next exercise, you’ll use an Arpeggiator MIDI effect plug-in to make the synthesizer melody arpeggiate notes in different octaves.
On the Lead Synth channel strip, click the MIDI FX section, and in the plug-in pop-up menu, choose Arpeggiator.

The Arpeggiator plug-in window opens. The MIDI regions on the track contain a single voice melody, so the Arpeggiator simply repeats the same note at 1/16 note intervals. Let’s slow it down.
Drag the Rate knob down to 1/8.

To spread the arpeggio effect over a wider pitch range, let’s raise the octave range.
Drag the Octave Range slider up to 3.
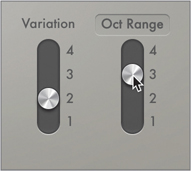
The notes are arpeggiated over a three-octave range and go quite high in pitch. To make the performance more legato, you can lengthen the individual notes generated by the Arpeggiator.
Click the Options button.

Drag the Note Length knob up to 105%.

The notes now slide in pitch from one octave to the next, producing an exhilarating portamento effect. Let’s hear the synth in the context of the whole mix.
Close the Arpeggiator plug-in window.
In the control bar, click the Solo button (or press Control-S) to turn it off.
You’ve inserted an Arpeggiator MIDI effect plug-in to flesh out a rather simple single voice melody and spread the arpeggiated eighth notes over a three-octave range. You’ve adjusted the note length inside the Arpeggiator to make sure the arpeggiated note pitches slide from one octave to the next, generating an expressive performance.
Loading and Editing Patches
Patches contain multiple plug-ins and their parameter values. Patches also contain Smart Control knobs that allow you to quickly dial different parameters. When you are looking for a complete sound processing solution for a track, selecting a patch from the Library is a quick and easy way to get started.
More Info ▶
Patches can contain more complex signal routing involving multiple channel strips, as you’ll explore later in this lesson.
Using Patches from the Library
In this exercise, you’ll load two different-sounding guitar amp patches for the guitar tracks in the verses and in the choruses.
Select the Gtr Harmonics track (Track 4).

The regions on the track are selected and soloed.
Listen to Gtr Harmonics regions in the chorus.
The guitar arpeggiates harmonics with a clean sound. Let’s choose a distorted guitar patch.
In the Library, choose Electric Guitar and Bass > Crunch Guitar > Big Brute Blues.

On the Gtr Harmonics channel strip, five audio effect plug-ins are inserted to re-create the Big Brute Blues patch sound. A bus send is created that routes the audio signal to an auxiliary channel strip (often abbreviated as Aux) to add a reverb effect to the guitar. Later in this lesson, you will set up your own bus sends to add reverb to a synthesizer channel strip.
On the Gtr Harmonics channel strip, drag the Volume fader down to –7.4 dB.
Select the Verse Guitar track (Track 3).
In the Library, choose Electric Guitar and Bass > Crunch Guitar > Old School Punk.
That patch is a little aggressive. On the channel strip, let’s turn off some of the effect plug-ins to go back to a somewhat more basic sound.
On the Verse Guitar channel strip, move the pointer over the Pedalboard plug-in and click the on/off button that appears on the left.
The plug-in is turned off, and the guitar has a little less distortion.
Three slots below, turn off the Compressor plug-in.

The guitar sounds a bit rawer, and a bit louder too. You need to readjust its volume.
On the Guitar Verse channel strip, drag the Volume fader down to –12.4 dB.
Turn off Solo mode and listen to the mix.
The guitars in the verses and the choruses now have a crunchy vintage amp tube distortion sound and bring a rock sound to the ensemble.
You have selected patches for two guitar tracks and turned off the extraneous effect plug-ins that weren’t needed for their sound. As you load patches or turn effect plug-ins on or off on a channel strip, the change in signal processing often results in a different volume, so make sure you readjust the volume faders to keep the instrument levels balanced.
Editing Patches with Smart Controls
Smart Controls are fully programmable knobs and switches that are mapped to various controls in a patch: channel strip controls, such as the Volume fader, Pan knob, or Send Level knobs, and plug-in knobs and sliders. When in a pinch, the Smart Controls offer you quick access to the main patch parameters, avoiding the need to open multiple plug-in windows to hunt for the right knob.
Select the Gtr Harmonics track (Track 4).
In the control bar, click the Smart Controls button (or press B).
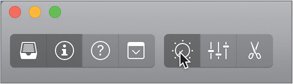
The Smart Controls pane opens, showing controls for the Big Brute Blues patch you loaded earlier in this lesson.
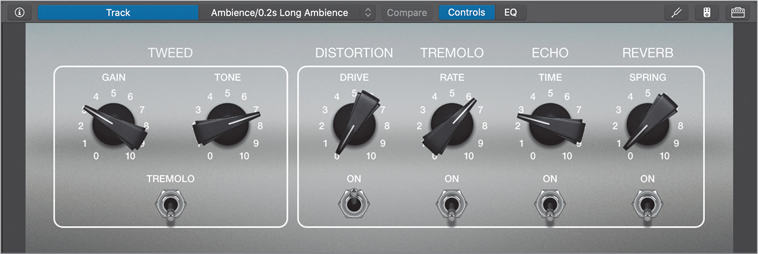
Let’s open the Amp Designer plug-in to see how the Smart Controls affect the amp settings.
On the Gtr Harmonics channel strip, click the Amp Designer plug-in (Amp).

The Amp Designer plug-in opens.
On the Smart Controls, drag the Gain knob all the way down, then all the way up.
In Amp Designer, the Gain knob moves from 4 to 8.5. The Smart Control knob restricts the range of gain it controls to what was determined as being the most useful gain range for that specific patch.
Set the Smart Control Gain knob to about 5.

This corresponds to a Gain value of about 6 in Amp Designer, and the guitar is a little more distorted.
On the Smart Controls, drag the Tone knob up, then down.
In Amp Designer, both the Treble and the Presence knobs move at different rates. A single Smart Control knob can control multiple patch parameters at various rates and even in different directions.
Set the Tone knob to 7.5.
Close the Amp Designer plug-in window.
You’ve used the Smart Controls pane to quickly adjust the sound of one of the plug-ins in the guitar patch. You will later assign controllers to Smart Controls to dial your sound with hardware knobs or sliders, and use Logic Remote to adjust Smart Controls from your iPad.
Setting Up Parallel Processing
Blending some of the dry audio of an instrument with some of the processed audio is a technique called parallel processing. To set it up, you use the Sends section of a channel strip to route some of the instrument’s audio signal to a bus. A bus is like a virtual audio cable inside Logic; it routes audio from one point to another in the Mixer. The bus routes the audio to an auxiliary channel strip (a channel strip that isn’t assigned to a track in the Tracks view) where you insert the effect plug-in. The track channel strip (dry audio) and the auxiliary channel strips (processed audio) are both routed to the Stereo Out.
Sending to a Bus to Route to an Aux
In the next exercise, you will send some of the lead synthesizer audio signal to a bus routed to an auxiliary channel strip to add a reverb effect. Using parallel processing for reverbs is quite common, because it allows you to mix some of the reverberated signal with the original signal. After you’ve inserted the reverb plug-in on an Aux, you can send multiple instruments to that Aux, making them sound like they’re in the same space.
On the Lead Synth channel strip, click the Send slot, and in the send pop-up menu, choose Bus > Bus 1.
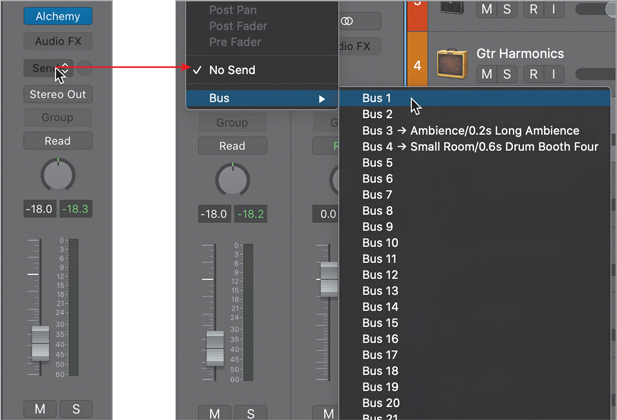
Note ▶
Depending on the patches you’ve loaded earlier, you may see different names in your bus pop-up menu, and a different Aux number may be used on the right channel strip in the inspector.
In the inspector, the right channel strip is a new Aux channel strip (Aux 3) with its input set to Bus 1. The bus is just a way to route some of the Lead Synth audio signal to the input of the Aux 3 channel strip. Let’s rename Aux 3.
At the bottom of the Aux 3 channel strip, double-click the name (Aux 3) and enter Reverb.

Let’s find a reverb patch.
At the top of the Aux channel strip, click immediately to the left of the Setting button.
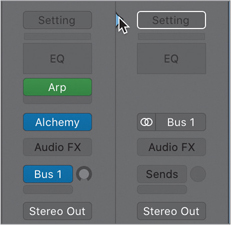
The blue triangle points to the Setting button at the top of the Reverb channel strip, and the Library displays auxiliary patches.
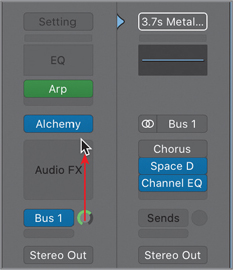
In the Library, choose Reverb > Large Spaces > Rooms > 3.7s Metallic Room.
On the Reverb channel strip, three plug-ins are inserted: a Chorus (turned off), a Space Designer (Space D), and a Channel EQ plug-in. Space Designer is the reverb plug-in. On the Lead Synth channel strip, you need to dial in the amount of signal you want to send to Bus 1 to be processed by Space Designer.
On the Lead Synth channel strip, drag the Bus 1 Send Level knob up.
The more synth signal you send to Bus 1, the more the synth is reverberated, and the further away from you it appears to be. Notice that while the track is playing, the meters on the Reverb channel strip reach higher.
Tip
Option-click a knob or a slider to set it to its default value.
Set the Bus 1 Send Level knob to –2.1 dB.
To compare the sound of the synth with and without reverb, you can toggle the bus send on and off.
On the Lead Synth channel strip, move the pointer over the Bus 1 send and click the on/off button that appears on the left.

You hear only the dry synth, without reverb. On the Reverb channel strip, the meters show no signal.
On the Lead Synth channel strip, turn the Bus 1 send back on.
In the inspector, to determine which channel strip is displayed on the right, you can Shift-click different destinations on the left channel strip.
On the Lead Synth channel strip, Shift-click the Stereo Out slot.

The Stereo Out channel strip is displayed on the right.
On the Lead Synth channel strip, Shift-click the Bus 1 send.
The Reverb aux is displayed on the right.
You’ve set up a bus send to route some of the synth audio signal to an Aux channel strip, where you loaded a reverb patch. Using parallel processing allows you to use the bus Send Level knob to balance the amount of reverb you are summing with the dry signal, which lets you adjust the perceived distance of the instrument in the mix.
Enabling Patch Merging
Now that you’ve set up an Aux channel strip with a reverb patch, you can place other instruments in the same virtual space by routing them to the same Aux so that they’re processed by the same reverb plug-in. In this exercise, you’ll duplicate the synth track to layer its sound with a different sounding synth.
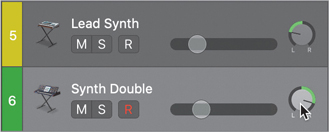
Option-drag the Lead Synth track header (Track 5) down.

The MIDI regions on Track 5 are duplicated onto Track 6. The Alchemy instrument plug-in inserted on Track 5 is duplicated on Track 6; however, you will now choose a different patch for the duplicate track.
Rename Track 6 Synth Double.
In the Library, choose Synthesizer > Lead > Slip and Slide Lead.

This patch uses the Retro Synth instrument plug-in (RetroSyn) and a whopping 10 effect plug-ins and two bus sends. For this double, you prefer a synth without all these effects, and as for the bus sends, you would rather process that new synth through the same reverb plug-in you’ve set up in the previous exercise so that both synths appear to be in the same space.
Let’s first clear the channel strip so that you can start with a blank slate.
At the top of the Synth Double channel strip, click the Setting button and choose Reset Channel Strip.
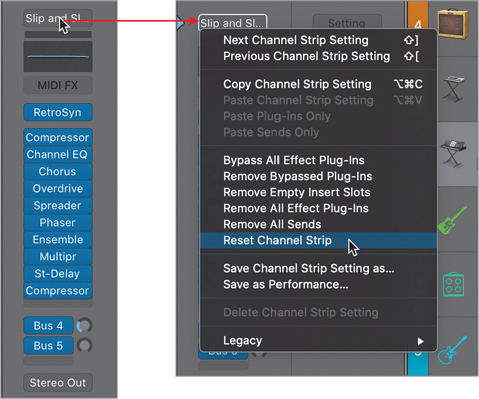
The channel strip is completely zeroed out. All plug-ins and sends are removed, and the Volume fader is set to 0 dB. To load only specific settings from a patch, you will enable patch merging in the Library.
In the Library, at the bottom, click the action pop-up menu and choose Enable Patch Merging.

You can deselect the buttons corresponding to the types of settings you do not wish to load from the patches you select.
Click the Sends and Audio Effects buttons to disable them.

Selecting a patch in the Library will now load only its instrument and MIDI effect plug-ins on the channel strip.
In the Library, choose Synthesizer > Lead > Slip and Slide Lead.
On the Synth Double channel strip, only the Retro Synth instrument plug-in is inserted. That synth is too loud.
On the Synth Double channel strip, drag the Volume fader down to –16.4 dB.
Let’s add some reverb!
On the Synth Double channel strip, click the Sends slot and choose Bus > Bus 1 > Reverb.

Drag the Bus 1 Send Level knob up to –3.5 dB.
Tip
Double-click a slider or knob in Logic to enter a value.
To finish mixing your choruses, let’s spread out the synth tracks in the stereo field.
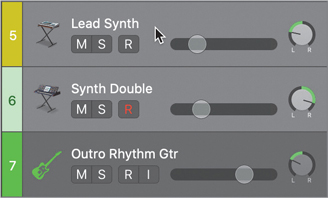
On the Lead Synth track header (Track 5), drag the Pan knob to –28.
On the Synth Double track header (Track 6), drag the Pan knob to +45.
The wide mix of reverberated layered synths and crunchy guitar harmonics make the choruses sound big and spacious, a nice contrast from the more intimate ambiance of the verses.
You’ve duplicated the synth track and used patch merging to load only the desired types of settings from the patch you chose in the Library. You then took advantage of the parallel processing you had set up in the previous exercise to add the same reverb to that new synth track, and panned the instruments playing the choruses, lifting your song section to another dimension.
Layering Patches with Summing Track Stacks
The two synthesizer tracks play the same MIDI regions and are meant to sound like a single layered patch. Packing the two tracks into a summing track stack lets you fold the two tracks into a single one. It also means that you can place your MIDI regions on a single track, the main track of the stack, and the MIDI data will be routed to all subtracks inside the stack.
In the Tracks view, Shift-click the Lead Synth track header (Track 5).
Tracks 5 and 6 are selected.
Choose Track > Create Track Stack (or press Command-Shift-D).
The Track Stack dialog opens, giving you a choice of a folder or summing stack. You can click the disclosure triangle to see more details about each option. Summing stacks allow you to mix multiple software instruments and save the stack as a patch, which is what you will do here.
In the Track Stack dialog, select Summing Stack and click Create.

The two synth tracks are packed in a summing stack. Let’s first rename the main track of the stack.
Double-click the name of the main track and rename it Layered Arp.

When multiple software instruments tracks are in a summing stack, MIDI regions on the main track trigger all instrument subtracks inside the stack. You will move one set of MIDI regions to the main track and delete the other.
In the Tracks view, select both Lead Synth regions in the Lead Synth track.

Drag the selected regions to the main track of the summing stack.

Tip
After you start dragging regions in the workspace, and while you are still holding down the mouse button, press and release Shift to limit the dragging motion to one direction (vertical or horizontal). Press and release Shift again to unlock this limitation.
You no longer need the duplicated regions on the Synth Double subtrack.
Select both Lead Synth regions in the Synth Double track and press Delete.

The MIDI regions on the main track trigger the instruments in both subtracks. You will open the Mixer to have a quick look at the signal routing of the summing stack you created.
In the control bar, click the Mixer button (or press X).

The output of the two subtracks (the two synthesizer tracks) are set to Bus 2, and their signal is routed to the input of the main track (Layered Arp), also set to Bus 2.
In the Arp Layers track, click the disclosure triangle.
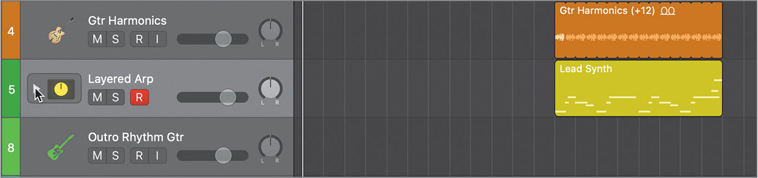
The track stack closes and appears as one single track. In the Mixer, the disclosure triangle for the stack closes, and the subtracks are hidden.
Close the Mixer.
You packed two software instrument tracks into a summing track stack, and moved MIDI regions to the main track of the track stack so that they trigger the two instruments on the subtracks. Later you will save that layered instrument summing stack as a single patch for easy recall.
Moving and Copying Plug-ins
When using multiple plug-ins to process an audio signal, the order of the plug-ins on the channel strip affect the resulting sound. In the Audio FX area of a channel strip, the audio signal is routed from top to bottom. Distorting a signal and then echoing it, for example, produces a different sound than echoing the signal first and distorting it afterward. You will now change the relative position of plug-ins on a channel strip, as well as copy a plug-in from one channel strip to another to duplicate the effect on another instrument.
Processing a Track with Multiple Plug-ins
On the two tracks at the bottom of the Tracks view (Tracks 10 and 11) are two short audio regions in the intro of the song. You will process the Intro Gtr on Track 10 through three different effects: a delay, a distortion, and a flanger (a modulation effect that adds motion to your sound). You will then change the order of the plug-ins to make sure you get the desired sound. Later you’ll copy the delay plug-in on the Vowel track so that it repeats along with the Intro Gtr.
Listen to the beginning of the intro.
You can use Solo mode and drag the intro arrangement marker into the ruler to create a cycle area and make it easy to listen to the tracks. The Intro Gtr and Vowel tracks are very short, one-hit samples. Let’s turn them into delayed sound effects that echo throughout the song intro to give them an intriguing quality and start the song in beauty.
Select the Intro Gtr track (Track 10).

The Intro Gtr channel strip appears on the left in the inspector.
On the Intro Gtr channel strip, click the Audio FX area and choose Delay > Tape Delay.
The guitar chord echoes a couple of times and dies out rather quickly. To make the delay effect last longer, you’ll make the sound repeat a few more times throughout the intro.
In the Tape Delay plug-in, raise the Feedback to 78%.

Note ▶
Feedback values above 100% create infinite sustain effects. The repeated signal is constantly fed back into the input of the effect, and the echoes never die. This effect is often used in dub music.
Now the guitar echoes multiple times, sustaining the effect longer throughout the intro.
In the inspector, click below the Tape Delay plug-in and choose Amps and Pedals > Amp Designer.
The Amp Designer plug-in window opens. The default amp sounds rather mid-range and almost nasal. Let’s find a better preset.
Tip
To hide or show all open plug-in windows, press V.
In the inspector, click to the left of the Amp Designer plug-in.
The Library displays Amp Designer presets.
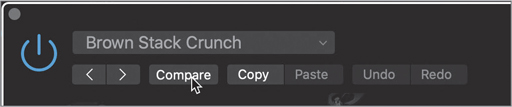
In the Library, choose 02 Crunch > Brown Stack Crunch.
This amp preset sounds deeper and has more body. You can compare the sound of this preset with the default preset that was loaded when you first opened the Amp Designer plug-in.
In the Amp Designer plug-in header, click the blue Compare button.
Note ▶
When you edit a plug-in’s parameter, the Compare functions allows you to toggle the plug-in parameters between the values saved in the project and the edited values.
The Compare button is black. You hear the default amp preset again and clearly hear the difference in frequency range. Let’s go back to Brown Stack Crunch.
Click the Compare button.

The Compare button is blue again and Amp Designer reverts its parameter values to the Brown Stack Crunch preset.
On a guitar amp, the amount of distortion applied to the guitar depends on the level of the guitar at the input of the amp. The Tape Delay plug-in produces echoes that slowly decrease in level throughout the intro and feeds them into the Amp Designer plug-in. The result is a series of repeats that are less and less distorted throughout the intro. You will later change the order of the plug-ins to get a different result, but first let’s add one more effect.
In the inspector, click below the Amp Designer plug-in and choose Modulation > Flanger.
More Info ▶
Hold down Option while clicking an Audio FX slot to access Legacy plug-ins or more plug-in format options (for example, a mono plug-in on a stereo channel strip).
The Flanger creates a frequency filtering effects that evolves continuously throughout the repeating echoes.
In the control bar, click the Library button (or press Y).
The Library closes.
Let’s change the order of the plug-ins on the channel strip to first process the short sample with a frequency modulation effect, and then repeat the same modulated sample throughout the intro.
When moving a plug-in on the channel strip, a white horizontal line in the Audio FX area indicates a position in the effect chain where you can insert a plug-in.
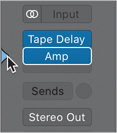
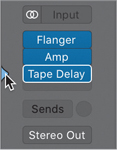
Drag the Flanger to very top of the Audio FX area until you see a white line above the Tape Delay plug-in.

The Flanger moves to the first slot and the Tape Delay and Amp Designer plug-ins both move one slot down. You now hear the same short modulation echoed multiple times.
Because the Tape Delay is before the Amp Designer, you still hear the first few notes distorted, and then the following ones incrementally clean up as the sound is repeated. Let’s first distort the sound and then echo it to get a consistent distortion on the sample.
When moving a plug-in, a white frame around another plug-in means you’re swapping the positions of the two plug-ins. Let’s swap the positions of the Tape Delay and Amp Designer plug-ins.
Drag the Tape Delay over the Amp Designer until you get a white frame around the Amp Designer plug-in.
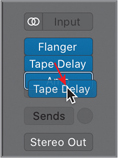
The plug-ins swap places.
Select both regions on Tracks 10 and 11 to solo them.
Listen to the intro. The Intro Gtr track has a consistent-sounding flanged and distorted sample echoing throughout the intro. However, the sample on the Vowel track plays only once. To make it repeat along with the guitar, you’ll copy the Tape Delay plug-in from the Intro Gtr to the Vowel channel strip.
In the control bar, click the Mixer button (or press X).
The Mixer opens and the Intro Gtr channel strip is selected.
Option-drag the Tape Delay plug-in to the Vowel channel strip on the right.
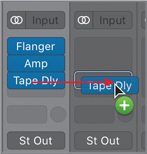
The plug-in is copied (with the same parameter values). The sample on the Vowel track now echoes along with the guitar on the track above.
Close the Mixer.
On the track headers, pan the Intro Gtr and Vowel tracks left and right to get a wide mix.

The sound effects in the intro are now spread out in the stereo field. If you used Solo mode and Cycle mode to easily preview your intro in this exercise, you can now turn them off.
Tip
To insert the same plug-in on several channel strips, in the Mixer, first drag the pointer over the name of consecutive channel strips (or Command-click separate channel strips to select them), and then insert the plug-in on one of the selected channel strips.
With the help of a few plug-ins, you’ve created a nice echoing effect that gives the song’s introduction a mysterious feel and captures the attention of the listener from the start. Moving plug-ins on the channel strip allows you to determine precisely in what order they process the audio signal to produce the desired effect. Copying plug-ins in the Mixer makes it easy to reproduce an effect on one channel strip to another instrument.
Saving User Patches and Plug-in Settings
While working on your songs, you may spend a good amount of time editing patches or plug-in presets, or inserting multiple individual plug-ins on a channel strip and dialing each plug-in to get a specific sound you’re after. When you’re happy with the way you’ve dialed a plug-in or a patch, you can save your own user plug-in setting or patches in the Library. Later in other projects you can easily recall those patches and settings to reuse your effect processing work on other channel strips.
Saving User Settings and Patches
Saving your own plug-in settings and patches allows you to quickly recall them on other tracks in the same project or other projects. You will now save the Tape Delay parameters you’ve adjusted earlier as a custom Tape Delay setting. You will then save the effect plug-in chain you’ve created earlier on the Intro Gtr track (Flanger, Amp Designer, and Tape Delay) as a patch that can be recalled on any audio track. Finally, you’ll save the Layered Arp synth summing stack as a software instrument patch.
Select the Intro Gtr track (Track 10).
In the control bar, click the Library button (or press Y).
The Library opens.
In the inspector, on the Intro Gtr channel strip, click to the left of the Tape Delay plug-in.
The blue triangle points to the Tape Delay plug-in, and in the Library, the Tape Delay presets are displayed.
At the lower right in the Library, click the Save button.

The Save Setting dialog opens. Note that the location is set to the Tape Delay folder inside the Plug-in Settings folder. To make settings and patches accessible in the library on your Mac, do not change the location in the save dialog.
In the Save Setting dialog, click the Save As field and enter Long Delay.

The setting is saved and appears at the root in the Library, while the factory presets are moved into a Factory folder. Your setting is now available whenever the Library is open and the blue triangle points to a Tape Delay plug-in.
Let’s save the whole patch now.
At the top of the Intro Gtr channel strip, click to the left of the Setting button.

The Library displays audio patches.
At the lower right in the Library, click the Save button.
The Save Patch dialog opens. Note that the location is set to the Audio folder inside the Patches folder on your hard drive.
In the Save dialog, click the Save As field, enter Flangey Echoes, and click Save (or press Return).

The patch is saved. A new User Patches folder appears at the root of the Library, and the Flangey Echoes patch is inside. Your new custom patch is now accessible in any Logic project. It is displayed in the Library only when an audio channel strip is selected and the blue triangle points to its Setting button at the top of the channel strip. Let’s save another patch, this time with the summing track stack you created earlier for the synth track in the chorus.
Tip
To delete a patch, select it in the Library and press the Delete button in the lower right.
Select the Layered Arp track (Track 5).
At the lower right in the Library, click the Save button.
Keep the Layered Arp name and default location and click Save (or press Return).
The software instrument patch is saved. When a software track is selected and you select that patch in the Library, the summing stack and its subtracks are re-created.
You’ve saved your own customized patch and plug-in presets. From now on, they are available in the Library on your Mac as long as the appropriate channel strip type (audio or software instrument) is selected. Remember that the Library displays patches when the blue triangle points to the Setting button at the top of the channel strip and displays individual plug-in settings when it points to a plug-in slot.
As you produce music, your newly found plug-in management skills will greatly improve your sound design and mixing workflows. Inserting plug-ins and selecting presets or patches will come in handy when you are looking to quickly add an effect to a track or find a software instrument sound. To customize the signal flow, you can move, copy, or reorder plug-ins. Finally, saving your own settings and patches makes it easy to reuse any plug-in setting or patch you’ve edited to suit your personal taste.
Key Commands
Keyboard Shortcuts
Library |
|
|---|---|
Up Arrow |
Selects the previous patch or setting |
Down Arrow |
Selects the next patch or setting |
|
|
General |
|
V |
Hides or shows all plug-in windows |
|
|
Tracks view |
|
Command-Shift-D |
Creates a track stack |