
Appendix
A
The Moonlit Flower
Using Snaps as a Switch

At the end of Chapter 3, I described the moonlit flower, a wearable light-up ring that uses a metal snap button as an on/off switch. This project was a bit advanced to put at the beginning of the book, so I decided to share the instructions here in an appendix. If you completed several of the projects in the book and you feel comfortable sewing and making circuits with conductive thread, you’ll enjoy this project. Here is how you can make a moonlit flower bracelet that lights up.
Make
Preparation
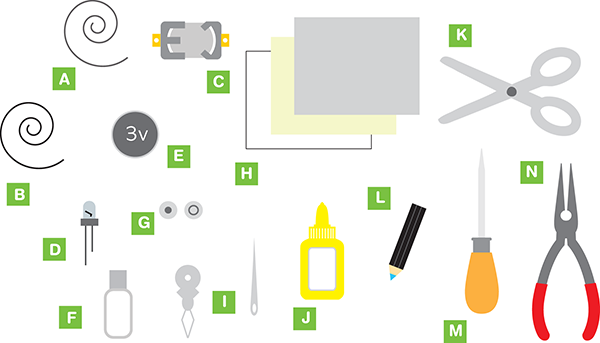
You need to gather the following materials before you begin the process of making the moonlit flower bracelet.
Make It
Since this is a project that you can wear, take your time and make sure to plan out the length of the strap and the placement of the flower, battery holder, and the snaps before you begin. It is a great idea to make a paper and tape prototype first so that you can confirm that you are happy with the size.
Pay extra attention when you are sewing on the snaps. It is easy to put them on upside down or on the wrong side of the strap. Double-check that they will snap together correctly before you sew them down. Follow these steps to create your flower bracelet:
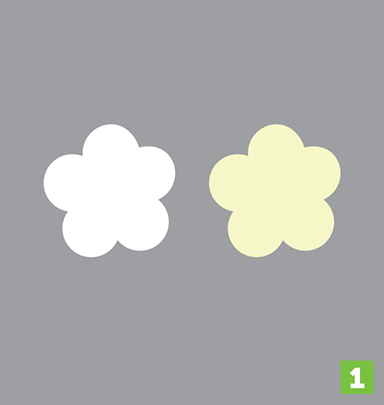
- Begin the process of making your moonlit flower bracelet by first cutting out two versions of the five-petal flower shape. If you make the flowers too small, it will be hard to stitch them neatly. We recommend that the flowers be about two inches wide.
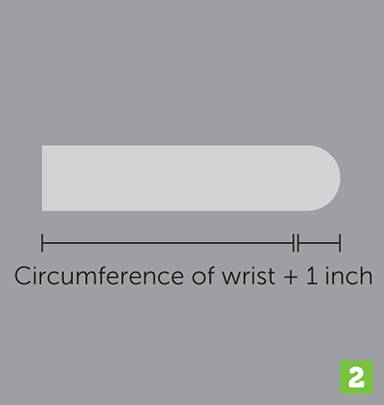
- Now measure and cut out your arm strap. The length of your strap will depend on the thickness of your wrist.
Measure the circumference of your wrist with a tape measure or with a piece of string and a ruler. Make sure you add one inch to your measurement to account for the overlap and the snap.
Make the strap about one inch wide with a rounded end.
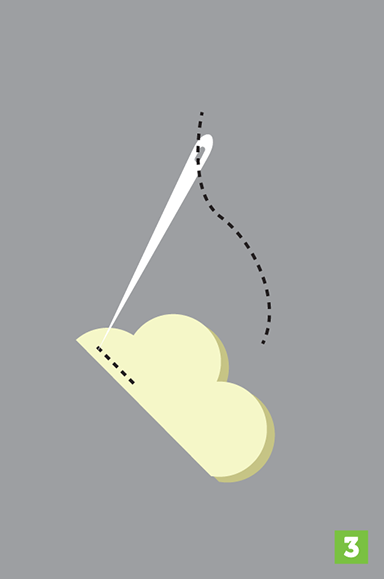
- Fold the felt across the center of a flower petal and then, using regular (non-conductive) thread, sew just above the folded crease on the back of the petal. Make sure to stop sewing where the petal meets the center of the flower. Do not sew across the center. Repeat this for all the petals. Sewing these creases on the bottom of the petals helps the petals pop out into three dimensions.
- After you’re done sewing all the petals on both flower shapes, sew the two flower shapes together with regular, non-conductive thread. Offset the petals slightly so that they are not stacked directly on top of each other. Then loop the thread through both flowers a few times near the middle to make your project look like a flower. Tie off the thread at the bottom of the flower.
- Now that you’ve got your flower prepared, it’s time to make it light up! Start by using an awl or another sharp poking tool to carefully make two holes for the LED legs in the center of the flower.
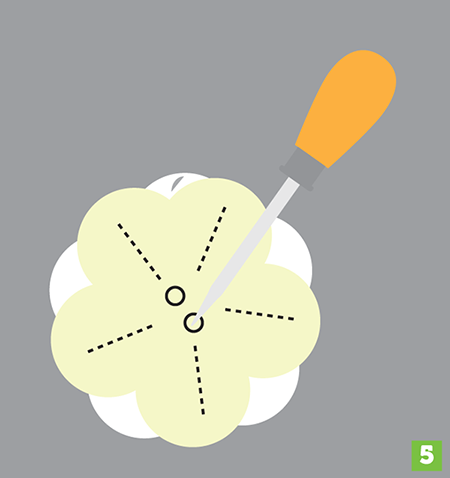
- Poke the LED legs through the holes with the LED facing up in the center of the flower and with the legs poking out the back of the flower. Use a chalk pen to mark which hole has the positive or longer leg of the LED coming out.
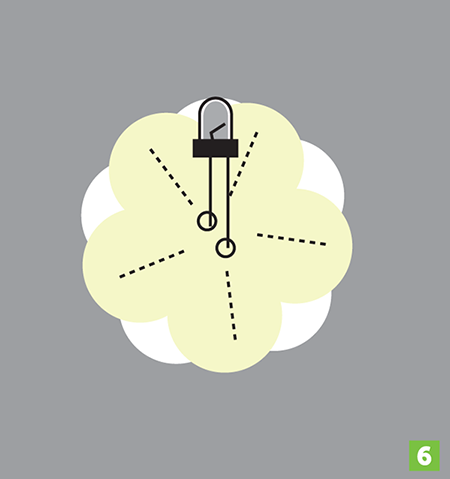
- Use needle-nose pliers to curl the legs of the LEDs so that you can sew to them. Make sure you remember which one is the positive leg and which one is the negative leg.
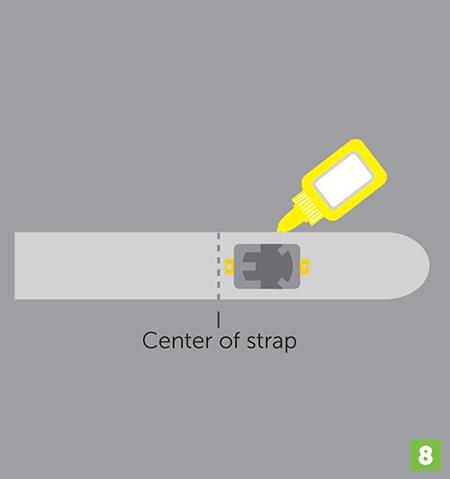
- Now it’s time to glue your battery holder to the strap. First check the placement of your battery holder. If you point the rounded end of the strap toward the right, the battery holder should be just to the right of the center line of the strap. Then paste the battery holder in position on the felt with glue.
- Now it’s time to attach your flower to your wrist strap. Place the flower with the LED just to the left of the battery holder.
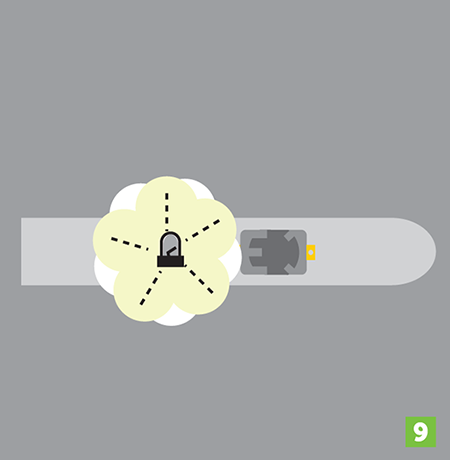
- Using conductive thread, connect the positive leg of the LED to the positive side of the battery holder. Note that in this illustration, the flower has been removed for clarity.
- Using conductive thread, connect one snap to the outside of the rectangle end of the strap. Make sure the snap is facing the right way. It is too easy to sew snaps on upside down! Poke the needle through the inside of the bracelet and then push the needle through a hole on the snap. Loop two or three times under and around the hole on the snap so that you get a good electrical connection. Then continue to sew down the snap by looping the needle and thread through the other three holes. Once the snap is secure, continue sewing with the same piece of thread and loop it around the negative leg of the LED a few times before tying it off. Use a bit of clear nail polish on the knots so that they do not come unraveled. Note that again, the flower has been removed for clarity.
- Finally, using conductive thread, connect the other half of the snap to the rounded end of the strap. Position the snap so that it goes on the inside of the strap. The rounded end of the strap will overlap the rectangle end and snap with its mate. Note that this snap is shown on the outside of the strap for clarity. Double-check that you are sewing it to the right place and that it will snap shut before you sew it down. Use the same technique as in step 11 to sew down the snap and then continue on with the same piece of conductive thread and connect it to the negative side of the battery holder. Dab a bit of clear nail polish on the knots so that they donot come unraveled.
- Now put your 3V coin battery into the battery holder.
- Fasten the snap to close your switch; the light in the flower should now turn on!
This project described here is a bracelet, but you could adapt this to add moonlit flowers to a belt, a shirt, or a bag. You can attach moonlit flowers to anything you want! Also, feel free to experiment with different materials for your flowers. Figure A-1 shows two mesh fabric flowers, one on a pin and one on a bracelet.
Figure A-1: A mesh moonlit flower bracelet