TEACHING AN OLD BOT NEW TRICKS
Make a vintage robot smarter.
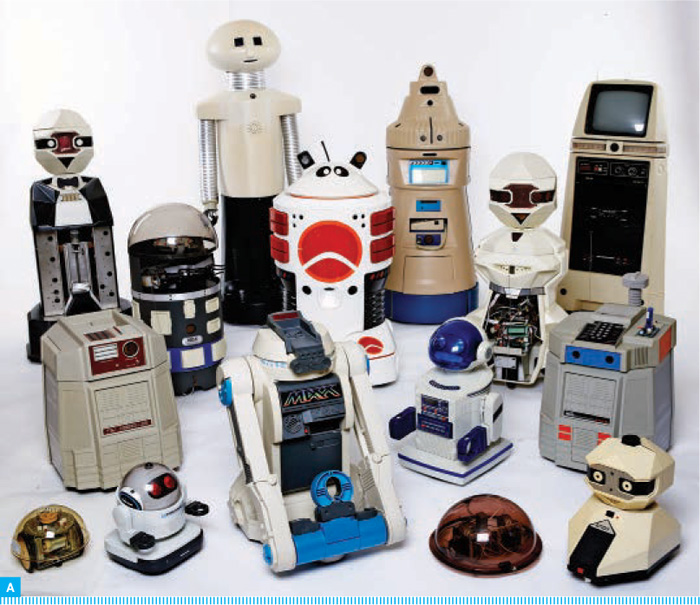
Fig. A: A sample of the author’s restored personal robots from the peak of the “robot revolution” of the 1980s. The re-brained BOB is on the upper right with his front cover removed to show his new brain.
Photograpy by Nathan Garcia
During the 1980s, as the personal computer industry was taking off, several companies introduced personal robots for home use. It was an idea ahead of its time, and while these robots didn’t go mainstream, they earned a devoted following that has been having fun hacking and tinkering ever since.
The most popular “antique” personal robots are the Heathkit HERO series, RB5X, Androbot Topo, Omnibot, and Maxx Steele. Rarer models, such as the Arctec Gemini, Hubot, and SynPet Newton, are now valuable collector’s items. And as time goes by, if you ask me, these old robots just keep getting cooler-looking.
There are some classic bots that I prefer to restore and preserve the way they are. But these robots also have ample room for upgrading with current technology. It isn’t hard to add new features, and if you do it right, you get the best of both worlds: a cool retro robot with modern programming and control capabilities.
Adopt a Robot
To find a classic robot, check eBay, Craigslist, and robot user groups online (makezine.com/19/oldbots for links). The robots also show up at garage sales, estate sales, flea markets, computer and electronics swap meets, and school auctions. You never know when you’ll find one, but it’s very exciting when your persistence pays off.

Fig. B: The author in his HERO robot parts room where some of the restorations take place.
When you do find vintage robots, anything that isn’t physically attached to them will typically be lost, including remotes, chargers, and documentation. Fortunately, some models are still commercially supported, even if it isn’t by the original manufacturer. Rhino Robotics provides parts and support for their Rhino robot arms. RB Robotics handles the RB5X and is very helpful with parts, upgrades, and support. The HERO robot line was sold to Mobile Ed Productions back in the mid-90s, but several years ago I acquired it myself. I now carry replacement parts, documentation, and even some new options to keep these great robots alive.
Improve Its Communication Skills
Ideally, a robot should be smart enough to get around on its own. By connecting your robot to a PC, it can benefit from more information about what’s going on around it, giving it greater autonomy. The host PC can run a custom application you write, or you can use something like Microsoft Robotics Developer Studio (RDS). Either way, the computer does the heavy thinking and controls the robot like an intelligent peripheral.
To make the connection, you can leverage the RS-232 serial port that most early robots originally used just for loading their programs onboard. Serial ports have become extinct on newer computers, but there are several ways to bridge the gap and get the two talking again.
» USB-to-Serial For a tethered connection, my favorite method is to use a USB-to-serial adapter based on the FTDI chipset. The drivers come standard with most operating systems, and once you plug the adapter in, it appears as a standard serial (COM) port on the host PC. The adapters come in several flavors. If your robot has a standard serial port, with a DB9 connector and the appropriate RS-232 voltage levels, you can use a regular USB-serial adapter available at computer stores.
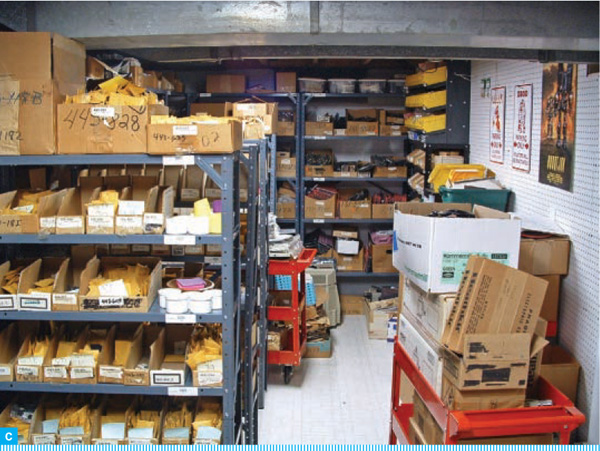
Fig. C: The author’s parts room, which includes redesigned and remanufactured circuit boards that use newer technology.
Photography by Robert L. Doerr
Otherwise, if there is a logic level serial signal available, you can directly wire up the FTDI chip without needing an extra RS-232 voltage converter such as a MAX232. The FTDI chip is surface-mount, so it’s hard to solder, but the DLP-USB232M from DLP Design lets you put it right on a breadboard or place it in a DIP socket.
I made a USB interface for the HERO 1 using the FTDI FT232RL chip. The interface plugs into the breadboard area on the robot’s head just like the original serial port did. Using the MProg utility, available at ftdichip.com, you can customize the behavior of FTDI chips to fit your application. As long as you don’t change the Vendor ID or Product ID fields, the chip’s default drivers will continue to work, but you can change the Product Description field so that a Windows machine will say it found a “HERO 1 Robot” when you plug in the USB cable!
» Bluetooth Another option is to cut the cord and run a wireless connection. For Bluetooth, I would recommend going right to the Class 1 devices so you can get the extended range (up to 100 meters). A couple of modules on the market convert Bluetooth to a standard RS-232 port, and in many cases, can plug right in. One that works well with the HERO 1 is Grid Connect’s Firefly GC-BT-BLUEPORT module with DTE connector.
I’ve modified a HERO 1 Serial Interface to use a DB9 connector and supply power for one of these, and the whole thing plugs neatly into the breadboard area on the robot’s head. I also like A7 Engineering’s eb-501 Bluetooth modules, which already have an onboard RS-232 interface, as well as 3V and 5V logic level signals.
» Wi-fi You can also use an existing wi-fi LAN to remotely control the robot. The WiPort and WiMicro modules from Lantronix, and the WIZ610wi-EVB board from WizNet can all bridge a wireless LAN to either 1 or 2 serial ports, for connecting to a robot.
Give It a Better Memory
Even with computer control, you may still want to augment the robot’s capacity to operate on its own. With older bots, especially the rarer ones, I prefer enhancements that plug in and bolt on, so the robot’s design isn’t altered and you can restore its original configuration, if desired.
The original HERO 2000 robot memory had 24K standard, and you could install an additional 576K by populating its three ET-19-15 static memory boards with a whopping 72 memory chips. Several years ago I designed an “H2KIDE” board for the robot, which matches its original maximum amount of memory using just three RAM chips, and lets you add more. It also adds an IDE interface that lets you connect a 2.5" laptop hard drive for program and data storage. It’s the equivalent of adding a 16-bit IDE drive to an older 8-bit PC, which would have only had MFM or RLL drives back then.

Fig. D: The author’s HERO 1 USB interface installed on the robot.

Fig. E: HERO 2000 H2KIDE board Memory/ IDE interface.
With an adapter, you can also use a CompactFlash card, since it mimics an IDE drive. This option allows the robot to easily recall programs saved on the hard drive and also store plenty of data about its travels, which can be transmitted up to a higher-level intelligence on a host PC. This is where a Bluetooth or wi-fi connection really helps.
Transplant Its Brain
While I prefer to do original restorations on robots, it isn’t always practical or possible. For example, I once ended up with an early Androbot BOB prototype, but its original brains were gone and irretrievable — I’d heard they were recycled to build other robots before the company folded. This BOB had been neglected for years, and he sat for a few more while I unsuccessfully tried to find technical details on his electronics. It was surprisingly depressing, seeing him as an empty shell, so I decided to bring him to life using a new brain, but in a way that I could undo just in case the original brains were ever found. I wouldn’t even drill any holes.
For the new brain, I used an MIT Handy Board (handyboard.com) with the optional expansion board. The Handy Board is a 68HC11-based controller designed for experimental mobile robotics, and although there are lots of newer microcontrollers on the market, it’s still great for many projects. Its Interactive C environment already provided a lot of the functionality I wanted, and it’s easy to add custom functions using the library of add-on code and examples on the Handy Board users group.
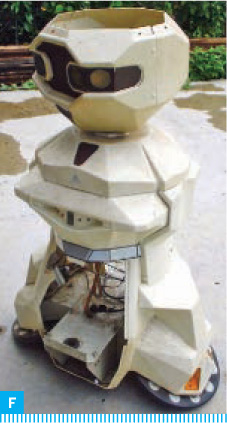
Fig. F: Gutted BOB as originally found (with no electronics).
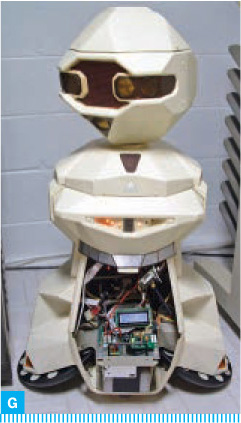
Fig. G: Working re-brained BOB.
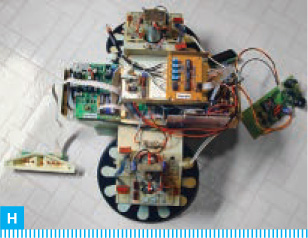
Fig. H: New electronics on BOB base.

Fig. I: The virtually brain-free Topo I in the author’s workshop.
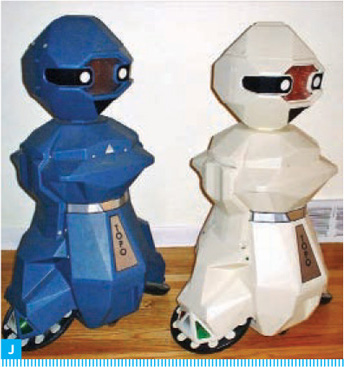
Fig. J: Two Androbot Topos, the regular production model (right) and a rare blue prototype (left).
Anytime you “re-brain” a bot, you lose the functionality of the original program and supporting routines. The Handy Board supports many of the low-level features I needed to re-create BOB’s original functionality (sonar, drive motors, sensors), but I needed to build the rest.
Since I wanted BOB to act like the original prototype, I was able to get a few clues on how he acted from a couple of people who used to work for Androbot, and also from a few fragments of Forth code that turned up for the BOB/XA (one of BOB’s Androbot siblings, characterized by a bow tie). It was a rewarding process, and although there were plenty of challenges along the way, it turned out better than I could have hoped. I documented the project in a series of 4 articles in Servo magazine, February through May 2008. Using the same basic principles, I could have used almost any other microcontroller. One newer one I’d consider is the Parallax Propeller, which has a lot of potential.
Some other robots are basically just remote control toys that are begging to get a brain installed. The original Androbot Topo I, for example, has motor drive electronics that accept the standard R/C signals that most microcontrollers (including BASIC Stamp and Arduino) can generate. Other robots, like the Tomy Omnibots, were made in decent numbers and are less precious. One of these would make a great starter robot if you wanted to add a microcontroller brain. With either of these bots, you’re not losing any original programming by installing new brains. Anything you write is going to be more than what was there to begin with.
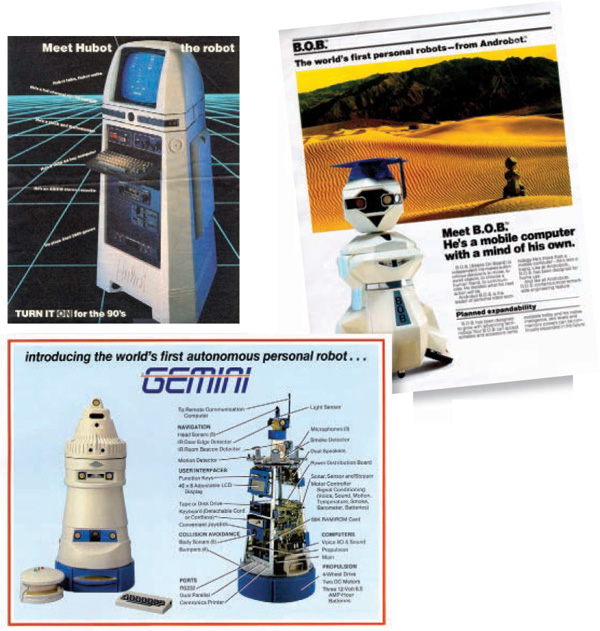
THREE ORIGINAL ADS FOR RARELY SEEN ROBOTS OF THE MID-80s: The Hubot was touted as the ultimate appliance, with an onboard computer, TV, Atari 2600 game system, and stereo. The Gemini was one of the most capable robots of the era, with an excellent navigation system. BOB held a special position as the Cadillac of the personal robots, but unfortunately never made it out of the lab.
Put It Online
Once you get your robots going and upgraded so they can talk over your home network, what comes next? Why not give them some additional smarts by letting them use the internet! You could do this directly with a PC controller onboard your bot, or else by running an “infomediary” application on the PC — middleware that gathers information for the bot, strips out anything extraneous, and transmits it in some format the bot can understand. The program could be as simple as a set of scripts that pull Google data whenever you ask the robot what’s going on in the world. Or it could pull down weather forecasts or Wikipedia entries. Using this strategy, the robot can act smart, even if the AI hasn’t caught up yet.
![]() For vintage robot user groups, serial-to-wireless module sources, and other online resources, see makezine.com/19/oldbots.
For vintage robot user groups, serial-to-wireless module sources, and other online resources, see makezine.com/19/oldbots.
Robert Doerr runs robotswanted.com, robotworkshop.com, and robotgallery.com. He also writes for Servo magazine.