
Photograph by Sam Murphy
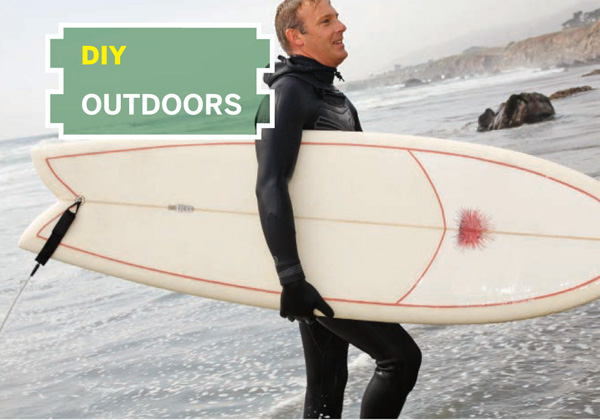
GREENER WAVES
 Surfboard kit uses a new epoxy technique without fiberglass.
“Aren’t we all tired of surfboards being as fragile as a porcelain doll? I can’t think of any other piece of sporting equipment that is as easily destroyed.”
—Board maker Matt Barker
Traditional surfboards are a frustrating old technology. First, they’re toxic landfill — polyurethane foam, fiberglassed with polyester resin. Worse, they’re fragile and short-lived because of cracks and leaks. That’s ridiculous, and at $400 and up, expensive. Modern epoxy boards are stronger, and greener, but start at $600.
A DIY kit from Greenlight Surfboard Supply is the ticket. For $395 it’s got all the materials and tools you need to make a tougher, greener epoxy board using expanded polystyrene (EPS) foam that’s recyclable. Greenlight’s new lamination technique, using stretchy bamboo fabric instead of fiberglass cloth, is easier and safer. And when this board finally fails I can recycle or compost most of it. Nice.
The layup uses a 2-part amine-cured epoxy resin from Resin Research. Their wetting agent, Additive F, helps the resin flow and “wet out” the cloth, and eliminates epoxy’s tendency to “blush” or sweat in humid or cool conditions. This resin was designed for surfboards; it cures clear and it’s UV-resistant.
I’m amazed at how pleasant it is to work with. It’s got 1/50th the VOCs of polyester, so instead of choking on fumes, you can barely smell it. You use less, and it cleans up with water and citrus cleaner instead of acetone. What an improvement for the DIYer.
Greenlight co-owner Brian Gagliana says they experimented with natural fibers for a year before perfecting a layup with bamboo fabric. “We found that putting it in tension made it stronger and easier to laminate,” he says, “as well as using less material.”
MATERIALS AND TOOLS
Greenlight Deluxe Eco-Friendly Starter Kit $395 from greenlightsurfsupply.com. Includes 2lb/ft3 EPS foam blank with laminated bamboo stringer, Resin Research 2000 epoxy resin, 2100F hardener, Additive F, bamboo “fiberglass” cloth, leash plug made of corn-based bio-plastic, fin boxes (or bamboo panel for shaping fins), inkjet/ laser logo paper, and 5-DVD instructional video set, plus a handsaw, mini plane, Surform rasp, laminating roller, spackle, glue, dust mask, latex gloves, and all brushes, tapes, and sandpapers.
Surfboard template, and plans for shaping and glassing racks Download at greenlightsurfsupply.com/templates.html.
1×4 scrap wood: 12”, 24” to make sanding blocks
2×4 lumber and wood screws to build a shaping rack and glassing racks
5gal buckets (2) and sand for glassing rack bases
Utility knife
Drill with 11/4” hole saw to mount the leash plug
Marker and pencil
Optional but recommended:
Calipers, T-square, framer’s square for keeping things symmetrical. I made calipers from scrap plywood.
Handheld drop light for creating shadows to help shape the foam
Round rasp or round file if you make a swallowtail
Coping saw or jigsaw if you make fins
41/2” angle grinder or Dremel rotary tool, with sanding disc for shaping fins and sanding down overlaps
Spring or ratchet clamps (2–3) for positioning fins
Distilled water for mixing spackle
Liquitex acrylic paint or similar, for pinlines
![]() CAUTION: Spare your lungs and wear a respirator or particle mask when sanding EPS foam or epoxy. Wear disposable gloves and eye protection when working with epoxy resin; it can irritate skin and eyes, and can cause skin sensitivity with repeat exposure.
CAUTION: Spare your lungs and wear a respirator or particle mask when sanding EPS foam or epoxy. Wear disposable gloves and eye protection when working with epoxy resin; it can irritate skin and eyes, and can cause skin sensitivity with repeat exposure.
You can shape a board in a weekend, but plan on a week or two to glass it. Here I’ll focus on the new glassing technique. For more on shaping, see makezine.com/19/diyoutdoors_epoxyboard, read Stephen Pirsch’s how-to at surfersteve.com, visit the forums at swaylocks.com, and watch the Greenlight kit videos.
1. Get your kit and download a template.
I made a twin-fin “fish” with Greenlight’s 6'6" kit. Whatever style you make, keep a similar board on hand for reference.
2. Glue and cut the foam blank.
Glue the blank halves to the stringer, as flush as possible. Trace the template on the bottom, saw it out, and square the rails with 36-grit sandpaper on your 12" sanding block.
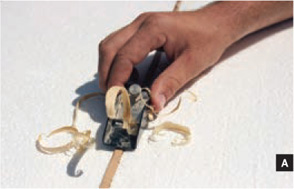
3. Level the deck and bottom.
Plane down the stringer where it rises above the foam (Figure A), then use your 24" sanding block to level the foam and stringer on the bottom and deck (Figure B).

Photography by Ed Troxell
4. Shape foil and bottom contour.
For a thinner board, keep sanding. For steeper waves, you can put more “rocker” in the bottom. For easier turns, I put some “vee” in the tail.
5. Shape the rails.
Following Greenlight’s diagrams, draw rail bands. Use the rasp to bevel the foam between bands (Figure C, following page), then use the 100-grit sanding screen to round the bevels into curves (Figure D). It works well!
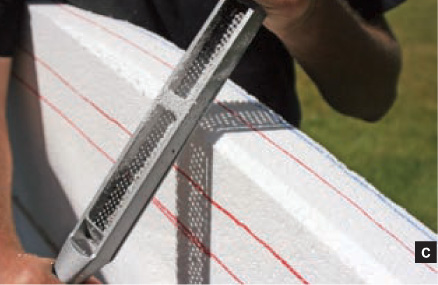
Fig. C: Use long strokes with the rasp to bevel the foam evenly between the rail bands you drew.
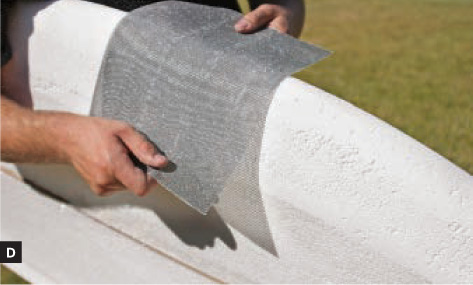
Fig. D: A drywall sanding screen rounds off the rail bevels nicely.
The bottom edges are sharp in the tail (more bite for turning), but rounded farther forward (more forgiving).
6. Blend the deck into the rails, nose, and tail.
With 60-grit on your 12" block, blend the deck into the rails and tail. To thin the nose, plane down the stringer, sand the foam down evenly, then blend.
7. Sand and spackle.
Sand the board with 80-grit on your foam sanding pad and remove any dust. To seal the EPS foam, mix lightweight spackle (DAP Fast ’n Final or Custom Patch-N-Paint) with water to the consistency of thin mayonnaise, then spackle the board, scrape away excess, and let it dry (Figure E). This type of spackle uses silica microcells as filler; pro shapers say it lets the epoxy resin penetrate and bond with the foam, but prevents the foam from soaking up too much.

Fig. E: Sealing the EPS foam with light-weight spackle keeps it from absorbing excess epoxy.
8. Add artwork and fin boxes (optional).
Stick down artwork with resin, working out any bubbles. You can also paint your board using water-based acrylic or latex paints.
Most fin boxes are installed before laminating; follow manufacturer’s instructions. Fin placement depends on board style, so copy a board or consult Greenlight or swaylocks.com.
9. Laminate the bottom.
Pencil a lap outline on the deck 2½" from the edge, using a jig of scrap foam (Figure F). Lay down double-sided tape just inside this lap line; this is the deck tape.

Fig. F: Use a chunk of scrap foam to make a jig for drawing lap lines.
Stretch bamboo cloth across the bottom, up over the rails, and down onto the deck tape (Figure G). Much easier than fiberglass! Pull it tight and smooth, with no wrinkles on the rails (Figure H). Minimize overlaps in the tail; you’ll have to sand them out later. At the tail and nose, where it’s tightest, tape excess fabric to the deck so it can’t pull away.
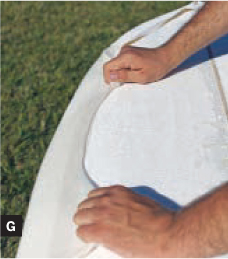
Fig. G: Stretch bamboo fabric across the bottom of the board, and stick it to the tape on the deck.

Fig. H: Keep stretching until all the wrinkles are off the rails, and behind the tape.
Put on 2 pairs of latex gloves, and mix up 9oz of epoxy resin. The formula is 2 parts resin, 1 part hardener, and 1ml of Additive F per ounce of hardener. Measure carefully: too little hardener and the resin won’t set; too much and it’ll get hot and set in the bucket, “exotherming” in a chain reaction. Stir well for 1 minute.
![]() CAUTION: Additive F is mostly xylene; keep it off your skin and don’t breathe it.
CAUTION: Additive F is mostly xylene; keep it off your skin and don’t breathe it.
Using a paintbrush, saturate the rails, work out any bubbles, and pull off the excess resin. Flip the board, and toss the first pair of gooey gloves. Saturate the entire bottom using the plastic spreader, working small areas from stringer to rails (Figure I). Leave no dry spots. Mix more resin as needed.

Fig. I: Spread resin evenly to saturate the fabric, leaving no dry spots and working out any bubbles.
Run the laminating roller over it all with moderate pressure; this strengthens the bond between the epoxy and foam (Figure J). Let it cure.
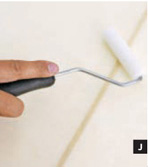
Fig. J: Roll it. Moderate pressure with the laminating roller helps bond the epoxy to the foam.
With a small block and 60-grit, sand down any wrinkles or overlaps on your rails. Score along the lap line with a utility knife, then peel the tape up and snap off the excess fabric (Figure K). Sand the lap flush to the deck foam, and remove all dust.
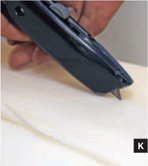
Fig. K: Score the lamination along the lap line, peel up the tape, and snap off the excess fabric.
10. Laminate the deck patch.
Reinforce 2/3 of the deck: put double-sided tape outside the lap line, stretch bamboo fabric onto it, and laminate with 9oz resin. Sand the laps flush to the foam, and remove any dust.
11. Shape and laminate fins (optional).
Cut fins from the bamboo panel with a coping saw. Foil them using a grinder, Dremel, or 60-grit block. Laminate in bamboo fabric, and sand with 80-grit.
12. Laminate the full deck.
Draw a lap line on the bottom, put down double-sided tape inside this line, and laminate the entire deck and rails, as you did the bottom. Start with 9oz of resin; you’ll probably use 18oz.
Score carefully — don’t cut your bottom lamination. Sand laps flush. Congratulations: your board is “glassed” in bombproof epoxy, with double-strength rails and deck patch. Lightly sand with 60-grit on your foam pad, and remove dust.
13. Paint pinlines (optional).
It’s traditional to hide lap lines under painted “pinlines” about 3/16" wide. Use masking tape and acrylic paint, and pull up the tape while it’s wet.
14. Glass on the fins.
Use clamps to hold the fins at your chosen toe-in and cant angle, as you glue them on with resin thickened with bamboo dust (Figure L). Let it cure.
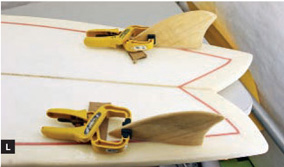
Fig. L: Shim the clamps to hold fins at the correct cant angle.
Strengthen the fin bases with “fillets” of resin: make a masking-tape dam around one side of each base, then tip the board on its side and pour a little resin along the bases, building them up 1/8"–¼". Repeat on the other side. Sand them nice and round using a pencil wrapped in 80-grit.
15. Hot-coat the board.
“Hot coat” is shaper-speak for the second coat of polyester resin, formulated to cure quicker, generating heat. Your epoxy hot coat won’t get hot, but serves the same purpose: to smooth the board and fill in the lamination texture.
Lightly sand with 120-grit and remove dust. Mix 12oz of resin with double Additive F (2ml per ounce of hardener). Paint the deck and rails, forcing resin into the fabric texture. Go over it again lightly to spread it evenly, letting the brush do the work (Figure M). Scrape drips off the bottom, and let it cure.
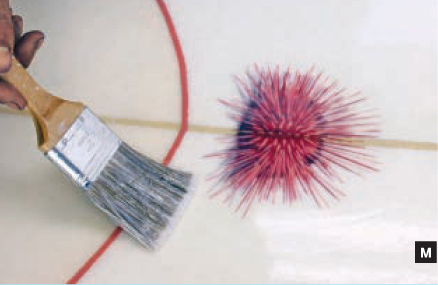
Fig. M: When hot-coating, use long, light strokes to spread the resin. A little extra pressure in the curve of the deck will help keep resin from pooling there.
Flip the board, sand down drips, and remove dust. Run masking tape around the rail just below the centerline, to save the deck from drips. Around the tail, add a resin dam of masking tape, sticking up; this will make a nice sharp edge (Figure N). Now paint the bottom and fins with 12oz of resin. Let it set 2 hours, then pull off the drip tape and let it cure.
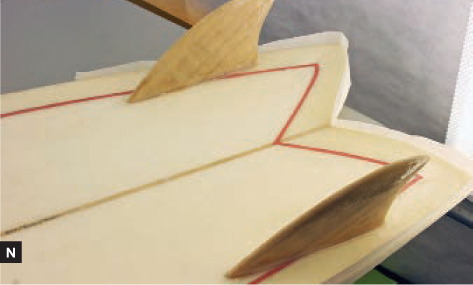
Fig. N: A dam of masking tape creates a nice sharp edge in the tail.
16. Sand the hot coat.
Sand the board well with 80-grit, then 120, on up to 220. A power sander is handy, but go easy. Use the foam sanding pad on the rounded rails, and a hard block on the sharp rails. Hand-sand the fins.
17. Install the leash plug.
Cut a 1¼" hole 5/8" deep in the deck, on the stringer a few inches from the tail. Clean the hole so the leash plug fits flush to the deck. Pour in a bit of resin thickened with bamboo dust, place the plug, and patiently drip resin around it to fill the gap (Figure O). Let it cure and sand it flush.
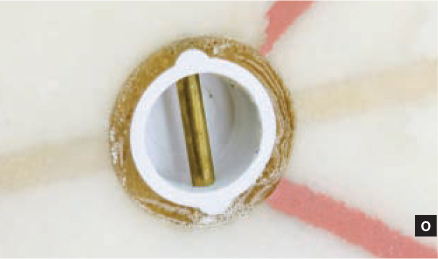
Fig. O: Drip resin around the leash plug, wait awhile for bubbles to rise, then drip a little more if needed.
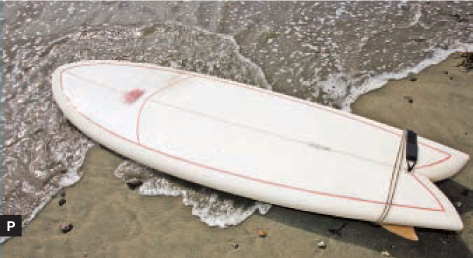
Fig. P: Your board will be strongest if you let the epoxy cure 7 full days — if you can wait that long.
Photograph by Sam Murphy (P)
18. Gloss-coat the board (optional).
Paint a thin coat of resin mixed with double Additive F, and let it cure. Sand with 320-grit and buff to a mirror polish. Go surfing!
Special thanks to Brian Gagliana at Greenlight Surfboard Supply for friendly advice and encouragement.
Keith Hammond is copy chief of MAKE.
Long Cord Storage
My shop vac came with a very long cord, so I made a simple bracket from PVC pipe for winding it up. If I wind it in a figure-eight pattern, it won’t be all twisted and tangled when I unwind it because the coils reverse as I wind it on.
—Frank Ford, frets.com/homeshoptech
Find more tools-n-tips at makezine.com/tnt.