
COME ON IN, THE WATER’S FINE!
WATERTIGHT MULTIROTORS FROM QUADH2O
Courtesy QuadH2o
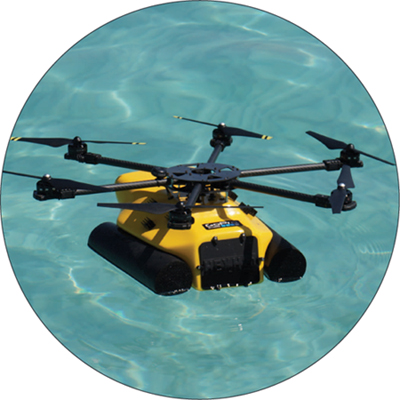
IF YOUR FLIGHT PLAN INVOLVES MORE THAN THE OCCASIONAL DOUSING, QUADH2O’S MULTIROTORS — available either as a kit or ready-to-fly — are designed to safely land in the water or fly in the rain. The company got its start in 2012 when designer/fabricator Nick Wadman was asked to photograph real estate using an aerial drone and needed to fly over water. Having a background in R/C and a passion for tinkering, he developed the QuadH2o ($849 kit; $3,499 RTF), designed to house the DJI Naza GPS and to carry a GoPro. The second drone in their fleet, the HexH2o, announced in late 2014 and available for preorder ($895 kit; $3,659 RTF), adds the capability to capture stabilized still or video footage underwater thanks to a watertight gimbal housing built for the DJI Zenmuse and GoPro. Videos of the HexH2o in action show it landing on calm water, maneuvering slowly while filming beneath the surface, and then taking off to capture aerial shots. ![]()
SHOOT THE CURL WITH A DIY WAVECOPTER
BUILD A WATERPROOF QUAD FRAME FROM ELECTRICAL PARTS

Courtesy Alec Short
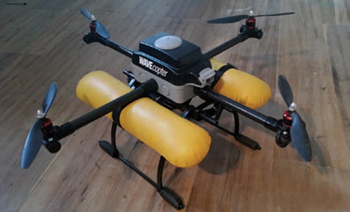
I BUILT THE WAVECOPTER TO GAIN A NEW PERSPECTIVE ON SURFING PHOTOGRAPHY and to do aerial surveying of event sites. A PVC 4-way junction cut to fit inside a weatherproof electrical socket box forms the hub. The carbon-fiber rotor arms are secured in place with locking PVC conduit thread adapters. The motor mounts are made from PVC 3-way inspection tees with both ends sealed with rubber grommets. (It’s important to upgrade the screws that come with the inspection cover to machine bolts, otherwise the motors will pull them free.) Configuration of the power and flight controller electronics will vary depending on your specific setup, but the most important part of this project is being able to house an optimum balance of battery power and weight in a watertight frame. I found that two ZIPPY Flightmax 2200mAh LiPo batteries fit perfectly under the lid of the Diall model WP23L socket box I used, but you may need to experiment a bit with comparable components available near you.
To complete your drone, attach landing gear and floats to the undercarriage. Calibrate your flight controller per the manufacturer’s instructions. Then install the motors; as long as they’re brushless (most are) no additional waterproofing is necessary, but you can take it further with our moisture-protecting electronics tips on the following page. Connect the batteries and test all your flight control systems before attaching the props to the motors. Happy flying! ![]()
Full instructions at makezine.com/go/waterproof-wavecopter/