Getting Started with littleBits
The new book from Maker Media will initiate you into the ecosystem of the versatile magnetic components

Hep Svadja
WITH LITTLEBITS ANYONE, OF ANY AGE, CAN HARNESS THE POWER OF ELECTRONICS, MICROCONTROLLERS, AND THE CLOUD. You can combine these snap-together magnetic bricks to make simple electronic circuits or build robots and interactive projects that combine sensors and an Arduino-compatible microcontroller.
There’s no better way to learn how to use littleBits than to jump right in and try them out. Here are the basics: how to power your Bits, how they connect — and a look at a few of the different inputs and outputs that you can use in your projects.
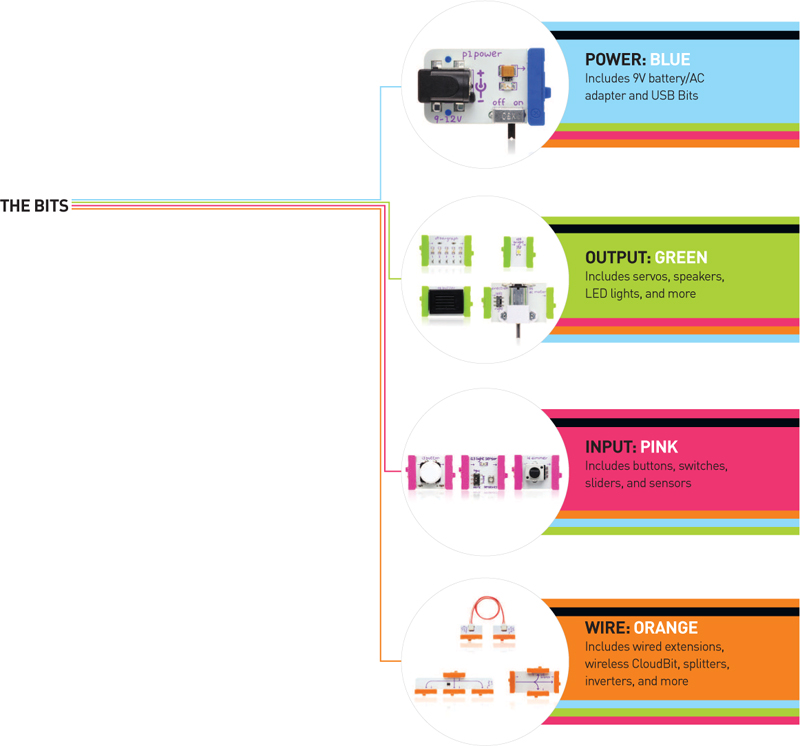
While there are over 60 different modules (or Bits) in the littleBits library to choose from, every module falls into one of four different categories, each with a particular color to make the modules easy to find and identify: Every Bit works with every other Bit in the library and it can keep growing to infinity.
littleBits
BITSNAP CONNECTORS
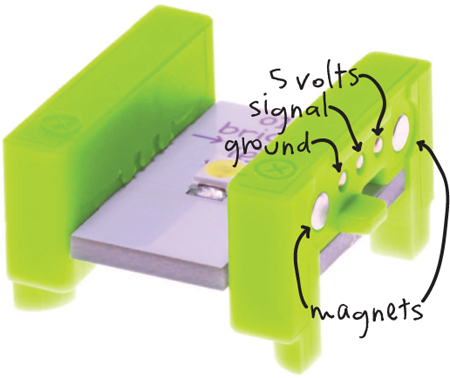
The Bits connect to each other magnetically with their bitSnap connector. This unique feature of the Bits helps you easily make the physical and electrical connections so that you can focus on creating your project. That means that there’s no need to worry about soldering or making sure you’re connecting the right wires.
If you look at the end of the connectors, you’ll see that there are five metal pads. The two outer pads are actually the magnets that hold the Bits together. The three inside pads are electrical terminals. The middle terminal carries the signal, which is how the Bits communicate. The signal can be anywhere from 0 to 5 volts. 0 volts is an OFF signal, whereas 5 volts is an ON signal.
The signal terminal’s voltage affects how the output Bits behave. For example, the more voltage there is on the signal line going into the LED Bit, the brighter the LED will be. The input Bits let you change the signal line’s voltage and affect the Bits that come after it.

AYAH BDEIR is the founder and CEO of little-Bits. She’s an engineer, interactive artist, co-founder of the Open Hardware Summit, a TED Senior Fellow and an alumna of the MIT Media Lab.

MATT RICHARDSON is a San Francisco-based creative technologist. He is co-author of Getting Started with Raspberry Pi, and the author of Getting Started with BeagleBone and Getting Started with Intel Galileo (available from Maker Media).
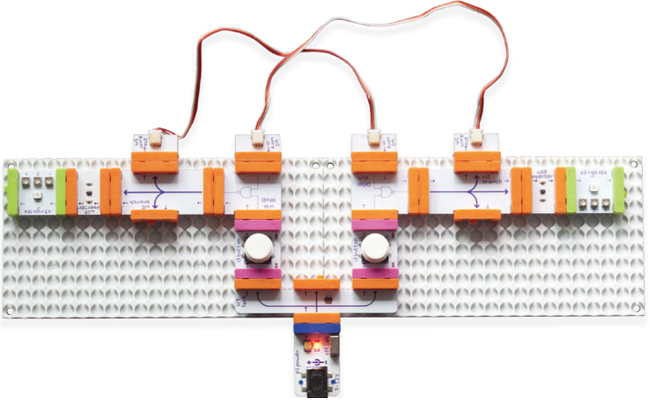
LOGIC BITS
The littleBits logic modules help you create rules for your circuit to follow, which opens up the possibility for more complex circuits. In electronics, these components are called logic gates.
What happens when you have multiple inputs and you want them to affect a single output? This is where the logic Bits are useful. The logic Bits work in the realm of digital, that is, only on or off. The important thing is that you can control two separate outputs, connect them both to a logic Bit, and connect an output to the logic Bit.
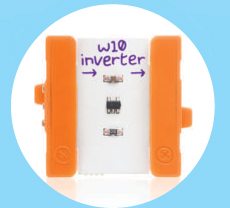
INVERTER
The inverter is one of the simplest wire modules, but it’s very handy. There are cases when you want the output of a Bit to be the opposite: whenever it receives an ON signal, it outputs an OFF signal and vice versa. That’s all the inverter Bit does. It outputs the opposite of its input.
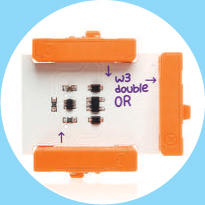
DOUBLE OR
With a double OR, when either input is ON, it will output ON. It’s also important to note with the double OR that when both inputs are ON, it outputs an ON signal. The double OR is useful when you want two possible ways for a user to interact with your project.
Input 1 |
Input 2 |
Double OR Output |
OFF |
OFF |
OFF |
ON |
ON |
ON |
OFF |
ON |
ON |
ON |
OFF |
ON |
NOR
As you may have guessed, the NOR Bit does the opposite of the Double OR Bit. In other words, when both of the inputs are OFF, then the NOR Bit outputs an ON signal. In any other case, it outputs OFF.
Input 1 |
Input 2 |
NOR Output |
OFF |
OFF |
ON |
ON |
ON |
OFF |
OFF |
ON |
OFF |
ON |
OFF |
OFF |

DOUBLE AND
With a double AND Bit, both input signals must be ON in order for it to output an ON signal.
Input 1 |
Input 2 |
Double AND Output |
OFF |
OFF |
OFF |
ON |
ON |
ON |
OFF |
ON |
OFF |
ON |
OFF |
OFF |

NAND
NAND means “NOT AND.” It does the exact opposite of the double AND. When both inputs are ON, it outputs OFF. In any other case, it outputs ON.
Input 1 |
Input 2 |
NAND Output |
OFF |
OFF |
ON |
ON |
ON |
OFF |
OFF |
ON |
ON |
ON |
OFF |
ON |

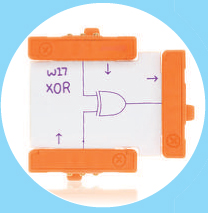
XOR
The XOR Bit means eXclusive OR. If either input is ON, the XOR Bit will output ON. But if both are ON, it will output OFF. If both inputs are OFF, it will output OFF. In short, it will only output ON when it receives a differing signal from its two inputs.
Input 1 |
Input 2 |
XOR Output |
OFF |
OFF |
OFF |
ON |
ON |
OFF |
OFF |
ON |
ON |
ON |
OFF |
ON |
WIRELESS AND CLOUD COMMUNICATION
With the help of the wireless receiver and transmitter Bits, you can send signals without wires. And with the cloudBit, you can connect your project to a Wi-Fi network so that it can be accessed wirelessly via the internet. If you have a pair of cloudBits, you can have one pass its signal through the internet. This means your project can stretch across the globe.
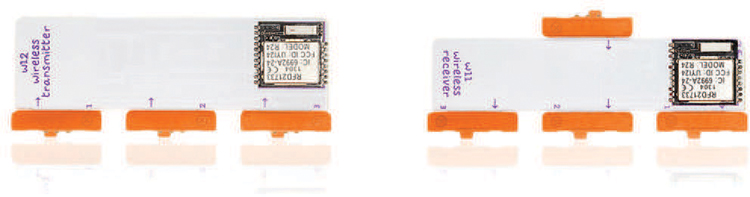
WIRELESS TRANSMITTER AND RECEIVER
The wireless transmitter and receiver Bits work with each other in order to easily make your project work without need for the bits to be right next to each other. The transmitter communicates the incoming signals directly to the receiver, so it works without the need for a wireless network and without any kind of set up. These Bits are great because they’re plug and play.
With the wireless Bits, you can make a remote control for a robot or car, create a wireless door lock, or be alerted in your living room when your back door is opened.
When you push the button on one circuit, the output should activate on the other. Try seeing how far you can go and still trigger the output with the button. The range of the wireless Bits is about 100 feet, so that it should still work from the next room, but your mileage may vary since there are a lot of factors that affect its performance.
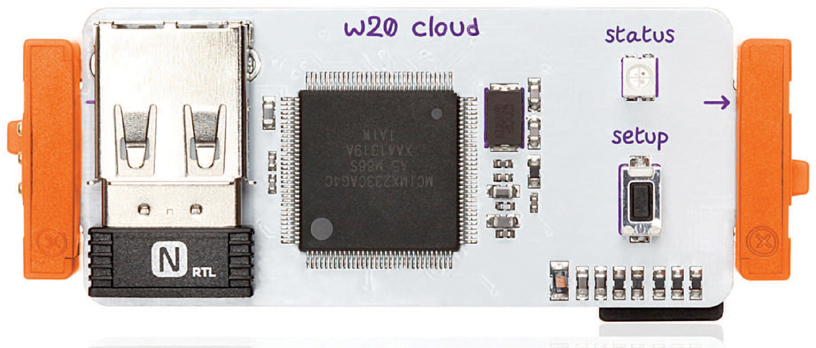
CLOUDBIT
Not only does the cloudBit enable long distance communication between littleBits projects, but it can also connect to a multitude of online services through IFTTT (ifttt.com). And if you’re an advanced developer, its open API means that the possibilities with how you can use it are limitless.
The cloudBit works by connecting to the internet over your Wi-Fi network. Through the internet, it establishes a connection to the littleBits Cloud Control servers, which receive signals from the cloudBit’s input bitSnap connector and send signals to the output bitSnap connector. The littleBits Cloud Control server will help you connect your cloudBit to other cloudBits, to IFTTT, and to your own web servers by using its API.
GOING FURTHER: MAKE YOUR OWN BITS
There’s a huge library of existing Bits available for you to choose from, but there are a few tools to help you create your own Bits. And through the BitLab program and the Hardware Developer Kit (HDK), you can even sell your creations. The HDK includes the proto modules, perf board, and bitSnaps to build your own circuit and add it to your library — or to the littleBits catalog itself. ![]()
Getting Started with littleBits is available this spring from Maker Media.