
Carbon-Fiber Acoustic Guitar
Use free 3D design tools to mold a tough, sleek guitar body (or anything else) in high-tech composite

Hep Svajda
SETH NEWSOME is a teacher turned maker living in San Francisco. He loves to explore how to create things (especially in wood), to master new methods, and then pass on his knowledge and teach others how to do the same thing.
HERE’S HOW I MADE THE BODY FOR MY CARBON-FIBER ACOUSTIC GUITAR, AS PART OF A WORKSHOP AT TECHSHOP in San Francisco. It’s a great technique that anyone can do. First you design a 3D mold made of stacked-up slices of cardboard, using Autodesk’s free 123D Make software. Then you lay carbon-fiber fabric over the mold and harden the fibers with marine-grade epoxy. My mold is modeled after a 1940 Gibson L-00 but the sides are rounded like an Ovation-style guitar, because carbon fiber doesn’t bend well around sharp corners. The finished guitar looks and sounds great!
I designed the workshop for complete beginners, so the whole body is laid up and finished with brush and gloved hands. (A more advanced technique uses vacuum bags, which I hope to try in the future.) It took me a week, working nights, to finish the body alone. You can probably make the whole guitar in a couple of weekends.
1. GET THE 3D GUITAR MODEL
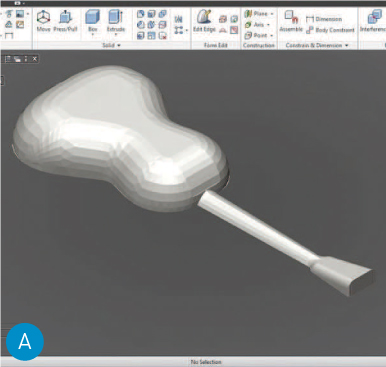
You can design your own guitar using your favorite 3D design software, or skip it and just download the 3D model I used (Figure A). Get it at the project page online: makezine.com/go/carbon-fiber-acoustic-guitar.
2. SLICE THE MODEL INTO LAYERS
Open Autodesk 123D Make and import your 3D model. On the left, under Construction Techniques, select Stacked Slices.
Now set the dimensions for the object you’re making and the material it’s being made from. For the Object Size, my model was 935mm long × 358mm wide × 111mm high (36"×14"×4.37"). For my Manufacturing Settings, I chose 0.177" slices on 18"×24" sheets, which created 56 parts spread over 23 sheets of standard cardboard (Figure B).

Inspect the model and sheets for errors. Then click Get Plans and select EPS format.
WHY CARBON FIBER?
Carbon fiber won’t replace traditional wood-body guitars anytime soon, but it has definite advantages:
Seth Newsome
• Acoustics Good carbon-fiber guitars have a very clear sound and loud volume. And carbon fiber varies little compared to wooden components, so it’s easier to crank out duplicates with reliable sound qualities.
• Durability Carbon fiber is just plain durable and strong. It’s a lot easier to patch or rebuild than wood, and it’s not affected by weather and humidity.
• Ease of Construction In just one night I went from a bottle of epoxy and a pile of fabric to a nice guitar-shaped body ready for finishing. Customization is easier too. You don’t need special guitar jigs, clamps, and tools — just reshape your mold.
Time Required: A Couple Weekends
Cost: $180–$200 body $100 components
Materials
» Corrugated cardboard
» Carbon-fiber fabric I used plain weave because it was affordable, but other styles might work better.
» Fiberglass, S-Glass (optional) A cheaper filler used between carbon layers.
» Coremat polyester foam
» Epoxy, TAP Plastics Marine Grade Premium 314 resin and 109 hardener Long open time, low odor, few bubbles.
» Black pigment for tinting plastic resins
» Plastic packing wrap aka stretch wrap or pallet wrap
» Auto body putty aka Bondo
» Painter’s tape
» Scrap wood
» Sandpaper, 80 or 120 grit
» Sandpaper, waterproof: 180, 220, 320, 400, 600, and 1000 grits
» Auto-body rubbing compound
» Paste wax
Tools
» Computer
» 3D design software (optional) My instructors used Autodesk Inventor to design the guitar’s 3D model. Download it from the project page, makezine.com/go/carbon-fiber-acoustic-guitar.
» 123D Make software free from 123dapp.com/make
» Laser cutter (optional) You can cut the cardboard by hand but I recommend you visit makezine.com/where-toget-digital-fabrication-tool-access to find a machine or service you can use.
» Vector graphics software (optional) such as Adobe Illustrator or CorelDRAW, to send files to the laser cutter
» Vise
» Scale (optional)
» Disposable containers and brushes
» Disposable gloves
» Dust mask or respirator Carbon fiber and epoxy make some nasty dust when cut and sanded.
» Safety goggles
» Disposable scissors
» Hacksaw
» Rotary tool with cutoff wheel such as a Dremel
» Sanding block
» Rag or polishing pad
3. LASER-CUT AND ASSEMBLE THE MOLD
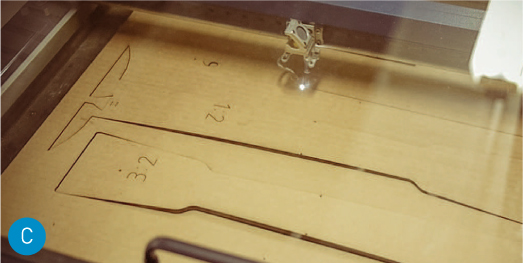
I used Adobe Illustrator to send the EPS files to an Epilog 60W laser cutter (Figure C). Choose settings appropriate for cardboard (I used 70% power, 90% speed, and 500Hz frequency).
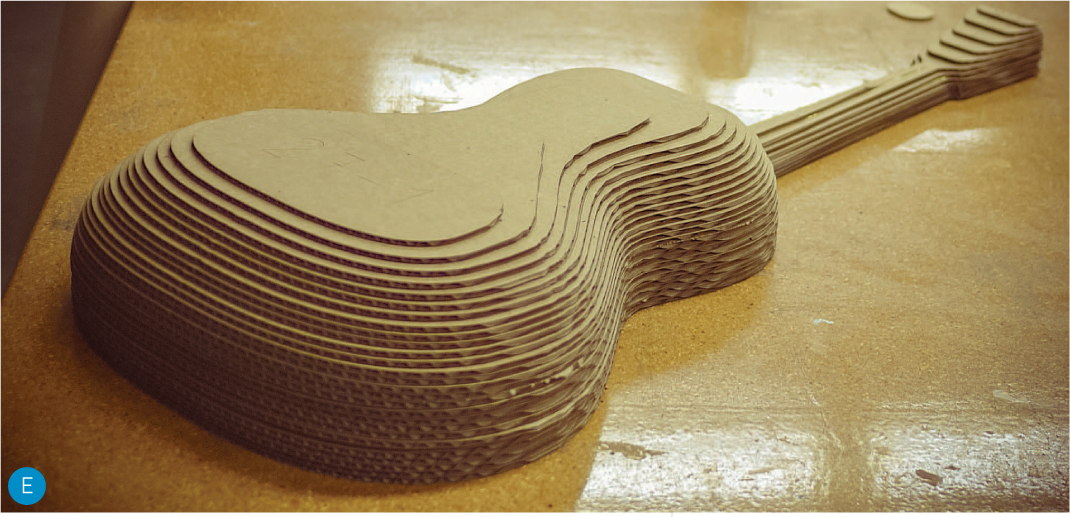
Each part is numbered. Stack them in numerical order, then assemble with a little glue between each layer (Figures Figure D and Figure E). Clamping is optional.

4. PREPARE THE MOLD
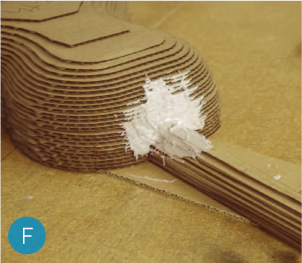
» Soften edges. Carbon fiber doesn’t bend well over sharp corners. Use auto-body putty to smooth the joint between the body and neck (Figure F).
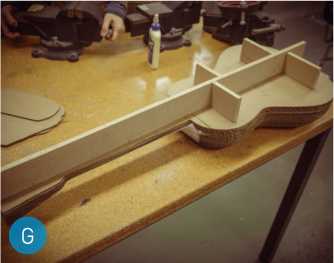
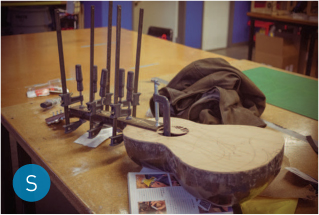
» Make a handle. Nail boards to the bottom of the mold to make a firm handle. Then clamp it in a vise to elevate the mold and keep it rock steady (Figure G).
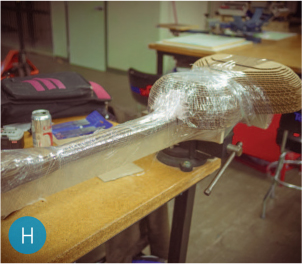
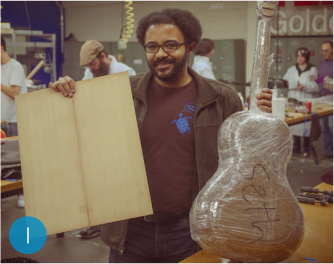
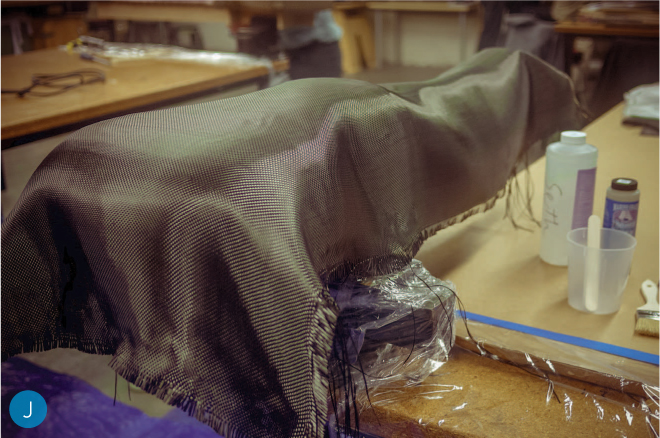
» Mold release. To prevent the epoxy from bonding with the cardboard, you need some type of barrier. Commercial mold release products won’t work with cardboard, so you’ll wrap the entire mold in packing plastic — a thicker, tougher cousin of cling-wrap (Figures Figure H and Figure I). Aim for long, smooth motions to avoid tangling and bunching.
Seth and David Newsome
5. LAY UP THE CARBON FIBER
Protect your workspace with tarps or plastic wrap, then neatly arrange your materials before starting. Once you mix the epoxy, things get messy fast!
Cut 2 sheets of carbon fiber and 1 sheet of S-Glass just a little longer and wider than the mold (I had about ½" overlap on each side). Set aside the better-looking sheet of carbon; this will be your final, show layer.
Mix 10oz of epoxy following the manufacturer’s instructions, in this case 4 parts resin to 1 part hardener. You can eyeball it in a measuring cup, but it’s best to measure it by weight. Epoxy likes it warm, so be aware of your epoxy’s minimum recommended temperature.
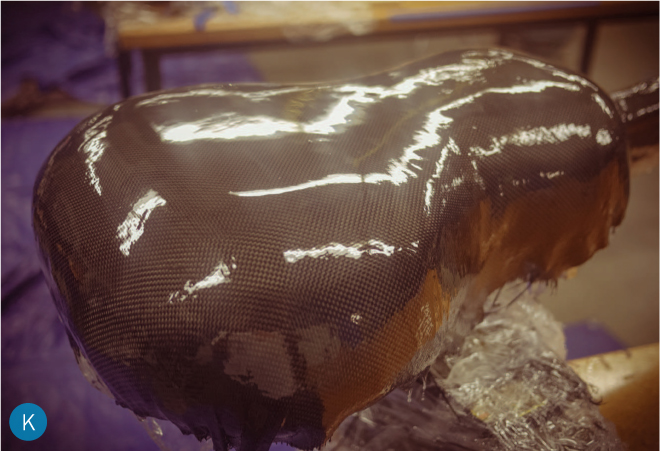
Lay the first layer of carbon over the mold, then load up your brush and wet the carbon fiber thoroughly with epoxy — no dry spots or bubbles (Figures Figure J and Figure K). Your epoxy has a 20–30 minute “pot time” before it hardens.
TIP: In tight corners the carbon fiber will tent and pull away from the mold. Cut relief slits, then overlap the 2 sides. If needed, bulk up the area with scraps of carbon fiber to soften the curve. Don’t worry about how it looks (it is only the first layer) and don’t be afraid to use your (gloved) fingers to tug, smoosh, and reshape the fiber by hand.
Mix another batch of epoxy and put down a layer of S-Glass in exactly the same way. Then another batch and your final layer of carbon. Careful, as everything you do now will show on the surface.
Let the epoxy cure fully, protecting it from dust and fingerprints.
6. RELEASE THE MOLD
Wearing your goggles and respirator, use a Dremel, angle grinder, or hacksaw to cut away the excess carbon and epoxy fringe to just above the cardboard mold. Beware of sharp little spikes and splinters.
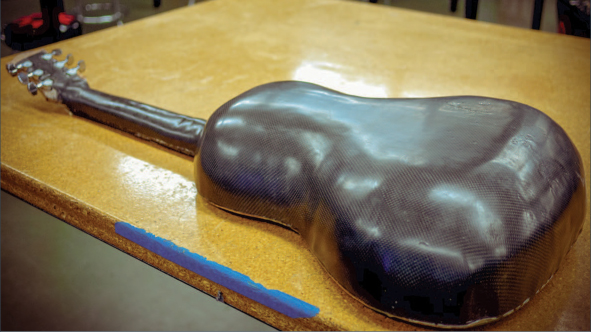
Have a friend hold the guitar body while you tug the mold out, or just tear it out in pieces (Figure L). Examine your handiwork. The hardest part is over!

7. REINFORCE THE BODY
A guitar body must be sturdy — any energy spent flexing is energy taken away from the sound — and the neck must withstand more than 100lbs of pull from the strings.
Check for any areas that are flexing too much. The edges of my guitar flexed a little bit, and so did some parts of the neck. (A traditional guitar has a threaded truss rod to adjust stiffness, but ours just has a very stiff carbon neck.)
Coremat is a super absorbent foam that sucks up lots of epoxy, making it very stiff once it dries. I put a layer of Coremat all along the edges of the body and down the center from the neck, adding a strip of S-Glass under the Coremat to help it stick to the carbon. It’s not pretty, but nobody will see it anyway (Figure M).

Flip the guitar upside down on a plastic mat and let the epoxy drip down to form a “lip” around the inside edge of the guitar. This makes a nice surface for mounting wooden components later. Weight the body and neck so they’ll dry flush (Figure N).

8. FLATTEN AND SHAPE THE BODY
Check that the guitar lies flat, and sand down any high spots with 80- or 120-grit paper on a long sanding block made of scrap 2 × 4.
Check the size of the neck and how it feels in your hands. Compare it to other guitars you play. Use an angle grinder or Dremel to cut the neck down lower if you wish.
Seth and David Newsome
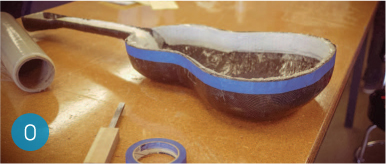
Now measure the thickness of your soundboard (mine was 2.6mm), and cut the body down lower than the neck by that exact thickness, so the soundboard will lie flush beneath the fretboard.
I marked the cut line with painter’s tape (Figure O and Figure P).

9. INSTALL THE GUITAR COMPONENTS
Installing the wood components is exactly like making a traditional guitar. I glued them to the body with 5-minute epoxy, using clamps and weights: first the soundboard, then the headstock, and finally the fretboard and bridge. (Figures Figure Q, Figure R, and Figure S).


You’ll need to cut the neck to fit your headstock, then cut your fretboard to fit the neck; for details, see the project page at makezine.com/go/carbon-fiber-acoustic-guitar. I also recommend Build Your Own Acoustic Guitar by Jonathan Kinkead.
10. PATCH, SAND, AND POLISH
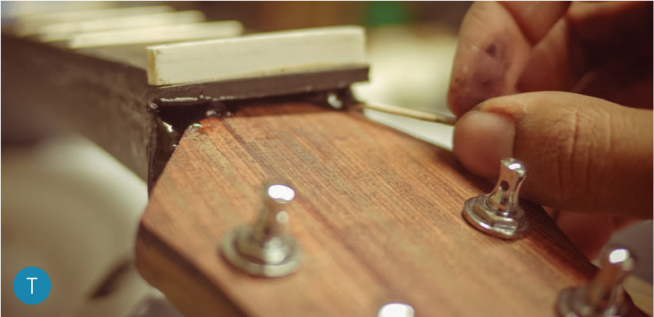
Patch any gaps with black 5-minute epoxy or your layup epoxy, tinted black (Figure T).
Protect the wooden components with masking tape and sand down any drips or high spots with 80 or 120 grit. Then wet-sand with waterproof sandpapers in 180, 220, 320, and finally 400 grit (Figure U).

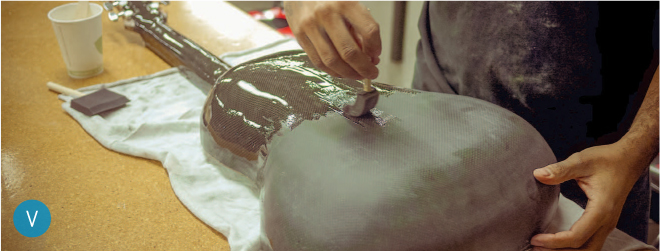
At this point I gave the whole body another gloss coat (optional) of epoxy (Figure V), and let it dry a full day, then wet-sanded with 400, 600, and 1000 grits to get a semi-gloss shine.
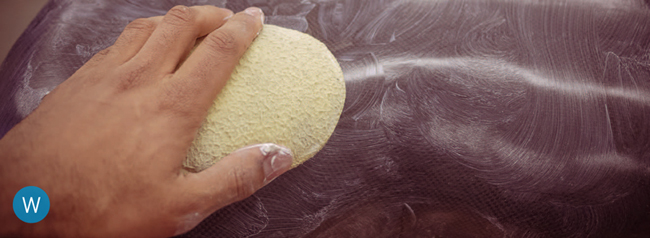
To polish the body, I gave it a coat of Turtle Wax auto-body rubbing compound, then a final coat of paste wax (Figure W).
This project pushed me to learn a lot of new skills and try experiments I never would have attempted otherwise. The fretboard is inlaid two ways: with CNC-cut maple and with laser-cut lettering filled with colored epoxy; the headstock is also laser-inlaid and the bridge is CNC-cut too. Finally, I laser-etched the Western red cedar soundboard with my own artwork, then hand-tinted it (Figure X).
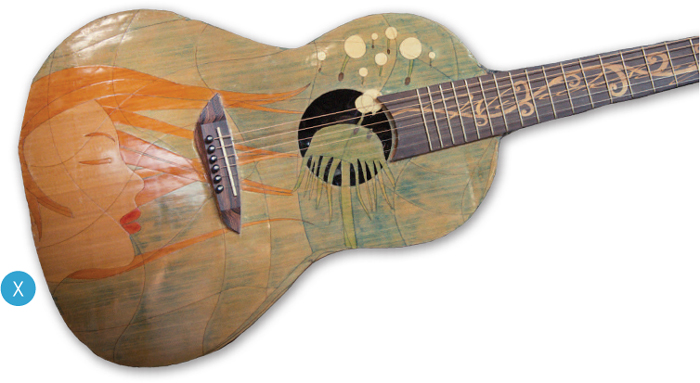
Considering this was my first time working with carbon fiber — or making a musical instrument — I’m very happy with how it all turned out. ![]()
Get the 3D guitar body model and more tips and photos at makezine.com/go/carbon-fiber-acoustic-guitar.