Creating a PeopleSoft environment in the Oracle Cloud requires three main components to be created in PeopleSoft Cloud Manager. The first requirement of provisioning an environment is having a database and application available in the repository; this was covered in Chapter 5. The second necessary component required to provision a PeopleSoft instance in the Oracle Cloud is a topology, which was covered in Chapter 6. The third and final piece required to provision a PeopleSoft instance is creating an environment template. The main purpose of the environment template is to tie the application information and the topology together to create a blueprint for how the environment will look once it is provisioned.
Environment Template
The PeopleSoft Cloud Manager Environment Template consists three main components. First the template requires basic information including the name of the environment template and the PeopleSoft Deployment Kit (DPK) that the template will be using to build the environment. Second, one or more topologies are selected for use at environment build time, and the custom attributes for each topology are available to be customized. Finally, security for the template is defined, allowing for administrator access and self-service provisioning to be available base on roles and permissions lists. Once these pieces are combined, you will have a reusable template that can be used to build environments for a variety of purposes.
Create a New Template
Creating a new template in PeopleSoft Cloud Manager is a four-step, guided process. The four steps in the process follow a guided wizard-like process and includes a progress bar along the top showing the template creation progress as each step in the process is completed. Step 1 includes the input of the basic details of the template, step 2 allows for the selection of available topologies and corresponding attributes, step 3 provides an opportunity in set user security for the template, and step 4 allows an opportunity to review the information input in the previous three steps. In the following sections, each of these steps is explored in detail and the process of creating a new template is shown step by step.
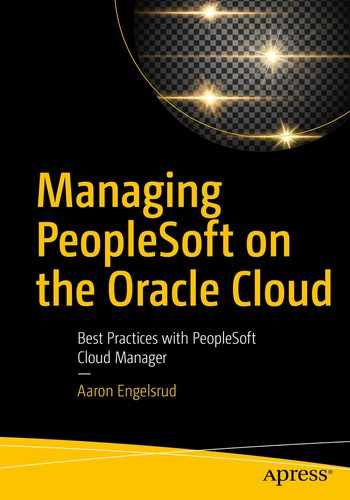
Environment Template tile

Add New Template button

Create Environment Template four-step process
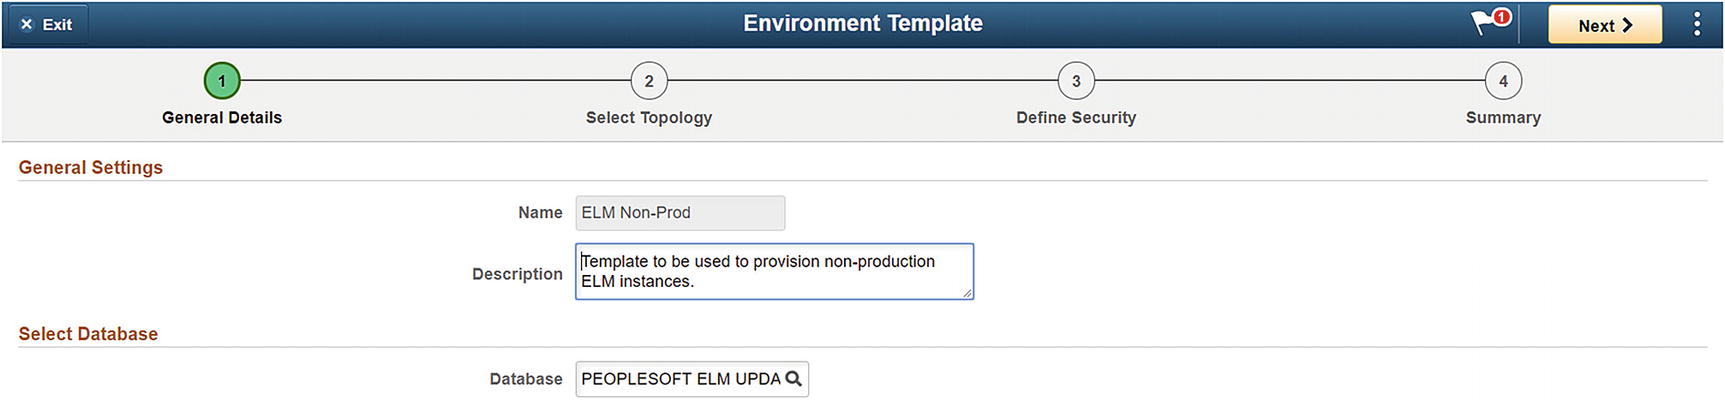
Step 1 – General Details
Name: ELM Non-Prod
Description: Template to be used to provision non-production ELM instances
Database: PEOPLESOFT ELM UPDATE IMAGE 9.2.018 – NATIVE OS (The database can be selected by clicking the magnify glass icon to the right of the text box and selecting the database from the list provided.)

General Details page
Once the general details page is complete and you have provided the detail necessary, click the next button at the top of the page and move on to step 2, selecting topology.
Step 2 – Select Topology
- 1.Starting from Step 2: Select Topology, add your first topology by clicking the magnifying glass to the left of the topology name filed. This detail can be seen in Figure 7-5.
 Figure 7-5
Select a topology
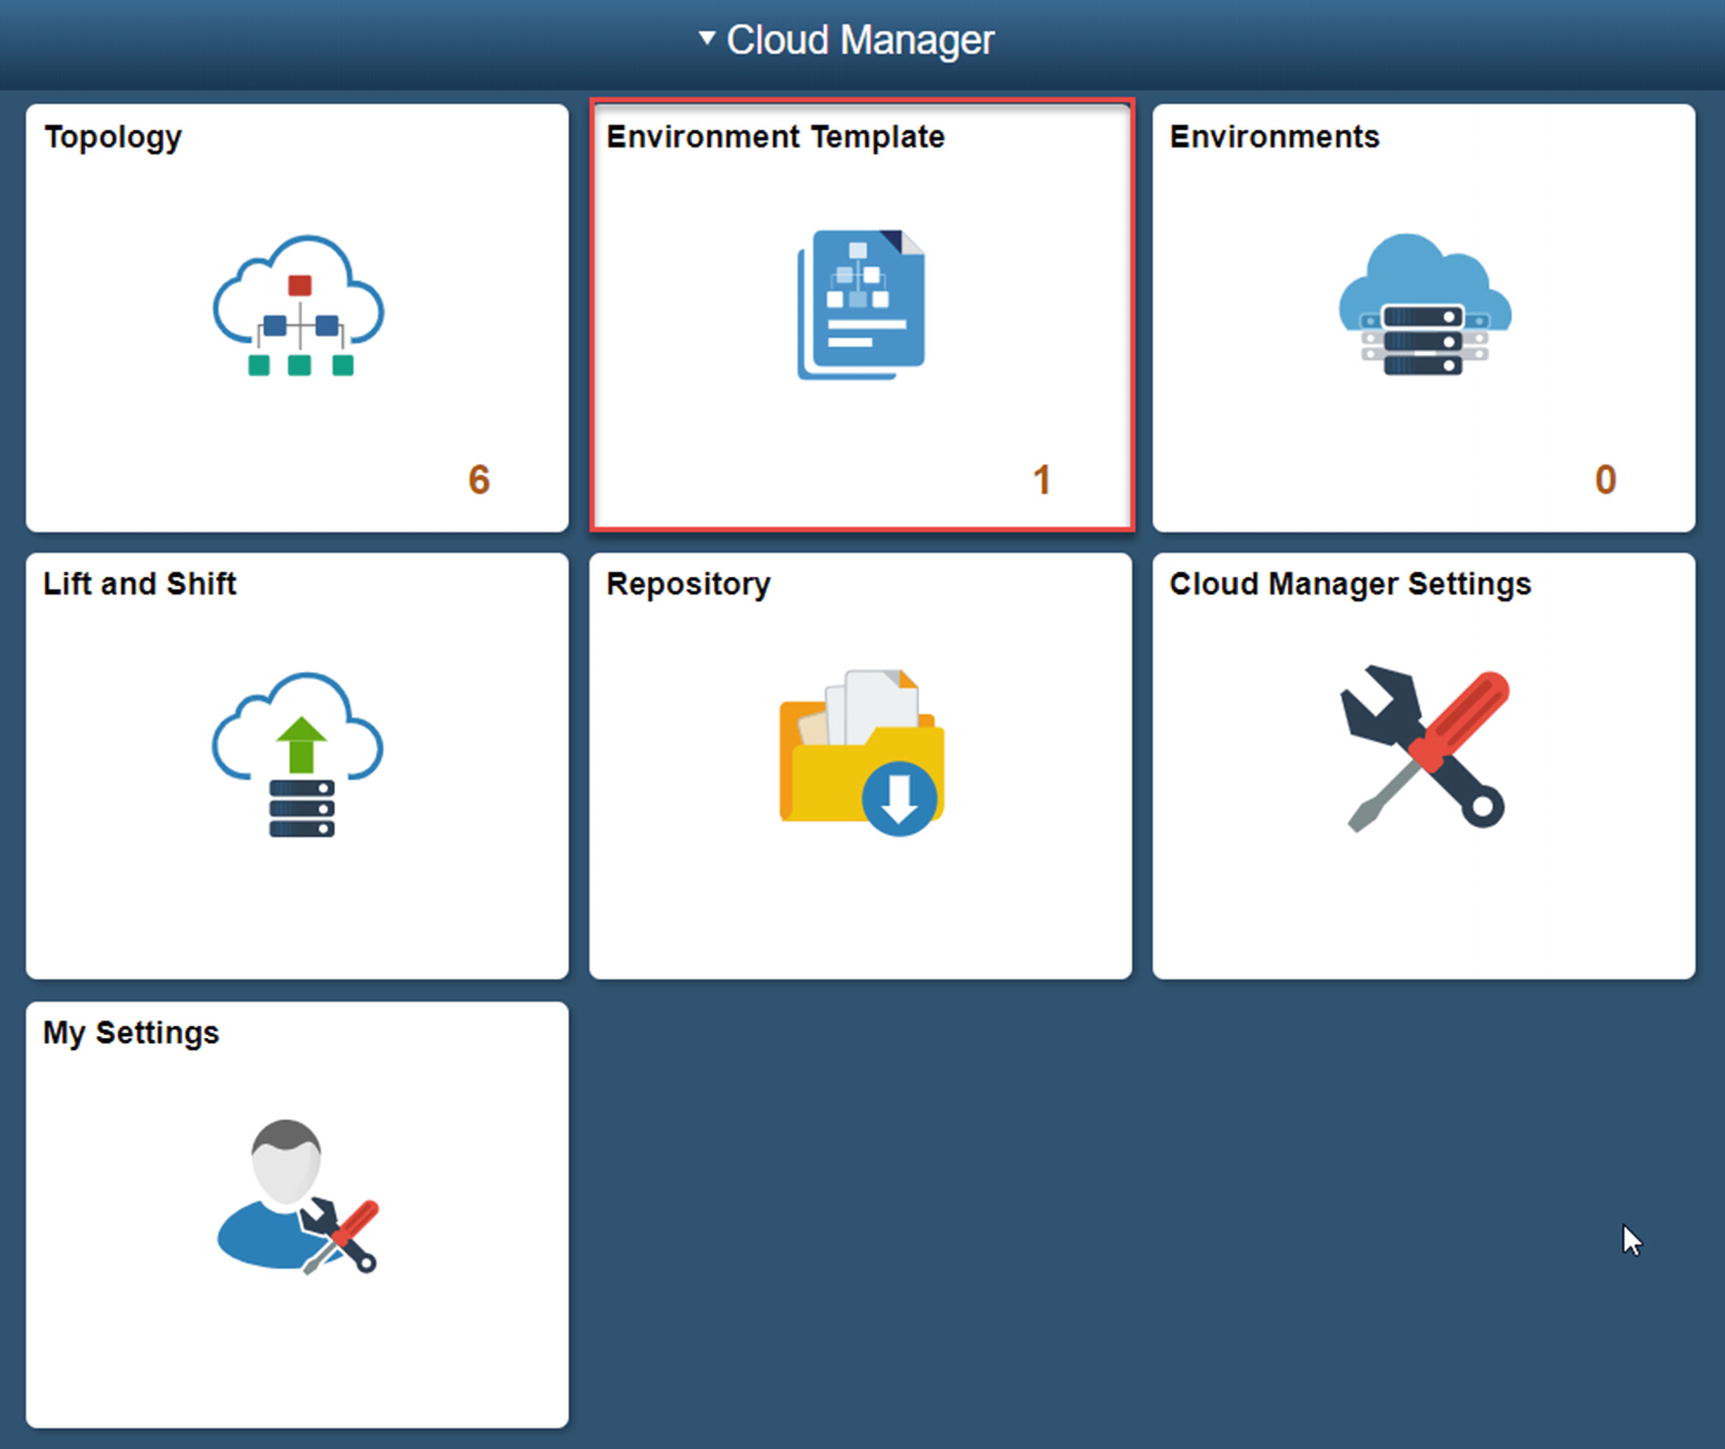
- 2.Select the topology you want from the page listing the available topologies. For the purpose of this tutorial, we will select the development (small) topology (Figure 7-6).
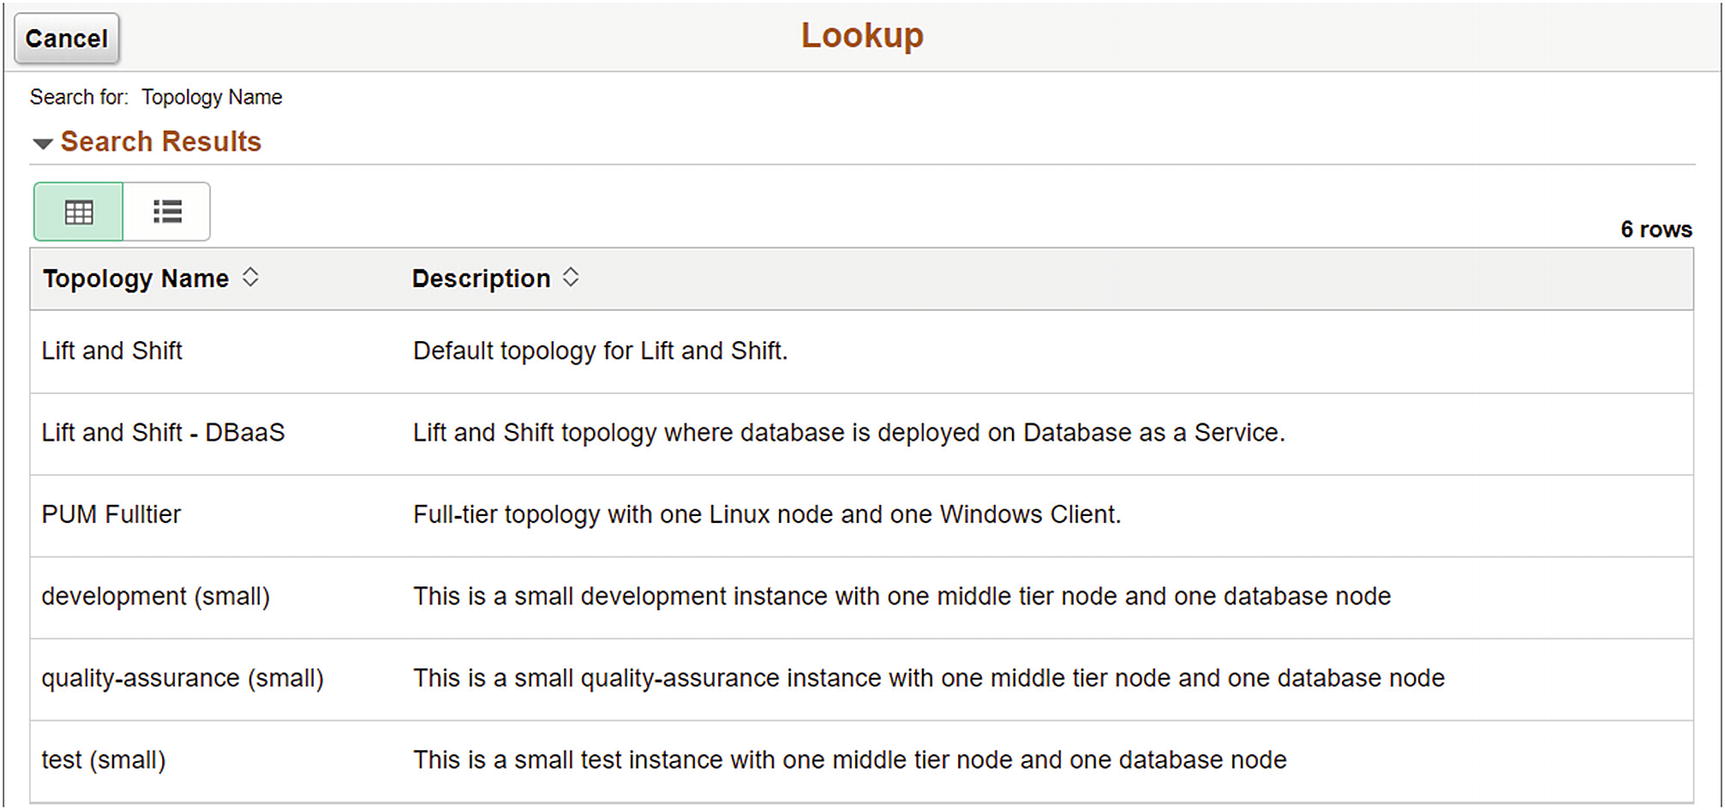 Figure 7-6
Topology lookup
- 3.
This topology will automatically be set as the default topology as it is the only option.
- 4.Based on the eventual use of the environment, a different topology can be selected at environment creation time to allow for different sizing and specifications. Given that we want the ability to use this template for development, quality assurance, and test environments, we are going to add both the quality assurance (small) and test (small) topologies to the template. Do this by clicking the plus (+) to the right of the current topology. The plus (+) sign is highlighted in Figure 7-7.
 Figure 7-7
Add an additional topology to the template
- 5.
Once you’ve selected all the topologies you’d like to have available for this environment template, you can move on and start setting the custom attributes for each of the selected topologies (Figure 7-8).
Multiple topologies
Custom Attributes
To set the custom attributes for each topology, start by expanding the Custom Attributes section at the bottom of the Select Topology step. Here you will find a drop-down to allow you to select the topology you want to edit the attributes of along with an Edit Custom Attributes button. You will note that you can set the custom attribute differently for each of the topologies you select for the environment template. This means you are easily able to allow for different custom attributes based on the topology and the use case of the environment being instantiated.
- 1.
Expand the Custom Attributes section at the bottom of the Select Topology page by clicking the word Custom Attributes.
- 2.From the Topology drop-down, select the development (small) topology and click the Edit Custom Attributes. This button and topology selection can be viewed in Figure 7-9.
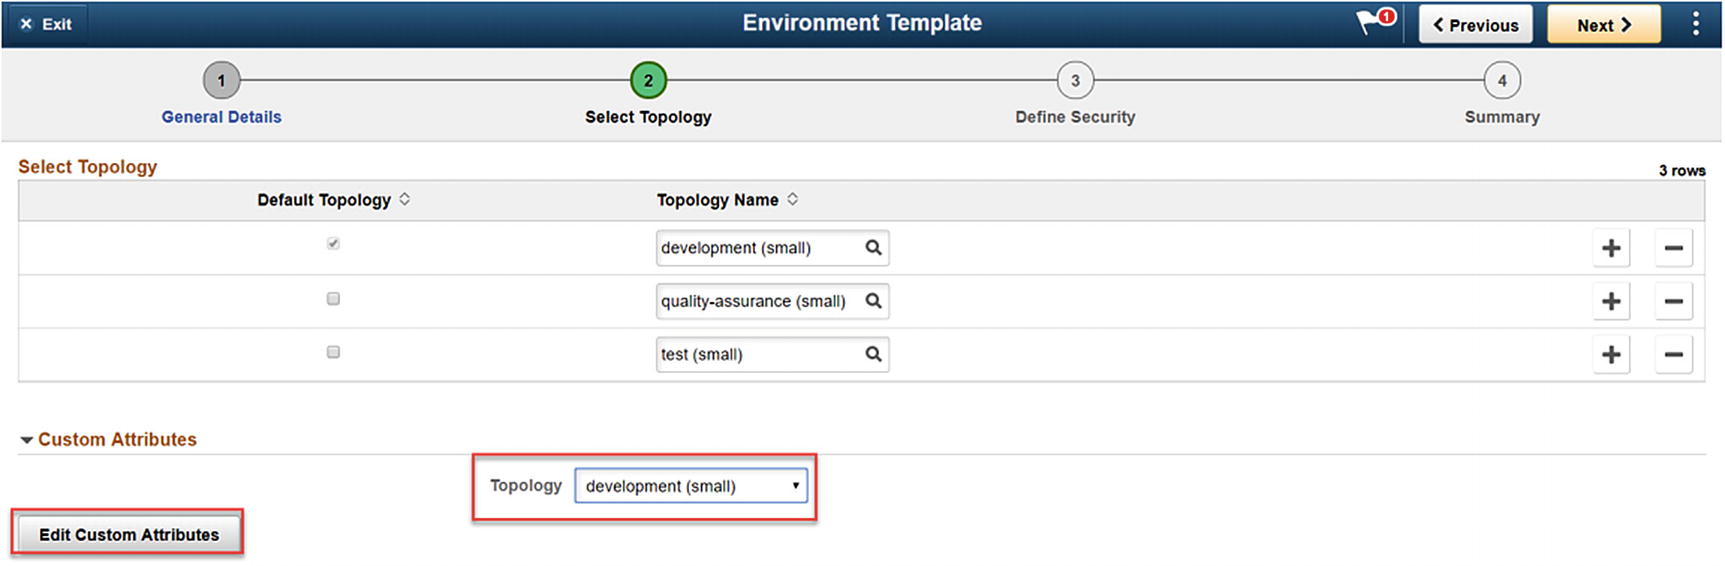 Figure 7-9
Edit Custom Attributes
- 3.
This will open the tiers that are appropriate to this topology. In this case, you should see Database Tier and Middle Tier as options. If this topology included a PeopleSoft Client tier, you would see that listed as well. The attributes available to you for each tier are listed in the following sections.
Middle Tier
The Middle Tier Custom Attributes consists of three main sections: General Settings, Domain Settings, and Advanced Settings.
General Settings
HTTP PIA Port: The default port for HTTP PIA is 8000. If you are using a different HTTP port per your standards, you can supply that port here.
Gateway Administrator Username: The default username for Gateway access is administrator. If you need to supply a different Gateway Username, you can supply that username in this field.
HTTPS PIA Port: The default HTTPS PIA port is 8443. If your standards require a different HTTPS PORT, update this field with the appropriate port number.
Enable EM Agent: This option allows you to either select NO (Disable)or YES (Enable) for the Enterprise Manager Agent for PeopleSoft. This option will default to NO.
WLS Port: This is port for the WebLogic Server which is set to a default of port 7000. Like HTTP and HTTPS, if you require a different WLS port, you can supply that value in this field.
WebLogic Administrator Username : This is the username of the WebLogic Administrator. The default value for this username is system. This is the user that is used to access the WebLogic console.
Jolt Port: This value the port number for the JOLT listener on the appserver. The default value for this port is 9033.
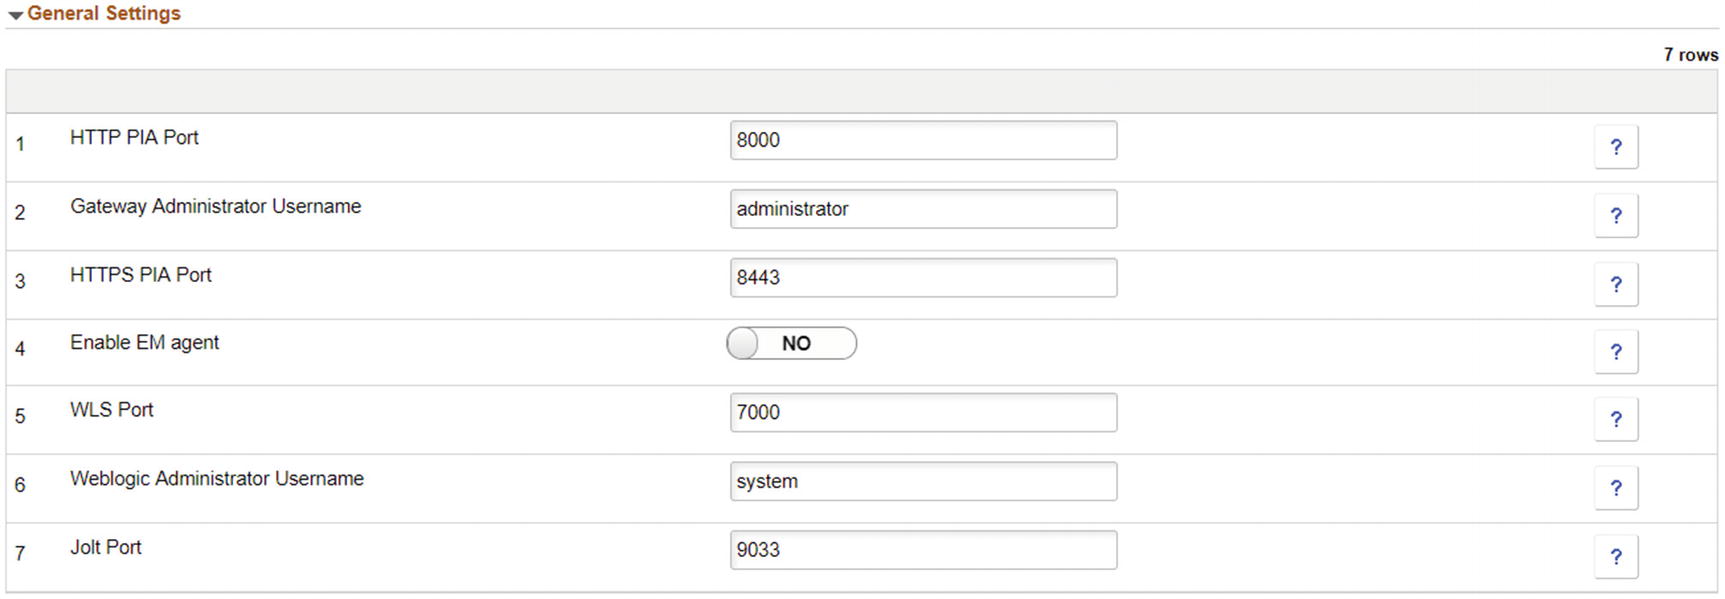
Middle Tier, General Settings
Domain Settings
Number of Domains: This is the number of appserver domains. This value is always set to 1.
Number of App Server Instances Per Domain: This field indicates the number of PSAPPSRV Services that are required. This setting is applied to all appserver domains. The supplied value for this setting is 3.
Number of Query Server Instances Per Domain: Supplied here is the number of PSQRYSRV services required for each domain. Like the PSAPPSRV value, this value is applied to all appserver domains. The default supplied here is 2.
Number of SQL Access App Server Per Domain: This is the number of PSSAMSRV instances created per domain. The default value supplied is 1.
Number of Jolt Listeners Per Domain: The number of Jolt Listeners created per domain. The default in this field is 3 based on the sizing of the topology.
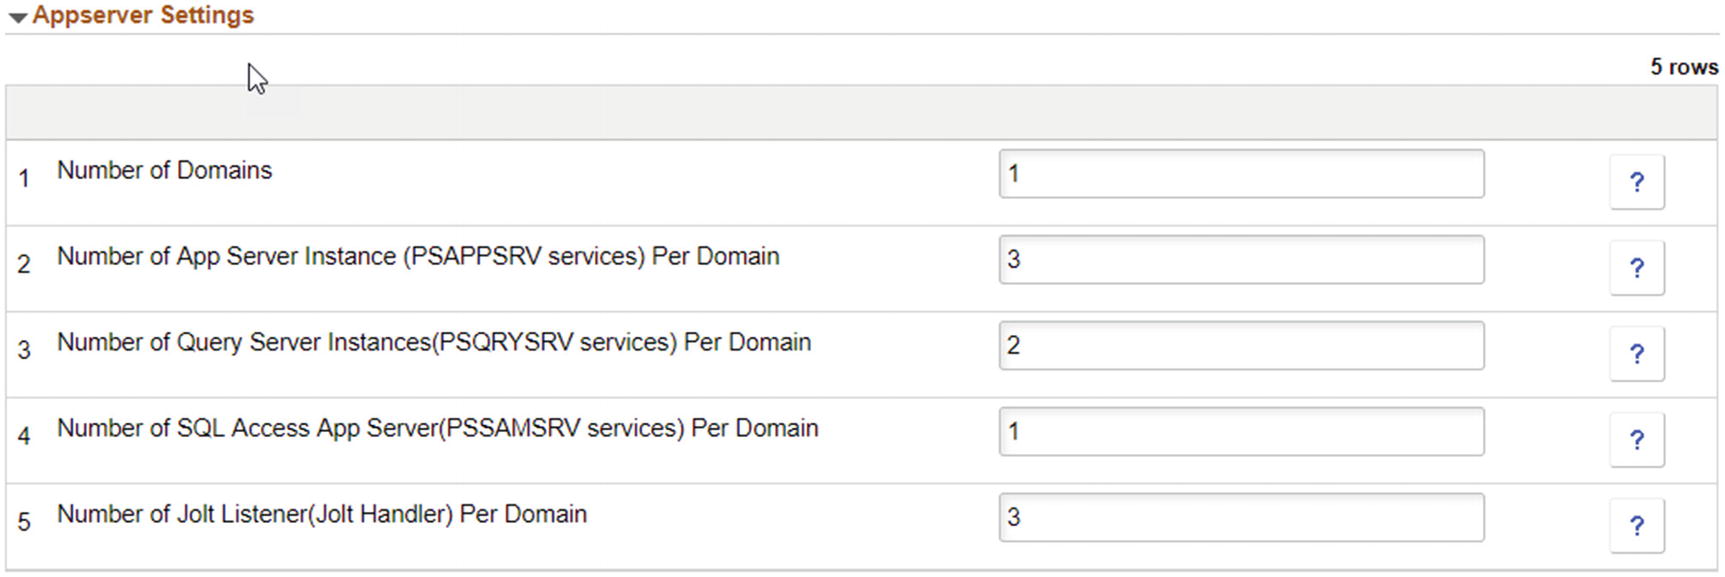
Middle Tier, Domain Settings, Appserver Settings
Number of Domains: This value sets the number of Process Scheduler Domains created. This value is set to 1.
Number of App Engine Server Instances (PSAESRV) Per Domain: This is the number of PSAAESRV Services, application engines, that are created. If your standards require a different number of application engine servers per domain than what is set, you can update this value to your appropriate number.
Number of App Engine Server Instances (PSDSTSRV) Per Domain: This value indicates the number of application servers required per domain.
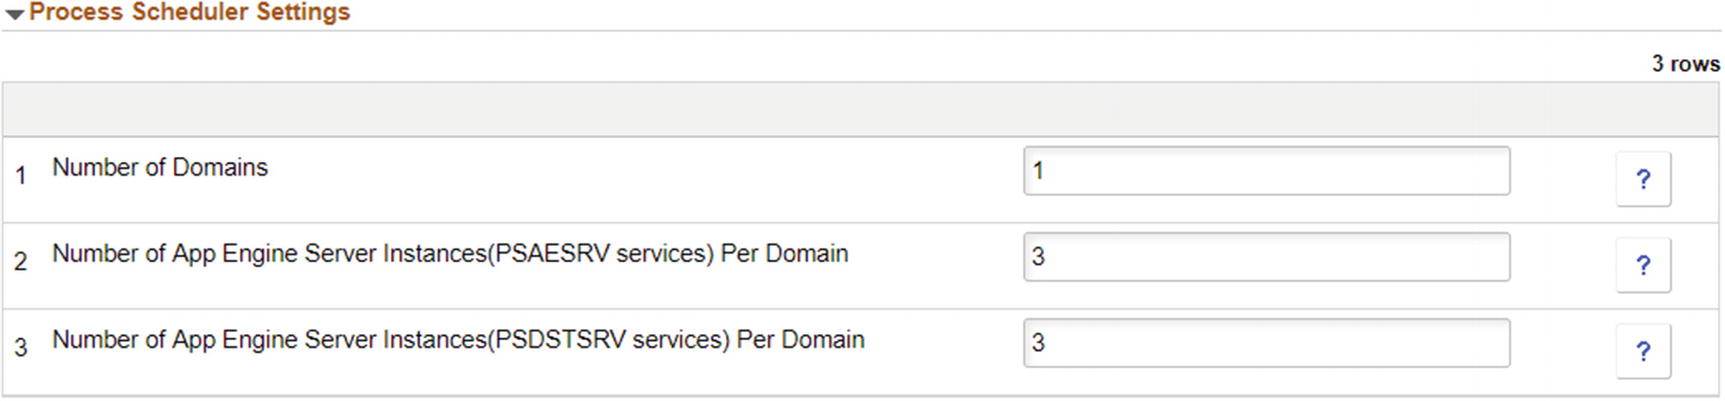
Middle Tier, Domain Settings, Process Scheduler Settings
Application Engine: This is the number of process scheduler jobs allowed.
XML Publisher: This value indicates the number of XML Publishers created.
COBOL SQL: Allows you to set the number of COBOL SQL process that can run.
Optimization Engine: Indicates the number of Optimization Engines on the Process Scheduler.
SQR Process: Sets the number of SQR Processes on the process scheduler.
SQR Report: Provides the process scheduler with the number of SQR reports.
Max API Aware: This parameter provides the process scheduler with the max number of API Aware services that can run concurrently on the server. An API Aware task is a process that can update its current status through a specific API.
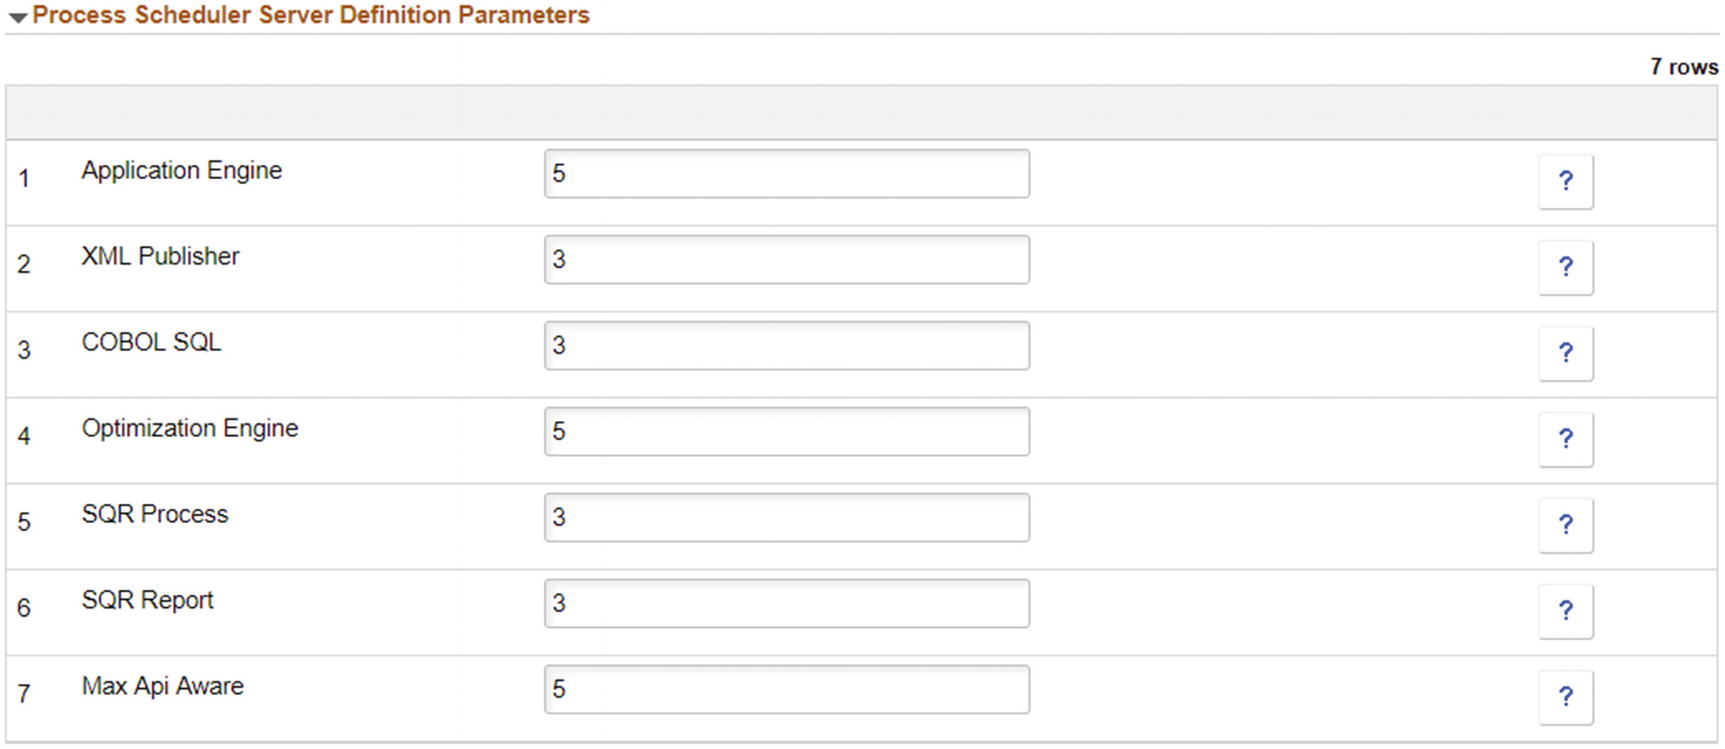
Middle Tier, Domain Settings, Process Scheduler Server Definition Parameters
Number of Domains: This provides the number of PIA web server domains. This value is set to 1.
Authentication Domain: If you have a custom authentication domain, you can enter that value here. The default value is .compute.oracle.com.

Middle Tier, Domain Settings, Web Server Settings
Advanced Settings

Middle Tier, Advanced Settings
Database Tier
The Database Tier Custom Attributes allows users to input custom database specific attributes per topology that are then used at environment creation to instantiate the Database Tier in the application stack.
General Settings
Enable EM Agent: This option allows you to either select NO (Disable) or YES (Enable) for the Enterprise Manager Agent for PeopleSoft. This option will default to NO.
Database Name: This allows you to enter a specific naming convention for the database being created in the Database Tier. Given that this is the development (small) topology for an ELM database, we will name the database created in this topology accordingly.
Database Operator ID: Default value is PS. If you require a different Database Operator ID, you can supply that value here.
Database Access ID: The default value is SYSADM.
Database Server Port: This indicates the port that the database server connects on. The default is port 1522.
Database Connect ID: The PeopleSoft Connect ID. Default value is people.
PeopleSoft Deployment Path: This is the path on the host for database deployment. Default path is /u01/app/oracle/product/.
Database Type: This is a drop-down which provides values that allow you to select the database type. In this case DEMO is default, while SYS is another provided database type option.
Enable Multi Language: Turn on (YES) or off (NO) Multi Language Support in the database.
Is Database Unicode: Select YES (Unicode) or NO (non-Unicode) for the database.

Database Tier, General Settings
Database as a Service (DBaaS)
While creating an environment template which includes DBaaS components, you have the option to customize various DBaaS attributes. These attributes can be used to allow PeopleSoft Cloud Manager to better create environments that more closely match your needs and business requirements as well as ensure database recovery and backup in case of failures. DBaaS options within PeopleSoft Cloud Manager allow for a truly production-ready and scalable database provisioning in the Oracle Cloud.
General Settings
Database Server Port: This indicates the port that the database server connects on. The default is port 1522.
Container Name: A container is a storage area in the Oracle Cloud Infrastructure that allows users to store and organize data. Here you can provide a container name to be used as the database is provisioned.
Character Set: This setting allows you to set the character set you would like for the database. The default database character set is AL32UTF8.
Database Connect ID: The PeopleSoft Connect ID. Default value is people.
Enable EM Agent: This option allows you to either select NO (Disable) or YES (Enable) for the Enterprise Manager Agent for PeopleSoft. This option will default to NO.
Database Name: This allows you to enter a specific naming convention for the database being created in the Database as a Service tier. For example, if you are setting up a production-ready environment template for ELM, you can choose to name the database being created accordingly.
National Character Set: The default value for this setting is UTF8. If you require a different National Character Set, such as UTFE, you can change that setting here.
Database Operator ID : Default value is PS. If you require a different Database Operator ID, you can supply that value here.
Database Access ID: The default value is SYSADM.
Database Type: This is a drop-down which provides values that allow you to select the database type. In this case DEMO is default while SYS is another provided database type option.
Enable Multi Language: Turn on (YES) or off (NO) Multi Language Support in the database.
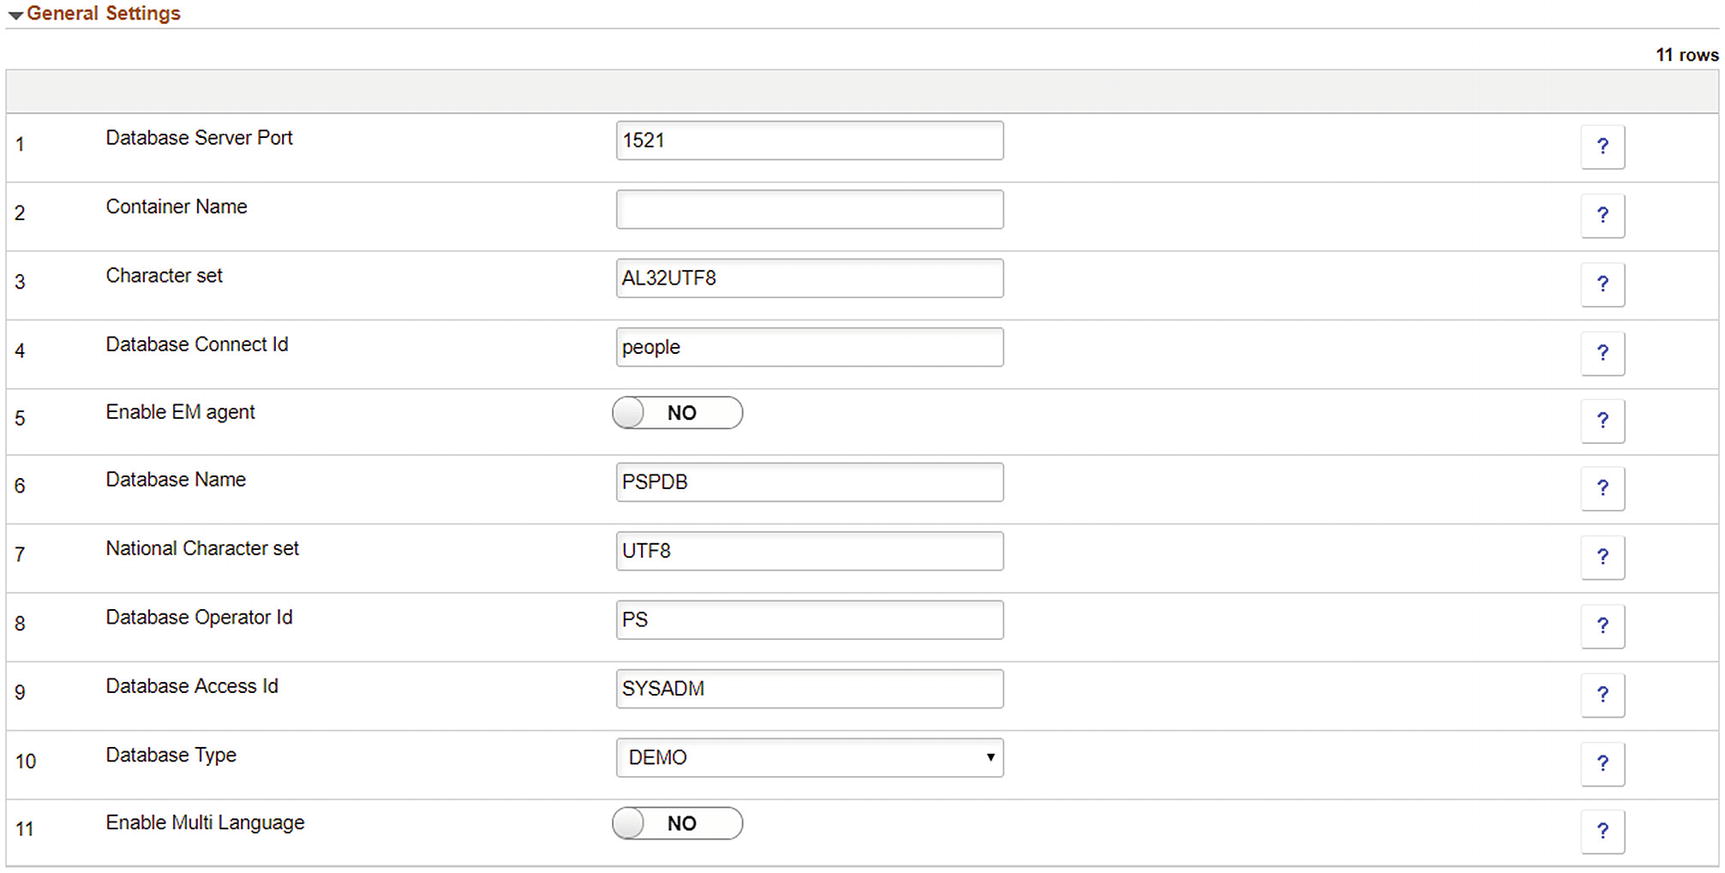
Database as a Service, Custom Attributes, General Settings
Advanced DBaaS Options
Service Level: This option is not user configurable and defaults to Oracle Database Cloud Service.
- Metering Frequency: This field is linked to the billing of your DBaaS service. The two options in the drop-down are Hourly or Monthly. Each option provides you with different a different billing scenario:
Hourly: This billing option provides you with a price based on the number of hours of the service used.
Monthly: This billing option provides you with one payment for the month independent of how many hours of service are consumed.
Software Release: Select which release of the Oracle Database you will be using with DBaaS. The options provided here are currently Oracle Database 12c Release 1 and Oracle Database 12c Release 2.
Database is RAC: Allows you to use Oracle Real Application Cluster (RAC) for the database by selecting YES or not by selecting NO.
Software Edition: Select the edition of the database software you will be using. The options provided are Enterprise Edition or Enterprise Edition – Extreme Performance. With these options, there are additional licensing constraints that will need to be addressed.
Backup Destination: Provide what type of database backup option will be used. The options provided are Both Cloud and Local Storage or No Backup.
Backup Container Name: If you select the Both Cloud and Local Storage option in the Backup Destination field, you will need to provide a container name for the cloud backup. If you select No Backup, you will not be able to provide a value in this field.
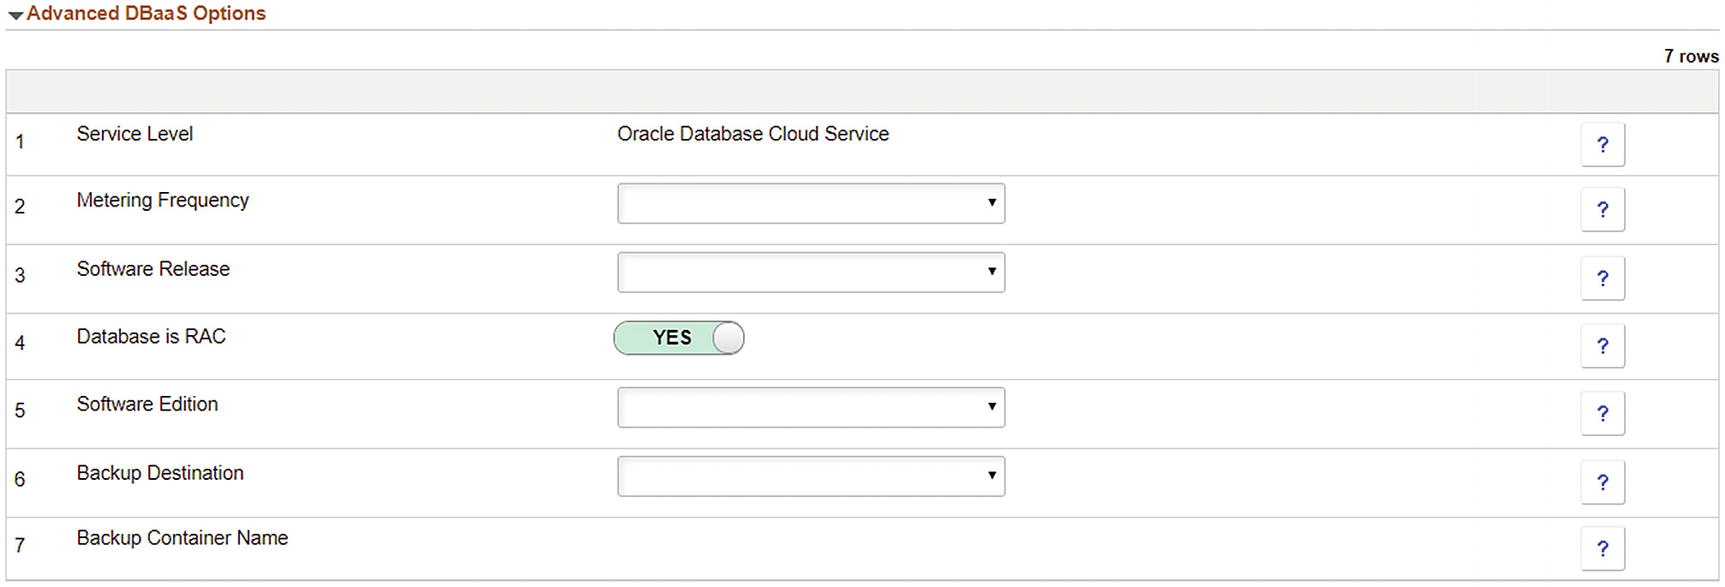
Database as a Service, Custom Attributes, Advanced DBaaS Options
Step 3 – Define Security
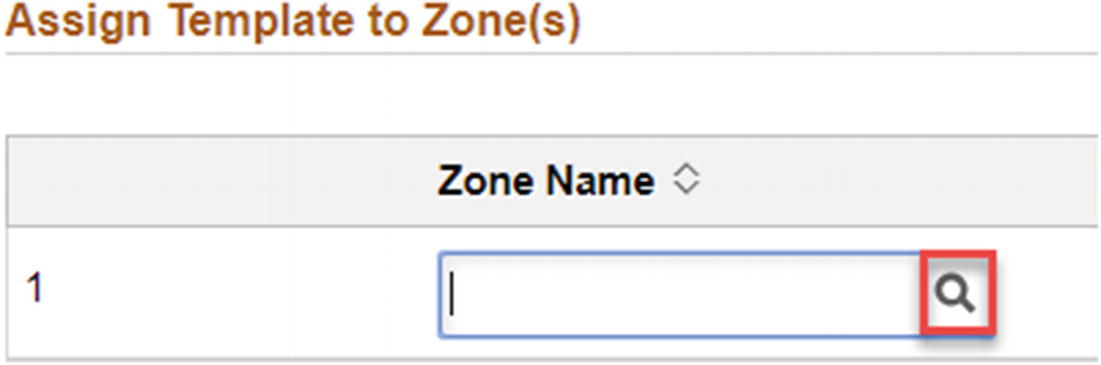
Zone Name Selection
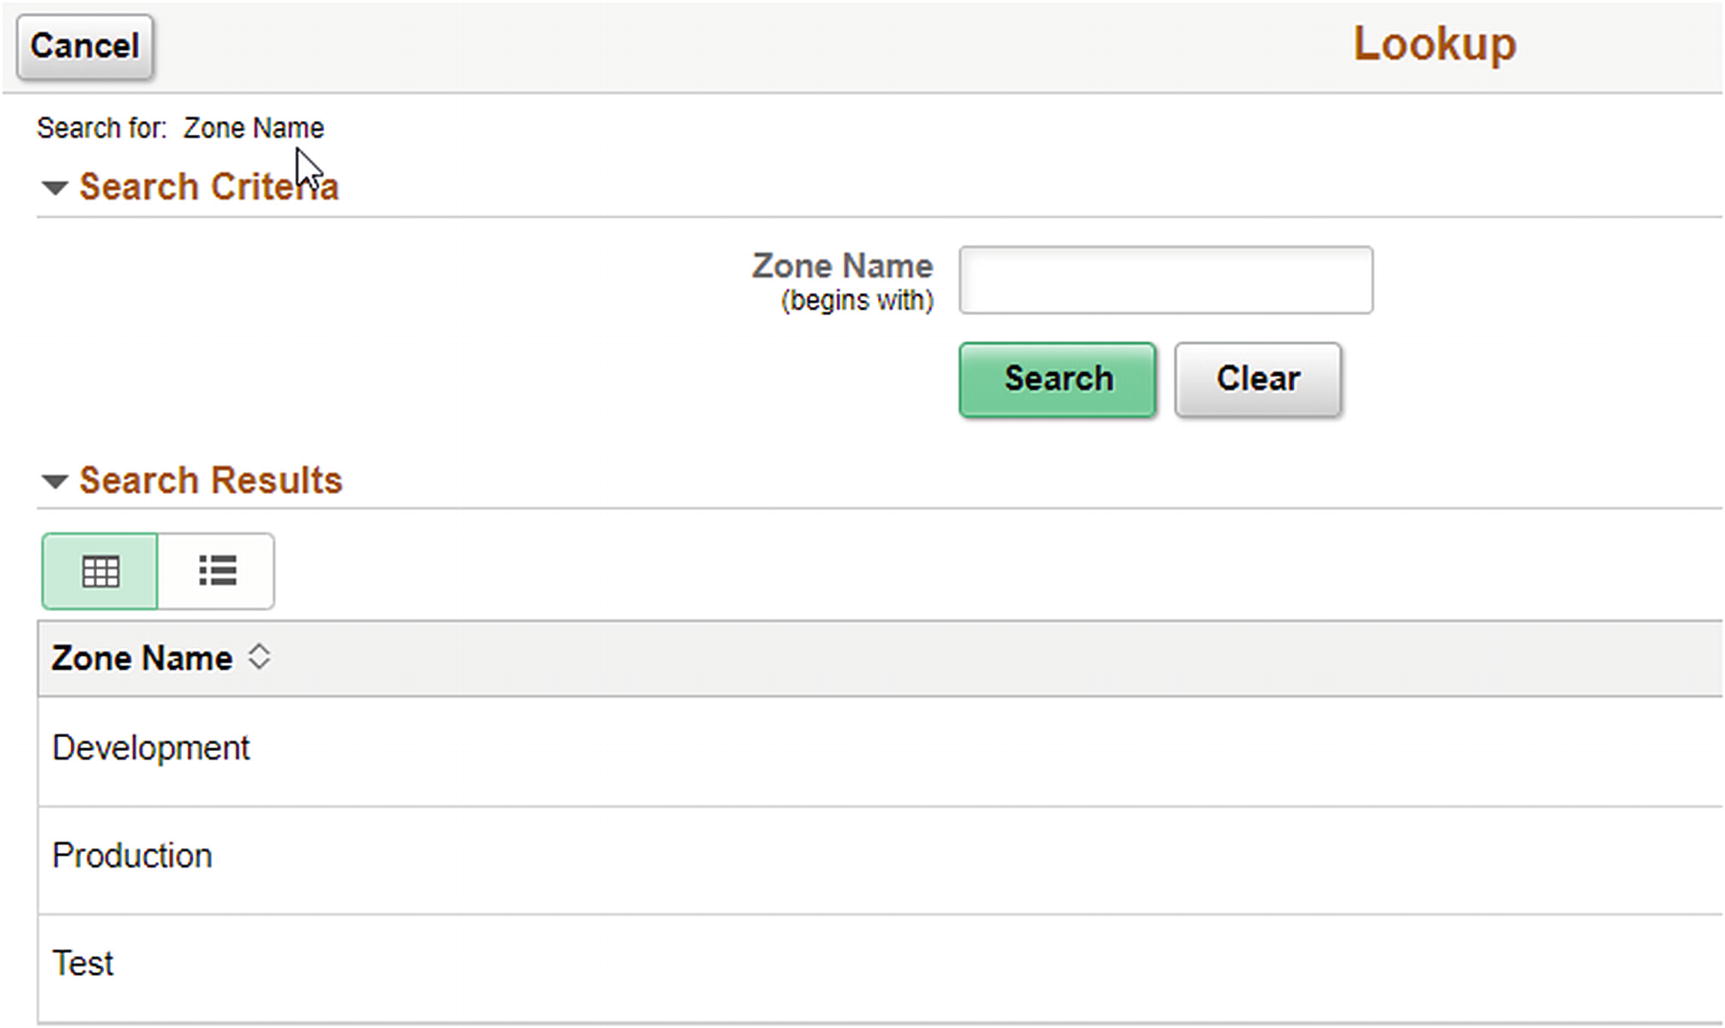
Zone Lookup
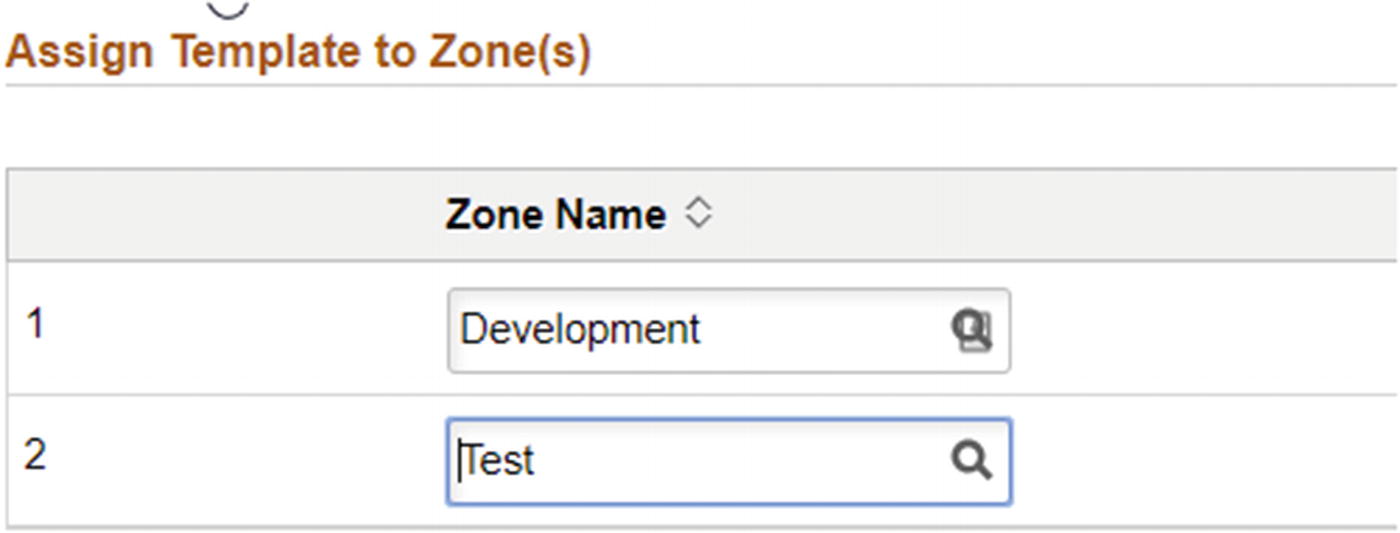
Zone Assignment
Now that the zones have been selected, the next step in the process to complete is to select which roles are going to have access to this template once it is created. There may be instances where you only want administrators to have access to a template for provisioning a production environment, but other instances where you want to grant users the ability spin up an instance without any assistance. The three-key PeopleSoft Cloud Manager delivered roles and associated permission lists are covered next.
Cloud Manager Delivered Roles and Permission Lists
Cloud Administrator (PACL_CAD): The Cloud Administrator role allows users the ability to download and initiate the Cloud Manager Image from the Oracle Cloud Marketplace, can set up and configure the Cloud Manager instance in Compute Classic, and has full access to set up the repository to auto-download content from MOS. Additionally, the Cloud Administrator has full access to every tile in Cloud Manager, can add the Cloud PeopleSoft Administrator and Self-Service User role to other users, and can manage all created environments. This is the most powerful role in PeopleSoft Cloud Manager and should be granted only where necessary and appropriate.

Cloud Administrator Role
Cloud PeopleSoft Administrator (PACL_PAD): Users assigned the Cloud PeopleSoft Administrator Role can create deployment templates based on downloaded PeopleSoft images or other environments in Compute Classic. This user has access to the Topology, Environment Template, Environments, and My Settings tiles from the PeopleSoft Cloud Manager home page and can also manage all created environments.
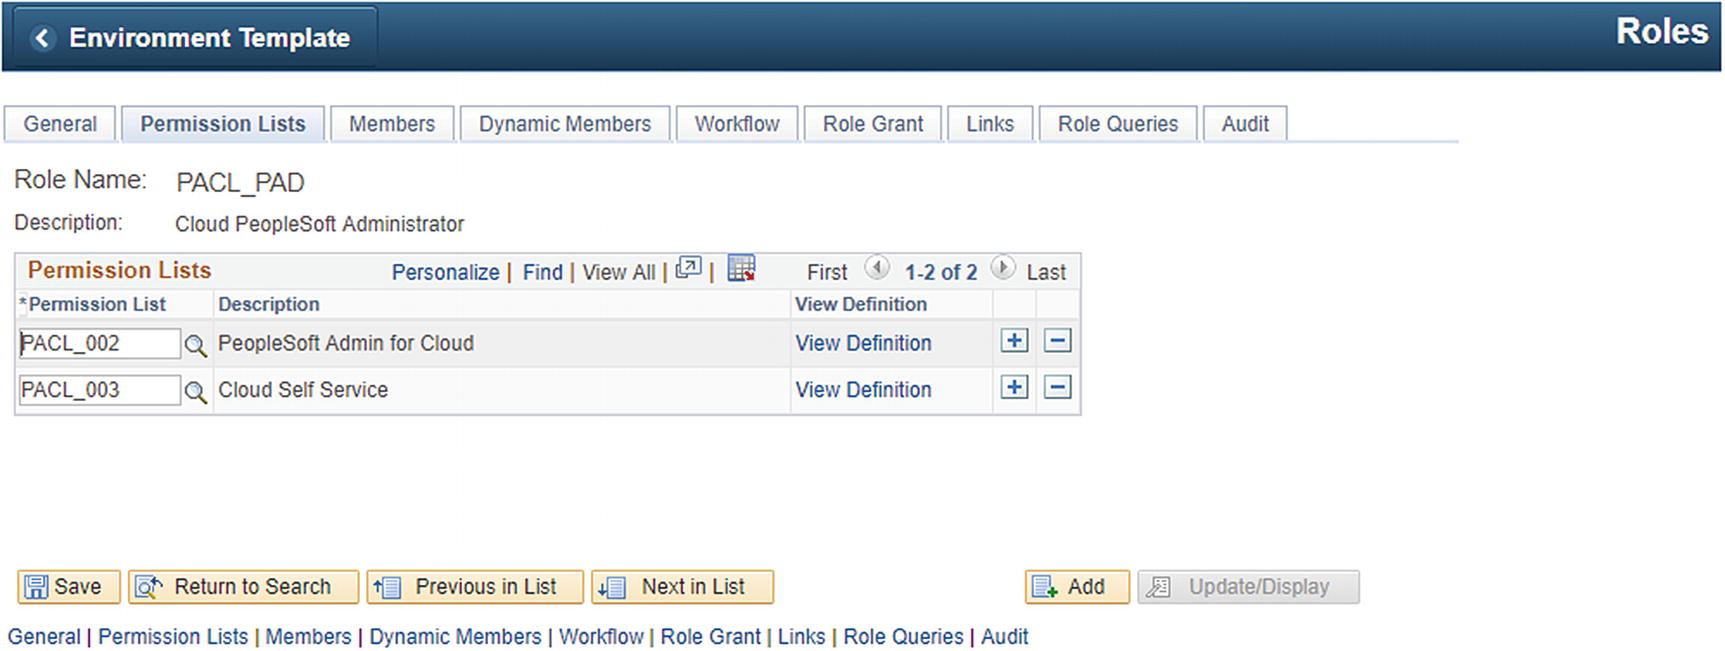
Cloud PeopleSoft Administrator Role
Self-Service User (PACL_SSC) : The main purpose of granting this role is to allow users the ability to create Compute Classic instances from templates that are available to them. They can also stop, start, and delete those instances that they have created. These users will only see the Environments and My Settings tiles on the PeopleSoft Cloud Manager home page.
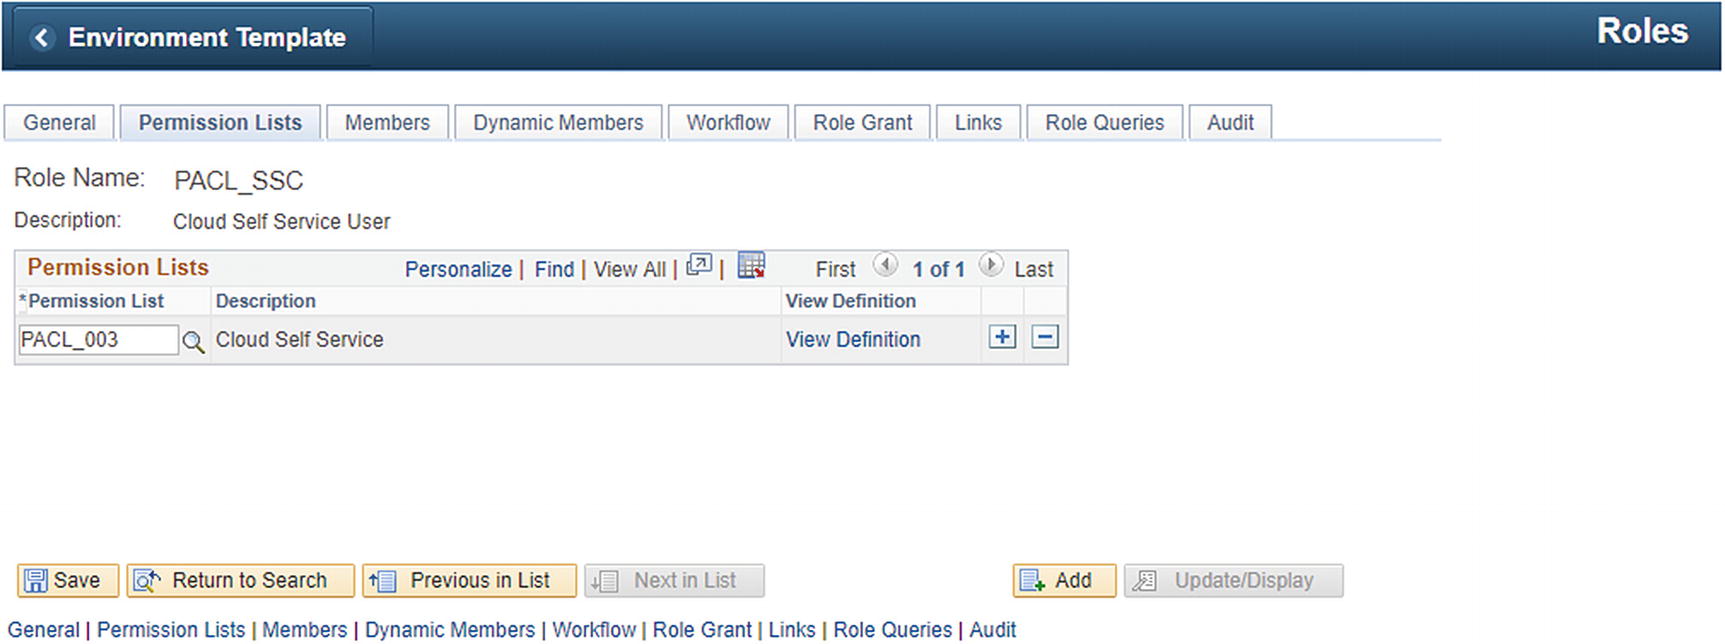
Self-Service User Role
Assigning Environment Template Security

Role search for PACL roles
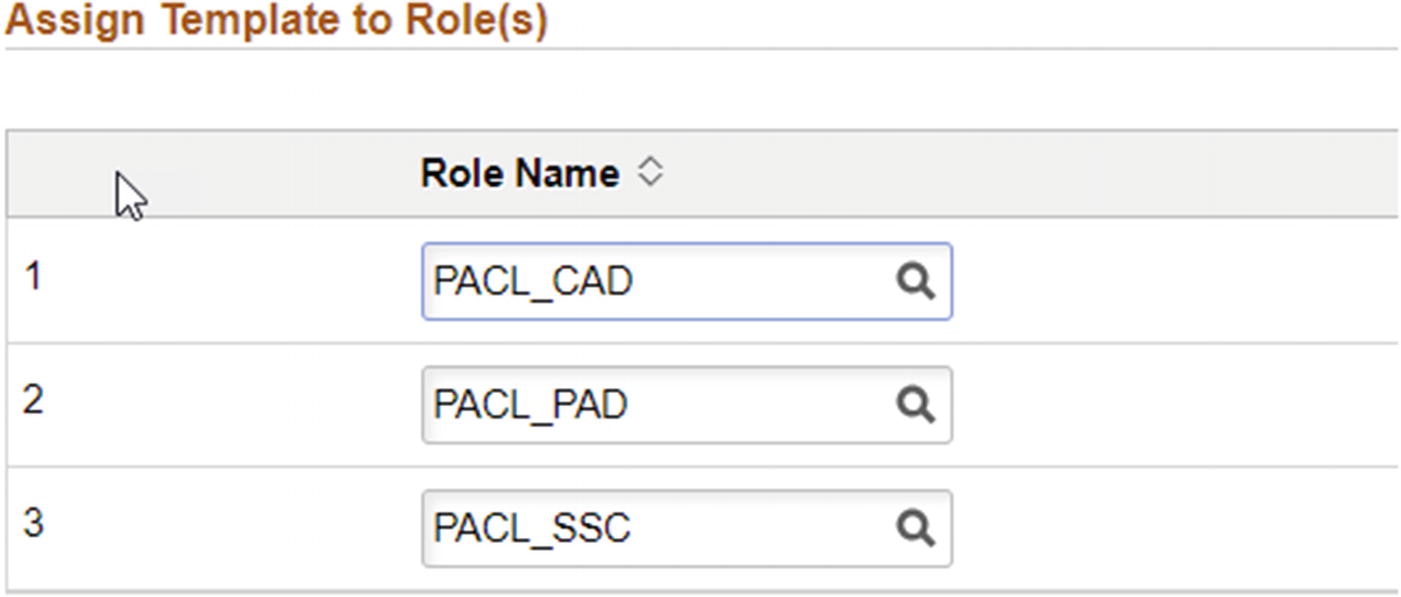
Assigned Cloud Roles
Once all three roles are added to the template, click the Next button at the top of the page to move to the Summary step.
Step 4 – Review and Submit Template
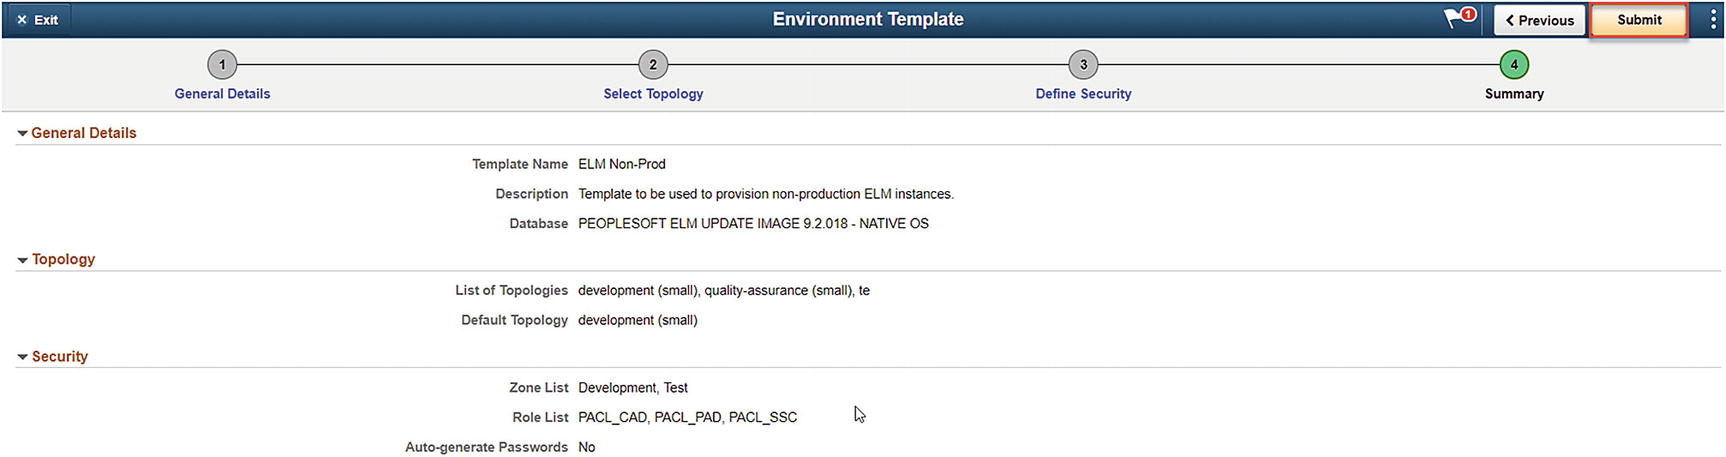
Summary, Step 4

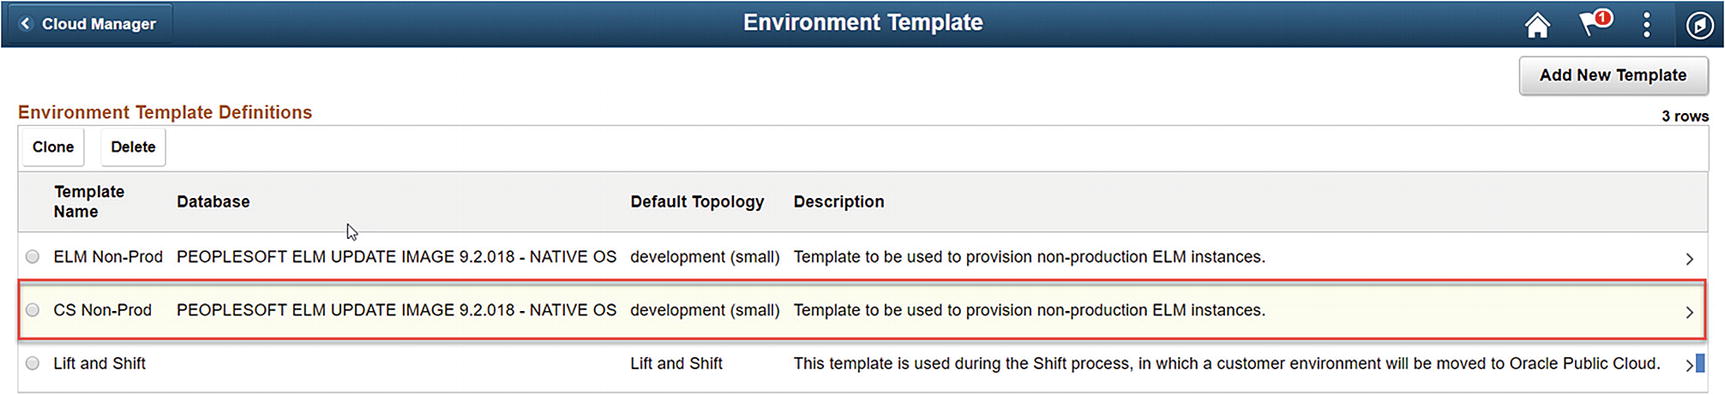
Newly created Environment Template
Edit an Existing Template
Editing an Environment Template
Using the next button at the top of the page, complete or edit the details on each step, review the summary page, and then click submit to save your changes to the environment template.
Clone an Existing Template

Clone radio option button selection
Cloned template
Delete an Existing Template
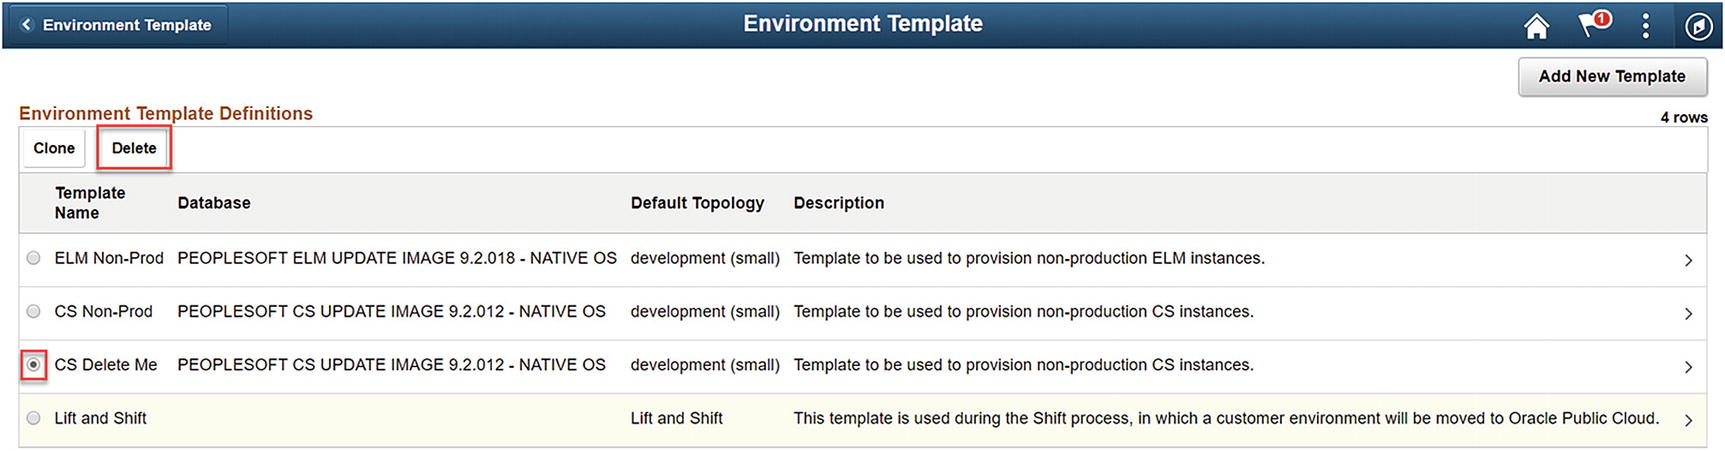
Template to be deleted

Delete template confirmation button