With the advent of PeopleSoft 9.2 and, more specifically, the delivery of new features, bug fixes, and other updates via PeopleSoft Images and PeopleSoft Update Manager, the concept of selective adoption has grown popular in the PeopleSoft community. Selective adoption and the use of PeopleSoft Update Manager allow you to define your own update strategy that works for you and your business. This process allows you to decide what updates you want and when you want to apply them. Given that updates are coming more frequently, it is important to both have a strategy to get the new features you want and allow for the maintenance and support that must happen to keep your PeopleSoft system secure and up to date.
PeopleSoft Cloud Manager can help streamline this process and provides a few key tools that help you deliver on the strategy you defined. First, PeopleSoft Cloud Manager allows for automatic downloads of the newest PeopleSoft Image, getting you the most current functionality with the least amount of effort. Second, using a PUM (PeopleSoft Update Manager) FullTier topology, PeopleSoft Cloud Manager allows you to quickly and easily deploy these new PeopleSoft Images to the Oracle Cloud Infrastructure; test the new functionality and see for yourself how it may benefit your business. Finally, PeopleSoft Cloud Manager also deploys a Windows virtual machine that includes Change Assistant to help you further manage the application of updates, functionality, and fixes to your PeopleSoft Environment.
This chapter will focus on the process of enabling selective adoption in PeopleSoft Cloud Manager. You will learn how to properly provision a PUM image in PeopleSoft Cloud Manager, how to add a target environment to that image, and then how to use that image to apply updates to your target environment. Utilizing this process will help you ensure that you can keep you PeopleSoft environment up to date, functional, and secure with as little downtime as possible.
Provisioning a PUM Image in the Cloud
- 1.If this is a brand-new application that you have not yet downloaded to the repository, start by navigating to the Repository tile on the PeopleSoft Cloud Manager home page and clicking it. The Repository tile is highlighted in Figure 10-1.
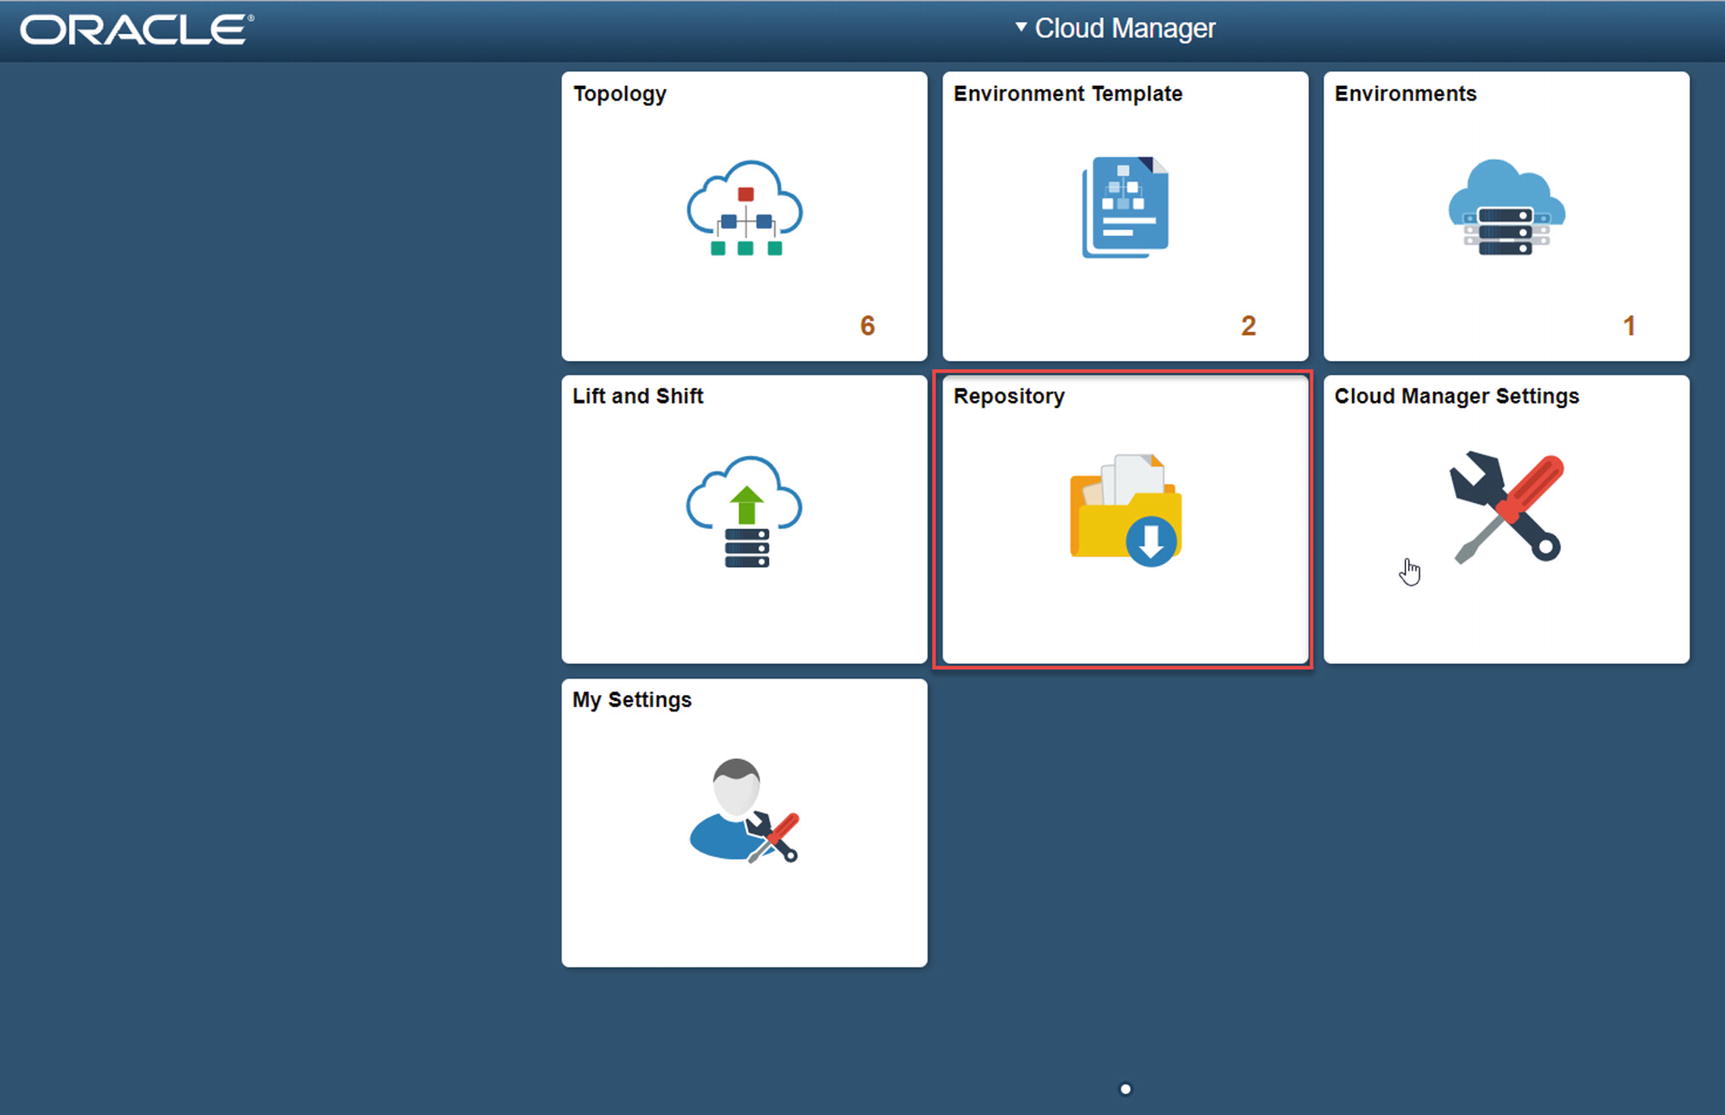 Figure 10-1
PeopleSoft Cloud Manager Repository tile
- 2.Once you are in the repository, click the Download Subscriptions menu option on the left-hand navigation as shown in Figure 10-2.
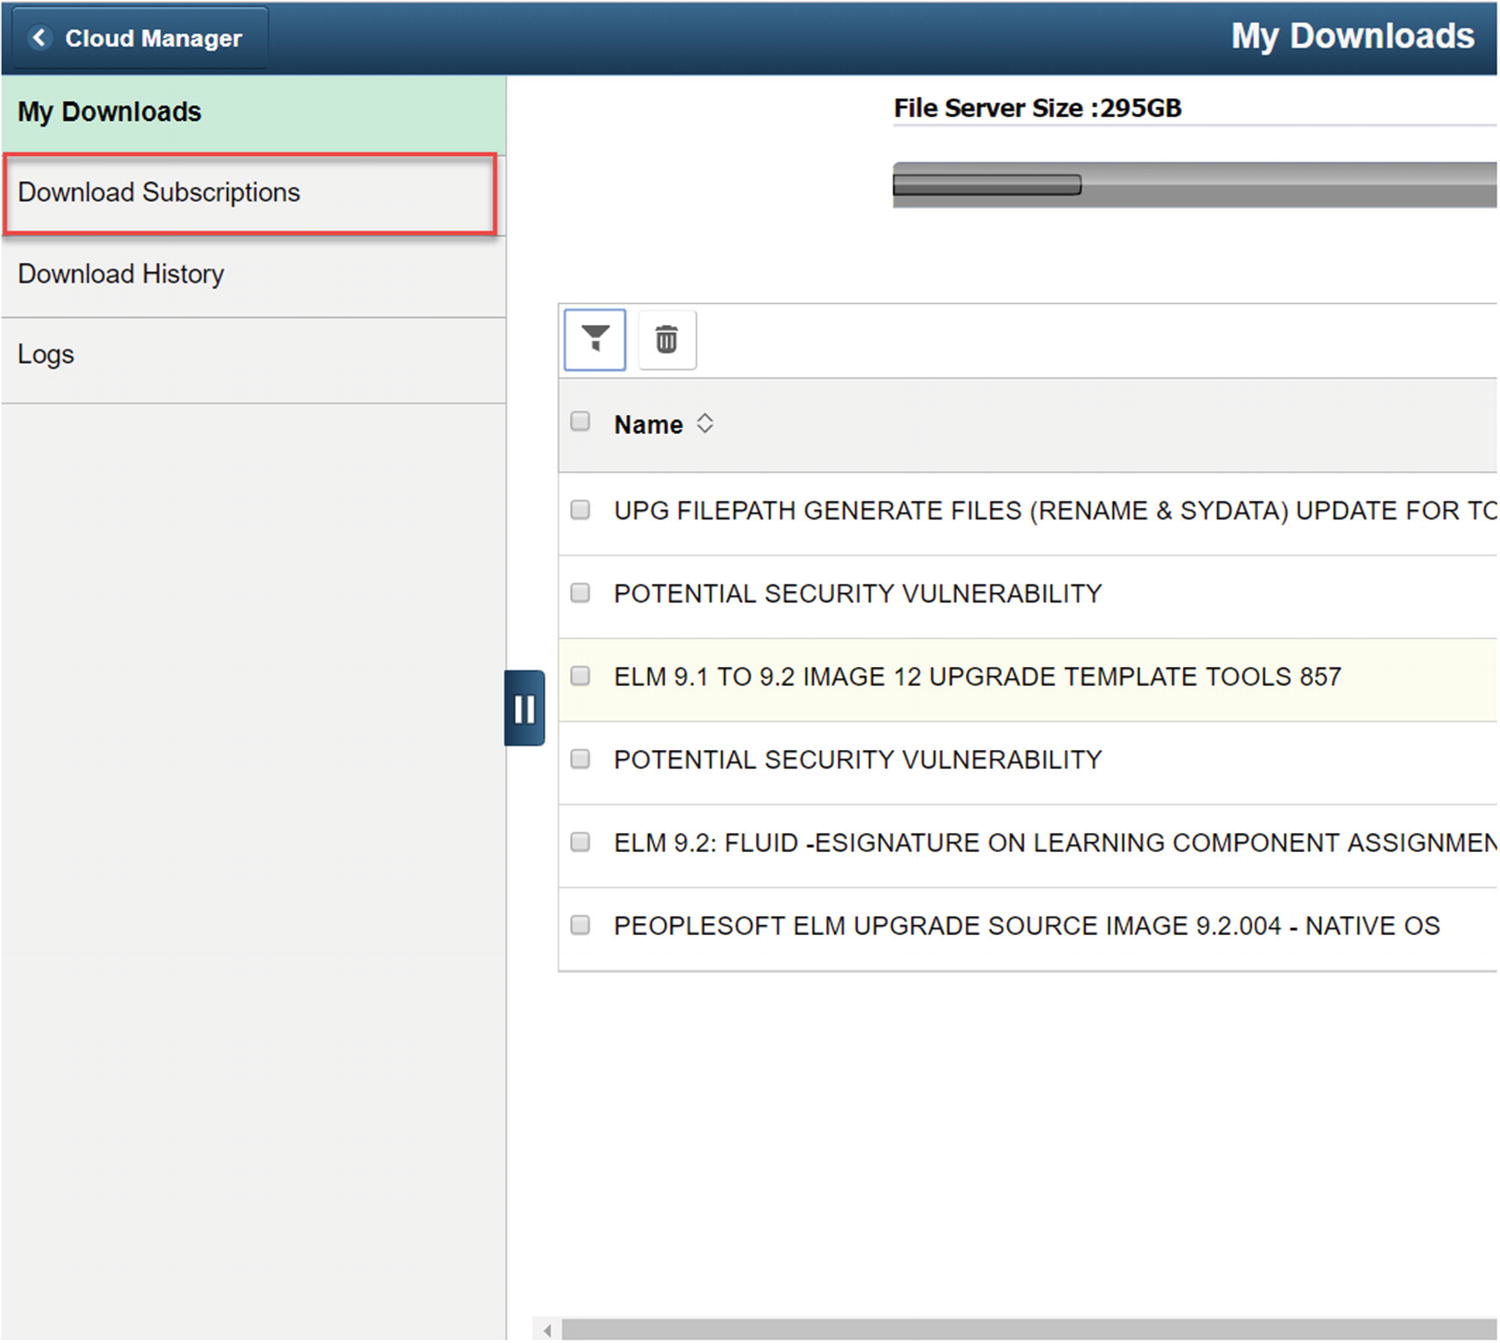 Figure 10-2
Download Subscription navigation option
- 3.From the Download Subscriptions page, click the Unsubscribed button at the top of the page. This will take you to a list of all the images you are not subscribed to. This button is highlighted in Figure 10-3.
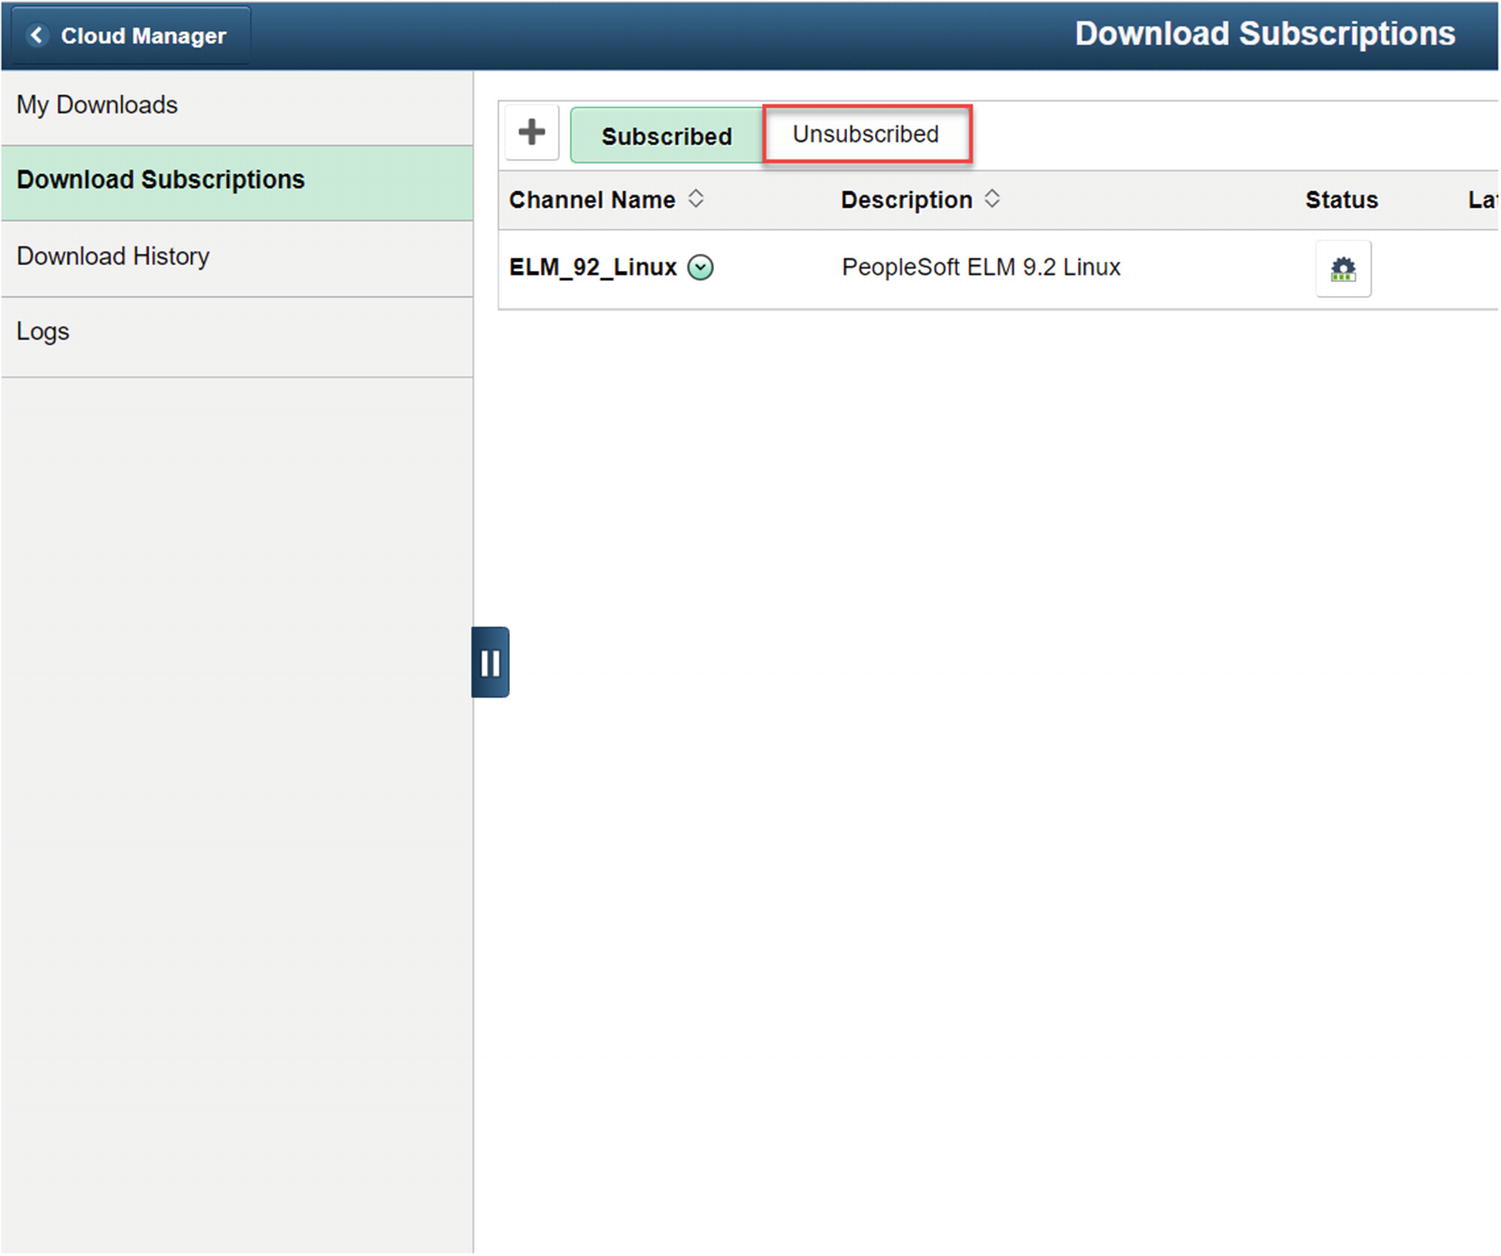 Figure 10-3
Unsubscribed PeopleSoft Images menu option
- 4.
Find the PeopleSoft Image (Channel) you want to subscribe to from the list of options.
- 5.Click the small circular arrow to the right of the channel name, and select Subscribe from the drop-down list as indicated in Figure 10-4.
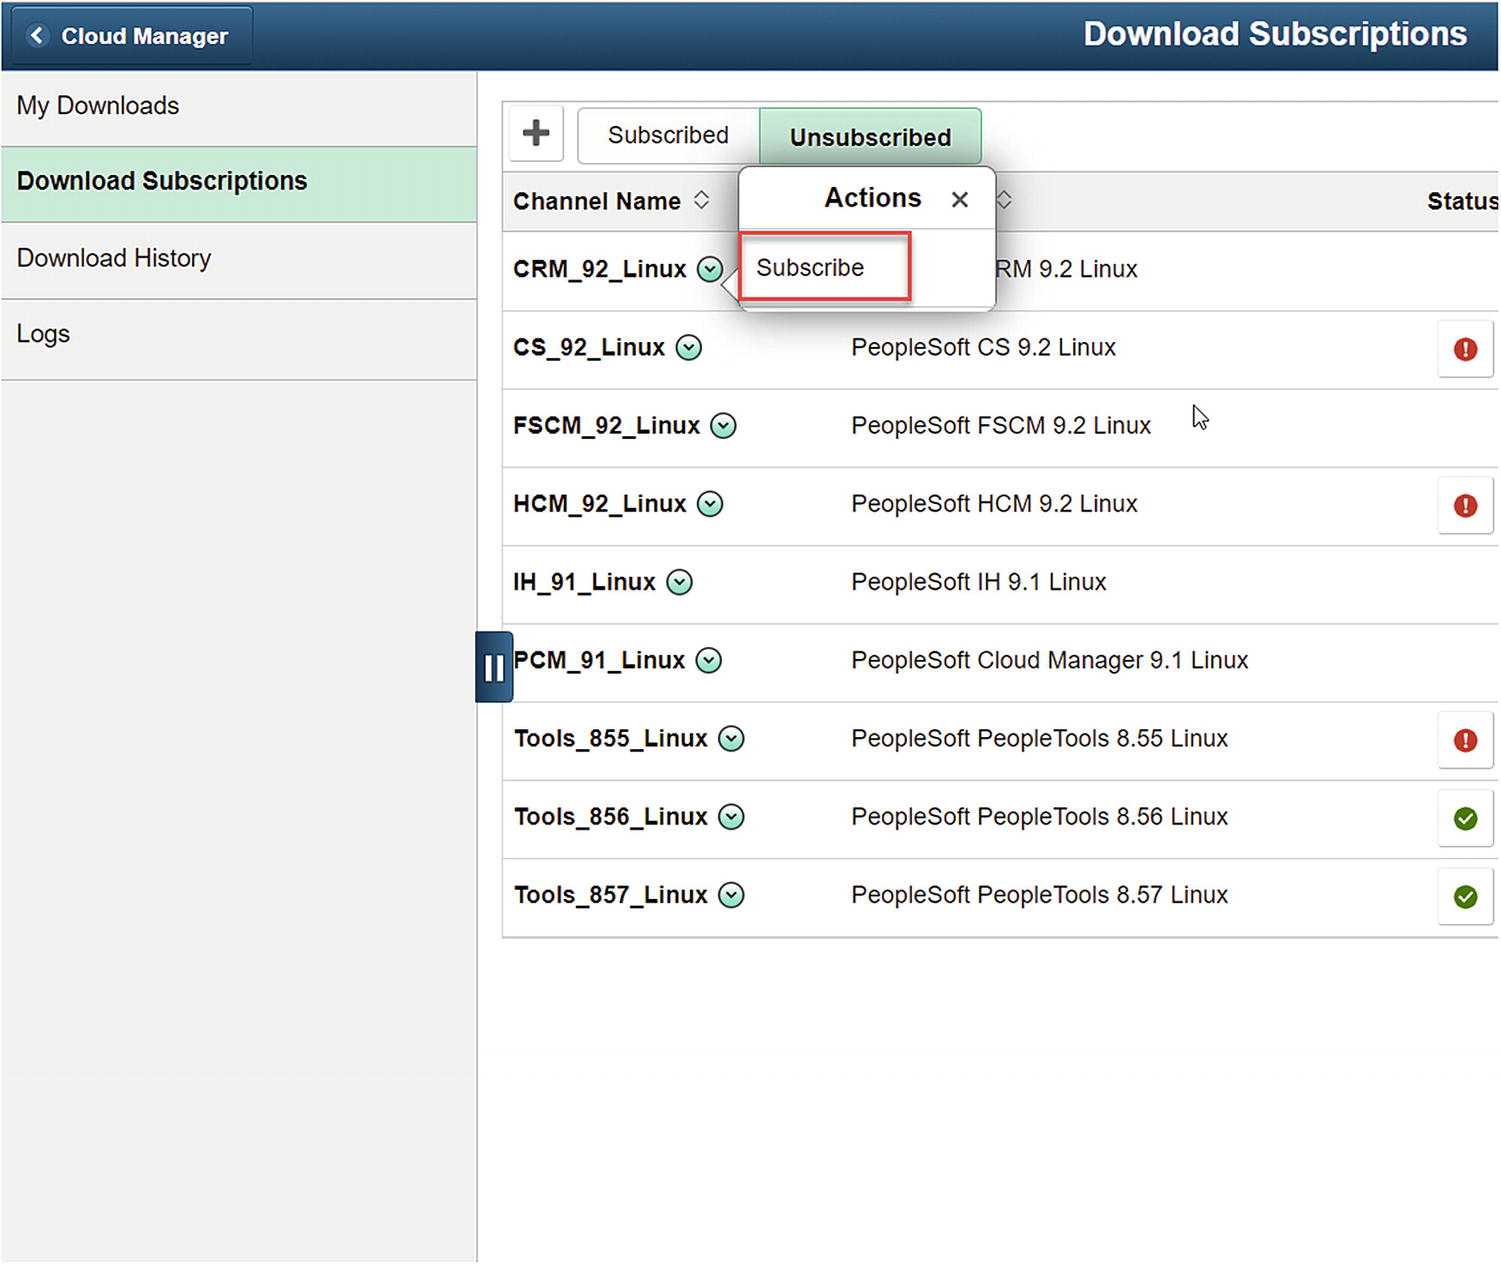 Figure 10-4
Subscribing to a PeopleSoft Channel on the Download Subscriptions page
- 6.
Once this is complete, the image download will begin. This will take some time to complete.
Monitoring the PUM Download
- 1.From the PeopleSoft Cloud Manager Repository page, click the Download History menu option in the left-hand navigation as highlighted in Figure 10-5.
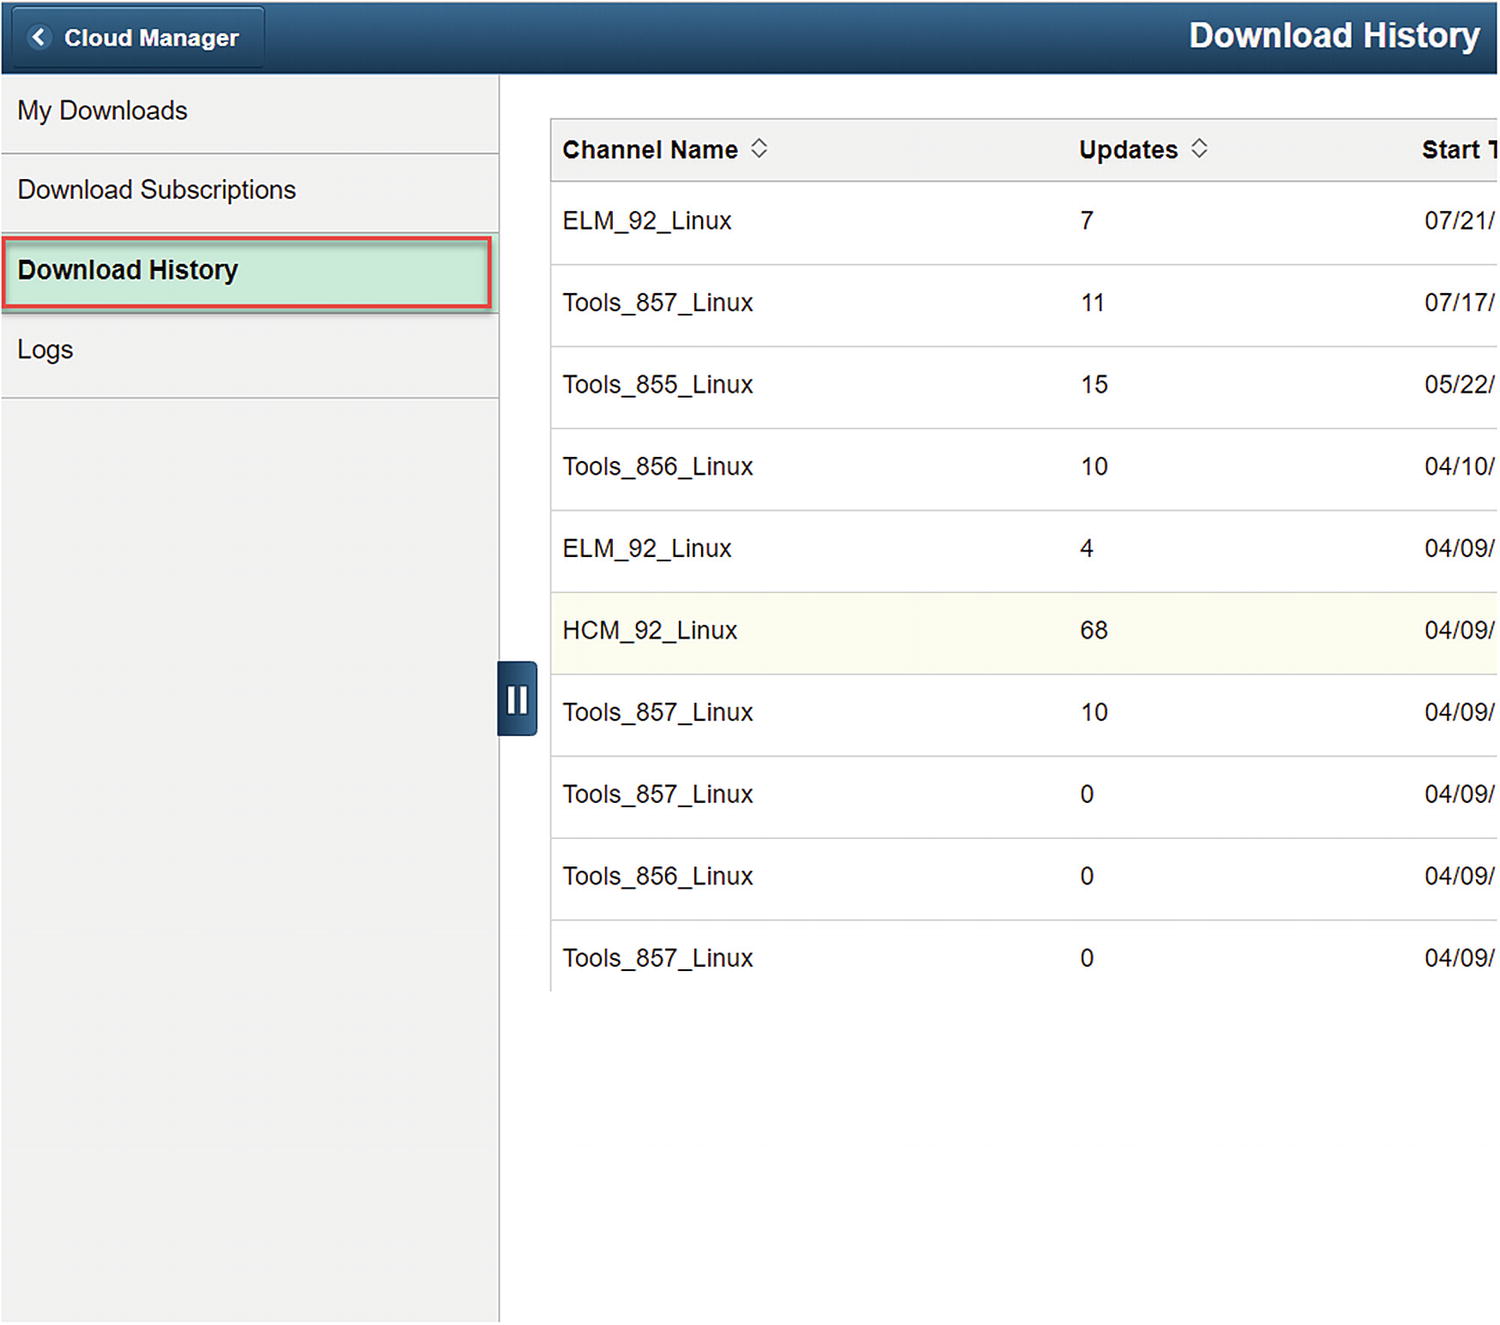 Figure 10-5
Download History page
- 2.From the Download History page, find the channel name you are interested in seeing the progress for, and click the arrow button on the right-hand side of the row. This small arrow is noted in Figure 10-6.
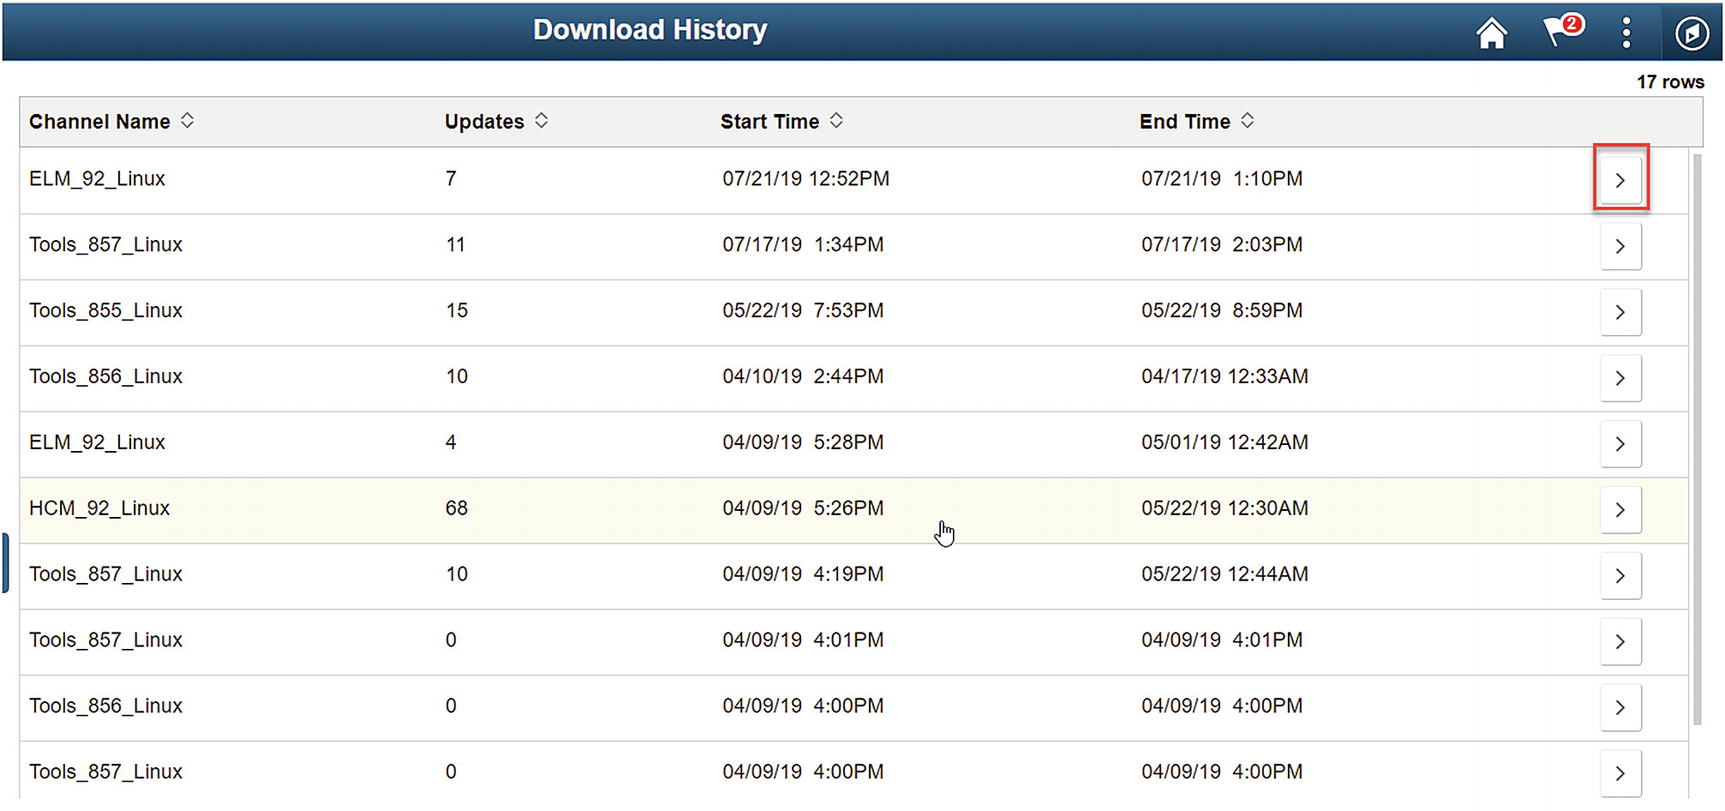 Figure 10-6
Download History Detail button
- 3.This will provide a list of all the objects that are either downloaded, in progress, or not yet downloaded for the channel selected. The various download status’ are highlighted in Figure 10-7.
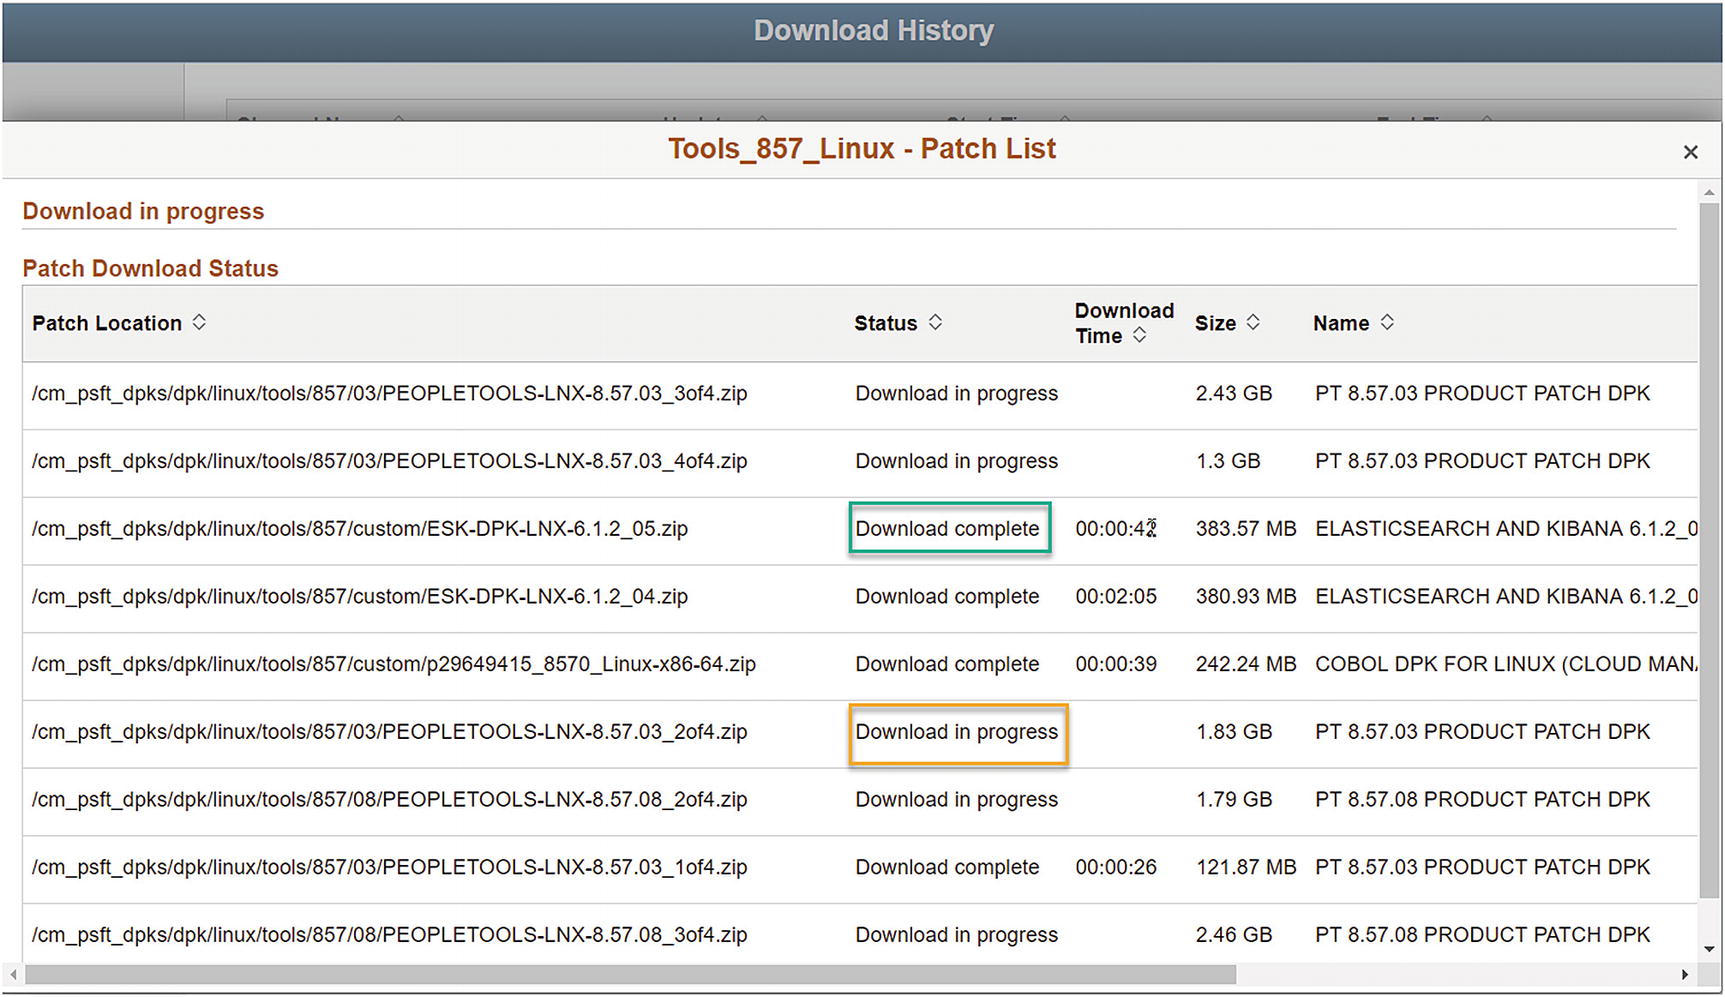 Figure 10-7
Download History patch download status
- 4.This view will also show you if downloads have failed and will also show the reason for the failure. A failed download can be seen in Figure 10-8.
 Figure 10-8
Download failure
- 5.Once your download is complete, the Patch Download Status will show sync complete, indicated in Figure 10-9, and all objects that have downloaded to your PeopleSoft Cloud Manager.
 Figure 10-9
Download complete in Download History

Download status complete in Downloaded Subscription views
Creating a PUM Environment Template
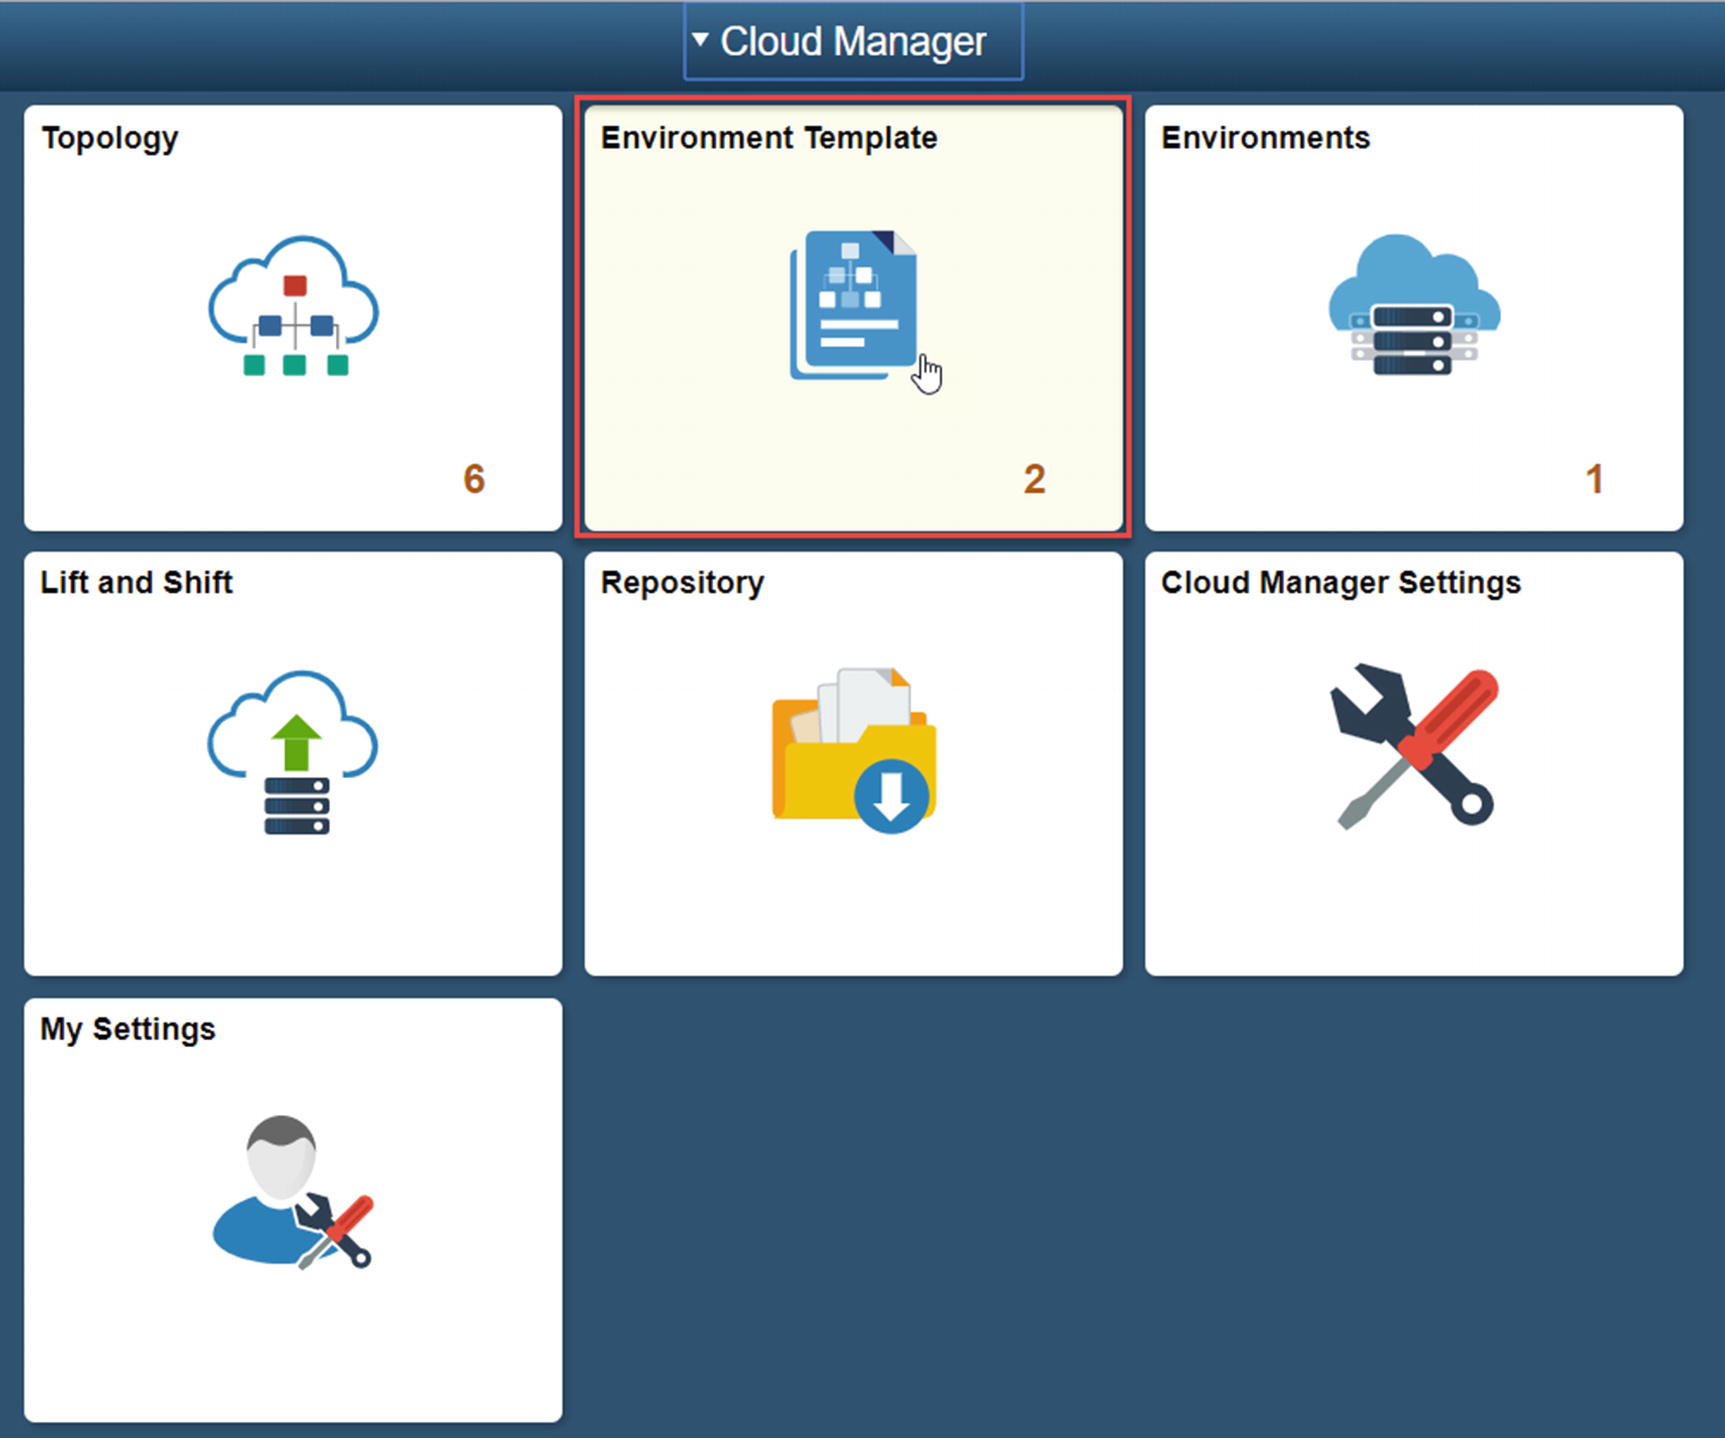
Environment Template tile
- 1.Create a new Environment Template by clicking the Add New Template button in the top right-hand corner of the Environment Template home page (Figure 10-12).
 Figure 10-12
Add New Template button
- 2.
Give the template a name, in this example ELM PUM, and a description, ELM PUM Image.
- 3.
Select the PUM image you want to create from the list of databases in the Select Database dialogue.
- 4.Click the Next button in the top right-hand corner of the page (Figure 10-13).
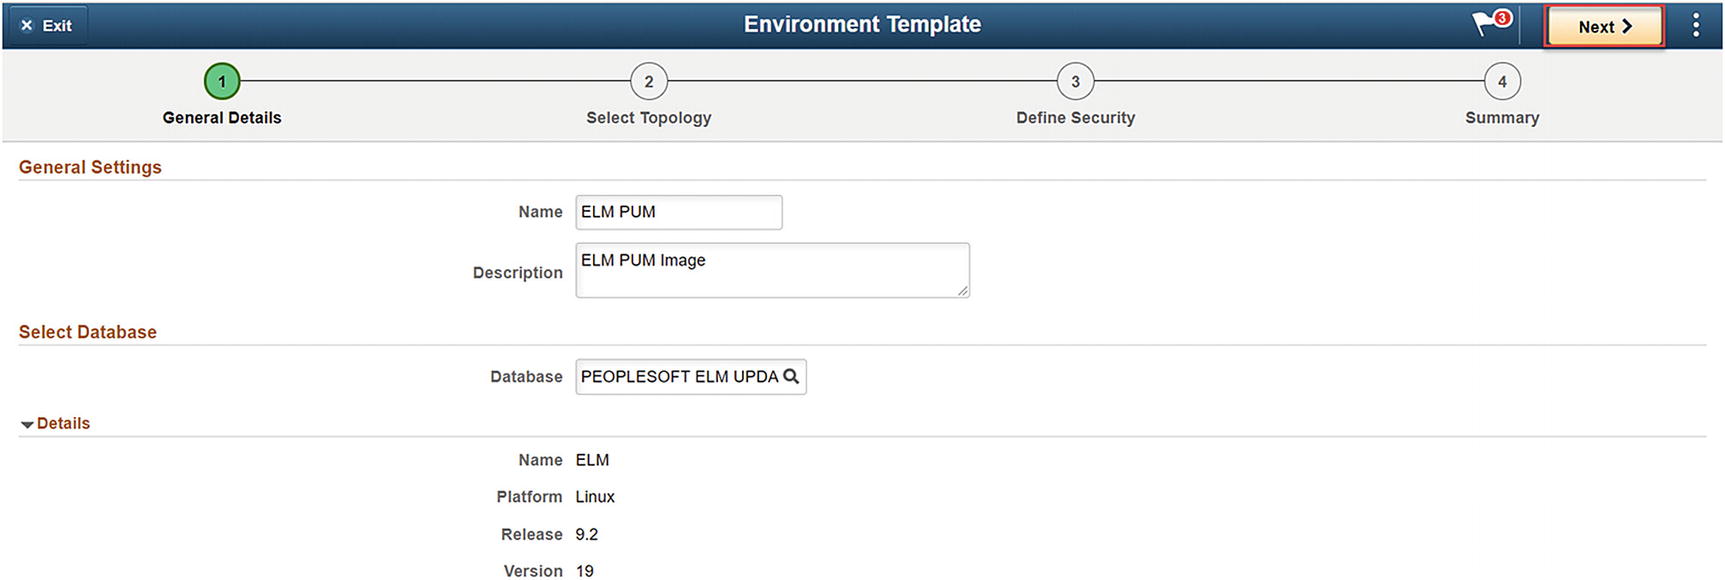 Figure 10-13
Environment Template General Details
- 5.Select the delivered PUM Fulltier topology on the Select Topology page, and click the Next button in the top right-hand corner of the page (Figure 10-14).
 Figure 10-14
PUM Fulltier Topology
- 6.On the Define Security step, select the Development Zone, and add any necessary security roles for the PUM Image. In this case the Cloud Manager Admin role is enough. Click Next in the upper right-hand corner as highlighted in Figure 10-15.
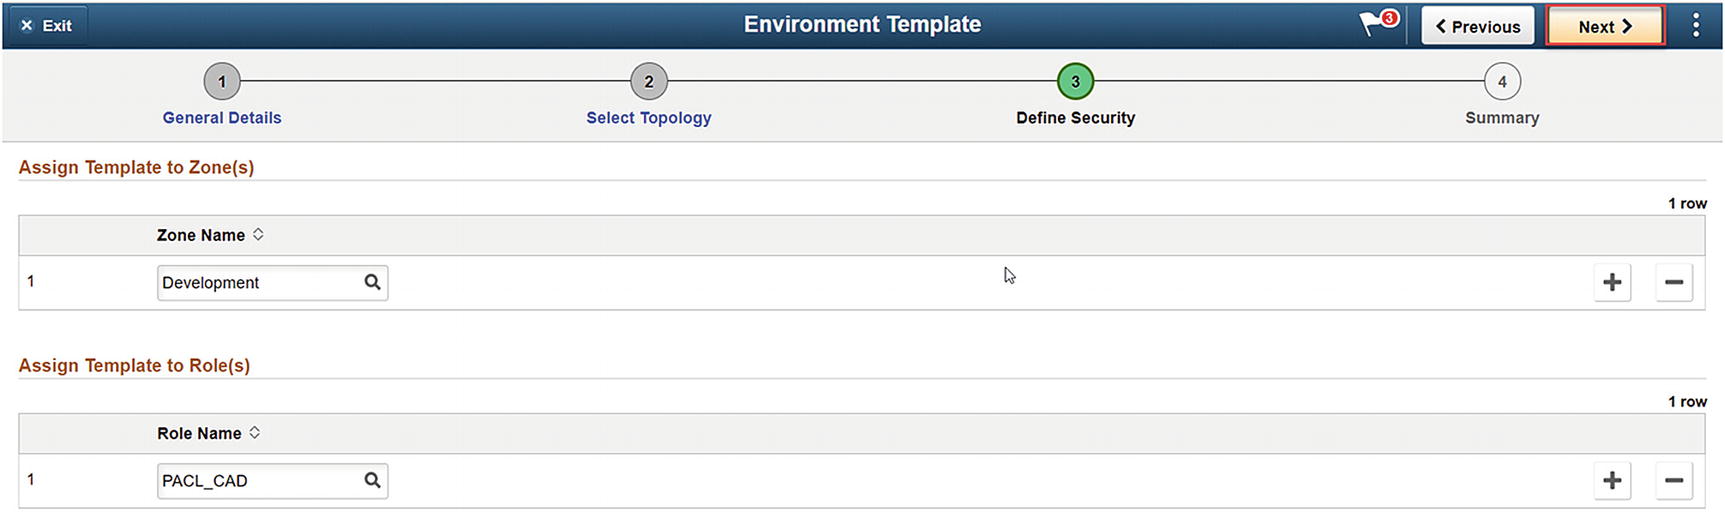 Figure 10-15
Define Security step in the Environment template
- 7.Review the details on the Summary page and, if you are happy with the results, click the Submit button in the upper right-hand corner of the page. The Summary page and the Submit button are shown in Figure 10-16.
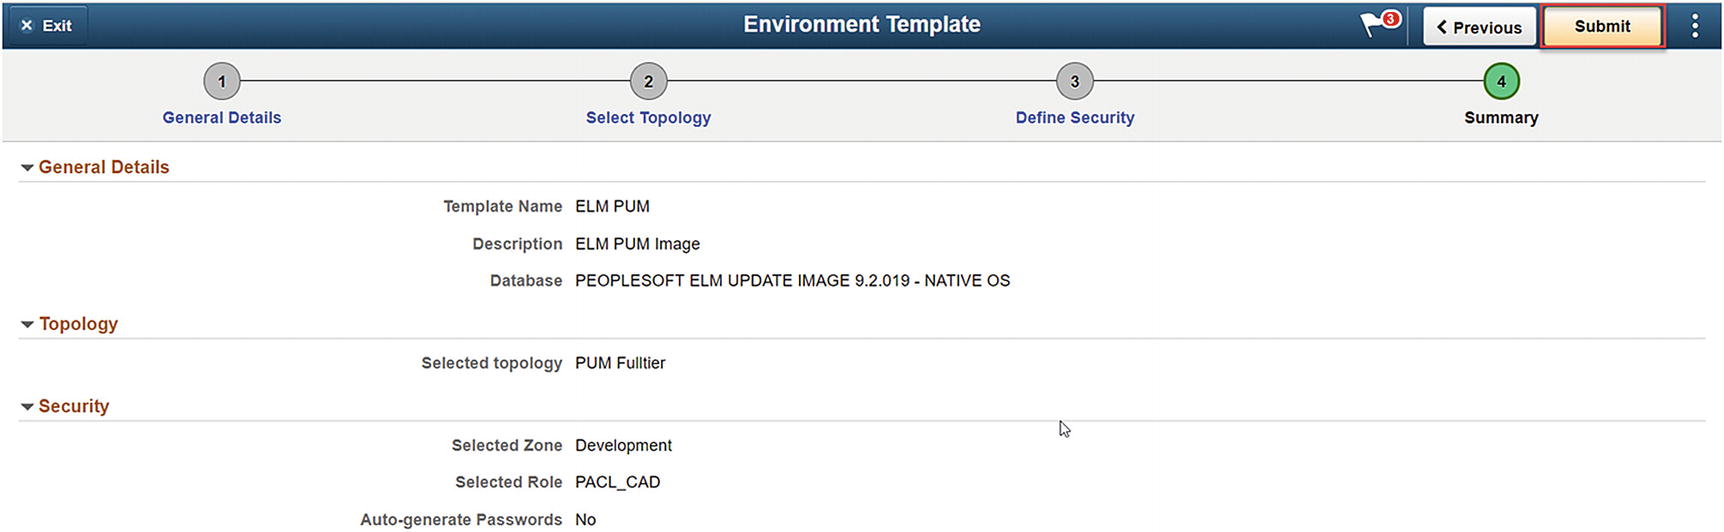 Figure 10-16
Environment Template Summary page
- 8.
Your PUM Template is complete.
Creating a PUM Environment
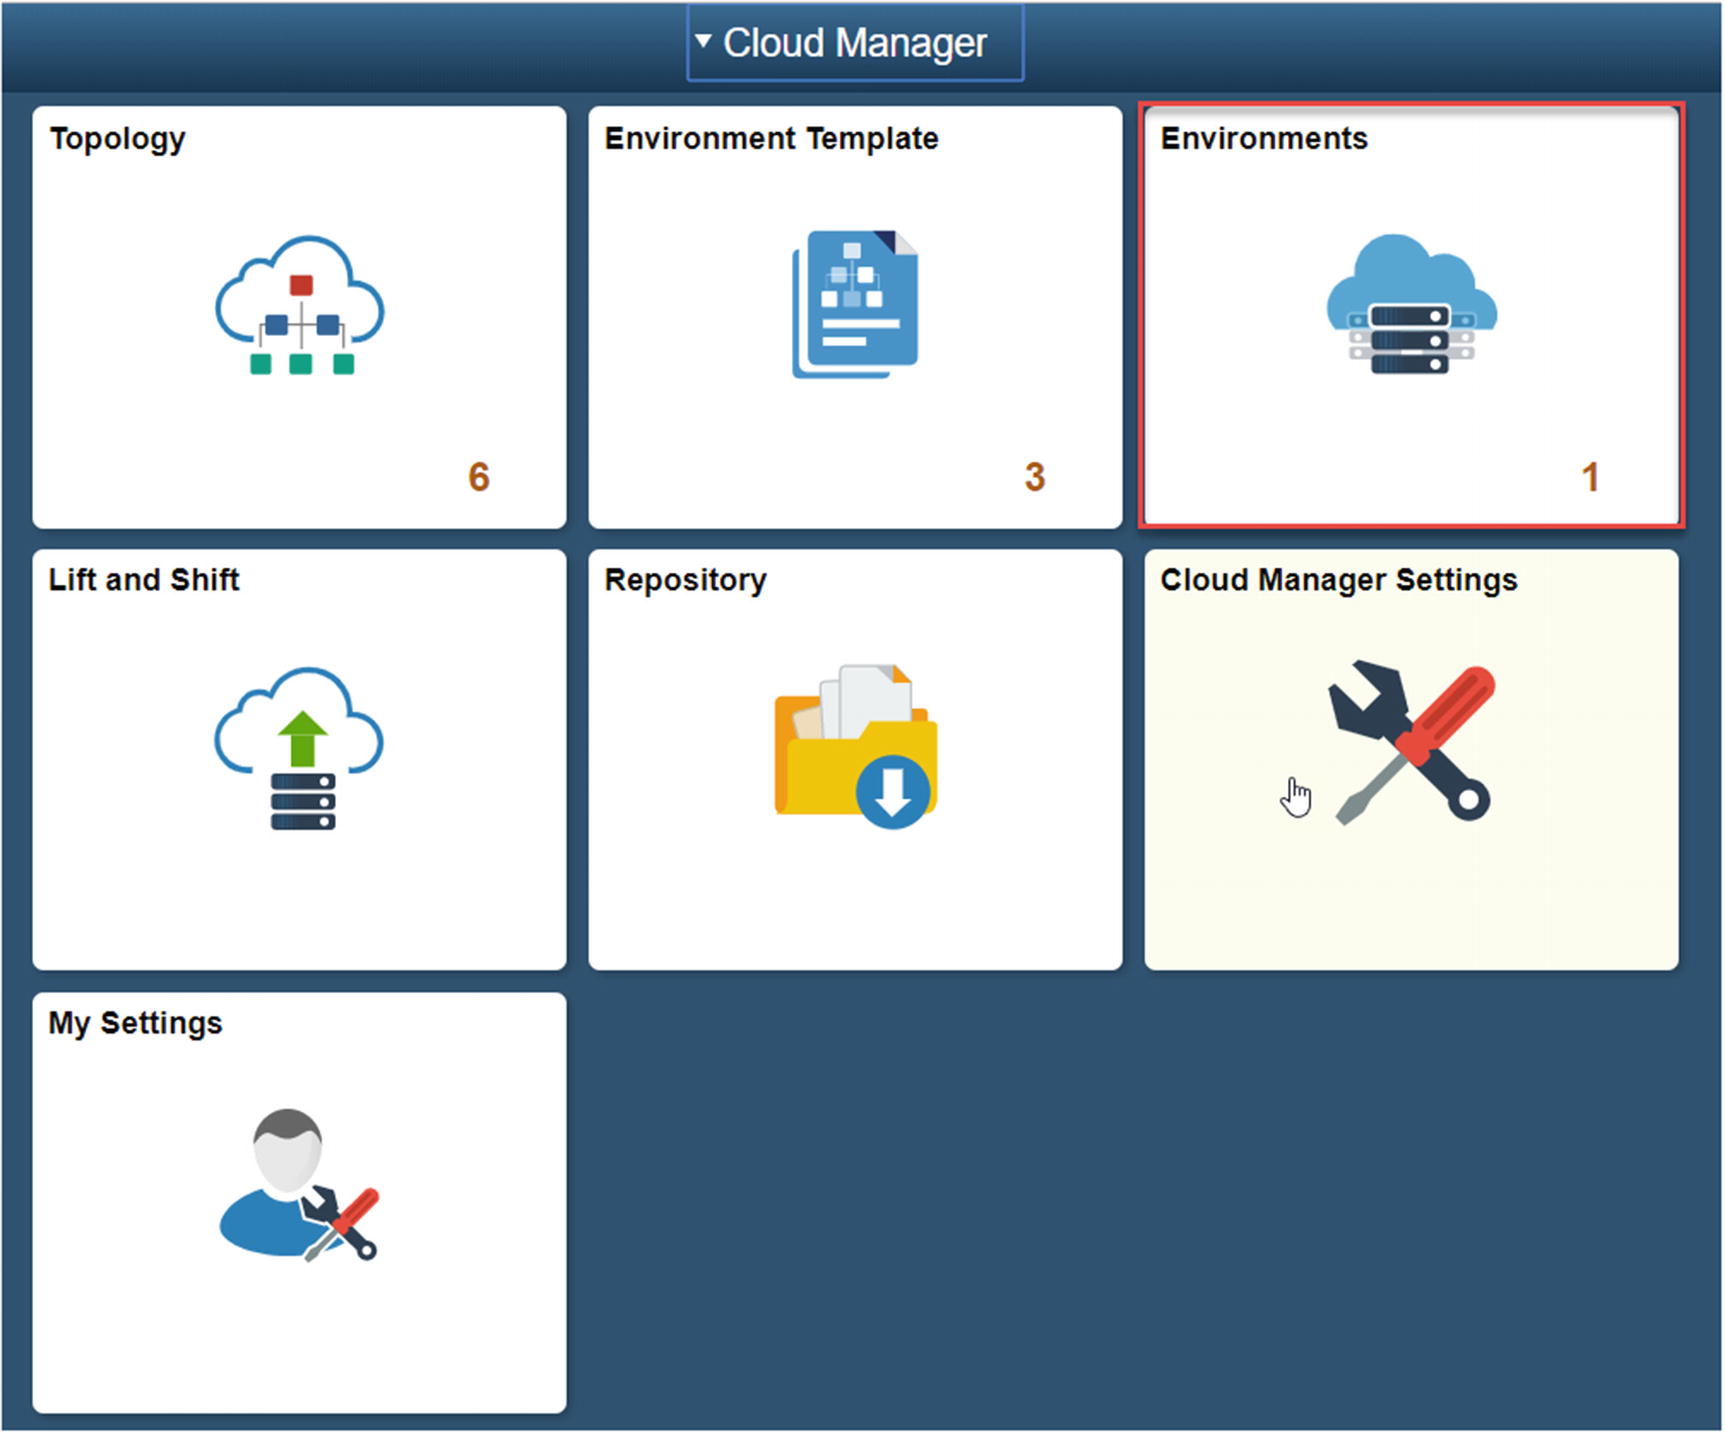
Environments tile
- 1.Click the Create Environment button in the top right-hand corner of the Environments home page (Figure 10-18).
 Figure 10-18
Create Environment button
- 2.In the Create Environment window, give the new environment a name, a description, and select the template we created in the previous section (Figure 10-19).
 Figure 10-19
Create PUM Environment dialogue
- 3.In the Full Tier Environment Attributes section, fill in the password information in the Credentials section (Figure 10-20).
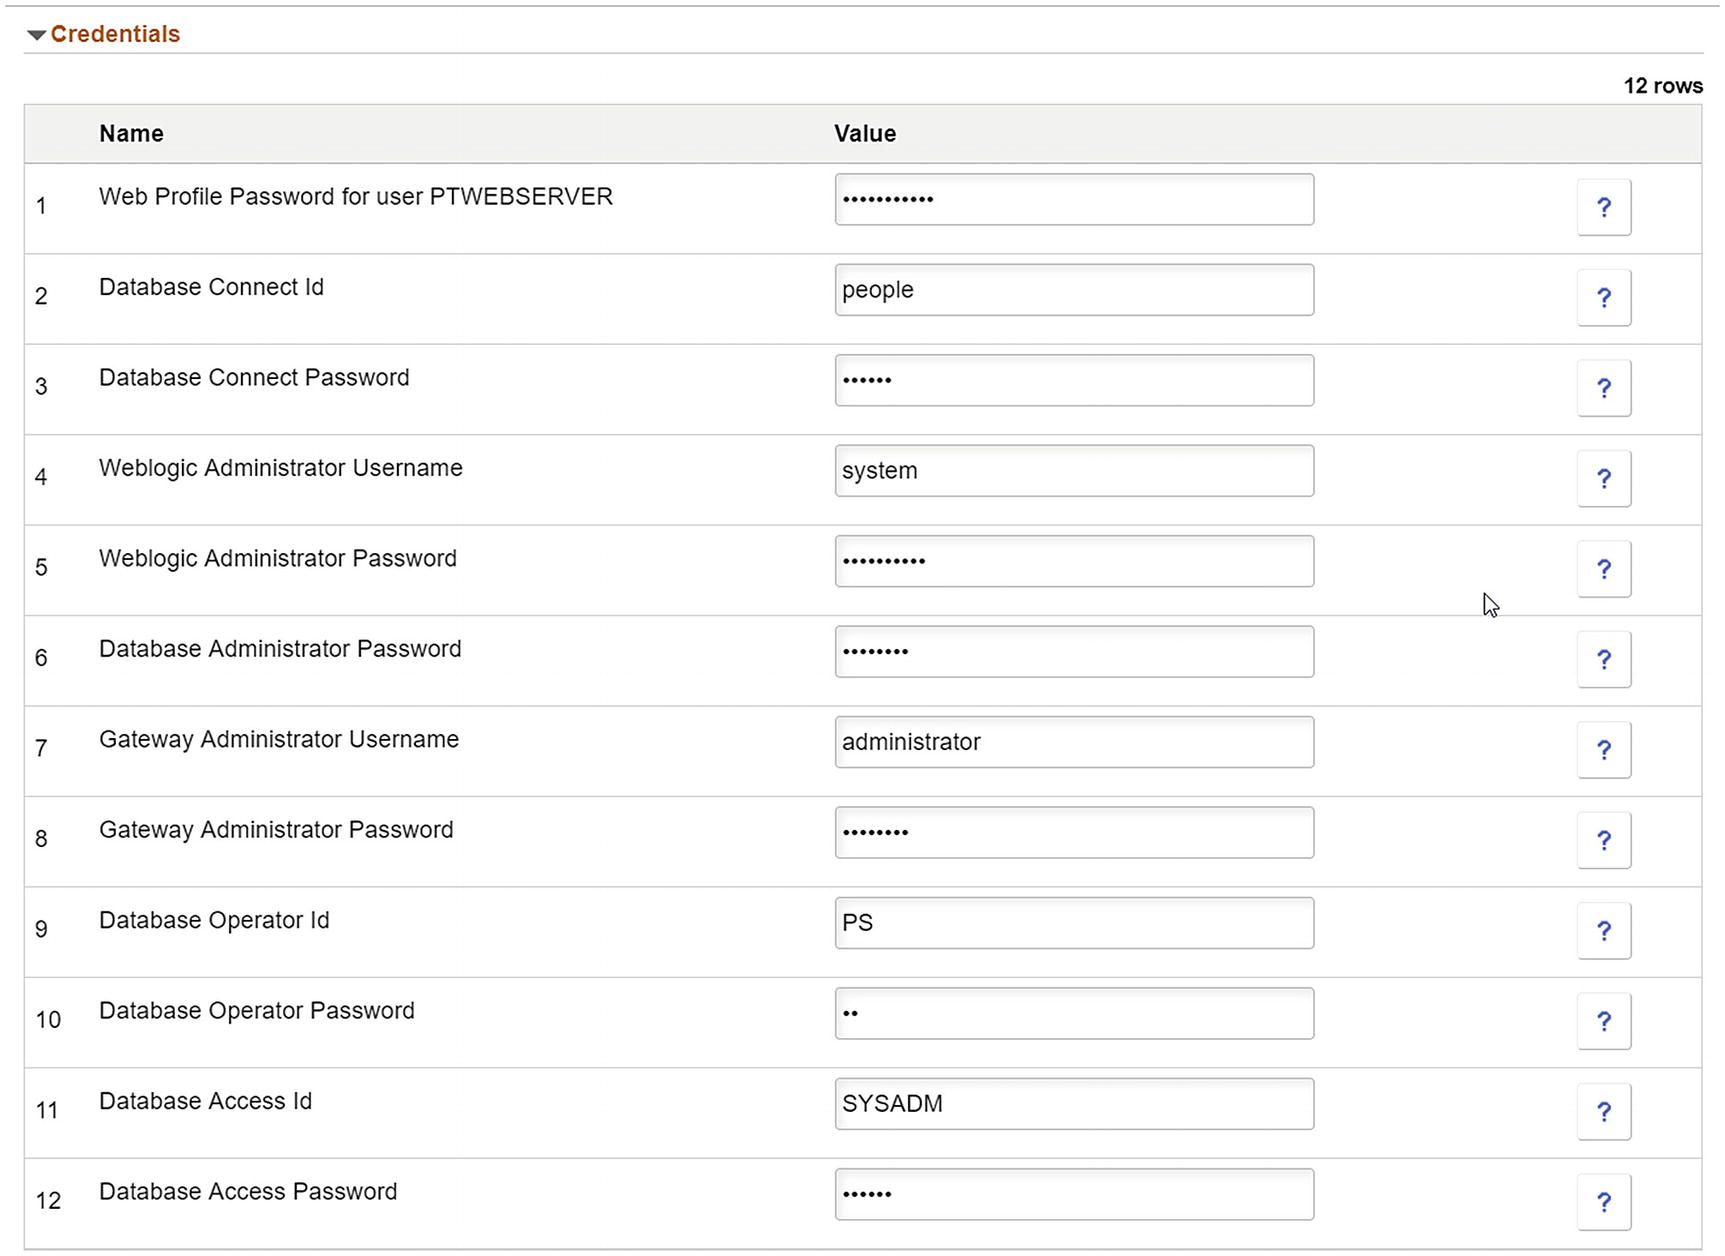 Figure 10-20
PUM Image Credentials section
- 4.Scroll down to the PeopleSoft Client Credentials section and fill in the Windows Administrator Password required to start the environment as shown in Figure 10-21.
 Figure 10-21
Windows Administrator Password entry
- 5.
Click the Done button in the upper right-hand corner of the Create Environment page (Figure 10-22).
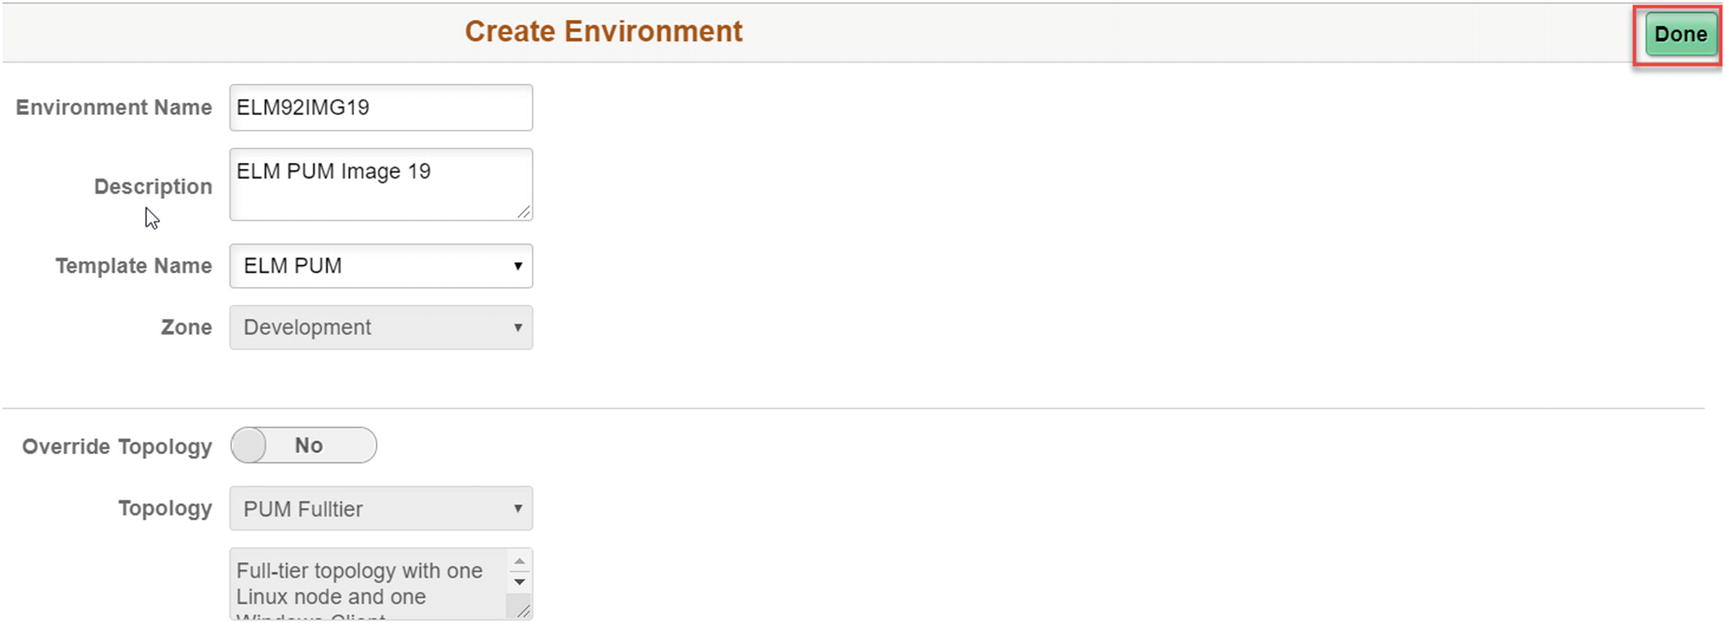
Click Done
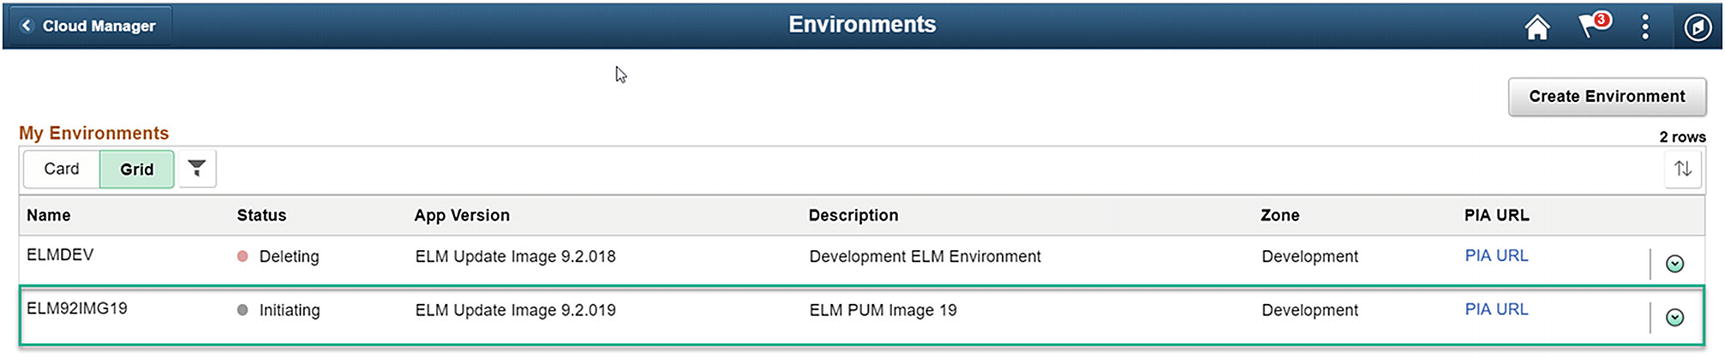
Initiating the PUM environment
Adding a Target to the PUM Image
- 1.From the Environments home page, click the related actions Details button on the far right of the PUM source environment. This action item is highlighted in Figure 10-24.
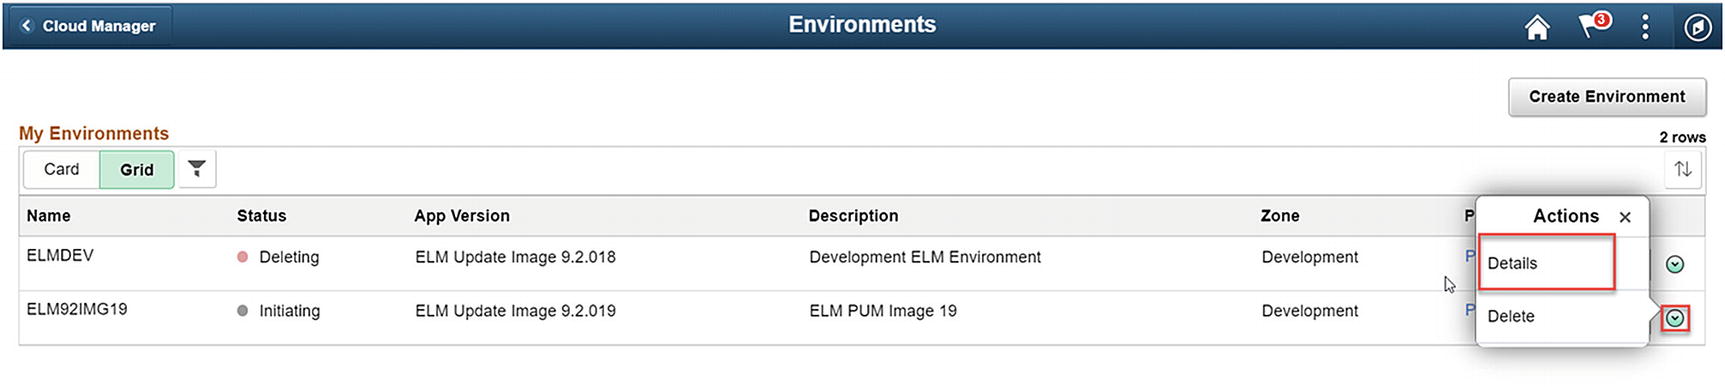 Figure 10-24
Details of the PUM Image
- 2.From the PUM Image Environment Details page, click Manage PUM Connections option on the left-hand navigation (Figure 10-25).
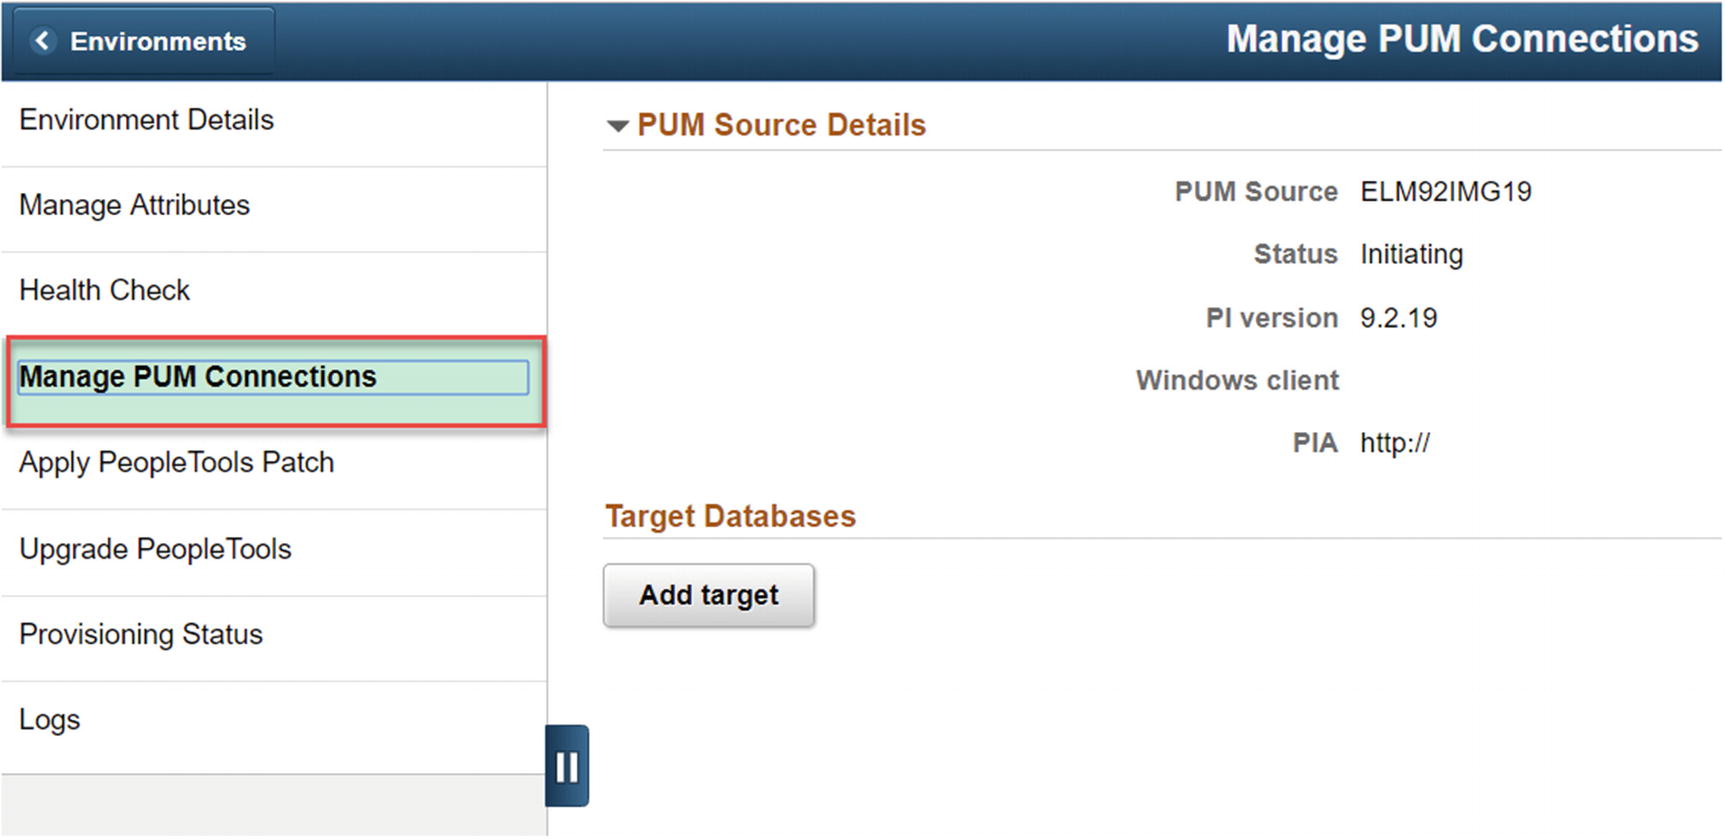 Figure 10-25
Manage PUM Connections
- 3.Click the Add target button, highlighted in Figure 10-26, and add any environment of the same application type; in this case we can select ELM target environments.
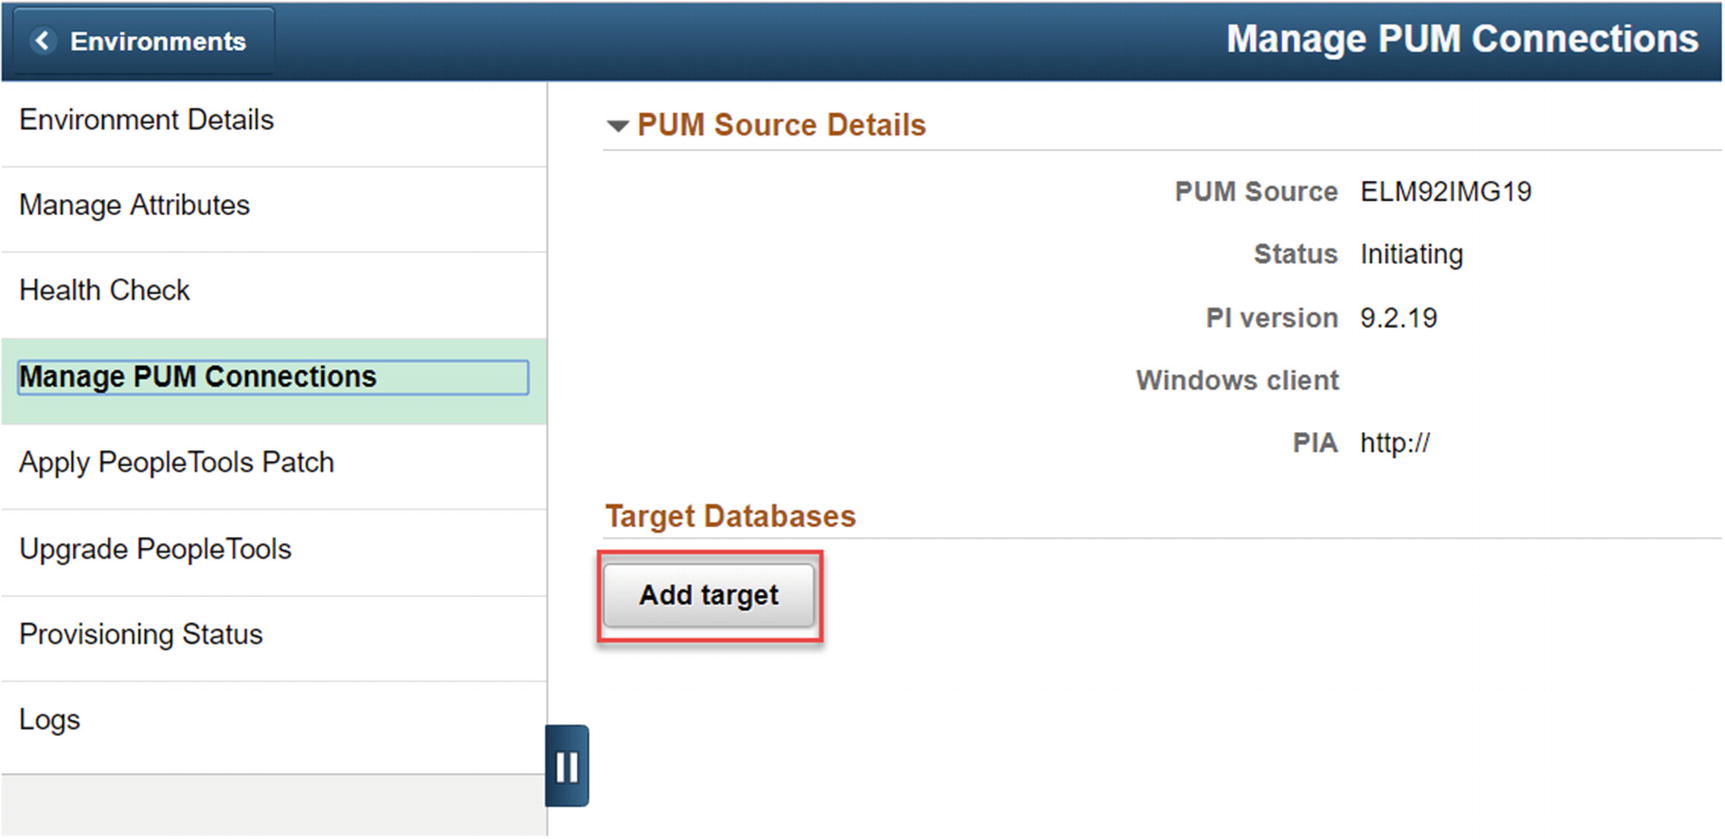 Figure 10-26
Add target button
- 4.
Select a target environment from the Target Environment drop-down.
- 5.
Click the Add button in the top right-hand corner of the Select Target window (Figure 10-27).
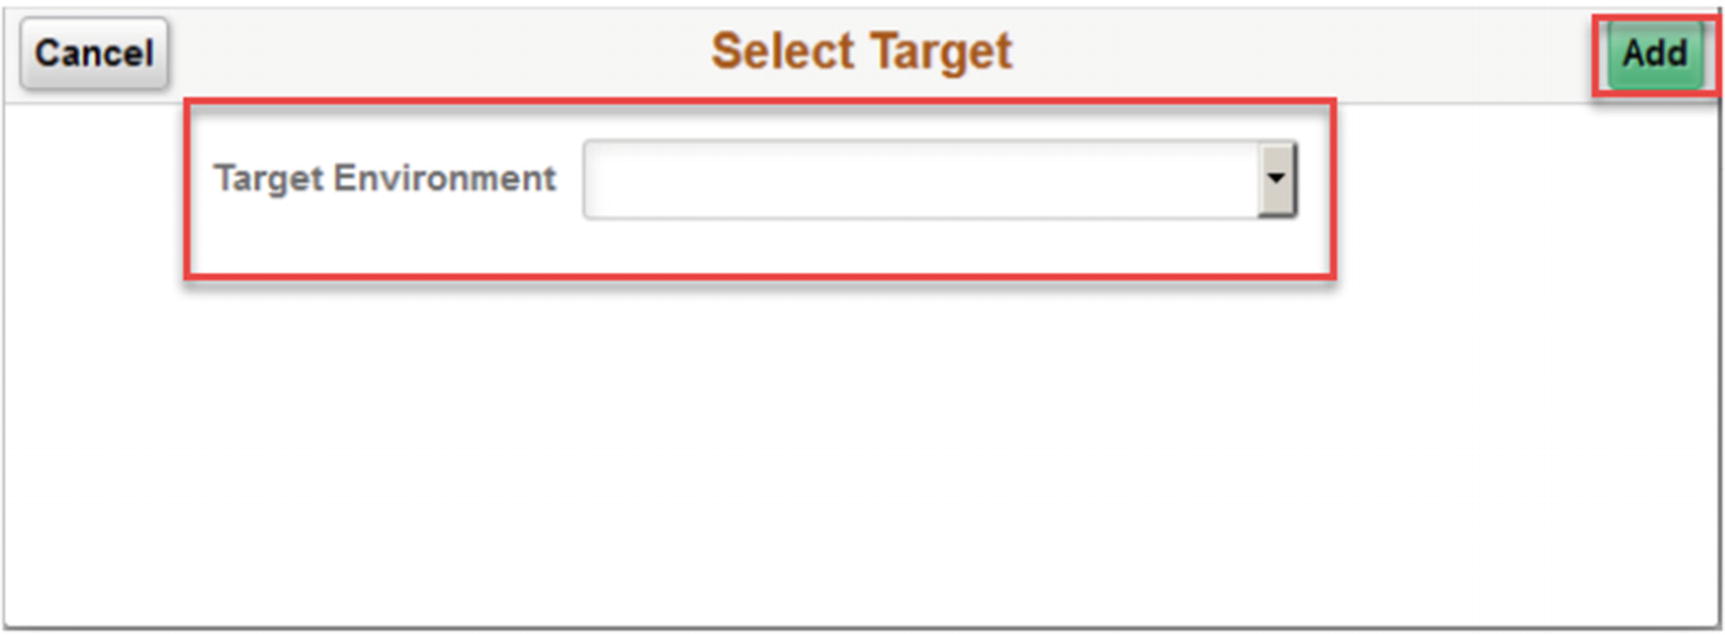
Select Target Environment and Add button
Completing these steps will start a process to add the target database you selected to the PUM image. This process can take a few minutes for the target database to be configured in the Change Assistant. The Target database is uploaded to the PUM source database for comparison. While the process is running, it will show a status of In Progress. The status of the Target database will change to Complete when this process is done and successful. Conversely, the status will change to Failed if the process did not finish successfully.
Change Assistant in the Oracle Cloud
- 1.
Go to the details page of the PUM image you are connecting to and find the IP address or the hostname of the PeopleSoft Client (Windows Virtual Machine) that was created as part of the PUM Fulltier topology used to create the environment.
- 2.
Connect to the Windows virtual machine utilizing Remote Desktop Connection.
- 3.
Configure this Windows box to best suit your needs as a Change Assistant box for your update process.
The full Change Assistant life cycle and selective adoption process are outside the scope of this book, but from this point in the process you can accomplish any of the same selective adoption and maintenance tasks you currently complete on-premise with your PUM image in the Oracle Cloud. Please reference the Change Assistant PeopleBooks for any further details on applying or creating change packages in Change Assistant.