The previous four chapters have focused exclusively on the steps and processes necessary to get PeopleSoft Cloud Manager up and running in the Oracle Cloud. From this point forward, we will be focused on the process of provisioning PeopleSoft environments in the Oracle cloud and understanding and utilizing all the features and tools that PeopleSoft Cloud Manager offers. There are four key components that need to be understood in order to properly provision and manage PeopleSoft instance in Cloud Manager: the repository, the topology, the template, and finally the PeopleSoft environment. These four components work together to automate and streamline the environment provisioning process within Cloud Manager.
The first step in provisioning a PeopleSoft environment in Cloud Manager requires downloading and accessing a PeopleSoft image to the repository. The repository within PeopleSoft Cloud Manager provides you with an easy way to both download and manage PeopleSoft images, patch sets, tools updates, and custom PeopleSoft images. The file server we created in Chapter 4 provides Cloud Manager a Network File System (NFS) repository where these images and downloads are stored. The subscription channels found within the repository allow administrators the ability to pick and choose which applications and maintenance content they want to download to the repository. From here, the download manager helps to automate the process of downloading and saving these images from Oracle Support.
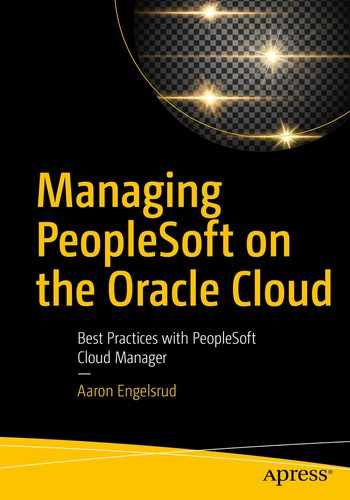
Accessing the Repository
Repository tile

Repository menu options
My Downloads
The first page that opens after accessing the Repository tile is the My Downloads page. If you are just getting started with PeopleSoft Cloud Manager, this page will largely be empty aside from the size of file server you created in the last chapter and the available space this file server provides. Once you have subscribed to some channels and have downloaded either some PeopleSoft images or PeopleSoft Release Patchsets, you will see the artifacts of those downloads listed here.
There are two main sections to the My Downloads page. First, the top of the page includes basic detail about the file server you have associated with PeopleSoft Cloud Manager. Second, the bottom half of the page details the artifacts that have been downloaded to your file server. Together, these two pieces of data provide you with a basic understanding of how much space you have available, how much you are using, and what has been downloaded.
File Server Information

My Downloads file server detail
As you can see in image 5-3, this simple graph provides some very important and simple information to you each time you access the repository. On the top left, you will see listed the File Server Size, in this case 295 GB (remember we created a 300 GB file server). In the middle of the bar graph, you will see listed how much of the file server space is currently available, in this case 263 GB. Quite easily, we can determine that we are currently using 32 GB of file space on the server (295GB – 263GB = 32GB). At a glance, we are provided with all the information we need to know if we need to add more space or if we have enough space to continue to download artifacts to the file server.
File Server SSH Access
Accessing your file server via SSH, which you will need to do to expand your file server, is a two-step process. First you will access your Cloud Manager virtual machine using the SSH command coupled with your public and private key pair. Once you have done this, you will then create an additional SSH session to your file server virtual machine using the Cloud Manager private SSH key.
- 1.
Open a PuTTY or other terminal application and start a ssh session using the opc user to your Cloud Manager virtual machine. If you look back in your notes from your installation, you should have the command you need. For reference, the command looks like this: ssh -i <path_to_private_key_file>/<private_key_name> -o ServerAliveInterval=5 -o ServerAliveCountMax=1 opc@<public_ip_address_of_instance>
- 2.
Once you have successfully logged in as the opc user, sudo to the psadm2 user on that VM. Sudo is a Unix command that allows you to elevate your privileges on the server to that of the user you are sudoing as, in this case psadm. The command looks like this: sudo su – psadm2
- 3.
You’ll note the use on your command prompt has now changed to psadm2 rather than opc.
- 4.
Change your present working directory (pwd) to /home/psadm2/psft/data/cloud/opchrome/<identity_domain_name>/<opc_user_id>/.ssh. In my case I will use this command to move to the correct directory: cd /home/psadm2/psft/data/cloud/opchome/6xxxxxxx3/[email protected]/.ssh
- 5.
In this directory, you will find the id_key_rsa.pub file. You can view the directory contents by entering the ls command at the prompt.
- 6.
Now you can enter a new SSH session using the id_key_rsa file located here. To do this, enter the following command at the Linux prompt: ssh -i id_key_rsa opc@<file_server_name>. In my case this command equates to ssh -i id_key_rsa opc@pcmBookFileServer.
- 7.
You will be prompted if you want to continue connecting; select yes and add the file server to your list of known hosts on the Cloud Manager VM.
- 8.
Once again, you will see your user and server name change at your command prompt, this time to opc@pcmbookfileserver. You are now connected to the file server virtual machine.
Expanding Your File Server
- 1.
Start by starting a new SSH session and connecting to your Cloud Manager virtual machine. This was covered in step 1 of the previous section.
- 2.
Determine the name of the device mounted on /cm_psft_dpks – you can find this device by using the df command from the Linux command prompt. Note this device name as you will need it later the process.
- 3.
Issue this command: unmount /cm_psft_dpks in the Cloud Manager virtual machine as the opc user.
- 4.Once this is complete, SSH to the File Manager virtual machine as described in the following section. Here you will need to stop both the NFS service and the smb service. Issue the following commands at the file server virtual machine dcommand prompt:/sbin/service nfs stop/sbin/service smb stop
- 5.
Next unmount the storage disk: unmount /u01/app/oracle/product
- 6.
Next, you need to switch over to the Oracle Compute Cloud Service Console window. To do this, log in to http://oracle.cloud.com and navigate to the Compute Cloud Service Console from your Cloud Dashboard.
- 7.
In the Service Console in the instance tab, click the file server instance to view the server details; in my case the file server is named pcmBookFileServer, and copy down the name of the storage disk attached to the file server. In my case, this storage is named pcmBookFileServer_storage_2.
- 8.
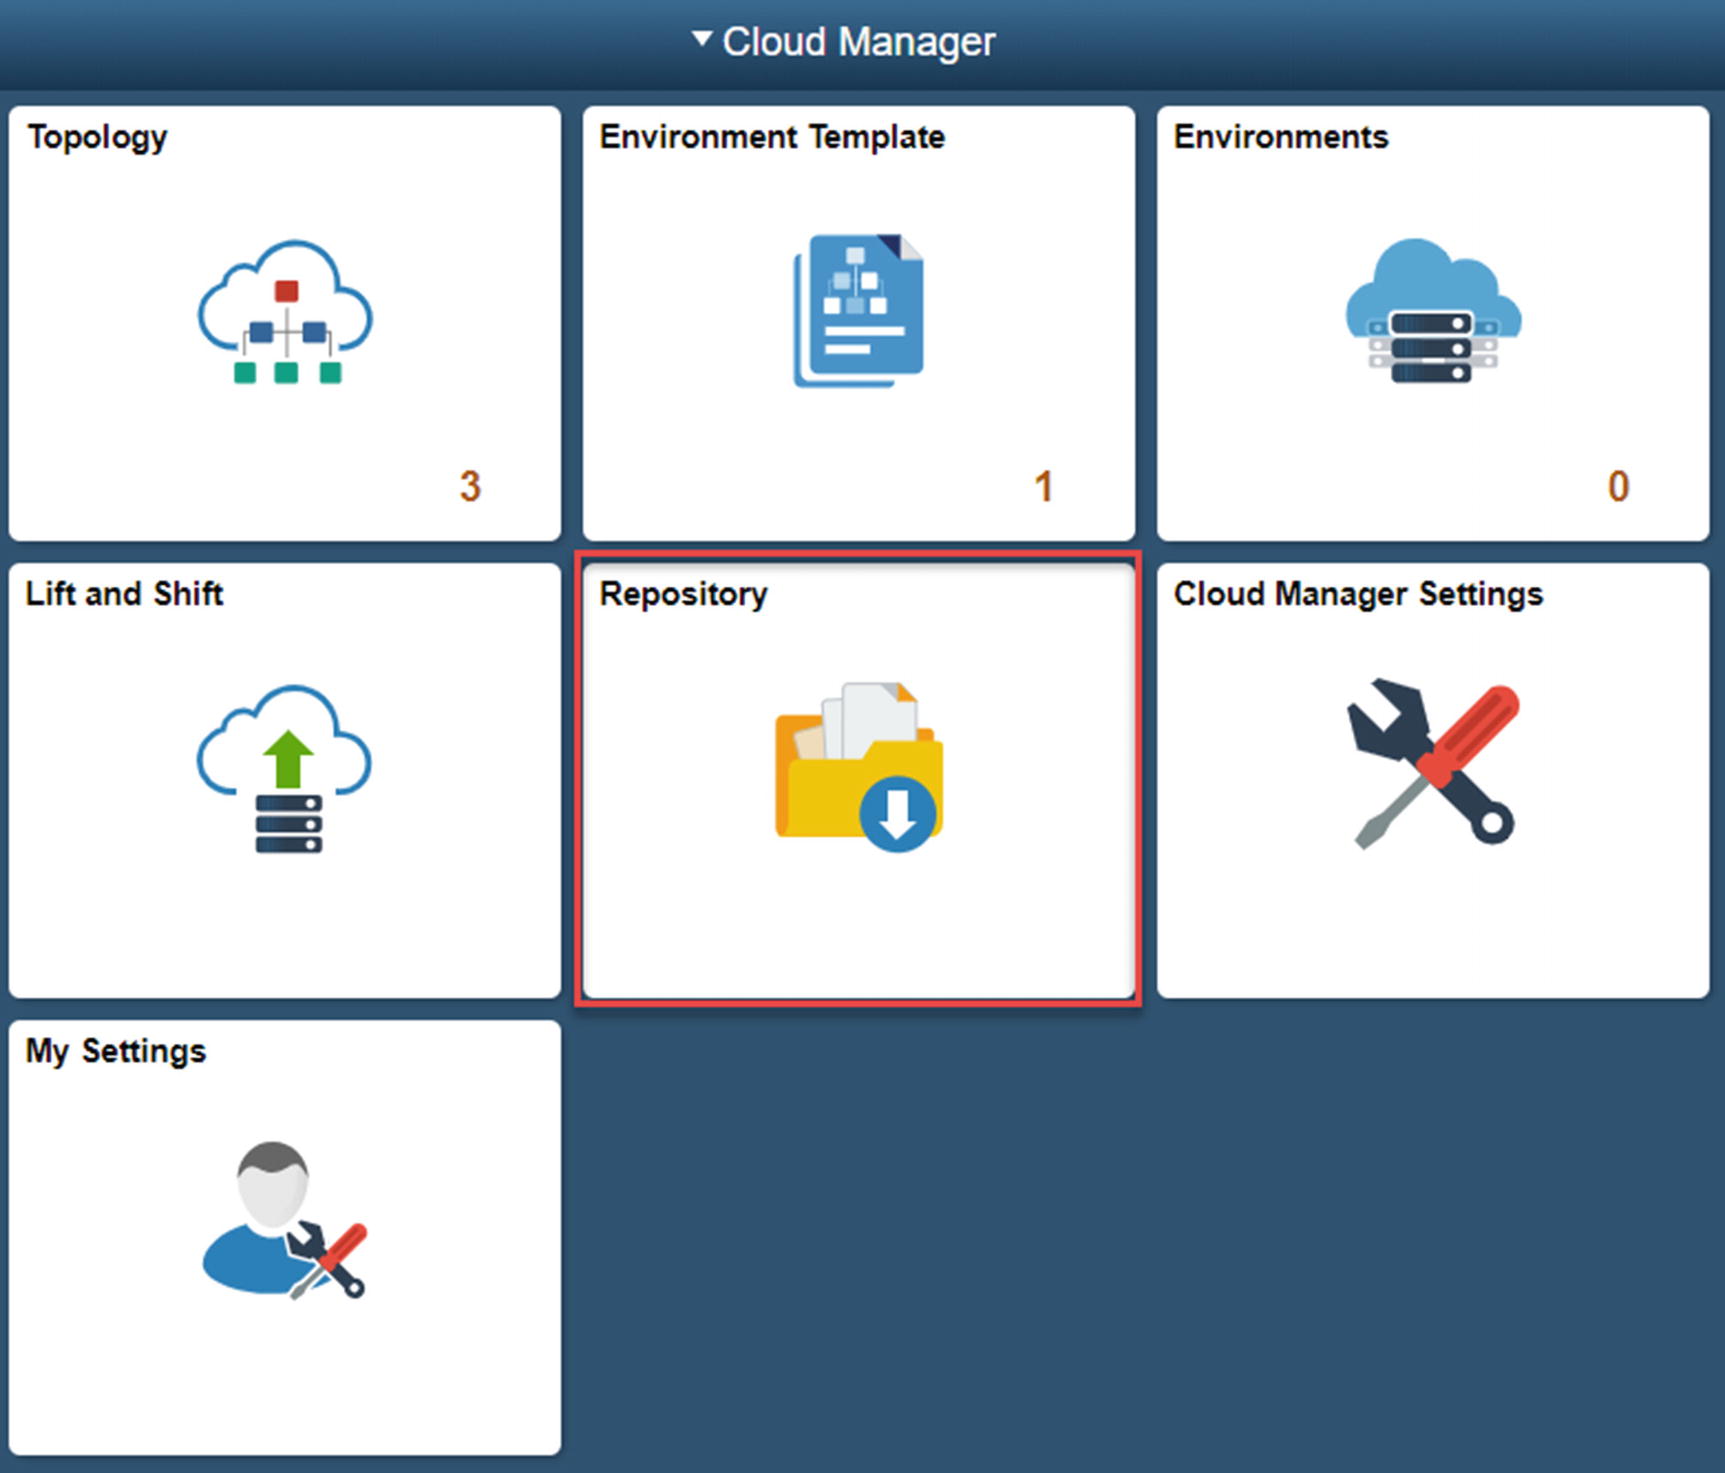
Navigate back to your main Compute Classic Service Console page and click the storage tab.
- 9.Find the disk associated with the file server as highlighted in Figure 5-4.
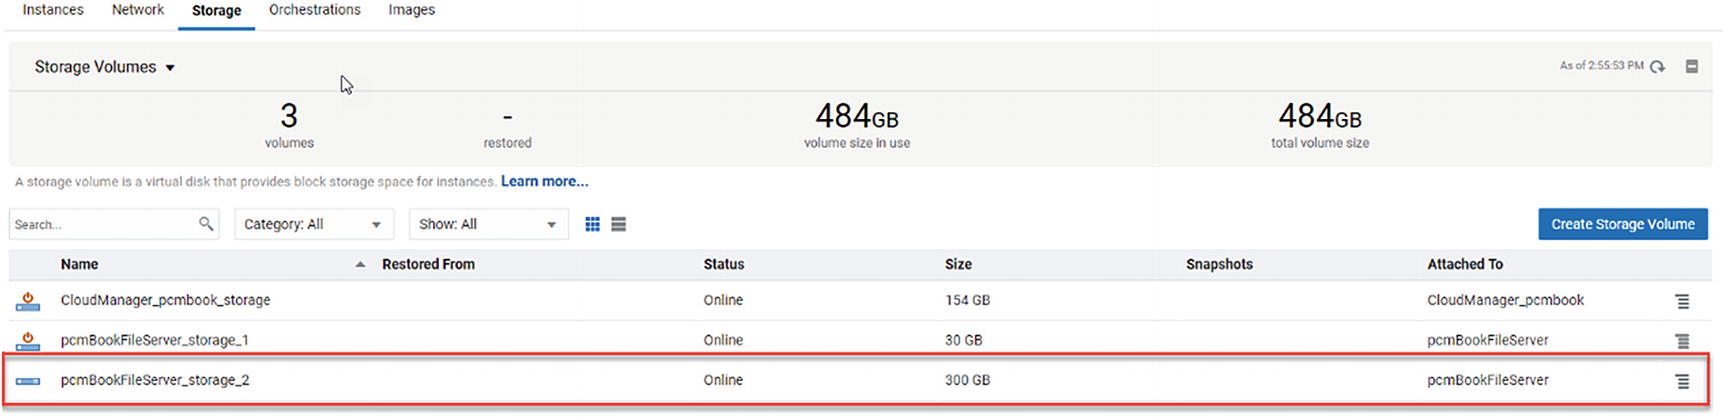 Figure 5-4
Storage tab, file server volume
- 10.Click the menu icon on the right of the storage volume and select Update (Figure 5-5).
 Figure 5-5
Update file server volume
- 11.Input the size required on the Size field (Figure 5-6).
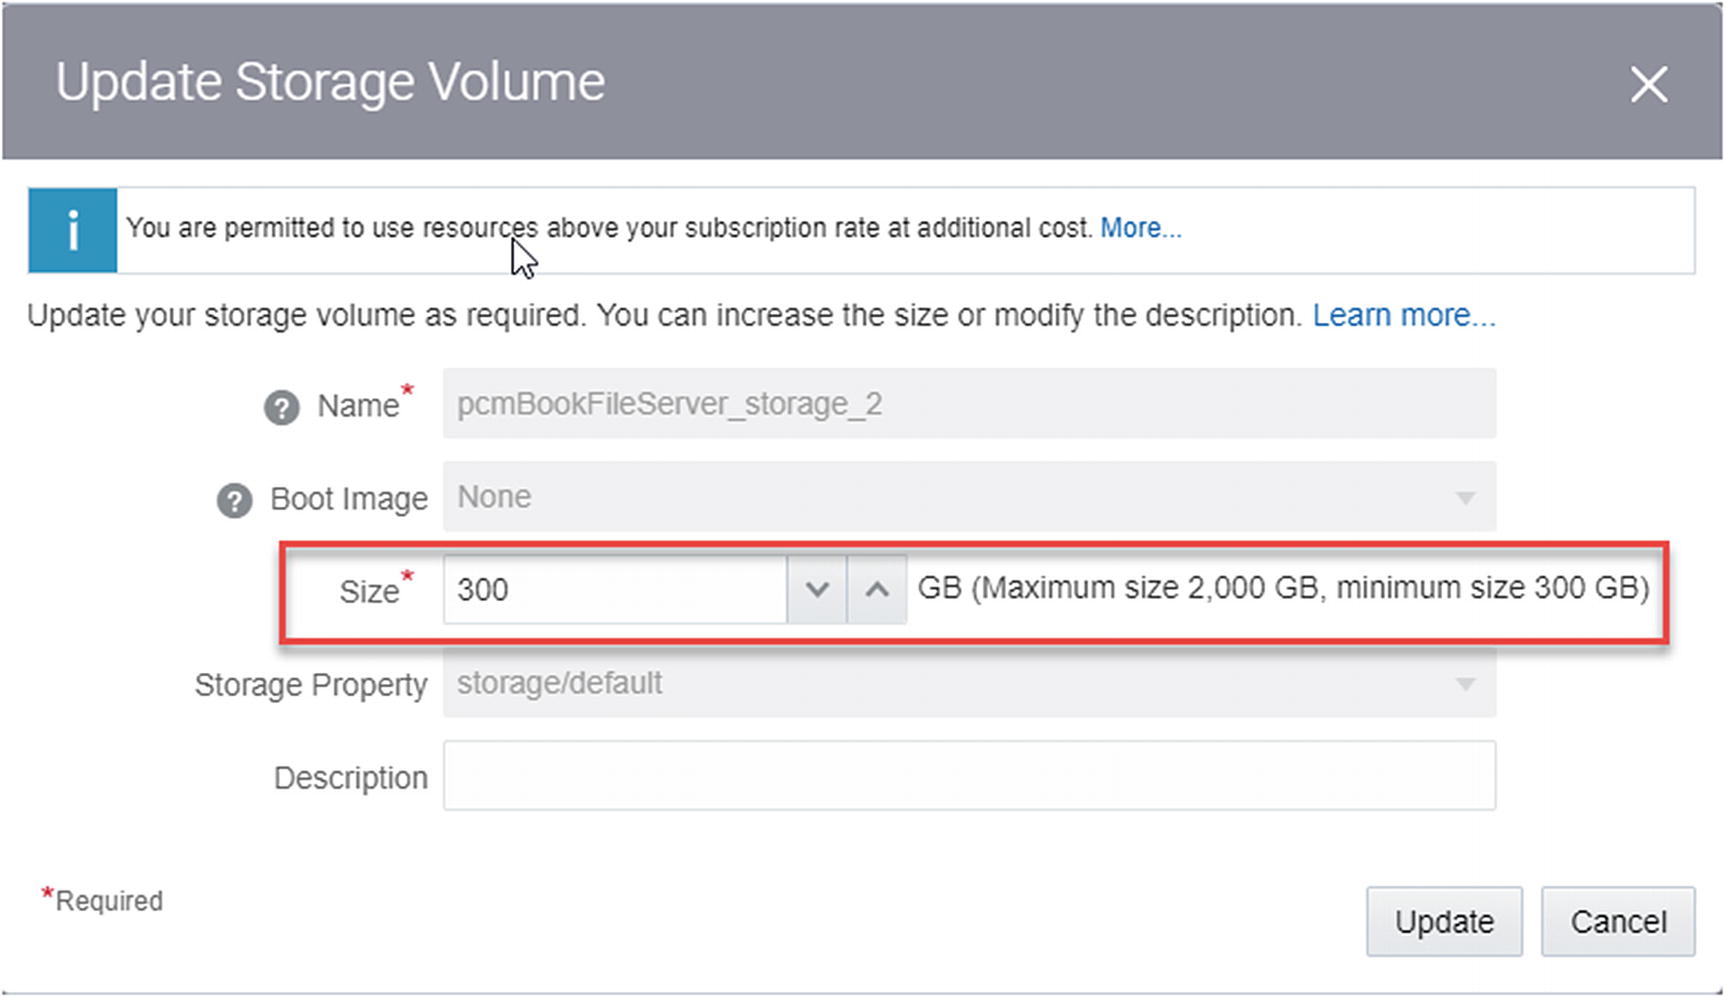 Figure 5-6
Update Storage Volume
- 12.
Click Update to increase the size as desired.
- 13.Back on the file server virtual machine (where you should still have a valid SSH connection), you need to run two different commands to expand the file system in the attached disk. From the Linux command prompt, rune2fsck -f /dev/<device name>resize2fs /dev/<device name>
In both cases, use the device name you determined in step 2 of this process.
- 14.Again, on the file server virtual machine, issue the following commands to mount the newly expanded disk, verify the new file server volume, and start both the NFS and SMB services:mount -adf -h /u01/app/oracle/product/sbin/service nfs start/sbin/service smb start
- 15.
Exit out of your file server SSH connection.
- 16.
Back in the Cloud Manager virtual machine, remount the file server share: mount -a
IF you have created your file server in Oracle Storage Classic, following these steps will allow you to quickly and easily increase the space available to you on your file server.
Download Detail

Download detail

Download filter

Filtered list
Artifact detail
Download Subscriptions

Download Subscription page detail
Subscribing to Channels
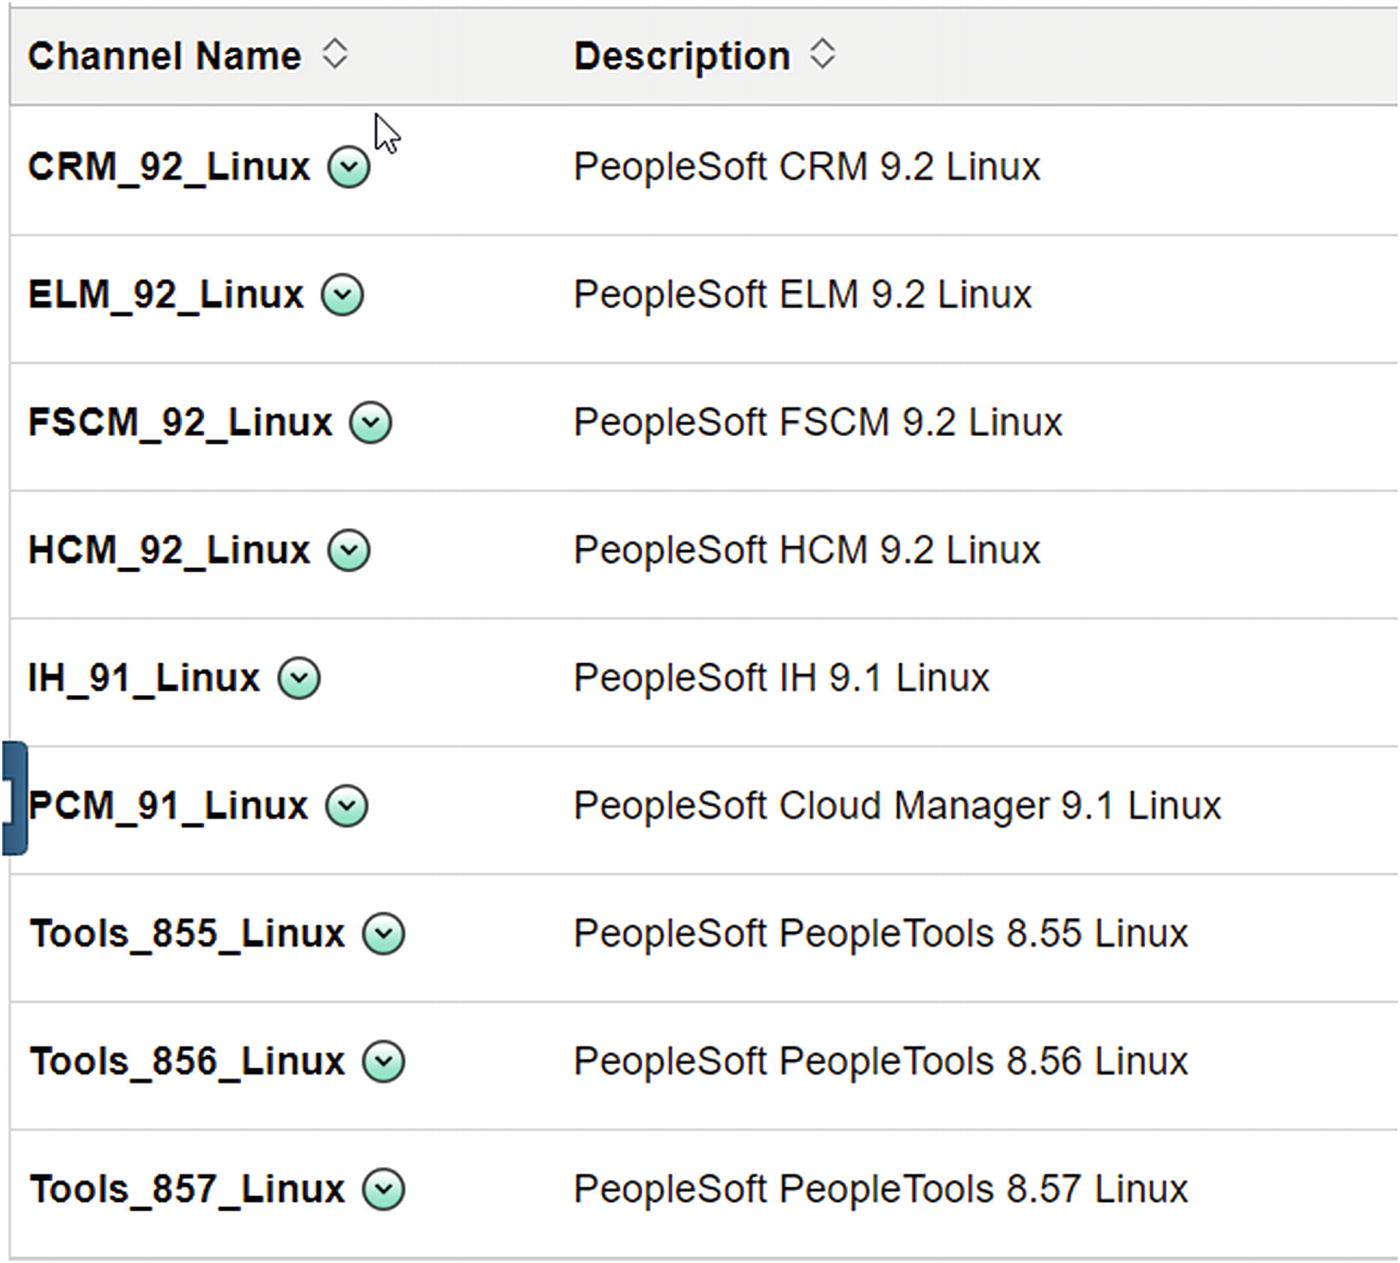
Cloud Manager predefined subscription channels
Subscribing from the Unsubscribed Page
The main section of the Download Subscription page consists of two main tabs, subscribed and unsubscribed. Any channels that you are already subscribed to and downloading content from will show up in the subscribed tab; if you have not yet subscribed to any channels, this page will be blank. Conversely, when you switch over to the Unsubscribed tab of the Download Subscriptions page, you will have access to any of the predefined channels you are not yet subscribed to.
- 1.
Log in to PeopleSoft Cloud Manager.
- 2.Click the Repository tile from the Cloud Manager home page (Figure 5-13).
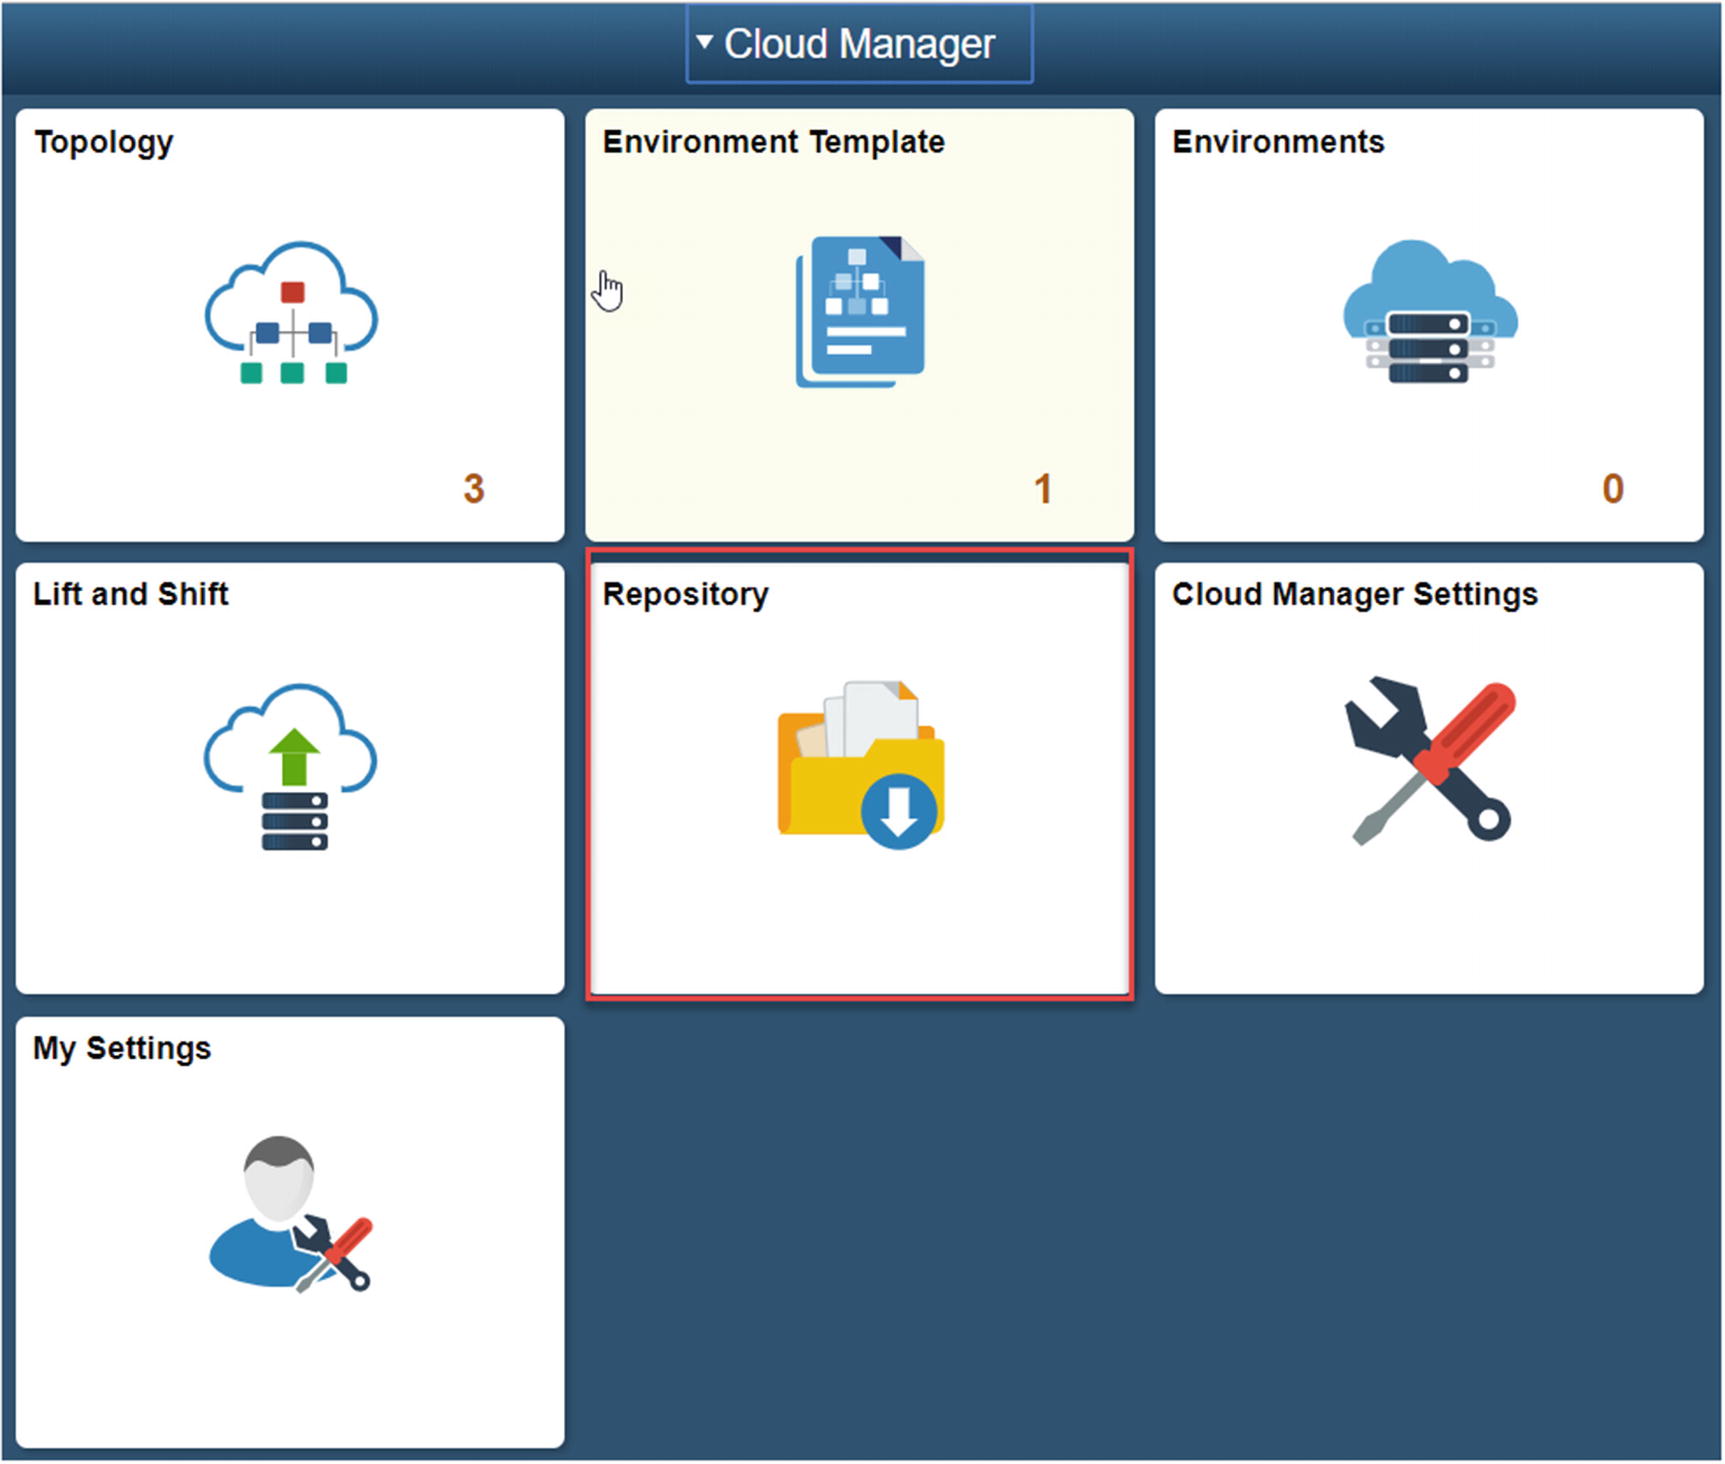 Figure 5-13
Repository tile
- 3.From the left-hand menu, select Download Subscriptions (Figure 5-14).
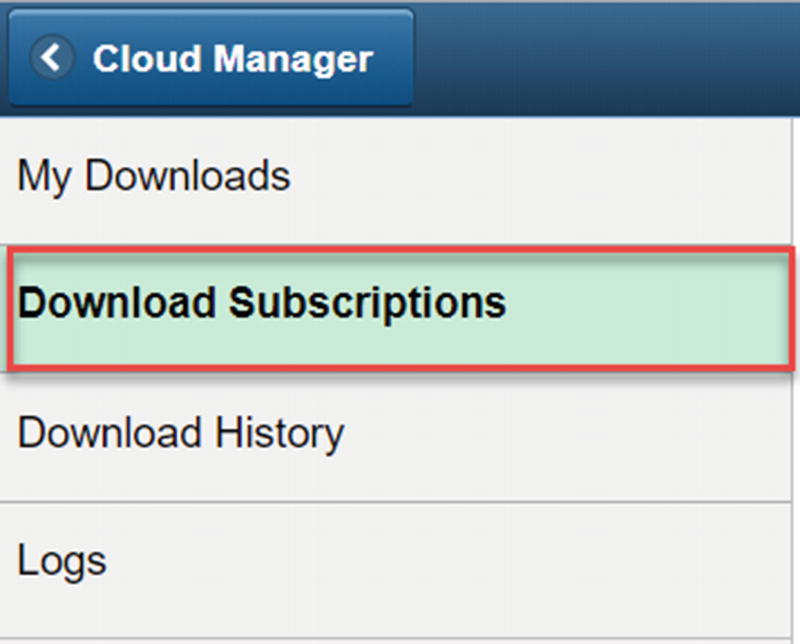 Figure 5-14
Download Subscriptions menu option
- 4.Select the Unsubscribed button at the top of the page (Figure 5-15).
 Figure 5-15
Unsubscribed button
- 5.
Find the channel you’d like to subscribe to from the list of unsubscribed channels. For this example we will be using the ELM_92_Linux channel.
- 6.Click the related actions drop-down button to the right of the channel name and select Subscribe from the pop-up menu (Figure 5-16).
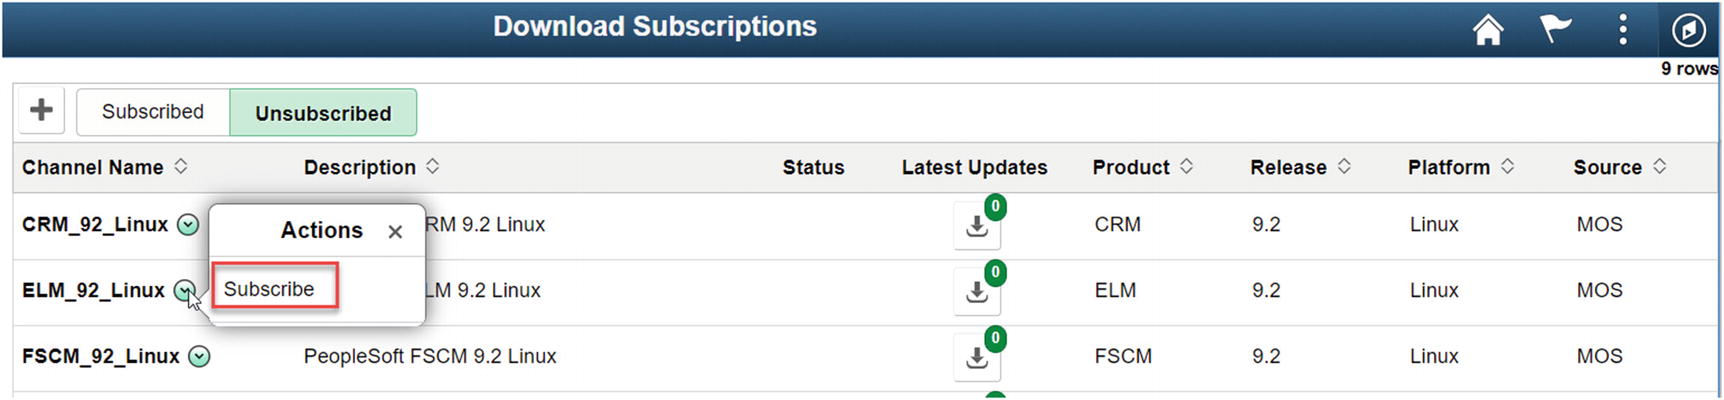 Figure 5-16
Channel Subscribe pop-up
- 7.
Click the Subscribed button at the top of the page.
- 8.You will now see the channel you just subscribed to listed on the Subscribed page (Figure 5-17).
 Figure 5-17
Newly subscribed channel
- 9.If you switch back to the My Downloads page within the repository, you will begin to see that artifacts from your channel subscription start to appear in the list of artifacts. In our example, ELM artifacts are now displayed in My Downloads (Figure 5-18).
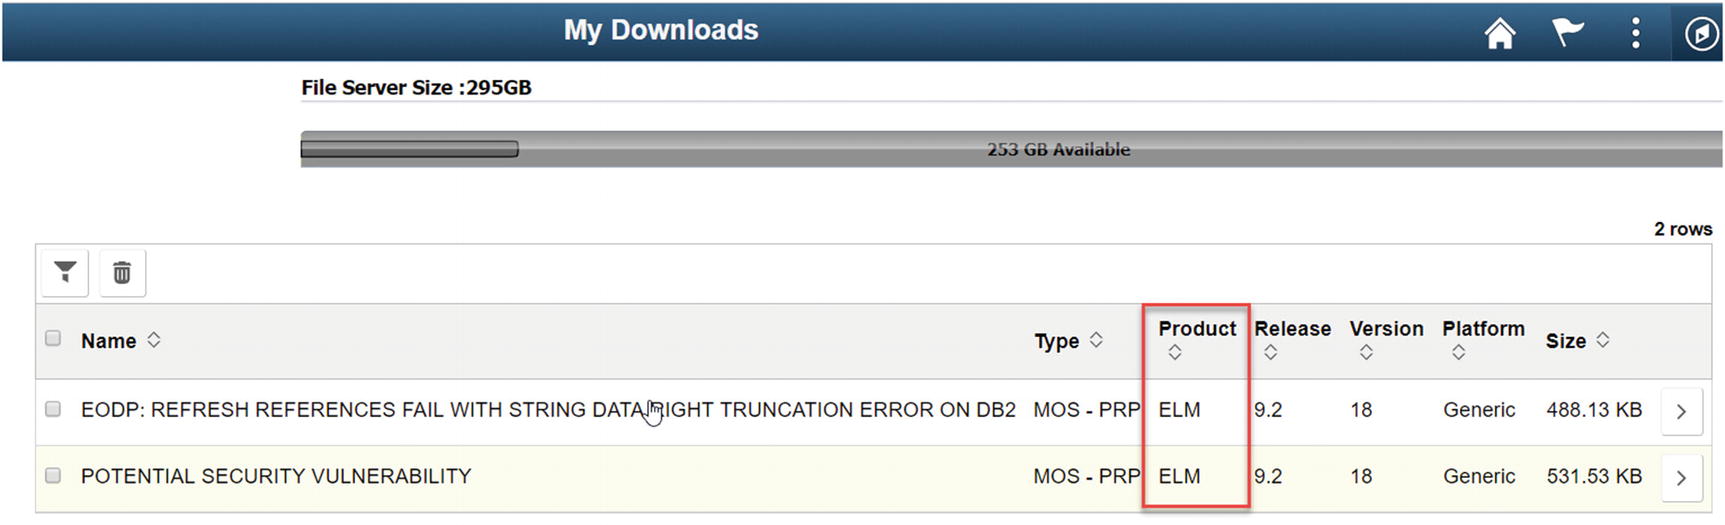 Figure 5-18
New artifacts in My Downloads
- 10.
Downloading a channel will take some time. You can check on the status of your channel, by going to the Download Subscriptions page and looking at the Status column for the channel you are watching. You will see either an In Progress Icon (Figure 5-19) or a Complete Icon (Figure 5-20) indicating the progress of the download.

Channel In Progress

Channel Complete
Creating a New Channel
- 1.Assuming you are already logged into the Cloud Manager application and on the Download Subscription page, click the plus (+) sign at the top of the page (Figure 5-21).
 Figure 5-21
Create a new channel
- 2.This will open the Create Channel dialogue window. This dialogue allows you to enter the following information:
Channel Name: This can be a name of your choice. For this example, we will follow the naming convention used by the delivered channels and name this new channel CRM_92_Windows.
Description: A brief description of what the channel contains. In this vcase CRM 9.2 Windows will be used.
Product Name: Select the appropriate product from the drop-down list.
Release Name: Select the appropriate release from the drop-down list.
Platform: Select the platform you want from the drop-down list. In this case, we will be selecting Windows.
Source: Select the download source from the drop-down list.
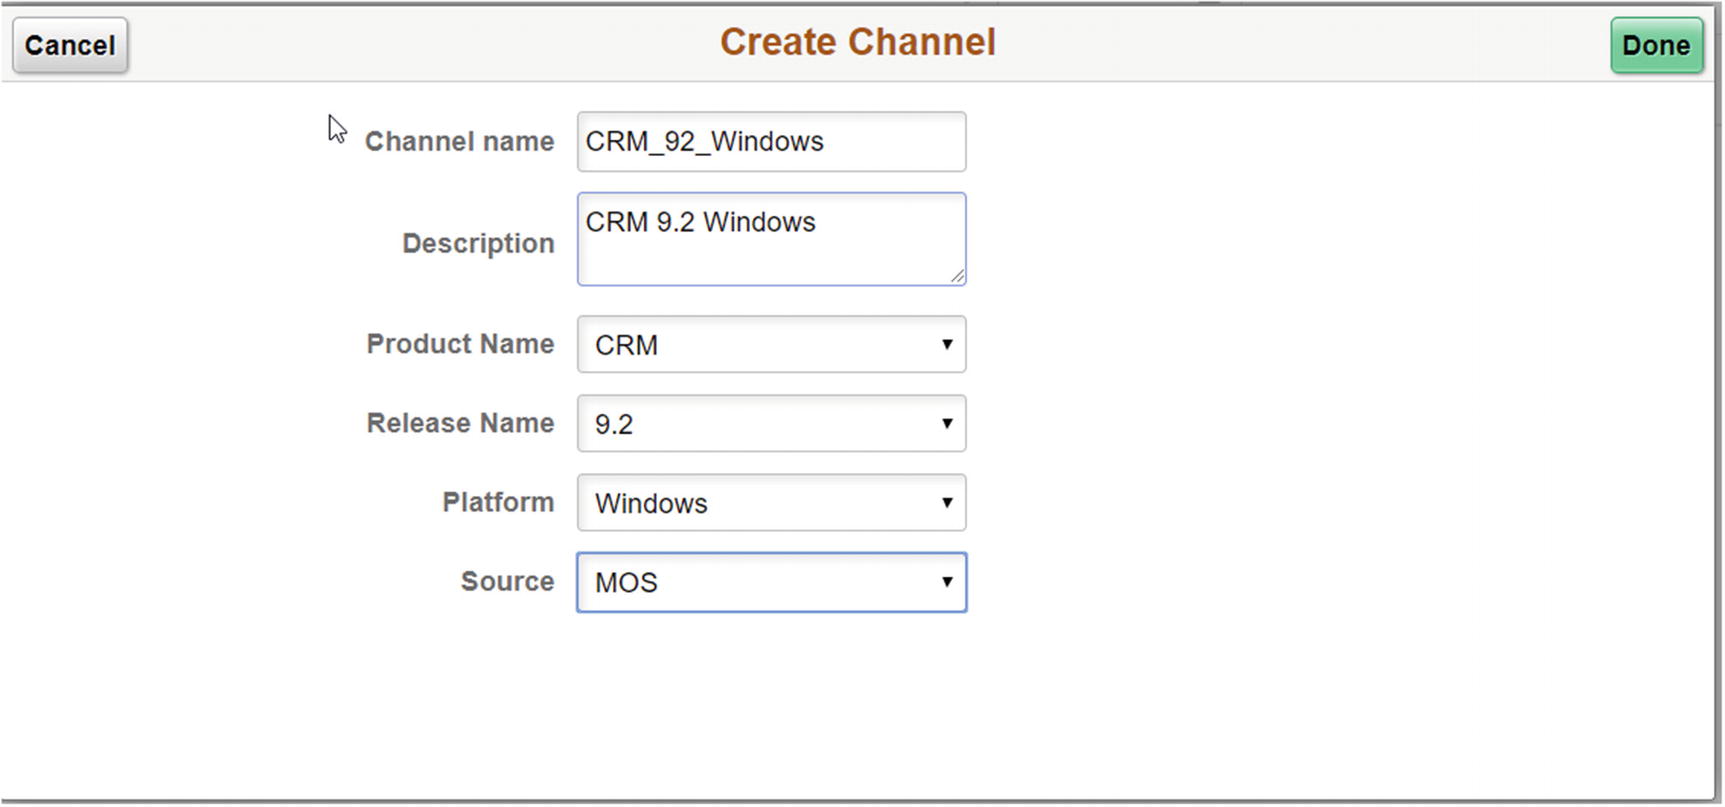
Create Channel dialogue
- 3.
Once this detail is entered, click Done in the upper right corner of the window.
- 4.
Your new channel should now show up in the Subscribed list of Channels.
Download History

Download History detail
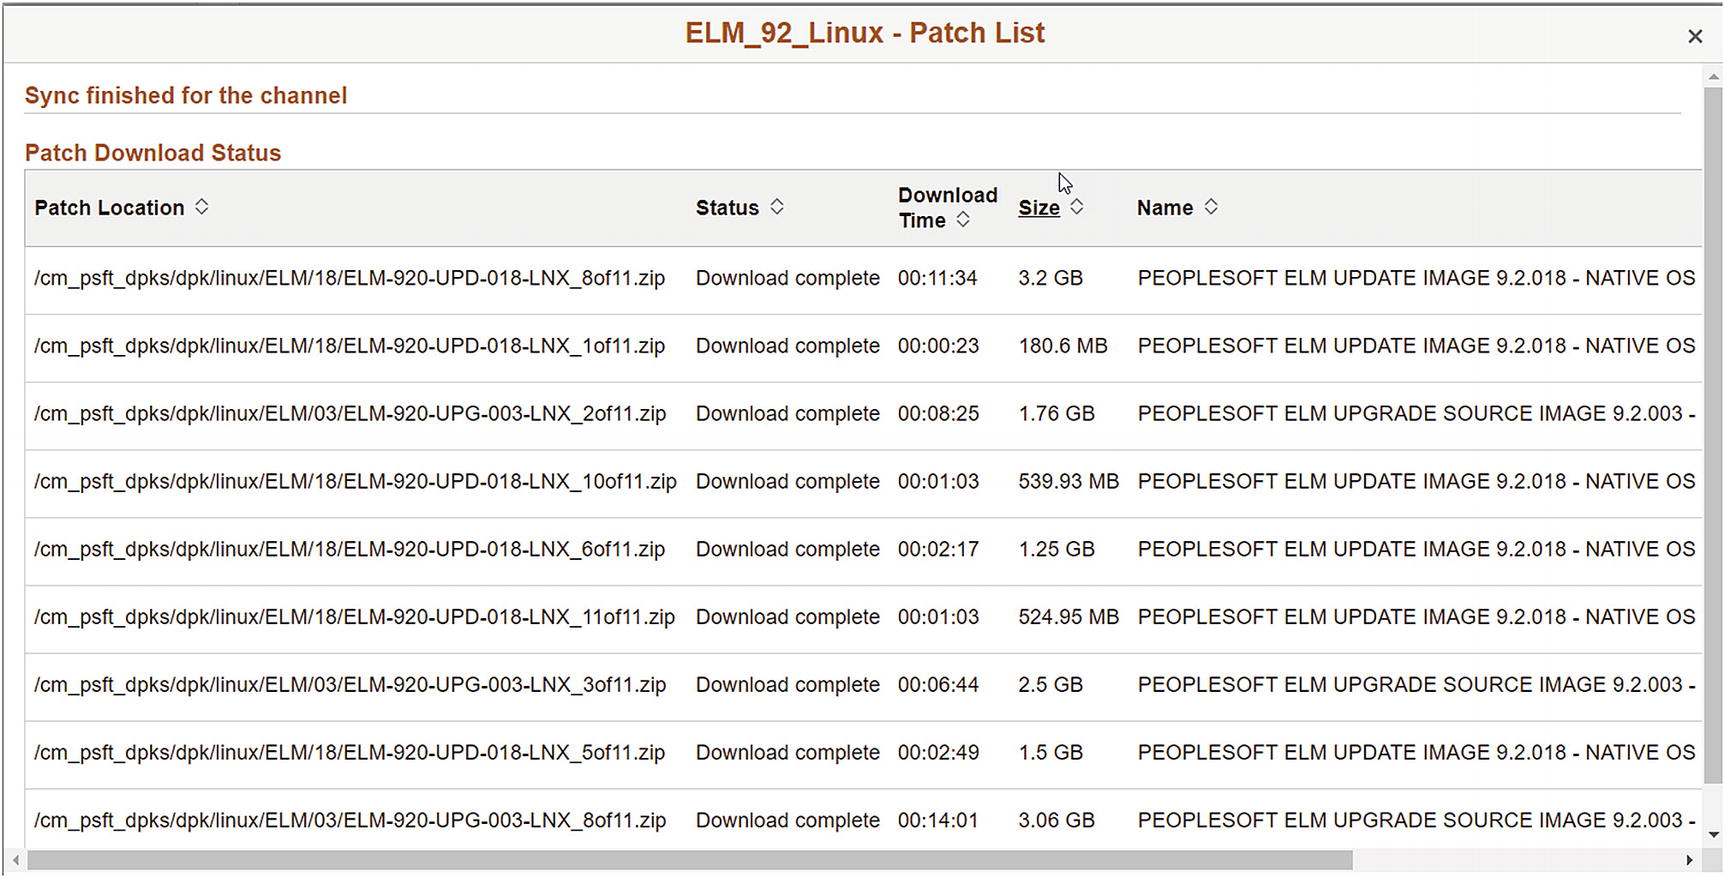
Download History patch detail
Repository Logs
You can easily view the content within the Downloads Logs through the Logs page. You can get to the Logs page by clicking the Repository tile on the home page and selecting Logs from the left-hand menu. This page provides you the opportunity to view the log output for any of the channels you are subscribed to as well as the output for each specific patch file within a channel.
Channel Name: Select the channel name from where you would like to search the log files. In our case, we will search ELM_92_Linux channel.
Log File: Allows you to select from a drop-down list the log file you would like to look at. Here we will be searching the ELM_92_Linux261.log file for details about the download process.
Number of Lines to Display: Limit the number of lines returned to something manageable. This defaults to ten lines.
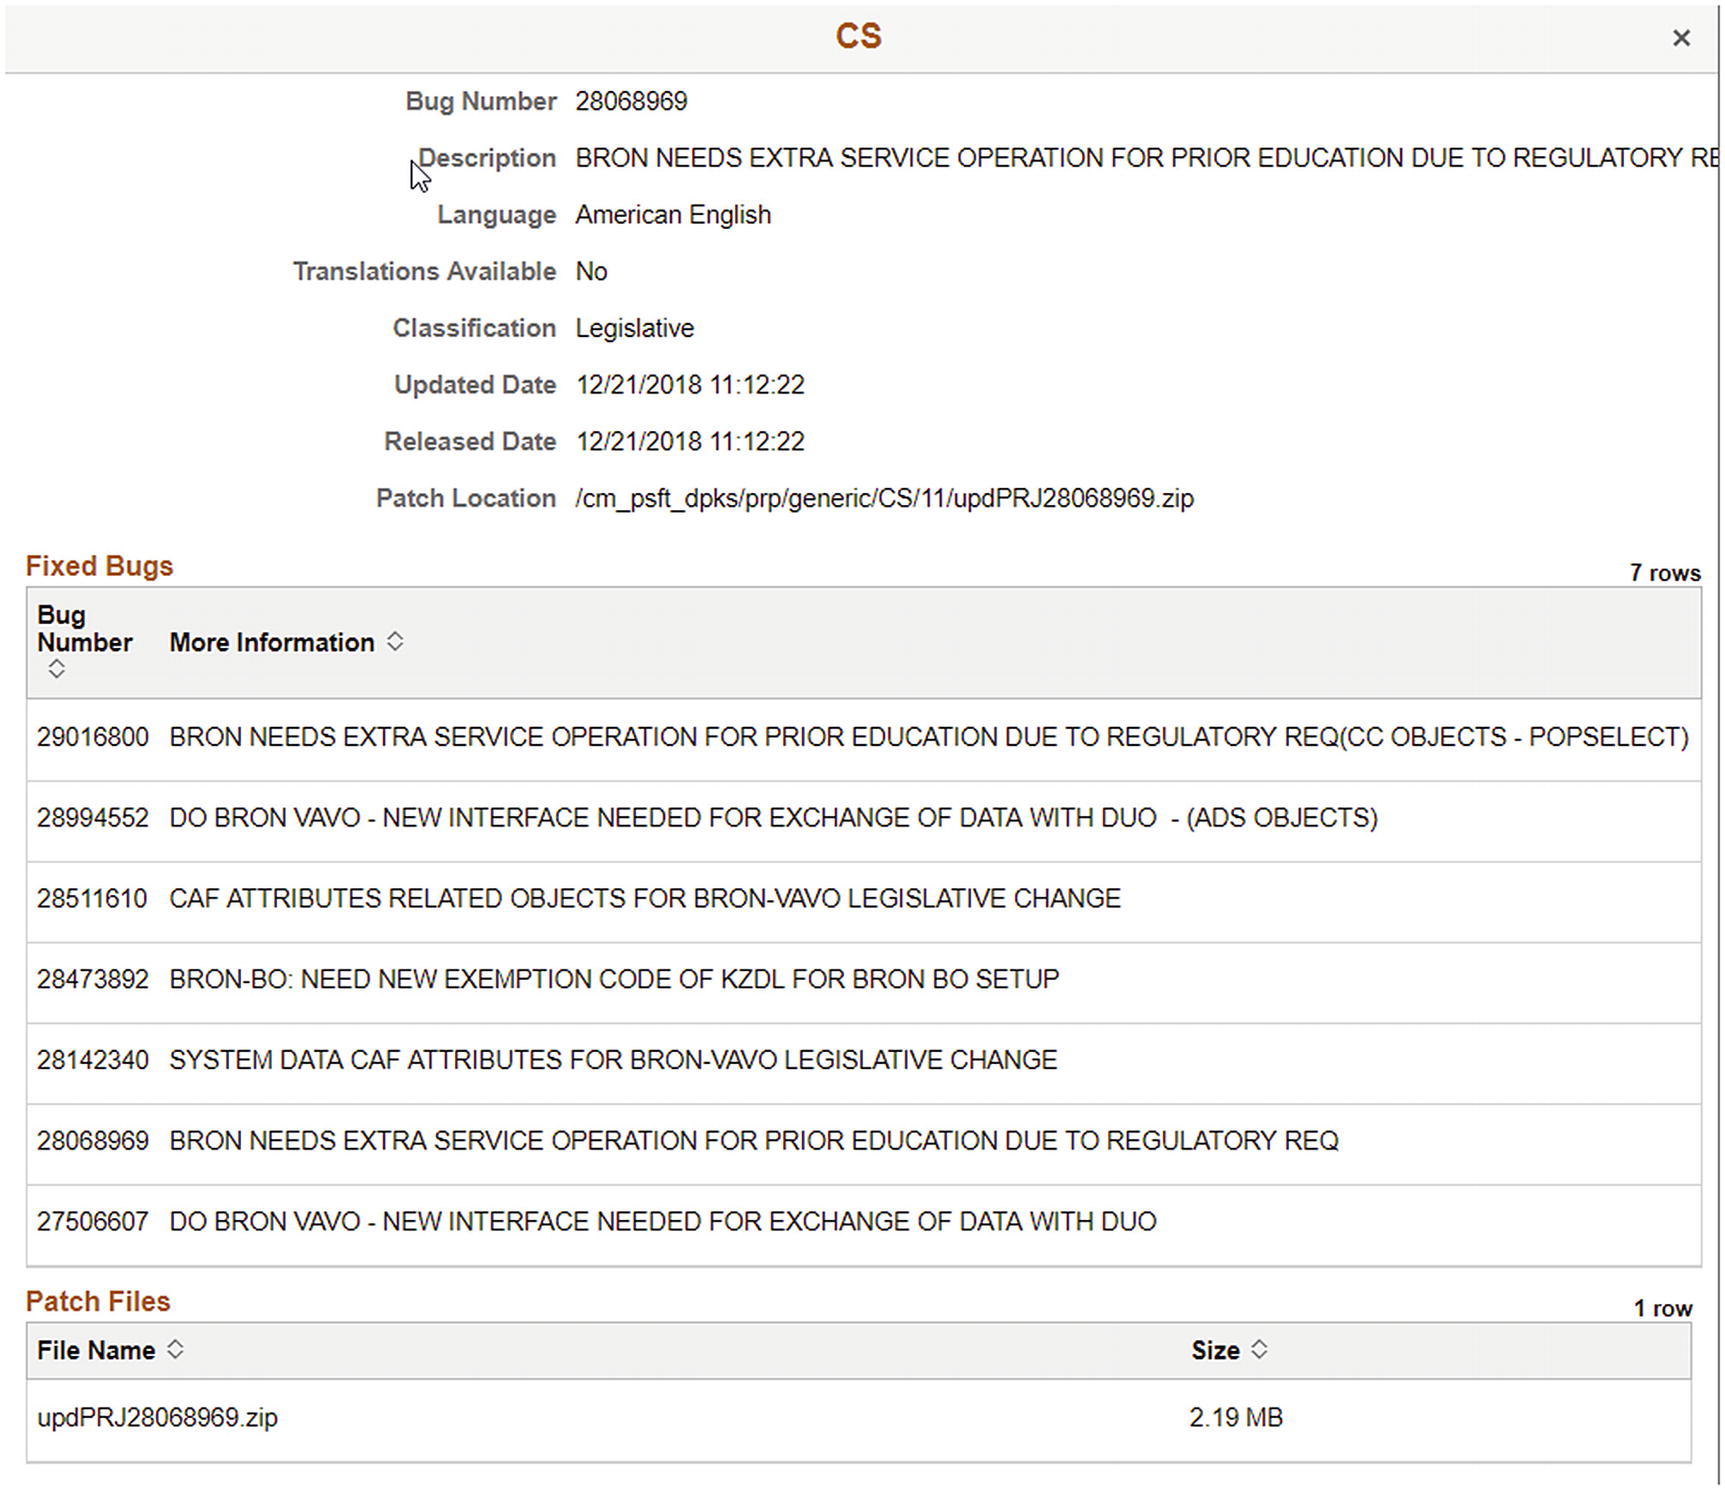
Search String: Enter the search string you are looking for in the log file. In our case we will look for the string “29057111” to find log detail about that particular bug number (Figure 5-25).
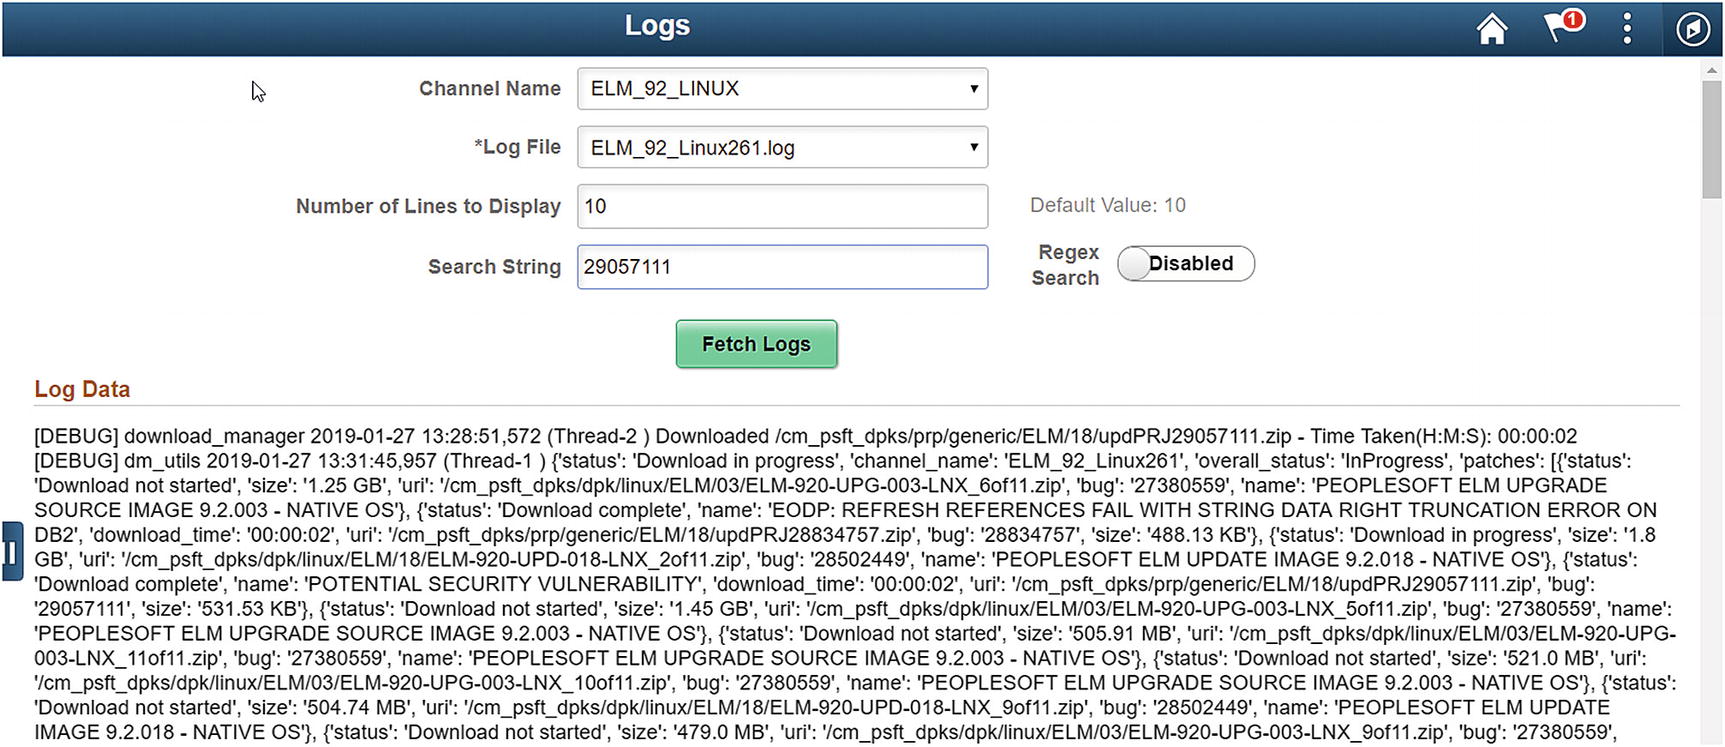
Repository download logs