
In the previous chapters, we learned about how RethinkDB works and how to scale it in order to achieve high availability and a fast response time. We also learned about running ReQL queries in RethinkDB and, before moving ahead to deploy our RethinkDB database, it's important to understand how to manage and administrate the RethinkDB database.
In this chapter, we are going to learn about RethinkDB administration, mainly user accounts, roles, and failover management, and also how to perform a crash recovery in the case of failure. We will also learn about data migration and backing up the RethinkDB database. In addition to this, we will also look over some of the third-party tools that we can use to perform the monitoring of RethinkDB.
In this chapter, we will also learn the following:
- Understanding access controls and permissions in RethinkDB
- Failover handling in RethinkDB
- Performing manual and automatic backup in RethinkDB
- Data import and export in RethinkDB
- Crash recovery in RethinkDB
- Using third-party tools
At the end of the chapter, we will also look over the third-party tools available for free to perform the monitoring of RethinkDB.
In RethinkDB, user access control is divided into permissions and scope. Each RethinkDB user has some permissions, and these permissions in turn have scope; that is, where they can perform their respective operation with each permission.
For example, say a user named John has a read permission, and his scope is tables. He can perform read (permission) operations on tables (scope), but not on databases.
In this section, we will learn about the kinds of permission and scope RethinkDB provides for administration purposes.
Let us look over the permissions and scope of RethinkDB in detail.
There are four permissions in RethinkDB; refer to the following table to understand their effect:
|
Permissions |
Effect |
|
|
Allows reading the data. |
|
|
Allows modification of data. |
|
|
Allows users to perform an |
|
|
Allows user to perform configuration tasks on tables/databases, depending upon the scope. |
As you can see in the preceding table, the read permission is self-explanatory, while the write permission consists of inserting records, replacing/updating, and deleting records.
We learned in Chapter 2, RethinkDB Query Language, that RethinkDB can perform the HTTP operation directly from the database, which can harm your database if it's open to hackers. They could dump millions of rows from the Large Hadron Collider into your database, which may bring down the whole system.
Note
CERN released 300 TB of data from the Large Hadron Collider. If you're interested, follow this link: http://www.theverge.com/2016/4/25/11501078/cern-300-tb-lhc-data-open-access
You can prevent this by only providing this access to trusted users. Moving on to the config permission, this is a kind of administrative permission where, if it's provided to the user, they can add/remove indexes, add/remove databases, reconfigure databases, and so on, depending upon the scope. We will look over the scopes in a moment.
Every permission is stored in a permissions table in the RethinkDB database. You can change the permission by using ReQL queries such as update or grant. RethinkDB encourages you to use grant for such operations.
Let's look over scopes now. RethinkDB scopes go from table, then to database, and then to global. Refer to the following table for better understanding:
|
Scopes |
Impact |
|
Table |
Permission to work on a particular table. |
|
Database |
Permission to work on a particular database. |
|
Global |
Permission to work on all tables and databases. |
As you can see, RethinkDB scopes allow you to provide permissions at the table, database, or global level.
Any permissions given to lower entities will override the higher entity permissions. What we mean is if you have write permission to the database but read permission to the table in that database, then the final access control is read for that table even though you have write permission for the database.
We have learned how permissions and roles work. Let's look over how to use them.
Before moving ahead to creating a new user and playing with the permissions and scope, let's learn a little bit about the admin user of RethinkDB.
As you may have noticed, we run most of our queries from the RethinkDB data explorer and that connects to the admin user who is the default user.
The default admin user is a global scope user with all the permissions. Initially, it is not associated with a password, but you can do so by running a simple query such as the following:
r.db('rethinkdb').table('users').get('admin').update({password: 'test@2016'});
or
Start RethinkDB using --initial-password parameter.
If you have set the password for the admin user, you need to provide the password in the RethinkDB client to connect to the RethinkDB instance. However, in the case of the RethinkDB web console, it will bypass the password and directly show the administrative screen.
We can secure that by using proxies. We have covered that in Chapter 4, Performance Tuning in RethinkDB, in the Securing clusters section.
Let's create a new user with no password. Run the following query from Data explorer as follows:
r.db("rethinkdb").table("users").insert({id: 'shahid',password: false})
You should be seeing the response shown here:

Now in order to check whether our user exists in system, let's select all users using the following query:
r.db("rethinkdb").table("users")
You should be seeing one more user document in the response of the query as shown here:
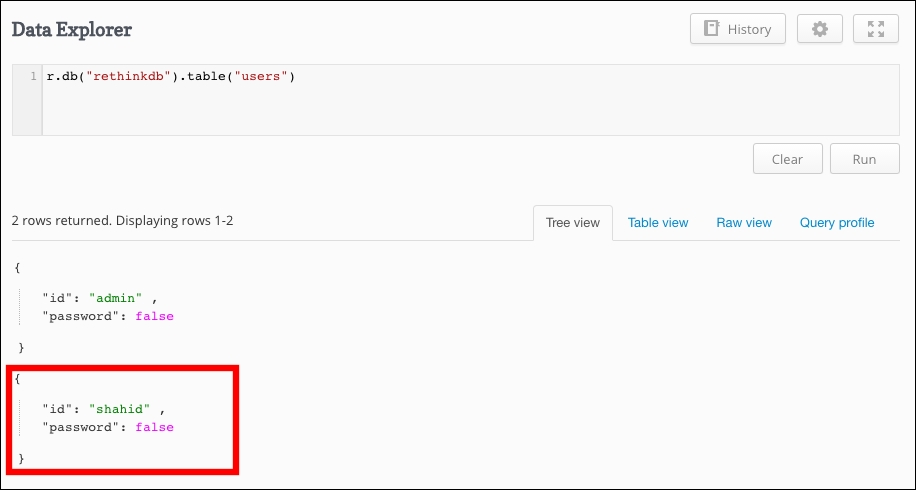
Congratulations! We have created new user using a simple insert query. However, this user can't do anything as we have not set any permissions during the creation of the user.
Since global scope is not specific to any database or table, let's look over it first. To give our user a global scope with all permissions, we need to run the following query:
r.grant("shahid",{read:true,write:true,config:true});
Notice in the query that we have not selected any databases or tables; we are providing our user access to every database with three permissions, that is, read, write and config. You should be getting the following response:

In order to provide permissions in the database scope, we need to run the following query:
r.db("company").grant("shahid",{read:true,write:true,config:false});
We are only providing read and write permissions to our user for the database named company.
You can chain the table here to limit the permission and scope to the table using the following query:
r.db("company").table("user").grant("shahid",{read:true,write:false,config:false});
Here, we have given read permission to our user for the user table, which resides in the company database.
This covers providing access control to the user. Let's look at how to revoke particular permissions of a user or delete a user.
To revoke the permissions of a user, you can run the grant query again and specify null or false to the permission you need to revoke.
For example, let's revoke the write permission of the user named shahid.
Here is the query:
r.db("company").grant("shahid",{read:true,write:false,config:false});
You can revoke the permission of the table scope by chaining the table name to the preceding query:
Now, in order to delete the user, you need to hard delete it from the RethinkDB user's table. So if we want to remove the user named shahid, here is the query:
r.db("rethinkdb").table("users").get("shahid").delete()
This will remove the user and automatically flush the permissions table. You don't need to do that manually.
Can we suspend the user for a certain length of time? Yes and no.
RethinkDB does not provide any status field for the user to suspend them, but you can do it by revoking all the permissions of the user, that is, read, write, connect, and config, and that user won't be able to do anything.
You can do it again using grant command, as shown here:
r.db("company").grant("shahid",{read:null,write:null,connect: null,config:null});
After running this query, a user will be suspended. This is the workaround I found when I realized RethinkDB doesn't provide a suspend user feature.
This covers the user management in RethinkDB along with the access controls. Let's look at how RethinkDB handles and maintains automatic failover.