
In this section, we will learn how to create the development provisioning profiles so that your applications can be installed on the iOS device so that you can deploy and test your applications prior to deploying your app to the Apple App Store:
- Log back in to the iOS developer portal at http://developer.apple.com/ .
- Click on the Member Center link that is located right at the top of the screen.
- Sign in to your account using your Apple ID and password. This will then display the developer program resources page, as shown in the following screenshot:

- Next, click on the Certificates, Identifiers & Profiles button, as done previously.
- Then, click on the All item located under the Provisioning Profiles section located at the left-hand side of the page.
- Next, click on the + button to display the Add iOS Provisioning Profiles section, as highlighted in the following screenshot:

- Then, choose the iOS App Development option from the Development section, and then click on the Continue button to proceed to the next step, as shown in the preceding screenshot.

- Next, select your App ID from the drop-down list available, as shown in the preceding screenshot, and click on the Continue button to proceed to the next step in the wizard:

- Then, choose your certificate from the list of available certificates that you would like to include to be part of the Provisioning Profiles, and click on the Continue button to proceed to the next step, as shown in the preceding screenshot.

- Next, choose from the list of devices that you would like to include as part of the Provisioning Profiles that you are about to create, and click on the Continue button to proceed to the next step, as shown in the preceding screenshot.
Note
For more information about how to register iOS devices using the Member Center, please refer to the Apple distribution guide documentation using the following link: https://developer.apple.com/library/ios/documentation/IDEs/Conceptual/AppDistributionGuide/MaintainingProfiles/MaintainingProfiles.html#//apple_ref/doc/uid/TP40012582-CH30-SW10 .
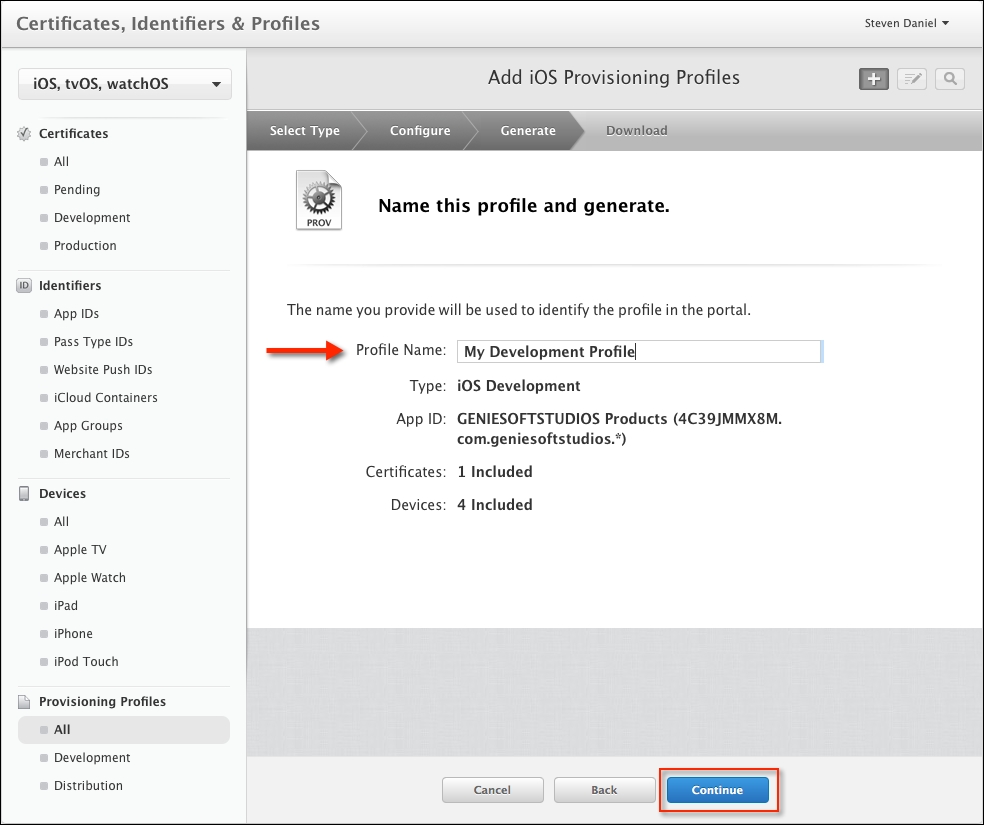
- Then, specify a name for the Profile Name field to be used to identify the provisioning profile within the iOS developer portal, and click on the Continue button to proceed to the next step, as shown in the preceding screenshot.

- Finally, your provisioning profile has been created and is ready to be used. You can choose to Download your provisioning profile from here, or you can let Xcode handle this for you, which we will be covering in the next sections.
- To close this screen, and take you back to the list of Provisioning Profiles, click on the Done button, as shown in the preceding screenshot.
In this section, we learned how to create a provisioning profile that will allow your applications to be installed onto a real iOS device. This will give you the ability to assign team members who are authorized to install and test an application onto each of their devices.