
Now that we have a table, let us put some data in it manually. Before we do that, here are some useful references on data manipulation within this book:
- Chapter 5 explains how to change data and structure, including how to use the Function selector
- Chapter 7 explains how to import data from existing files
- Chapter 9 explains how to copy data from other tables
- Chapter 10 explains the relational system (in our case, we will want to link to the
authortable)
For now, click on the Insert link, which will lead us to the data-entry (or edit) panel. This screen has room to enter information for two rows, that is, two books in our example. This is because the default value of $cfg['InsertRows'] is 2. In the lower part of the screen, the dialog Continue insertion with 2 rows can be used if the default number of rows does not suit our needs. By default, the Ignore checkbox is ticked, which means that the second group of input fields will be ignored. As soon as we enter some information in one field of this group and exit the field, the Ignore box is automatically unchecked if JavaScript is enabled in the browser.
We can enter the following sample information for two books:
- ISBN: 1-234567-89-0, title: A hundred years of cinema (volume 1), 600 pages, author ID: 1
- ISBN: 1-234567-22-0, title: Future souvenirs, 200 pages, author ID: 2
The Value column width obeys the maximum length for the character columns. For this example, we keep the lower drop-down selector to its default value of Insert as new row. We then click on Go to insert the data. There is a Go button after each set of columns that represent a row, and another one on the lower part of the screen. All these have the same effect of saving the entered data but are provided for convenience.
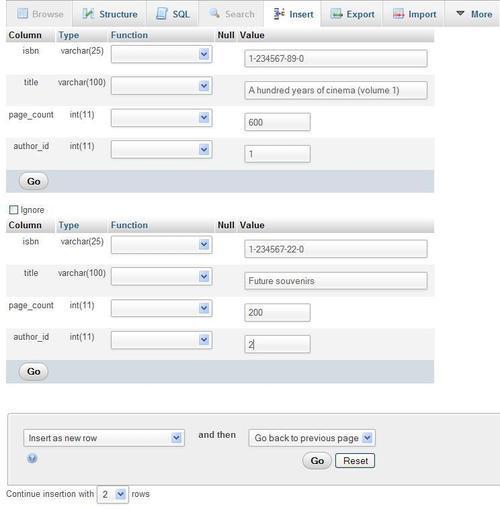
If our intention had been to enter data for more books after these two, we would have selected Insert another new row from the second drop-down before clicking on Go. This would then insert the data we have provided and reload the screen to insert more.
By default, phpMyAdmin displays an input field on a single line for the column types CHAR and VARCHAR. This is controlled by setting $cfg['CharEditing'] to'input'. Sometimes, we may want to insert line breaks (new lines) within the field. This can be done by setting $cfg['CharEditing'] to'textarea'. This is a global setting, and will apply to all the columns of all the tables, for all users of this copy of phpMyAdmin. In this mode, insertion of line breaks may be done manually with the Enter key, or by copying and pasting lines of text from another on-screen source. Applying this setting would generate a different Insert screen, shown as follows:
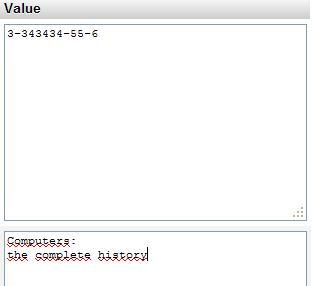
With this entry mode, the maximum length of each column no longer applies visually. It would be enforced by MySQL at insert time.