
In Chapter 10, we defined relations between the book and author tables. These relations were used for various foreign key functions (for example, getting a list of possible values in Insert mode). We will now examine a feature that enables us to generate a custom-made relational schema for our tables in the popular PDF format and other formats as well. This feature requires that the phpMyAdmin configuration storage be properly installed and configured.
To get a more complete schema, we will now add another table, country, to our database. The following block of code displays the contents of its export file:
CREATE TABLE IF NOT EXISTS `country` (
`code` char(2) NOT NULL,
`description` varchar(50) NOT NULL,
PRIMARY KEY (`code`)
) ENGINE=MyISAM DEFAULT CHARSET=latin1;
INSERT INTO `country` (`code`, `description`) VALUES
('ca', 'Canada'),
('uk', 'United Kingdom'),
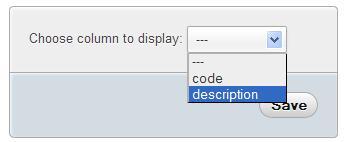
We will now link this table to the author table. First, in the Relation view for the country table, we specify the column that we want to display, and then click on Save.
We then add a country_code column (same type and size as that of the code column in the country table) to the author table, and in the Relation view, we link it to the newly-created country table.
For this example, it's not necessary to enter any country data for an author, as we are interested only in the relational schema.

Each relational schema is called a page. We can create or edit a page by clicking on Edit or export relational schema in the Operations page of the Database view.
A relational schema cannot span multiple databases. But even working with just one database, the number of tables might be large. Representing the various table relations in a clear way could be a challenge. This is why we may use many pages, each showing some tables and their relations.
We must also take into account the dimensions of the final output. Printing on letter-size paper gives us less space to show all of our tables and still have a legible schema.
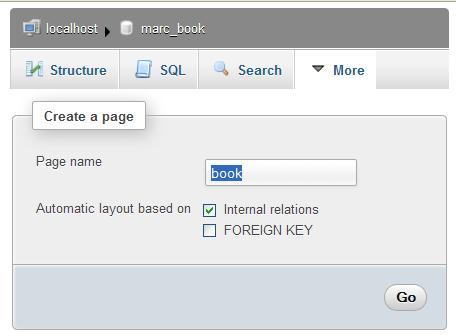
As there are no existing pages, we need to create one. As our most important table is book, we will also name this page book.
We will choose which tables we wish to see in the relational schema. We could choose each table individually. However, for a good start, checking the appropriate Automatic layout checkbox is recommended. Doing this puts all the related tables from our database onto the list of tables to be included in the schema. It then generates appropriate coordinates so that the tables will appear in a spiral layout, starting from the center of the schema. These coordinates are expressed in millimeters, with (0, 0) being located at the upper-left corner. We then click on Go:
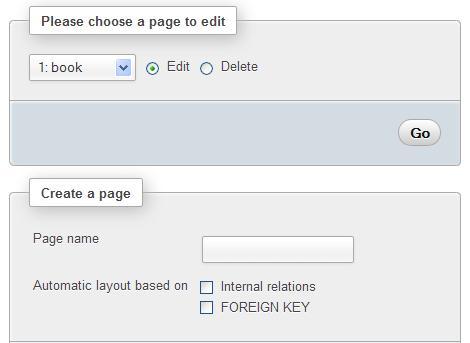
We now get a page with three different sections. The first one is the page menu, where we choose the page on which we want to work (from the drop-down menu). We can also delete the chosen page. We could also eventually create a second schema (page).
The next section is the table placement portion. We can now see the benefit of the Automatic layout feature—we already have our three tables selected, with the X and Y coordinate columns filled in. We can add a table (on the last line), delete a table (using the checkbox), and change the coordinates (which represent the position of the upper-left corner of each table on the schema):
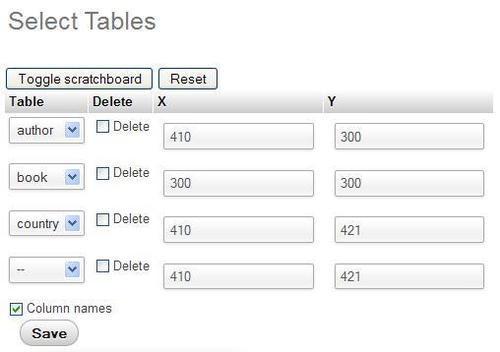
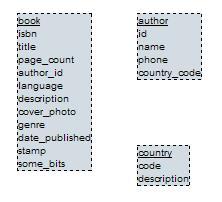
To help set exact coordinates, a visual editor is available for JavaScript-enabled browsers. The editor appears when the Toggle scratchboard button is clicked once. It will disappear when this button is clicked again. We can drag and drop tables on the scratchboard, and the coordinates will change accordingly. The appearance of the tables on the scratchboard provides a rough guide to the final PDF output. Some people prefer to see only the table names (without every column name) on the scratchboard. This can be done by deselecting the Column names checkbox and then clicking on Save. The following image shows an example of this scratchboard:
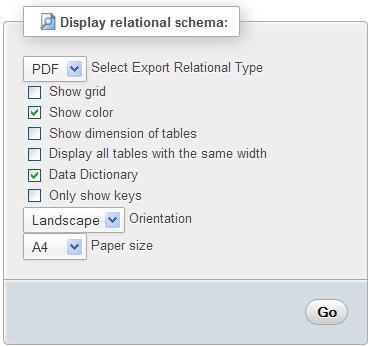
The last section of the screen is the report generation dialog. Now that we have created a page, the Display relational schema shows a dialog as seen in the following screenshot:
|
Option |
Description |
|---|---|
|
Select Export Relational Type |
Permits to choose the file format to export to (PDF, SVG, DIA, Visio, or EPS). |
|
Show grid |
The schema will have a grid layer with the coordinates displayed. Useful when designing and testing the schema. |
|
Show color |
The links, table names, and special columns (primary keys and display columns) will be in color. |
|
Show dimension of tables |
The visual dimension of each table in the table title (for example, 32x30) will be displayed. This is useful when designing and testing the schema. |
|
Display all tables with the same width |
All tables will be displayed using the same width. (Normally, the width adjusts itself according to the length of the table and column names.) |
|
Data Dictionary |
The data dictionary, which was covered earlier in this chapter, will be included at the beginning of the report. |
|
Only show keys |
Does not show the columns on which there are no indexes defined. |
|
Orientation |
Here, we choose the printed orientation of the report |
|
Paper size |
Changing this option will influence the schema and the scratchboard dimensions. |
In config.inc.php, the following parameters define the available paper sizes and the default choice:
$cfg['PDFPageSizes'] = array('A3', 'A4', 'A5', 'letter', 'legal'),
$cfg['PDFDefaultPageSize'] = 'A4';
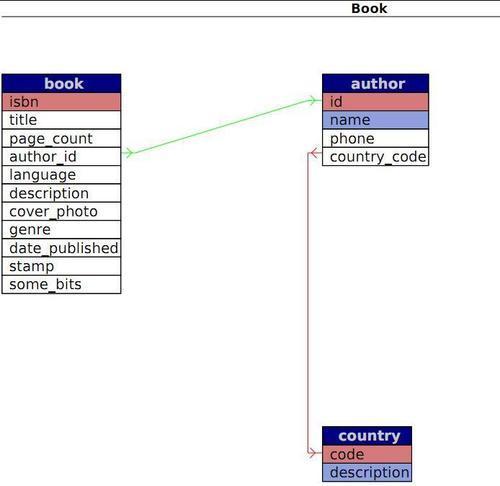
The following screenshot shows the last page of the generated report (the schema page) in PDF format. The first four pages contain the data dictionary along with an additional feature.
Arrows point in the direction of the corresponding foreign table. If Show color checkbox has been ticked, the primary keys are shown in red and the display columns in blue, as shown in the following screenshot:
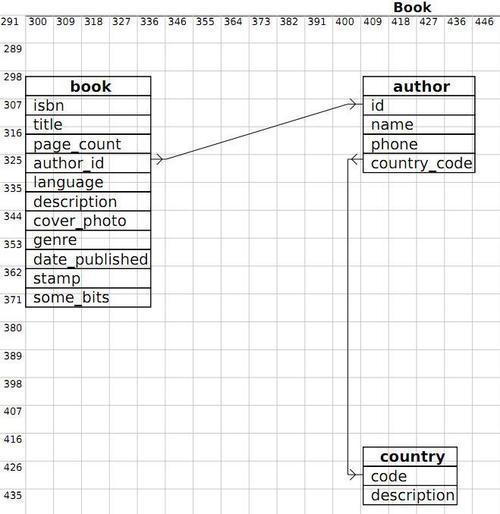
The following screenshot provides another example generated from the same book table's PDF page definition. This time the grid is shown, but not the colors:
All the text we see in the PDF schema is drawn using a specific font. phpMyAdmin uses the DejaVuSans font (http://dejavu.sourceforge.net), which covers a wide range of characters.
For actual PDF generation, phpMyAdmin relies on the tcpdf library (http://tcpdf.sourceforge.net). This library has two ways of using fonts—embedded and not embedded. Embedding fonts will produce a bigger PDF file because the whole font is included in the PDF file. This is the default option chosen by phpMyAdmin because the library does not depend on the presence of a specific TrueType font in the client operating system.
The fonts are located in libraries/tcpdf/fonts under the main phpMyAdmin directory.
To use a different font file, we must first add it to the library (tools are present in the original tcpdf kit and a tutorial is available on the http://www.fpdf.org website) and then modify phpMyAdmin's libraries/schema/ Pdf_Relation_Schema.class.php source code.
The Designer feature (available in the Database view) offers a more refined way of moving the tables on screen, as the column links follow the table movements. Therefore, an interface exists between the tables' coordinates, as saved by the Designer, and the coordinates for the schema. Let us enter the Designer and click on the small PDF logo.
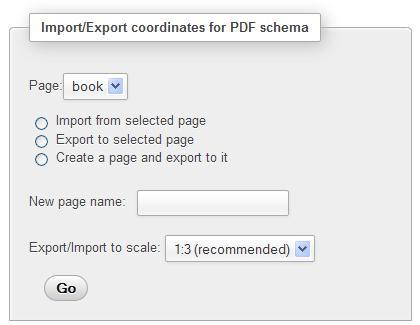
This brings us to a panel where we can choose the (existing) schema name and the action we want to perform—in our case, to export the Designer coordinates to the schema definition. We could also use the New page name dialog, entering a page name, and then clicking on Go to create an empty page. From here, we can subsequently export the coordinates saved from the Designer workspace:
Note
There is a difference in the span of tables managed by the Designer and by the Edit or export relational schema feature. The Designer manipulates, by default, every table of a database, whereas the Edit or export relational schema panel offers us a choice of tables, enabling us to represent a subset of the relations if there are many tables.