Chapter 10: Controlling Secure Access to Information Stored in Office 365
In the previous chapters, we have discussed the importance of securing and protecting a Microsoft 365 environment and shown you the various methods of protection that are available to you as an administrator. These include Multi-Factor Authentication, Conditional Access, Role-based access control, Azure AD Identity Protection, and Privileged Identity Management (PIM).
In this chapter, we will examine some additional features that you can use to protect user and device access within Office 365. We will show you how Privileged Access Management (PAM) enables the principle of just enough access (JEA) and grants permissions to users for functions at the task level, as opposed to a collection of tasks that are combined to make up a role (such as in PIM).
You will also learn the principles of the Customer Lockbox and how to turn Customer Lockbox requests on or off. Additionally, we will explain how to configure external sharing with Azure B2B while also demonstrating how this process differs from the external sharing capabilities of OneDrive and SharePoint Online.
We shall cover these topics in the following order:
- Understanding PIM
- Understanding Customer Lockbox
- Protecting access to the collaboration components of Office 365
- Allowing external user access with B2B sharing
Understanding privileged access management
PAM is a Microsoft 365 feature that provides more granular capabilities by granting users access to functions at a task level, as opposed to via roles. This is best explained by comparing PAM to PIM. We examined PIM earlier in this book in Chapter 4, Role Assignment and Privileged Identities in Microsoft 365, and explained how it can be used to grant JIT access to the administrative roles within Microsoft 365 (such as Global Administrator or Exchange Administrator). These roles are made up of a collection of functions. PAM differs in that it enables the principle of JEA instead, which means that access can be granted to specific individual functions instead of a collection of functions that make up a role. For example, with PAM, you can grant your users access to a single function, such as creating a new Exchange Online Transport rule.
Important note
At the time of writing this book, Privileged Access Management is limited only to functions available within Exchange Online. It is expected that functions from other services within Office 365 will be added to PAM in the coming months.
Let's take a look at how to enable PAM in a Microsoft 365 tenant and start using it, both from the Microsoft 365 Admin Center and from Windows PowerShell.
Enabling PAM
To enable PAM within your Microsoft 365 tenant, you need to have the Exchange Management Administrator role. You can enable and configure this feature by logging into the Microsoft 365 Admin Center at https://admin.microsoft.com/ and completing the following steps:
- Create a mail-enabled security group in Office 365 and add members to this group who you wish to be able to approve PAM requests. In the following example, we have created a group called PAM:
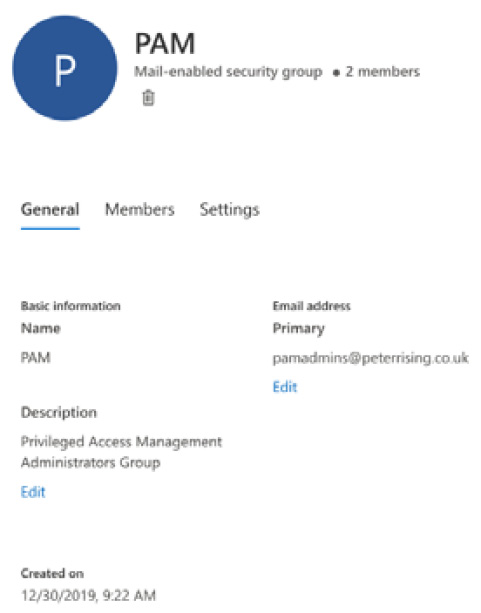
Figure 10.1 – Mail-enabled security group
- Next, navigate to Settings | Org settings, as shown in the following screenshot:
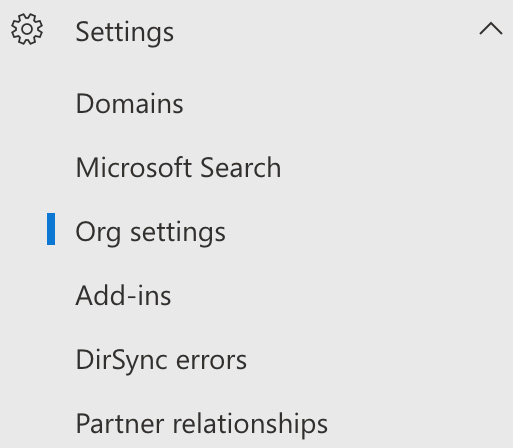
Figure 10.2 – Settings
- Select the Security & privacy option, as shown in the following screenshot:

Figure 10.3 – Security and privacy
- Scroll down to Privileged Access. You will see the following screen. Click on Edit:

Figure 10.4 – Privileged Access
- Set Require approvals for privilege tasks to On and choose the group we created in step 1. Then, click on Save, as shown in the following screenshot:
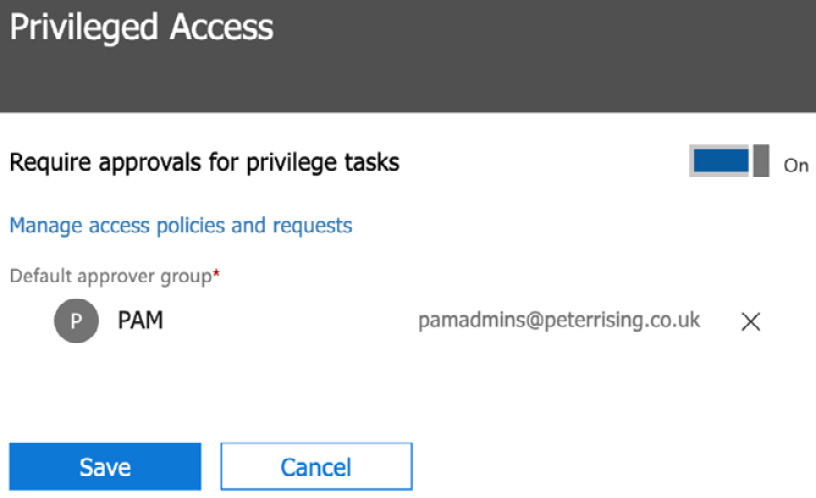
Figure 10.5 – Privileged Access
This page will now look as follows:
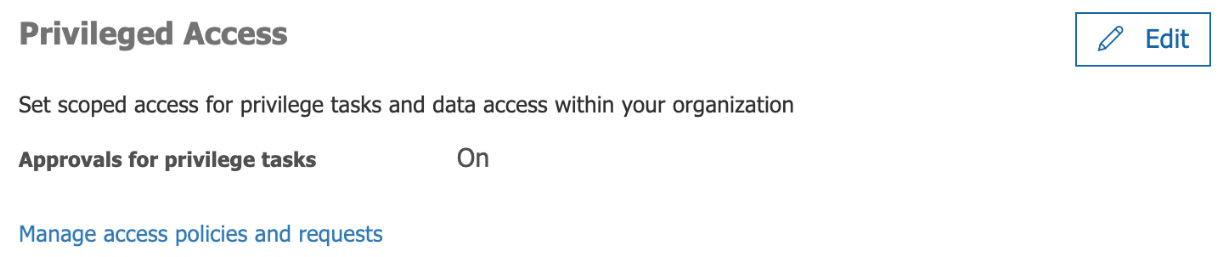
Figure 10.6 – Privileged Access
- To enable PAM using Exchange Online PowerShell, enter the following command:
Enable-ElevatedAccessControl -AdminGroup '[email protected]'
Now that we have enabled the PAM feature, let's look at creating access policies.
Creating access policies for PAM
To create an access policy for PAM, we need to complete the following steps:
- From the Microsoft 365 Admin Center, navigate to Settings | Security & privacy and choose Privileged Access. Then, select Manage access policies and requests, as shown in the following screenshot:

Figure 10.7 – Manage access policies and requests
- Next, click on Configure Policies at the top right-hand side of the screen, as shown in the following screenshot:
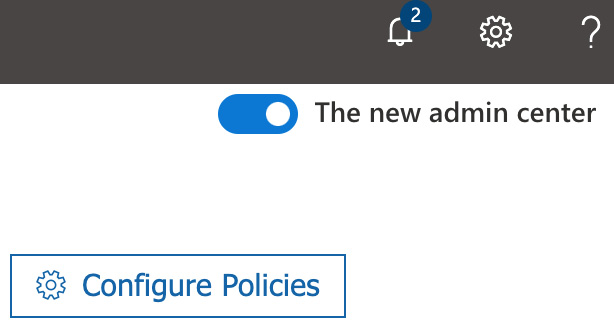
Figure 10.8 – Configure Policies
- You will see a list of policies. As shown in the following screenshot, we have already created some policies:

Figure 10.9 – Policies
- To create a new policy, click on Add a policy. Here, you will see the options shown in the following screenshot:
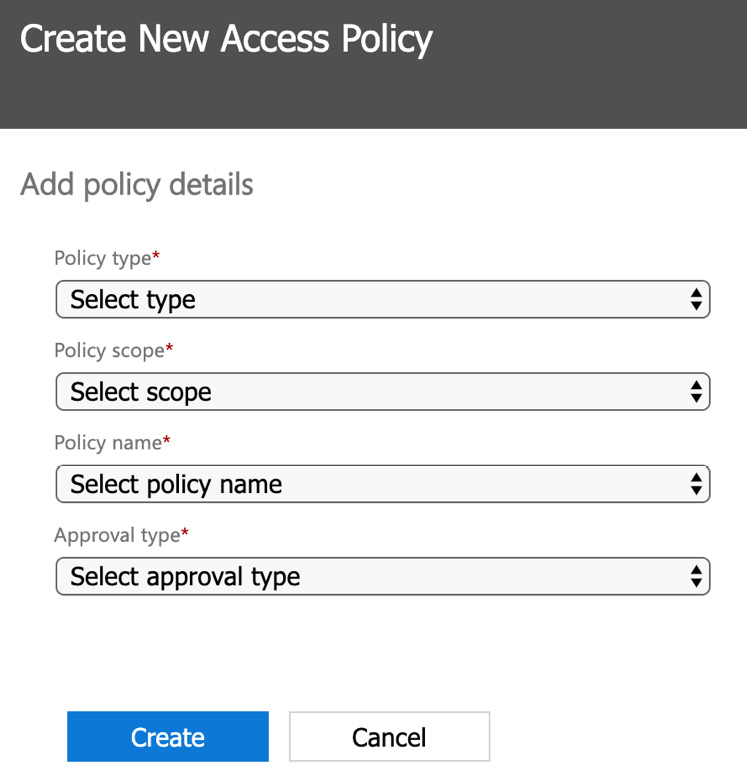
Figure 10.10 – Create New Access Policy
You have the following options to choose from for each of the available fields:

- Once you have made the required field selections for your policy, click on Create.
- To create a new access policy using Exchange Online PowerShell, we can run the following command:
New-ElevatedAccessApprovalPolicy -Task 'ExchangeNew-MailboxSearch' -ApprovalType Manual -ApproverGroup '[email protected]'
The previous command creates a new policy with the following settings:

So, to recap, we have now enabled PAM in our Microsoft 365 tenant and created some example access policies. Next, let's look at submitting and approving PAM requests.
Submitting and approving PAM requests
Now that we have PAM enabled and some access policies set up, users are able to submit privileged access requests that can then be approved by members of the approval group, which we set up earlier in this chapter.
Important note
At the time of writing this book, the ability for standard users to submit PAM requests from the Microsoft 365 Admin Center is oddly not yet available, and only users with existing admin role assignments are able to access the submission request page.
In order to submit and approve requests from the Microsoft 365 Admin Center, we need to complete the following steps:
- From the Microsoft 365 Admin Center, navigate to Settings | Security & privacy and choose Privileged Access.
- Select Manage access policies and requests. You will see the following screen:

Figure 10.11 – Managing access policies and requests
- Users with existing admin access are able to click on New request and choose from the options shown in the following screenshot:

Figure 10.12 – New access request
- Once the details have been filled in, the user will click on Save to complete the request.
The request will then appear in the list and be visible to approvers, who may then open and approve or deny the request for access.
Important note
Users should be able to submit PAM requests, and then get them approved or denied by the approvers by using Exchange Online PowerShell. As the functionality for this process is limited at the time of writing this book and cannot be accessed by users yet, we are not able to cover this process in detail. Please take a look at the Privileged Access Management link that's included in the References section at the end of this chapter for more details.
In this section, we have shown you how PAM can be used in Microsoft 365 to provide users with access to elevated privileges at the task level using the principle of JEA. Next, we will examine how the Customer Lockbox feature allows you to control the level of access that Microsoft support engineers will have to your environment when troubleshooting issues on your behalf.
Understanding Customer Lockbox
On occasion, you may need to contact Microsoft for support in relation to your Office 365 tenant. This is usually achieved via the use of troubleshooting tools or other means.
However, on some occasions, it may be necessary for a Microsoft Engineer to request access to your tenant.
In order to ensure that this is carried out in a secure and controlled manner, Microsoft provide the Customer Lockbox feature, which, when enabled, will require any Microsoft support representatives to complete a request and approval process in order to gain access.
Important note
Customer Lockbox is only available for organizations with Microsoft 365 E5, Office 365 E5, Information Protection and Compliance, or Advanced Compliance add-on subscriptions. Customer Lockbox currently works only with Exchange Online, OneDrive, and SharePoint Online.
Enabling Customer Lockbox
The Customer Lockbox feature can be enabled in the Microsoft 365 Admin Center by Office 365 Global Administrators (or by any user who has been assigned the Customer Lockbox access approver admin role). Once the feature has been activated, Microsoft is obliged to seek permission from an organization before accessing any content within their tenant.
Enabling the Customer Lockbox feature can be done by completing the following steps:
- From the Microsoft 365 Admin Center, navigate to Settings | Org settings | Security & privacy and choose Edit from the Customer Lockbox section, as shown in the following screenshot:

Figure 10.13 – Customer Lockbox
- Click the check box next to Require approval for all data access requests and click Save changes.
The Customer Lockbox feature is now enabled for the tenant. Next, we will examine the process of approving or denying a Customer Lockbox request from Microsoft.
Responding to Customer Lockbox requests
Whenever Microsoft make a Customer Lockbox request for access to your tenant, Global Administrators can respond to this by completing the following steps:
- Log into the Microsoft 365 Admin Center and navigate to Support | Customer Lockbox Requests, as shown in the following screenshot:
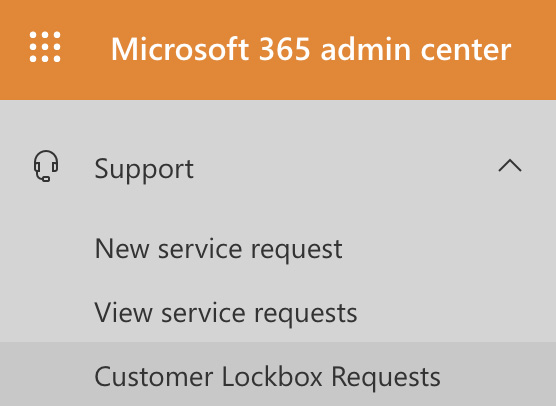
Figure 10.14 – Customer Lockbox Requests
- Any Customer Lockbox Requests will be shown here and will include a reference number, date of the request, the identity of the requestor, and the status of the request (which will initially be set to Pending).
- By clicking on a request, the Global Administrator can review further details about the nature of the request, and then choose to Approve or Deny access.
- If the request is approved, the Microsoft Engineer will then be granted a 4-hour window of access to troubleshoot the issue. After this 4-hour period, access will be automatically removed.
All Customer Lockbox activity is recorded in the Office 365 audit log and can be accessed from the Microsoft 365 Security and Compliance Center at https://protection.office.com.
Important note
Further information on auditing Customer Lockbox activity is included in the References section at the end of this chapter.
In this section, we have introduced you to the Customer Lockbox feature of Office 365, which allows Global Administrators to enable a setting that requires Microsoft support engineers to request approval for access to your environment in order to troubleshoot issues related to Exchange Online, OneDrive, and SharePoint Online.
In the next section, we will show you how it is possible to protect the collaboration components within your Office 365 environment by configuring policies to protect and secure your SharePoint Online Team Sites and document libraries, as well as OneDrive document libraries.
Protecting access to the collaboration components of Office 365
With more and more documents being stored in the cloud, it is important, as a Microsoft 365 Administrator, to ensure that access to files and folders in services such as SharePoint Online and OneDrive are effectively protected.
There are some simple settings within the SharePoint Online Admin Center that you can configure to apply access control settings for your users, which will help to ensure that only authorized personnel are able to access the content that is hosted in your Microsoft 365 tenant.
In order to configure these settings, we need to take the following steps:
- Log into the Microsoft 365 Admin Center at https://admin.microsoft.com/. Then, under Admin Centers, select SharePoint, as shown in the following screenshot:
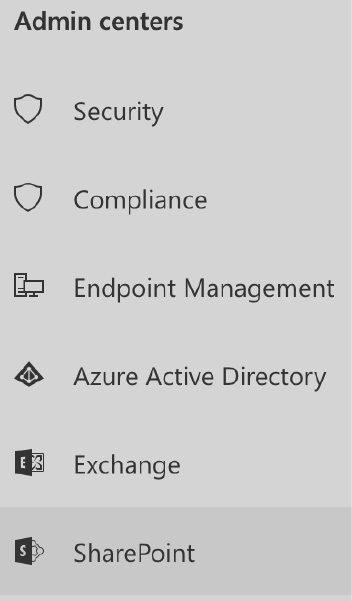
Figure 10.15 – SharePoint
- From the SharePoint Admin Center, select Access Control from the left-hand side menu, which will make the following options appear:
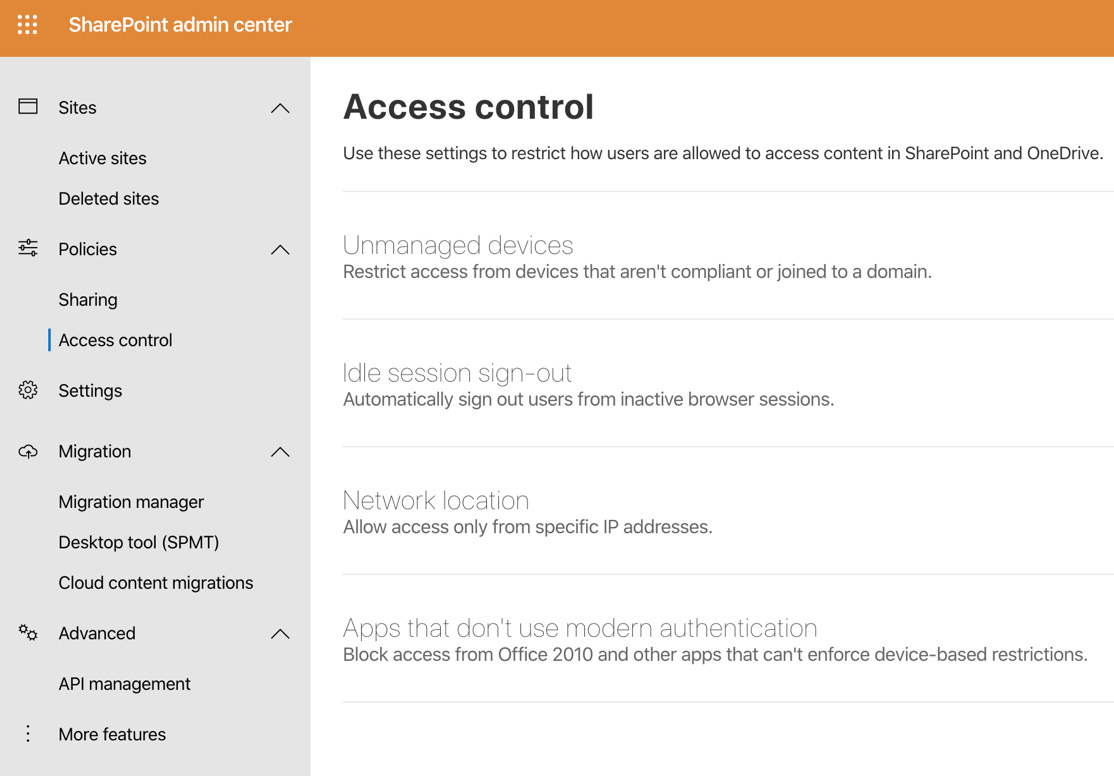
Figure 10.16 – Access control
- The Unmanaged devices option enables you to set tenant-wide settings to control the level of access from any unmanaged devices, as shown in the following screenshot:

Figure 10.17 – Unmanaged devices
- The Idle session sign-out option can be set as follows to automatically sign out users after a period of inactivity:

Figure 10.18 – Idle session sign-out
- Under Network location, you have the option to allow access only from IP ranges that you have specified, as shown in the following screenshot:
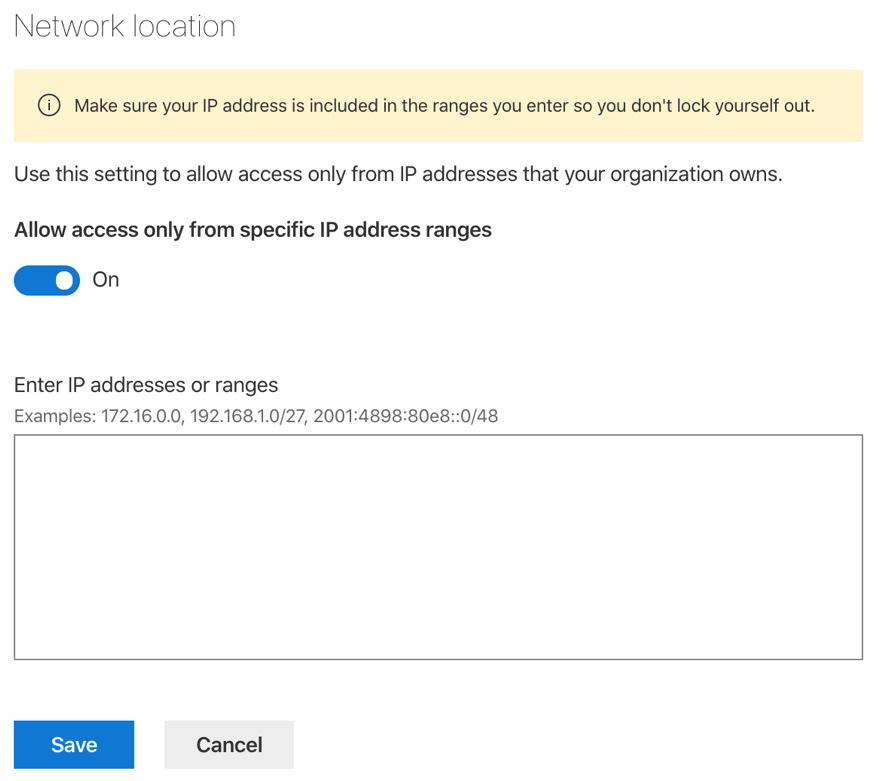
Figure 10.19 – Network location
- Finally, you can set the option to allow or block access for Apps that don't use modern authentication, as shown in the following screenshot:
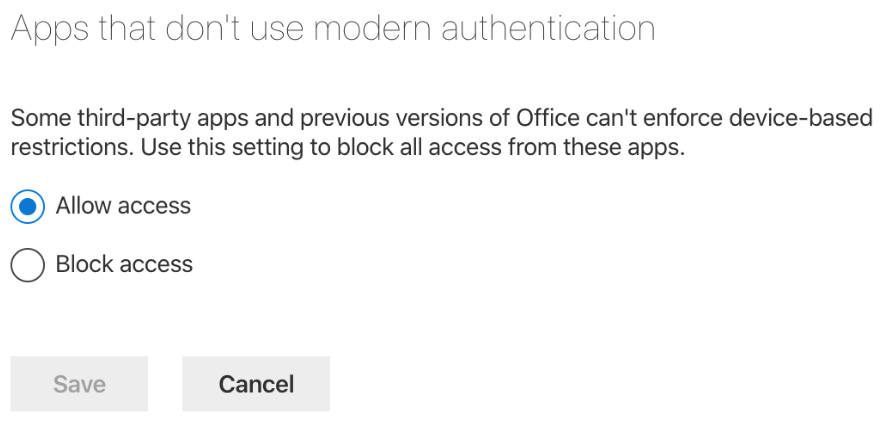
Figure 10.20 – Apps that don't use modern authentication
It is highly recommended that Microsoft 365 Administrators review these settings where they have users accessing content within SharePoint Online and OneDrive.
Organizational needs and policies will, of course, differ, but it is good practice to use these settings as a baseline to protect access to your Office 365 documents and data.
Important note
The access control settings described here are a good starting point for protecting and securing access to your data within Microsoft 365. In order to apply more advanced protection, consider configuring Conditional Access Policies and Azure AD Identity Protection, as described in the earlier chapters of this book.
In this section, we have shown you some quick and easy ways to protect your files and folders stored in SharePoint Online and OneDrive Sites and Document Libraries.
We showed you how the access control settings in the SharePoint Online Admin Center can be used to apply policies for unmanaged devices, idle session timeout settings, and allow access only from specified IP address ranges. We also showed you how to allow or block apps that do not use modern authentication.
In the final section of this chapter, we will examine the principles of allowing external user access to your Microsoft 365 environment by using Azure Active Directory B2B collaboration.
Allowing external user access with B2B sharing
With Azure AD B2B, Microsoft 365 administrators have the ability to enable and control cross-organization collaboration. This allows you to invite external users to access apps and resources within your Office 365 environment, while also requiring these external users to comply with the security principles that you have defined for your organization, such as Multi-Factor Authentication or Conditional Access.
There are some licensing requirements that relate to Azure AD B2B, and you can allow up to five guest users per Azure AD license.
Inviting external users is a very straightforward process, and is shown in the following steps:
- Log into the Azure portal at https://portal.azure.com and navigate to Azure Active Directory | Users:
- Select the New guest user option, as shown in the following screenshot:

Figure 10.21 – New guest user
- You will see the following options, where you can either create the user yourself or send an invitation to the user:
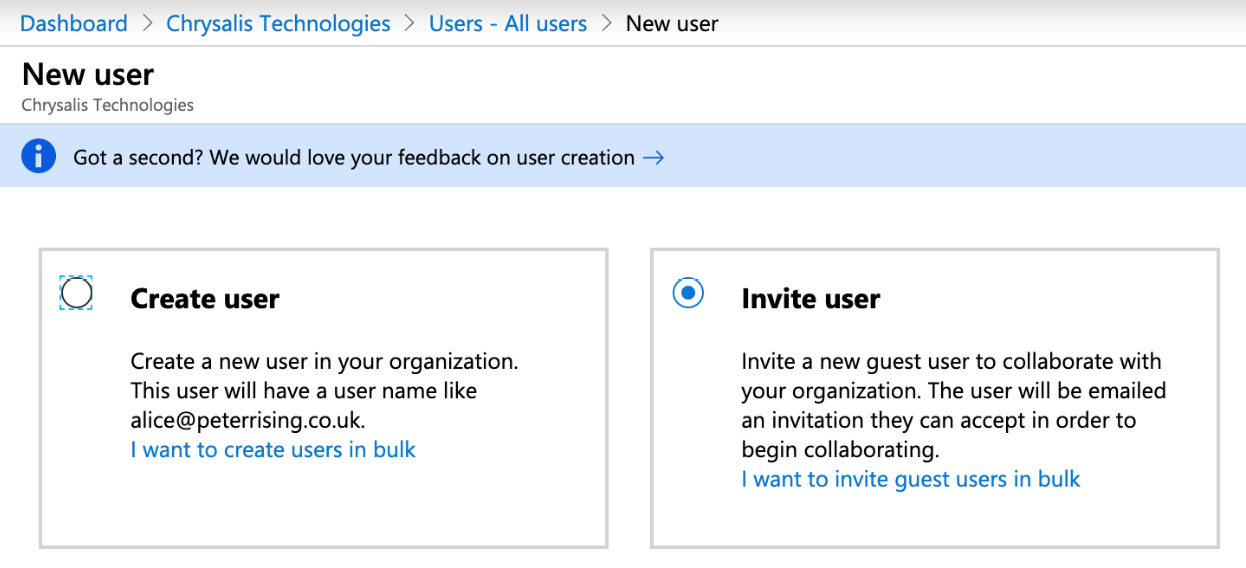
Figure 10.22 – New guest user
- In this example, we will choose to send an invitation to an external user who is using a personal Google account, as shown in the following screenshot:

Figure 10.23 – User details
- Further down the guest user creation dialog, we can control what the new guest user will be able to access by assigning them to groups, allowing or blocking sign in, setting a country usage location, and assigning roles, as shown in the following screenshot:

Figure 10.24 – Groups and roles
- Once you have made the required selections for your external user, click on Invite. The invitation will be generated, as follows:

Figure 10.25 – Successful invitation
- Now, our target guest user will receive an invitation email in their Gmail account, as shown in the following screenshot:
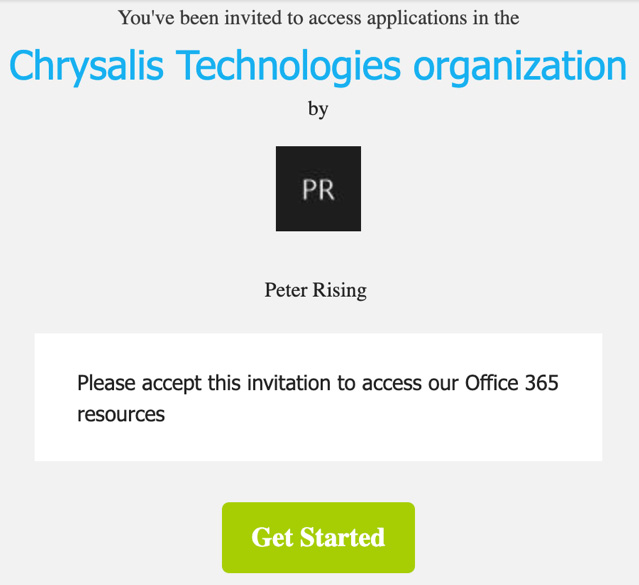
Figure 10.26 – Guest user invitation
- By clicking on the Get Started link in the invitation email, the guest user will be prompted to click Next to create an account, as shown in the following screenshot:

Figure 10.27 – Create account
The guest user will then be required to set a password, select a region, and provide their date of birth. They will also receive a further verification email with a code they will need to enter.
- Once this has all been completed, they will see the permissions review dialog, as shown in the following screenshot. They must click on Accept to complete the process:
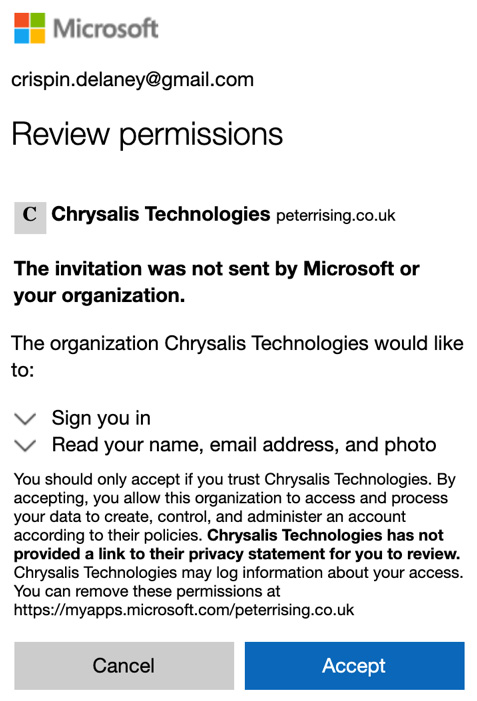
Figure 10.28 – Review permissions
The user is now logged into your organization's Office 365 environment and will be able to access any apps or resources you have assigned to them. In this example, we have not assigned the user to any apps yet, but this can easily be done via group memberships:

Figure 10.29 – Apps
- Back in the Azure portal, you will now be able to see the new Guest user object, as shown in the following screenshot:

Figure 10.30 – Guest user object
When we select the user, we can see that they retain their own identity. However, we can also apply our organizational requirements to them in order for them to be able to access the apps and resources within our environment:

Figure 10.31 – Guest user details
Azure B2B is a simple yet powerful way to allow external parties access to the apps and resources in your Microsoft 365 environment, all while retaining control of what they are allowed to do and the security principles they must adhere to in order to gain access.
Important note
SharePoint Online and OneDrive have slightly different invitation mechanisms for external/guest users. The options for external access can be found in the SharePoint Admin Center, under the Sharing section.
Summary
In this chapter, we examined the principles of securing access to your Microsoft 365 environment by using features such as privileged access management to grant users just enough access to specific tasks within Microsoft 365, instead of assigning them to roles that have additional capabilities.
We also showed you how the Customer Lockbox is used to ensure that Microsoft support engineers must specifically request permission to access your tenant, and that their activities will be recorded in an audit log. In addition, we demonstrated how access controls can easily be applied for SharePoint and OneDrive via the SharePoint Admin Center, as well as how Azure B2B sharing allows you to invite external users into your organization to access your apps and resources in a secure and controlled manner.
In the next chapter, we will introduce you to Azure Information Protection, which is a powerful Azure AD Premium feature that allows Microsoft 365 administrators to configure labels and policies in the Azure portal and synchronize these to the Microsoft 365 Admin Center using unified labeling.
Users are then able to apply label classifications to emails and documents in order to protect them and ensure that only authorized recipients can access the content.
Questions
- True or False: Privileged Access Management is currently supported only for Exchange Online.
a. True
b. False
- With Azure B2B, how many guest users can be licensed to a single Azure AD license?
a. 3
b. 5
c. 10
d. 15
- When a Customer Lockbox access request is made by Microsoft, how long does the representative have access to the Microsoft 365 environment?
a. 1 hour
b. 2 hours
c. 4 hours
d. 6 hours
e. 1 day
- Which of the following is not an available policy type in Privileged Access Management?
a. Task
b. Role Group
c. Role
d. Task Group
- Which of the following is not an option when configuring access controls in the SharePoint Admin Center?
a. Unmanaged devices
b. Unmanaged users
c. Idle session timeout
d. Network Location
e. Apps that don't use modern authentication
- Where in the Microsoft 365 Admin Center would you configure Privileged Access Management?
a. Settings | Services and Add-ins
b. Settings | Domains
c. Settings | Security and Privacy
d. Settings | Organization Profile
- What are the methods of setting up Azure B2B guest users (choose two)?
a. Invite User
b. Delegate User
c. Create User
d. Synchronize User
e. Add existing user to a group
- True or False: The SharePoint Online external sharing setting is the same as for Azure AD B2B.
a. True
b. False
- Which of the following subscriptions will provide the Customer Lockbox functionality (choose two)?
a. Microsoft 365 E5
b. Microsoft 365 E3
c. Office 365 E3
d. Office 365 E5
e. Office 365 Business Premium
- True or False: Azure B2B guest users can be forced to register for Multi-Factor Authentication in order to gain access to your Microsoft 365 environment.
a. True
b. False
References
Please refer to the following links for more information regarding what was covered in this chapter:
- Privileged Access Management: https://docs.microsoft.com/en-us/microsoft-365/compliance/privileged-access-management-overview
- Configuring Privileged Access Management: https://docs.microsoft.com/en-us/microsoft-365/compliance/privileged-access-management-configuration
- Customer Lockbox (and auditing Customer Lockbox requests) in Office 365: https://docs.microsoft.com/en-us/microsoft-365/compliance/customer-lockbox-requests
- Securing SharePoint Sites and files: https://docs.microsoft.com/en-gb/microsoft-365/enterprise/sharepoint-file-access-policies
- Azure Active Directory B2B: https://docs.microsoft.com/en-us/azure/active-directory/b2b/
- Troubleshooting Azure Active Directory B2B: https://docs.microsoft.com/en-us/azure/active-directory/b2b/troubleshoot