Chapter 12: Data Loss Prevention
Data Loss Prevention (DLP) in Microsoft 365 is designed to allow administrators to protect users from accidentally sharing sensitive information from your organization. This is achieved by creating policies that can be applied to your users and groups across multiple Microsoft 365 services. These policies use built-in or custom sensitive information types that can then be detected within the emails or documents that your users are working on, as well as trigger user policy tips to provide guidance on sharing information. These policies can also block any such emails or documents more aggressively when a policy match is detected and alert and report on such instances.
In this chapter, we will show you how to effectively plan and implement your sensitive information types and DLP policies. We will also demonstrate how you can manage the reporting features and alert settings available to you, along with creating policies from built-in templates or creating custom policies to meet your requirements using simple or advanced settings.
We shall cover these topics in the following order:
- Planning and implementing DLP
- Creating DLP policies and assigning them to Office 365 locations
- Managing sensitive information types
- DLP reporting and alerting capabilities
Planning and implementing DLP
In order to effectively plan for your Microsoft 365 DLP deployment, you need to understand any existing or potential data leakage within your organization. DLP can initially be configured with policies that run in test mode only. This is a good starting point for acquiring the information you need to determine your DLP strategy.
Before you go ahead and create your test policies, it is important that you understand how DLP works, what sort of information can be detected, and which Microsoft 365 services can be protected.
A good starting point is to examine the Sensitive info types that are used by DLP policies. There are a number of built-in sensitive information types available in Microsoft 365. These can be viewed from the Microsoft 365 Security and Compliance Center, which can be accessed by administrators at https://protection.office.com, or by navigating to Classification | Sensitive info types, as shown in the following screenshot:

Figure 12.1 – Sensitive info types
These Sensitive info types can be associated with the DLP policies that you create. It is also possible to create your own custom Sensitive info types. The following screenshot shows some of the built-in Sensitive info types:

Figure 12.2 – Built-in Sensitive info types
The DLP policies that you create in the Security and Compliance Center can be applied to the following Microsoft 365 locations:
- Exchange email
- SharePoint sites
- OneDrive accounts
- Teams chat and channel messages
In the following screenshot, you can see that you have the option to protect all available locations or only those you wish to select:

Figure 12.3 – Protecting Office 365 locations
DLP policies can be configured with conditions and actions, including the following:
- Notify users when content matches the policy settings
- Detect when a specific amount of information is being shared at one time
- Send incident reports to Global Admins
- Restrict access or encrypt the content
Choosing only the option to Notify users when content matches the policy settings is a good way of testing your DLP policies. Users will receive policy tips in their Microsoft Office applications, and a corresponding alert will be generated in the Security and Compliance Center. However, no further action will be taken, and no encryption or access restrictions will be applied.
When you've finished setting up your DLP Policy, select the option shown in the following screenshot. This will place the policy in test mode, and users will see policy tips when there is a match:

Figure 12.4 – Setting the policy in test mode
Important note
Policy tips are currently only available for users with Microsoft Office applications running on Windows computers, Outlook on the web, documents in SharePoint Online or OneDrive for Business, and Excel, PowerPoint, and Word (when the document is stored on a site targeted by a DLP policy).
In this section, we have explained how DLP works in Microsoft 365. We showed you that DLP policies can be created in the Microsoft 365 Security and Compliance Center to protect your Microsoft 365 locations. This is done by identifying the sensitive information types in these locations that are defined in the policy. We also explained that it's good practice to set your DLP policies in test mode initially and show policy tips to your users. This will help your users become familiar with the principles of DLP before you fully enable it, and will also help administrators experience typical alerts and matches, and how to take corrective measures.
Next, we will show you how to create DLP policies and assign them to your users and groups in Microsoft 365.
Creating DLP policies and assigning them to Office 365 locations
Now that you understand the core components that make up a DLP policy and that enabling your policies in test mode is a good way to begin, let's go ahead and create an actual DLP policy using a template and assign it to the chosen Office 365 locations. To do this, we need to complete the following steps:
- Log into the Microsoft 365 Security and Compliance Center, which can be accessed by administrators at https://protection.office.com, and navigate to Data loss prevention | Policy, as shown in the following screenshot:

Figure 12.5 – Policy
- Click on Create a policy, as shown in the following screenshot:

Figure 12.6 – Create a policy
- For this example, we will configure a Financial policy from a template for a business in the United Kingdom. Choose Financial and select United Kingdom, as shown in the following screenshot:
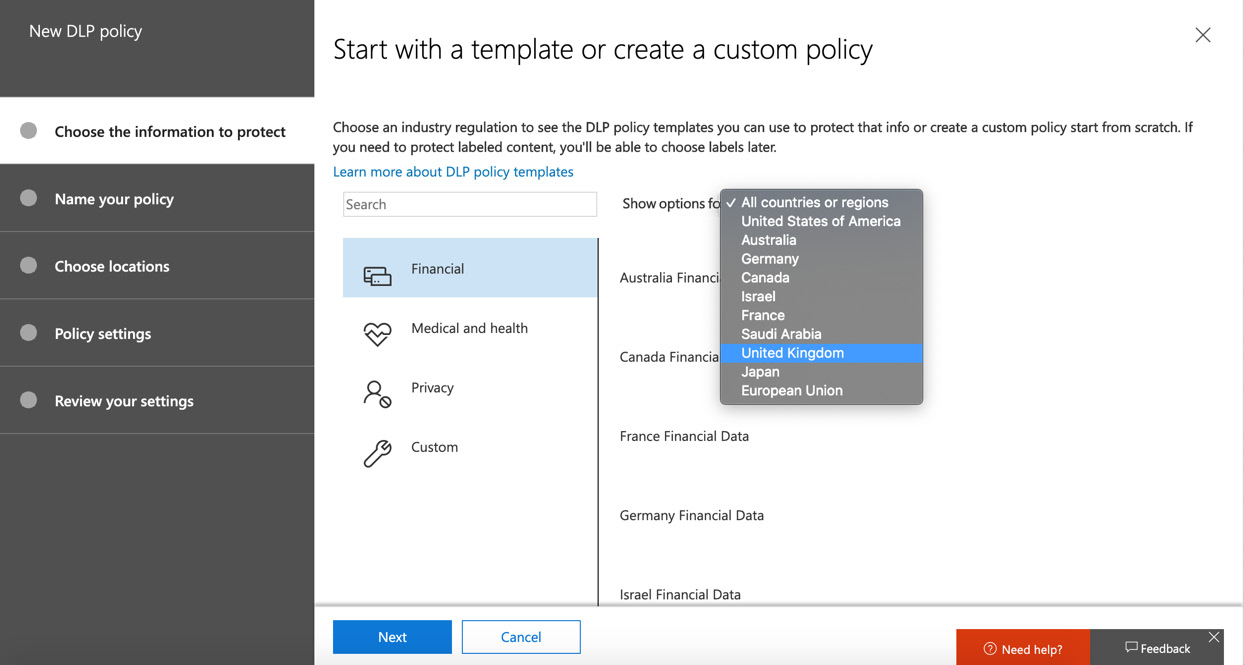
Figure 12.7 – Creating a policy from a template
- There are two options for UK under the financial templates. For this example, we will select U.K. Financial Data and then Next, as shown in the following screenshot:

Figure 12.8 – Creating a policy from a template
- Next, enter a Name and Description for your policy and click Next, as shown in the following screenshot:
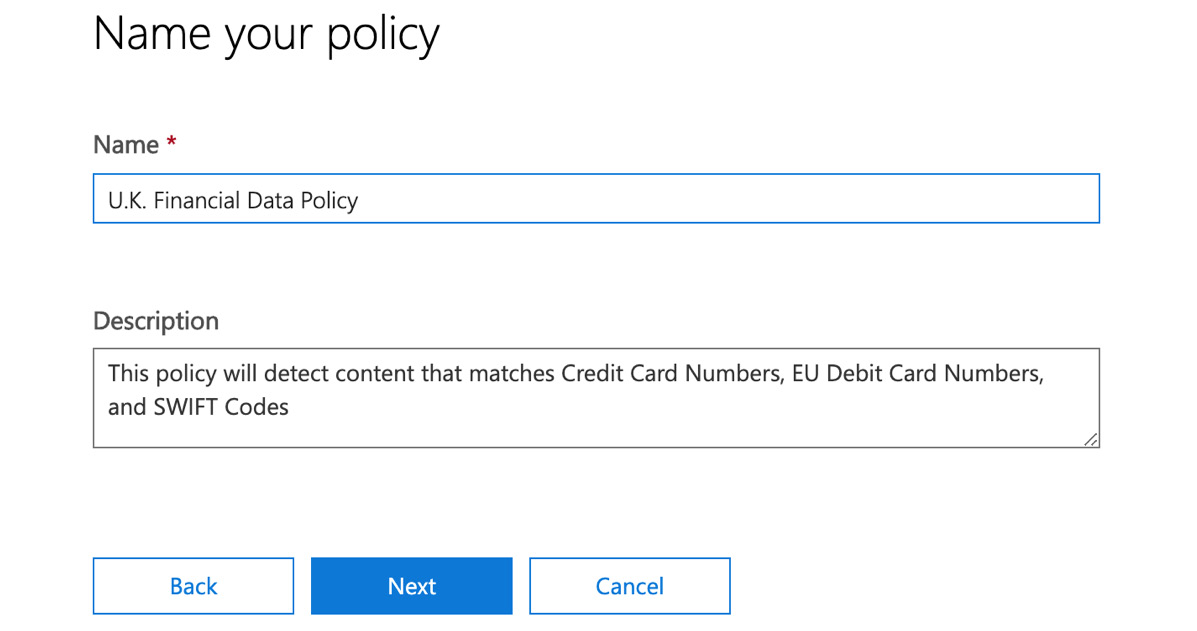
Figure 12.9 – Setting a Name and Description for the policy
- Next, you have the option to choose the locations you wish to protect. In this example, we will choose the default option, which is to protect all content. Once selected, click Next, as shown in the following screenshot:

Figure 12.10 – Choosing which Office 365 locations to protect
- Now, we have the option to customize the protection settings. For this example policy, we will leave the default settings as-is, as shown in the following screenshot:

Figure 12.11 – Customizing the content to protect
- Once you have clicked Next, you can choose what you wish the policy to do if sensitive information is detected. There are a number of options that can be set at this point, as follows:
a. Showing policy tips to users and sending them an email notification
b. Detecting a specific amount of sensitive info being shared at one time
c. Sending reports in an email
d. Restricting access to the content
For this example, we will configure these settings like so:
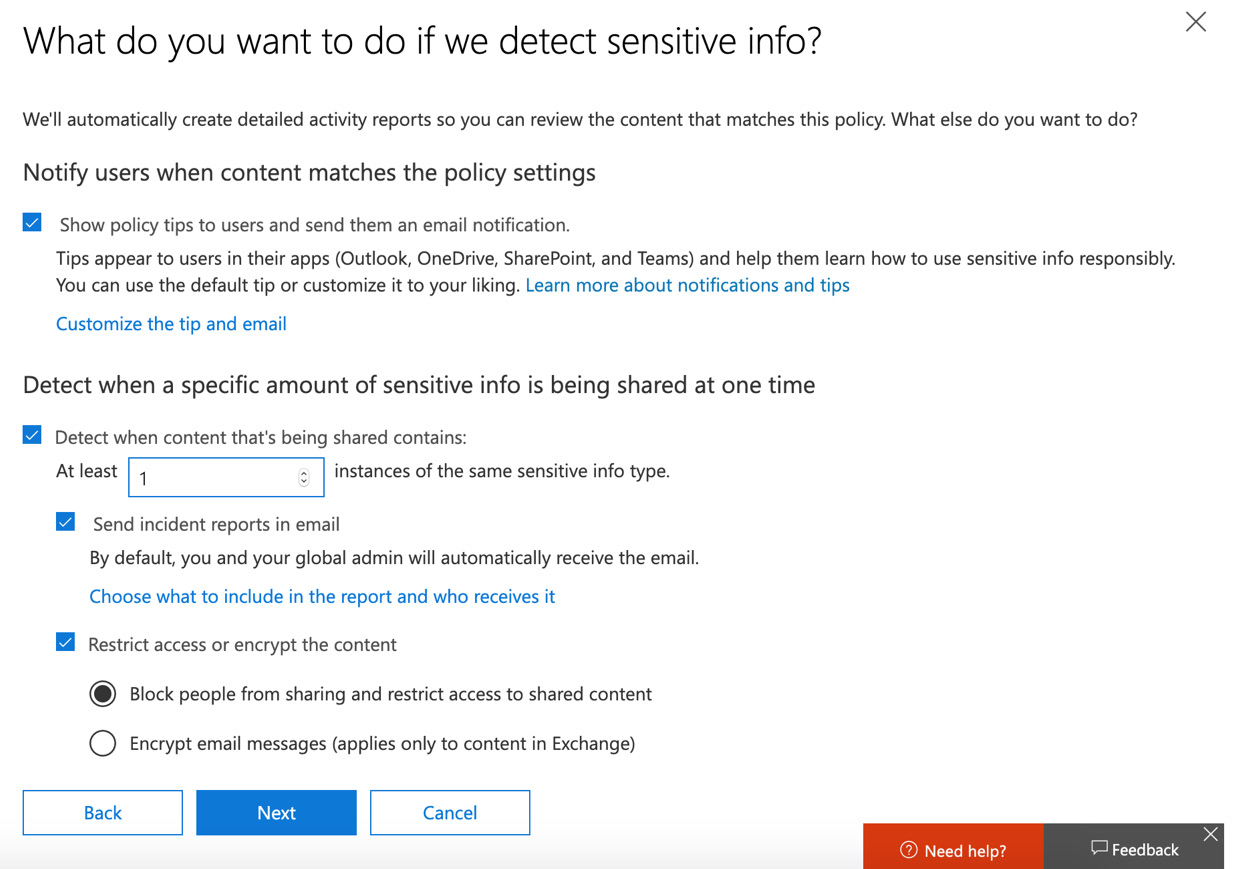
Figure 12.12 – Settings for when sensitive information is detected
- By selecting the option to Choose what to include in the report and who receives it, we have the option to choose the settings for our incident report, as shown in the following screenshot:

Figure 12.13 – Customize the incident report screen
- Click on OK and then Next. You will see the following options for customizing access and override permissions. In this example, we will set the option for an override of the policy to be allowed by users who see the policy tip. A justification for the override must be provided, as shown in the following screenshot:

Figure 12.14 – Customize access and override permissions screen
- Next, we can choose how we wish the policy to be applied. It can be enabled immediately, placed in test mode, or turned off for later use. In this example, we will choose the option to test our new policy first, and also enable policy tips for our users while in test mode, as shown in the following screenshot:
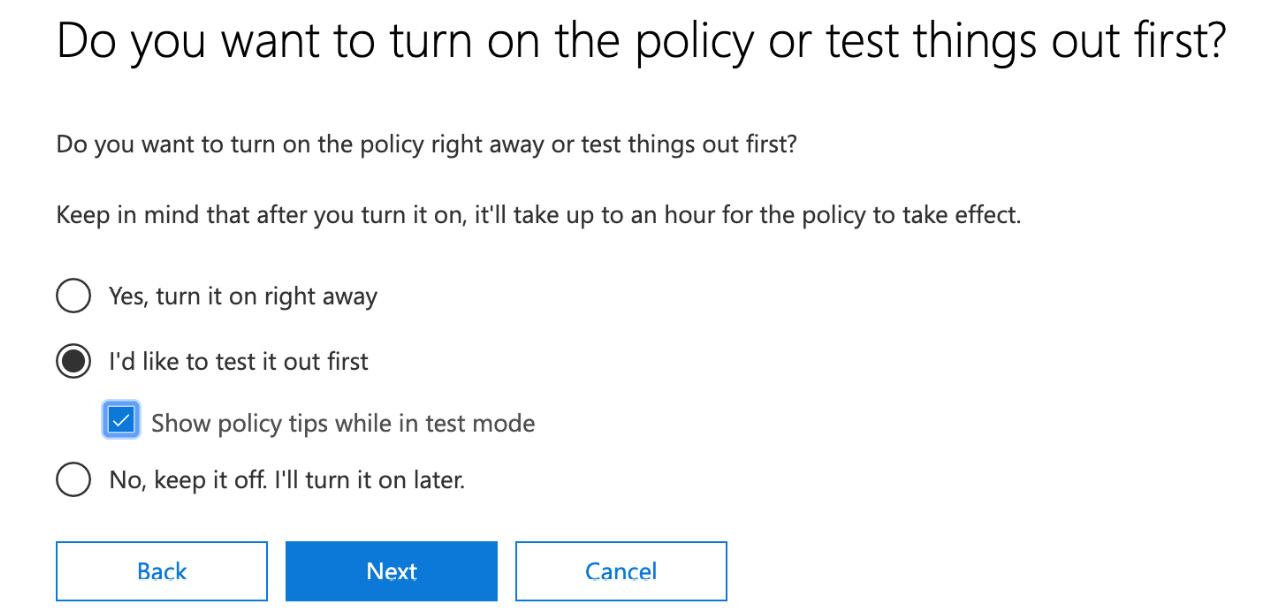
Figure 12.15 – Turning on the policy
- Click Next. You will see the following screen, where you can review the settings you have configured for your policy and make any last-minute changes if required:
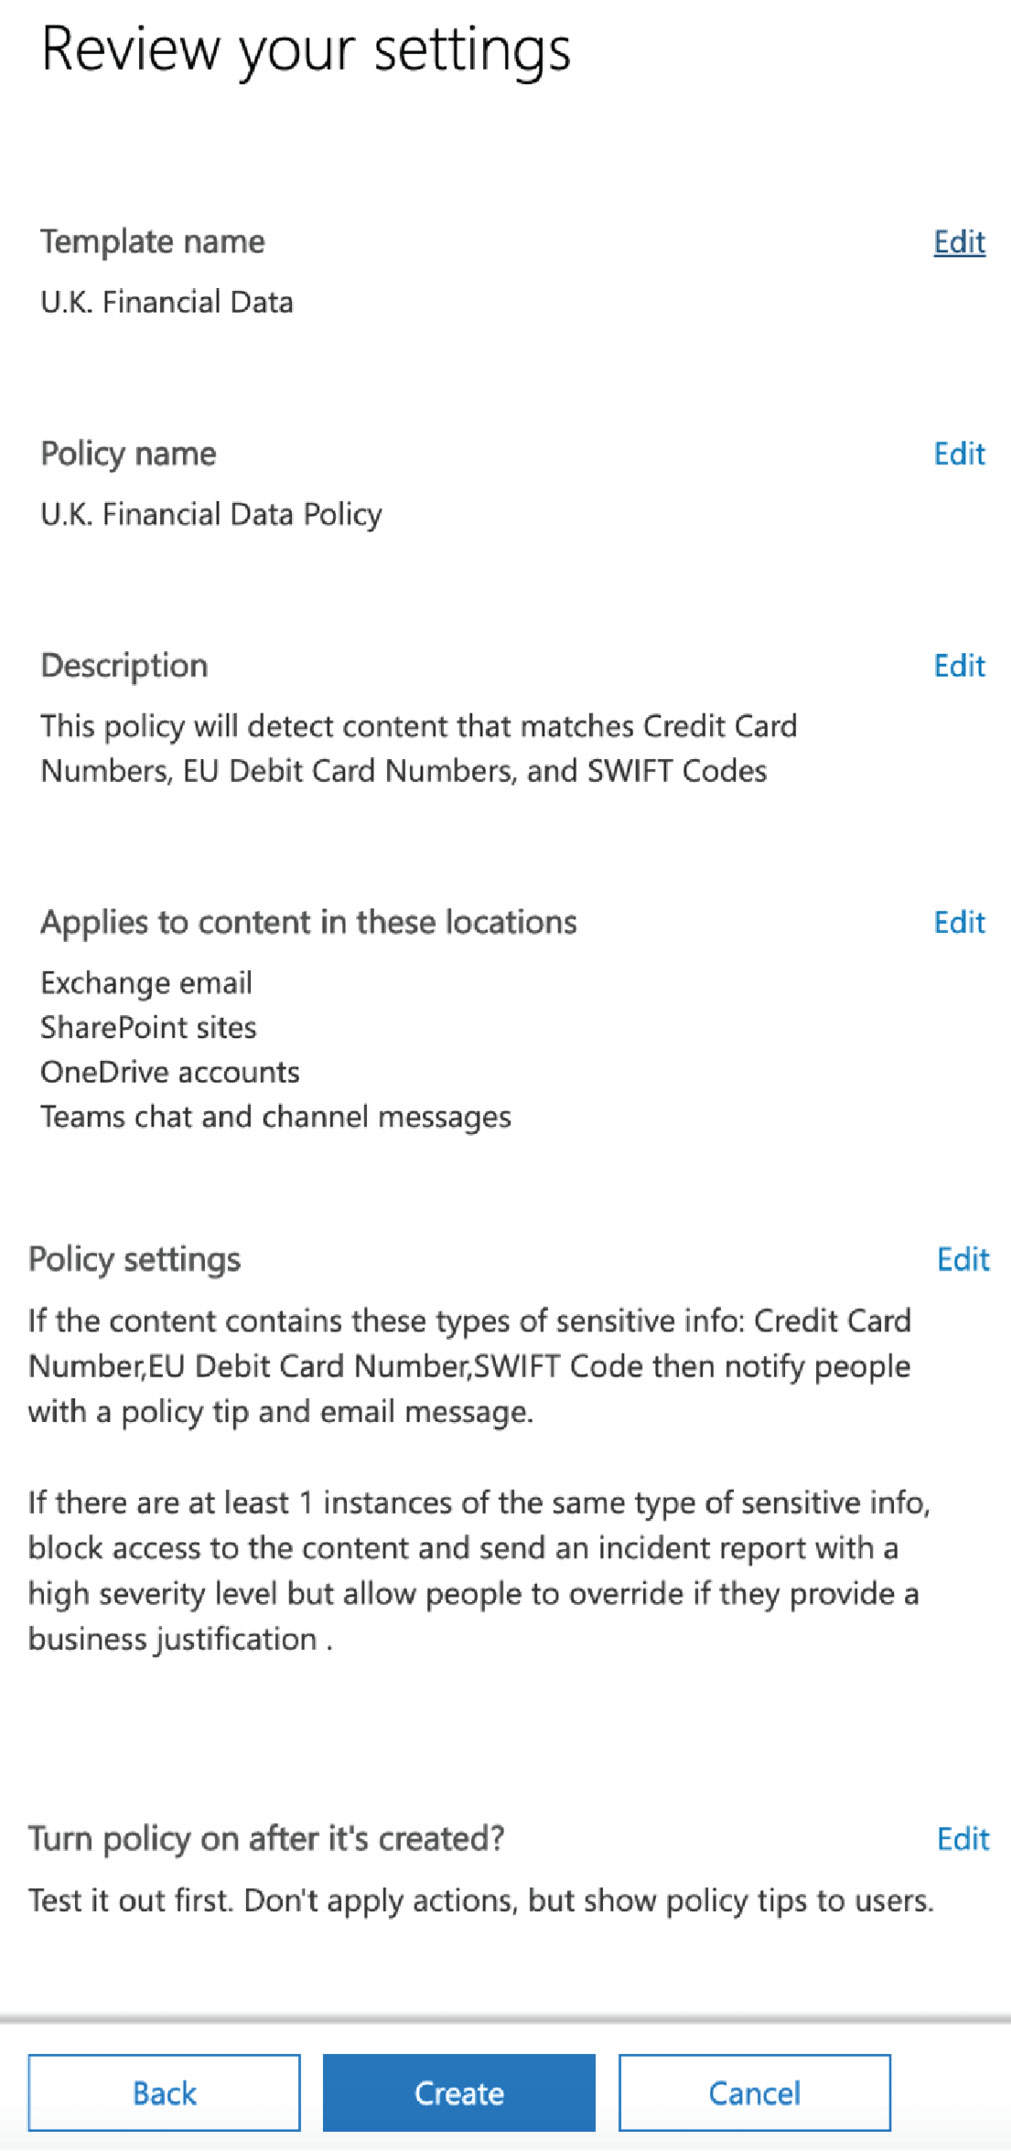
Figure 12.16 – Reviewing the settings
- Once you are happy with your policy settings, click Create to finish creating your policy.
Testing your DLP policy
Now that your DLP policy has been created, it should take effect after approximately 1 hour and start detecting genuine policy matches. It is also possible to attempt to manually trigger the policy by sending an email from an account that is bound by the policy containing a match.
In our example policy, we created conditions to apply the policy when UK financial data was detected. It is important to point out that DLP is intelligent enough to know when a random set of numbers are entered to represent a debit or credit card number. However, there are some websites available where genuine test card numbers can be found in order to conduct successful testing.
In the following screenshot, we can see that a policy tip appears when a user in our tenant tries to send an email to an external recipient that contains a credit card number:

Figure 12.17 – Policy tip in Outlook
Since we set up the policy so that it only runs in test mode at this time, the user will still be able to successfully send the email.
Once the user has sent the email, an alert will be sent to them, as shown in the following screenshot:
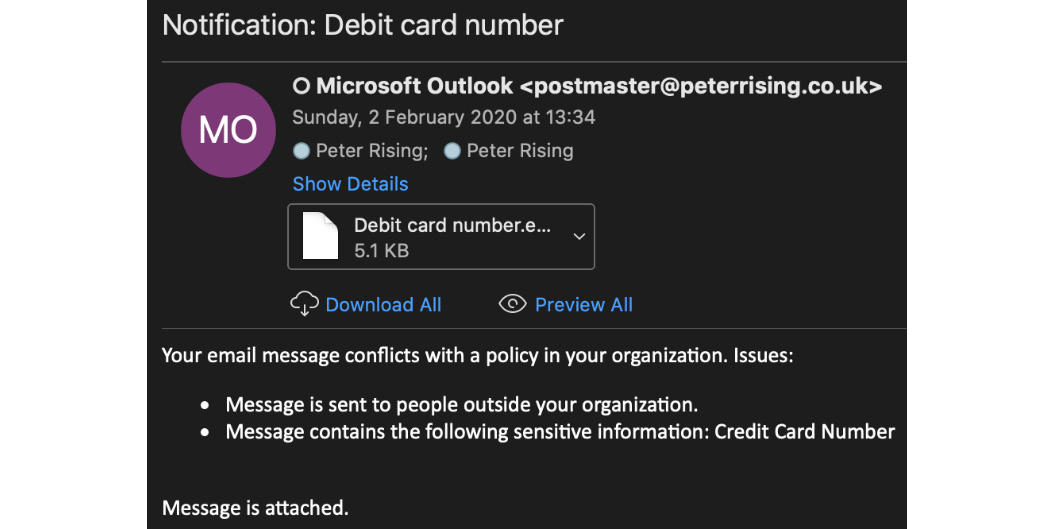
Figure 12.18 – Email notification of policy match
A copy of the original email is also attached to the alert.
So, if you initially configure your DLP policies in test mode in this way, this will give you a good opportunity to assess the accuracy and effectiveness of your policies when you make the decision to fully activate and enforce them.
Editing your DLP policy
When testing your DLP policy, you may find that you need to go back and make some changes if the results are not as expected. You can change the conditions, actions, user notifications, user overrides, and incident report settings within your policy while editing.
To edit the policy, you need to complete the following steps:
- Highlight the policy and select Edit policy, as shown in the following screenshot:

Figure 12.19 – Edit policy
- You will see that this policy has been set up with both low and high volume detected content settings, as shown in the following screenshot:
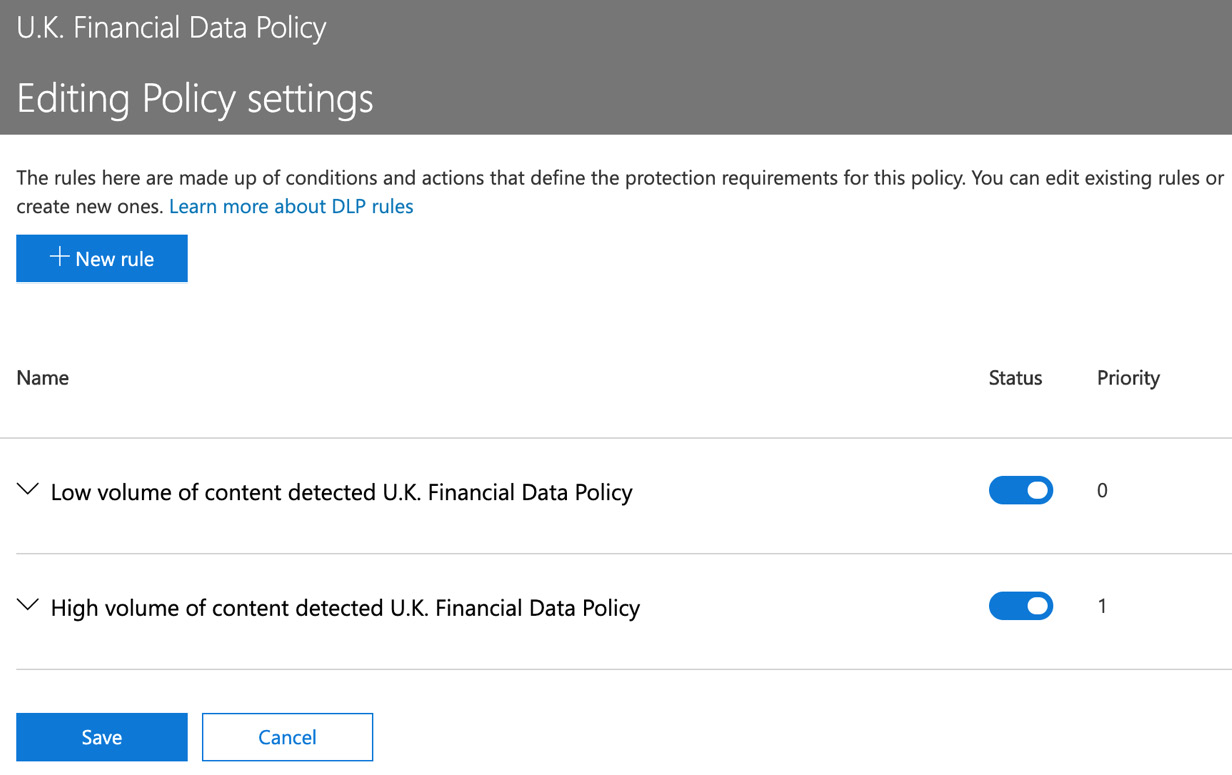
Figure 12.20 – Low and high volume content options
It is important to modify both of these settings with any changes to the policy you wish to make.
- For this example, we will select the low volume option and click Edit rule, as shown in the following screenshot:

Figure 12.21 – Editing the low volume content rule
- Editing the rule will open the advanced edit options, as shown in the following screenshot:

Figure 12.22 – Advanced edit options
- You will need to navigate through all of the sections within the advanced policy settings and, once you are happy with your changes, click Save.
The changes to your policy will be saved and should take effect in a short period of time.
Important note
DLP policies can also be created and managed via the Exchange Online Management Center at https://outlook.office.com/ecp. However, policies that are created here will only apply to Exchange Online. It is a Microsoft recommended practice that you create your DLP policies from the Microsoft 365 Security and Compliance Center, as detailed in the steps laid out in the previous section.
In this section, we showed you how to create a DLP policy and assign it to all or a selection of Office 365 locations. We demonstrated how you can keep your new policy turned off until you are ready to test or activate it, as well as how to enable it in test mode with user notifications and policy tips.
We also showed you how you can edit your DLP policies after creating them and how you can modify them with the advanced policy settings.
Next, we will look at the sensitive information types included in the Security and Compliance Center.
Managing sensitive information types
As we have already discussed, DLP is able to use the many built-in sensitive information types that are available in the Microsoft 365 Security and Compliance Center. However, there may also be occasions where it is necessary for a business to add one or more custom sensitive information types to allow the identification and protection of information, which is not covered by the built-in options.
To create a custom sensitive information type in the Security and Compliance Center, you will need to have either Global Administrator or Compliance Administrator permissions. Then, complete the following steps:
- Select Classification | Sensitive info types and click Create, as shown in the following screenshot:
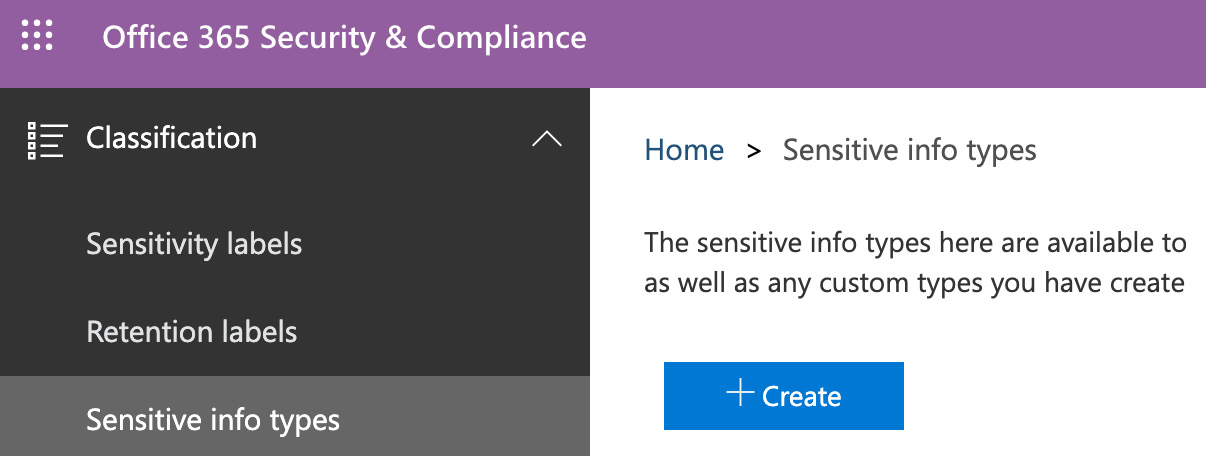
Figure 12.23 – Creating a sensitive information type
- Enter a Name and Description for your new sensitive information type and then click on Next, as shown in the following screenshot. Here, we are creating an entry for an employee ID:

Figure 12.24 – Choosing a name and description
- On the Requirements for matching section, click on Add an element, as shown in the following screenshot:
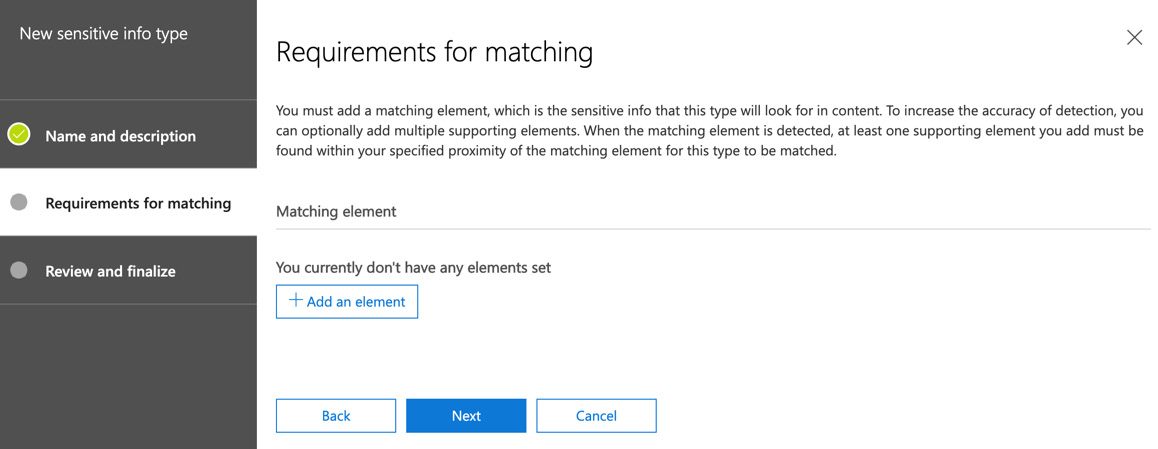
Figure 12.25 – Setting the requirements for matching
- You can choose from Keywords, Regular expression, or Dictionary (Large keywords). In this example, we will choose Keywords. The following screenshot shows Keywords as one of the available options for this setting:
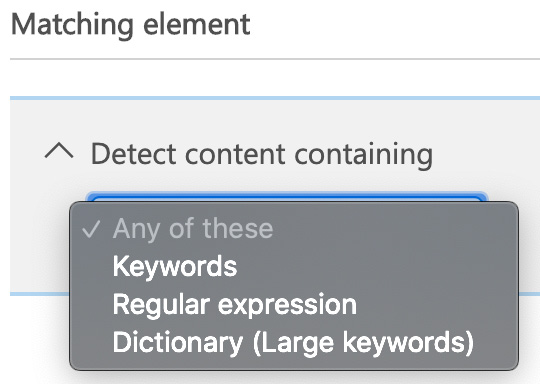
Figure 12.26 – Setting the matching element
- For our example, we will add an entry called CTECHOP (which will represent the Chrysalis Technologies operative), as shown in the following screenshot:

Figure 12.27 – Setting the keyword
- Supporting elements can also be added to the sensitive information type, as shown in the following screenshot. For this example, we will not add any Supporting elements:

Figure 12.28 – Add supporting elements
- You can also change the Confidence level and Character proximity settings for the sensitive information type. In this example, we will leave the default settings as-is, as shown in the following screenshot:

Figure 12.29 – Confidence level settings
- Click Next to be taken to the Review and finalize options. If you are happy with the settings you have configured, click on Finish, as shown in the following screenshot:
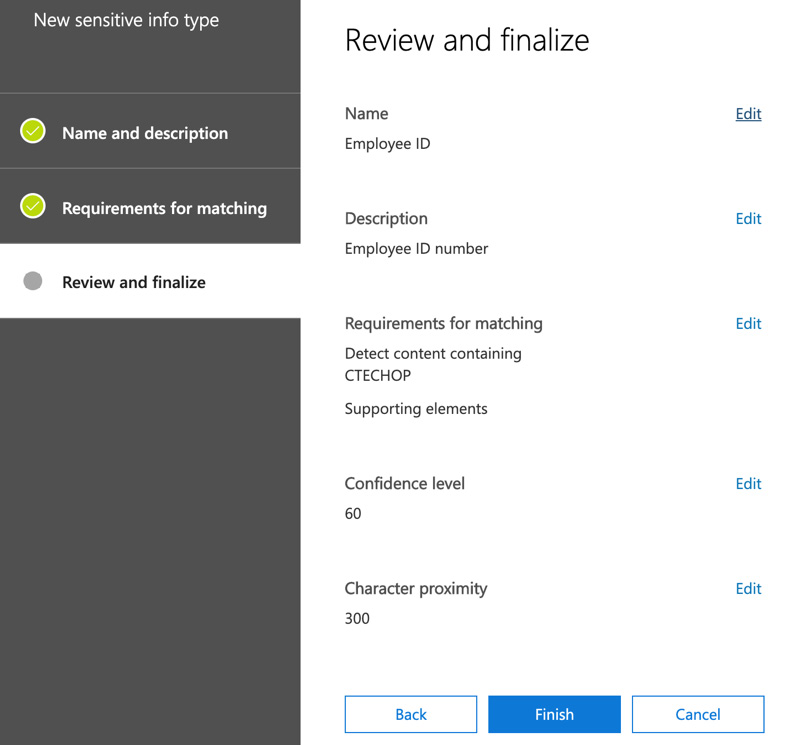
Figure 12.30 – Review and finalize page
- You will receive the message as shown in the following screenshot. Click Yes:

Figure 12.31 – Notification of sensitive information type creation
Your custom sensitive information type is now set up and available. It is recommended that you test this before advising your Microsoft 365 users that it is available to them. A custom sensitive information type can be added to a new or existing DLP policy by searching for the sensitive information type when creating or editing a policy, as shown in the following screenshot:

Figure 12.32 – Adding a custom sensitive information type to a DLP policy
Important note
It is also possible to configure custom sensitive information types by using Security and Compliance Center PowerShell, as well as Exact Data Match Based Classification. Information related to these methods can be found in the references section at the end of this chapter.
In this section, we demonstrated that while the built-in sensitive information types included in the Microsoft 365 Security and Compliance Center will usually fulfill most requirements, it may also be necessary, on some occasions, to create one or more custom sensitive information types.
We showed you how to create a custom sensitive information type by using a keyword and also demonstrated that other methods are available, such as Regular expression and Dictionary (Large keywords).
Next, we will review the reporting and alerting capabilities that are available within your Microsoft 365 environment.
DLP reporting and alerting capabilities
There are a number of reporting and alerting capabilities for DLP that are available within the Microsoft 365 Security and Compliance Center. Regularly reviewing these will give Microsoft 365 administrators valuable insights into how effectively DLP is configured and working. The reports that are available are as follows:
- DLP policy matches
- DLP incidents
- DLP false positives and overrides
You can view the available DLP reports from the Security and Compliance Center by navigating to Reports | Dashboard and choosing DLP policy matches, as shown in the following screenshot:

Figure 12.33 – DLP policy matches
The DLP policy matches section shows a count of recent policy matches, all of which you can filter by date, location, policy, or action.
Clicking into the tile will give you a broader view of the DLP policy match activity, along with related reports on DLP incidents and DLP false positives and overrides, as shown in the following screenshot:

Figure 12.34 – DLP policy match activity
The DLP incident reports shows us that, in this case, there have been six recent DLP incidents in our tenant related to Exchange Online. You can choose the Request report option in order to send an email to yourself or others that contains further details on these incidents so that you can analyze further and take any corrective measures.
DLP false positives and overrides will show you a count of any detected false positives and overrides (if allowed). This report can be filtered and examined in the same way as the DLP incident reports so that you can analyze this activity and, once again, apply any required corrective measures. For example, if DLP policy overrides are allowed in your organization and you are seeing a high volume of overrides and user justifications, this may need to be addressed.
All of the DLP reports available in the Security and Compliance Center can contain information for up to 4 months prior to the current date. However, the most recent DLP activity may take up to 24 hours to be included in these reports.
Important note
It is also possible to acquire reporting information related to DLP by using Windows PowerShell. Details on how to run these reports is included in the references section at the end of this chapter.
Summary
In this chapter, we explained how DLP in Microsoft 365 can help you create policies based on built-in and custom sensitive information types. This prevents the users in your organization accidentally sharing sensitive information.
We demonstrated how to set up and modify a DLP policy and apply it to all or selected Office 365 locations. We also showed you how to effectively plan your DLP rollout by creating policies in test mode only, as well as how to view and interpret the reports that are available in the Security and Compliance Center.
In addition, we showed you how to view and interpret the available reports and alerts related to DLP from the Security and Compliance Center, along with how to set up your own custom sensitive information types using regular expressions, keywords, and dictionary (large keywords) settings.
In the next chapter, we will be looking at Cloud App Discovery and Security and how this can be used to gain visibility of SaaS applications within our Microsoft 365 environment.
Questions
- DLP helps to prevent the accidental sharing of data from Office 365 locations by using policies that look for matches against both built-in and custom sensitive information types.
a. True
b. False
- Which of the following locations in Office 365 can't be protected by a DLP policy (choose two)?
a. SharePoint sites
b. PowerApps
c. OneDrive accounts
d. Exchange email
e. Yammer groups
f. Teams chat and channel messages
- Where in the Microsoft 365 Security and Compliance Center would you view the available DLP reports?
a. Data Loss Prevention | Policy
b. Threat Management | Dashboard
c. Reports | Dashboard
d. Classification | Sensitive info types
- Which of the following is not an example of a custom sensitive information type?
a. Dictionary (large keyword)
b. Regular expression
c. Dictionary (regular expression)
d. Keyword
- The rules within DLP Policies are made up conditions and actions.
a. True
b. False
- Other than the Security and Compliance Center, where can you also configure DLP policies?
a. Teams Admin Center
b. Exchange Admin Center
c. The Azure Portal
d. The Microsoft 365 Admin Center
- When a DLP policy is set to test with policy tips, the policy and its rule will be enforced.
a. True
b. False
- What can DLP protect within Microsoft Teams (select two)?
a. Calendar
b. Teams chat
c. Channel messages
d. Apps
- When including or excluding Exchange email content from a DLP policy, this is based on which of the following?
a. Security Groups
b. Distribution Groups
c. Office 365 Groups
d. Users
- Policy tips are available to users who are working with Microsoft Office 2016 for Mac.
a. True
b. False
References
Please refer to the following links for more information regarding what was covered in this chapter:
- Overview of DLP: https://docs.microsoft.com/en-gb/microsoft-365/compliance/data-loss-prevention-policies
- Setting up a DLP policy from a template: https://docs.microsoft.com/en-gb/microsoft-365/compliance/create-a-dlp-policy-from-a-template
- DLP reporting using PowerShell: https://docs.microsoft.com/en-us/powershell/module/exchange/policy-and-compliance-dlp/Get-DlpDetectionsReport?redirectedfrom=MSDN&view=exchange-ps
- Viewing reports for DLP: https://docs.microsoft.com/en-gb/microsoft-365/compliance/view-the-dlp-reports
- Connecting to Security and Compliance PowerShell: https://docs.microsoft.com/en-us/powershell/exchange/office-365-scc/connect-to-scc-powershell/connect-to-scc-powershell?view=exchange-ps
- Creating a custom sensitive information type using Security and Compliance PowerShell: https://docs.microsoft.com/en-us/microsoft-365/compliance/create-a-custom-sensitive-information-type-in-scc-powershell
- Creating a custom sensitive information type using exact data match-based classification: https://docs.microsoft.com/en-us/microsoft-365/compliance/create-custom-sensitive-information-types-with-exact-data-match-based-classification