
In this demonstration, we are going to deploy a Windows VM from the Azure portal. We are going to set up networking and storage and select a VM size for this VM. We are also going to configure high availability for this VM, by placing it in an Availability Set. To do so, perform the following steps:
- Navigate to the Azure portal by opening https://portal.azure.com.
- In the left menu, click Virtual machines, and then, in the top menu, click + Add as follows:

Creating a new VM
- We are going to create a Windows VM, so in the Basics blade, add the following values:
- Subscription: Choose a subscription.
- Resource group: Type PacktVMGroup.
- Virtual machine name: Type PacktWindowsVM.
- Region: Choose a region.
- Availability options: Here, select Availability set.
- Availability set: Create new, and call it PacktWindowsAS. Keep the default fault domains and update the domains for this VM.
- Image: Choose Windows Server Datacenter 2016.
- Azure Spot instance: Select No.Size: Here, you can choose between the different sizes. Click Change size and select Standard DS1 v2.
- Administrator account: Provide a username and a password.
- Inbound port rules: Select Allow selected ports and enable Remote Desktop Protocol (RDP). You will need this to log in to the server after creation.
- Save money: If you already have a valid Windows Server Datacenter license, you get a discount on this VM.
- Click Next: Disks.
- Here, you can select the disk type. Keep the default as follows, which is Premium SSD:
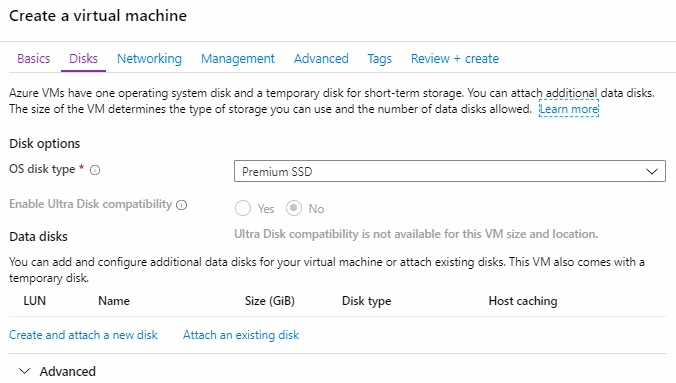
Select disk type
- Click Next: Networking.
- In the Networking blade, you can configure the virtual network. You can keep the default values for this machine as follows:

Set networking for VM
- Click Next: Management.
- In the Management blade, you can configure monitoring, and create and select a storage account for monitoring. You can also assign a system-assigned managed identity, which can be used to authenticate to various Azure resources, such as Azure Key Vault, without storing any credentials in code. You can also enable auto shutdown here, as follows:

Set management features
- We can now create the VM. Click Review + create and the settings will be validated. After that, click Create to actually deploy the VM.
We have now deployed a Windows VM, placed it in an Availability Set, and looked at the networking, storage, and monitoring features and capabilities for this VM. In the next section, we are going to deploy a Windows Server VM from PowerShell.