Chapter 1
Azure virtual networks
Overview
In traditional, on-premises datacenters, virtual networks (vNETs) help connect devices, virtual machines, and datacenters to make services accessible in different locations and across geographic boundaries. A vNET emulates a physical network in that it is a combination of hardware and software resources working together to provide networking capabilities for virtual infrastructure resources. In Azure, a vNET provides the base layer for a private network to host Azure resources, such as Azure virtual machines (VMs), Azure virtual machine scale sets (VMSS), virtual private network (VPN) gateways, firewalls, and so on, to securely connect and communicate with each other and other resources hosted on on-premises networks or on the internet.
Azure virtual networks features
An Azure vNET has a number of unique features to take advantage of the Azure cloud’s extensibility, scaling, and global availability. These features help address different types of vNET requirements or scenarios, such as the following:
Communication with on-premises resources and services Various options are available to communicate with on-premises resources and services such as Azure ExpressRoute, Site-to-Site (S2S) VPN, and Point-to-Site (P2S) VPN. An Azure vNET helps support Azure-based connectivity services, Azure resources, and on-premises resources and services.
Communication between Azure resources in the same and different Azure regions Azure vNET enables resources within the same vNET, as well as resources in different vNETs in the same or different Azure region using vNET peering, to securely communicate with each other.
Communication between Azure and internet-based resources and services Inbound connectivity to resources in a vNET requires the use of either a public IP address or public-facing load balancer that can route traffic to internal resources. However, all resources in a vNET can communicate externally by default.
Network traffic management Azure vNET supports the use of network security groups (NSGs) and network virtual appliances (NVAs) to filter traffic between subnets in the same vNET and between vNETs. Azure vNET also supports using route tables and Border Gateway Protocol (BGP) routes to route traffic between different subnets or networks on-premises or the internet.
Integration with Azure services Azure vNET supports integration with Azure services such as Azure SQL Database and Azure Storage using Azure Private Link and service endpoints for secure communication over public and private networks.
Design concepts and deployment considerations
vNETs are a backbone of any Azure deployment. It is important to understand the design concepts behind vNETs to deploy them in an optimal manner to achieve scale, security, and redundancy.
Address space
An address space is a private IP address range or series of ranges allocated to a vNET and is used to provide IP addresses to resources hosted in the vNET. For example, if you create a private address space of 10.10.10.0/24, VMs hosted in that vNET would obtain IP addresses between 10.10.10.1 to 10.10.10.251.
Subnets
You can split or segment an address space into multiple network subnets and assign portions of the address space to each subnet. You can then host different Azure resources in different subnets, and apply different routing, traffic-management, and security policies to each subnet based on its resource requirements.
You can extend your current on-premises network address space to Azure to maintain the same IP series in both locations. You should do this only if there are IP dependencies for applications being migrated to Azure, as this type of setup requires careful planning and integration to avoid routing issues.
You can also set up subnet delegation to integrate Azure PaaS services directly into an Azure vNET. This gives full control to the Azure service to set up rules for access to the service via that vNET subnet. You can choose to set up specific subnets just for delegation to such services.
vNET peering
An Azure vNET is scoped to a single region. So, resources that must be hosted in different regions cannot be set up within the same vNET. You can only achieve this using multiple vNET setups in each Azure region where resources must be hosted. However, vNETs can be connected to other vNETs using peering. This enables VMs on vNETs in the same or different Azure region to communicate with each other securely. This allows organizations to set up resources as close as possible to the intended target audience, but consolidate key services such as monitoring, logging, data warehousing, and so on in a single region by enabling all resources across vNETs to be able to talk to each other.
Routing
Azure supports several different types of routing types:
Default system routes
Optional system routes
User-defined routes
The following sections offer details about each of these routing types to give you a better understanding of each one and how best to use them.
Default system routes
Default system routes are automatically created and assigned to every subnet in a vNET. These routes are created and managed by the Azure service itself. Table 1-1 outlines the default system routes defined automatically by Azure whenever a vNET is created. Each default system route defines the source network, address prefix, and next-hop type.
TABLE 1-1 Default system routes
Source | Address prefix | Next-hop type |
Default | Unique to the vNET | vNET |
Default | 0.0.0.0/0 | Internet |
Default | 10.0.0.0/8 | None |
Default | 192.168.0.0/16 | None |
Default | 100.64.0.0/10 | None |
Table 1-1 notes various next-hop types. These depend on the purpose of the address prefix, as detailed here:
vNET If an address space contains multiple IP ranges or subnets, Azure creates an individual route for each subnet, and routes traffic between them without requiring the use of a gateway. When the next-hop type is vNET, the traffic for those IP address ranges will be contained within the vNET itself.
Internet This is the default route for all traffic to the internet, including any traffic that does not have a specific route defined in the route table. The only exception to this is traffic to Azure services, which is routed using the Microsoft Azure backbone network instead.
None Azure automatically creates default routes to the following three reserved address prefixes. If the next-hop type is None, it implies the traffic is dropped:
10.0.0.0/8 Reserved for private use in RFC 1918.
192.168.0.0/16 Reserved for private use in RFC 1918.
100.64.0.0/10 Reserved in RFC 6598.
When traffic exits a subnet, Azure matches the destination address prefix to the default route defined for that address prefix and routes accordingly. If multiple routes are defined for the same IP address prefix or if overlapping IP prefixes exist, Azure has a pre-defined algorithm and logic to determine the best course of action. (For more on this, see the section “Route selection in Azure” later in this chapter.)
Optional system routes
Beyond the default routes that are added to every subnet, optional routes are added after you enable specific Azure capabilities. Azure adds these routes to specific subnets or to the entire vNET, depending on the capability enabled. Table 1-2 shows an example of how these optional default routes are added. Each route defines the source, address prefix, next-hop type, and subnet with which the route is associated.
TABLE 1-2 Optional system routes
Source | Address prefix | Next-hop type | Subnet within VNet to which route is added |
Default | Unique to the vNET (for example, 10.10.10.0/24) | vNET peering | All |
vNET gateway | Prefix advertised from on-premises via BGP or configured in the local network gateway | vNET gateway | All |
Default | Multiple | VirtualNetworkServiceEndpoint | Only the subnet for which a service endpoint is enabled |
The next-hop type depends on the purpose of the route, as explained here:
vNET gateway When a vNET gateway is added to a vNET, optional routes are added based on the subnet defined in the gateway configuration or on the routes propagated from the on-premises network gateway using the BGP.
vNET peering As discussed, you can use peering to connect different Azure vNETs. When peering is established, a route for each address range is added to the route table.
VirtualNetworkServiceEndpoint If you integrate an Azure PaaS service to a vNET using a service endpoint, Azure adds a route for the service endpoint to the route table. Azure adds routes only for the subnets for which the service endpoint is enabled. Azure maintains this information automatically when changes are made to subnet associations.
Custom routes
In addition to default and optional system-generated and system-managed routes, you can set up custom routes to direct traffic to on-premises networks or other services, per your requirements. There are two ways to do this, as follows:
User-defined routes
Border Gateway Protocol (BGP) routes
User-defined routes
User-defined routes are custom routes that you define to override the default system routes created by Azure or as additional routes to address specific routing requirements for your environment for compliance or monitoring purposes. To create a user-defined route, you create a route table that contains a series of routing rules; you then associate this route table with one or more subnets.
As mentioned, user-defined routes either override system-defined routes or work alongside them. This implies that user-defined routes take precedence over system-defined routes in the event of a conflict.
User-defined routes support some of the same next-hop types as default and optional system routes, such as vNET, Internet, None, and vNET gateway. In addition, they support a next-hop type called virtual appliance, which routes traffic to vNET appliances such as firewalls. However, user-defined routes do not support vNET peering VirtualNetworkServiceEndpoint next-hop types.
Border Gateway Protocol (BGP) routes
BGP routes are another type of user-defined route. These are supported only in scenarios where an Azure virtual gateway S2S VPN or Azure ExpressRoute connection is used to establish connectivity with on-premises networks.
With BGP routes, the initial route exchange occurs when a connection between an on-premises gateway and an Azure VPN gateway is established. This allows either end to automatically propagate the required routes and maintain them as changes occur, without manual intervention.
Route selection in Azure
Now that you have a better understanding of the different routing types available in Azure, it is important to understand how the routing algorithm selects the most appropriate route for outbound traffic from a subnet.
If there is only a single route defined for a destination IP address, the logic for the algorithm is extremely simple: It must use that single available route. However, if multiple routes exist for the same destination IP address, Azure must identify which route’s IP address prefix most closely matches the destination IP address. If multiple routes contain the same address prefix, and that IP address prefix is the one that most closely matches the destination IP address, Azure selects the route based on the following priorities, in order:
User-defined route.
BGP route.
Default or optional system route.
Network security groups (NSGs)
You can use NSGs to set up inbound and outbound traffic-filtering rules to and from Azure resources in an Azure vNET. You can set up each rule to allow or deny traffic, inbound or outbound, and identify other parameters such as source and destination, port, and protocol.
An NSG can be applied on a subnet level and another applied on a resource level, such as an Azure VM. In such scenarios, traffic is evaluated against the rules configured in both NSGs, and the more restrictive action of the two is applied.
Availability zones support
vNETs span across all availability zones in a defined Azure region. There is no requirement or even possibility to spread them across different availability zones. This is by design. Any resources set up to use availability zones can use the same vNET without additional configuration.
vNET network address translation (NAT)
Network address translation (NAT) helps route inbound or outbound traffic using a set of static public IP addresses to or from specific internal hosts. In the case of an Azure vNET NAT, outbound internet-based traffic is routed via a single or range of static public IP addresses. This eliminates the need to associate a public IP address with each VM requiring a static outbound IP or using a load balancer for outbound traffic routing.
NAT can be set up for a single or multiple subnets in a vNET. All subnets can use the same NAT, or separate NATs can be set up for every subnet in the vNET. Once defined, NAT is set as the default internet destination of a subnet.
Integrations for enhanced security
Azure vNETs support integration with Azure PaaS services to restrict access to the service from specific networks and endpoints. You can achieve this by using one of the following methods, depending on your environment’s access requirements:
Network isolation using dedicated vNETs or subnet segmentation You can create a dedicated vNET on which to deploy Azure services and use NSGs or Azure firewall services to control traffic, depending on your organization’s security requirements. You can also segment subnets to create services in their own subnet and set up NSGs to restrict access as needed.
Private endpoints and Private Link You can use private endpoints and Private Link services to enable private access to Azure services over an internal network instead of the public internet. You can securely connect to Azure PaaS services over peered Azure networks and interconnected on-premises networks. This is a one-way communication from internal networks to Azure services and does not support outbound connections from PaaS services to on-premises resources.
Service endpoints Service endpoints allow access to Azure PaaS services over the Azure backbone without completely exposing the service to all internet-based endpoints. You can integrate Azure vNETs with the service endpoint connected to the service, thereby providing secure access to the service even from customer environments.
Service tags
Service tags are pre-defined groups of IP addresses created and managed by Microsoft for different Azure services. For example, the AzureActiveDirectory service tag contains all IP address prefixes used by the Azure Active Directory service. If the IP address prefixes for a service change over time, the service tag automatically notes the change when used to define network access controls.
The VirtualNetwork service tag defines all IP address prefixes associated with the vNET, any peered vNETs, any on-premises address spaces connected over VPN or ExpressRoute, and any default and user-defined routes.
Disaster recovery planning
If a disaster brings an Azure region offline, the vNETs in that region will not automatically be available in another. If facing such a scenario, you have a few options to consider:
You can preconfigure the same vNET address space and subnets in another Azure region. However, the two regions cannot be connected to or communicate with each other, as the network addresses overlap.
You can set up a different vNET address space and subnet configuration in another Azure region and replicate, pre-create, or automatically provision all the related Azure resources when necessary. In such a scenario, both regions can be connected and communicate with each other. You’ll need to take resource-level conflicts into consideration separately during the redundancy planning for each workload.
vNET walkthrough
The following sections walk you through the process of creating a vNET using the Azure Portal, Azure PowerShell, and the Azure CLI. If you are following along, be sure to select resources and resource names based on your environment, including a unique vNET name for each of your deployments. Also be sure to delete any unwanted resources after you have completed testing to reduce charges levied by Microsoft for these resources.
Using the Azure Portal
To create a vNET using the Azure Portal, follow these steps:
Log into the Azure Portal, type virtual networks in the search box to locate the service, and select it from the list that appears. (See Figure 1-1.)

FIGURE 1-1 Create a virtual network.
Click Create or Create Virtual Network to start the Create Virtual Network wizard. (See Figure 1-2.)
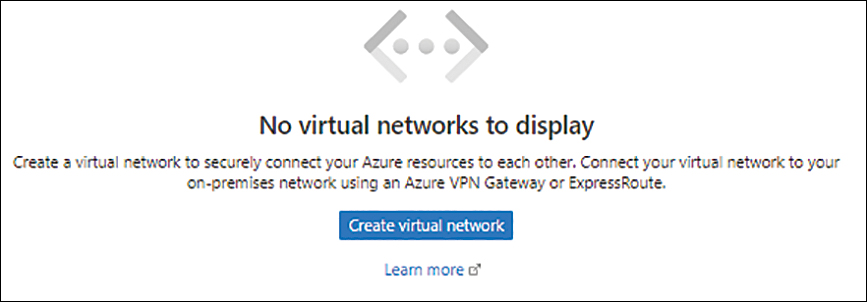
FIGURE 1-2 Click Create Virtual Network.
In the Basics tab of the Create Virtual Network wizard (see Figure 1-3), enter the following information and click Next:
Subscription Select the subscription to host the vNET.
Resource Group Select the resource group you want to host the vNET. Alternatively, click the Create New link and follow the prompts to create a new resource group.
Name Type a name for the vNET. If the name you type is already in use, the wizard will prompt you to enter another name.
Region Select the Azure region in which you want to create the vNET.

FIGURE 1-3 The Basics tab of the Create Virtual Network wizard.
In the IP Addresses tab of the Create Virtual Network wizard, review the default IPv4 address space defined by the Azure service. To associate a different address space with the vNET, replace the current address space with the one you want. (See Figure 1-4.)
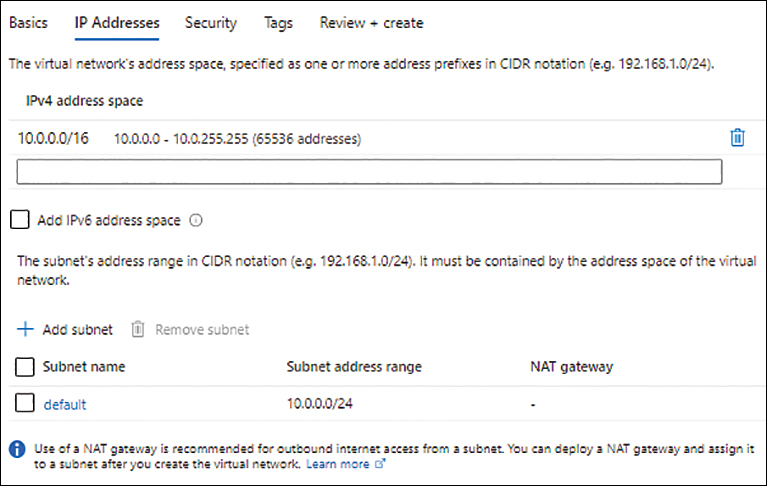
FIGURE 1-4 The IP Addresses tab of the Create Virtual Network wizard.
Review the default subnet defined by the Azure service and change it if needed. Then click Next.
In the Security tab, leave the default settings as is (set to Disable for all services) and click Next. (See Figure 1-5.)

FIGURE 1-5 The Security tab of the Create Virtual Network wizard.
In the Tags tab, enter any tags required for the vNET or leave the fields blank (see Figure 1-6) and click Next.

FIGURE 1-6 The Tags tab of the Create Virtual Network wizard.
In the Review + Create tab (see Figure 1-7), review your settings and click Create.

FIGURE 1-7 The Review + Create tab of the Create Virtual Network wizard.
When the deployment is complete, click Go to Resource to access the vNET setup. (See Figure 1-8.)

FIGURE 1-8 Click Go to Resource.
Using Azure PowerShell
You can create a vNET using Azure PowerShell with the New-AzVirtualNetwork command and various switches to set the vNET’s parameters. The following code shows you how. Use this snippet to create the same vNET as you did in the Azure Portal; when you do, be sure to either delete the previous network or give this new network a different name:
#Define variables
$vnetName = 'vNET01"
$rg = "RG01"
$location = "East US"
$Subnet = New-AzVirtualNetworkSubnetConfig -Name default -AddressPrefix "10.0.0.0/24"
#Create virtual network with the default subnet configuration
New-AzVirtualNetwork -Name $vnetName -ResourceGroupName $rg -Location $location
-AddressPrefix "10.0.0.0/16" -Subnet $default
Using the Azure CLI
You can create a vNET using the Azure CLI with the az network vnet command and various switches to set the vNET’s parameters. The following Bash script shows you how. Use this snippet to create the same vNET as you did in the Azure Portal; when you do, be sure to either delete the previous network or give this new network a different name:
#Define variables
vnetname = "vNET01"
rg = "RG01"
location = "East US"
subnet = "default"
#Create virtual network with the default subnet configuration
az network vnet create -g $rg -n $vnetname –location $location --address-prefix
10.0.0.0/16 --subnet-name $subnet --subnet-prefix 10.0.0.0/24
Best practices
Following are some general best practices for designing and securing vNETs in Azure:
Identify unique address spaces across the organization Be sure to use Azure address spaces that do not overlap with others already in use in the on-premises or other connected cloud environments. Although you can use the same address spaces if necessary, this requires careful planning, execution, and maintenance to avoid routing issues.
Size address spaces for long-term use When sizing address spaces in Azure, take into account long-term goals and requirements. Don’t use all address ranges for subnets right away, with no room for expansion later. Although you can add more address spaces to the vNET at a later stage, considering this during initial planning can reduce issues in the future.
Consolidate into fewer larger vNETs Although it is possible to connect multiple vNETs, it is a better practice to consolidate, such that you have fewer larger vNETs that cover the necessary requirements. This reduces the environment’s complexity and management overhead.
Secure internal traffic Use NSGs to secure internal traffic between Azure and on-premises networks to ensure that the only networks that can communicate with each other are the ones you require to do so. Isolate critical networks in their own subnets or vNETs and ensure that access to those subnets or vNETs is restricted to only the required source and destination endpoints, protocols, and ports. Finally, use Azure ExpressRoute instead of an S2S VPN if you require all internal communications to route over a completely private network.
Protect against DDoS attacks Use Azure Firewall and Azure Security Center to detect and prevent distributed denial of service (DDoS) attacks from known malicious IP ranges. You can set up the environment to automatically respond to such threats once detected or simply alert you so you can take action manually. (See Figure 1-9.)
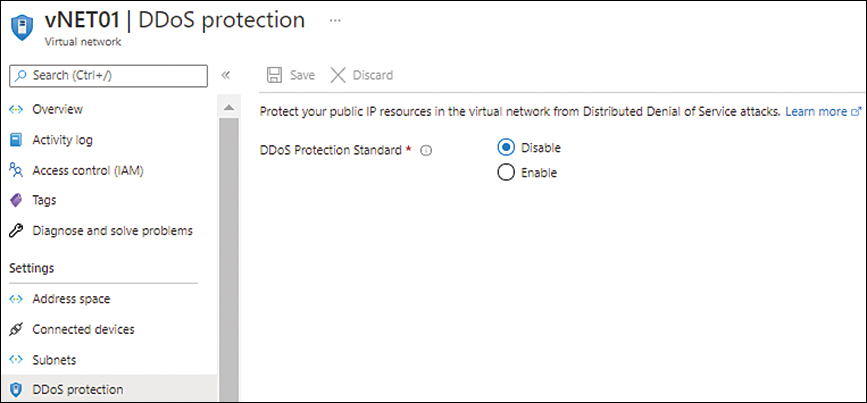
FIGURE 1-9 The DDoS Protection tab of the Azure vNET.
Use Log Analytics to analyze vNET flow logs This will provide you with a better understanding of traffic on the vNET. Set up Log Analytics integration to gain deeper visibility into the traffic on a vNET to make better decisions about vNET security and the routing setup.
Use Azure Firewall’s Threat Intelligence capabilities Azure Firewall is connected to the Microsoft Threat Intelligence feed, which is constantly updated from different sources regarding ongoing and new threat vectors around the globe. By enabling this for a firewall instance connected to an Azure vNET, you can better protect your environment from known bad actors on the internet.
Use service tags to reduce complexity in network security rules Service tags are a great way to manage traffic rules associated with Azure services. Use service tags whenever possible to reduce the management overhead of tracking and maintaining service changes that could potentially affect communications within your vNET.
Use tags to document vNET configuration Label different components and vNET security rules to easily identify or filter them as required.
Use Azure Policy to standardize the vNET configuration Azure Policy can help you enforce vNET security standards, including policy requirements, policy documentation, and so on, to ensure that all vNETs across an organization are created with the same set of guidelines.
Use automated logging and monitoring You can use Azure Activity Logs and Azure Monitor to track and alert on events on an Azure vNET, such as configuration changes. It is a good practice to set up alerts for critical events that could have a detrimental impact on your environment. You can also integrate Azure Log Analytics to store logs for longer periods of time for historical reporting and comparisons.